The DHT11 is a digital temperature and humidity sensor. It uses a capacitive humidity sensor and a thermistor to measure the surrounding air and sends out a digital signal on the data pin (no analog input pins needed). Its simple to use, and the update timing of the sensor is about 2 seconds. Thermistor temperature circuits can be much quicker and are very accurate in measuring temperature.
We will be using the DHT11 sensor to measure temperature and humidity. A separate thermistor circuit will also be used to measure temperature on an analog input. This will be all done on our Arduino UNO R3 controller on our super starter kit. Let’s get started.
A full list of posts in this series can be obtained at the following location:
Arduino Uno Software Super Starter Kit
Previous posts in this Arduino Uno Super Starter Kit Series:
Hardware and Powering – Video
Software – Video
LEDs – Video
Digital Inputs – Video
Analog Inputs – Video
Buzzers – Video
Tilt Ball Switch – Video
Servo – Video
Ultrasonic Sensor – Video
Watch the video below to see the temperature and humidity measurements with our Arduino Uno Kit. Elegoo Super Starter Kit UNO R3.
What are Temperature and Humidity?
Temperature is a measure of any physical system, to transfer heat energy to another physical system. The temperature of a substance is closely related to the average kinetic energy of its molecules. This is the measurement of thermal energy present in all matter.
Humidity describes the concentration of water vapor or water molecules in the air. Water vapor, the gaseous state of water, is generally invisible to the human eye. Humidity indicates the likelihood for precipitation, dew, or fog to be present.
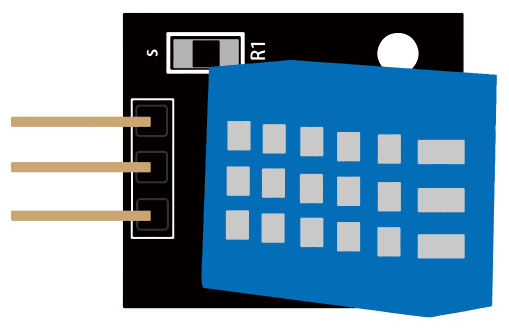
What is a DHT11 Sensor?
DHT11 digital temperature and humidity sensor is a composite Sensor that contains a calibrated digital signal output of the temperature and humidity. The dedicated digital modules collection technology and the temperature and humidity sensing technology are applied to ensure that the product has high reliability and excellent long-term stability. The sensor includes a resistive moisture sensor and an NTC temperature measurement device and connects with a high-performance 8-bit microcontroller.
DHT11 Specifications:
– Operating Voltage: 3.5V to 5.5V
– Operating current: 0.3mA (measuring) 60uA (standby)
– Output: Serial data
– Temperature Range: 0°C to 50°C
– Humidity Range: 20% to 90%
– Resolution: Temperature and Humidity both are 16-bit
– Accuracy: ±1°C and ±1%
Note: Even though the accuracy is not great on these sensors, it is usually good enough for applications such as HVAC (Heating, Ventilation, and Air Conditioning) Systems, Weather Stations, Medical Equipment for measuring humidity, Home Automation Systems, etc.
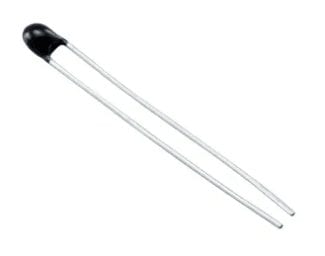
What is a Thermistor?
A thermistor is a thermal resistor – a resistor that changes its resistance with temperature. Technically, all resistors are thermistors – their resistance changes slightly with temperature – but the change is usually very small and difficult to measure. Thermistors are made so that the resistance changes drastically with temperature. It can be 100 Ohms or more, per degree of change.
There are two kinds of thermistors, NTC (negative temperature coefficient) and PTC (positive temperature coefficient). In general, you will see NTC sensors used for temperature measurement. PTCs are often used as resettable fuses – an increase in temperature increases the resistance which means that as more current passes through them, they heat up and reduce the current. This is used for protecting circuits!
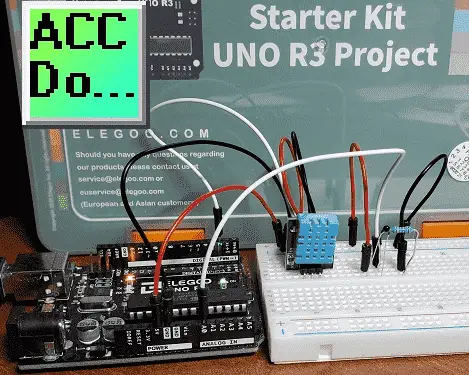
Wiring the DHT11 Sensor and Thermistor Circuits to our Arduino UNO
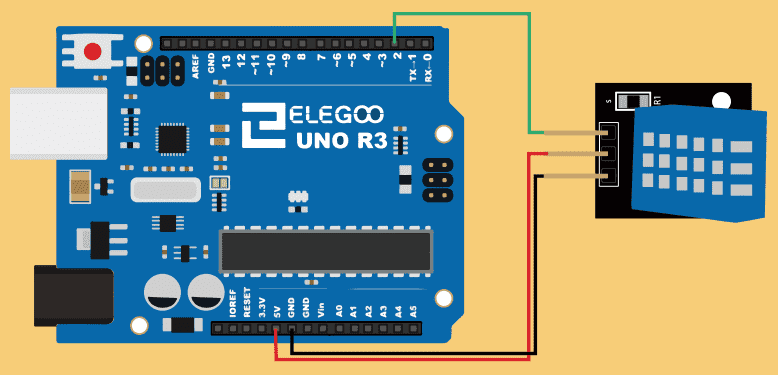
The DHT11 sensor will have three wires. Our signal will go to pin 2. The Vcc connection will be red and connected to our 5VDC supply. GND will be black and connected to the GND connection on our Arduino UNO R3.
We will also add the 10K thermistor and 10K resistor as our second circuit.
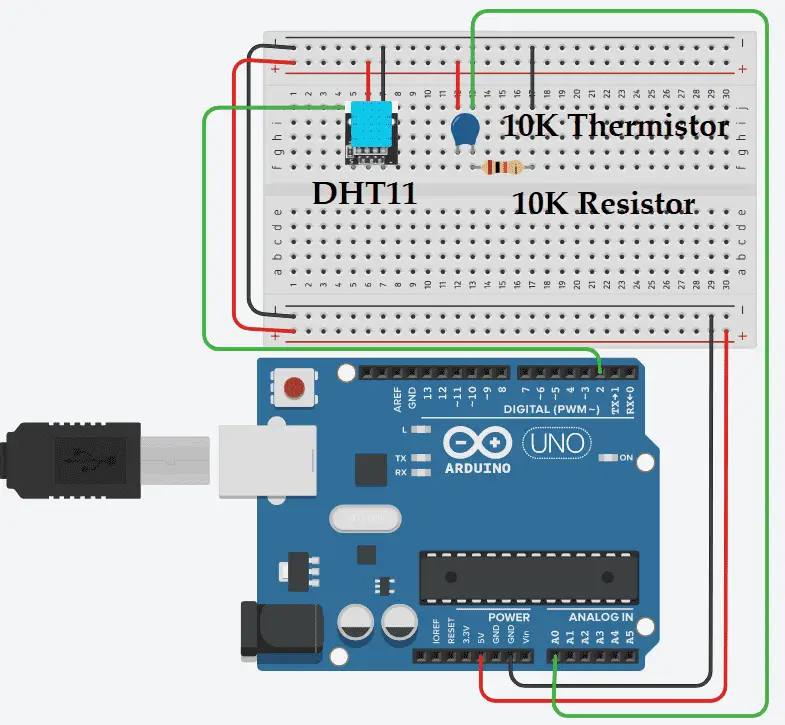
The output of this voltage divider circuit will be connected to pin A0. (Analog Input)
Steinhart-Hart equation is used to calculate the temperature using a thermistor. The methods to get the coefficients for thermistors can be found here.
Arduino UNO Temperature and Humidity Program
We will use a .ZIP library for the DHT11 sensor.
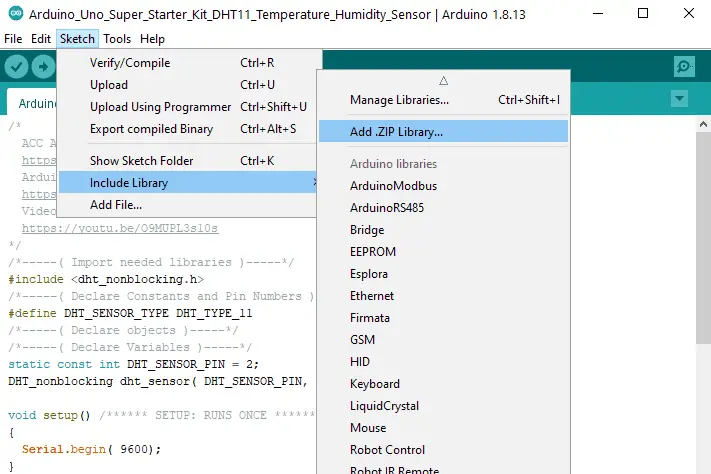
Select “Add IZIP Library…” from the main menu | Sketch | Include Library.
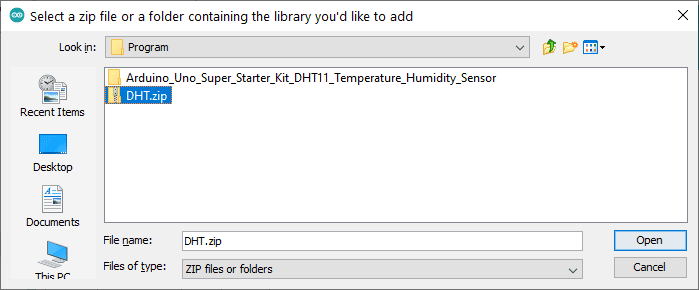
The DHT.zip file came on the disk with the Arduino UNO R3 super starter kit. It can also be downloaded from the link below with the program. Select this library and then select open. This will add the library to the Arduino IDE (Integrated Development Environment).
This first part will set up the library and declare the variables for the DHT11 sensor.
/*-----( Import needed libraries )-----*/
#include
/*-----( Declare Constants and Pin Numbers )-----*/
#define DHT_SENSOR_TYPE DHT_TYPE_11
/*-----( Declare objects )-----*/
/*-----( Declare Variables )-----*/
static const int DHT_SENSOR_PIN = 2;
DHT_nonblocking dht_sensor( DHT_SENSOR_PIN, DHT_SENSOR_TYPE );
We will now declare the variables for the thermistor temperature circuit.
int ThermistorPin = 0;
int Vo;
float R1 = 10000;
float logR2, R2, T;
// Calculating the Steinhart-Hart Coefficients for Thermistors
// https://www.thinksrs.com/downloads/pdfs/applicationnotes/LDC%20Note%204%20NTC%20Calculator.pdf
float c1 = 2.108508173e-03, c2 = 0.7979204727e-04, c3 = 6.535076315e-07;
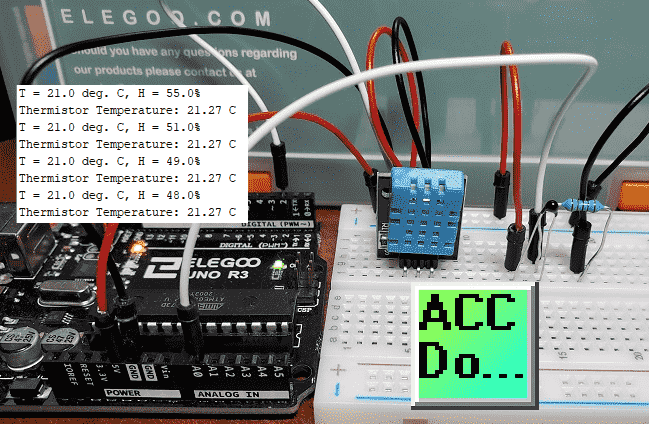
The serial port monitor will be used to display the temperature and humidity readings. We will open the port.
void setup() /****** SETUP: RUNS ONCE ******/
{
Serial.begin( 9600);
}
This function will return the temperature and humidity values from the DHT11 sensor every 4 seconds.
/*
* Poll for a measurement, keeping the state machine alive. Returns
* true if a measurement is available.
*/
static bool measure_environment( float *temperature, float *humidity )
{
static unsigned long measurement_timestamp = millis( );
/* Measure once every four seconds. */
if( millis( ) - measurement_timestamp > 3000ul )
{
if( dht_sensor.measure( temperature, humidity ) == true )
{
measurement_timestamp = millis( );
return( true );
}
}
return( false );
}
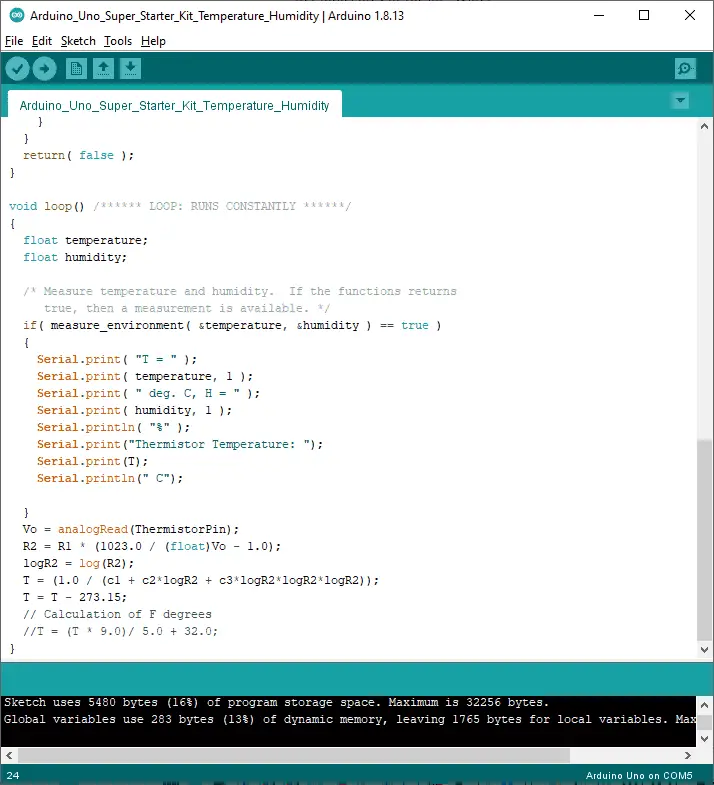
The temperature is then calculated in the main loop for the thermistor circuit in degrees Celsius. Degrees Fahrenheit calculation is also included but commented out.
void loop() /****** LOOP: RUNS CONSTANTLY ******/
{
Vo = analogRead(ThermistorPin);
R2 = R1 * (1023.0 / (float)Vo - 1.0);
logR2 = log(R2);
T = (1.0 / (c1 + c2*logR2 + c3*logR2*logR2*logR2));
T = T - 273.15;
// Calculation of F degrees
//T = (T * 9.0)/ 5.0 + 32.0;
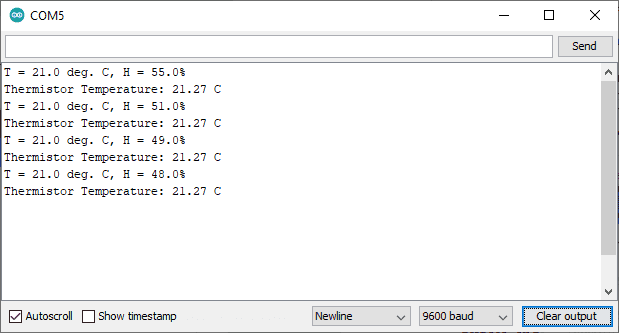
If a measurement is available from the DHT11 sensor then print the temperature and humidity along with the calculated temperature from the thermistor circuit.
Note: Since the DHT11 is communicating to the Arduino serially through a discrete input pin, this takes time to get the information updated.
float temperature;
float humidity;

/* Measure temperature and humidity. If the functions returns
true, then a measurement is available. */
if( measure_environment( &temperature, &humidity ) == true )
{
Serial.print( "T = " );
Serial.print( temperature, 1 );
Serial.print( " deg. C, H = " );
Serial.print( humidity, 1 );
Serial.println( "%" );
Serial.print("Thermistor Temperature: ");
Serial.print(T);
Serial.println(" C");

}
}
Upload the program sketch to the Arduino UNO R3 controller.
Start the serial monitor to watch the temperature and humidity readings on our circuits.
The above Arduino program sketch can be downloaded here.
Watch the video below to see the display of temperature and humidity on our Arduino Uno Super Starter Kit.
Elegoo Links:
Service
service@elegoo.com (USA and Canada)
EUservice@elegoo.com (Europe)
Arduino Compatible Links:
Product Hardware
Elegoo UNO Project Super Starter Kit
Elegoo Download Page
Amazon.com
Amazon.ca
Software
– Arduino IDE (Integrated Development Environment)
– Productivity Blocks (Development Timesaver)
– Productivity Blocks Documentation (Wiki)
Community
– Arduino Blog
– Arduino Forum
– Arduino UNO Facebook
Next time we will look at the IR receiver module on our Arduino Elegoo super starter kit UNO R3.
Watch on YouTube: Arduino Uno Temperature and Humidity
If you have any questions or need further information please contact me.
Thank you,
Garry
If you’re like most of my readers, you’re committed to learning about technology. Numbering systems used in PLCs are not difficult to learn and understand. We will walk through the numbering systems used in PLCs. This includes Bits, Decimal, Hexadecimal, ASCII, and Floating Point. To get this free article, subscribe to my free email newsletter.
Use the information to inform other people how numbering systems work. Sign up now. The ‘Robust Data Logging for Free’ eBook is also available as a free download. The link is included when you subscribe to ACC Automation.