The C-More can create a drop-down menu. This applies to all models of the HMI controller. A drop-down is a menu that offers a list of options. The currently selected item in the list is always displayed. When the visible item is selected (touched), other items from the list “drop-down” into view, and the operator can choose from those options.
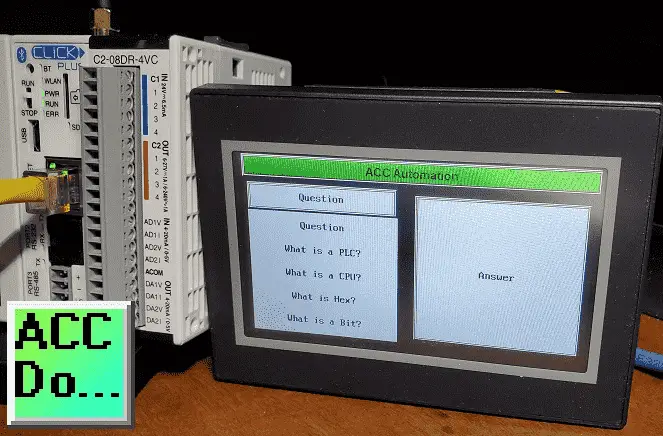
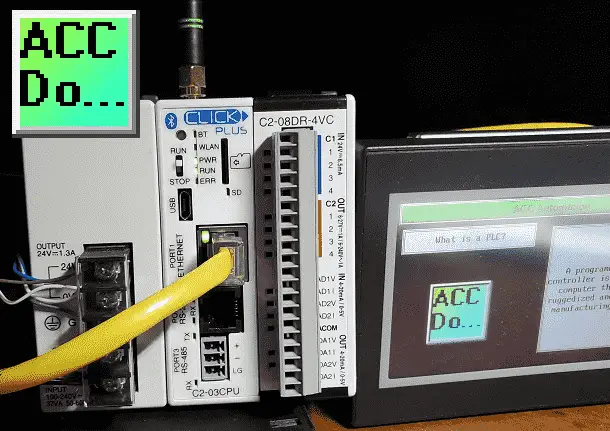
We will be creating a drop-down menu using a C-More Micro HMI. (Human Machine Interface) This could also be done using the EA7 or EA9 C-More HMI controllers. The EA3-T4CL will be communicating to a Click PLUS PLC. A ladder logic program in the PLC will control the operation of this operator interface drop-down menu. Selecting a question on the drop-down will give an answer on the corresponding Lookup Text display. Let’s get started.
Previously in this C-More Micro HMI Panel series, we have done the following:
System Hardware – Video
Installing the Software – Video
– Update Automation Direct Software C-More Micro HMI Video
System Setup Screens – Video
First Program – Video
First Program Part 2 (PLC < – > Panel) – Video
Common Screen Menu – Video
Simulate Project – Video
Object List Shapes – Video
Object Buttons and Indicators – Video
Object Numeric Entry – Video
Object Meters and Graphs – Video
Object Bitmap – Video
Object Recipe – Video
Object Text – Video
Omron CP1H to C-More Micro HMI Communication – Video
What is a Drop-Down?
A drop-down list is a graphical control element that allows the operator to choose one value from a list. When a drop-down list is inactive, it displays a single value. When activated, it displays a list of values, from which the operator may select one.

Drop-downs conserve screen space. This is why we are demonstrating their use on a C-More Micro HMI. Since drop-downs are common in computer systems, operators are familiar with the use of this type of menu. Options presented to the operator will only show legal choices so you will not have to deal with erroneous data entered.
Watch the video below to see the drop-down menu on the C-More Micro HMI Panel working with the Click PLC.
Click to C-More Communication Protocol
We will be connecting the C-More Micro HMI model EA3-T4CL to the Click Plus WiFi Ethernet PLC. The Click PLC Ethernet Protocol will be used for communication.
Using the C-More Micro Programming Software call up the Panel Manager by selecting it from the main menu | Setup | Panel Manger.
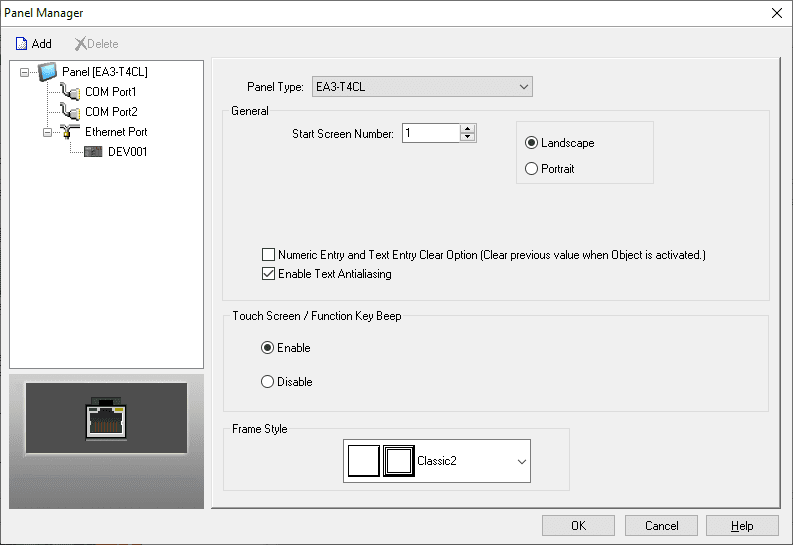
The panel type is set for an EA3-T4CL. Select the DEV001 device under the Ethernet Port.
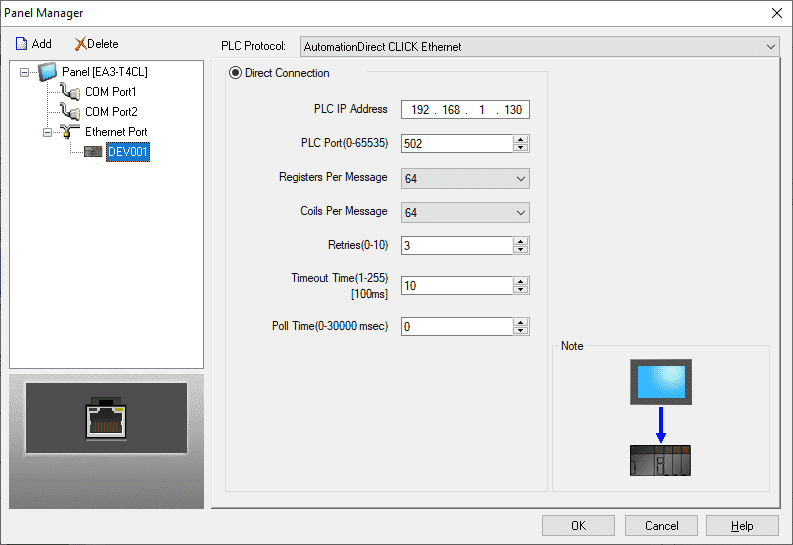
This will show the PLC Protocol as Automation Direct CLICK Ethernet. Our IP address can be seen here and must match the Click ethernet or WiFi address. Leave the rest of the parameters as their default.
Looking at the Click Programming software, select Com Port from the main menu | Setup menu.
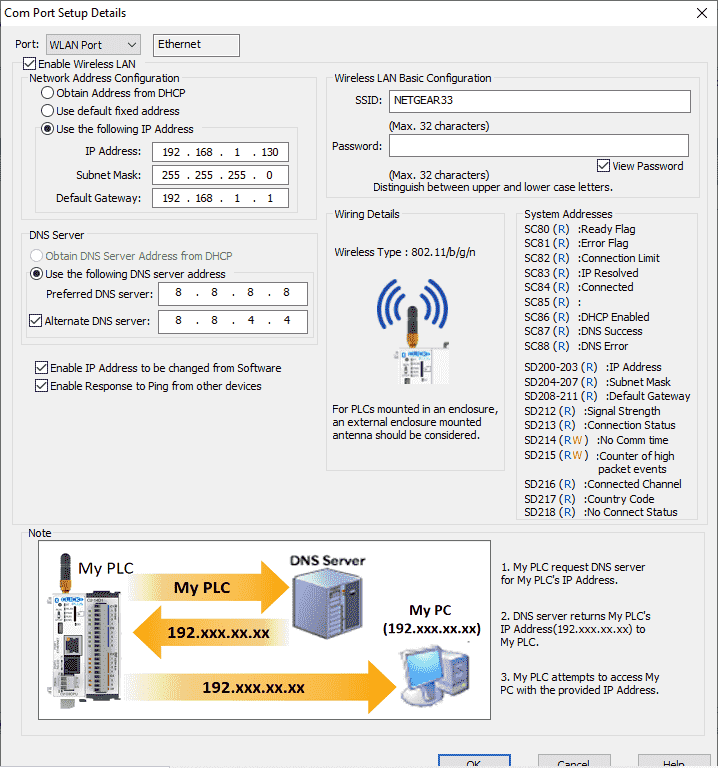
The WLAN port is selected from the drop-down menu for Port. A fixed IP address is set that matches the C-More controller. Select Port1.
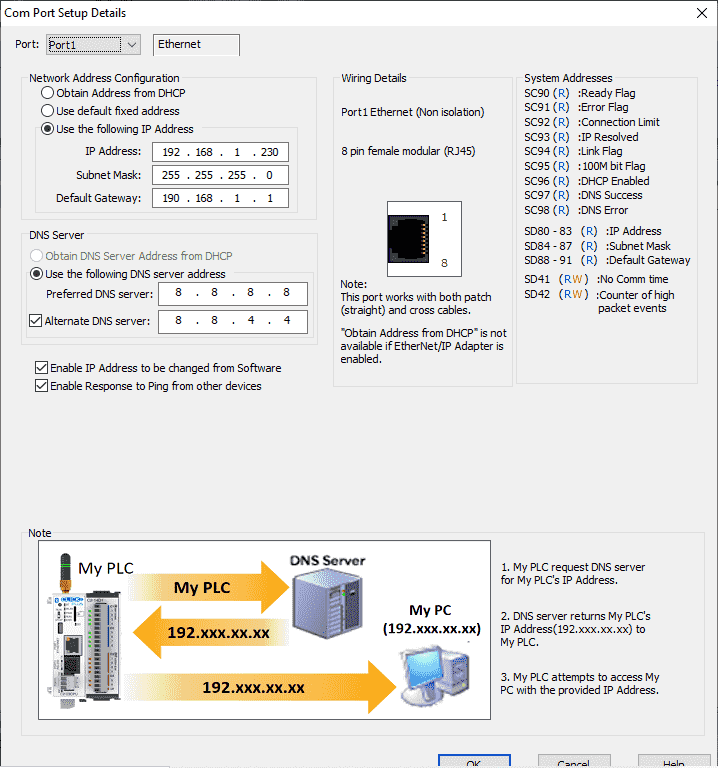
Setting up the ethernet port as well with a fixed IP address will ensure that we can always find this device through other software on our network.
The communication parameters are now set between the Click and C-More controllers using Ethernet.
C-More Drop-Down Create
All of the objects mentioned in this post can be found in the C-More Micro and C-More series found on our website. Every post will have a corresponding video at the end to demonstrate the operation of the object. A drop-down can be created using any of the C-More HMI controllers using the following technique.
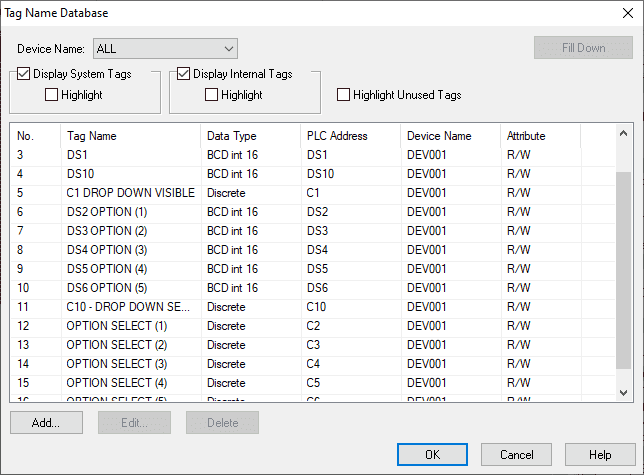
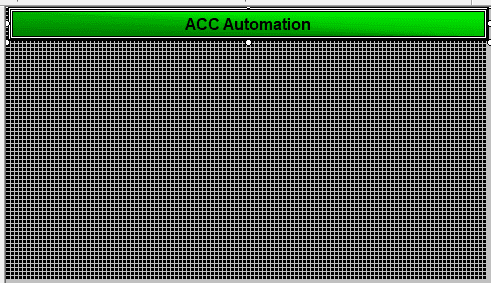
Looking at the tag name database we will use DS1 for the current question lookup and DS10 for the answer lookup text. C1 is the visibility of the options and C10 is to select the drop-down. DS2 to DS6 contain the value of the lookup text for each of the options available to the user. C2 to C6 are pushbuttons for the selection of the option in the drop-down. We will start with a black background on screen 1.
 The Drop-Down will use the Lookup Text object and its corresponding message database will be used for all of the displays for our menu.
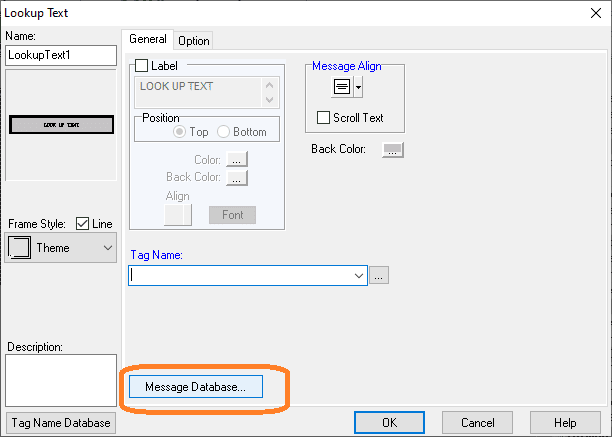
Select the message database button. You can also reach the message database by using the main menu | Database | Message Database.
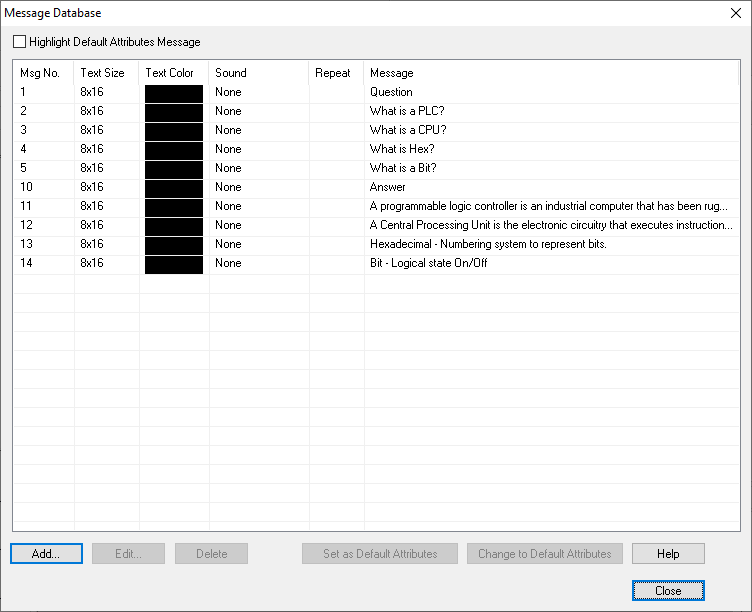
We will be using messages 1 to 5 as the question and 10 to 14 as the answers for our drop-down menu. Every message can be customized with different text sizes, sounds, and colors.
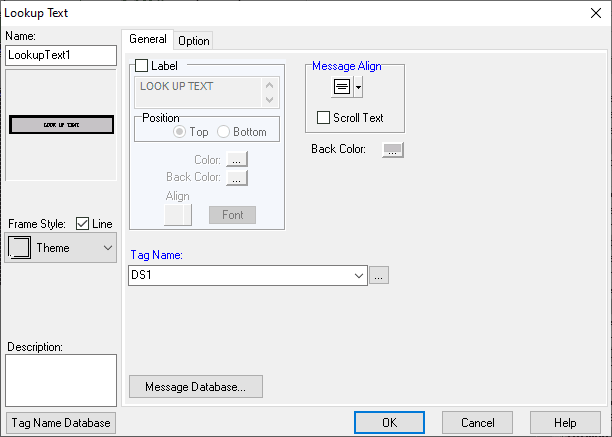
DS1 will be used for our question lookup text. This will be used as the fixed text that will then trigger the drop-down menu.
We will place 5 additional lookup text objects on the screen that will represent the options for the operator.
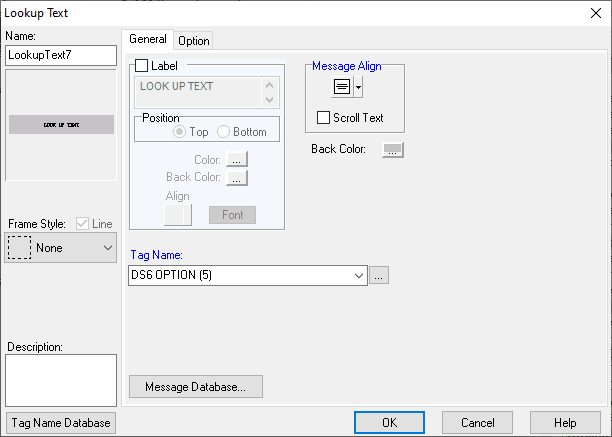
DS2 to DS6 will contain the values of 1 to 5 for the corresponding message option for the drop-down menu. Select the options tab for the lookup text.
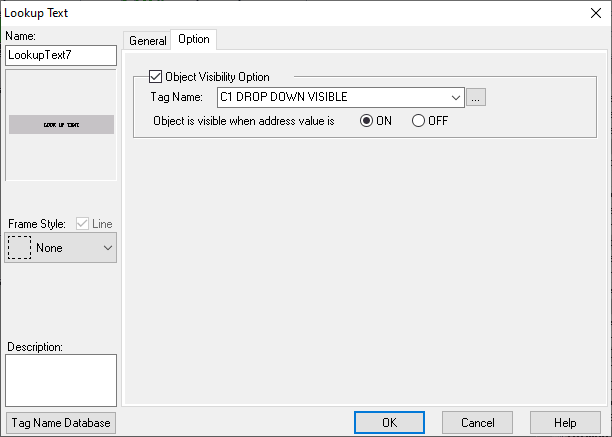
The five lookup text options will have object visibility based on the value of C1.

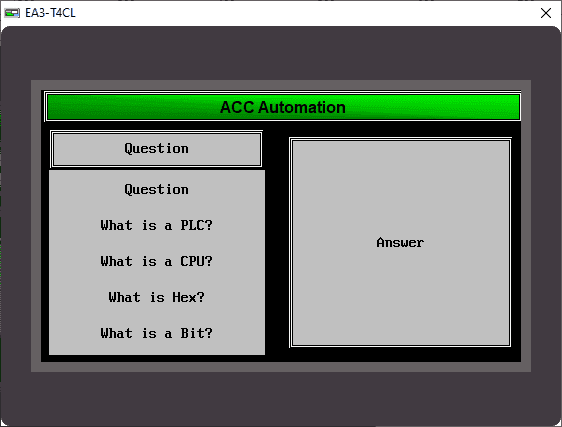
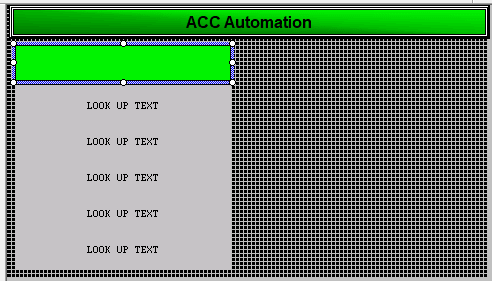
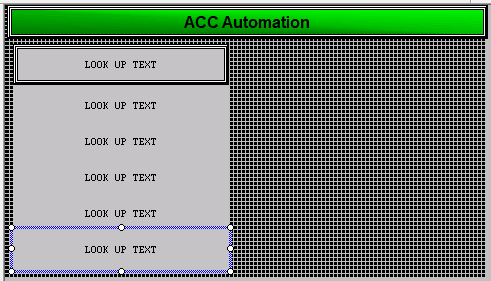
Here are our completed lookup text objects on the screen.
A momentary pushbutton will now be added.
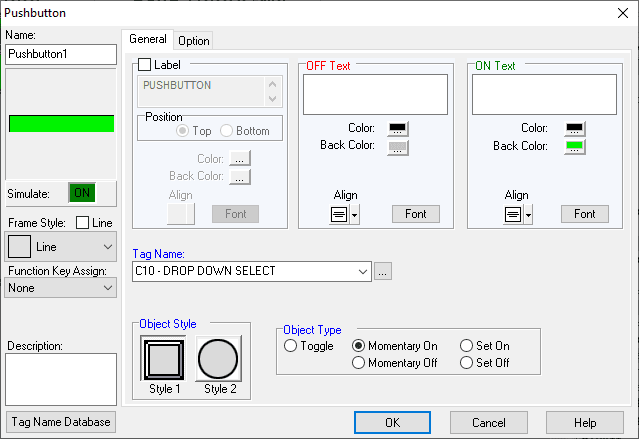
C10 will be used as the tag reference in our Click PLC. This will turn on C10 when the button is pressed only.
Position this pushbutton over the main lookup text for our drop-down menu.
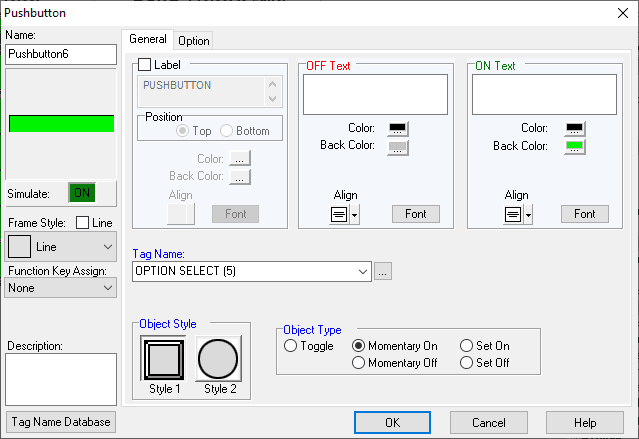
We will now add C2 to C6 momentary pushbuttons to our drop-down menu. These will represent the selection of the option for the drop-down.
Select the options tab.
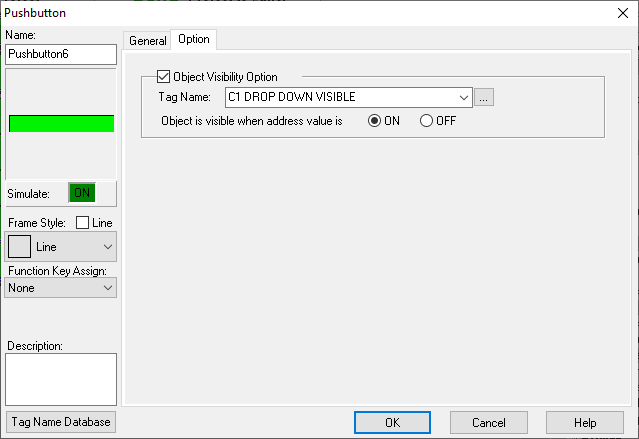
C1 visibility will also be used for the pushbuttons of the options.
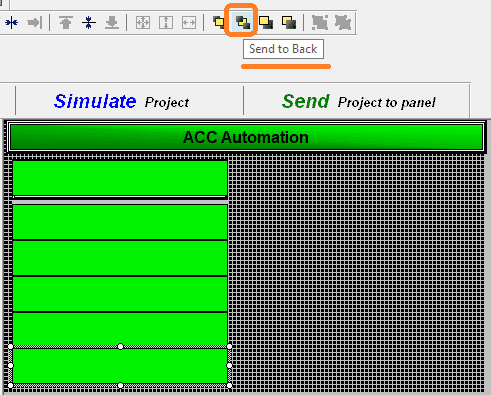
Position the pushbuttons over the text lookup objects for each option in our drop-down. Select send to back for each of the pushbuttons programmed. This will allow the lookup text to be shown, but still, have the pushbutton behind it.
Select another lookup text and place this on the screen. This will be used for the answer to the question.
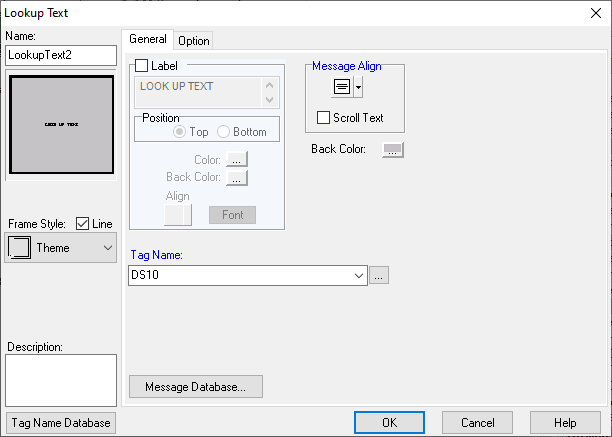
DS10 will contain the value of the message for the answer to display.
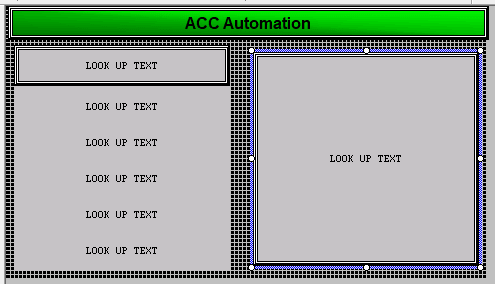
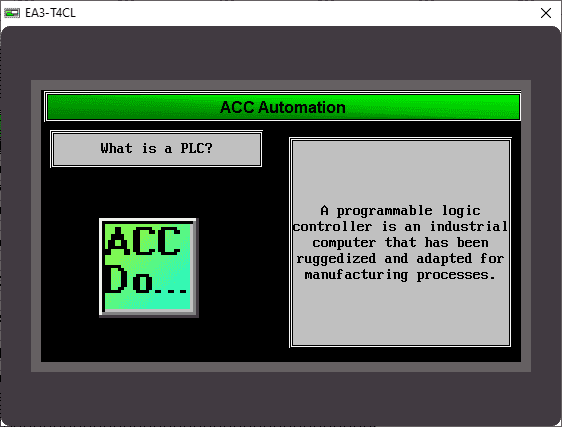
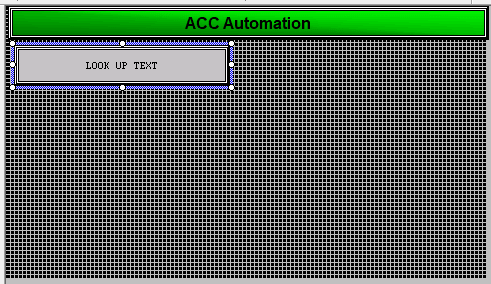
Adding other objects to the location of the drop-down menu objects can easily be done. Let’s add a static bitmap image.
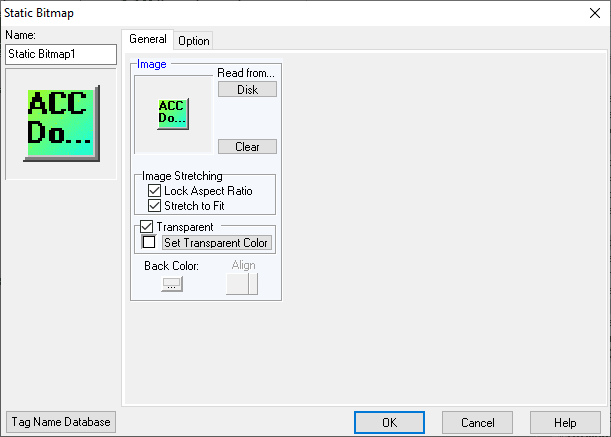
Place this on the screen.
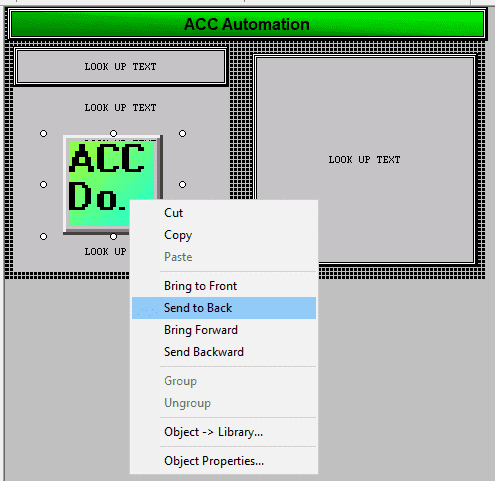
Size and position the image on the screen. We will now send this to the background so when the drop-down is selected the options will be displayed over the image. You can use the send-to-back icon on the main menu or right-click on the object and select send-to-back.

Our drop-down menu has now been created on our C-More. To make this function, we will now look at the PLC program required.
Click Drop-Down PLC Program
The first rung of the ladder will set the visibility bit (C1) on to display our options to the operator.

Selecting the first option or the first scan of the PLC will reset the question drop-down and answer lookup text registers. It will also reset the C1 visibility for the options.

When option 2 is selected the visibility of the options will turn off and the corresponding question and answers will be set.
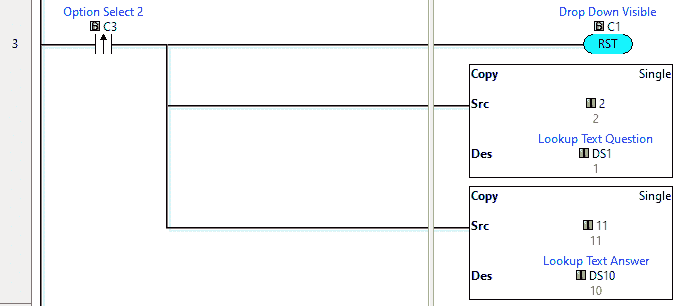
This code will repeat for options 3 to 5.
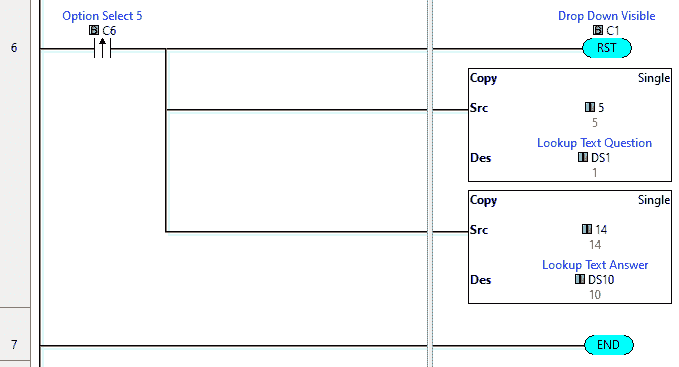
The ladder logic is now complete to operate our C-More drop-down menu.
Download the PLC and C-More Micro programs here.
Watch the video below to see the drop-down menu of our C-More Micro HMI Panel. This is being controlled by the Click PLC program.
C-More Micro Panels from Automation Direct
https://www.automationdirect.com/adc/Shopping/Catalog/HMI_(Human_Machine_Interface)/C-more_Micro_Panels
C-More Micro – Graphic Panel (EA3 Series) User Manual and Quick Start Guides
https://cdn.automationdirect.com/static/manuals/ea3mguserm/ea3mguserm.html
EA3-T4CL C-More Micro Specifications
https://cdn.automationdirect.com/static/specs/ea3t4cl.pdf
C-More Micro Programming Software V4.35
http://support.automationdirect.com/products/cmoremicro.html
This free software will enable you to program all of the C-More Micro HMI units. It includes a simulator for your application.
Watch on YouTube: C-More Drop-Down Create
If you have any questions or need further information please contact me.
Thank you,
Garry
If you’re like most of my readers, you’re committed to learning about technology. Numbering systems used in PLCs are not difficult to learn and understand. We will walk through the numbering systems used in PLCs. This includes Bits, Decimal, Hexadecimal, ASCII, and Floating Point.
To get this free article, subscribe to my free email newsletter.
Use the information to inform other people how numbering systems work. Sign up now.

The ‘Robust Data Logging for Free’ eBook is also available as a free download. The link is included when you subscribe to ACC Automation.