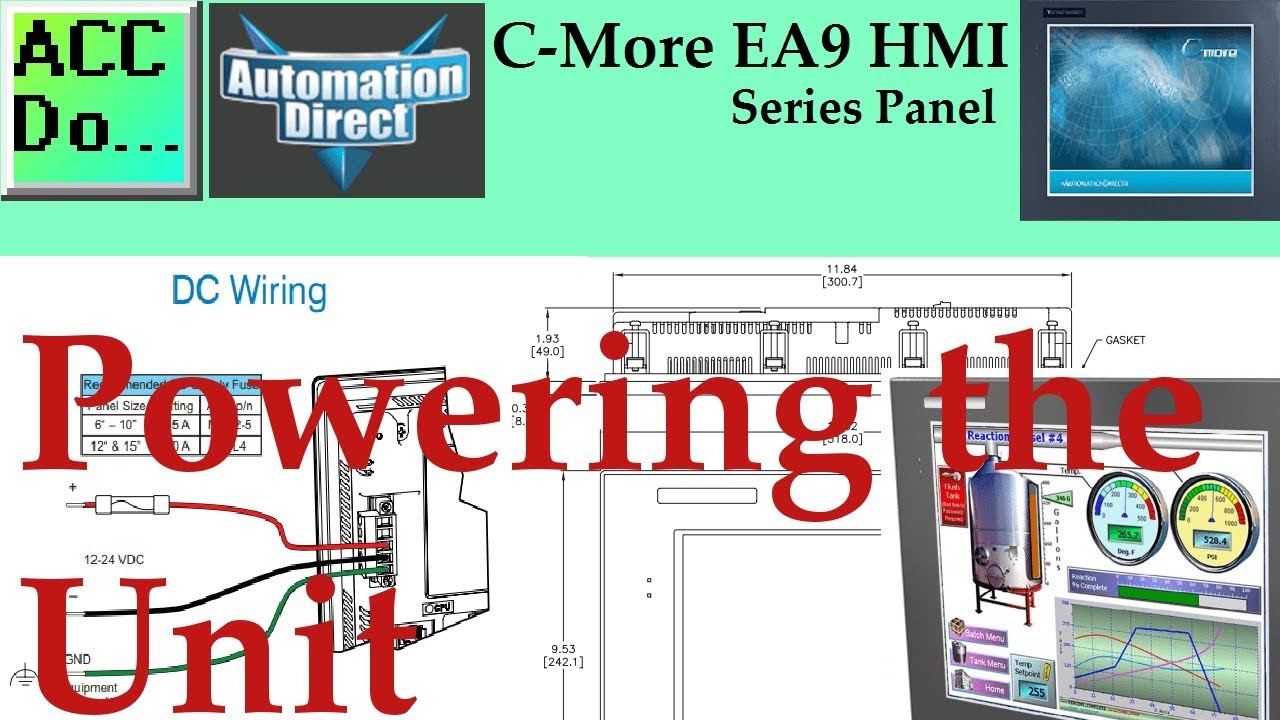
C-More EA9 HMI Series Panel Powering the Unit
2K views · Oct 13, 2022 accautomation.ca
We will now look at powering up our C-More EA9 HMI unit. Human-machine interfaces (HMI) like the C-More are made to display and control operations for our automation solution. Information is displayed in a graphics format. (Graphical User Interface – GUI) The HMI is usually part of the SCADA (Supervisory Control and Data Acquisition) system. Communication from the HMI to the control is usually done through a serial (RS232 / RS485 / RS422) or Ethernet (RJ45) method with different protocols depending on the manufacturer of the control. The automation control device is not limited to a PLC. (Programmable Logic Controller) You can communicate also to drives, temperature process controllers, etc. The HMI usually will include several different protocols and port configurations to maximize the amount of control product that it will be able to communicate. C-More Operator Panels come in 6”, 7” wide, 10”, 10” wide, 12” or 15” models. They are programmed using the EA9-PGMSW programming software through either the USB or Ethernet cable. A voltage supply of 12-24 VDC is required for the panel. The optional C-More AC Power Adapter EA-AC can also be used to supply this voltage. We will be looking at one of the newest members of the C-More Panel HMI devices from Automation Direct. This is the EA9-T10CL. This ten-inch colour TFT LCD screen offers great features that we will be exploring as we review this product. Let’s get started. More information can be obtained on our website. This includes all of the links mentioned in this video. https://accautomation.ca/c-more-ea9-hmi-series-panel-system-hardware Previously we have discussed the following in our C-More HMI Panel: System Hardware https://accautomation.ca/c-more-micro-hmi-system-hardware Unboxing and Review Video https://youtu.be/_uCcALMqYlM Powering the Unit https://youtu.be/BIGrOvxlDTI There are several reasons that we are using the EA9-T10CL C-More HMI Panel. Here are a few: • Touch screen display (LCD) 280 NITS display brightness • 10.4” diagonal colour TFT (Thin Film Transistor) • Analog resistive (1024 X 1024) touch screen allowing unlimited touch areas • EA9-PGMSW programming software • 800 x 600-pixel display • 64K colours • 50,000-hour average backlight half-life • USB port B (program/download) and USB port A (USB device options) • Ethernet 10/100 Base-T port (program/download & PLC communication • Remote Internet Access • Serial PLC interface (RS-232/422/485) • One built-in SD memory card slot • 12–24 VDC powered (18W), 110VAC power adapter (optional) • Audio Line Out, stereo - requires amplifier and speaker(s) • 26MB project memory • Data logging • 0 to 50°C [32 to 122°F] operating temperature range • NEMA 4/4X, IP65 compliant when mounted correctly, indoor use only • Slim design saves panel space • UL, cUL & CE agency approvals • 2-year warranty from date of purchase https://www.accautomation.ca
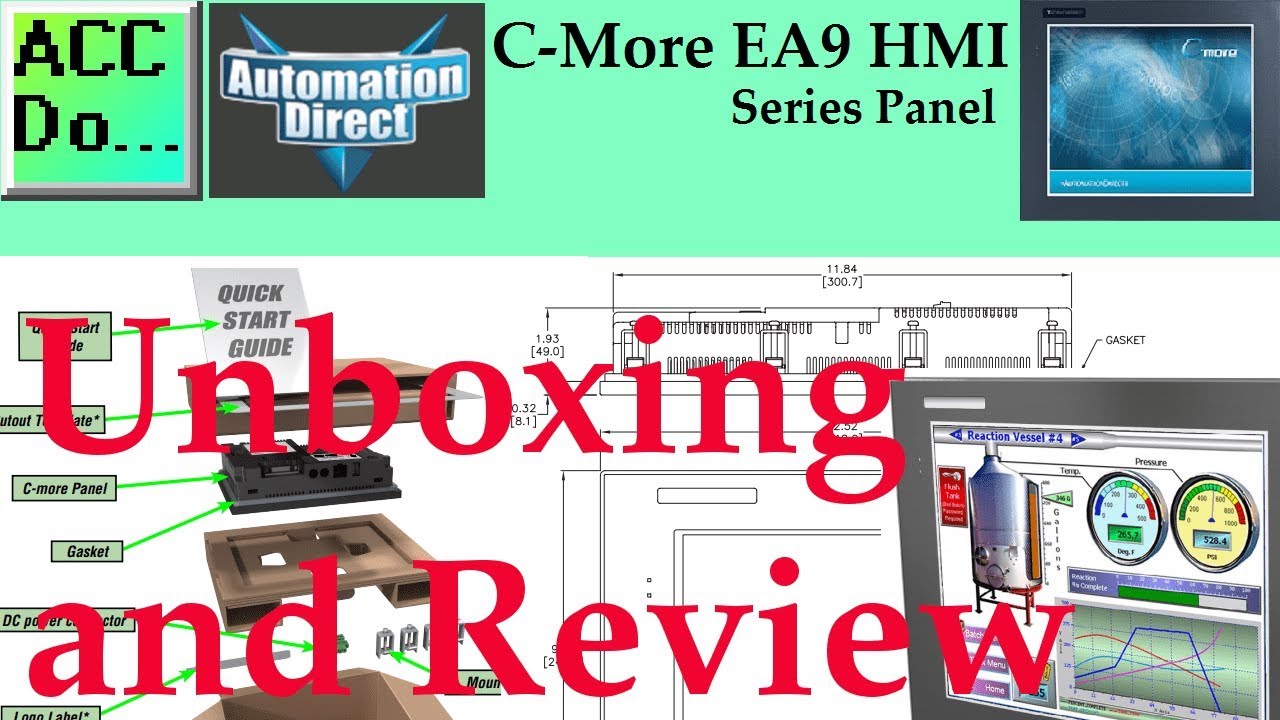
C-More EA9 HMI Series Panel Unboxing and Review
27K views · Oct 13, 2022 accautomation.ca
We will be unboxing and reviewing our C-More EA9 unit. Human-machine interfaces (HMI) are made to display and control operations for our automation solution. Information is displayed in a graphics format. (Graphical User Interface – GUI) The HMI is usually part of the SCADA (Supervisory Control and Data Acquisition) system. Communication from the HMI to the control is usually done through a serial (RS232 / RS485 / RS422) or Ethernet (RJ45) method with different protocols depending on the manufacturer of the control. The automation control device is not limited to a PLC. (Programmable Logic Controller) You can communicate also to drives, temperature process controllers, etc. The HMI usually will include several different protocols and port configurations to maximize the amount of control product that it will be able to communicate. C-More Operator Panels come in 6”, 7” wide, 10”, 10” wide, 12” or 15” models. They are programmed using the EA9-PGMSW programming software through either the USB or Ethernet cable. A voltage supply of 12-24 VDC is required for the panel. The optional C-More AC Power Adapter EA-AC can also be used to supply this voltage. We will be looking at one of the newest members of the C-More Panel HMI devices from Automation Direct. This is the EA9-T10CL. This ten-inch colour TFT LCD screen offers great features that we will be exploring as we review this product. Let’s get started. More information can be obtained on our website. This includes all of the links mentioned in this video. https://accautomation.ca/c-more-ea9-hmi-series-panel-system-hardware Previously we have discussed the following in our C-More HMI Panel: System Hardware https://accautomation.ca/c-more-micro-hmi-system-hardware Unboxing and Review Video https://youtu.be/_uCcALMqYlM Powering the Unit https://youtu.be/BIGrOvxlDTI There are several reasons that we are using the EA9-T10CL C-More HMI Panel. Here are a few: • Touch screen display (LCD) 280 NITS display brightness • 10.4” diagonal colour TFT (Thin Film Transistor) • Analog resistive (1024 X 1024) touch screen allowing unlimited touch areas • EA9-PGMSW programming software • 800 x 600-pixel display • 64K colours • 50,000-hour average backlight half-life • USB port B (program/download) and USB port A (USB device options) • Ethernet 10/100 Base-T port (program/download & PLC communication • Remote Internet Access • Serial PLC interface (RS-232/422/485) • One built-in SD memory card slot • 12–24 VDC powered (18W), 110VAC power adapter (optional) • Audio Line Out, stereo - requires amplifier and speaker(s) • 26MB project memory • Data logging • 0 to 50°C [32 to 122°F] operating temperature range • NEMA 4/4X, IP65 compliant when mounted correctly, indoor use only • Slim design saves panel space • UL, cUL & CE agency approvals • 2-year warranty from date of purchase https://www.accautomation.ca
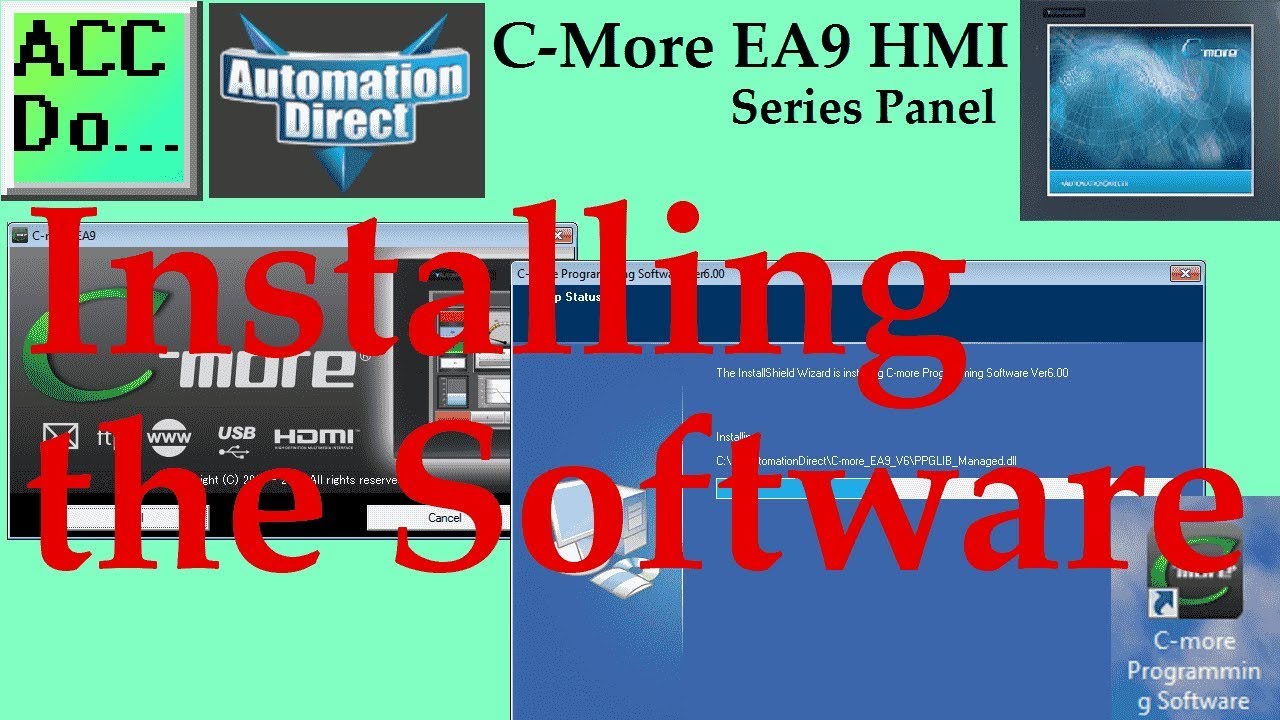
C-More EA9 HMI Series Panel Installing the Software
9K views · Oct 13, 2022 accautomation.ca
UPDATE: The C-More EA9 Programming Software is now completely FREE! The C-more Programming Software is a free download from Automation Direct. The software can run in DEMO (demonstration) mode or a key can be purchased to unlock this software. This powerful C-more Touch Panel programming software makes the HMI touch screen panel setup and programming quick and simple. Simply drag and drop the objects from the object bar onto the screen construction area. A complete set of control panel objects include pushbuttons, selector switches, pilot lights, text and numeric data displays, bar graph displays, static and dynamic bitmapped images, and more. Configure your PLC tags and click on the objects you want to use. A built-in simulator will allow you to review your work on the computer before downloading the project. We will be installing the C-more Programming Software onto our PC (computer). This will be the DEMO mode of the program. The DEMO mode will do the following: - You CAN download our sample projects and explore the capabilities of C-more. - You CAN use the Simulator to test your project on the PC and see how the Simulator can save you hours of programming time. - You CAN create your own objects, and save them in your object library. - You CAN explore the online help, and find answers to many questions that might not be covered here on the website. The full package will allow you to save your projects, download them to a panel and includes the full symbol factory library with over 4000 symbols. Let’s get started. More information can be obtained on our website. This includes all of the links mentioned in this video. https://accautomation.ca/c-more-ea9-hmi-series-panel-installing-the-software Previously we have discussed the following in our C-More HMI Panel: System Hardware https://accautomation.ca/c-more-micro-hmi-system-hardware Unboxing and Review Video https://youtu.be/_uCcALMqYlM Powering the Unit https://youtu.be/BIGrOvxlDTI There are several reasons that we are using the EA9-T10CL C-More HMI Panel.Here are a few: • Touch screen display (LCD) 280 NITS display brightness • 10.4” diagonal colour TFT (Thin Film Transistor) • Analog resistive (1024 X 1024) touch screen allowing unlimited touch areas • EA9-PGMSW programming software • 800 x 600 pixel display • 64K colours • 50,000 hour average backlight half-life • USB port B (program/download) and USB port A (USB device options) • Ethernet 10/100 Base-T port (program/download & PLC communication • Remote Internet Access • Serial PLC interface (RS-232/422/485) • One built-in SD memory card slot • 12–24 VDC powered (18W), 110VAC power adapter (optional) • Audio Line Out, stereo - requires amplifier and speaker(s) • 26MB project memory • Data logging • 0 to 50°C [32 to 122°F] operating temperature range • NEMA 4/4X, IP65 compliant when mounted correctly, indoor use only • Slim design save panel space • UL, cUL & CE agency approvals • 2-year warranty from date of purchase https://www.accautomation.ca
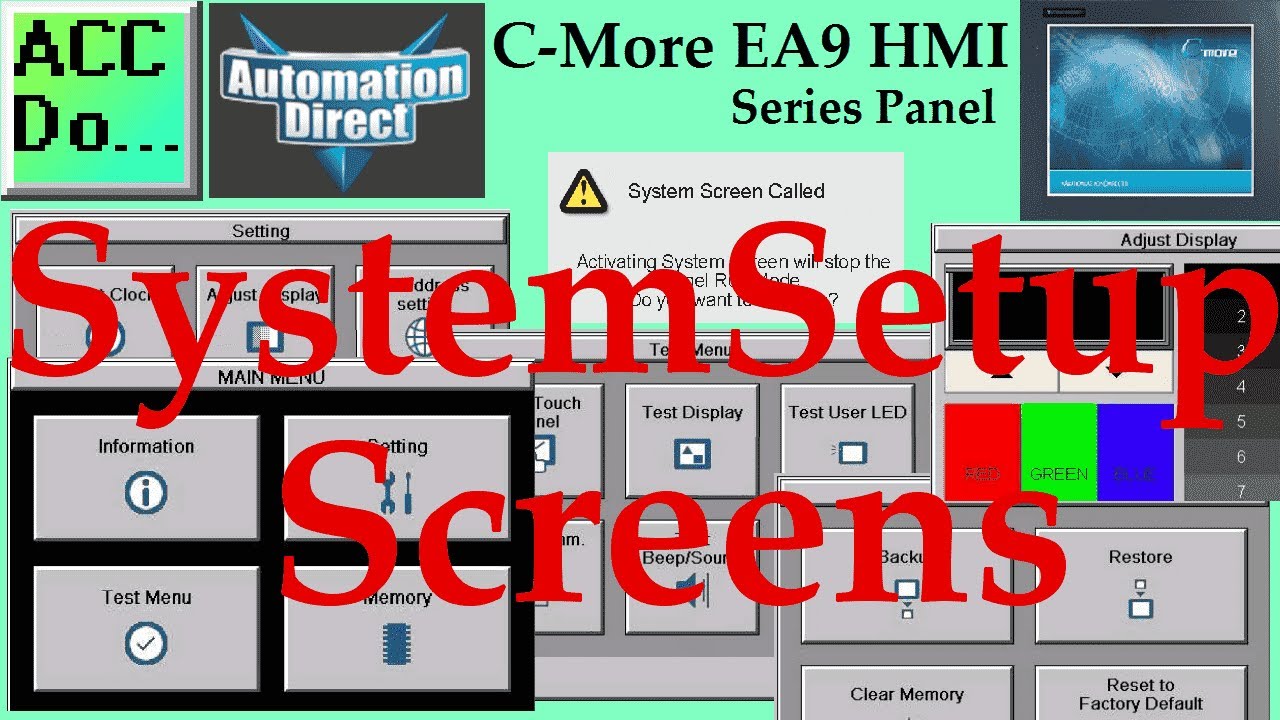
C-More EA9 HMI Series Panel System Setup Screens
1K views · Oct 13, 2022 accautomation.ca
The C-more touch panels include a series of built-in System Setup Screens that allow you to view detailed information about the panel; adjust certain features; configure communications; test various functions of the touch panel; backup & restore firmware, a recipe, log, and project memory; clear memory and reset all values and conditions back to the original factory defaults. Information, Setting, Test Menu, and Memory make up the four Main Menu setup screens. Information - The information tabs display details about the touch panel model; the panel’s name; version information for the hardware, boot loader, and firmware; clock source, and beeper status. Other tabs display details on the panel’s internal memory and the status of any external memory devices. Communication port details are available in this area, as well as an error log to help in troubleshooting the system. Setting - This is the area for making adjustments to the internal clock, adjusting the brightness of the display, setting the IP address adjusting (calibrating) the touch panel, enabling or disabling the internal beep, and enabling or disabling a mouse pointer. Test Menu - This menu will allow you to test the touch panel, test the display, test the user LED, test the communication ports, and test both the internal beeper or the audio line output. If a speaker with an amplifier is connected, a WAV sound file is a system provided for the audio line output test. Memory - The Memory menu allows you to either backup or stores your project, log data, recipe data, and/or system memory. Selections can be made to backup to optional SD card memory or USB pen drive memory. The menu selections also give you the ability to clear the memory, and there is also a selection to reset all of the touch panels settings back to the original factory defaults. We will be reviewing these system screens of the C-More HMI Panel. Let’s get started. More information can be obtained on our website. This includes all of the links mentioned in this video. https://accautomation.ca/c-more-ea9-hmi-series-panel-system-setup-screens Previously we have discussed the following in our C-More HMI Panel: System Hardware https://accautomation.ca/c-more-micro-hmi-system-hardware Unboxing and Review Video https://youtu.be/_uCcALMqYlM Powering the Unit https://youtu.be/BIGrOvxlDTI Installing the Software https://accautomation.ca/c-more-ea9-hmi-series-panel-installing-the-software https://youtu.be/6EnyUbEp4As There are several reasons that we are using the EA9-T10CL C-More HMI Panel. Here are a few: • Touch screen display (LCD) 280 NITS display brightness • 10.4” diagonal colour TFT (Thin Film Transistor) • Analog resistive (1024 X 1024) touch screen allowing unlimited touch areas • EA9-PGMSW programming software • 800 x 600-pixel display • 64K colours • 50,000-hour average backlight half-life • USB port B (program/download) and USB port A (USB device options) • Ethernet 10/100 Base-T port (program/download & PLC communication • Remote Internet Access • Serial PLC interface (RS-232/422/485) • One built-in SD memory card slot • 12–24 VDC powered (18W), 110VAC power adapter (optional) • Audio Line Out, stereo - requires amplifier and speaker(s) • 26MB project memory • Data logging • 0 to 50°C [32 to 122°F] operating temperature range • NEMA 4/4X, IP65 compliant when mounted correctly, indoor use only • Slim design saves panel space • UL, cUL & CE agency approvals • 2-year warranty from date of purchase https://www.accautomation.ca
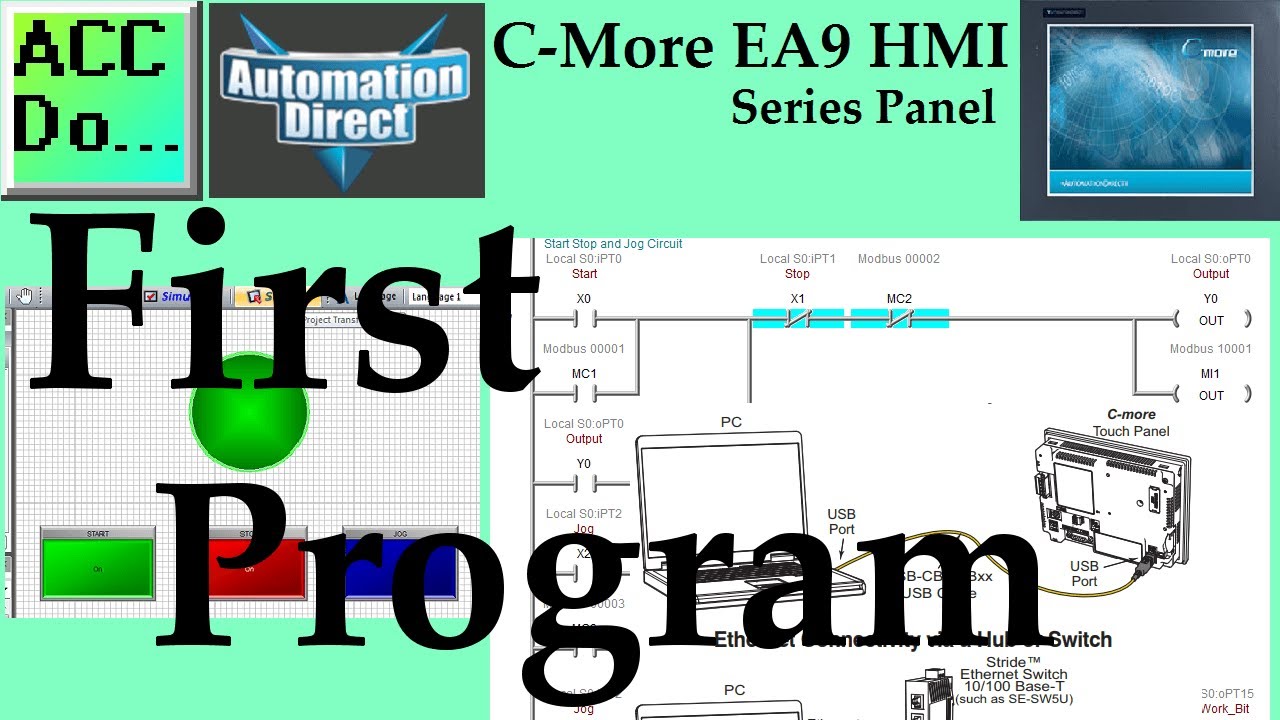
C-More First Program - EA9 HMI Series Panel
2K views · Oct 13, 2022 accautomation.ca
We will now put our first program into the C-More EA9 HMI Panel using the C-More programming software. The Do-more Designer Simulator will be used with a modified Start Stop Jog Circuit so we can use our HMI screen to monitor the output as well as control the inputs on the PLC. Communications will be established to our C-More EA9-T10CL unit and the firmware will be updated. We will then develop our control for our PLC ladder logic circuit. The PLC logic for our circuit can be found in our post: How to Make a Start / Stop / Jog Circuit in a PLC. Our C-More EA9 HMI Panel will be communicating to the PLC simulator via Ethernet with the Modbus TCP protocol. Let’s get started. c-more first program More information can be obtained on our website. This includes all of the links mentioned in this video. https://accautomation.ca/c-more-ea9-hmi-series-panel-first-program 00:00 C-More First Program - EA9 Series 00:33 Page Display - Zooming 01:32 Panel and Communication Setup 02:20 Review of PLC Program and Addresses 03:16 Adding C-More Pushbuttons - Start Stop Jog 07:07 Adding C-More Indicator Light 08:42 Transfer and Test Program Establishing Communication and Updating Firmware Video https://youtu.be/WTHw1p-iJFE First Program Video https://youtu.be/5c8ZsdK5dak Previously we have discussed the following in our C-More HMI Panel: System Hardware https://accautomation.ca/c-more-micro-hmi-system-hardware Unboxing and Review Video https://youtu.be/_uCcALMqYlM Powering the Unit https://youtu.be/BIGrOvxlDTI Installing the Software https://accautomation.ca/c-more-ea9-hmi-series-panel-installing-the-software https://youtu.be/6EnyUbEp4As System Setup Screens https://accautomation.ca/c-more-ea9-hmi-series-panel-system-setup-screens https://youtu.be/tL6Ygr1BuDY There are several reasons that we are using the EA9-T10CL C-More HMI Panel. Here are a few: • Touch screen display (LCD) 280 NITS display brightness • 10.4” diagonal colour TFT (Thin Film Transistor) • Analog resistive (1024 X 1024) touch screen allowing unlimited touch areas • EA9-PGMSW programming software • 800 x 600-pixel display • 64K colours • 50,000-hour average backlight half-life • USB port B (program/download) and USB port A (USB device options) • Ethernet 10/100 Base-T port (program/download & PLC communication • Remote Internet Access • Serial PLC interface (RS-232/422/485) • One built-in SD memory card slot • 12–24 VDC powered (18W), 110VAC power adapter (optional) • Audio Line Out, stereo - requires amplifier and speaker(s) • 26MB project memory • Data logging • 0 to 50°C [32 to 122°F] operating temperature range • NEMA 4/4X, IP65 compliant when mounted correctly, indoor use only • Slim design saves panel space • UL, cUL & CE agency approvals • 2-year warranty from date of purchase https://www.accautomation.ca
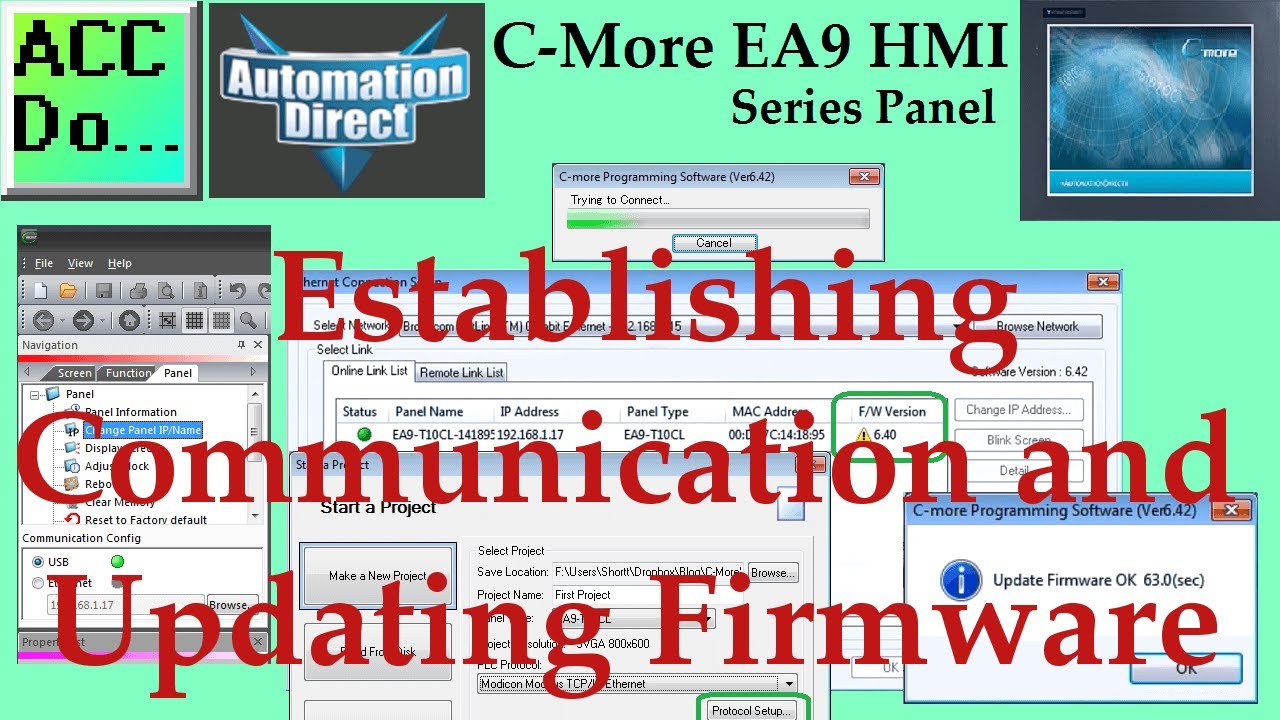
C-More EA9 HMI Series Panel Communication and Updating Firmw...
1K views · Oct 13, 2022 accautomation.ca
Establishing communication and updating the C-More firmware will be shown. We will now put our first program into the C-More EA9 HMI Panel using the C-More programming software. The Do-more Designer Simulator will be used with a modified Start Stop Jog Circuit so we can use our HMI screen to monitor the output as well as control the inputs on the PLC. Communications will be established to our C-More EA9-T10CL unit and the firmware will be updated. We will then develop our control for our PLC ladder logic circuit. The PLC logic for our circuit can be found in our post: How to Make a Start / Stop / Jog Circuit in a PLC. Our C-More EA9 HMI Panel will be communicating to the PLC simulator via Ethernet with the Modbus TCP protocol. Let’s get started. More information can be obtained on our website. This includes all of the links mentioned in this video. https://accautomation.ca/c-more-ea9-hmi-series-panel-first-program Establishing Communication and Updating Firmware Video https://youtu.be/WTHw1p-iJFE First Program Video https://youtu.be/5c8ZsdK5dak Previously we have discussed the following in our C-More HMI Panel: System Hardware https://accautomation.ca/c-more-micro-hmi-system-hardware Unboxing and Review Video https://youtu.be/_uCcALMqYlM Powering the Unit https://youtu.be/BIGrOvxlDTI Installing the Software https://accautomation.ca/c-more-ea9-hmi-series-panel-installing-the-software https://youtu.be/6EnyUbEp4As System Setup Screens https://accautomation.ca/c-more-ea9-hmi-series-panel-system-setup-screens https://youtu.be/tL6Ygr1BuDY 00:00 C-More EA9 HMI Series Panel Establishing Communication and Updating Firmware 00:42 C-More First Program Establish Communication 04:18 C-More Firmware Update There are several reasons that we are using the EA9-T10CL C-More HMI Panel. Here are a few: • Touch screen display (LCD) 280 NITS display brightness • 10.4” diagonal color TFT (Thin Film Transistor) • Analog resistive (1024 X 1024) touch screen allowing unlimited touch areas • EA9-PGMSW programming software • 800 x 600-pixel display • 64K colors • 50,000-hour average backlight half-life • USB port B (program/download) and USB port A (USB device options) • Ethernet 10/100 Base-T port (program/download & PLC communication • Remote Internet Access • Serial PLC interface (RS-232/422/485) • One built-in SD memory card slot • 12–24 VDC powered (18W), 110VAC power adapter (optional) • Audio Line Out, stereo - requires amplifier and speaker(s) • 26MB project memory • Data logging • 0 to 50°C [32 to 122°F] operating temperature range • NEMA 4/4X, IP65 compliant when mounted correctly, indoor use only • Slim design saves panel space • UL, cUL & CE agency approvals • 2-year warranty from date of purchase https://www.accautomation.ca
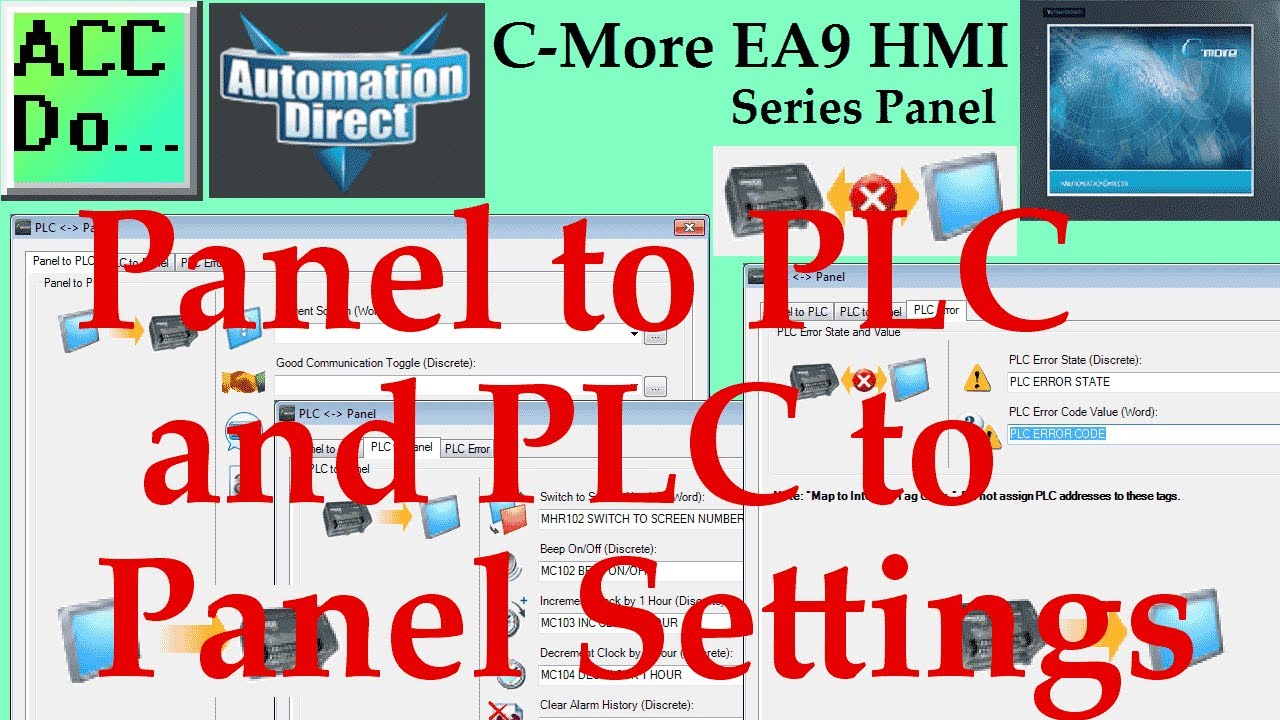
C-More EA9 HMI Series Panel to PLC and PLC to Panel Settings
3K views · Oct 13, 2022 accautomation.ca
We will now look at the C-More panel settings for communication to the PLC. The C-More EA9 HMI (Human Machine Interface) Series Panel will communicate to the PLC directly through the tag database that we discovered in our first program. We were able to read and write individual bits in the PLC. Panel to PLC communications is used to write information into the PLC; like current screen number, displayed, good communications, pop-up keyboard, and current language number used in the HMI. PLC to Panel communications is used by the PLC to control the HMI. Switch to screen number, beep, increment and decrement the Clock by one hour, clear alarm history, clear alarm count, start screen saver and select language are the items you can control in the HMI. PLC Error is used to communicate internally in the HMI the PLC error state and PLC error code value. We will be setting up and testing our PLC to Panel and Panel to PLC communications on our EA9 C-More. Let’s get started. More information can be obtained on our website. This includes all of the links mentioned in this video. https://accautomation.ca/c-more-ea9-hmi-series-panel-to-plc-and-plc-to-panel-settings/ Previously we have discussed the following in our C-More HMI Panel: System Hardware https://accautomation.ca/c-more-micro-hmi-system-hardware Unboxing and Review Video https://youtu.be/_uCcALMqYlM Powering the Unit https://youtu.be/BIGrOvxlDTI Installing the Software https://accautomation.ca/c-more-ea9-hmi-series-panel-installing-the-software https://youtu.be/6EnyUbEp4As System Setup Screens https://accautomation.ca/c-more-ea9-hmi-series-panel-system-setup-screens https://youtu.be/tL6Ygr1BuDY First Program https://accautomation.ca/c-more-ea9-hmi-series-panel-first-program Establishing Communication and Updating Firmware Video https://youtu.be/WTHw1p-iJFE First Program Video https://youtu.be/5c8ZsdK5dak 00:00 C-More EA9 HMI Series Panel to PLC and PLC to Panel Settings 00:42 C-More Adding the Second Page 01:04 C-More Programming Software Navigation – Windows 02:56 C-More Panel to PLC Settings 04:52 C-More PLC to Panel Settings 06:13 C-More PLC Error 06:55 C-More HMI Programming and Testing PLC to Panel Settings There are several reasons that we are using the EA9-T10CL C-More HMI Panel. Here are a few: • Touch screen display (LCD) 280 NITS display brightness • 10.4” diagonal color TFT (Thin Film Transistor) • Analog resistive (1024 X 1024) touch screen allowing unlimited touch areas • EA9-PGMSW programming software • 800 x 600-pixel display • 64K colors • 50,000-hour average backlight half-life • USB port B (program/download) and USB port A (USB device options) • Ethernet 10/100 Base-T port (program/download & PLC communication • Remote Internet Access • Serial PLC interface (RS-232/422/485) • One built-in SD memory card slot • 12–24 VDC powered (18W), 110VAC power adapter (optional) • Audio Line Out, stereo - requires amplifier and speaker(s) • 26MB project memory • Data logging • 0 to 50°C [32 to 122°F] operating temperature range • NEMA 4/4X, IP65 compliant when mounted correctly, indoor use only • Slim design saves panel space • UL, cUL & CE agency approvals • 2-year warranty from date of purchase ACC Automation https://www.accautomation.ca
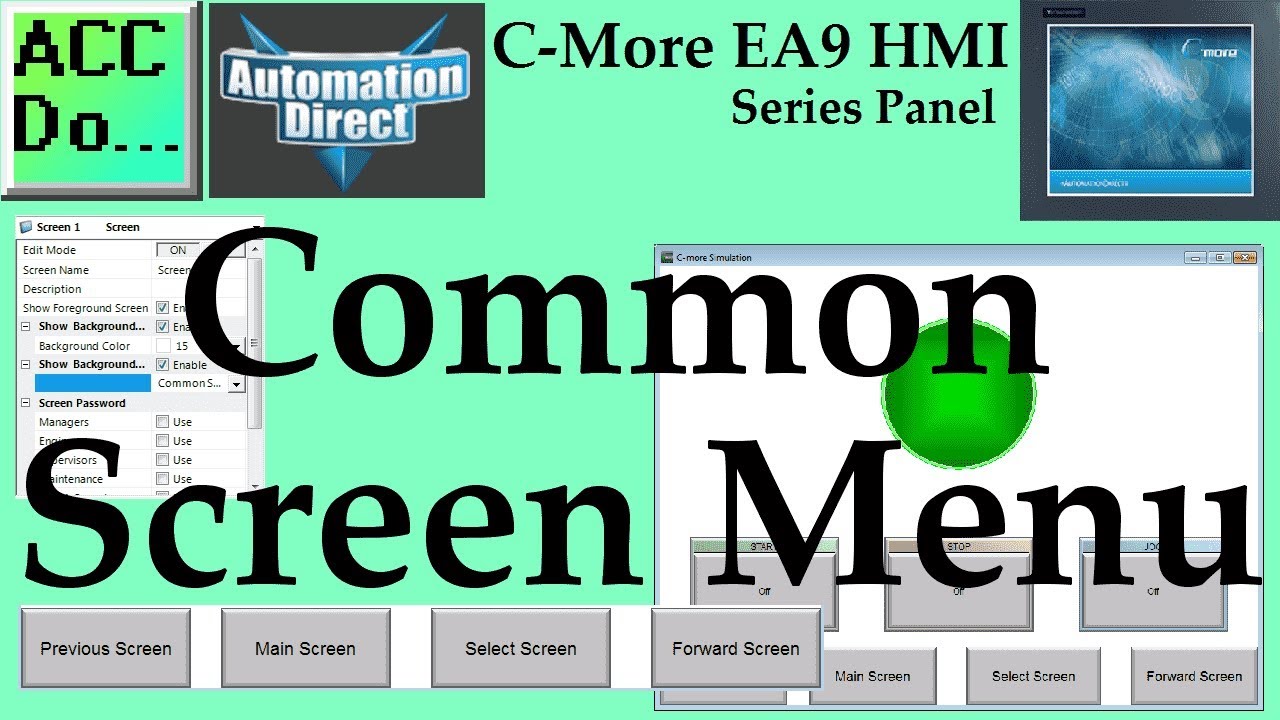
C-More EA9 HMI Series Panel Common Screen Menu
726 views · Oct 13, 2022 accautomation.ca
We will now look at programming in our C-More, common screen menus. Allowing operators of your HMI (Human Machine Interface) panel to easily navigate all of the information available is a vital part of programming. We want to present the information to the operator so they will clearly understand the programmed operation of the unit. Common menus on the HMI panel pages will allow the quick navigation, understanding, and control that your operators want. When programming operator interfaces I have always heard to use the KISS method. (Keep It Stupidly Simple.) Your HMI program interface could contain hundreds of pages containing vital information for operator understanding and control, but you must make it easily accessible and intuitive. This is how you design and program a good HMI panel display. We will be creating a common screen menu for our C-More EA9 HMI Panel using the C-More programming software. Using our previous program created we will be making a background screen to act as our menu system. Let’s get started. More information can be obtained on our website. This includes all of the links mentioned in this video. https://accautomation.ca/c-more-ea9-hmi-series-panel-common-screen-menu Previously we have discussed the following in our C-More HMI Panel: System Hardware https://accautomation.ca/c-more-micro-hmi-system-hardware Unboxing and Review Video https://youtu.be/_uCcALMqYlM Powering the Unit https://youtu.be/BIGrOvxlDTI Installing the Software https://accautomation.ca/c-more-ea9-hmi-series-panel-installing-the-software https://youtu.be/6EnyUbEp4As System Setup Screens https://accautomation.ca/c-more-ea9-hmi-series-panel-system-setup-screens https://youtu.be/tL6Ygr1BuDY First Program https://accautomation.ca/c-more-ea9-hmi-series-panel-first-program Establishing Communication and Updating Firmware Video https://youtu.be/WTHw1p-iJFE First Program Video https://youtu.be/5c8ZsdK5dak Panel to PLC and PLC to Panel Settings https://accautomation.ca/c-more-ea9-hmi-series-panel-to-plc-and-plc-to-panel-settings/ https://youtu.be/b_KsLBDrtOU There are several reasons that we are using the EA9-T10CL C-More HMI Panel. Here are a few: • Touch screen display (LCD) 280 NITS display brightness • 10.4” diagonal colour TFT (Thin Film Transistor) • Analog resistive (1024 X 1024) touch screen allowing unlimited touch areas • EA9-PGMSW programming software • 800 x 600-pixel display • 64K colours • 50,000-hour average backlight half-life • USB port B (program/download) and USB port A (USB device options) • Ethernet 10/100 Base-T port (program/download & PLC communication • Remote Internet Access • Serial PLC interface (RS-232/422/485) • One built-in SD memory card slot • 12–24 VDC powered (18W), 110VAC power adapter (optional) • Audio Line Out, stereo - requires amplifier and speaker(s) • 26MB project memory • Data logging • 0 to 50°C [32 to 122°F] operating temperature range • NEMA 4/4X, IP65 compliant when mounted correctly, indoor use only • Slim design saves panel space • UL, cUL & CE agency approvals • 2-year warranty from date of purchase https://www.accautomation.ca
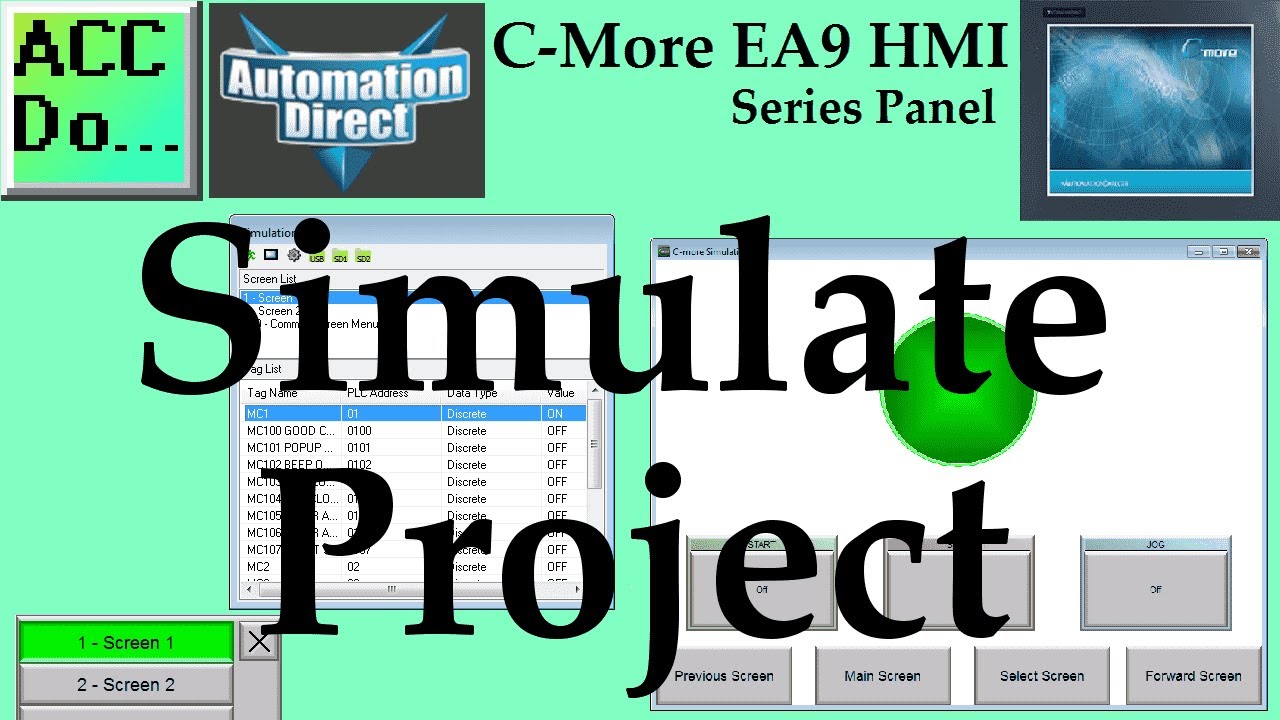
C-More EA9 HMI Series Panel Simulate Project
6K views · Oct 13, 2022 accautomation.ca
We will now look at the C-More simulate project mode on the C-More EA9 Software. The C-More HMI Panel programming software has a simulation mode. This simulator will allow you to test your project before transferring it to a panel. Testing your application is a vital step in HMI program development. This feature of the software will save you time and money especially if your hardware is not available. The simulator will display two windows. There is a graphical display of your HMI panel and a simulation control window. The control window will allow you to control variables in the project similar to a PLC. We will be looking at our program developed last time (Common Screen Menu) and use the simulator to mimic how the PLC and HMI Panel will communicate in the field. This will help to detect any problems before we transfer to our panel. Let’s get started. More information can be obtained on our website. This includes all of the links mentioned in this video. https://accautomation.ca/c-more-ea9-hmi-series-panel-simulate-project Previously we have discussed the following in our C-More HMI Panel: System Hardware https://accautomation.ca/c-more-micro-hmi-system-hardware Unboxing and Review Video https://youtu.be/_uCcALMqYlM Powering the Unit https://youtu.be/BIGrOvxlDTI Installing the Software https://accautomation.ca/c-more-ea9-hmi-series-panel-installing-the-software https://youtu.be/6EnyUbEp4As System Setup Screens https://accautomation.ca/c-more-ea9-hmi-series-panel-system-setup-screens https://youtu.be/tL6Ygr1BuDY First Program https://accautomation.ca/c-more-ea9-hmi-series-panel-first-program Establishing Communication and Updating Firmware Video https://youtu.be/WTHw1p-iJFE First Program Video https://youtu.be/5c8ZsdK5dak Panel to PLC and PLC to Panel Settings https://accautomation.ca/c-more-ea9-hmi-series-panel-to-plc-and-plc-to-panel-settings/ https://youtu.be/b_KsLBDrtOU Common Screen Menu https://accautomation.ca/c-more-ea9-hmi-series-panel-common-screen-menu https://youtu.be/OGtA9RR-dc4 There are several reasons that we are using the EA9-T10CL C-More HMI Panel. Here are a few: • Touch screen display (LCD) 280 NITS display brightness • 10.4” diagonal colour TFT (Thin Film Transistor) • Analog resistive (1024 X 1024) touch screen allowing unlimited touch areas • EA9-PGMSW programming software • 800 x 600-pixel display • 64K colours • 50,000-hour average backlight half-life • USB port B (program/download) and USB port A (USB device options) • Ethernet 10/100 Base-T port (program/download & PLC communication • Remote Internet Access • Serial PLC interface (RS-232/422/485) • One built-in SD memory card slot • 12–24 VDC powered (18W), 110VAC power adapter (optional) • Audio Line Out, stereo - requires amplifier and speaker(s) • 26MB project memory • Data logging • 0 to 50°C [32 to 122°F] operating temperature range • NEMA 4/4X, IP65 compliant when mounted correctly, indoor use only • Slim design saves panel space • UL, cUL & CE agency approvals • 2-year warranty from date of purchase https://www.accautomation.ca
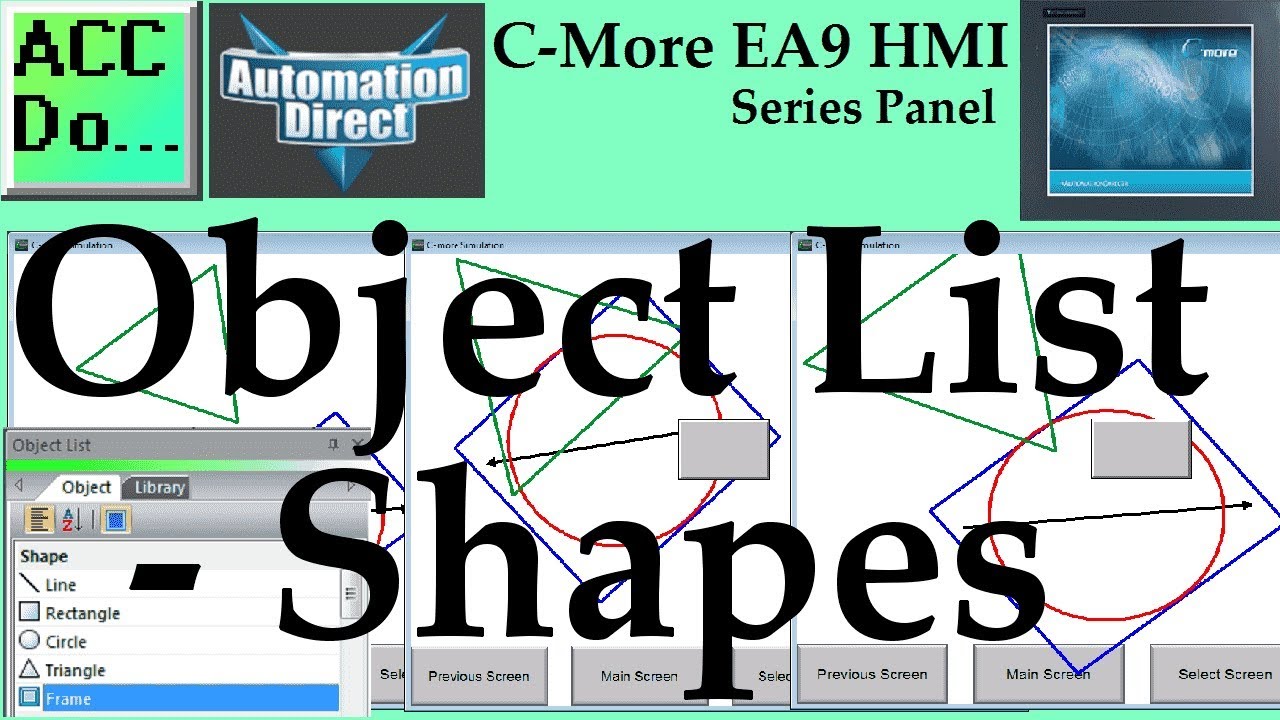
C-More EA9 HMI Series Panel Object List Shapes
2K views · Oct 13, 2022 accautomation.ca
We will now look at the C-More EA9 object shapes. These shapes can move and resize when connected to the PLC. The C-More HMI Panel software uses virtual components called Objects. These objects are programmable to simulate the functions that you require on your automation project. Pushbuttons, Switches, meters, and graphs are just a few of the objects that are available to you. We can place several of these objects on one screen and have multiple panel screens. This helps you produce simple, intuitive looking human-machine interfaces. We will be looking at our program we have so far developed (Simulate Project) and add shapes to a new screen page. These shapes can move and resize when interacting with the PLC. The navigation of the objects and additional information will also be discussed. Let’s get started. More information can be obtained on our website. This includes all of the links mentioned in this video. https://accautomation.ca/c-more-ea9-hmi-series-panel-object-list-shapes Previously we have discussed the following in our C-More HMI Panel: System Hardware https://accautomation.ca/c-more-micro-hmi-system-hardware Unboxing and Review Video https://youtu.be/_uCcALMqYlM Powering the Unit https://youtu.be/BIGrOvxlDTI Installing the Software https://accautomation.ca/c-more-ea9-hmi-series-panel-installing-the-software https://youtu.be/6EnyUbEp4As System Setup Screens https://accautomation.ca/c-more-ea9-hmi-series-panel-system-setup-screens https://youtu.be/tL6Ygr1BuDY First Program https://accautomation.ca/c-more-ea9-hmi-series-panel-first-program Establishing Communication and Updating Firmware Video https://youtu.be/WTHw1p-iJFE First Program Video https://youtu.be/5c8ZsdK5dak Panel to PLC and PLC to Panel Settings https://accautomation.ca/c-more-ea9-hmi-series-panel-to-plc-and-plc-to-panel-settings/ https://youtu.be/b_KsLBDrtOU Common Screen Menu https://accautomation.ca/c-more-ea9-hmi-series-panel-common-screen-menu https://youtu.be/OGtA9RR-dc4 Simulate Project https://accautomation.ca/c-more-ea9-hmi-series-panel-simulate-project https://youtu.be/fx-1rucSE4g There are several reasons that we are using the EA9-T10CL C-More HMI Panel. Here are a few: • Touch screen display (LCD) 280 NITS display brightness • 10.4” diagonal colour TFT (Thin Film Transistor) • Analog resistive (1024 X 1024) touch screen allowing unlimited touch areas • EA9-PGMSW programming software • 800 x 600-pixel display • 64K colours • 50,000-hour average backlight half-life • USB port B (program/download) and USB port A (USB device options) • Ethernet 10/100 Base-T port (program/download & PLC communication • Remote Internet Access • Serial PLC interface (RS-232/422/485) • One built-in SD memory card slot • 12–24 VDC powered (18W), 110VAC power adapter (optional) • Audio Line Out, stereo - requires amplifier and speaker(s) • 26MB project memory • Data logging • 0 to 50°C [32 to 122°F] operating temperature range • NEMA 4/4X, IP65 compliant when mounted correctly, indoor use only • Slim design saves panel space • UL, cUL & CE agency approvals • 2-year warranty from date of purchase https://www.accautomation.ca
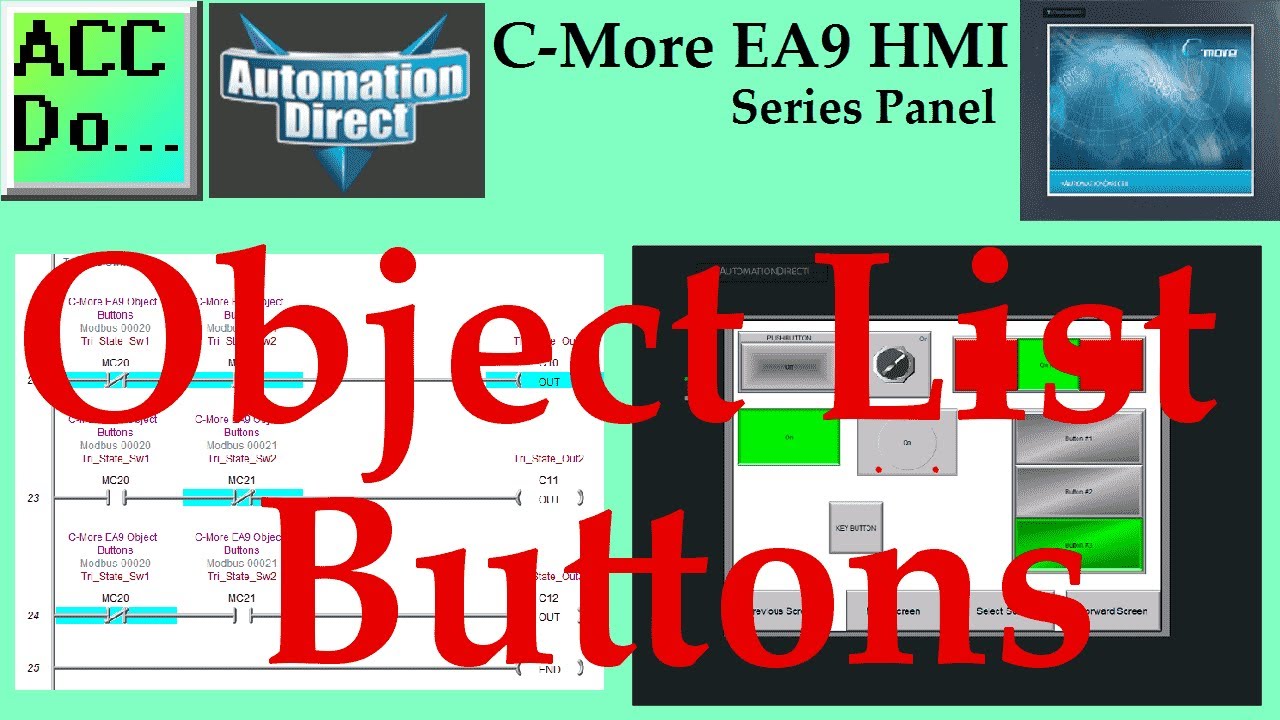
C-More EA9 HMI Series Panel Object List Buttons
1K views · Oct 13, 2022 accautomation.ca
We will now look at the C-More EA9 object buttons that we can use on this HMI. The C-More HMI Panel software uses virtual components called Objects. These objects are programmable to simulate the functions that you require on your automation project. Pushbuttons, Switches, meters, and graphs are just a few of the available things to you. Continuing from last time, we will now look at the object buttons that we can use with our HMI panel. The button objects available on the C-More EA9 are Pushbuttons, Switches, Radio Buttons, Indicator Buttons, Step Switches, Tri-State Switches, and Key Buttons. Let’s get started. More information can be obtained on our website. This includes all of the links mentioned in this video. https://accautomation.ca/c-more-ea9-hmi-series-panel-object-list-buttons Previously we have discussed the following in our C-More HMI Panel: System Hardware https://accautomation.ca/c-more-micro-hmi-system-hardware Unboxing and Review Video https://youtu.be/_uCcALMqYlM Powering the Unit https://youtu.be/BIGrOvxlDTI Installing the Software https://accautomation.ca/c-more-ea9-hmi-series-panel-installing-the-software https://youtu.be/6EnyUbEp4As System Setup Screens https://accautomation.ca/c-more-ea9-hmi-series-panel-system-setup-screens https://youtu.be/tL6Ygr1BuDY First Program https://accautomation.ca/c-more-ea9-hmi-series-panel-first-program Establishing Communication and Updating Firmware Video https://youtu.be/WTHw1p-iJFE First Program Video https://youtu.be/5c8ZsdK5dak Panel to PLC and PLC to Panel Settings https://accautomation.ca/c-more-ea9-hmi-series-panel-to-plc-and-plc-to-panel-settings/ https://youtu.be/b_KsLBDrtOU Common Screen Menu https://accautomation.ca/c-more-ea9-hmi-series-panel-common-screen-menu https://youtu.be/OGtA9RR-dc4 Simulate Project https://accautomation.ca/c-more-ea9-hmi-series-panel-simulate-project https://youtu.be/fx-1rucSE4g Object List Shapes https://accautomation.ca/c-more-ea9-hmi-series-panel-object-list-shapes https://youtu.be/JeTjaTn9OVc There are several reasons that we are using the EA9-T10CL C-More HMI Panel. Here are a few: • Touch screen display (LCD) 280 NITS display brightness • 10.4” diagonal color TFT (Thin Film Transistor) • Analog resistive (1024 X 1024) touch screen allowing unlimited touch areas • EA9-PGMSW programming software • 800 x 600-pixel display • 64K colors • 50,000-hour average backlight half-life • USB port B (program/download) and USB port A (USB device options) • Ethernet 10/100 Base-T port (program/download & PLC communication • Remote Internet Access • Serial PLC interface (RS-232/422/485) • One built-in SD memory card slot • 12–24 VDC powered (18W), 110VAC power adapter (optional) • Audio Line Out, stereo - requires amplifier and speaker(s) • 26MB project memory • Data logging • 0 to 50°C [32 to 122°F] operating temperature range • NEMA 4/4X, IP65 compliant when mounted correctly, indoor use only • Slim design saves panel space • UL, cUL & CE agency approvals • 2-year warranty from date of purchase https://www.accautomation.ca
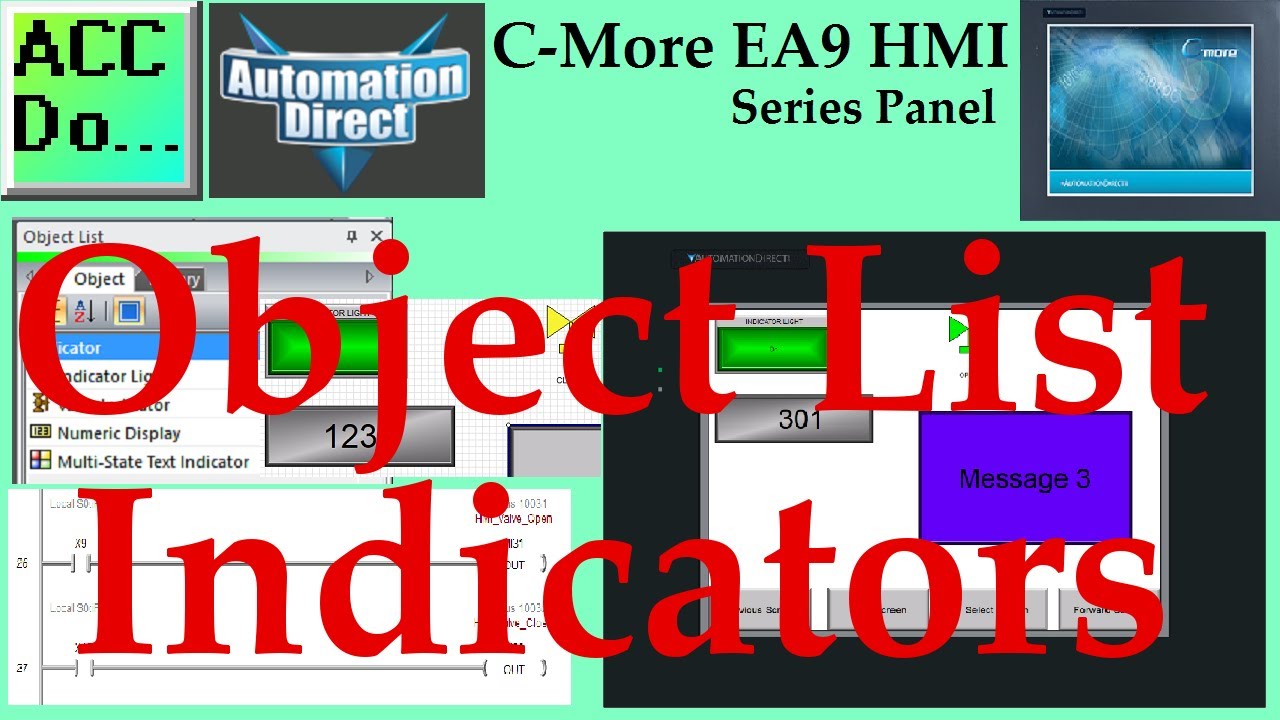
C-More EA9 HMI Series Panel Object List Indicators
7K views · Oct 13, 2022 accautomation.ca
We will now look at the C-More indicators that we can use on our HMI. The C-More HMI Panel software uses virtual components called Objects. These objects are programmable to simulate the functions that you require on your automation project. Pushbuttons, Switches, meters, and graphs are just a few of the objects that are available to you. We will now look at the object indicators that we can use with our HMI panel. The indicator objects that are available on the C-More EA9 are Indicator Light, Valve Indicator, Numeric Display, and Multi-State Text Indicator. Let’s get started. More information can be obtained on our website. This includes all of the links mentioned in this video. https://accautomation.ca/c-more-ea9-hmi-series-panel-object-list-indicators Previously we have discussed the following in our C-More HMI Panel: System Hardware https://accautomation.ca/c-more-micro-hmi-system-hardware Unboxing and Review Video https://youtu.be/_uCcALMqYlM Powering the Unit https://youtu.be/BIGrOvxlDTI Installing the Software https://accautomation.ca/c-more-ea9-hmi-series-panel-installing-the-software https://youtu.be/6EnyUbEp4As System Setup Screens https://accautomation.ca/c-more-ea9-hmi-series-panel-system-setup-screens https://youtu.be/tL6Ygr1BuDY First Program https://accautomation.ca/c-more-ea9-hmi-series-panel-first-program Establishing Communication and Updating Firmware Video https://youtu.be/WTHw1p-iJFE First Program Video https://youtu.be/5c8ZsdK5dak Panel to PLC and PLC to Panel Settings https://accautomation.ca/c-more-ea9-hmi-series-panel-to-plc-and-plc-to-panel-settings/ https://youtu.be/b_KsLBDrtOU Common Screen Menu https://accautomation.ca/c-more-ea9-hmi-series-panel-common-screen-menu https://youtu.be/OGtA9RR-dc4 Simulate Project https://accautomation.ca/c-more-ea9-hmi-series-panel-simulate-project https://youtu.be/fx-1rucSE4g Object List Shapes https://accautomation.ca/c-more-ea9-hmi-series-panel-object-list-shapes https://youtu.be/JeTjaTn9OVc Object List Buttons https://accautomation.ca/c-more-ea9-hmi-series-panel-object-list-buttons https://youtu.be/lk2aHQtKzEg There are several reasons that we are using the EA9-T10CL C-More HMI Panel.Here are a few: • Touch screen display (LCD) 280 NITS display brightness • 10.4” diagonal color TFT (Thin Film Transistor) • Analog resistive (1024 X 1024) touch screen allowing unlimited touch areas • EA9-PGMSW programming software • 800 x 600 pixel display • 64K colors • 50,000 hour average backlight half-life • USB port B (program/download) and USB port A (USB device options) • Ethernet 10/100 Base-T port (program/download & PLC communication • Remote Internet Access • Serial PLC interface (RS-232/422/485) • One built-in SD memory card slot • 12–24 VDC powered (18W), 110VAC power adapter (optional) • Audio Line Out, stereo - requires amplifier and speaker(s) • 26MB project memory • Data logging • 0 to 50°C [32 to 122°F] operating temperature range • NEMA 4/4X, IP65 compliant when mounted correctly, indoor use only • Slim design save panel space • UL, cUL & CE agency approvals • 2-year warranty from date of purchase https://www.accautomation.ca
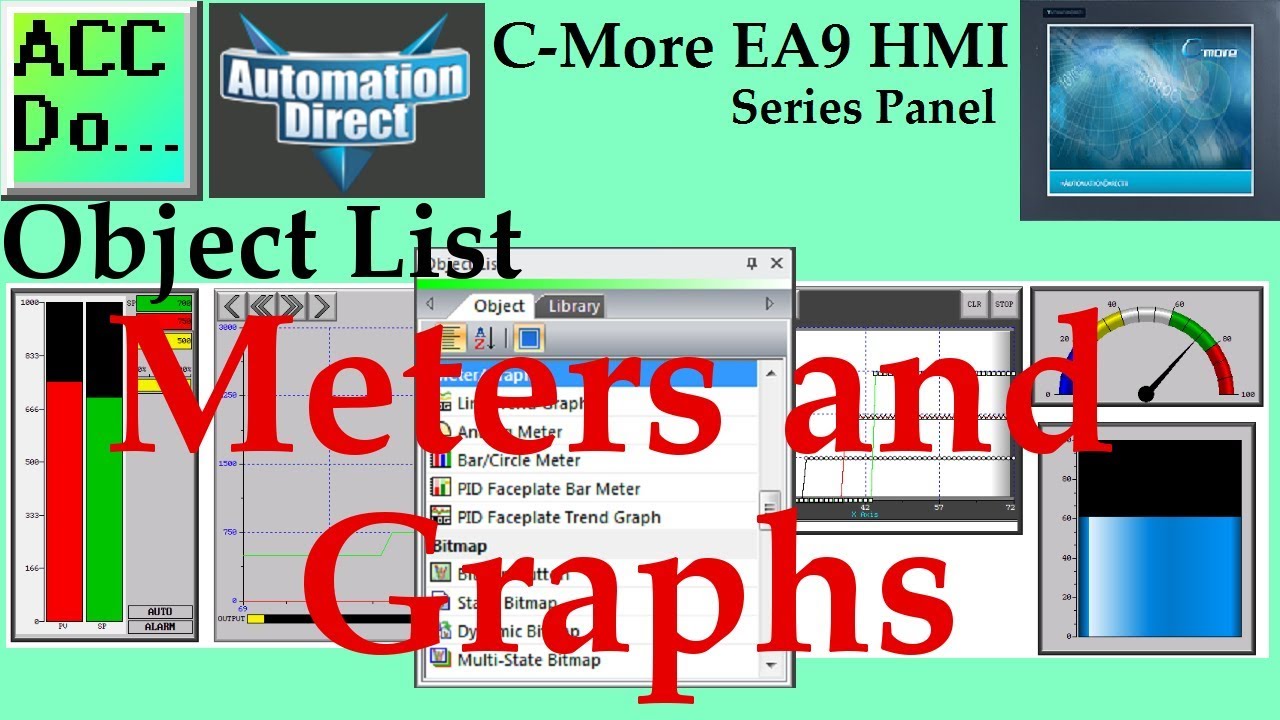
C-More EA9 HMI Series Panel Object List Meters and Graphs
2K views · Oct 13, 2022 accautomation.ca
We will now look at the C-More EA9 meters and graphs that we can have on our HMI. The C-More HMI Panel software uses virtual components called Objects. These objects are programmable to simulate the functions that you require on your automation project. Pushbuttons, Switches, meters, and graphs are just a few of the available things to you. We will now look at the object list meters and graphs that we can use with our HMI panel. The meter and graph objects available on the C-More EA9 are Line Trend Graph, Analog Meter, Bar/Circle Meter, PID Faceplate Bar Meter, and PID Faceplate Trend Meter. Let’s get started. More information can be obtained on our website. This includes all of the links mentioned in this video. https://accautomation.ca/c-more-ea9-hmi-series-panel-object-list-meters-and-graphs Previously we have discussed the following in our C-More HMI Panel: System Hardware https://accautomation.ca/c-more-micro-hmi-system-hardware Unboxing and Review Video https://youtu.be/_uCcALMqYlM Powering the Unit https://youtu.be/BIGrOvxlDTI Installing the Software https://accautomation.ca/c-more-ea9-hmi-series-panel-installing-the-software https://youtu.be/6EnyUbEp4As System Setup Screens https://accautomation.ca/c-more-ea9-hmi-series-panel-system-setup-screens https://youtu.be/tL6Ygr1BuDY First Program https://accautomation.ca/c-more-ea9-hmi-series-panel-first-program Establishing Communication and Updating Firmware Video https://youtu.be/WTHw1p-iJFE First Program Video https://youtu.be/5c8ZsdK5dak Panel to PLC and PLC to Panel Settings https://accautomation.ca/c-more-ea9-hmi-series-panel-to-plc-and-plc-to-panel-settings/ https://youtu.be/b_KsLBDrtOU Common Screen Menu https://accautomation.ca/c-more-ea9-hmi-series-panel-common-screen-menu https://youtu.be/OGtA9RR-dc4 Simulate Project https://accautomation.ca/c-more-ea9-hmi-series-panel-simulate-project https://youtu.be/fx-1rucSE4g Object List Shapes https://accautomation.ca/c-more-ea9-hmi-series-panel-object-list-shapes https://youtu.be/JeTjaTn9OVc Object List Buttons https://accautomation.ca/c-more-ea9-hmi-series-panel-object-list-buttons https://youtu.be/lk2aHQtKzEg Object List Indicators https://accautomation.ca/c-more-ea9-hmi-series-panel-object-list-indicators https://youtu.be/9XKnXu6XKak Object List Entry https://accautomation.ca/c-more-ea9-hmi-series-panel-object-list-entry https://youtu.be/xob4NZ-dqoo There are several reasons that we are using the EA9-T10CL C-More HMI Panel. Here are a few: • Touch screen display (LCD) 280 NITS display brightness • 10.4” diagonal color TFT (Thin Film Transistor) • Analog resistive (1024 X 1024) touch screen allowing unlimited touch areas • EA9-PGMSW programming software • 800 x 600-pixel display • 64K colors • 50,000-hour average backlight half-life • USB port B (program/download) and USB port A (USB device options) • Ethernet 10/100 Base-T port (program/download & PLC communication • Remote Internet Access • Serial PLC interface (RS-232/422/485) • One built-in SD memory card slot • 12–24 VDC powered (18W), 110VAC power adapter (optional) • Audio Line Out, stereo - requires amplifier and speaker(s) • 26MB project memory • Data logging • 0 to 50°C [32 to 122°F] operating temperature range • NEMA 4/4X, IP65 compliant when mounted correctly, indoor use only • Slim design saves panel space • UL, cUL & CE agency approvals • 2-year warranty from date of purchase https://www.accautomation.ca
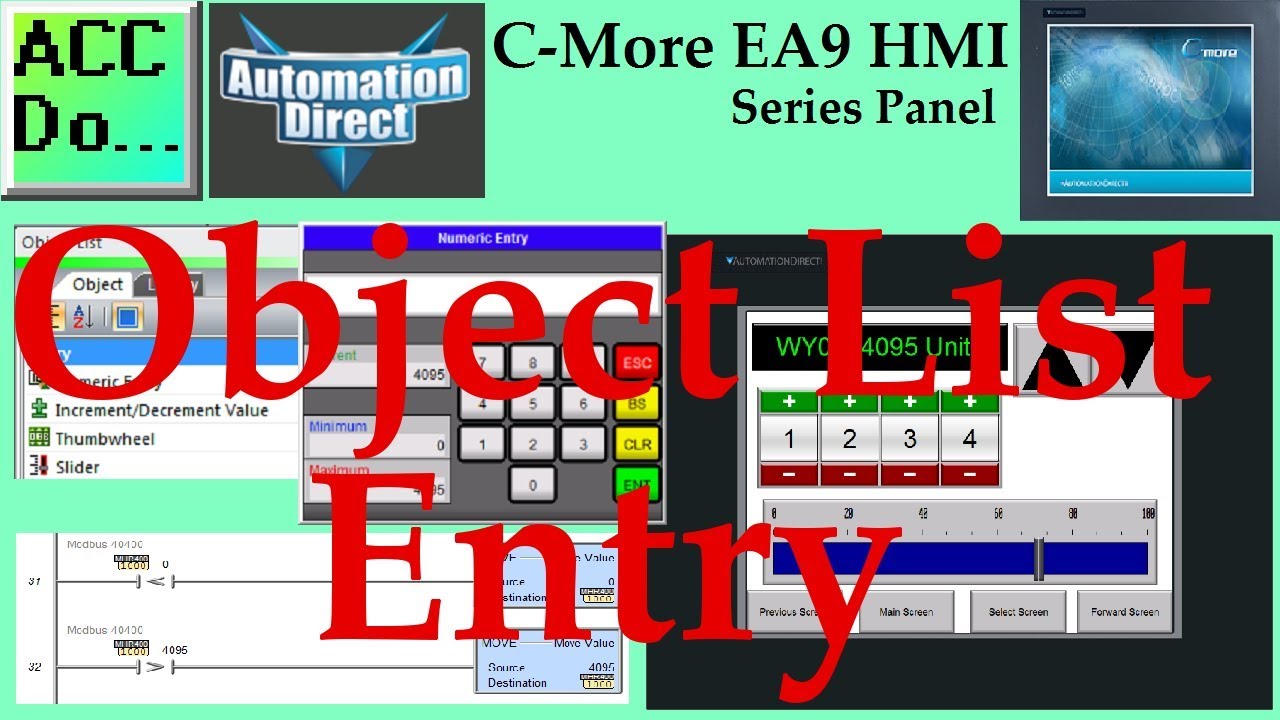
C-More EA9 HMI Series Panel Object List Entry
7K views · Oct 13, 2022 accautomation.ca
We will now look at the C-More EA9 Object list entry. The C-More HMI Panel software uses virtual components called Objects. These objects are programmable to simulate the functions that you require on your automation project. Pushbuttons, Switches, meters, and graphs are just a few of the objects that are available to you. We will now look at the object entry that we can use with our HMI panel. The entry objects that are available on the C-More EA9 are Numeric Entry, Increment/Decrement Value, Thumbwheel, and Slider. Let’s get started. More information can be obtained on our website. This includes all of the links mentioned in this video. https://accautomation.ca/c-more-ea9-hmi-series-panel-object-list-entry Previously we have discussed the following in our C-More HMI Panel: System Hardware https://accautomation.ca/c-more-micro-hmi-system-hardware Unboxing and Review Video https://youtu.be/_uCcALMqYlM Powering the Unit https://youtu.be/BIGrOvxlDTI Installing the Software https://accautomation.ca/c-more-ea9-hmi-series-panel-installing-the-software https://youtu.be/6EnyUbEp4As System Setup Screens https://accautomation.ca/c-more-ea9-hmi-series-panel-system-setup-screens https://youtu.be/tL6Ygr1BuDY First Program https://accautomation.ca/c-more-ea9-hmi-series-panel-first-program Establishing Communication and Updating Firmware Video https://youtu.be/WTHw1p-iJFE First Program Video https://youtu.be/5c8ZsdK5dak Panel to PLC and PLC to Panel Settings https://accautomation.ca/c-more-ea9-hmi-series-panel-to-plc-and-plc-to-panel-settings/ https://youtu.be/b_KsLBDrtOU Common Screen Menu https://accautomation.ca/c-more-ea9-hmi-series-panel-common-screen-menu https://youtu.be/OGtA9RR-dc4 Simulate Project https://accautomation.ca/c-more-ea9-hmi-series-panel-simulate-project https://youtu.be/fx-1rucSE4g Object List Shapes https://accautomation.ca/c-more-ea9-hmi-series-panel-object-list-shapes https://youtu.be/JeTjaTn9OVc Object List Buttons https://accautomation.ca/c-more-ea9-hmi-series-panel-object-list-buttons https://youtu.be/lk2aHQtKzEg Object List Indicators https://accautomation.ca/c-more-ea9-hmi-series-panel-object-list-indicators https://youtu.be/9XKnXu6XKak There are several reasons that we are using the EA9-T10CL C-More HMI Panel. Here are a few: • Touch screen display (LCD) 280 NITS display brightness • 10.4” diagonal colour TFT (Thin Film Transistor) • Analog resistive (1024 X 1024) touch screen allowing unlimited touch areas • EA9-PGMSW programming software • 800 x 600-pixel display • 64K colours • 50,000-hour average backlight half-life • USB port B (program/download) and USB port A (USB device options) • Ethernet 10/100 Base-T port (program/download & PLC communication • Remote Internet Access • Serial PLC interface (RS-232/422/485) • One built-in SD memory card slot • 12–24 VDC powered (18W), 110VAC power adapter (optional) • Audio Line Out, stereo - requires amplifier and speaker(s) • 26MB project memory • Data logging • 0 to 50°C [32 to 122°F] operating temperature range • NEMA 4/4X, IP65 compliant when mounted correctly, indoor use only • Slim design saves panel space • UL, cUL & CE agency approvals • 2-year warranty from date of purchase https://www.accautomation.ca
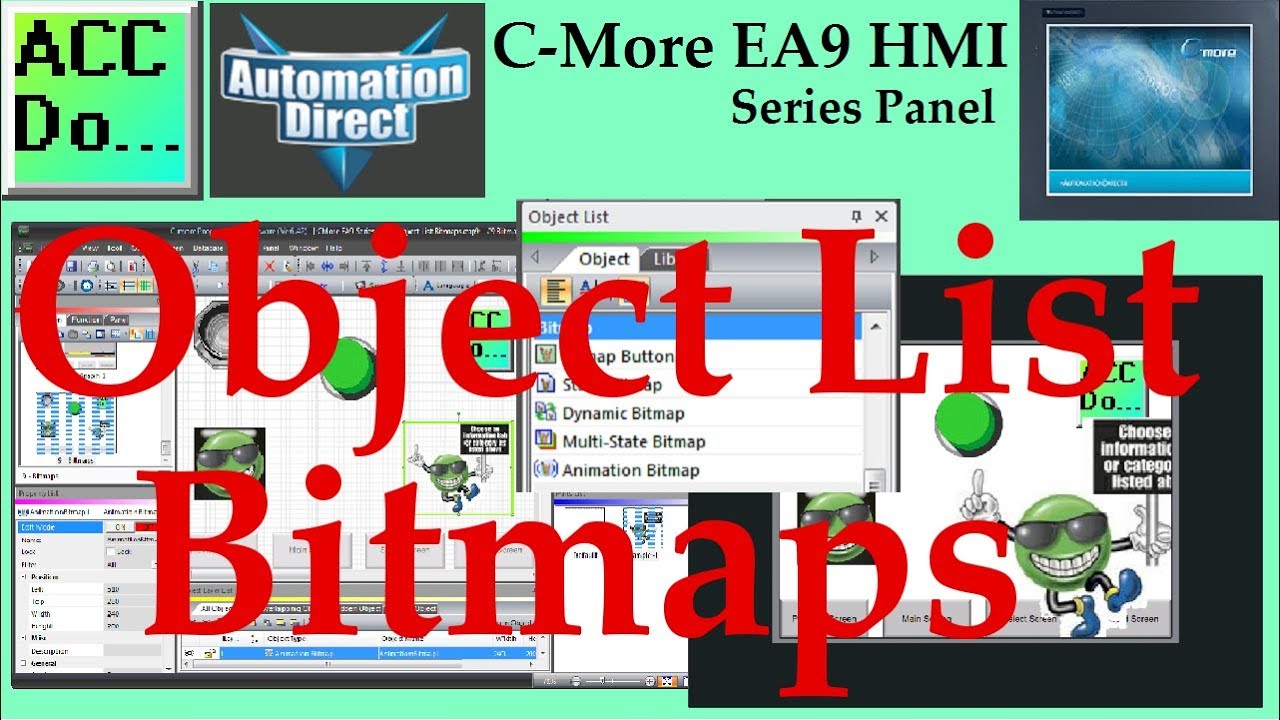
C-More EA9 HMI Series Panel Object List Bitmaps
3K views · Oct 13, 2022 accautomation.ca
C-More bitmaps will use BMP files for buttons, dynamic, multi-state, and animated items on the HMI. The C-More HMI Panel software uses virtual components called Objects. These objects are programmable to simulate the functions that you require on your automation project. Pushbuttons, Switches, meters, and graphs are just a few of the available things to you. We will now look at the object list bitmaps that we can use with our HMI panel. A bitmap is an image file format used to store digital pictures (images). The extension used to represent a bitmap file is BMP. The bitmap objects available on the C-More EA9 are Bitmap Button, Static Bitmap, Dynamic Bitmap, Multi-State Bitmap, and Animation Bitmap. Let’s get started. More information can be obtained on our website. This includes all of the links mentioned in this video. https://accautomation.ca/c-more-ea9-hmi-series-panel-object-list-bitmaps 00:00 C-More EA9 HMI Series Panel Object List Bitmaps 01:29 Setting Our C-More Object Bitmap Screen 02:35 C-More Bitmap Button 04:36 C-More Static Bitmap 05:25 C-More Dynamic Bitmap 07:12 C-More Multi-State Bitmap 10:12 C-More Animation Bitmap 13:38 Simulate our Project 15:53 Download to EA9 and Run HMI Program (Do-More Designer Simulator) Previously we have discussed the following in our C-More HMI Panel: System Hardware https://accautomation.ca/c-more-micro-hmi-system-hardware Unboxing and Review Video https://youtu.be/_uCcALMqYlM Powering the Unit https://youtu.be/BIGrOvxlDTI Installing the Software https://accautomation.ca/c-more-ea9-hmi-series-panel-installing-the-software https://youtu.be/6EnyUbEp4As System Setup Screens https://accautomation.ca/c-more-ea9-hmi-series-panel-system-setup-screens https://youtu.be/tL6Ygr1BuDY First Program https://accautomation.ca/c-more-ea9-hmi-series-panel-first-program Establishing Communication and Updating Firmware Video https://youtu.be/WTHw1p-iJFE First Program Video https://youtu.be/5c8ZsdK5dak Panel to PLC and PLC to Panel Settings https://accautomation.ca/c-more-ea9-hmi-series-panel-to-plc-and-plc-to-panel-settings/ https://youtu.be/b_KsLBDrtOU Common Screen Menu https://accautomation.ca/c-more-ea9-hmi-series-panel-common-screen-menu https://youtu.be/OGtA9RR-dc4 Simulate Project https://accautomation.ca/c-more-ea9-hmi-series-panel-simulate-project https://youtu.be/fx-1rucSE4g Object List Shapes https://accautomation.ca/c-more-ea9-hmi-series-panel-object-list-shapes https://youtu.be/JeTjaTn9OVc Object List Buttons https://accautomation.ca/c-more-ea9-hmi-series-panel-object-list-buttons https://youtu.be/lk2aHQtKzEg Object List Indicators https://accautomation.ca/c-more-ea9-hmi-series-panel-object-list-indicators https://youtu.be/9XKnXu6XKak Object List Entry https://accautomation.ca/c-more-ea9-hmi-series-panel-object-list-entry https://youtu.be/xob4NZ-dqoo Object List Meters and Graphs https://accautomation.ca/c-more-ea9-hmi-series-panel-object-list-meters-and-graphs https://youtu.be/dmebD7vhkds There are several reasons that we are using the EA9-T10CL C-More HMI Panel. Here are a few: • Touch screen display (LCD) 280 NITS display brightness • 10.4” diagonal color TFT (Thin Film Transistor) • Analog resistive (1024 X 1024) touch screen allowing unlimited touch areas • EA9-PGMSW programming software • 800 x 600-pixel display • 64K colors • 50,000-hour average backlight half-life • USB port B (program/download) and USB port A (USB device options) • Ethernet 10/100 Base-T port (program/download & PLC communication • Remote Internet Access • Serial PLC interface (RS-232/422/485) • One built-in SD memory card slot • 12–24 VDC powered (18W), 110VAC power adapter (optional) • Audio Line Out, stereo - requires amplifier and speaker(s) • 26MB project memory • Data logging • 0 to 50°C [32 to 122°F] operating temperature range • NEMA 4/4X, IP65 compliant when mounted correctly, indoor use only • Slim design saves panel space • UL, cUL & CE agency approvals • 2-year warranty from date of purchase https://www.accautomation.ca
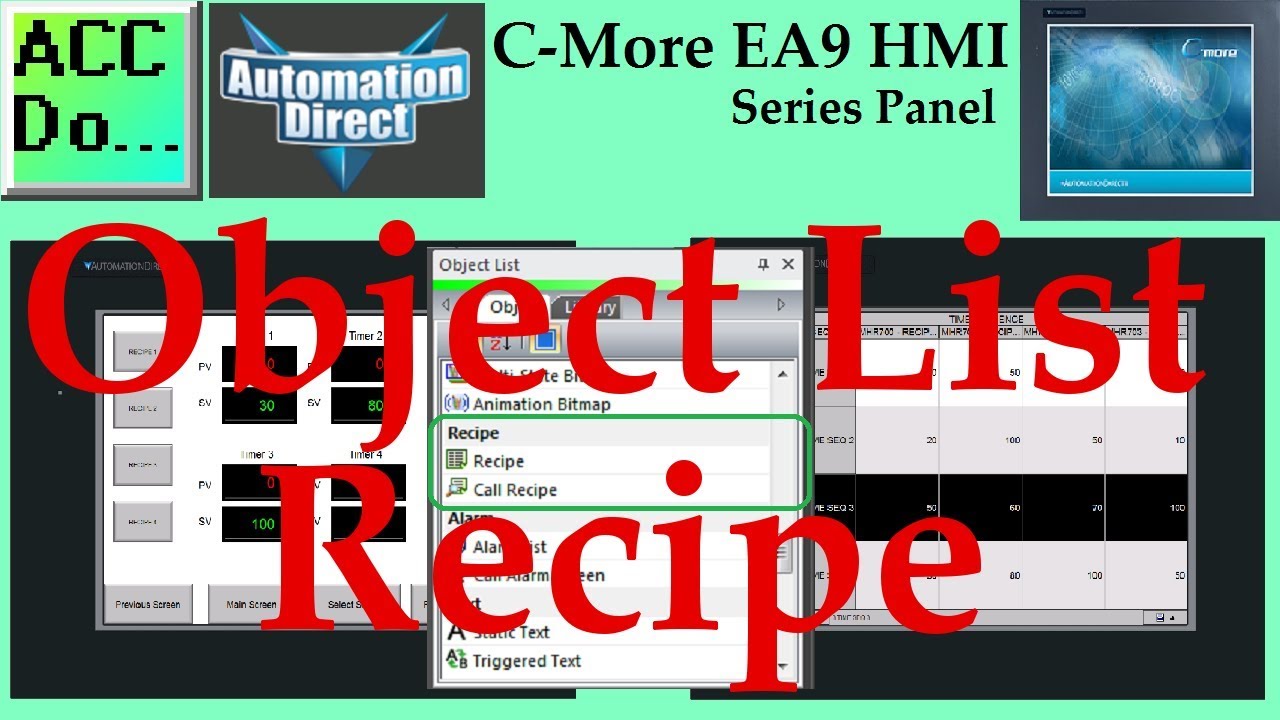
C-More EA9 HMI Series Panel Object List Recipe
2K views · Oct 13, 2022 accautomation.ca
We will now look at the C-More EA9 recipe object. The C-More HMI Panel software uses virtual components called Objects. These objects are programmable to simulate the functions that you require on your automation project. Pushbuttons, Switches, meters, and graphs are just a few of the objects that are available to you. The recipe object changes the value of a tag or multiple tags. We will now look at the object list recipe that we can use with our HMI panel. The recipe objects that are available on the C-More EA9 are Recipe and Call Recipe. Let’s get started. More information can be obtained on our website. This includes all of the links mentioned in this video. https://accautomation.ca/c-more-ea9-hmi-series-panel-object-list-recipe Previously we have discussed the following in our C-More HMI Panel: System Hardware https://accautomation.ca/c-more-micro-hmi-system-hardware Unboxing and Review Video https://youtu.be/_uCcALMqYlM Powering the Unit https://youtu.be/BIGrOvxlDTI Installing the Software https://accautomation.ca/c-more-ea9-hmi-series-panel-installing-the-software https://youtu.be/6EnyUbEp4As System Setup Screens https://accautomation.ca/c-more-ea9-hmi-series-panel-system-setup-screens https://youtu.be/tL6Ygr1BuDY First Program https://accautomation.ca/c-more-ea9-hmi-series-panel-first-program Establishing Communication and Updating Firmware Video https://youtu.be/WTHw1p-iJFE First Program Video https://youtu.be/5c8ZsdK5dak Panel to PLC and PLC to Panel Settings https://accautomation.ca/c-more-ea9-hmi-series-panel-to-plc-and-plc-to-panel-settings/ https://youtu.be/b_KsLBDrtOU Common Screen Menu https://accautomation.ca/c-more-ea9-hmi-series-panel-common-screen-menu https://youtu.be/OGtA9RR-dc4 Simulate Project https://accautomation.ca/c-more-ea9-hmi-series-panel-simulate-project https://youtu.be/fx-1rucSE4g Object List Shapes https://accautomation.ca/c-more-ea9-hmi-series-panel-object-list-shapes https://youtu.be/JeTjaTn9OVc Object List Buttons https://accautomation.ca/c-more-ea9-hmi-series-panel-object-list-buttons https://youtu.be/lk2aHQtKzEg Object List Indicators https://accautomation.ca/c-more-ea9-hmi-series-panel-object-list-indicators https://youtu.be/9XKnXu6XKak Object List Entry https://accautomation.ca/c-more-ea9-hmi-series-panel-object-list-entry https://youtu.be/xob4NZ-dqoo Object List Meters and Graphs https://accautomation.ca/c-more-ea9-hmi-series-panel-object-list-meters-and-graphs https://youtu.be/dmebD7vhkds Object List Bitmaps https://accautomation.ca/c-more-ea9-hmi-series-panel-object-list-bitmaps https://youtu.be/P_uNunjo91Q There are several reasons that we are using the EA9-T10CL C-More HMI Panel. Here are a few: • Touch screen display (LCD) 280 NITS display brightness • 10.4” diagonal color TFT (Thin Film Transistor) • Analog resistive (1024 X 1024) touch screen allowing unlimited touch areas • EA9-PGMSW programming software • 800 x 600-pixel display • 64K colors • 50,000-hour average backlight half-life • USB port B (program/download) and USB port A (USB device options) • Ethernet 10/100 Base-T port (program/download & PLC communication • Remote Internet Access • Serial PLC interface (RS-232/422/485) • One built-in SD memory card slot • 12–24 VDC powered (18W), 110VAC power adapter (optional) • Audio Line Out, stereo - requires amplifier and speaker(s) • 26MB project memory • Data logging • 0 to 50°C [32 to 122°F] operating temperature range • NEMA 4/4X, IP65 compliant when mounted correctly, indoor use only • Slim design saves panel space • UL, cUL & CE agency approvals • 2-year warranty from date of purchase https://www.accautomation.ca
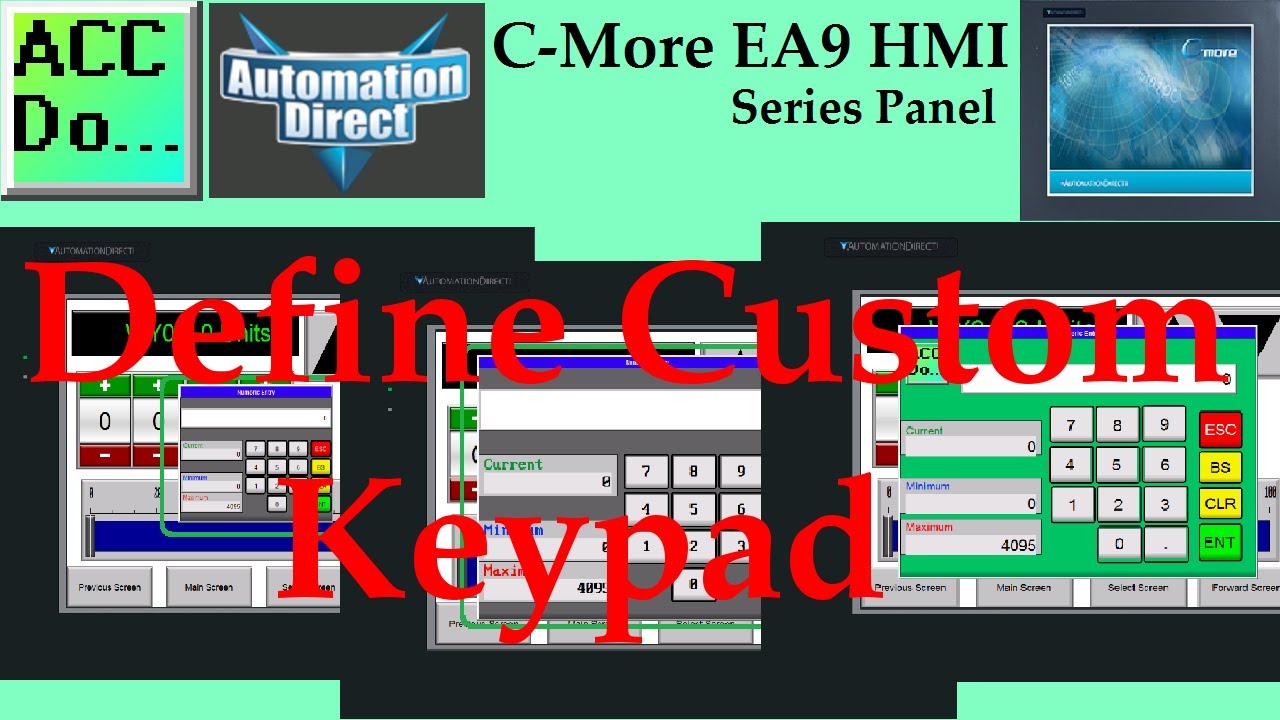
C-More EA9 HMI Series Panel Define Custom Keypad
393 views · Oct 13, 2022 accautomation.ca
We will now look at the C-More EA9 custom keypad for our HMI. The C-More HMI Panel software uses popup system default keypads. I recently was asked to enlarge the keypad to make editing easier. We will now look at enlarging the existing system default keypads. This is especially good with touch screens over 10 inches. We will also look at how to define a custom keypad for the C-More HMI. Let’s get started. More information can be obtained on our website. This includes all of the links mentioned in this video. https://accautomation.ca/c-more-ea9-hmi-series-panel-define-custom-keypad Previously we have discussed the following in our C-More HMI Panel: System Hardware https://accautomation.ca/c-more-micro-hmi-system-hardware Unboxing and Review Video https://youtu.be/_uCcALMqYlM Powering the Unit https://youtu.be/BIGrOvxlDTI Installing the Software https://accautomation.ca/c-more-ea9-hmi-series-panel-installing-the-software https://youtu.be/6EnyUbEp4As System Setup Screens https://accautomation.ca/c-more-ea9-hmi-series-panel-system-setup-screens https://youtu.be/tL6Ygr1BuDY First Program https://accautomation.ca/c-more-ea9-hmi-series-panel-first-program Establishing Communication and Updating Firmware Video https://youtu.be/WTHw1p-iJFE First Program Video https://youtu.be/5c8ZsdK5dak Panel to PLC and PLC to Panel Settings https://accautomation.ca/c-more-ea9-hmi-series-panel-to-plc-and-plc-to-panel-settings/ https://youtu.be/b_KsLBDrtOU Common Screen Menu https://accautomation.ca/c-more-ea9-hmi-series-panel-common-screen-menu https://youtu.be/OGtA9RR-dc4 Simulate Project https://accautomation.ca/c-more-ea9-hmi-series-panel-simulate-project https://youtu.be/fx-1rucSE4g Object List Shapes https://accautomation.ca/c-more-ea9-hmi-series-panel-object-list-shapes https://youtu.be/JeTjaTn9OVc Object List Buttons https://accautomation.ca/c-more-ea9-hmi-series-panel-object-list-buttons https://youtu.be/lk2aHQtKzEg Object List Indicators https://accautomation.ca/c-more-ea9-hmi-series-panel-object-list-indicators https://youtu.be/9XKnXu6XKak Object List Entry https://accautomation.ca/c-more-ea9-hmi-series-panel-object-list-entry https://youtu.be/xob4NZ-dqoo Object List Meters and Graphs https://accautomation.ca/c-more-ea9-hmi-series-panel-object-list-meters-and-graphs https://youtu.be/dmebD7vhkds Object List Bitmaps https://accautomation.ca/c-more-ea9-hmi-series-panel-object-list-bitmaps https://youtu.be/P_uNunjo91Q Object List Recipe https://accautomation.ca/c-more-ea9-hmi-series-panel-object-list-recipe https://youtu.be/h27EE2IWyHw There are several reasons that we are using the EA9-T10CL C-More HMI Panel. Here are a few: • Touch screen display (LCD) 280 NITS display brightness • 10.4” diagonal colour TFT (Thin Film Transistor) • Analog resistive (1024 X 1024) touch screen allowing unlimited touch areas • EA9-PGMSW programming software • 800 x 600-pixel display • 64K colours • 50,000-hour average backlight half-life • USB port B (program/download) and USB port A (USB device options) • Ethernet 10/100 Base-T port (program/download & PLC communication • Remote Internet Access • Serial PLC interface (RS-232/422/485) • One built-in SD memory card slot • 12–24 VDC powered (18W), 110VAC power adapter (optional) • Audio Line Out, stereo - requires amplifier and speaker(s) • 26MB project memory • Data logging • 0 to 50°C [32 to 122°F] operating temperature range • NEMA 4/4X, IP65 compliant when mounted correctly, indoor use only • Slim design saves panel space • UL, cUL & CE agency approvals • 2-year warranty from date of purchase https://www.accautomation.ca
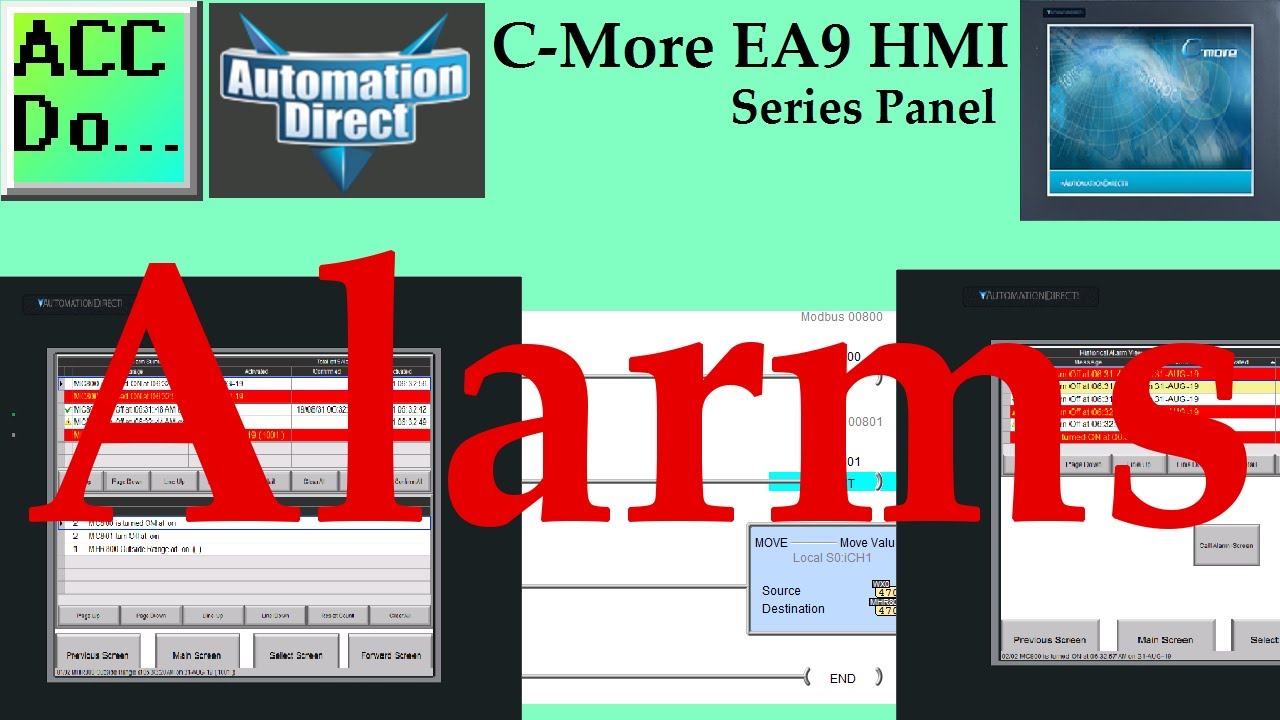
C-More EA9 HMI Series Panel Object List Alarms
1K views · Oct 13, 2022 accautomation.ca
We will now look at the C-More Alarms in the EA9 HMI. The C-More HMI Panel software uses virtual components called Objects. These objects are programmable to simulate the functions that you require on your automation project. Pushbuttons, Switches, meters, and graphs are just a few of the objects that are available to you. The Alarm List Objects include a variety of options to customize the display of alarms as a screen. This is in addition to the alarm banner at the bottom of the screen that shows the active alarms. We also have the Alarm Screen Style setting in Panel Manager. We will now look at the object list alarms that we can use with our HMI panel. The alarm objects that are available on the C-More EA9 are the Alarm List and Call Alarm Screen. Alarms are specified as an event in the C-More HMI panel. We will program both discrete (On/Off) and limits on a range for our event alarms. Let’s get started. More information can be obtained on our website. This includes all of the links mentioned in this video. https://accautomation.ca/c-more-ea9-hmi-series-panel-object-list-alarms 00:00 C-More EA9 HMI Series Panel Object List Alarms 00:36 Setting Our Alarm Screens – C-More 05:44 Event Manager Database (Alarm Database) 11:33 C-More Alarms Simulation 14:00 Transfer HMI Program to C-More 15:16 C-More Alarms PLC Program Additions Previously we have discussed the following in our C-More HMI Panel: System Hardware https://accautomation.ca/c-more-micro-hmi-system-hardware Unboxing and Review Video https://youtu.be/_uCcALMqYlM Powering the Unit https://youtu.be/BIGrOvxlDTI Installing the Software https://accautomation.ca/c-more-ea9-hmi-series-panel-installing-the-software https://youtu.be/6EnyUbEp4As System Setup Screens https://accautomation.ca/c-more-ea9-hmi-series-panel-system-setup-screens https://youtu.be/tL6Ygr1BuDY First Program https://accautomation.ca/c-more-ea9-hmi-series-panel-first-program Establishing Communication and Updating Firmware Video https://youtu.be/WTHw1p-iJFE First Program Video https://youtu.be/5c8ZsdK5dak Panel to PLC and PLC to Panel Settings https://accautomation.ca/c-more-ea9-hmi-series-panel-to-plc-and-plc-to-panel-settings/ https://youtu.be/b_KsLBDrtOU Common Screen Menu https://accautomation.ca/c-more-ea9-hmi-series-panel-common-screen-menu https://youtu.be/OGtA9RR-dc4 Simulate Project https://accautomation.ca/c-more-ea9-hmi-series-panel-simulate-project https://youtu.be/fx-1rucSE4g Object List Shapes https://accautomation.ca/c-more-ea9-hmi-series-panel-object-list-shapes https://youtu.be/JeTjaTn9OVc Object List Buttons https://accautomation.ca/c-more-ea9-hmi-series-panel-object-list-buttons https://youtu.be/lk2aHQtKzEg Object List Indicators https://accautomation.ca/c-more-ea9-hmi-series-panel-object-list-indicators https://youtu.be/9XKnXu6XKak Object List Entry https://accautomation.ca/c-more-ea9-hmi-series-panel-object-list-entry https://youtu.be/xob4NZ-dqoo Object List Meters and Graphs https://accautomation.ca/c-more-ea9-hmi-series-panel-object-list-meters-and-graphs https://youtu.be/dmebD7vhkds Object List Bitmaps https://accautomation.ca/c-more-ea9-hmi-series-panel-object-list-bitmaps https://youtu.be/P_uNunjo91Q Object List Recipe https://accautomation.ca/c-more-ea9-hmi-series-panel-object-list-recipe https://youtu.be/h27EE2IWyHw Define Custom Keypad https://accautomation.ca/c-more-ea9-hmi-series-panel-define-custom-keypad https://youtu.be/JPn9s4fRGvE There are several reasons that we are using the EA9-T10CL C-More HMI Panel. Here are a few: • Touch screen display (LCD) 280 NITS display brightness • 10.4” diagonal color TFT (Thin Film Transistor) • Analog resistive (1024 X 1024) touch screen allowing unlimited touch areas • EA9-PGMSW programming software • 800 x 600-pixel display • 64K colors • 50,000-hour average backlight half-life • USB port B (program/download) and USB port A (USB device options) • Ethernet 10/100 Base-T port (program/download & PLC communication • Remote Internet Access • Serial PLC interface (RS-232/422/485) • One built-in SD memory card slot • 12–24 VDC powered (18W), 110VAC power adapter (optional) • Audio Line Out, stereo - requires amplifier and speaker(s) • 26MB project memory • Data logging • 0 to 50°C [32 to 122°F] operating temperature range • NEMA 4/4X, IP65 compliant when mounted correctly, indoor use only • Slim design saves panel space • UL, cUL & CE agency approvals • 2-year warranty from date of purchase https://www.accautomation.ca
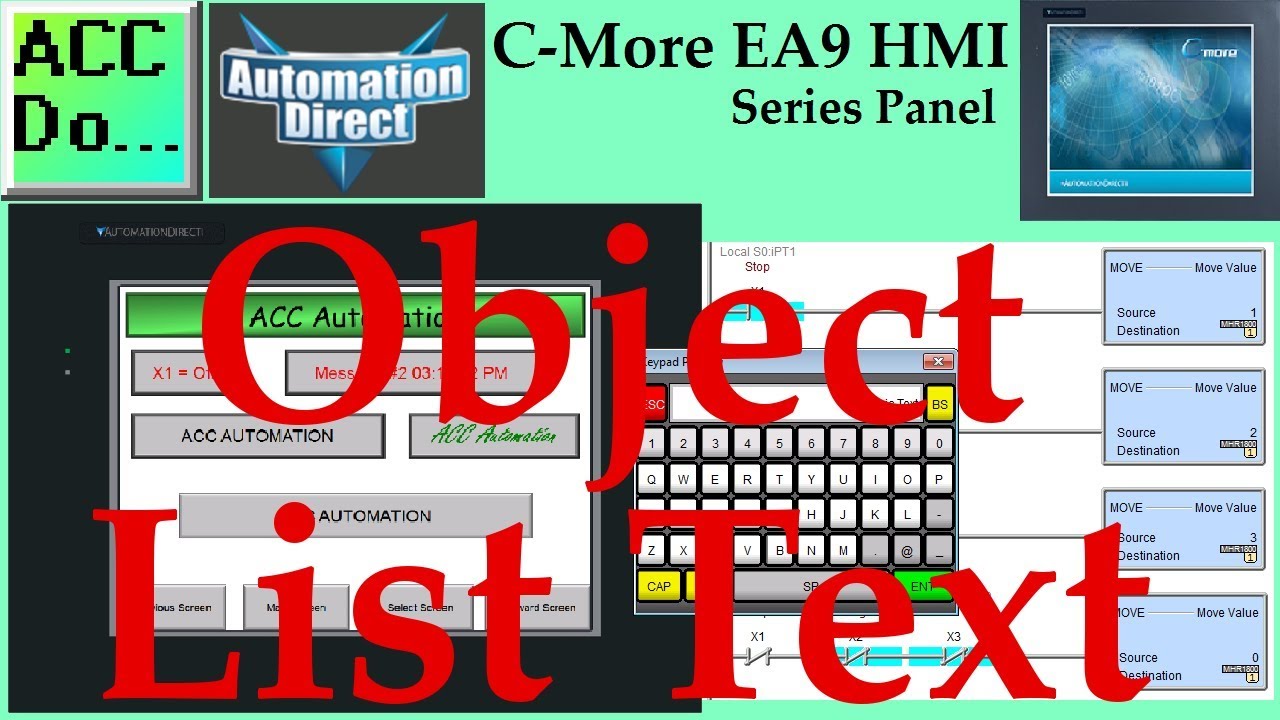
C-More EA9 HMI Series Panel Object List Text
6K views · Oct 13, 2022 accautomation.ca
We will now look at the C-More EA9 text object. The C-More HMI Panel software uses virtual components called Objects. These objects are programmable to simulate the functions that you require on your automation project. Pushbuttons, Switches, meters, and graphs are just a few of the objects that are available to you. The Text List Objects include a variety of options to customize the display of text on a screen. We will now look at the object list text that we can use with our HMI panel. The text objects that are available on the C-More EA9 are Static, Triggered, Lookup, Dynamic, Bitmap, and Text Entry. We will program each of these text objects. Let’s get started. More information can be obtained on our website. This includes all of the links mentioned in this video. https://accautomation.ca/c-more-ea9-hmi-series-panel-object-list-text Previously we have discussed the following in our C-More HMI Panel: System Hardware https://accautomation.ca/c-more-micro-hmi-system-hardware Unboxing and Review Video https://youtu.be/_uCcALMqYlM Powering the Unit https://youtu.be/BIGrOvxlDTI Installing the Software https://accautomation.ca/c-more-ea9-hmi-series-panel-installing-the-software https://youtu.be/6EnyUbEp4As System Setup Screens https://accautomation.ca/c-more-ea9-hmi-series-panel-system-setup-screens https://youtu.be/tL6Ygr1BuDY First Program https://accautomation.ca/c-more-ea9-hmi-series-panel-first-program Establishing Communication and Updating Firmware Video https://youtu.be/WTHw1p-iJFE First Program Video https://youtu.be/5c8ZsdK5dak Panel to PLC and PLC to Panel Settings https://accautomation.ca/c-more-ea9-hmi-series-panel-to-plc-and-plc-to-panel-settings/ https://youtu.be/b_KsLBDrtOU Common Screen Menu https://accautomation.ca/c-more-ea9-hmi-series-panel-common-screen-menu https://youtu.be/OGtA9RR-dc4 Simulate Project https://accautomation.ca/c-more-ea9-hmi-series-panel-simulate-project https://youtu.be/fx-1rucSE4g Object List Shapes https://accautomation.ca/c-more-ea9-hmi-series-panel-object-list-shapes https://youtu.be/JeTjaTn9OVc Object List Buttons https://accautomation.ca/c-more-ea9-hmi-series-panel-object-list-buttons https://youtu.be/lk2aHQtKzEg Object List Indicators https://accautomation.ca/c-more-ea9-hmi-series-panel-object-list-indicators https://youtu.be/9XKnXu6XKak Object List Entry https://accautomation.ca/c-more-ea9-hmi-series-panel-object-list-entry https://youtu.be/xob4NZ-dqoo Object List Meters and Graphs https://accautomation.ca/c-more-ea9-hmi-series-panel-object-list-meters-and-graphs https://youtu.be/dmebD7vhkds Object List Bitmaps https://accautomation.ca/c-more-ea9-hmi-series-panel-object-list-bitmaps https://youtu.be/P_uNunjo91Q Object List Recipe https://accautomation.ca/c-more-ea9-hmi-series-panel-object-list-recipe https://youtu.be/h27EE2IWyHw Define Custom Keypad https://accautomation.ca/c-more-ea9-hmi-series-panel-define-custom-keypad https://youtu.be/JPn9s4fRGvE Object List Alarms https://accautomation.ca/c-more-ea9-hmi-series-panel-object-list-alarms https://youtu.be/aCtzD60icGA There are several reasons that we are using the EA9-T10CL C-More HMI Panel. Here are a few: • Touch screen display (LCD) 280 NITS display brightness • 10.4” diagonal color TFT (Thin Film Transistor) • Analog resistive (1024 X 1024) touch screen allowing unlimited touch areas • EA9-PGMSW programming software • 800 x 600-pixel display • 64K colors • 50,000-hour average backlight half-life • USB port B (program/download) and USB port A (USB device options) • Ethernet 10/100 Base-T port (program/download & PLC communication • Remote Internet Access • Serial PLC interface (RS-232/422/485) • One built-in SD memory card slot • 12–24 VDC powered (18W), 110VAC power adapter (optional) • Audio Line Out, stereo - requires amplifier and speaker(s) • 26MB project memory • Data logging • 0 to 50°C [32 to 122°F] operating temperature range • NEMA 4/4X, IP65 compliant when mounted correctly, indoor use only • Slim design saves panel space • UL, cUL & CE agency approvals • 2-year warranty from date of purchase https://www.accautomation.ca
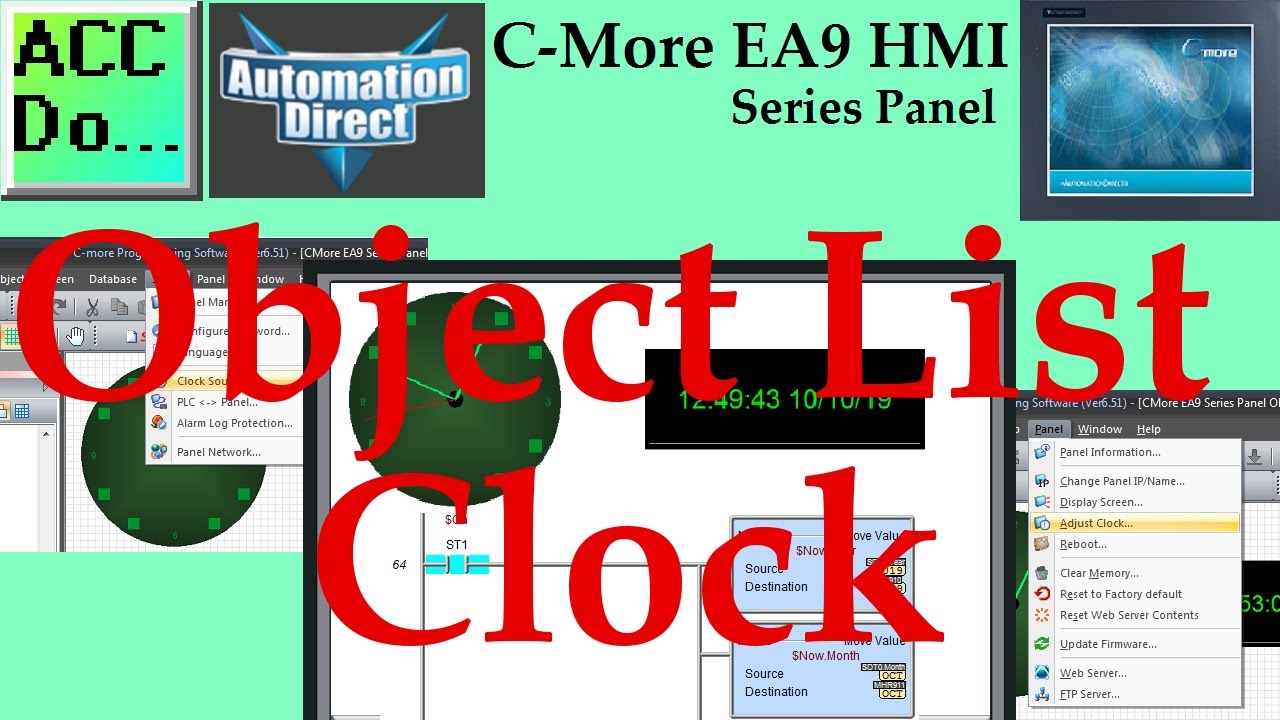
C-More EA9 HMI Series Panel Object List Clock
4K views · Oct 13, 2022 accautomation.ca
We will now look at the C-More real-time clock object. The C-More HMI Panel software uses virtual components called Objects. These objects are programmable to simulate the functions that you require on your automation project. Pushbuttons, Switches, meters, and graphs are just a few of the objects that are available to you. The Clock Objects includes a couple of options to customize the display of a real-time clock (RTC) on a screen. We will now look at the object list clock that we can use with our HMI panel. The clock objects that are available on the C-More EA9 are analog and digital. We will program each of these text objects. The source for the RTC clock will also be discussed and programmed both externally and internally. Let’s get started. More information can be obtained on our website. This includes all of the links mentioned in this video. https://accautomation.ca/c-more-ea9-hmi-series-panel-object-list-clock Previously we have discussed the following in our C-More HMI Panel: System Hardware https://accautomation.ca/c-more-micro-hmi-system-hardware Unboxing and Review Video https://youtu.be/_uCcALMqYlM Powering the Unit https://youtu.be/BIGrOvxlDTI Installing the Software https://accautomation.ca/c-more-ea9-hmi-series-panel-installing-the-software https://youtu.be/6EnyUbEp4As System Setup Screens https://accautomation.ca/c-more-ea9-hmi-series-panel-system-setup-screens https://youtu.be/tL6Ygr1BuDY First Program https://accautomation.ca/c-more-ea9-hmi-series-panel-first-program Establishing Communication and Updating Firmware Video https://youtu.be/WTHw1p-iJFE First Program Video https://youtu.be/5c8ZsdK5dak Panel to PLC and PLC to Panel Settings https://accautomation.ca/c-more-ea9-hmi-series-panel-to-plc-and-plc-to-panel-settings/ https://youtu.be/b_KsLBDrtOU Common Screen Menu https://accautomation.ca/c-more-ea9-hmi-series-panel-common-screen-menu https://youtu.be/OGtA9RR-dc4 Simulate Project https://accautomation.ca/c-more-ea9-hmi-series-panel-simulate-project https://youtu.be/fx-1rucSE4g Object List Shapes https://accautomation.ca/c-more-ea9-hmi-series-panel-object-list-shapes https://youtu.be/JeTjaTn9OVc Object List Buttons https://accautomation.ca/c-more-ea9-hmi-series-panel-object-list-buttons https://youtu.be/lk2aHQtKzEg Object List Indicators https://accautomation.ca/c-more-ea9-hmi-series-panel-object-list-indicators https://youtu.be/9XKnXu6XKak Object List Entry https://accautomation.ca/c-more-ea9-hmi-series-panel-object-list-entry https://youtu.be/xob4NZ-dqoo Object List Meters and Graphs https://accautomation.ca/c-more-ea9-hmi-series-panel-object-list-meters-and-graphs https://youtu.be/dmebD7vhkds Object List Bitmaps https://accautomation.ca/c-more-ea9-hmi-series-panel-object-list-bitmaps https://youtu.be/P_uNunjo91Q Object List Recipe https://accautomation.ca/c-more-ea9-hmi-series-panel-object-list-recipe https://youtu.be/h27EE2IWyHw Define Custom Keypad https://accautomation.ca/c-more-ea9-hmi-series-panel-define-custom-keypad https://youtu.be/JPn9s4fRGvE Object List Alarms https://accautomation.ca/c-more-ea9-hmi-series-panel-object-list-alarms https://youtu.be/aCtzD60icGA Object List Text https://accautomation.ca/c-more-ea9-hmi-series-panel-object-list-text https://youtu.be/NNYFIQ9Z0CA There are several reasons that we are using the EA9-T10CL C-More HMI Panel. Here are a few: • Touch screen display (LCD) 280 NITS display brightness • 10.4” diagonal color TFT (Thin Film Transistor) • Analog resistive (1024 X 1024) touch screen allowing unlimited touch areas • EA9-PGMSW programming software • 800 x 600-pixel display • 64K colors • 50,000-hour average backlight half-life • USB port B (program/download) and USB port A (USB device options) • Ethernet 10/100 Base-T port (program/download & PLC communication • Remote Internet Access • Serial PLC interface (RS-232/422/485) • One built-in SD memory card slot • 12–24 VDC powered (18W), 110VAC power adapter (optional) • Audio Line Out, stereo - requires amplifier and speaker(s) • 26MB project memory • Data logging • 0 to 50°C [32 to 122°F] operating temperature range • NEMA 4/4X, IP65 compliant when mounted correctly, indoor use only • Slim design saves panel space • UL, cUL & CE agency approvals • 2-year warranty from date of purchase https://www.accautomation.ca
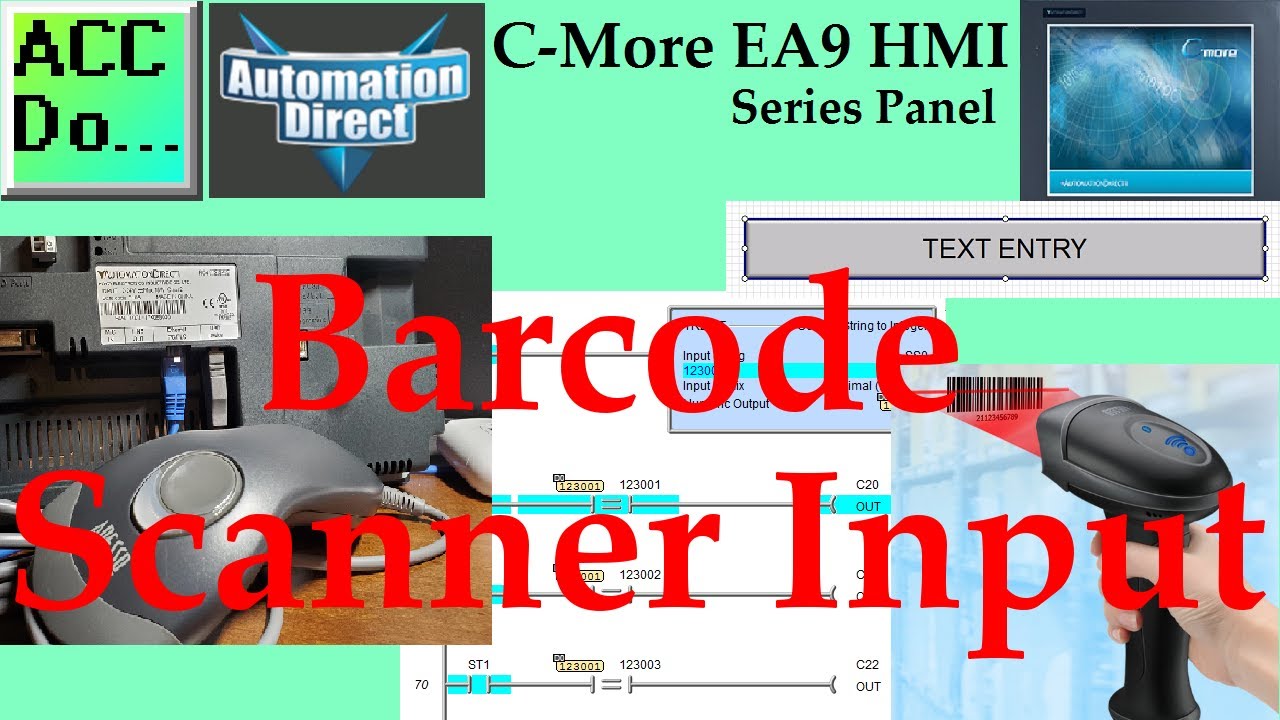
C-More EA9 HMI Series Panel Barcode Scanner Input
2K views · Oct 13, 2022 accautomation.ca
The C-More HMI Panel will support a barcode scanner (barcode reader) input. A scanner uses a light source and a light sensor to translate optical impulses into an electrical signal. The CMore can accept a USB barcode scanner input. We will now connect and program a barcode scanner into our HMI panel. The PLC ladder logic will then be modified to take action on the barcode input. Let’s get started. More information can be obtained on our website. This includes all of the links mentioned in this video. https://accautomation.ca/c-more-ea9-hmi-series-panel-barcode-scanner-input Previously we have discussed the following in our C-More HMI Panel: System Hardware https://accautomation.ca/c-more-micro-hmi-system-hardware Unboxing and Review Video https://youtu.be/_uCcALMqYlM Powering the Unit https://youtu.be/BIGrOvxlDTI Installing the Software https://accautomation.ca/c-more-ea9-hmi-series-panel-installing-the-software https://youtu.be/6EnyUbEp4As System Setup Screens https://accautomation.ca/c-more-ea9-hmi-series-panel-system-setup-screens https://youtu.be/tL6Ygr1BuDY First Program https://accautomation.ca/c-more-ea9-hmi-series-panel-first-program Establishing Communication and Updating Firmware Video https://youtu.be/WTHw1p-iJFE First Program Video https://youtu.be/5c8ZsdK5dak Panel to PLC and PLC to Panel Settings https://accautomation.ca/c-more-ea9-hmi-series-panel-to-plc-and-plc-to-panel-settings/ https://youtu.be/b_KsLBDrtOU Common Screen Menu https://accautomation.ca/c-more-ea9-hmi-series-panel-common-screen-menu https://youtu.be/OGtA9RR-dc4 Simulate Project https://accautomation.ca/c-more-ea9-hmi-series-panel-simulate-project https://youtu.be/fx-1rucSE4g Object List Shapes https://accautomation.ca/c-more-ea9-hmi-series-panel-object-list-shapes https://youtu.be/JeTjaTn9OVc Object List Buttons https://accautomation.ca/c-more-ea9-hmi-series-panel-object-list-buttons https://youtu.be/lk2aHQtKzEg Object List Indicators https://accautomation.ca/c-more-ea9-hmi-series-panel-object-list-indicators https://youtu.be/9XKnXu6XKak Object List Entry https://accautomation.ca/c-more-ea9-hmi-series-panel-object-list-entry https://youtu.be/xob4NZ-dqoo Object List Meters and Graphs https://accautomation.ca/c-more-ea9-hmi-series-panel-object-list-meters-and-graphs https://youtu.be/dmebD7vhkds Object List Bitmaps https://accautomation.ca/c-more-ea9-hmi-series-panel-object-list-bitmaps https://youtu.be/P_uNunjo91Q Object List Recipe https://accautomation.ca/c-more-ea9-hmi-series-panel-object-list-recipe https://youtu.be/h27EE2IWyHw Define Custom Keypad https://accautomation.ca/c-more-ea9-hmi-series-panel-define-custom-keypad https://youtu.be/JPn9s4fRGvE Object List Alarms https://accautomation.ca/c-more-ea9-hmi-series-panel-object-list-alarms https://youtu.be/aCtzD60icGA Object List Text https://accautomation.ca/c-more-ea9-hmi-series-panel-object-list-text https://youtu.be/NNYFIQ9Z0CA Object List Clock https://accautomation.ca/c-more-ea9-hmi-series-panel-object-list-clock https://youtu.be/pomvTvld-pA There are several reasons that we are using the EA9-T10CL C-More HMI Panel. Here are a few: • Touch screen display (LCD) 280 NITS display brightness • 10.4” diagonal color TFT (Thin Film Transistor) • Analog resistive (1024 X 1024) touch screen allowing unlimited touch areas • EA9-PGMSW programming software • 800 x 600-pixel display • 64K colors • 50,000-hour average backlight half-life • USB port B (program/download) and USB port A (USB device options) • Ethernet 10/100 Base-T port (program/download & PLC communication • Remote Internet Access • Serial PLC interface (RS-232/422/485) • One built-in SD memory card slot • 12–24 VDC powered (18W), 110VAC power adapter (optional) • Audio Line Out, stereo - requires amplifier and speaker(s) • 26MB project memory • Data logging • 0 to 50°C [32 to 122°F] operating temperature range • NEMA 4/4X, IP65 compliant when mounted correctly, indoor use only • Slim design saves panel space • UL, cUL & CE agency approvals • 2-year warranty from date of purchase https://www.accautomation.ca
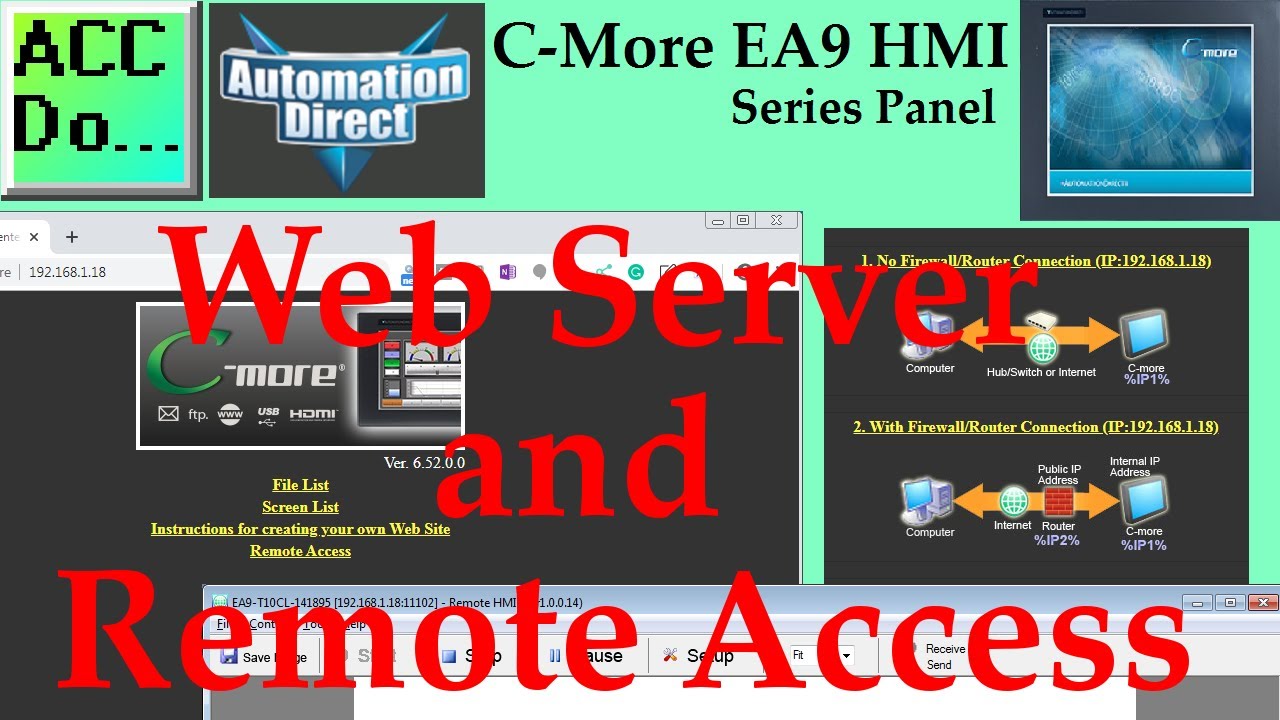
C-More EA9 HMI Series Panel Web Server and Remote Access (Ap...
2K views · Oct 13, 2022 accautomation.ca
We will now look at programming the C-More EA9 web server and control using remote apps on Android, IoS, and windows for access. The C-More HMI Panel can function as a simple web server. A web server includes software and hardware that will respond to World Wide Web client requests. The communication between client and server takes place using the Hypertext Transfer Protocol. (HTTP). Information generally takes the form of pages that may include images, style sheets, scripts, and page text contents. Remote access will allow for viewing or controlling the C-More EA9 HMI. We can use any windows based machine or use the C-More remote HMI App from the Apple iTunes store, Google Play, or Amazon App Store for mobile devices. We will turn on the webserver functionality in our HMI panel. Using a web browser (Chrome), we will connect to our C-More EA9 HMI. We will then download the remote access software from the website. We will then run this remote access software to control our existing HMI program. Let’s get started. More information can be obtained on our website. This includes all of the links mentioned in this video. https://accautomation.ca/c-more-ea9-hmi-series-panel-web-server-and-remote-access Previously we have discussed the following in our C-More HMI Panel: System Hardware https://accautomation.ca/c-more-micro-hmi-system-hardware Unboxing and Review Video https://youtu.be/_uCcALMqYlM Powering the Unit https://youtu.be/BIGrOvxlDTI Installing the Software https://accautomation.ca/c-more-ea9-hmi-series-panel-installing-the-software https://youtu.be/6EnyUbEp4As System Setup Screens https://accautomation.ca/c-more-ea9-hmi-series-panel-system-setup-screens https://youtu.be/tL6Ygr1BuDY First Program https://accautomation.ca/c-more-ea9-hmi-series-panel-first-program Establishing Communication and Updating Firmware Video https://youtu.be/WTHw1p-iJFE First Program Video https://youtu.be/5c8ZsdK5dak Panel to PLC and PLC to Panel Settings https://accautomation.ca/c-more-ea9-hmi-series-panel-to-plc-and-plc-to-panel-settings/ https://youtu.be/b_KsLBDrtOU Common Screen Menu https://accautomation.ca/c-more-ea9-hmi-series-panel-common-screen-menu https://youtu.be/OGtA9RR-dc4 Simulate Project https://accautomation.ca/c-more-ea9-hmi-series-panel-simulate-project https://youtu.be/fx-1rucSE4g Object List Shapes https://accautomation.ca/c-more-ea9-hmi-series-panel-object-list-shapes https://youtu.be/JeTjaTn9OVc Object List Buttons https://accautomation.ca/c-more-ea9-hmi-series-panel-object-list-buttons https://youtu.be/lk2aHQtKzEg Object List Indicators https://accautomation.ca/c-more-ea9-hmi-series-panel-object-list-indicators https://youtu.be/9XKnXu6XKak Object List Entry https://accautomation.ca/c-more-ea9-hmi-series-panel-object-list-entry https://youtu.be/xob4NZ-dqoo Object List Meters and Graphs https://accautomation.ca/c-more-ea9-hmi-series-panel-object-list-meters-and-graphs https://youtu.be/dmebD7vhkds Object List Bitmaps https://accautomation.ca/c-more-ea9-hmi-series-panel-object-list-bitmaps https://youtu.be/P_uNunjo91Q Object List Recipe https://accautomation.ca/c-more-ea9-hmi-series-panel-object-list-recipe https://youtu.be/h27EE2IWyHw Define Custom Keypad https://accautomation.ca/c-more-ea9-hmi-series-panel-define-custom-keypad https://youtu.be/JPn9s4fRGvE Object List Alarms https://accautomation.ca/c-more-ea9-hmi-series-panel-object-list-alarms https://youtu.be/aCtzD60icGA Object List Text https://accautomation.ca/c-more-ea9-hmi-series-panel-object-list-text https://youtu.be/NNYFIQ9Z0CA Object List Clock https://accautomation.ca/c-more-ea9-hmi-series-panel-object-list-clock https://youtu.be/pomvTvld-pA Barcode Scanner Input https://accautomation.ca/c-more-ea9-hmi-series-panel-barcode-scanner-input https://youtu.be/dLLlC71-B8Y There are several reasons that we are using the EA9-T10CL C-More HMI Panel. Here are a few: • Touch screen display (LCD) 280 NITS display brightness • 10.4” diagonal color TFT (Thin Film Transistor) • Analog resistive (1024 X 1024) touch screen allowing unlimited touch areas • EA9-PGMSW programming software • 800 x 600-pixel display • 64K colors • 50,000-hour average backlight half-life • USB port B (program/download) and USB port A (USB device options) • Ethernet 10/100 Base-T port (program/download & PLC communication • Remote Internet Access • Serial PLC interface (RS-232/422/485) • One built-in SD memory card slot • 12–24 VDC powered (18W), 110VAC power adapter (optional) • Audio Line Out, stereo - requires amplifier and speaker(s) • 26MB project memory • Data logging • 0 to 50°C [32 to 122°F] operating temperature range • NEMA 4/4X, IP65 compliant when mounted correctly, indoor use only • Slim design saves panel space • UL, cUL & CE agency approvals • 2-year warranty from date of purchase https://www.accautomation.ca
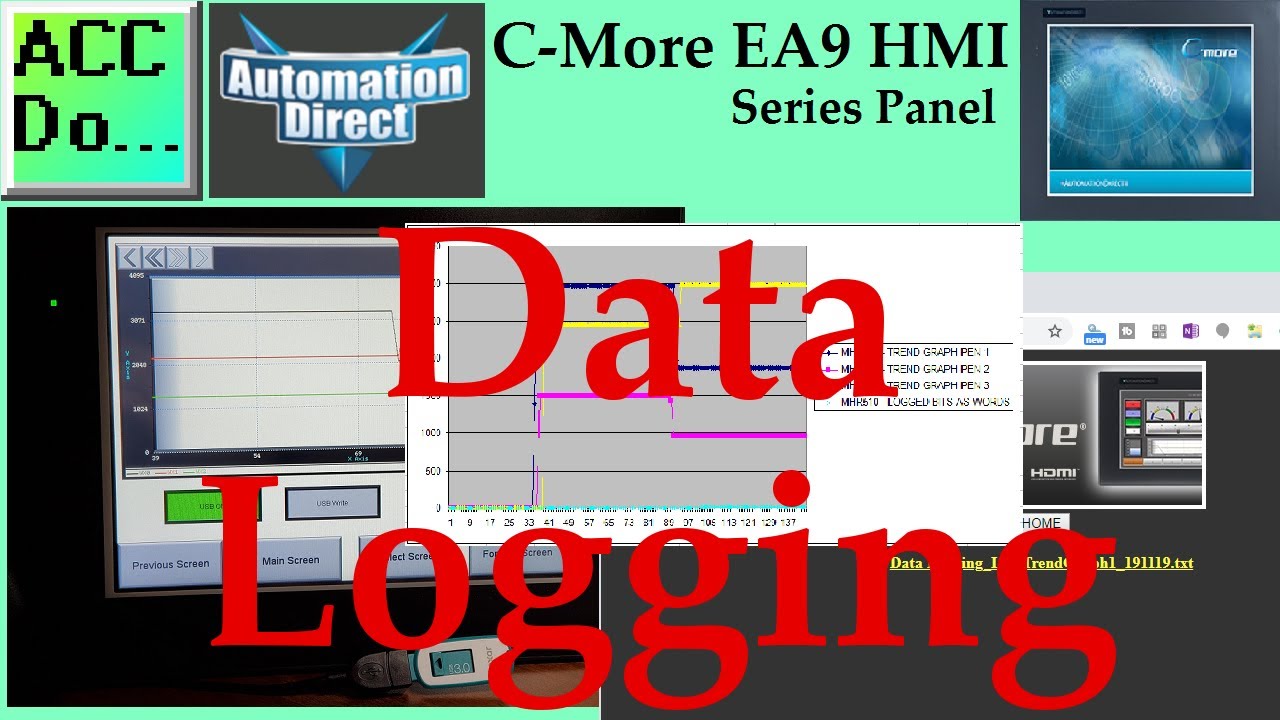
C-More EA9 HMI Series Panel Data Logging
6K views · Oct 13, 2022 accautomation.ca
The C-More HMI Panel can log data using the Line Trend Graph or PID Faceplate Trend Graph objects. When Save Log Data is selected on the Options tab configuration for that object, data is written to a ".txt " file saved to the chosen storage device. Data Logging is commonly used to monitor systems and/or processes at an industrial facility, providing time, date, and current conditions as configured on the Object. Data Logging can collect temperatures, flows, alarms, levels, pressure, and any instrument measurable condition. We will be data logging from a Line Trend Graph. A register (word) made up of bits will also be logged. We will log this information every second on our USB stick. Starting/stopping the logging can be controlled on the HMI and USB reject. Once the USB is ejected, it can be connected to our computer to review the files. We will also view and copy the files from our web server that we enabled last time on our C-More EA9 HMI panel. Let’s get started. More information can be obtained on our website. This includes all of the links mentioned in this video. https://accautomation.ca/c-more-ea9-hmi-series-panel-data-logging Previously we have discussed the following in our C-More HMI Panel: System Hardware https://accautomation.ca/c-more-micro-hmi-system-hardware Unboxing and Review Video https://youtu.be/_uCcALMqYlM Powering the Unit https://youtu.be/BIGrOvxlDTI Installing the Software https://accautomation.ca/c-more-ea9-hmi-series-panel-installing-the-software https://youtu.be/6EnyUbEp4As System Setup Screens https://accautomation.ca/c-more-ea9-hmi-series-panel-system-setup-screens https://youtu.be/tL6Ygr1BuDY First Program https://accautomation.ca/c-more-ea9-hmi-series-panel-first-program Establishing Communication and Updating Firmware Video https://youtu.be/WTHw1p-iJFE First Program Video https://youtu.be/5c8ZsdK5dak Panel to PLC and PLC to Panel Settings https://accautomation.ca/c-more-ea9-hmi-series-panel-to-plc-and-plc-to-panel-settings/ https://youtu.be/b_KsLBDrtOU Common Screen Menu https://accautomation.ca/c-more-ea9-hmi-series-panel-common-screen-menu https://youtu.be/OGtA9RR-dc4 Simulate Project https://accautomation.ca/c-more-ea9-hmi-series-panel-simulate-project https://youtu.be/fx-1rucSE4g Object List Shapes https://accautomation.ca/c-more-ea9-hmi-series-panel-object-list-shapes https://youtu.be/JeTjaTn9OVc Object List Buttons https://accautomation.ca/c-more-ea9-hmi-series-panel-object-list-buttons https://youtu.be/lk2aHQtKzEg Object List Indicators https://accautomation.ca/c-more-ea9-hmi-series-panel-object-list-indicators https://youtu.be/9XKnXu6XKak Object List Entry https://accautomation.ca/c-more-ea9-hmi-series-panel-object-list-entry https://youtu.be/xob4NZ-dqoo Object List Meters and Graphs https://accautomation.ca/c-more-ea9-hmi-series-panel-object-list-meters-and-graphs https://youtu.be/dmebD7vhkds Object List Bitmaps https://accautomation.ca/c-more-ea9-hmi-series-panel-object-list-bitmaps https://youtu.be/P_uNunjo91Q Object List Recipe https://accautomation.ca/c-more-ea9-hmi-series-panel-object-list-recipe https://youtu.be/h27EE2IWyHw Define Custom Keypad https://accautomation.ca/c-more-ea9-hmi-series-panel-define-custom-keypad https://youtu.be/JPn9s4fRGvE Object List Alarms https://accautomation.ca/c-more-ea9-hmi-series-panel-object-list-alarms https://youtu.be/aCtzD60icGA Object List Text https://accautomation.ca/c-more-ea9-hmi-series-panel-object-list-text https://youtu.be/NNYFIQ9Z0CA Object List Clock https://accautomation.ca/c-more-ea9-hmi-series-panel-object-list-clock https://youtu.be/pomvTvld-pA Barcode Scanner Input https://accautomation.ca/c-more-ea9-hmi-series-panel-barcode-scanner-input https://youtu.be/dLLlC71-B8Y Web Server and Remote Access https://accautomation.ca/c-more-ea9-hmi-series-panel-web-server-and-remote-access https://youtu.be/0r33T1gL8lA There are several reasons that we are using the EA9-T10CL C-More HMI Panel. Here are a few: • Touch screen display (LCD) 280 NITS display brightness • 10.4” diagonal color TFT (Thin Film Transistor) • Analog resistive (1024 X 1024) touch screen allowing unlimited touch areas • EA9-PGMSW programming software • 800 x 600-pixel display • 64K colors • 50,000-hour average backlight half-life • USB port B (program/download) and USB port A (USB device options) • Ethernet 10/100 Base-T port (program/download & PLC communication • Remote Internet Access • Serial PLC interface (RS-232/422/485) • One built-in SD memory card slot • 12–24 VDC powered (18W), 110VAC power adapter (optional) • Audio Line Out, stereo - requires amplifier and speaker(s) • 26MB project memory • Data logging • 0 to 50°C [32 to 122°F] operating temperature range • NEMA 4/4X, IP65 compliant when mounted correctly, indoor use only • Slim design saves panel space • UL, cUL & CE agency approvals • 2-year warranty from date of purchase https://www.accautomation.ca
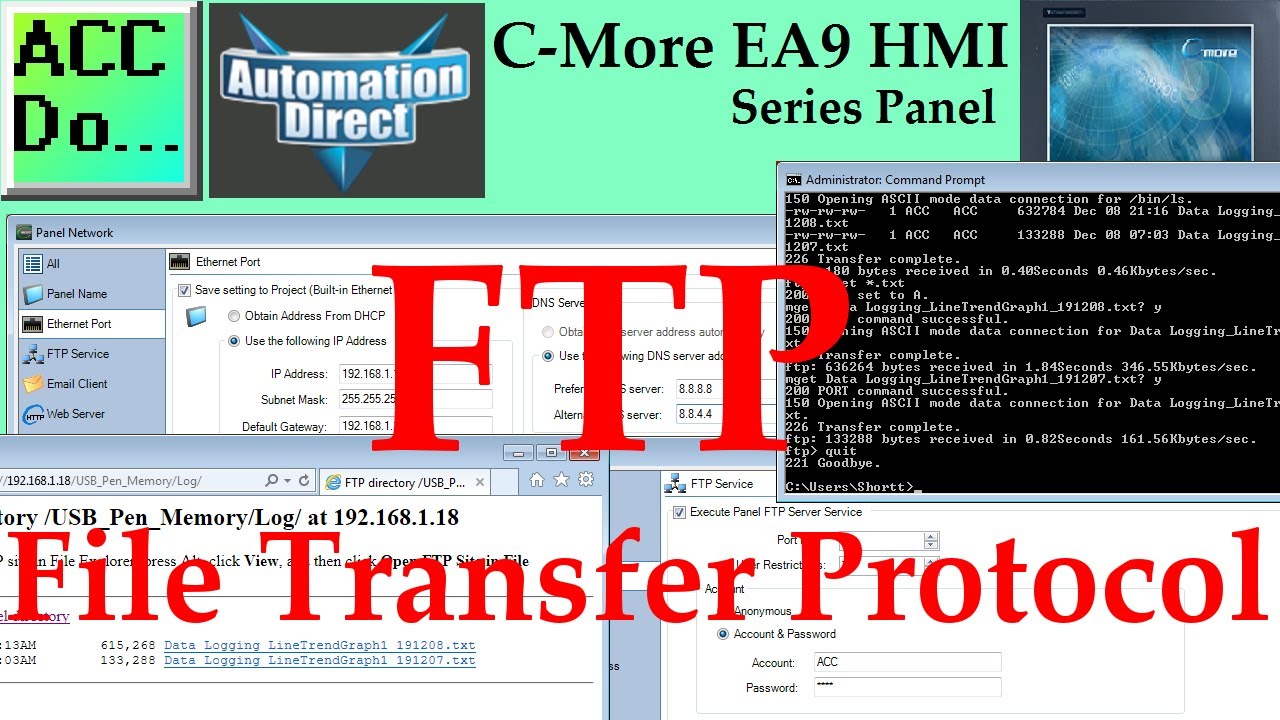
C-More EA9 HMI Series Panel FTP - File Transfer Protocol
4K views · Oct 13, 2022 accautomation.ca
The C-More EA9 HMI Panel through the Ethernet port can be set up to use FTP (File Transfer Protocol). FTP is a standard network protocol used to transfer computer files between a client and a server on a computer network. Depending on your application, the C-More HMI can be used as an FTP Client or Server. An FTP client can send and receive files from an FTP server site. You will need an FTP Server already set up in your network to use this feature. (Example: FTP Web Server) See the help file in the C-More software for more information on the Cmore FTP Client Setup and use. We will be setting up the FTP Server function and accessing the data log that we set up previously using a PC as the client. The Cmore FTP Server can retrieve data from the C-more memory with requests from the client. The power of this setup is the ability to automate the retrieval of the information using a batch (BAT) file. Let’s get started. More information can be obtained on our website. This includes all of the links mentioned in this. video. https://accautomation.ca/c-more-ea9-hmi-series-panel-ftp-file-transfer-protocol Previously we have discussed the following in our C-More HMI Panel: System Hardware https://accautomation.ca/c-more-micro-hmi-system-hardware Unboxing and Review Video https://youtu.be/_uCcALMqYlM Powering the Unit https://youtu.be/BIGrOvxlDTI Installing the Software https://accautomation.ca/c-more-ea9-hmi-series-panel-installing-the-software https://youtu.be/6EnyUbEp4As System Setup Screens https://accautomation.ca/c-more-ea9-hmi-series-panel-system-setup-screens https://youtu.be/tL6Ygr1BuDY First Program https://accautomation.ca/c-more-ea9-hmi-series-panel-first-program Establishing Communication and Updating Firmware Video https://youtu.be/WTHw1p-iJFE First Program Video https://youtu.be/5c8ZsdK5dak Panel to PLC and PLC to Panel Settings https://accautomation.ca/c-more-ea9-hmi-series-panel-to-plc-and-plc-to-panel-settings/ https://youtu.be/b_KsLBDrtOU Common Screen Menu https://accautomation.ca/c-more-ea9-hmi-series-panel-common-screen-menu https://youtu.be/OGtA9RR-dc4 Simulate Project https://accautomation.ca/c-more-ea9-hmi-series-panel-simulate-project https://youtu.be/fx-1rucSE4g Object List Shapes https://accautomation.ca/c-more-ea9-hmi-series-panel-object-list-shapes https://youtu.be/JeTjaTn9OVc Object List Buttons https://accautomation.ca/c-more-ea9-hmi-series-panel-object-list-buttons https://youtu.be/lk2aHQtKzEg Object List Indicators https://accautomation.ca/c-more-ea9-hmi-series-panel-object-list-indicators https://youtu.be/9XKnXu6XKak Object List Entry https://accautomation.ca/c-more-ea9-hmi-series-panel-object-list-entry https://youtu.be/xob4NZ-dqoo Object List Meters and Graphs https://accautomation.ca/c-more-ea9-hmi-series-panel-object-list-meters-and-graphs https://youtu.be/dmebD7vhkds Object List Bitmaps https://accautomation.ca/c-more-ea9-hmi-series-panel-object-list-bitmaps https://youtu.be/P_uNunjo91Q Object List Recipe https://accautomation.ca/c-more-ea9-hmi-series-panel-object-list-recipe https://youtu.be/h27EE2IWyHw Define Custom Keypad https://accautomation.ca/c-more-ea9-hmi-series-panel-define-custom-keypad https://youtu.be/JPn9s4fRGvE Object List Alarms https://accautomation.ca/c-more-ea9-hmi-series-panel-object-list-alarms https://youtu.be/aCtzD60icGA Object List Text https://accautomation.ca/c-more-ea9-hmi-series-panel-object-list-text https://youtu.be/NNYFIQ9Z0CA Object List Clock https://accautomation.ca/c-more-ea9-hmi-series-panel-object-list-clock https://youtu.be/pomvTvld-pA Barcode Scanner Input https://accautomation.ca/c-more-ea9-hmi-series-panel-barcode-scanner-input https://youtu.be/dLLlC71-B8Y Web Server and Remote Access https://accautomation.ca/c-more-ea9-hmi-series-panel-web-server-and-remote-access https://youtu.be/0r33T1gL8lA Data Logging https://accautomation.ca/c-more-ea9-hmi-series-panel-data-logging https://youtu.be/Kc87v1JqolQ There are several reasons that we are using the EA9-T10CL C-More HMI Panel. Here are a few: • Touch screen display (LCD) 280 NITS display brightness • 10.4” diagonal color TFT (Thin Film Transistor) • Analog resistive (1024 X 1024) touch screen allowing unlimited touch areas • EA9-PGMSW programming software • 64K colors • 50,000-hour average backlight half-life • USB port B (program/download) and USB port A (USB device options) • Ethernet 10/100 Base-T port (program/download & PLC communication • Remote Internet Access • Serial PLC interface (RS-232/422/485) • One built-in SD memory card slot • Audio Line Out, stereo - requires amplifier and speaker(s) • Data logging • 0 to 50°C [32 to 122°F] operating temperature range • NEMA 4/4X, IP65 compliant when mounted correctly, indoor use only • Slim design saves panel space • UL, cUL & CE agency approvals • 2-year warranty from date of purchase https://www.accautomation.ca
C-More EA9 HMI Series Panel Sending Email
29K views · Oct 13, 2022 accautomation.ca
The C-More EA9 HMI Panel, through the Ethernet port, can send secure email messages. These mail messages with attachments can be transmitted through a specified mail server. We will be sending an email using a Gmail account with authentication. This will also include an attached logged data file. We will also discuss how the C-More HMI can send a text (SMS) message. Let's get started. More information can be obtained on our website. This includes all of the links mentioned in this video. https://accautomation.ca/c-more-ea9-hmi-series-panel-sending-email Note: Google is removing "Less Secured Apps" in the mail app. (Gmail). This will then give you the option to generate an "App Password" for your controller or program. If you are using this to send email from your controller, you must enable 2-step verification. Gmail Less Secure App Access - App Passwords https://youtube.com/shorts/r9WxLTNDz24 Previously we have discussed the following in our C-More HMI Panel: System Hardware https://accautomation.ca/c-more-micro-hmi-system-hardware Unboxing and Review Video https://youtu.be/_uCcALMqYlM Powering the Unit https://youtu.be/BIGrOvxlDTI Installing the Software https://accautomation.ca/c-more-ea9-hmi-series-panel-installing-the-software https://youtu.be/6EnyUbEp4As System Setup Screens https://accautomation.ca/c-more-ea9-hmi-series-panel-system-setup-screens https://youtu.be/tL6Ygr1BuDY First Program https://accautomation.ca/c-more-ea9-hmi-series-panel-first-program Establishing Communication and Updating Firmware Video https://youtu.be/WTHw1p-iJFE First Program Video https://youtu.be/5c8ZsdK5dak Panel to PLC and PLC to Panel Settings https://accautomation.ca/c-more-ea9-hmi-series-panel-to-plc-and-plc-to-panel-settings/ https://youtu.be/b_KsLBDrtOU Common Screen Menu https://accautomation.ca/c-more-ea9-hmi-series-panel-common-screen-menu https://youtu.be/OGtA9RR-dc4 Simulate Project https://accautomation.ca/c-more-ea9-hmi-series-panel-simulate-project https://youtu.be/fx-1rucSE4g Object List Shapes https://accautomation.ca/c-more-ea9-hmi-series-panel-object-list-shapes https://youtu.be/JeTjaTn9OVc Object List Buttons https://accautomation.ca/c-more-ea9-hmi-series-panel-object-list-buttons https://youtu.be/lk2aHQtKzEg Object List Indicators https://accautomation.ca/c-more-ea9-hmi-series-panel-object-list-indicators https://youtu.be/9XKnXu6XKak Object List Entry https://accautomation.ca/c-more-ea9-hmi-series-panel-object-list-entry https://youtu.be/xob4NZ-dqoo Object List Meters and Graphs https://accautomation.ca/c-more-ea9-hmi-series-panel-object-list-meters-and-graphs https://youtu.be/dmebD7vhkds Object List Bitmaps https://accautomation.ca/c-more-ea9-hmi-series-panel-object-list-bitmaps https://youtu.be/P_uNunjo91Q Object List Recipe https://accautomation.ca/c-more-ea9-hmi-series-panel-object-list-recipe https://youtu.be/h27EE2IWyHw Object List Alarms https://accautomation.ca/c-more-ea9-hmi-series-panel-object-list-alarms https://youtu.be/aCtzD60icGA Object List Text https://accautomation.ca/c-more-ea9-hmi-series-panel-object-list-text https://youtu.be/NNYFIQ9Z0CA Object List Clock https://accautomation.ca/c-more-ea9-hmi-series-panel-object-list-clock https://youtu.be/pomvTvld-pA Barcode Scanner Input https://accautomation.ca/c-more-ea9-hmi-series-panel-barcode-scanner-input https://youtu.be/dLLlC71-B8Y Web Server and Remote Access https://accautomation.ca/c-more-ea9-hmi-series-panel-web-server-and-remote-access https://youtu.be/0r33T1gL8lA Data Logging https://accautomation.ca/c-more-ea9-hmi-series-panel-data-logging https://youtu.be/Kc87v1JqolQ FTP File Transfer Protocol https://accautomation.ca/c-more-ea9-hmi-series-panel-ftp-file-transfer-protocol https://youtu.be/b5TmA5sUdFE There are several reasons that we are using the EA9-T10CL C-More HMI Panel. Here are a few: • Touch screen display (LCD) 280 NITS display brightness • 10.4" diagonal color TFT (Thin Film Transistor) • Analog resistive (1024 X 1024) touch screen allowing unlimited touch areas • EA9-PGMSW programming software • 800 x 600-pixel display • 64K colors • 50,000-hour average backlight half-life • USB port B (program/download) and USB port A (USB device options) • Ethernet 10/100 Base-T port (program/download & PLC communication • Remote Internet Access • Serial PLC interface (RS-232/422/485) • One built-in SD memory card slot • 12–24 VDC powered (18W), 110VAC power adapter (optional) • Audio Line Out, stereo - requires amplifier and speaker(s) • 26MB project memory • Data logging • 0 to 50°C [32 to 122°F] operating temperature range • NEMA 4/4X, IP65 compliant when mounted correctly, indoor use only • Slim design saves panel space • UL, cUL & CE agency approvals • 2-year warranty from date of purchase https://www.accautomation.ca
C-More EA9 HMI Series Headless RHMI Panel Unboxing
8K views · Oct 13, 2022 accautomation.ca
The C-More EA9 HMI Panel now comes in a headless version. (EA9-RHMI) All of the great features already built into the EA9 are available with the new headless model. This unit can be mounted within the cabinet, and you can decide how to display the information. This user-friendly, time-saving software platform allows your system data to be shown to the operators in new ways thanks to the C-More headless HMI panel. Capabilities like data logging, FTP (File Transfer Protocol), secure email, remote HMI, and data sharing can now be added to existing PLC hardware. We will be unboxing this EA9-RHMI unit. Once power is supplied to the unit, we will establish communication and save the program. Let's get started. More information can be obtained on our website. This includes all of the links mentioned in this video. https://accautomation.ca/c-more-ea9-hmi-series-headless-rhmi-panel Headless EA9-RHMI Panel Unboxing - Video https://youtu.be/Pi2NlVhPxg8 Headless EA9-RHMI Panel Establish Communication - Video https://youtu.be/xeOCzc9vJAQ Previously we have discussed the following in our C-More HMI Panel: System Setup Screens https://accautomation.ca/c-more-ea9-hmi-series-panel-system-setup-screens https://youtu.be/tL6Ygr1BuDY First Program https://accautomation.ca/c-more-ea9-hmi-series-panel-first-program Establishing Communication and Updating Firmware Video https://youtu.be/WTHw1p-iJFE First Program Video https://youtu.be/5c8ZsdK5dak Panel to PLC and PLC to Panel Settings https://accautomation.ca/c-more-ea9-hmi-series-panel-to-plc-and-plc-to-panel-settings/ https://youtu.be/b_KsLBDrtOU Common Screen Menu https://accautomation.ca/c-more-ea9-hmi-series-panel-common-screen-menu https://youtu.be/OGtA9RR-dc4 Simulate Project https://accautomation.ca/c-more-ea9-hmi-series-panel-simulate-project https://youtu.be/fx-1rucSE4g Object List Shapes https://accautomation.ca/c-more-ea9-hmi-series-panel-object-list-shapes https://youtu.be/JeTjaTn9OVc Object List Buttons https://accautomation.ca/c-more-ea9-hmi-series-panel-object-list-buttons https://youtu.be/lk2aHQtKzEg Object List Indicators https://accautomation.ca/c-more-ea9-hmi-series-panel-object-list-indicators https://youtu.be/9XKnXu6XKak Object List Entry https://accautomation.ca/c-more-ea9-hmi-series-panel-object-list-entry https://youtu.be/xob4NZ-dqoo Object List Meters and Graphs https://accautomation.ca/c-more-ea9-hmi-series-panel-object-list-meters-and-graphs https://youtu.be/dmebD7vhkds Object List Bitmaps https://accautomation.ca/c-more-ea9-hmi-series-panel-object-list-bitmaps https://youtu.be/P_uNunjo91Q Object List Recipe https://accautomation.ca/c-more-ea9-hmi-series-panel-object-list-recipe https://youtu.be/h27EE2IWyHw Define Custom Keypad https://accautomation.ca/c-more-ea9-hmi-series-panel-define-custom-keypad https://youtu.be/JPn9s4fRGvE Object List Alarms https://accautomation.ca/c-more-ea9-hmi-series-panel-object-list-alarms https://youtu.be/aCtzD60icGA Object List Text https://accautomation.ca/c-more-ea9-hmi-series-panel-object-list-text https://youtu.be/NNYFIQ9Z0CA Object List Clock https://accautomation.ca/c-more-ea9-hmi-series-panel-object-list-clock https://youtu.be/pomvTvld-pA Barcode Scanner Input https://accautomation.ca/c-more-ea9-hmi-series-panel-barcode-scanner-input https://youtu.be/dLLlC71-B8Y Web Server and Remote Access https://accautomation.ca/c-more-ea9-hmi-series-panel-web-server-and-remote-access https://youtu.be/0r33T1gL8lA Data Logging https://accautomation.ca/c-more-ea9-hmi-series-panel-data-logging https://youtu.be/Kc87v1JqolQ FTP File Transfer Protocol https://accautomation.ca/c-more-ea9-hmi-series-panel-ftp-file-transfer-protocol https://youtu.be/b5TmA5sUdFE Sending Email https://accautomation.ca/c-more-ea9-hmi-series-panel-sending-email https://youtu.be/0Pbmlo9pGYQ There are several reasons that we are using the EA9-T10CL C-More HMI Panel. Here are a few: • Touch screen display (LCD) 280 NITS display brightness • 10.4" diagonal color TFT (Thin Film Transistor) • Analog resistive (1024 X 1024) touch screen allowing unlimited touch areas • EA9-PGMSW programming software • 800 x 600-pixel display • 64K colors • 50,000-hour average backlight half-life • USB port B (program/download) and USB port A (USB device options) • Ethernet 10/100 Base-T port (program/download & PLC communication • Remote Internet Access • Serial PLC interface (RS-232/422/485) • One built-in SD memory card slot • 12–24 VDC powered (18W), 110VAC power adapter (optional) • Audio Line Out, stereo - requires amplifier and speaker(s) • 26MB project memory • Data logging • 0 to 50°C [32 to 122°F] operating temperature range • NEMA 4/4X, IP65 compliant when mounted correctly, indoor use only • Slim design saves panel space • UL, cUL & CE agency approvals • 2-year warranty from date of purchase https://www.accautomation.ca
C-More EA9 HMI Series Headless RHMI Panel Establish Communic...
5K views · Oct 13, 2022 accautomation.ca
The C-More EA9 HMI Panel now comes in a headless version. (EA9-RHMI) All of the great features already built into the EA9 are available with the new headless model. This unit can be mounted within the cabinet, and you can decide how to display the information. This user-friendly, time-saving software platform allows your system data to be shown to the operators in new ways thanks to the C-More headless HMI panel. Capabilities like data logging, FTP (File Transfer Protocol), secure email, remote HMI, and data sharing can now be added to existing PLC hardware. We will be unboxing this EA9-RHMI unit. Once power is supplied to the unit, we will establish communication and save the program. Let's get started. More information can be obtained on our website. This includes all of the links mentioned in this video. https://accautomation.ca/c-more-ea9-hmi-series-headless-rhmi-panel Headless EA9-RHMI Panel Unboxing - Video https://youtu.be/Pi2NlVhPxg8 Headless EA9-RHMI Panel Establish Communication - Video https://youtu.be/xeOCzc9vJAQ Previously we have discussed the following in our C-More HMI Panel: System Setup Screens https://accautomation.ca/c-more-ea9-hmi-series-panel-system-setup-screens https://youtu.be/tL6Ygr1BuDY First Program https://accautomation.ca/c-more-ea9-hmi-series-panel-first-program Establishing Communication and Updating Firmware Video https://youtu.be/WTHw1p-iJFE First Program Video https://youtu.be/5c8ZsdK5dak Panel to PLC and PLC to Panel Settings https://accautomation.ca/c-more-ea9-hmi-series-panel-to-plc-and-plc-to-panel-settings/ https://youtu.be/b_KsLBDrtOU Common Screen Menu https://accautomation.ca/c-more-ea9-hmi-series-panel-common-screen-menu https://youtu.be/OGtA9RR-dc4 Simulate Project https://accautomation.ca/c-more-ea9-hmi-series-panel-simulate-project https://youtu.be/fx-1rucSE4g Object List Shapes https://accautomation.ca/c-more-ea9-hmi-series-panel-object-list-shapes https://youtu.be/JeTjaTn9OVc Object List Buttons https://accautomation.ca/c-more-ea9-hmi-series-panel-object-list-buttons https://youtu.be/lk2aHQtKzEg Object List Indicators https://accautomation.ca/c-more-ea9-hmi-series-panel-object-list-indicators https://youtu.be/9XKnXu6XKak Object List Entry https://accautomation.ca/c-more-ea9-hmi-series-panel-object-list-entry https://youtu.be/xob4NZ-dqoo Object List Meters and Graphs https://accautomation.ca/c-more-ea9-hmi-series-panel-object-list-meters-and-graphs https://youtu.be/dmebD7vhkds Object List Bitmaps https://accautomation.ca/c-more-ea9-hmi-series-panel-object-list-bitmaps https://youtu.be/P_uNunjo91Q Object List Recipe https://accautomation.ca/c-more-ea9-hmi-series-panel-object-list-recipe https://youtu.be/h27EE2IWyHw Define Custom Keypad https://accautomation.ca/c-more-ea9-hmi-series-panel-define-custom-keypad https://youtu.be/JPn9s4fRGvE Object List Alarms https://accautomation.ca/c-more-ea9-hmi-series-panel-object-list-alarms https://youtu.be/aCtzD60icGA Object List Text https://accautomation.ca/c-more-ea9-hmi-series-panel-object-list-text https://youtu.be/NNYFIQ9Z0CA Object List Clock https://accautomation.ca/c-more-ea9-hmi-series-panel-object-list-clock https://youtu.be/pomvTvld-pA Barcode Scanner Input https://accautomation.ca/c-more-ea9-hmi-series-panel-barcode-scanner-input https://youtu.be/dLLlC71-B8Y Web Server and Remote Access https://accautomation.ca/c-more-ea9-hmi-series-panel-web-server-and-remote-access https://youtu.be/0r33T1gL8lA Data Logging https://accautomation.ca/c-more-ea9-hmi-series-panel-data-logging https://youtu.be/Kc87v1JqolQ FTP File Transfer Protocol https://accautomation.ca/c-more-ea9-hmi-series-panel-ftp-file-transfer-protocol https://youtu.be/b5TmA5sUdFE Sending Email https://accautomation.ca/c-more-ea9-hmi-series-panel-sending-email https://youtu.be/0Pbmlo9pGYQ There are several reasons that we are using the EA9-T10CL C-More HMI Panel. Here are a few: • Touch screen display (LCD) 280 NITS display brightness • 10.4" diagonal color TFT (Thin Film Transistor) • Analog resistive (1024 X 1024) touch screen allowing unlimited touch areas • EA9-PGMSW programming software • 800 x 600-pixel display • 64K colors • 50,000-hour average backlight half-life • USB port B (program/download) and USB port A (USB device options) • Ethernet 10/100 Base-T port (program/download & PLC communication • Remote Internet Access • Serial PLC interface (RS-232/422/485) • One built-in SD memory card slot • 12–24 VDC powered (18W), 110VAC power adapter (optional) • Audio Line Out, stereo - requires amplifier and speaker(s) • 26MB project memory • Data logging • 0 to 50°C [32 to 122°F] operating temperature range • NEMA 4/4X, IP65 compliant when mounted correctly, indoor use only • Slim design saves panel space • UL, cUL & CE agency approvals • 2-year warranty from date of purchase https://www.accautomation.ca
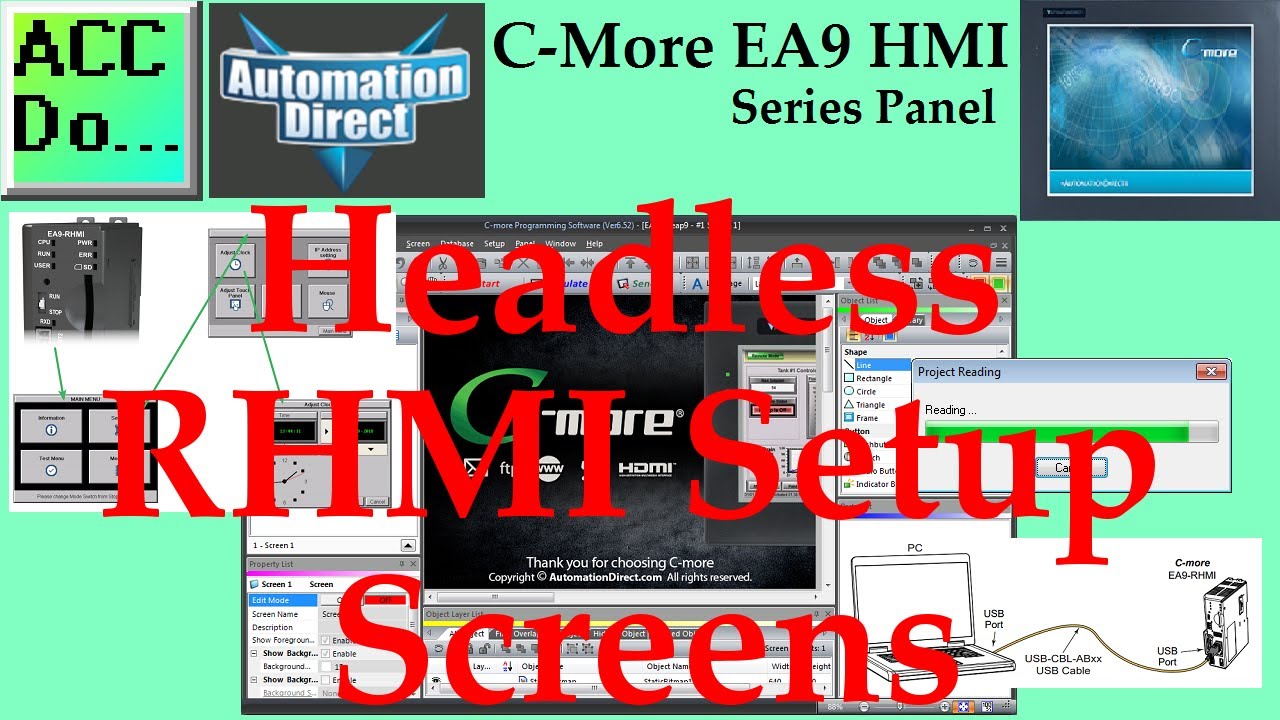
C-More EA9 HMI Series Headless RHMI Setup Screens
13K views · Oct 13, 2022 accautomation.ca
We will now look at the cmore ea9 hmi setup screens. The C-more headless EA9-RHMI is programmed using the C-more Programming Software, EA9-PGMSW. The developed project is transferred from the PC to the HMI by either a USB or an Ethernet connection. Previously we used the Ethernet connection to establish communication. We will be using the USB connection to establish communication, save the program, and review the setup screens of the Headless C-more. Let's get started. More information can be obtained on our website. This includes all of the links mentioned in this video. https://accautomation.ca/c-more-ea9-hmi-series-headless-rhmi-setup-screens Previously we have discussed the following in our C-More HMI Panel: System Hardware https://accautomation.ca/c-more-micro-hmi-system-hardware Powering the Unit https://youtu.be/BIGrOvxlDTI Installing the Software https://accautomation.ca/c-more-ea9-hmi-series-panel-installing-the-software https://youtu.be/6EnyUbEp4As System Setup Screens https://accautomation.ca/c-more-ea9-hmi-series-panel-system-setup-screens https://youtu.be/tL6Ygr1BuDY First Program https://accautomation.ca/c-more-ea9-hmi-series-panel-first-program Establishing Communication and Updating Firmware Video https://youtu.be/WTHw1p-iJFE First Program Video https://youtu.be/5c8ZsdK5dak Panel to PLC and PLC to Panel Settings https://accautomation.ca/c-more-ea9-hmi-series-panel-to-plc-and-plc-to-panel-settings/ https://youtu.be/b_KsLBDrtOU Common Screen Menu https://accautomation.ca/c-more-ea9-hmi-series-panel-common-screen-menu https://youtu.be/OGtA9RR-dc4 Simulate Project https://accautomation.ca/c-more-ea9-hmi-series-panel-simulate-project https://youtu.be/fx-1rucSE4g Object List Shapes https://accautomation.ca/c-more-ea9-hmi-series-panel-object-list-shapes https://youtu.be/JeTjaTn9OVc Object List Buttons https://accautomation.ca/c-more-ea9-hmi-series-panel-object-list-buttons https://youtu.be/lk2aHQtKzEg Object List Indicators https://accautomation.ca/c-more-ea9-hmi-series-panel-object-list-indicators https://youtu.be/9XKnXu6XKak Object List Entry https://accautomation.ca/c-more-ea9-hmi-series-panel-object-list-entry https://youtu.be/xob4NZ-dqoo Object List Meters and Graphs https://accautomation.ca/c-more-ea9-hmi-series-panel-object-list-meters-and-graphs https://youtu.be/dmebD7vhkds Object List Bitmaps https://accautomation.ca/c-more-ea9-hmi-series-panel-object-list-bitmaps https://youtu.be/P_uNunjo91Q Object List Recipe https://accautomation.ca/c-more-ea9-hmi-series-panel-object-list-recipe https://youtu.be/h27EE2IWyHw Define Custom Keypad https://accautomation.ca/c-more-ea9-hmi-series-panel-define-custom-keypad https://youtu.be/JPn9s4fRGvE Object List Alarms https://accautomation.ca/c-more-ea9-hmi-series-panel-object-list-alarms https://youtu.be/aCtzD60icGA Object List Text https://accautomation.ca/c-more-ea9-hmi-series-panel-object-list-text https://youtu.be/NNYFIQ9Z0CA Object List Clock https://accautomation.ca/c-more-ea9-hmi-series-panel-object-list-clock https://youtu.be/pomvTvld-pA Barcode Scanner Input https://accautomation.ca/c-more-ea9-hmi-series-panel-barcode-scanner-input https://youtu.be/dLLlC71-B8Y Web Server and Remote Access https://accautomation.ca/c-more-ea9-hmi-series-panel-web-server-and-remote-access https://youtu.be/0r33T1gL8lA Data Logging https://accautomation.ca/c-more-ea9-hmi-series-panel-data-logging https://youtu.be/Kc87v1JqolQ FTP File Transfer Protocol https://accautomation.ca/c-more-ea9-hmi-series-panel-ftp-file-transfer-protocol https://youtu.be/b5TmA5sUdFE Sending Email https://accautomation.ca/c-more-ea9-hmi-series-panel-sending-email https://youtu.be/0Pbmlo9pGYQ Headless RHMI Panel https://accautomation.ca/c-more-ea9-hmi-series-headless-rhmi-panel Headless RHMI Panel Unboxing - Video https://youtu.be/Pi2NlVhPxg8 Headless RHMI Panel Establish Communication - Video https://youtu.be/xeOCzc9vJAQ There are several reasons that we are using the EA9-T10CL C-More HMI Panel. Here are a few: • Touch screen display (LCD) 280 NITS display brightness • 10.4" diagonal color TFT (Thin Film Transistor) • Analog resistive (1024 X 1024) touch screen allowing unlimited touch areas • EA9-PGMSW programming software • 800 x 600-pixel display • 64K colors • 50,000-hour average backlight half-life • USB port B (program/download) and USB port A (USB device options) • Ethernet 10/100 Base-T port (program/download & PLC communication • Remote Internet Access • Serial PLC interface (RS-232/422/485) • One built-in SD memory card slot • 12–24 VDC powered (18W), 110VAC power adapter (optional) • Audio Line Out, stereo - requires amplifier and speaker(s) • 26MB project memory • Data logging • 0 to 50°C [32 to 122°F] operating temperature range • NEMA 4/4X, IP65 compliant when mounted correctly, indoor use only • Slim design saves panel space • UL, cUL & CE agency approvals • 2-year warranty from date of purchase https://www.accautomation.ca
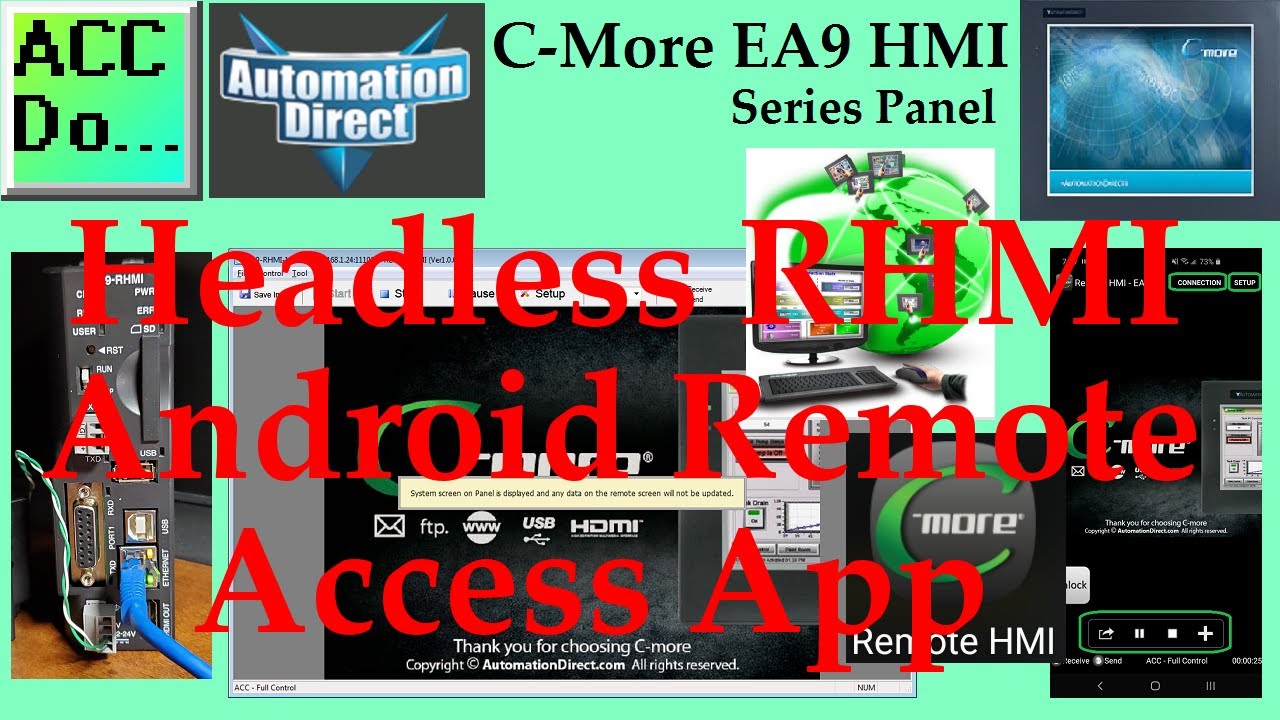
C-More EA9 HMI Series Headless Android Remote Access App
2K views · Oct 13, 2022 accautomation.ca
Remote access will allow for viewing or controlling the C-More EA9 HMI series. We can use any windows based machine or the C-More remote HMI App from the Apple iTunes store, Google Play, or Amazon App Store for mobile devices. This software is available free of charge. Setting up the EA9 series for remote access and control through the C-More programming software to the HMI. We will be downloading the Windows application from the c-more panel. This is done through the web browser of your computer. We will also look at the c-more remote HMI app from Google play. Let’s get started. More information can be obtained on our website. This includes all of the links mentioned in this video. https://accautomation.ca/c-more-ea9-hmi-series-headless-rhmi-remote-control Windows Remote Access Console Video https://youtu.be/ZoCX-6zZCT0 Android Remote Access App Video https://youtu.be/jUe2qyZl7gg Previously we have discussed the following in our C-More HMI Panel: Installing the Software https://accautomation.ca/c-more-ea9-hmi-series-panel-installing-the-software https://youtu.be/6EnyUbEp4As System Setup Screens https://accautomation.ca/c-more-ea9-hmi-series-panel-system-setup-screens https://youtu.be/tL6Ygr1BuDY First Program https://accautomation.ca/c-more-ea9-hmi-series-panel-first-program Establishing Communication and Updating Firmware Video https://youtu.be/WTHw1p-iJFE First Program Video https://youtu.be/5c8ZsdK5dak Panel to PLC and PLC to Panel Settings https://accautomation.ca/c-more-ea9-hmi-series-panel-to-plc-and-plc-to-panel-settings/ https://youtu.be/b_KsLBDrtOU Common Screen Menu https://accautomation.ca/c-more-ea9-hmi-series-panel-common-screen-menu https://youtu.be/OGtA9RR-dc4 Simulate Project https://accautomation.ca/c-more-ea9-hmi-series-panel-simulate-project https://youtu.be/fx-1rucSE4g Object List Buttons https://accautomation.ca/c-more-ea9-hmi-series-panel-object-list-buttons https://youtu.be/lk2aHQtKzEg Object List Indicators https://accautomation.ca/c-more-ea9-hmi-series-panel-object-list-indicators https://youtu.be/9XKnXu6XKak Object List Entry https://accautomation.ca/c-more-ea9-hmi-series-panel-object-list-entry https://youtu.be/xob4NZ-dqoo Object List Meters and Graphs https://accautomation.ca/c-more-ea9-hmi-series-panel-object-list-meters-and-graphs https://youtu.be/dmebD7vhkds Object List Bitmaps https://accautomation.ca/c-more-ea9-hmi-series-panel-object-list-bitmaps https://youtu.be/P_uNunjo91Q Object List Recipe https://accautomation.ca/c-more-ea9-hmi-series-panel-object-list-recipe https://youtu.be/h27EE2IWyHw Object List Alarms https://accautomation.ca/c-more-ea9-hmi-series-panel-object-list-alarms https://youtu.be/aCtzD60icGA Object List Text https://accautomation.ca/c-more-ea9-hmi-series-panel-object-list-text https://youtu.be/NNYFIQ9Z0CA Object List Clock https://accautomation.ca/c-more-ea9-hmi-series-panel-object-list-clock https://youtu.be/pomvTvld-pA Barcode Scanner Input https://accautomation.ca/c-more-ea9-hmi-series-panel-barcode-scanner-input https://youtu.be/dLLlC71-B8Y Web Server and Remote Access https://accautomation.ca/c-more-ea9-hmi-series-panel-web-server-and-remote-access https://youtu.be/0r33T1gL8lA Data Logging https://accautomation.ca/c-more-ea9-hmi-series-panel-data-logging https://youtu.be/Kc87v1JqolQ FTP File Transfer Protocol https://accautomation.ca/c-more-ea9-hmi-series-panel-ftp-file-transfer-protocol https://youtu.be/b5TmA5sUdFE Sending Email https://accautomation.ca/c-more-ea9-hmi-series-panel-sending-email https://youtu.be/0Pbmlo9pGYQ Headless RHMI Panel https://accautomation.ca/c-more-ea9-hmi-series-headless-rhmi-panel Headless RHMI Panel Unboxing - Video https://youtu.be/Pi2NlVhPxg8 Headless RHMI Panel Establish Communication - Video https://youtu.be/xeOCzc9vJAQ Headless RHMI Setup Screens https://accautomation.ca/c-more-ea9-hmi-series-headless-rhmi-setup-screens https://youtu.be/goxtiIdATAM There are several reasons that we are using the EA9-T10CL C-More HMI Panel. Here are a few: • Touch screen display (LCD) 280 NITS display brightness • 10.4” diagonal color TFT (Thin Film Transistor) • Analog resistive (1024 X 1024) touch screen allowing unlimited touch areas • EA9-PGMSW programming software • 800 x 600-pixel display • 64K colors • 50,000-hour average backlight half-life • USB port B (program/download) and USB port A (USB device options) • Ethernet 10/100 Base-T port (program/download & PLC communication • Remote Internet Access • Serial PLC interface (RS-232/422/485) • One built-in SD memory card slot • 12–24 VDC powered (18W), 110VAC power adapter (optional) • Audio Line Out, stereo - requires amplifier and speaker(s) • 26MB project memory • Data logging • 0 to 50°C [32 to 122°F] operating temperature range • NEMA 4/4X, IP65 compliant when mounted correctly, indoor use only • Slim design saves panel space • UL, cUL & CE agency approvals • 2-year warranty from date of purchase ACC Automation https://www.accautomation.ca
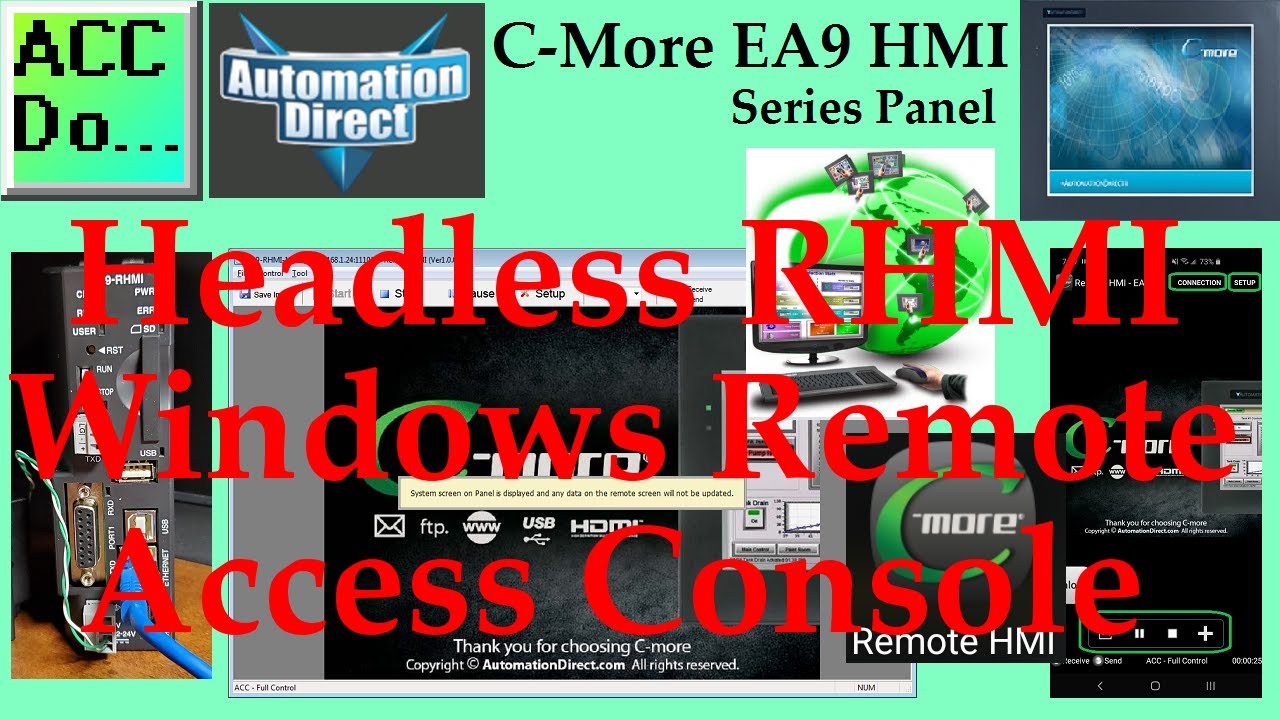
C-More EA9 HMI Headless RHMI Windows Remote Access App
2K views · Oct 13, 2022 accautomation.ca
Remote access will allow for viewing or controlling the C-More EA9 HMI series. We can use any windows based machine or the C-More remote HMI App from the Apple iTunes store, Google Play, or Amazon App Store for mobile devices. This software is available free of charge. Setting up the EA9 series for remote access and control through the C-More programming software to the HMI. We will be downloading the Windows application from the c-more panel. This is done through the web browser of your computer. We will also look at the c-more remote HMI app from Google play. Let’s get started. More information can be obtained on our website. This includes all of the links mentioned in this video. https://accautomation.ca/c-more-ea9-hmi-series-headless-rhmi-remote-control Windows Remote Access Console Video https://youtu.be/ZoCX-6zZCT0 Android Remote Access App Video https://youtu.be/jUe2qyZl7gg Previously we have discussed the following in our C-More HMI Panel: Installing the Software https://accautomation.ca/c-more-ea9-hmi-series-panel-installing-the-software https://youtu.be/6EnyUbEp4As System Setup Screens https://accautomation.ca/c-more-ea9-hmi-series-panel-system-setup-screens https://youtu.be/tL6Ygr1BuDY First Program https://accautomation.ca/c-more-ea9-hmi-series-panel-first-program Establishing Communication and Updating Firmware Video https://youtu.be/WTHw1p-iJFE First Program Video https://youtu.be/5c8ZsdK5dak Panel to PLC and PLC to Panel Settings https://accautomation.ca/c-more-ea9-hmi-series-panel-to-plc-and-plc-to-panel-settings/ https://youtu.be/b_KsLBDrtOU Common Screen Menu https://accautomation.ca/c-more-ea9-hmi-series-panel-common-screen-menu https://youtu.be/OGtA9RR-dc4 Simulate Project https://accautomation.ca/c-more-ea9-hmi-series-panel-simulate-project https://youtu.be/fx-1rucSE4g Object List Buttons https://accautomation.ca/c-more-ea9-hmi-series-panel-object-list-buttons https://youtu.be/lk2aHQtKzEg Object List Indicators https://accautomation.ca/c-more-ea9-hmi-series-panel-object-list-indicators https://youtu.be/9XKnXu6XKak Object List Entry https://accautomation.ca/c-more-ea9-hmi-series-panel-object-list-entry https://youtu.be/xob4NZ-dqoo Object List Meters and Graphs https://accautomation.ca/c-more-ea9-hmi-series-panel-object-list-meters-and-graphs https://youtu.be/dmebD7vhkds Object List Bitmaps https://accautomation.ca/c-more-ea9-hmi-series-panel-object-list-bitmaps https://youtu.be/P_uNunjo91Q Object List Recipe https://accautomation.ca/c-more-ea9-hmi-series-panel-object-list-recipe https://youtu.be/h27EE2IWyHw Object List Alarms https://accautomation.ca/c-more-ea9-hmi-series-panel-object-list-alarms https://youtu.be/aCtzD60icGA Object List Text https://accautomation.ca/c-more-ea9-hmi-series-panel-object-list-text https://youtu.be/NNYFIQ9Z0CA Object List Clock https://accautomation.ca/c-more-ea9-hmi-series-panel-object-list-clock https://youtu.be/pomvTvld-pA Barcode Scanner Input https://accautomation.ca/c-more-ea9-hmi-series-panel-barcode-scanner-input https://youtu.be/dLLlC71-B8Y Web Server and Remote Access https://accautomation.ca/c-more-ea9-hmi-series-panel-web-server-and-remote-access https://youtu.be/0r33T1gL8lA Data Logging https://accautomation.ca/c-more-ea9-hmi-series-panel-data-logging https://youtu.be/Kc87v1JqolQ FTP File Transfer Protocol https://accautomation.ca/c-more-ea9-hmi-series-panel-ftp-file-transfer-protocol https://youtu.be/b5TmA5sUdFE Sending Email https://accautomation.ca/c-more-ea9-hmi-series-panel-sending-email https://youtu.be/0Pbmlo9pGYQ Headless RHMI Panel https://accautomation.ca/c-more-ea9-hmi-series-headless-rhmi-panel Headless RHMI Panel Unboxing - Video https://youtu.be/Pi2NlVhPxg8 Headless RHMI Panel Establish Communication - Video https://youtu.be/xeOCzc9vJAQ Headless RHMI Setup Screens https://accautomation.ca/c-more-ea9-hmi-series-headless-rhmi-setup-screens https://youtu.be/goxtiIdATAM There are several reasons that we are using the EA9-T10CL C-More HMI Panel. Here are a few: • Touch screen display (LCD) 280 NITS display brightness • 10.4” diagonal color TFT (Thin Film Transistor) • Analog resistive (1024 X 1024) touch screen allowing unlimited touch areas • EA9-PGMSW programming software • 800 x 600-pixel display • 64K colors • 50,000-hour average backlight half-life • USB port B (program/download) and USB port A (USB device options) • Ethernet 10/100 Base-T port (program/download & PLC communication • Remote Internet Access • Serial PLC interface (RS-232/422/485) • One built-in SD memory card slot • 12–24 VDC powered (18W), 110VAC power adapter (optional) • Audio Line Out, stereo - requires amplifier and speaker(s) • 26MB project memory • Data logging • 0 to 50°C [32 to 122°F] operating temperature range • NEMA 4/4X, IP65 compliant when mounted correctly, indoor use only • Slim design saves panel space • UL, cUL & CE agency approvals • 2-year warranty from date of purchase ACC Automation https://www.accautomation.ca
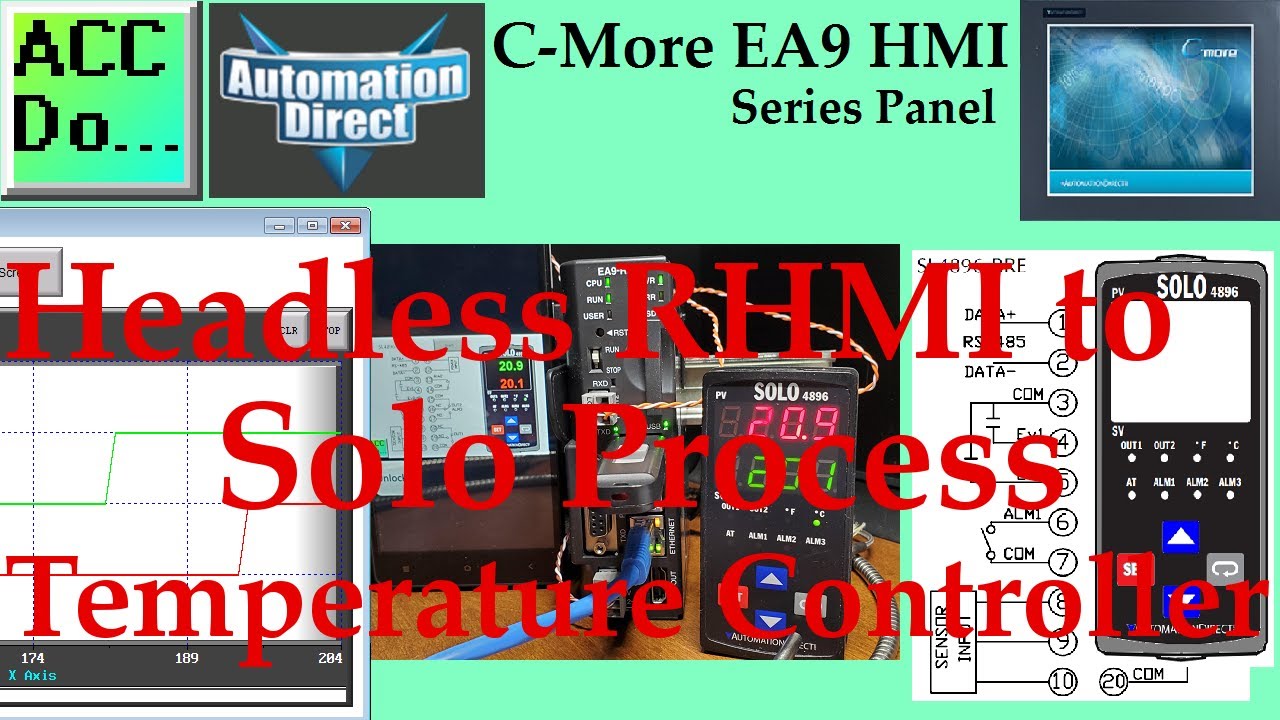
C-More EA9 HMI Series to Solo Process Temperature Controller
7K views · Oct 13, 2022 accautomation.ca
The cmore EA9 HMI can connect to the Solo process temperature controller using the built-in RS485 serial communication port. This will connect up to 32 solo units to the HMI for display and control. We will be setting up our headless RHMI cmore EA9 to communicate to the Solo process temperature controller. Using the information we discussed previously, we will set up data logging, file transfer protocol (FTP), bitmaps, etc. We will also set up an object library of the Solo 4896. This will consist of a bitmap, numeric display, numeric edit, indication lights, and up and down increment. The system will then be controlled using the remote applications discussed last time. Let's get started. More information can be obtained on our website. This includes all of the links mentioned in this video. https://accautomation.ca/c-more-ea9-hmi-series-headless-rhmi-to-solo-process-temperature-controller Previously we have discussed some of the following in our C-More HMI Panel: Installing the Software https://accautomation.ca/c-more-ea9-hmi-series-panel-installing-the-software https://youtu.be/6EnyUbEp4As First Program https://accautomation.ca/c-more-ea9-hmi-series-panel-first-program Establishing Communication and Updating Firmware Video https://youtu.be/WTHw1p-iJFE Simulate Project https://accautomation.ca/c-more-ea9-hmi-series-panel-simulate-project https://youtu.be/fx-1rucSE4g Object List Buttons https://accautomation.ca/c-more-ea9-hmi-series-panel-object-list-buttons https://youtu.be/lk2aHQtKzEg Object List Indicators https://accautomation.ca/c-more-ea9-hmi-series-panel-object-list-indicators https://youtu.be/9XKnXu6XKak Object List Entry https://accautomation.ca/c-more-ea9-hmi-series-panel-object-list-entry https://youtu.be/xob4NZ-dqoo Object List Meters and Graphs https://accautomation.ca/c-more-ea9-hmi-series-panel-object-list-meters-and-graphs https://youtu.be/dmebD7vhkds Object List Bitmaps https://accautomation.ca/c-more-ea9-hmi-series-panel-object-list-bitmaps https://youtu.be/P_uNunjo91Q Object List Recipe https://accautomation.ca/c-more-ea9-hmi-series-panel-object-list-recipe https://youtu.be/h27EE2IWyHw Define Custom Keypad https://accautomation.ca/c-more-ea9-hmi-series-panel-define-custom-keypad https://youtu.be/JPn9s4fRGvE Object List Alarms https://accautomation.ca/c-more-ea9-hmi-series-panel-object-list-alarms https://youtu.be/aCtzD60icGA Object List Text https://accautomation.ca/c-more-ea9-hmi-series-panel-object-list-text https://youtu.be/NNYFIQ9Z0CA Object List Clock https://accautomation.ca/c-more-ea9-hmi-series-panel-object-list-clock https://youtu.be/pomvTvld-pA Barcode Scanner Input https://accautomation.ca/c-more-ea9-hmi-series-panel-barcode-scanner-input https://youtu.be/dLLlC71-B8Y Web Server and Remote Access https://accautomation.ca/c-more-ea9-hmi-series-panel-web-server-and-remote-access https://youtu.be/0r33T1gL8lA Data Logging https://accautomation.ca/c-more-ea9-hmi-series-panel-data-logging https://youtu.be/Kc87v1JqolQ FTP File Transfer Protocol https://accautomation.ca/c-more-ea9-hmi-series-panel-ftp-file-transfer-protocol https://youtu.be/b5TmA5sUdFE Sending Email https://accautomation.ca/c-more-ea9-hmi-series-panel-sending-email https://youtu.be/0Pbmlo9pGYQ Headless RHMI Panel https://accautomation.ca/c-more-ea9-hmi-series-headless-rhmi-panel Headless RHMI Panel Unboxing - Video https://youtu.be/Pi2NlVhPxg8 Headless RHMI Panel Establish Communication - Video https://youtu.be/xeOCzc9vJAQ Headless RHMI Setup Screens https://accautomation.ca/c-more-ea9-hmi-series-headless-rhmi-setup-screens https://youtu.be/goxtiIdATAM Headless RHMI Remote Control https://accautomation.ca/c-more-ea9-hmi-series-headless-rhmi-remote-control Windows Remote Access Console https://youtu.be/ZoCX-6zZCT0 Android Remote Access App https://youtu.be/jUe2qyZl7gg There are several reasons that we are using the EA9-T10CL C-More HMI Panel. Here are a few: • Touch screen display (LCD) 280 NITS display brightness • 10.4" diagonal color TFT (Thin Film Transistor) • Analog resistive (1024 X 1024) touch screen allowing unlimited touch areas • EA9-PGMSW programming software • 800 x 600-pixel display • 64K colors • 50,000-hour average backlight half-life • USB port B (program/download) and USB port A (USB device options) • Ethernet 10/100 Base-T port (program/download & PLC communication • Remote Internet Access • Serial PLC interface (RS-232/422/485) • One built-in SD memory card slot • 12–24 VDC powered (18W), 110VAC power adapter (optional) • Audio Line Out, stereo - requires amplifier and speaker(s) • 26MB project memory • Data logging • 0 to 50°C [32 to 122°F] operating temperature range • NEMA 4/4X, IP65 compliant when mounted correctly, indoor use only • Slim design saves panel space • UL, cUL & CE agency approvals • 2-year warranty from date of purchase ACC Automation https://www.accautomation.ca
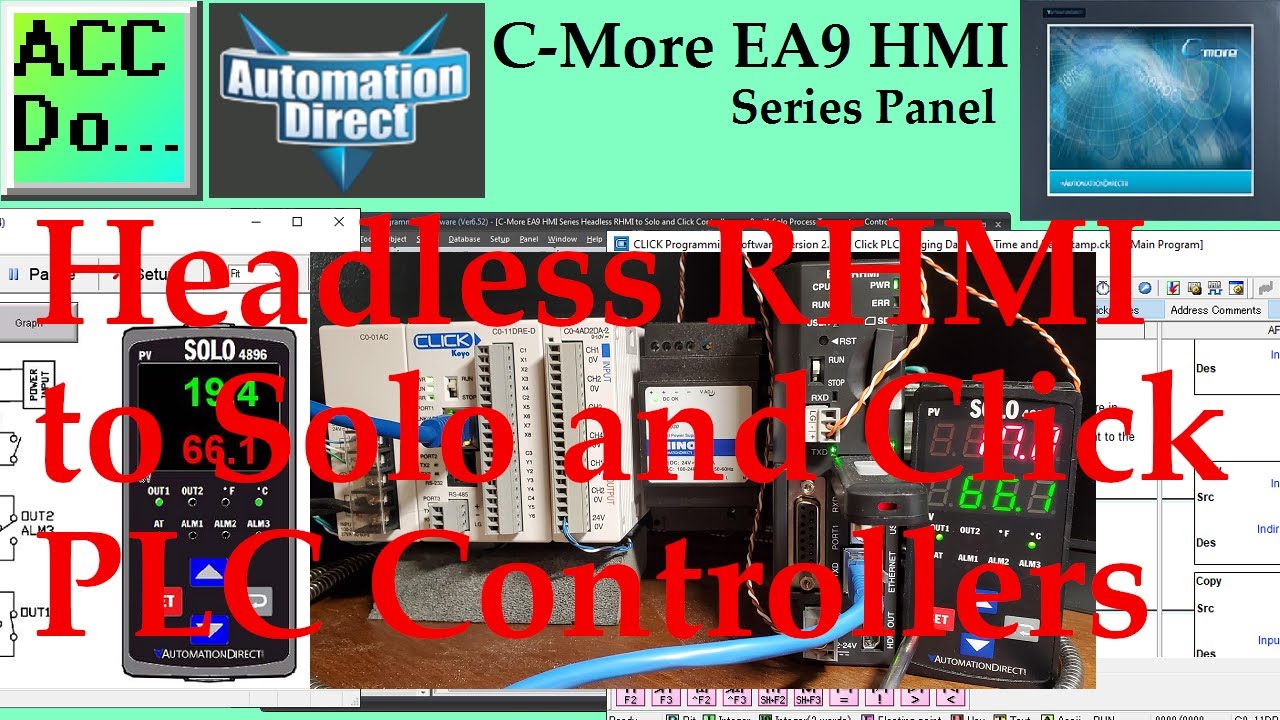
C-More EA9 HMI Series to Solo and Click PLC Controllers
726 views · Oct 13, 2022 accautomation.ca
We will now look at the c-more ea9 HMI headless RHMI to the Solo (Process and Temperature) and Click PLC controllers. The cmore EA9 HMI has an event manager that can be used to trigger actions based on various events. We will be adding a Click PLC to our headless RHMI cmore EA9 program that we created last time to communicate to the Solo process temperature controller. The Solo will be connected via RS485 using the Modbus RTU protocol. We will connect the Click PLC to the Ethernet port using the Modbus TCP protocol. Using the event manager, we will be writing the set value (SV) and present value (PV) of the solo process temperature controller to the Click PLC. We will also allow the Click PLC to write the SV into the Solo. This is in addition to writing the set value via remote apps and the Solo. Let's gLet'sarted. More information can be obtained on our website. This includes all of the links mentioned in this video. https://accautomation.ca/c-more-ea9-hmi-series-headless-rhmi-to-solo-and-click-plc-controllers Here is a link to the entire EA9 Series: https://accautomation.ca/series/c-more-hmi-series-panel/ Previously we have discussed the following in our C-More HMI Panel: Installing the Software https://accautomation.ca/c-more-ea9-hmi-series-panel-installing-the-software https://youtu.be/6EnyUbEp4As First Program https://accautomation.ca/c-more-ea9-hmi-series-panel-first-program Video https://youtu.be/5c8ZsdK5dak Simulate Project https://accautomation.ca/c-more-ea9-hmi-series-panel-simulate-project https://youtu.be/fx-1rucSE4g Object List Buttons https://accautomation.ca/c-more-ea9-hmi-series-panel-object-list-buttons https://youtu.be/lk2aHQtKzEg Object List Indicators https://accautomation.ca/c-more-ea9-hmi-series-panel-object-list-indicators https://youtu.be/9XKnXu6XKak Object List Entry https://accautomation.ca/c-more-ea9-hmi-series-panel-object-list-entry https://youtu.be/xob4NZ-dqoo Object List Meters and Graphs https://accautomation.ca/c-more-ea9-hmi-series-panel-object-list-meters-and-graphs https://youtu.be/dmebD7vhkds Object List Bitmaps https://accautomation.ca/c-more-ea9-hmi-series-panel-object-list-bitmaps https://youtu.be/P_uNunjo91Q Object List Recipe https://accautomation.ca/c-more-ea9-hmi-series-panel-object-list-recipe https://youtu.be/h27EE2IWyHw Object List Alarms https://accautomation.ca/c-more-ea9-hmi-series-panel-object-list-alarms https://youtu.be/aCtzD60icGA Object List Clock https://accautomation.ca/c-more-ea9-hmi-series-panel-object-list-clock https://youtu.be/pomvTvld-pA Web Server and Remote Access https://accautomation.ca/c-more-ea9-hmi-series-panel-web-server-and-remote-access https://youtu.be/0r33T1gL8lA Data Logging https://accautomation.ca/c-more-ea9-hmi-series-panel-data-logging https://youtu.be/Kc87v1JqolQ FTP File Transfer Protocol https://accautomation.ca/c-more-ea9-hmi-series-panel-ftp-file-transfer-protocol https://youtu.be/b5TmA5sUdFE Sending Email https://accautomation.ca/c-more-ea9-hmi-series-panel-sending-email https://youtu.be/0Pbmlo9pGYQ Headless RHMI Panel https://accautomation.ca/c-more-ea9-hmi-series-headless-rhmi-panel Headless RHMI Panel Unboxing - Video https://youtu.be/Pi2NlVhPxg8 Headless RHMI Panel Establish Communication - Video https://youtu.be/xeOCzc9vJAQ Headless RHMI Setup Screens https://accautomation.ca/c-more-ea9-hmi-series-headless-rhmi-setup-screens https://youtu.be/goxtiIdATAM Headless RHMI Remote Control https://accautomation.ca/c-more-ea9-hmi-series-headless-rhmi-remote-control Windows Remote Access Console https://youtu.be/ZoCX-6zZCT0 Android Remote Access App https://youtu.be/jUe2qyZl7gg Headless RHMI to Solo Process Temperature Controller https://accautomation.ca/c-more-ea9-hmi-series-headless-rhmi-to-solo-process-temperature-controller https://youtu.be/X5ZDUlGFNbE There are several reasons that we are using the EA9-T10CL C-More HMI Panel. Here are a few: • Touch screen display (LCD) 280 NITS display brightness • 10.4" diagonal color TFT (Thin Film Transistor) • Analog resistive (1024 X 1024) touch screen allowing unlimited touch areas • EA9-PGMSW programming software • 800 x 600-pixel display • 64K colors • 50,000-hour average backlight half-life • USB port B (program/download) and USB port A (USB device options) • Ethernet 10/100 Base-T port (program/download & PLC communication • Remote Internet Access • Serial PLC interface (RS-232/422/485) • One built-in SD memory card slot • 12–24 VDC powered (18W), 110VAC power adapter (optional) • Audio Line Out, stereo - requires amplifier and speaker(s) • 26MB project memory • Data logging • 0 to 50°C [32 to 122°F] operating temperature range • NEMA 4/4X, IP65 compliant when mounted correctly, indoor use only • Slim design saves panel space • UL, cUL & CE agency approvals • 2-year warranty from date of purchase ACC Automation https://www.accautomation.ca
Omron CP1H PLC to C-More HMI EA9 RHMI Communication
7K views · Oct 13, 2022 accautomation.ca
We will now look at the omron plc to cmore hmi communication. This headless HMI will use an android app to display the Omron PLC values on the cmore hmi. Our sample CP1H PLC program will use buttons and indicators to control a start/stop jog circuit. An analog input into the PLC will be scaled and displayed on a gauge and numeric display on our HMI screen. We will also write information to our 7 segment display on the CPU from our HMI screen. Omron serial host link protocol will be used to communicate over an RS485 serial cable. We will demonstrate remote access using our windows and android device. Let’s get started. More information can be obtained on our website. This includes all of the links mentioned in this video. http://accautomation.ca/omron-cp1h-to-c-more-ea9-rhmi-communication 00:00 Introduction 00:32 Hardware 02:43 Omron PLC Program Review 05:12 CMore Program Review 09:05 HMI Web Server / Remote Access 13:40 Testing the program - Windows remote and Android Remote HMI 18:25 Conclusion The C-More EA9 Series of human-machine interfaces (HMI) provides a way for the operator to control and will perform a lot of additional items. The free programming software is very user friendly and fully featured. Here are some of the additional items that this robust and powerful HMI can do besides communicating with programmable logic controllers (PLCs). Send Email – This includes authentication for the email client protocol Log Data – This can log data files to the internal memory or an external thumb drive (32G) FTP Server – Use file transfer protocol to retrieve information from the HMI to a network. This can be done automatically with a batch file. Web Server – This HMI can be a web server on your network Remote Internet Access – Windows, Android, and IOS operating systems have the ability to take advantage of this remote access to the HMI. The programs are free and fully functional. Previously in this Omron CP1H series, we looked at the following: System Hardware http://accautomation.ca/omron-cp1h-system-hardware/ CX-Programmer http://accautomation.ca/omron-cp1h-cx-programmer/ Establish Communication http://accautomation.ca/omron-cp1h-establish-communication/ Omron CP1H Setting, Forcing and Online Editing http://accautomation.ca/omron-cp1h-setting-forcing-and-online-editing/ Omron CP1H Numbering Systems and Addressing http://accautomation.ca/omron-cp1h-numbering-systems-and-addressing/ Omron CP1H Timers http://accautomation.ca/omron-cp1h-timers Omron CP1H Counters http://accautomation.ca/omron-cp1h-counters Omron CP1H Data Movement http://accautomation.ca/omron-cp1h-data-movement Omron CP1H Compare Instructions http://accautomation.ca/omron-cp1h-compare-instructions Omron CP1H Data Shifting Instructions http://accautomation.ca/omron-cp1h-data-shifting-instructions Omron CP1H Math Instructions http://accautomation.ca/omron-cp1h-math-instructions Omron CP1H Data Conversion Instructions http://accautomation.ca/omron-cp1h-data-conversion-instructions Omron CP1H Program Control Instructions http://accautomation.ca/omron-cp1h-program-control-instructions Omron CP1H Table Data Instructions http://accautomation.ca/omron-cp1h-table-data-instructions Omron CP1H Data Control Instructions http://accautomation.ca/omron-cp1h-data-control-instructions Omron CP1H AdvancedHMI Communication http://accautomation.ca/omron-cp1h-advancedhmi-communication https://youtu.be/5_FZ61Ep6u0 There are several reasons why we are using the Omron CP1H Controller. Here are just a few. - Standalone PLC with built-in I/O - Communication ability - Ethernet Port, RS232, RS485 - support for protocols such as Modbus, Host Link, ASCII (No Protocol) - Built-in Analog inputs and outputs - 4 axis control of motion - 4 high-speed counters - powerful instruction set (similar to CS and CJ series) - Ability to expand the system with a variety of modules The Omron CP1 series of programmable logic controllers consists of three different units. CP1E is the cost-effective unit, CP1L is the high performing controller that can come with embedded Ethernet and the CP1H is the position control and comprehensive programmable logic controller. We will be looking a the CP1H for this series, but a majority of the information can be applied to the CP1E and the CP1L controllers as well. http://www.accautomation.ca
Productivity P1AM Arduino Modbus TCP to C-More EA9
159K views · Oct 12, 2022 accautomation.ca
We will now look at P1AM Arduino Modbus TCP communication to the C-More EA9 Series HMI. This will be communicating the Ethernet Modbus TCP protocol. The P1AM will be the server (slave) and the EA9-RHMI client (master). We will be using the remote android and windows app to connect to the C-More EA9 HMI. This will display the information from our Arduino P1AM on our headless unit. Let's get started. More information can be obtained on our website. This includes all of the links mentioned in this video. https://accautomation.ca/p1am-arduino-modbus-tcp-to-c-more-ea9 00:00 Introduction 00:33 P1AM Samples on GitHub 01:50 P1AM Modbus TCP Server (Slave) Program 02:15 P1AM Dependencies (Library) 03:50 MAC and IP address P1AM-ETH shield 04:50 Types of Modbus Addresses 05:59 C-More Program Setup Convert + Settings for Remote Access 09:17 C-More Simulation 10:25 Tag Database 11:23 Hardware review 12:30 Program testing - Downloading 14:04 Remote Access Windows and Android 17:23 Conclusion Here are previous posts in this Productivity Open Arduino Compatible Industrial Controller Series. A full list can be obtained at the following location: https://accautomation.ca/series/productivity-open-arduino-compatible-industrial-controller Industrial Controller Hardware https://accautomation.ca/productivity-open-arduino-compatible-industrial-controller-hardware - Starter Kit Unboxing Video https://youtu.be/y6T8fWKWan8 - Powering Up Video https://youtu.be/PHnLJa6X1d0 Installing the Software https://accautomation.ca/productivity-open-arduino-compatible-industrial-controller-installing-the-Software https://youtu.be/M7Agvhq69og First Program https://accautomation.ca/productivity-open-p1am-industrial-arduino-first-program https://youtu.be/x2yKEw1lWGg Program Structure https://accautomation.ca/productivity-open-p1am-industrial-arduino-program-structure https://youtu.be/a1eimdZpfLg Variables Data Types https://accautomation.ca/productivity-open-p1am-industrial-arduino-variables-data-types https://youtu.be/7C26YtFBC7c Serial Monitor COM https://accautomation.ca/productivity-open-p1am-industrial-arduino-serial-monitor-com https://youtu.be/eDngjuBYCBg Program Control https://accautomation.ca/productivity-open-p1am-industrial-arduino-program-control/ https://youtu.be/-J-Ikt3yWhU Operators https://accautomation.ca/productivity-open-p1am-industrial-arduino-operators https://youtu.be/Q9J7RUXdeEk GPIO Inputs and Outputs https://accautomation.ca/productivity-open-p1am-industrial-arduino-gpio-inputs-and-outputs https://youtu.be/49QPNQu6aaY Math Instructions https://accautomation.ca/productivity-open-p1am-industrial-arduino-math-instructions https://youtu.be/akx61GqRn3M Time Instructions https://accautomation.ca/productivity-open-p1am-industrial-arduino-time-instructions https://youtu.be/ql9ShzOIrqQ P1000 Expansion Analog Combination Module https://accautomation.ca/productivity-open-p1am-industrial-arduino-p1000-expansion-analog-combination-module https://youtu.be/f7myzcPP0_8 PP1000 Expansion Digital Inputs and Outputs Part 1 https://accautomation.ca/productivity-open-p1am-industrial-arduino-p1000-expansion-digital-inputs-and-outputs-part-1 https://youtu.be/Pub7M_NP4rw P1000 Expansion Digital Inputs and Outputs Part 2 https://accautomation.ca/productivity-open-p1am-industrial-arduino-p1000-expansion-digital-inputs-and-outputs-part-2 https://youtu.be/K65luk051gQ Watchdog Timer https://accautomation.ca/productivity-open-p1am-industrial-arduino-watchdog-timer https://youtu.be/t0SydLhJfg4 P1000 Expansion Thermocouple Module https://accautomation.ca/productivity-open-p1am-industrial-arduino-p1000-expansion-thermocouple-module https://youtu.be/ONme9l2HK34 PID Control https://accautomation.ca/productivity-open-p1am-industrial-arduino-pid-control https://youtu.be/QVOwlcccJu0 Arduino Modbus TCP to C-More Micro EA3 https://accautomation.ca/productivity-open-p1am-industrial-arduino-modbus-tcp-to-c-more-micro-ea3 https://youtu.be/xoVg5NfxRtM There are several reasons why we are using the Productivity Open Arduino Compatible Industrial Controller. Here are just a few. - CE and UL certified - Designed to be MKRZero compatible - Industrial shields available - Ethernet and general-purpose IO - 15 Productivity 1000 PLC modules can be added - Customize your system - Use your Arduino programs in the industrial environment - Micro USB port - Power the CPU only and programming - Micro SD card slot - Programmable toggle switch - CPU LED light - Free software - Arduino IDE - Productivity blocks - Program Development Time Saver The Productivity Open Arduino Compatible Industrial Controller currently has all of these features built into the P1AM-100 CPU. https://www.accautomation.ca
C-More EA9 Disable Exponent Notation
180 views · Oct 11, 2022 accautomation.ca
C-More EA9 Disable Exponent Notation Exponent notation is on by default in the EA9 software. This will be displayed usually when you are trying to display very small numbers. An example of this would be an analog value when it is close to 0. To disable, call up the panel manager. Main menu | Setup | Panel Manager... Select the disable exponent notation option. Save and download the program to the C-More HMI controller. You can use the simulator to test. Programming and examples of the C-More EA9 HMI Series Panel: https://accautomation.ca/series/c-more-hmi-series-panel/ There are several reasons that we are using the EA9 C-More HMI Panels. Here are a few: • C-more HMI - Easy to configure, install and maintain... • C-more remote HMI • C-more touch panels - 10 models, 7 screen sizes • EA9-PGMSW programming software - free download • PLC drivers and supported protocols for all of the popular controllers • Free C-More Remote HMI Apps • iPhone / iPad / iPod touch • Android devices • Windows • Data Logging • Web Server • FTP server • Send secured email / SMS messages • Audio Line Out, stereo - requires amplifier and speaker(s) • 2-year warranty from date of purchase #shorts ACC Automation https://accautomation.ca/
C-More EA9 Invisible Pushbutton
8 views · Oct 11, 2022 accautomation.ca
C-More EA9 Invisible Pushbutton Create the Pushbutton. We can make this button invisible in a couple of ways. 1 - Hide it behind another object - Place the Pushbutton on the screen over an existing object. Right-click on the Pushbutton and select "Send to Back" 2 - Change the Pushbutton text and back color to the same as the background color of the page. The C-More programming software simulator is a good way to test this option. Programming and examples of the C-More EA9 HMI Series Panel: https://accautomation.ca/series/c-more-hmi-series-panel/ There are several reasons that we are using the EA9 C-More HMI Panels. Here are a few: • C-more HMI - Easy to configure, install and maintain... • C-more remote HMI • C-more touch panels - 10 models, 7 screen sizes • EA9-PGMSW programming software - free download • PLC drivers and supported protocols for all of the popular controllers • Free C-More Remote HMI Apps • iPhone / iPad / iPod touch • Android devices • Windows • Data Logging • Web Server • FTP server • Send secured email / SMS messages • Audio Line Out, stereo - requires amplifier and speaker(s) • 2-year warranty from date of purchase #shorts ACC Automation https://accautomation.ca/
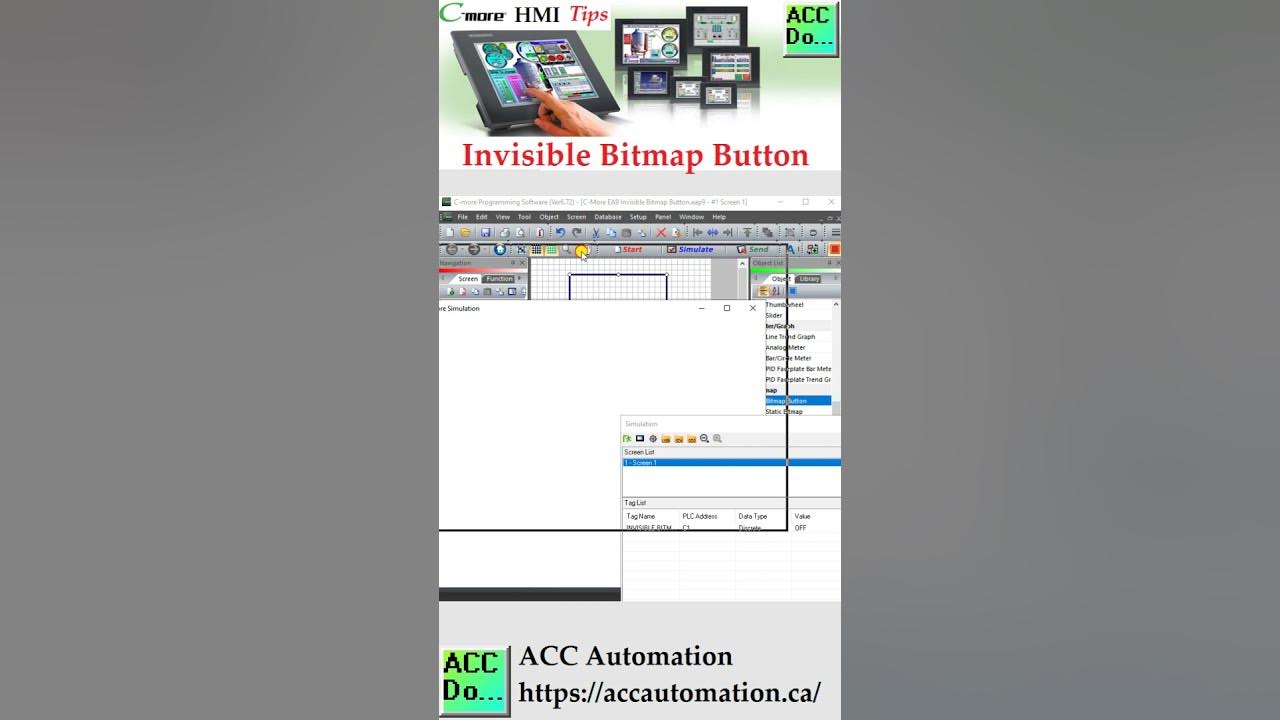
C-More EA9 Invisible Bitmap Button
25 views · Oct 11, 2022 accautomation.ca
An invisible bitmap button can be created by making a bitmap with a solid color. In my case, I have a 300 x 300 pixel 256 BMP picture. This was created in paint. In the C-More EA9 Programming Software callup the Bitmap Button. This is located under the bitmap heading in the objects. You can also use the main menu | Object | Bitmap | Bitmap Button... Read from the disk the solid bitmap you created for both the OFF and ON Bitmaps. Set the transparent color for the ON and OFF Bitmaps to the color of the button. Set the button and indicator tag. Test the invisible bitmap button using the simulator. Programming and examples of the C-More EA9 HMI Series Panel: https://accautomation.ca/series/c-more-hmi-series-panel/ There are several reasons that we are using the EA9 C-More HMI Panels. Here are a few: • C-more HMI - Easy to configure, install and maintain... • C-more remote HMI • C-more touch panels - 10 models, 7 screen sizes • EA9-PGMSW programming software - free download • PLC drivers and supported protocols for all of the popular controllers • Free C-More Remote HMI Apps • iPhone / iPad / iPod touch • Android devices • Windows • Data Logging • Web Server • FTP server • Send secured email / SMS messages • Audio Line Out, stereo - requires amplifier and speaker(s) • 2-year warranty from date of purchase #shorts ACC Automation https://accautomation.ca/
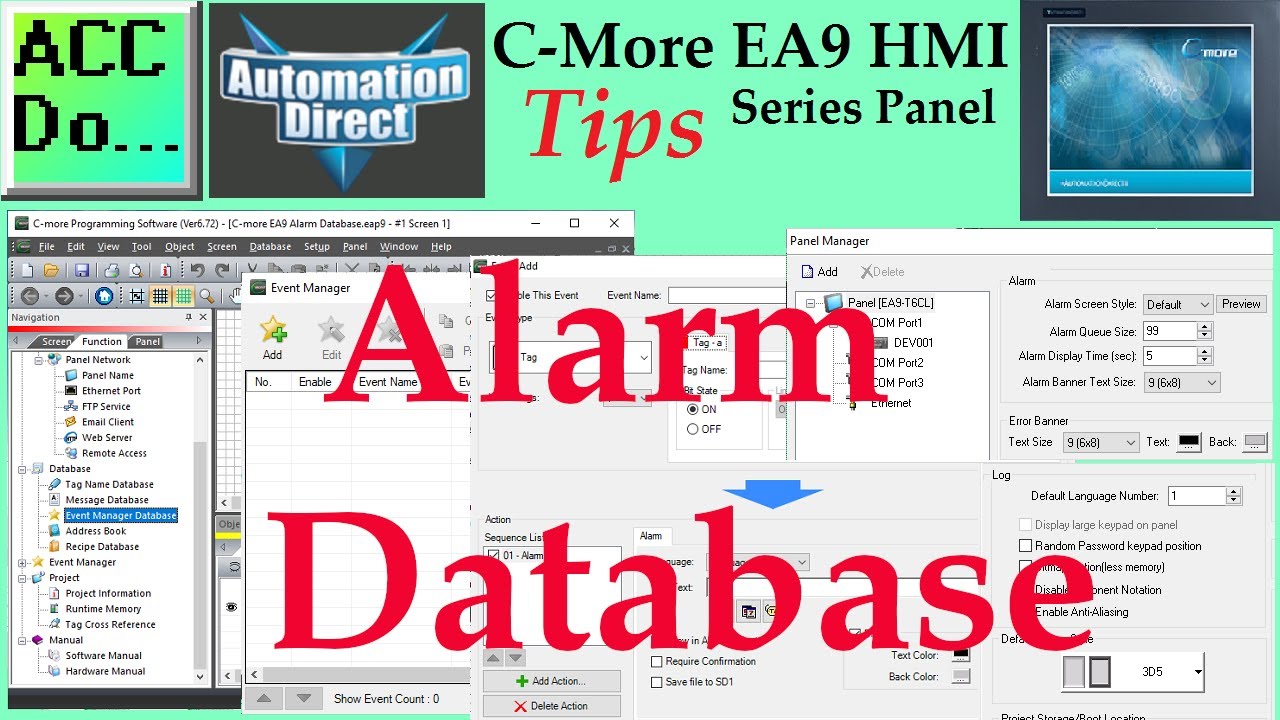
C-more EA9 Alarm Database
34 views · Oct 9, 2022 accautomation.ca
C-more does not have a conventional Alarm Database. Alarms are configured in the Event Manager using an Alarm Action. It allows you to configure other actions in conjunction with the Alarm, such as popping up a Message Box, sending an email, or even initiating a screen change. The Event Manager Database can be called by selecting it under the database in the function tab of the navigation window. Alternatively, you can use the main menu | Database | Event Manager Database... Select the Add button in the event manager window to add an event. The alarm action is the default value for the event. Panel manager can be accessed from the main menu | Setup | Panel Manager... The panel manager will allow you to set up the Alarm parameters such as style, size, time, etc. Programming and examples of the C-More EA9 HMI Series Panel: https://accautomation.ca/series/c-more-hmi-series-panel/ There are several reasons that we are using the EA9 C-More HMI Panels. Here are a few: • C-more HMI - Easy to configure, install and maintain... • C-more remote HMI • C-more touch panels - 10 models, seven-screen sizes • EA9-PGMSW programming software - free download • PLC drivers and supported protocols for all of the popular controllers • Free C-More Remote HMI Apps • iPhone / iPad / iPod touch • Android devices • Windows • Data Logging • Web Server • FTP server • Send secured email / SMS messages • Audio Line Out, stereo - requires amplifier and speaker(s) • 2-year warranty from date of purchase #shorts ACC Automation https://accautomation.ca/
Revolutionizing Industrial Automation - The C More EA9 RHMI ...
3K views · Apr 28, 2024 accautomation.ca
The C-More EA9 HMI Panel comes in a headless version. (EA9-RHMI) All of the great features already built into the EA9 are available with the headless model. This unit can be mounted within the cabinet, and you can decide how to display the information. This user-friendly, time-saving software platform allows your system data to be shown to the operators in new ways thanks to the C-More headless HMI panel. Capabilities like data logging, FTP (File Transfer Protocol), secure email, remote HMI, and data sharing can now be added to existing PLC hardware. The EA9 HMI series can be found here: https://accautomation.ca/series/c-more-hmi-series-panel/ FAQ - Frequently Asked Questions https://accautomation.ca/series/c-more-hmi-series-panel/c-more-ea9-faq/ Here is the original post of the Headless RHMI Panel: https://accautomation.ca/c-more-ea9-hmi-series-headless-rhmi-panel/ Video https://www.youtube.com/watch?v=xeOCzc9vJAQ ACC Automation https://accautomation.ca/
Creating the Ultimate Automation Training Setup - Part 2
3K views · Dec 5, 2024 accautomation.ca
Previously, we learned that only 31% of businesses have fully automated at least one function (McKinsey). There is a massive demand for automation and creating training environments. Using the machine simulator, we utilized the Modbus TCP (Ethernet) Server in the "Easy Transfer Line." This is just one of many pre-built scenes, or you can design your own for your industry. This set the stage for the Productivity PLC Simulator to communicate and control the line. We programmed the PLC, tested, and monitored our system. We will now add a human-machine interface (HMI) to our system. Modifying the PLC logic to accommodate the controls from the touch screen, we will add a C-More CM5 unit. This HMI will communicate with the productivity PLC simulator and the easy transfer line machine. This will create our ultimate automation training environment. Let's get started. Our website post provides effortless access to all the relevant links discussed in the video. We have gathered all the necessary information for your convenience, to all the resources mentioned. https://accautomation.ca/creating-the-ultimate-automation-training-setup2/ 00:00 Creating the Ultimate Automation Training Setup Part 2 01:15 PLC / HMI Program Development 02:32 Modifying the Productivity Suite PLC Program 04:54 Modify the C-More CM5 HMI Program 09:04 Download and Test the HMI program in our Ultimate Automation Environment The EasyPLC Software Suite Series can be found here... https://accautomation.ca/series/easyplc-software-suite/ Some previous posts include the following: EasyPLC Installing the Software https://accautomation.ca/easyplc-installing-the-software/ https://youtu.be/EbWS_elbI2w EasyPLC Quick Start Software Suite https://accautomation.ca/easyplc-software-suite-quick-start/ https://youtu.be/dK9IS1Ir7c0 Click PLC Easy Transfer Line Programming https://accautomation.ca/click-plc-easy-transfer-line-programming/ https://youtu.be/o7G_ZtPBjbg Productivity PLC Simulator - Chain Conveyor MS https://accautomation.ca/productivity-plc-simulator-chain-conveyor-ms/ https://youtu.be/wp16dsrCvb8 Click PLC Simple Conveyor EasyPLC https://accautomation.ca/click-plc-simple-conveyor-easyplc/ https://youtu.be/pfR5zgUZS7A EasyPLC Paint Line Bit Shift - BRX Do-More PLC https://accautomation.ca/easyplc-paint-line-bit-shift-brx-do-more-plc/ https://youtu.be/5avWZ1RpCRc 4 Way Traffic Light PLC Program EasyPLC https://accautomation.ca/4-way-traffic-light-plc-program-easyplc/ https://youtu.be/DV-9Qq1lT0I EasyPLC Palletizing Robot Programming Click PLC https://accautomation.ca/easyplc-palletizing-robot-programming-click-plc/ https://youtu.be/wcLPxsrlMFQ EasyPLC Machine Editor - Design a Simulation https://accautomation.ca/easyplc-machine-editor-design-a-simulation/ https://youtu.be/B2GJhAvnQZE PLC Programming - A Tutorial for Beginners https://accautomation.ca/plc-programming-a-tutorial-for-beginners/ https://youtu.be/0zX05FSKmHo Parking Cars Simulator PLC Programming Demo https://youtu.be/baJz0sb4VmE Robot Packing PLC Program Development - Click PLC https://accautomation.ca/robot-packing-plc-program-development/ https://youtu.be/ILVcB9bKxmc LS Electric XGB PLC Easy Transfer Program https://accautomation.ca/ls-electric-xgb-plc-easy-transfer-program/ https://youtu.be/7B458ZiiJQ0 Latest Machine Simulator Modbus Server Driver https://accautomation.ca/latest-machine-simulator-modbus-server-driver/ https://youtu.be/n1PPvS5Vwpo Machine Simulator Modbus Server to C-More HMI https://accautomation.ca/machine-simulator-modbus-server-to-c-more-hmi/ https://youtu.be/opXe-wnbneo Creating the Ultimate Automation Training Setup1 https://accautomation.ca/creating-the-ultimate-automation-training-setup1/ https://youtu.be/2W2r65b6SlI Machine Simulator Suite (EasyPLC Software Suite) is a complete PLC, HMI, and Machine Simulator Software package. This PLC learning package includes the following: Easy PLC - PLC Simulation will allow Ladder, Grafcet, Logic Blocks, or Script programming. HMI System - Easily create a visual human-machine interface (HMI), Machine Simulator - A virtual 3D world with real-time graphics and physical properties. PLC programs can be tested using EasyPLC or through other interfaces. (Modbus RTU, TCP, etc.) Machine Simulator Lite - Designed to run on Android Devices. Machine Simulator VR - Virtual Reality comes to life so you can test, train, or practice your PLC programming. Purchase your copy of this learning package for less than USD 95 for a single computer install or less than USD 110 to allow different computers. Receive 10% off the price by typing in ACC in the comment section when you order. http://www.nirtec.com/index.php/purchase-price/ Learn PLC programming the easy way. Invest in yourself today. Here is a list of YouTube Shorts about the Machine Simulator Software Suite (EasyPLC Software Suite). https://www.youtube.com/playlist?list=PL3y71jAPOdZAvTC8-TWNifAHpgEkAfqZQ ACC Automation https://accautomation.ca/