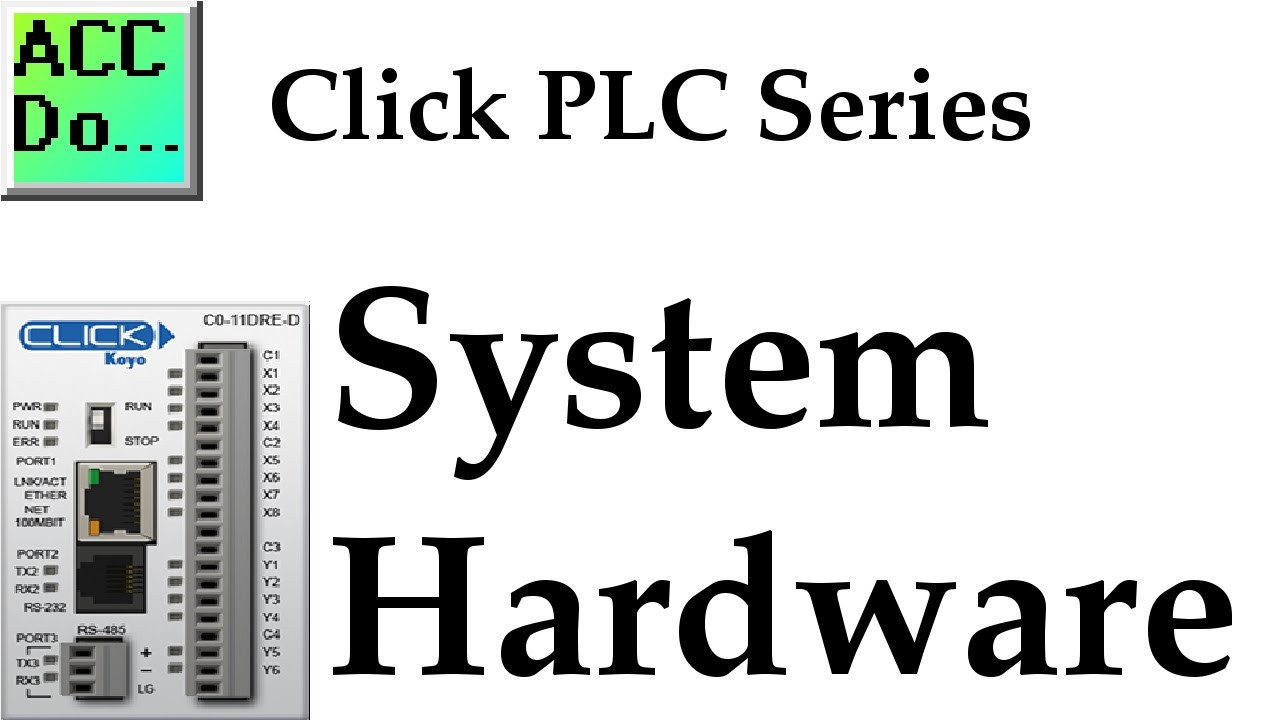
Click PLC System Hardware
3K views · Oct 16, 2022 accautomation.ca
Many people ask me what I do when looking at a new PLC model or system. My approach is very straight forward and we will view this in action with this Click PLC series. This series will go from examining the hardware to programming and communicating to the PLC in several ways. If you have questions along the way, please let me know. More information can be obtained at our website. This includes all of the links mentioned in this video. https://accautomation.ca/click-plc-system-hardware The five steps to PLC program development will determine the inputs and outputs required in our system. 1 – Define the task 2 - Define the inputs and outputs 3 – Develop a logical sequence of operation 4 - Develop the PLC program 5 – Test the program 00:00 Click PLC System Hardware 00:30 Click PLC Download Manual and Product Inserts 00:42 Click PLC CPU Unit 03:09 Click Expansion IO Port and Connections 04:04 Click PLC Power Supply 06:08 Click PLC Programming Software 06:28 Click PLC System Configuration There are several reasons why we are using the Click PLC. Here are just a few. - Investment is low for the hardware and the software is free - Standalone PLC with built-in I/O - Communication ability - Ethernet Port, RS232, RS485 - support for protocols such as Modbus RTU, Modbus TCP, etc. - Ability to expand the system with a variety of modules including RTD and Thermocouple inputs directly. https://www.accautomation.ca
Click PLC Installing the Software
5K views · Oct 16, 2022 accautomation.ca
Today we will be installing the free software required to program the PLC. This includes the actual program and communication drivers. More information can be obtained at our website. This includes all of the links mentioned in this video. https://accautomation.ca/click-plc-installing-the-software Download the Click Programming software at the following address: https://support.automationdirect.com/products/clickplcs.html This software currently supports Windows 2000 Service Pack 4, XP Home or Professional, Vista (32 bit), and Windows 7 and Windows 8 (32 bit and 64 bit for both). We will be using Windows 7 64 bit. Previously we discussed the Click PLC System-Hardware. https://accautomation.ca/click-plc-system-hardware/ 00:00 Click PLC Installing the Software 00:22 Download Click PLC Programming Software 01:46 Start the Click PLC Software Installation 03:00 Installing the Click USB Serial Device Driver 04:06 Connect USB Converter to Computer There are several reasons why we are using the Click PLC. Here are just a few. - Investment is low for the hardware and the software is free - Standalone PLC with built-in I/O - Communication ability - Ethernet Port, RS232, RS485 - support for protocols such as Modbus RTU, Modbus TCP, etc. - Ability to expand the system with a variety of modules including RTD and Thermocouple inputs directly. https://www.accautomation.ca
Click PLC Establish Communication
4K views · Oct 16, 2022 accautomation.ca
Today we will be establishing PC to PLC communications. This will allow us to program, edit or alter the way in which our Click PLC will function. More information can be obtained at our website. This includes all of the links mentioned in this video. https://accautomation.ca/click-plc-establish-communication Previously we discussed: Click PLC System-Hardware. https://accautomation.ca/click-plc-system-hardware/ Click PLC Installing the Software https://accautomation.ca/click-plc-installing-the-software/ Download the Click Programming software at the following address: https://support.automationdirect.com/products/clickplcs.html 00:00 Click PLC Establish Communication 00:20 USB to RS232 Click PLC 03:42 USB to RS485 Click PLC 05:43 Ethernet RJ45 to Click PLC There are several reasons why we are using the Click PLC. Here are just a few. - Investment is low for the hardware and the software is free - Standalone PLC with built-in I/O - Communication ability - Ethernet Port, RS232, RS485 - support for protocols such as Modbus RTU, Modbus TCP, etc. - Ability to expand the system with a variety of modules including RTD and Thermocouple inputs directly. https://www.accautomation.ca
Click PLC Numbering System and Addressing
3K views · Oct 16, 2022 accautomation.ca
Continuing our series, we will now look at the numbering systems and addressing used in the Click PLC. More information can be obtained at our website. This includes all of the links mentioned in this video. https://accautomation.ca/click-plc-numbering-system-and-addressing 00:00 Click PLC Numbering System and Addressing 01:05 Data Types – Click Addressing 02:05 Memory Types – Click Addressing 03:38 Memory Map – Click PLC (Indirect Addressing) 04:24 Connect to the Click PLC 05:35 Data View – Monitoring Click Addressing Previously we discussed: Click PLC System-Hardware. https://accautomation.ca/click-plc-system-hardware/ Click PLC Installing the Software https://accautomation.ca/click-plc-installing-the-software/ Click PLC Establish Communication https://accautomation.ca/click-plc-establish-communication/ Download the Click Programming software at the following address: https://support.automationdirect.com/products/clickplcs.html There are several reasons why we are using the Click PLC. Here are just a few. - Investment is low for the hardware and the software is free - Standalone PLC with built-in I/O - Communication ability - Ethernet Port, RS232, RS485 - support for protocols such as Modbus RTU, Modbus TCP, etc. - Ability to expand the system with a variety of modules including RTD and Thermocouple inputs directly. https://www.accautomation.ca
Click PLC Timer Programming Example
11K views · Oct 16, 2022 accautomation.ca
We will now look at programming a click plc timer example. More information can be obtained on our website. This includes all of the links mentioned in this video. https://accautomation.ca/click-plc-timers-and-counters 00:00 Click PLC Timers 00:25 Adding a Timer online to our Click PLC 01:48 PLC Instruction Timing Chart 02:04 Timer Present (Current) Value Retained or not Retained (Separate Timer Reset) 03:08 Controlling a PLC timer output point 03:55 Download program to Click PLC (Runtime edit) 04:30 Testing our Click PLC Timer program (Data View - Forcing Bits) 06:35 Click PLC RTC - Real-Time Clock Setting 07:16 Click RTC Address Bits Previously we discussed: Click PLC System-Hardware. https://accautomation.ca/click-plc-system-hardware/ Click PLC Installing the Software https://accautomation.ca/click-plc-installing-the-software/ Click PLC Establish Communication https://accautomation.ca/click-plc-establish-communication/ Click PLC Numbering System and Addressing https://accautomation.ca/click-plc-numbering-system-and-addressing Continuing our series, we will now look at timers and how they are used in the Click PLC. Most PLC programs have timers and some will incorporate a real-time clock. (RTC) Check out the Click PLC Counters https://youtu.be/0rXuWPo_ees Download the Click Programming software at the following address: http://support.automationdirect.com/products/clickplcs.html There are several reasons why we are using the Click PLC. Here are just a few. - Investment is low for the hardware and the software is free - Standalone PLC with built-in I/O - Communication ability - Ethernet Port, RS232, RS485 - support for protocols such as Modbus RTU, Modbus TCP, etc. - Ability to expand the system with a variety of modules including RTD and Thermocouple inputs directly. http://www.accautomation.ca
Click PLC Counter Programming Example
42K views · Oct 16, 2022 accautomation.ca
We will now look at a programming example of a click plc counter. Programming counters in the click plc will be demonstrated through a ladder logic example. More information can be obtained on our website. This includes all of the links mentioned in this video. https://accautomation.ca/click-plc-timers-and-counters/ Previously we discussed: Click PLC System-Hardware. https://accautomation.ca/click-plc-system-hardware/ Click PLC Installing the Software https://accautomation.ca/click-plc-installing-the-software/ Click PLC Establish Communication https://accautomation.ca/click-plc-establish-communication/ Click PLC Numbering System and Addressing https://accautomation.ca/click-plc-numbering-system-and-addressing Continuing our series, we will now look at timers and how they are used in the Click PLC. Check out the Click PLC Timers https://youtu.be/7VpgURVaspU 00:00 Click PLC Counter Programming Example 00:32 Adding a Counter using the programming software 04:41 Downloading PLC program to Click 05:16 Monitoring the Click PLC Counter 07:10 Click Counter Non-Memory Retentive Download the Click Programming software at the following address: https://support.automationdirect.com/products/clickplcs.html There are several reasons why we are using the Click PLC. Here are just a few. - Investment is low for the hardware and the software is free - Standalone PLC with built-in I/O - Communication ability - Ethernet Port, RS232, RS485 - support for protocols such as Modbus RTU, Modbus TCP, etc. - Ability to expand the system with a variety of modules including RTD and Thermocouple inputs directly. https://www.accautomation.ca
Click PLC Program Control Instructions
14K views · Oct 16, 2022 accautomation.ca
We will now look at the click plc program control instructions. The program control instructions will allow us to specify what logic parts get solved and when. This will control how the PLC will scan and solve your logic in your program. Program control (flow) instructions in the Click PLC will utilize interrupts and subroutines. We discussed interruptions in the last post on Click PLC Compare and Math Instructions. They can be timed or event (Built-in inputs on the CPU.) When the interrupt happens, it will immediately go and solve the logic in the interrupt and then return to the instruction following the location that it was called. This can and will happen any time throughout the scan of the PLC. More information can be obtained on our website. This includes all of the links mentioned in this video. https://accautomation.ca/click-plc-program-control-instructions 00:00 Click PLC program control 00:23 Click PLC Interrupts 01:45 Interrupt Setup 02:35 Click PLC Subroutines 03:12 Calling subroutines - Main PLC 04:33 Testing our PLC Program Control Previously we discussed: Click PLC System-Hardware. https://accautomation.ca/click-plc-system-hardware/ Click PLC Installing the Software https://accautomation.ca/click-plc-installing-the-software/ Click PLC Establish Communication https://accautomation.ca/click-plc-establish-communication/ Click PLC Numbering System and Addressing https://accautomation.ca/click-plc-numbering-system-and-addressing Click PLC Timers and Counters https://accautomation.ca/click-plc-timers-and-counters Click PLC Compare and Math Instructions https://accautomation.ca/click-plc-compare-and-math-instructions Download the Click Programming software at the following address: https://support.automationdirect.com/products/clickplcs.html There are several reasons why we are using the Click PLC. Here are just a few. - Investment is low for the hardware, and the software is free - Standalone PLC with built-in I/O - Communication ability - Ethernet Port, RS232, RS485 - support for protocols such as Modbus RTU, Modbus TCP, etc. - Ability to directly expand the system with various modules, including RTD and Thermocouple inputs. https://www.accautomation.ca
Click PLC Compare and Math Instructions
4K views · Oct 16, 2022 accautomation.ca
We will now look at the comparison and math instructions. Using examples, we will show how they are used in the Click PLC. More information can be obtained at our website. This includes all of the links mentioned in this video. https://accautomation.ca/click-plc-compare-and-math-instructions 00:00 Click PLC Compare and Math Instructions 02:13 Compare Contact 03:11 Compare Contact Click Program Example 04:15 Math Instruction 06:00 Math Instruction Click Program Example Previously we discussed: Click PLC System-Hardware. https://accautomation.ca/click-plc-system-hardware/ Click PLC Installing the Software https://accautomation.ca/click-plc-installing-the-software/ Click PLC Establish Communication https://accautomation.ca/click-plc-establish-communication/ Click PLC Numbering System and Addressing https://accautomation.ca/click-plc-numbering-system-and-addressing Click PLC Timers and Counters https://accautomation.ca/click-plc-timers-and-counters Download the Click Programming software at the following address: https://support.automationdirect.com/products/clickplcs.html There are several reasons why we are using the Click PLC. Here are just a few. - Investment is low for the hardware, and the software is free - Standalone PLC with built-in I/O - Communication ability - Ethernet Port, RS232, RS485 - support for protocols such as Modbus RTU, Modbus TCP, etc. - Ability to directly expand the system with various modules, including RTD and Thermocouple inputs. ACC Automation https://www.accautomation.ca
Click PLC Shift Register Instruction
5K views · Oct 16, 2022 accautomation.ca
A lot of times when programming a PLC you need to track what has previously happened. Shift registers allow you to do just that. The Click PLC has a shift register in the instruction set. We will discuss the shift register and look at an example. The shift register instruction will move a range of consecutive bits. This movement is controlled by the clock input bit which will trigger with each transition from off to on. The bits continually shift with the clock pulse until the end bit number. When the bit shifts past the last bit number then the bit information is lost. The data input will put a ‘1’ or a ‘0’ in the first bit of the shift register. (Note: We can also put bits on anywhere within the shift register.) Reset input will clear the shift register by putting a ‘0’ in each of the bits in the range. More information can be obtained at our website. This includes all of the links mentioned in this video. https://accautomation.ca/click-plc-shift-register-instruction 00:00 Click PLC Shift Register Instruction 00:33 Click Shift Register Instruction Parts 02:08 Monitoring the Shift Register Bits 03:19 Adding Additional Inputs to a Shift Register 05:31 Click Shift Register Timing Chart 06:15 Shit Register Instruction Sample Program Previously we discussed: Click PLC System Hardware. http://accautomation.ca/click-plc-system-hardware/ Click PLC Installing the Software http://accautomation.ca/click-plc-installing-the-software/ Click PLC Establish Communication http://accautomation.ca/click-plc-establish-communication/ Click PLC Numbering System and Addressing http://accautomation.ca/click-plc-numbering-system-and-addressing Click PLC Timers and Counters http://accautomation.ca/click-plc-timers-and-counters Click PLC Compare and Math Instructions http://accautomation.ca/click-plc-compare-and-math-instructions Click PLC Program Control Instructions http://accautomation.ca/click-plc-program-control-instructions Download the Click Programming software at the following address: http://support.automationdirect.com/products/clickplcs.html There are several reasons why we are using the Click PLC. Here are just a few. - Investment is low for the hardware and the software is free - Standalone PLC with built in I/O - Communication ability - Ethernet Port, RS232, RS485 - support for protocols such as Modbus RTU, Modbus TCP, etc. - Ability to expand the system with a variety of modules including RTD and Thermocouple inputs directly. https://www.accautomation.ca
Click PLC Drum Instruction Sequence
1K views · Oct 16, 2022 accautomation.ca
Drum instructions are great tools when you have a simple sequence of events that need to occur at a set time interval or as a result of an event. They mimic an electromechanical drum sequencer. The Click PLC has a drum in the instruction set. We will discuss the drum instruction and look at an example of controlling traffic lights. More information can be obtained at our website. This includes all of the links mentioned in this video. https://accautomation.ca/click-plc-drum-instruction/ 00:00 Click PLC Drum Instruction Sequence 00:20 What is a Drum Instruction? (Sequencer) 00:38 Parts of the Click Drum Instruction 02:07 Click PLC Drum Instruction Traffic Light Example 03:39 Click Drum Traffic Light Ladder Logic 05:10 Running / Monitoring Click PLC Program Previously we discussed: Click PLC System-Hardware. https://accautomation.ca/click-plc-system-hardware/ Click PLC Installing the Software https://accautomation.ca/click-plc-installing-the-software/ Click PLC Establish Communication https://accautomation.ca/click-plc-establish-communication/ Click PLC Numbering System and Addressing https://accautomation.ca/click-plc-numbering-system-and-addressing Click PLC Timers and Counters https://accautomation.ca/click-plc-timers-and-counters Click PLC Compare and Math Instructions https://accautomation.ca/click-plc-compare-and-math-instructions Click PLC Program Control Instructions https://accautomation.ca/click-plc-program-control-instructions Click PLC Shift Register Instruction https://accautomation.ca/click-plc-shift-register-instruction Download the Click Programming software at the following address: https://support.automationdirect.com/products/clickplcs.html There are several reasons why we are using the Click PLC. Here are just a few. - Investment is low for the hardware and the software is free - Standalone PLC with built-in I/O - Communication ability - Ethernet Port, RS232, RS485 - support for protocols such as Modbus RTU, Modbus TCP, etc. - Ability to expand the system with a variety of modules including RTD and Thermocouple inputs directly. https://www.accautomation.ca
Click PLC Send and Receive Serial Communication Instructions
5K views · Oct 16, 2022 accautomation.ca
Click plc send and receive serial communication instructions that can be used to communicate to external equipment. We will be communicating serially to a temperature controller using Modbus RTU serial RS485. Receive and Send instructions will allow you to send and receive serial data to an external device. The communication method that you setup can be ASCII or Modbus. ASCII (American Standard Communication for Information Interchange) can be used to send to devices such as a printer. Receiving ASCII can be used for connecting barcode scanners to the PLC. The barcode will be read as an ASCII string in the PLC. Modbus serial communication (Modbus RTU) is a standard protocol used in many automation devices. We will demonstrate the Send and Receive instruction by communicating Modbus to a Solo Temperature Controller. Our example will read the current process (PV) value and write the setpoint value (SV) in the controller. More information can be obtained on our website. This includes all of the links mentioned in this video. https://accautomation.ca/click-plc-send-and-receive-instructions 00:00 Click PLC Send and Receive Modbus RTU Serial to Solo Temperature Controller 00:35 Solo Process Temperature Controller Setup 02:17 Modbus RTU Communication Parameters 02:57 Click Modbus Recieve Instruction 03:38 Click Port Setup 04:40 Solo Modbus Read Addresses 06:40 Click Modbus Send Instruction 07:32 Solo Modbus Write Address 08:49 Testing our Modbus Communication - Click to Solo 09:14 Data View Monitoring Previously we discussed: Click PLC System-Hardware. https://accautomation.ca/click-plc-system-hardware/ Click PLC Installing the Software https://accautomation.ca/click-plc-installing-the-software/ Click PLC Establish Communication https://accautomation.ca/click-plc-establish-communication/ Click PLC Numbering System and Addressing https://accautomation.ca/click-plc-numbering-system-and-addressing Click PLC Timers and Counters https://accautomation.ca/click-plc-timers-and-counters Click PLC Compare and Math Instructions https://accautomation.ca/click-plc-compare-and-math-instructions Click PLC Program Control Instructions https://accautomation.ca/click-plc-program-control-instructions Click PLC Shift Register Instruction https://accautomation.ca/click-plc-shift-register-instruction Click PLC Drum Instruction https://accautomation.ca/click-plc-drum-instruction Download the Click Programming software at the following address: https://support.automationdirect.com/products/clickplcs.html There are several reasons why we are using the Click PLC. Here are just a few. - Investment is low for the hardware and the software is free (Low Cost PLC) - Standalone PLC with built-in I/O - Communication ability - Ethernet Port, RS232, RS485 - support for protocols such as Modbus RTU, Modbus TCP, etc. - Ability to expand the system with a variety of modules including RTD and Thermocouple inputs directly. https://www.accautomation.ca
Click PLC AdvancedHMI Modbus Communication
2K views · Oct 16, 2022 accautomation.ca
We will now look at the click plc AdvancedHMI Modbus serial communication. Advanced HMI is a powerful, adaptable HMI/SCADA (Supervisory Control and Data Acquisition) development package that takes advantage of Visual Studio. There is no coding required and you can simply drag and drop items onto the page. The best thing is that the software is free. We will look at using AdvancedHMI with the Click PLC. Our sample Click PLC program will read the present value (PV) and the indicating lights on our Solo Process Temperature Controller. It will then write the set value (SV) to the Solo. This communication will be done using the Modbus RTU protocol over an RS485 serial port on the Click. The AdvancedHMI package will communicate Modbus TCP over Ethernet to the Click PLC. We will be able to monitor our PV and set our SV on the Solo via the AdvancedHMI window. More information can be obtained on our website. This includes all of the links mentioned in this video. https://accautomation.ca/click-plc-advancedhmi-communication 00:00 Click PLC AdvancedHMI Modbus Communication 00:20 What is AdvancedHMI? 02:04 Installing AdvancedHMI 02:48 AdvancedHMI Program 04:51 Click PLC / AdvancedHMI Program Run Previously we discussed: Click PLC System-Hardware. https://accautomation.ca/click-plc-system-hardware/ Click PLC Installing the Software https://accautomation.ca/click-plc-installing-the-software/ Click PLC Establish Communication https://accautomation.ca/click-plc-establish-communication/ Click PLC Numbering System and Addressing https://accautomation.ca/click-plc-numbering-system-and-addressing Click PLC Timers and Counters https://accautomation.ca/click-plc-timers-and-counters Click PLC Compare and Math Instructions https://accautomation.ca/click-plc-compare-and-math-instructions Click PLC Program Control Instructions https://accautomation.ca/click-plc-program-control-instructions Click PLC Shift Register Instruction https://accautomation.ca/click-plc-shift-register-instruction Click PLC Drum Instruction https://accautomation.ca/click-plc-drum-instruction Click PLC Send and Receive Instructions https://accautomation.ca/click-plc-send-and-receive-instructions Download the Click Programming software at the following address: https://support.automationdirect.com/products/clickplcs.html There are several reasons why we are using the Click PLC. Here are just a few. - Investment is low for the hardware and the software is free - Standalone PLC with built-in I/O - Communication ability - Ethernet Port, RS232, RS485 - support for protocols such as Modbus RTU, Modbus TCP, etc. - Ability to expand the system with a variety of modules including RTD and Thermocouple inputs directly. https://www.accautomation.ca
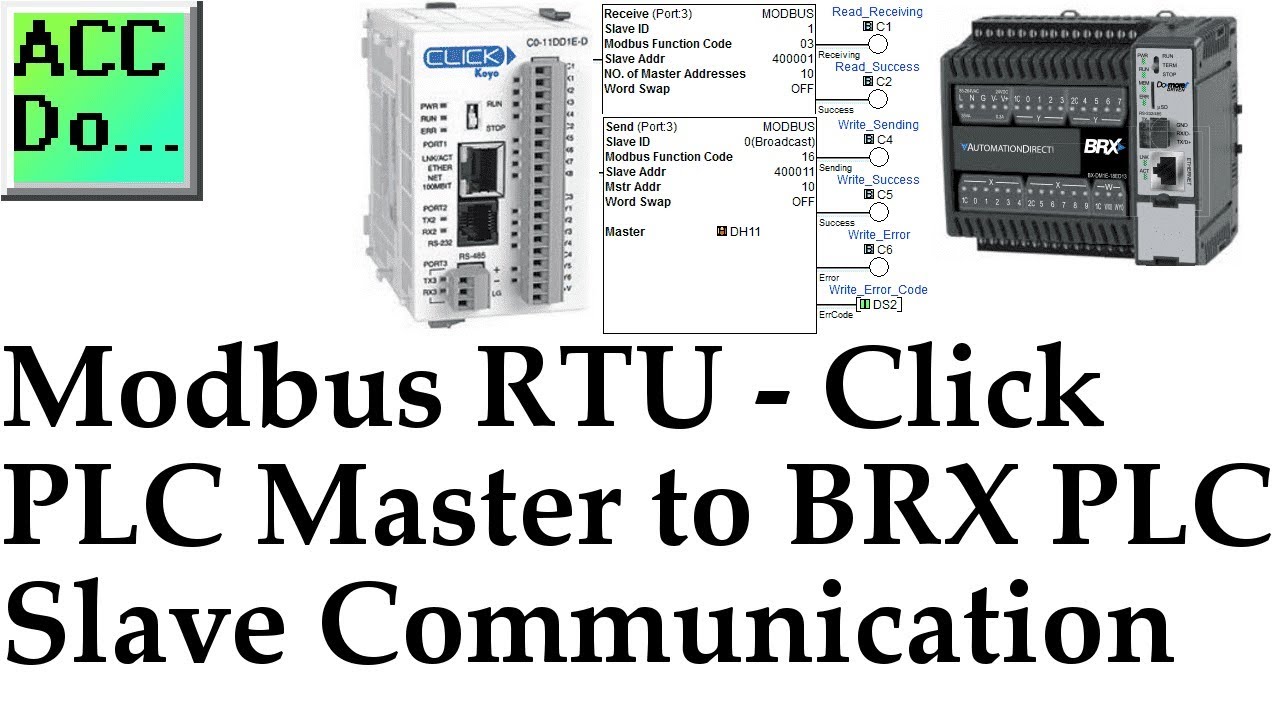
Modbus RTU Click PLC Master to BRX Do-More PLC Slave Communi...
1K views · Oct 15, 2022 accautomation.ca
We will now use Modbus RTU to connect a Click Master to a BRX Do-More Slave controller. Recently I was asked to demonstrate communication between a Click PLC and BRX PLC using Modbus RTU. Both PLCs are available from automation direct com. Modbus serial communication (Modbus RTU) is a standard protocol used in many automation devices. It works on a Master / Slave configuration. You can have only one master per network on Modbus RTU (Remote Terminal Unit). A maximum of 32 devices (Nodes) on the network can communicate to the master. A review of the Modbus RTU protocol (RTU frames) can be seen at the following URL. http://www.rtaautomation.com/technologies/modbus-rtu/ Using the Click PLC as a Master we will be communicating to the BRX PLC (Slave). Our example will read 10 registers from the BRX PLC and write 10 registers to the Click PLC. Let's get started! More information can be obtained at our website. This includes all of the links mentioned in this video. https://accautomation.ca/modbus-rtu-click-plc-master-to-brx-plc-slave-communication 00:00 Modbus RTU Click PLC Master to BRX Do-More PLC Slave Communication 01:28 Wiring – Modbus RTU 02:11BRX Do-More PLC Configuration 03:10 BRX Do-More Ladder Program 04:14 Click PLC Configuration 05:03 Click PLC Program 07:33 Running and monitoring the communication Previously we discussed: Click PLC System-Hardware. https://accautomation.ca/click-plc-system-hardware/ Click PLC Installing the Software https://accautomation.ca/click-plc-installing-the-software/ Click PLC Establish Communication https://accautomation.ca/click-plc-establish-communication/ Click PLC Numbering System and Addressing https://accautomation.ca/click-plc-numbering-system-and-addressing Click PLC Timers and Counters https://accautomation.ca/click-plc-timers-and-counters Click PLC Compare and Math Instructions https://accautomation.ca/click-plc-compare-and-math-instructions Click PLC Program Control Instructions https://accautomation.ca/click-plc-program-control-instructions Click PLC Shift Register Instruction https://accautomation.ca/click-plc-shift-register-instruction Click PLC Drum Instruction https://accautomation.ca/click-plc-drum-instruction Click PLC Send and Receive Instructions https://accautomation.ca/click-plc-send-and-receive-instructions Click PLC AdvancedHMI Communication https://accautomation.ca/click-plc-advancedhmi-communication There are several reasons why we are using the Click PLC. Here are just a few. - Investment is low for the hardware and the software is free - Standalone PLC with built-in I/O - Communication ability - Ethernet Port, RS232, RS485 - support for protocols such as Modbus RTU, Modbus TCP, etc. - Ability to expand the system with a variety of modules including RTD and Thermocouple inputs directly. https://www.accautomation.ca
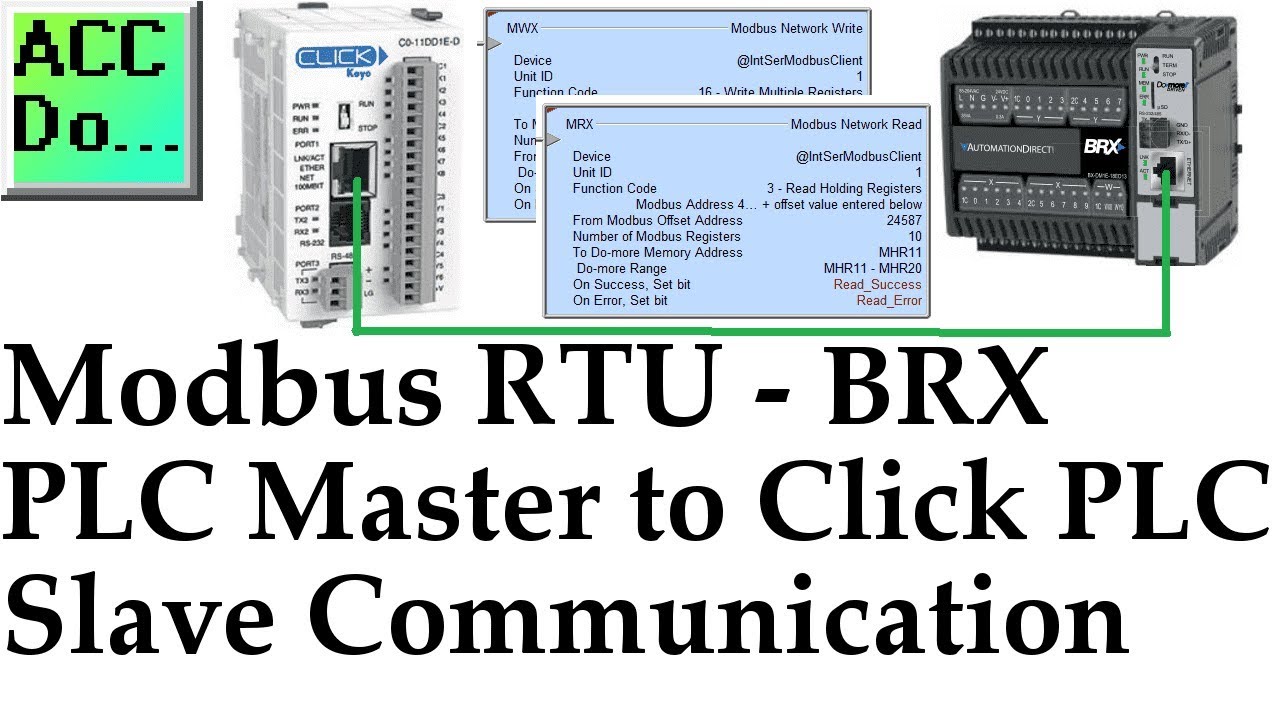
Modbus RTU BRX Do-More Master to Click Slave PLC
5K views · Oct 15, 2022 accautomation.ca
Recently I was asked to demonstrate communication between a BRX PLC and Click PLC using Modbus RTU. Both PLCs are available from automation direct com. Modbus serial communication (Modbus RTU) is a standard protocol used in many automation devices. It works on a Master / Slave configuration. You can have only one master per network on Modbus RTU (Remote Terminal Unit). A maximum of 32 devices (Nodes) on the network can communicate to the master. A review of the Modbus RTU protocol (RTU frames) can be seen at the following URL. https://www.rtaautomation.com/technologies/modbus-rtu/ Using the BRX PLC as a Master, we will be communicating to the Click PLC (Slave). Our example will read 10 registers from the Click PLC and write 10 registers from the BRX PLC. Let's get started! More information can be obtained at our website. This includes all of the links mentioned in this video. https://accautomation.ca/modbus-rtu-brx-plc-master-to-click-plc-slave-communication 00:00 Modbus RTU BRX Do-More Master to Click Slave PLC 00:24 Overview of Communication - Modbus 01:40 Modbus RTU (RS485) Wiring 02:16 Click PLC Setup and Program for Modbus RTU Slave Unit 03:21 BRX Do-More PLC Setup and Program for Modbus RTU Master Unit 07:45 Running the programs and testing communication This post is part of our BRX Series PLC. Here are some of the topics that we have already covered in this series. System Hardware https://accautomation.ca/brx-plc-system-hardware System Hardware Video https://youtu.be/wSYgY09VYeA Unboxing Video https://youtu.be/-Tf8m3BqzPo Installing the Software https://accautomation.ca/brx-plc-installing-the-software Installing the Software Video https://youtu.be/iFI1ebP8Zkk Establishing Communication https://accautomation.ca/brx-plc-establishing-communication Establishing Communication Video https://youtu.be/shU5g8MA8VM Updating Firmware Video https://youtu.be/gsfcGGK4-Sk Numbering Systems and Addressing https://accautomation.ca/brx-plc-numbering-systems-and-addressing Numbering Systems and Addressing Video https://youtu.be/-GiKnIDycKY First Program https://accautomation.ca/brx-plc-first-program First Program Video https://youtu.be/ANSNhdlm_Ao Monitoring and Testing the Program https://accautomation.ca/brx-plc-monitoring-and-testing-the-program Monitoring and Testing the Program Video https://youtu.be/gv3d0vozxac Online Editing and Debug Mode https://accautomation.ca/brx-plc-online-editing-and-debug-mode Online Editing and Debug Mode Video https://youtu.be/77pemu3zXrE Timers https://accautomation.ca/brx-plc-timers Timers Video https://youtu.be/0qU9kgunPi4 Counters https://accautomation.ca/brx-plc-counters Counters Video https://youtu.be/k84VQy8ifgg High-Speed IO https://accautomation.ca/brx-plc-high-speed-io High-Speed IO Video https://youtu.be/6B5hp_Ri0Ls There are several reasons why we are using the BRX Series Controller. Here are just a few. - Standalone PLC with built-in I/O - Built-in Data Logging - Communication ability - Ethernet Port, RS232, RS485, USB - support for protocols such as Modbus RTU, Modbus TCP, ASCII, K-sequence (DirectLOGIC users), Custom Protocols (ASCII over serial, TCP or UDP over Ethernet) - Built-in Analog input and output - Integrated motion control - High speed counters - Powerful instruction set (Video of Instructions in software) - Ability to expand the system with a variety of modules - Part of the Do-More series of PLCs which use the same free software. (Do-More Designer) - Integrated simulator in the software capable of external communications for testing The BRX series of programmable logic controllers consist of four different units. They differ depending on the Inputs and Outputs built into the unit and if it has an ethernet port. No I/O Micro PLC unit – (BX ME) 10 Point Micro PLC unit – (BX 10/10E) 18 Point Micro PLC unit - (BX 18/18E) 36 Point Micro PLC unit - (BX 36/36E) These CPUs (Central Processing Units) are also known as MPU (Multi-Processing Units) because of the communication capabilities. https://www.accautomation.ca
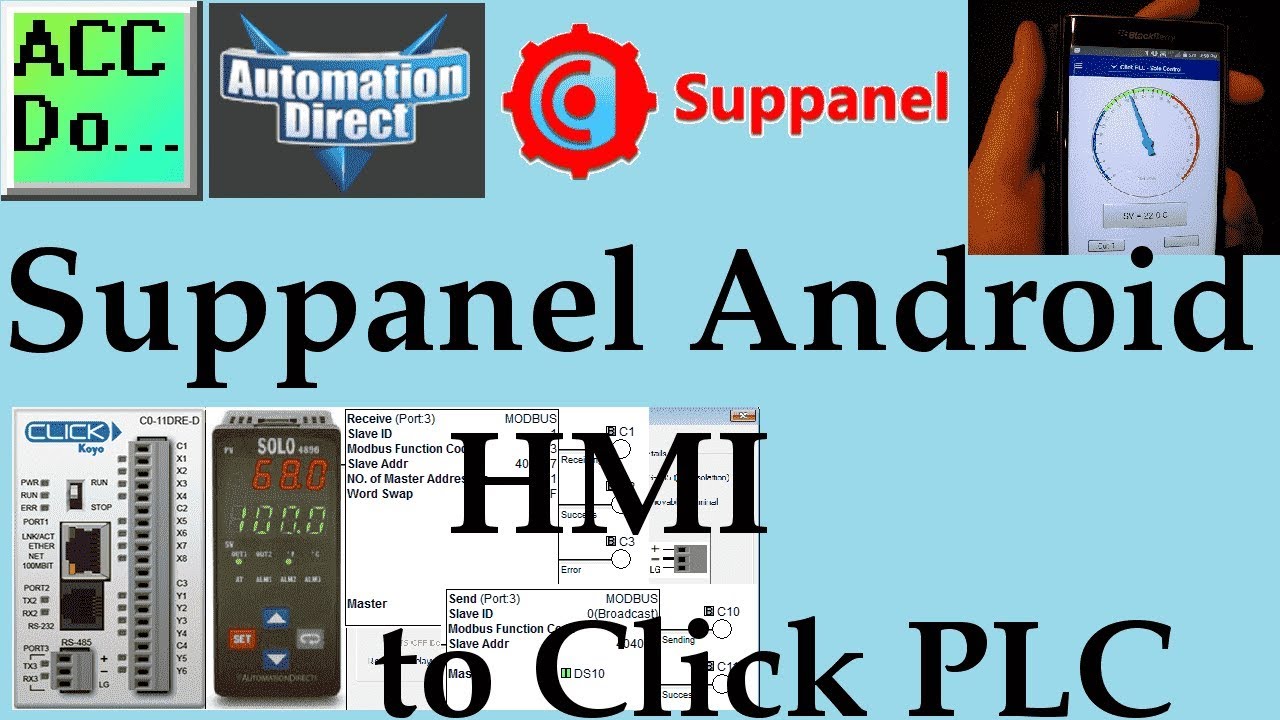
Suppanel Android HMI to Click PLC (Modbus)
3K views · Oct 14, 2022 accautomation.ca
Suppanel is an Android app used to create a human-machine interface (HMI). We will connect this to our Click PLC using Modbus TCP. This HMI panel can be made on your computer, tablet, or phone using the appropriate operating system or software. You can use this software to create panels that can control or modify values in your automated system. These panels can be shared with other Suppanel users. We will be creating a Suppanel Panel to monitor and control a Solo Process Temperature Controller via the Click programmable logic controller (PLC). The Click will be communicating to the Solo with serial RS485 using Modbus RTU protocol. The Suppanel HMI will be communicating to the Click PLC using the Ethernet Modbus TCP protocol. Let’s get started. More information can be obtained at our website. This includes all of the links mentioned in this video. http://accautomation.ca/suppanel-android-hmi-to-click-plc 00:00 Suppanel Android HMI to Click PLC (Modbus) 00:16 Communication Overview - Suppanel to Click to Solo Temperature Controller 01:30 Download and Install Suppanel Software 02:00 Click PLC Program - Explanation of existing program to Solo 04:13 Click PLC Modbus TCP IP Address and Register Addresses 06:56 Suppanel Programming 18:30 Running our Suppanel Software and Demonstrate Control There are several reasons why we are using the Suppanel android HMI. Here are just a few. - Connect to OPC Unified Automation Servers, S7, and Modbus TCP devices - Control and modify values on the industrial plant or your home automation - Share the panels with other Suppanel users via email or messaging - Comes with highly configurable controls: Numeric, Gauges, Switches / Arrow / Animated GIF / Pipe, etc., Trend Control, Alarm Control - Powerful built-in designer - no external editor required - Immediate change from design to execution and vice versa for quick debugging - Wide zoom capability in both design and run modes - Free 60-day Software Evaluation ACC Automation http://www.accautomation.ca
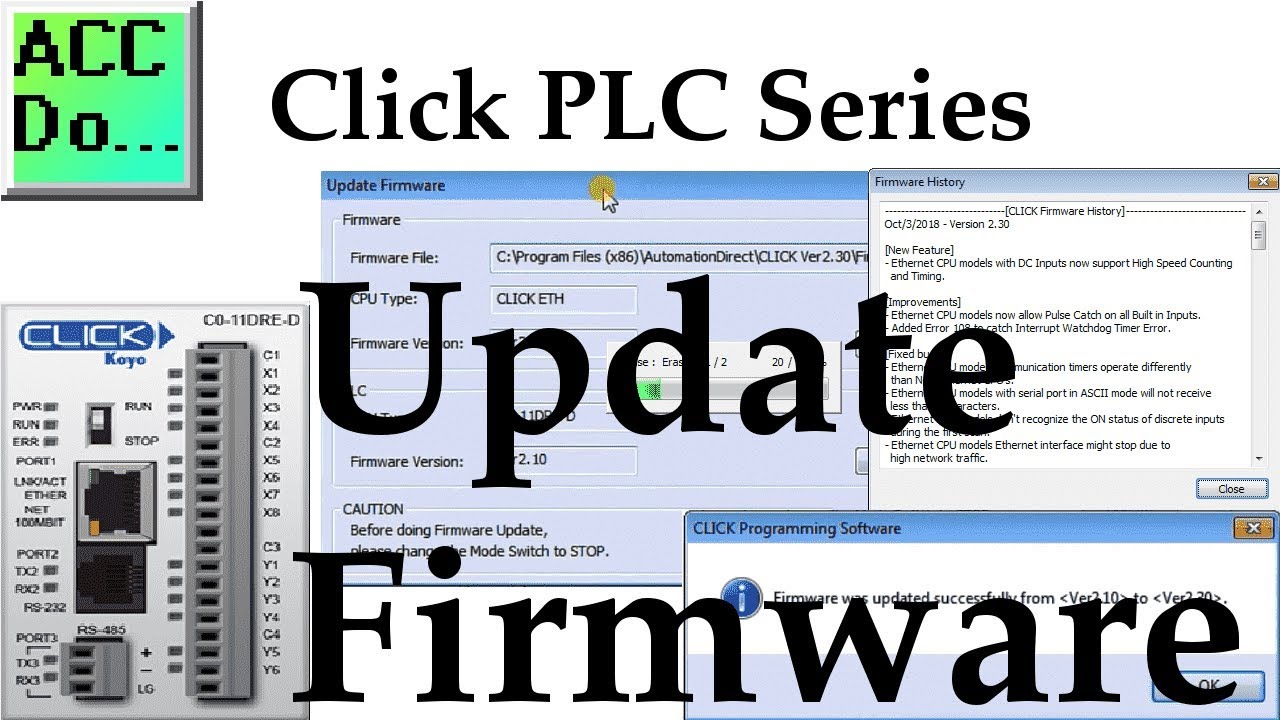
Click PLC Update Firmware
4K views · Oct 14, 2022 accautomation.ca
We will now update the firmware on our Click PLC. Firmware is usually PLC operating system code that is written into a read-only memory. The BIOS (Basic Input Output System) of a PC (personal computer) is a good example of firmware. It provides a low-level interface between the hardware and software. The Click PLC firmware comes with the programming software. https://support.automationdirect.com/products/clickplcs.html We will be updating the firmware of our Click PLC from 2.10 to 2.30. Let's get started! More information can be obtained on our website. This includes all of the links mentioned in this video. http://accautomation.ca/click-plc-update-firmware Previously we discussed: Click PLC System-Hardware. http://accautomation.ca/click-plc-system-hardware/ Click PLC Installing the Software http://accautomation.ca/click-plc-installing-the-software/ Click PLC Establish Communication http://accautomation.ca/click-plc-establish-communication/ Click PLC Numbering System and Addressing http://accautomation.ca/click-plc-numbering-system-and-addressing Click PLC Timers and Counters http://accautomation.ca/click-plc-timers-and-counters Click PLC Compare and Math Instructions http://accautomation.ca/click-plc-compare-and-math-instructions Click PLC Program Control Instructions http://accautomation.ca/click-plc-program-control-instructions Click PLC Shift Register Instruction http://accautomation.ca/click-plc-shift-register-instruction Click PLC Drum Instruction http://accautomation.ca/click-plc-drum-instruction Click PLC Send and Receive Instructions http://accautomation.ca/click-plc-send-and-receive-instructions Click PLC AdvancedHMI Communication http://accautomation.ca/click-plc-advancedhmi-communication Modbus RTU Click PLC Master to BRX PLC Slave Communication http://accautomation.ca/modbus-rtu-click-plc-master-to-brx-plc-slave-communication Video https://youtu.be/CIsj-Xppoog There are several reasons why we are using the Click PLC. Here are just a few. - Investment is low for the hardware and the software is free - Standalone PLC with built-in I/O - Communication ability - Ethernet Port, RS232, RS485 - support for protocols such as Modbus RTU, Modbus TCP, etc. - Ability to expand the system with a variety of modules including RTD and Thermocouple inputs directly. http://www.accautomation.ca
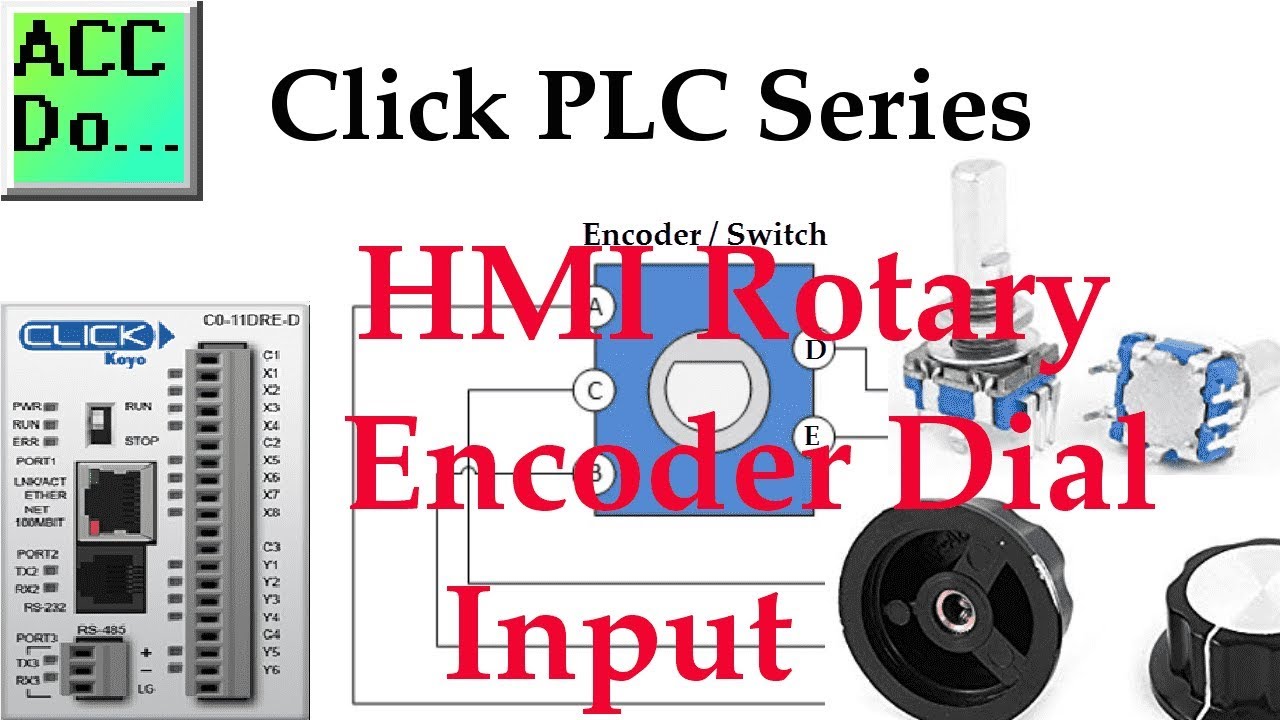
Click PLC HMI Rotary Encoder Dial Input
2K views · Oct 14, 2022 accautomation.ca
We will now look at the programming and wiring of a rotary encoder to the Click PLC input. Rotary encoders are modern digital devices that have taken over from the potentiometer in stereos and many other applications. This is because of their fine digital control and they can fully rotate without end stops. We can connect the rotary encoder into the PLC using just two digital inputs. This human-machine interface (HMI) has the advantage over touch screens and other methods of control into the PLC. The operator can control the rate and setpoint with the dial (rotary encoder) without looking at the control. This will allow the operator to concentrate on other tasks. We will be connecting a rotary encoder with a dial into the Click PLC. The signals being sent from the rotary encoder will be explained. Different methods of programming this input in our PLC will be discussed. Let’s get started. More information can be obtained on our website. This includes all of the links mentioned in this video. https://accautomation.ca/click-plc-hmi-rotary-encoder-dial-input Rotary Encoder https://amzn.to/2TWFjpZ Dial for rotary encoder https://amzn.to/2E4C62P Previously we discussed: Click PLC System Hardware. https://accautomation.ca/click-plc-system-hardware/ Click PLC Installing the Software https://accautomation.ca/click-plc-installing-the-software/ Click PLC Establish Communication https://accautomation.ca/click-plc-establish-communication/ Click PLC Numbering System and Addressing https://accautomation.ca/click-plc-numbering-system-and-addressing Click PLC Timers and Counters https://accautomation.ca/click-plc-timers-and-counters Click PLC Compare and Math Instructions https://accautomation.ca/click-plc-compare-and-math-instructions Click PLC Program Control Instructions https://accautomation.ca/click-plc-program-control-instructions Click PLC Shift Register Instruction https://accautomation.ca/click-plc-shift-register-instruction Click PLC Drum Instruction https://accautomation.ca/click-plc-drum-instruction Click PLC Send and Receive Instructions https://accautomation.ca/click-plc-send-and-receive-instructions Click PLC AdvancedHMI Communication https://accautomation.ca/click-plc-advancedhmi-communication Modbus RTU Click PLC Master to BRX PLC Slave Communication https://accautomation.ca/modbus-rtu-click-plc-master-to-brx-plc-slave-communication Video https://youtu.be/CIsj-Xppoog Click PLC - Update Firmware https://accautomation.ca/click-plc-update-firmware Video https://youtu.be/1X_kw4Rhokw There are several reasons why we are using the Click PLC. Here are just a few. - Investment is low for the hardware and the software is free - Standalone PLC with built-in I/O - Communication ability - Ethernet Port, RS232, RS485 - support for protocols such as Modbus RTU, Modbus TCP, etc. - Ability to expand the system with a variety of modules including RTD and Thermocouple inputs directly. https://www.accautomation.ca
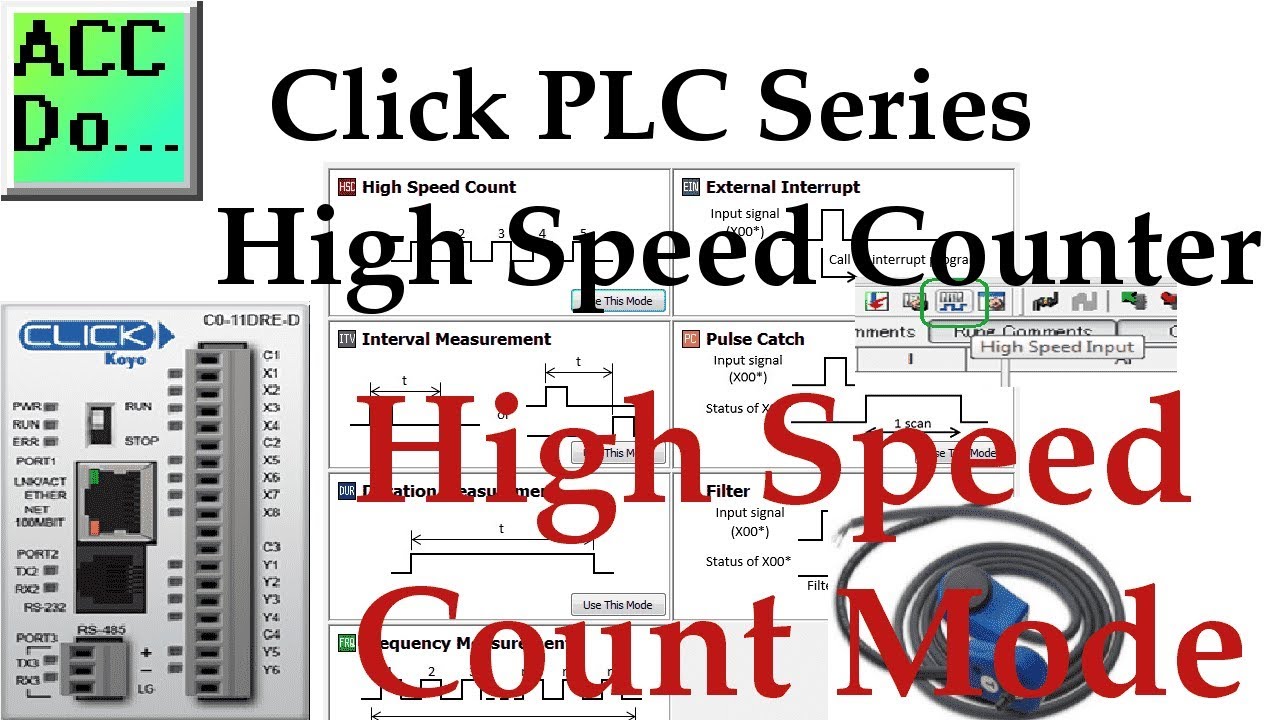
Click PLC High Speed Counter Input Mode High Speed Count
7K views · Oct 14, 2022 accautomation.ca
We will now look at the Click PLC high speed counter input. The Click PLC family has been updated, and now has the ability to use high speed counting. This is available on all of the Ethernet units that have DC inputs. The faster processer on the Ethernet unit (3 to 10 times faster than the basic unit) allows this capability. There are seven (7) different modes of operation for the high speed counter available so adaption to your automation solution is easy. The input can count Up, Down, Up/Down, Pulse/Direction or Quadrature (with Z). Maximum speed on the high speed counter inputs are 100 kHz. That is 100,000 pulses per second. We will be looking at the different high speed counter modes available in the click. This is all setup through a user friendly graphical user interface. Let’s get started! More information can be obtained on our website. This includes all of the links mentioned in this video. https://accautomation.ca/click-plc-high-speed-counting-part-1 Dart Magnetic Pick-up https://amzn.to/2rc9LiK https://ebay.to/2QqMFDh High Speed Count Mode https://youtu.be/P3l34unyAyU Interval Measurement Mode https://youtu.be/-t8JSKruilE Duration Measurement Mode https://youtu.be/znF6PRwGq-Y Frequency Measurement Mode https://youtu.be/m0I9P5AoFqE Previously we discussed: Click PLC System Hardware. https://accautomation.ca/click-plc-system-hardware/ Click PLC Installing the Software https://accautomation.ca/click-plc-installing-the-software/ Click PLC Establish Communication https://accautomation.ca/click-plc-establish-communication/ Click PLC Numbering System and Addressing https://accautomation.ca/click-plc-numbering-system-and-addressing Click PLC Timers and Counters https://accautomation.ca/click-plc-timers-and-counters Click PLC Compare and Math Instructions https://accautomation.ca/click-plc-compare-and-math-instructions Click PLC Program Control Instructions https://accautomation.ca/click-plc-program-control-instructions Click PLC Shift Register Instruction https://accautomation.ca/click-plc-shift-register-instruction Click PLC Drum Instruction https://accautomation.ca/click-plc-drum-instruction Click PLC Send and Receive Instructions https://accautomation.ca/click-plc-send-and-receive-instructions Click PLC AdvancedHMI Communication https://accautomation.ca/click-plc-advancedhmi-communication Modbus RTU Click PLC Master to BRX PLC Slave Communication https://accautomation.ca/modbus-rtu-click-plc-master-to-brx-plc-slave-communication Video https://youtu.be/CIsj-Xppoog Click PLC - Update Firmware https://accautomation.ca/click-plc-update-firmware Video https://youtu.be/1X_kw4Rhokw Click PLC HMI Rotary Encoder Dial Input https://accautomation.ca/click-plc-hmi-rotary-encoder-dial-input Video https://youtu.be/mix9k2RTdII The entire Click PLC series can be found at this URL: https://accautomation.ca/series/click-plc/ There are several reasons why we are using the Click PLC. Here are just a few. - Investment is low for the hardware and the software is free - Standalone PLC with built-in I/O - Communication ability - Ethernet Port, RS232, RS485 - support for protocols such as Modbus RTU, Modbus TCP, etc. - Ability to expand the system with a variety of modules including RTD and Thermocouple inputs directly. https://www.accautomation.ca
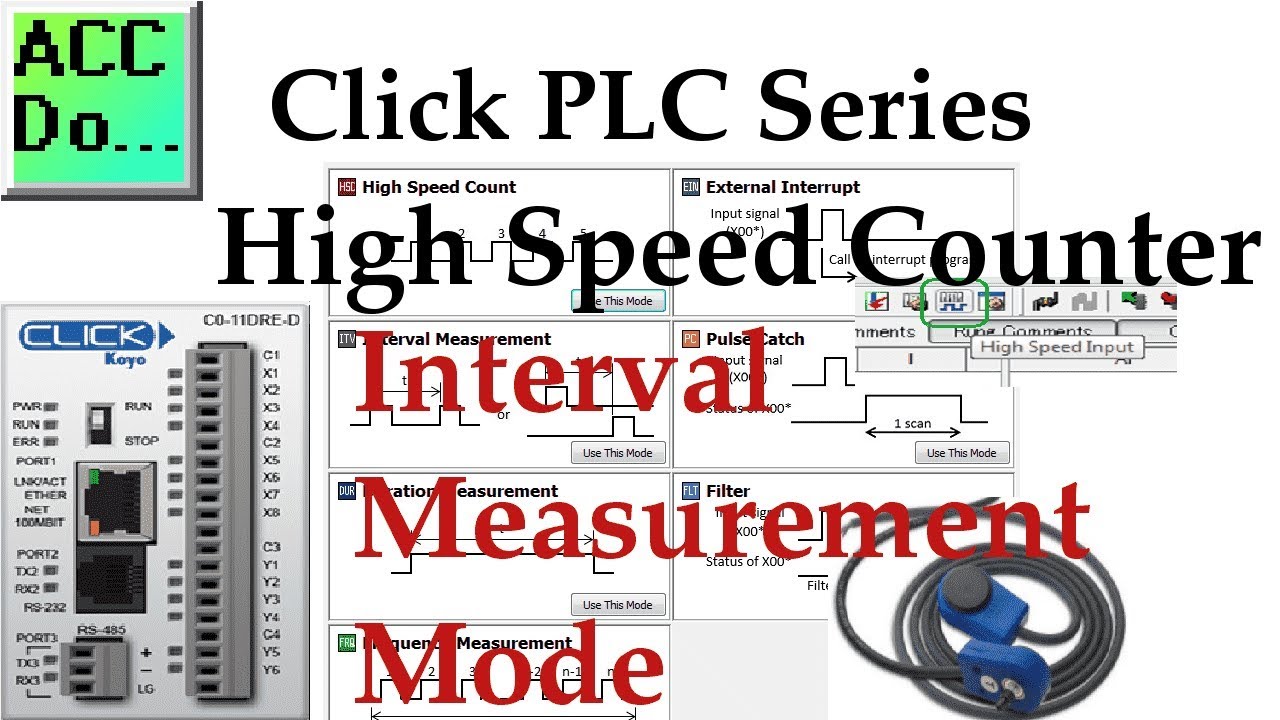
Click PLC High Speed Counter Input Interval Measurement Mode
13K views · Oct 14, 2022 accautomation.ca
We will now look at the Click PLC high speed counter input. The Click PLC family has been updated, and now has the ability to use high speed counting. This is available on all of the Ethernet units that have DC inputs. The faster processer on the Ethernet unit (3 to 10 times faster than the basic unit) allows this capability. There are seven (7) different modes of operation for the high speed counter available so adaption to your automation solution is easy. The input can count Up, Down, Up/Down, Pulse/Direction or Quadrature (with Z). Maximum speed on the high speed counter inputs are 100 kHz. That is 100,000 pulses per second. We will be looking at the different high speed counter modes available in the click. This is all setup through a user friendly graphical user interface. Let’s get started! More information can be obtained on our website. This includes all of the links mentioned in this video. https://accautomation.ca/click-plc-high-speed-counting-part-1 Dart Magnetic Pick-up https://amzn.to/2rc9LiK https://ebay.to/2QqMFDh High Speed Count Mode https://youtu.be/P3l34unyAyU Interval Measurement Mode https://youtu.be/-t8JSKruilE Duration Measurement Mode https://youtu.be/znF6PRwGq-Y Frequency Measurement Mode https://youtu.be/m0I9P5AoFqE Previously we discussed: Click PLC System Hardware. https://accautomation.ca/click-plc-system-hardware/ Click PLC Installing the Software https://accautomation.ca/click-plc-installing-the-software/ Click PLC Establish Communication https://accautomation.ca/click-plc-establish-communication/ Click PLC Numbering System and Addressing https://accautomation.ca/click-plc-numbering-system-and-addressing Click PLC Timers and Counters https://accautomation.ca/click-plc-timers-and-counters Click PLC Compare and Math Instructions https://accautomation.ca/click-plc-compare-and-math-instructions Click PLC Program Control Instructions https://accautomation.ca/click-plc-program-control-instructions Click PLC Shift Register Instruction https://accautomation.ca/click-plc-shift-register-instruction Click PLC Drum Instruction https://accautomation.ca/click-plc-drum-instruction Click PLC Send and Receive Instructions https://accautomation.ca/click-plc-send-and-receive-instructions Click PLC AdvancedHMI Communication https://accautomation.ca/click-plc-advancedhmi-communication Modbus RTU Click PLC Master to BRX PLC Slave Communication https://accautomation.ca/modbus-rtu-click-plc-master-to-brx-plc-slave-communication Video https://youtu.be/CIsj-Xppoog Click PLC - Update Firmware https://accautomation.ca/click-plc-update-firmware Video https://youtu.be/1X_kw4Rhokw Click PLC HMI Rotary Encoder Dial Input https://accautomation.ca/click-plc-hmi-rotary-encoder-dial-input Video https://youtu.be/mix9k2RTdII The entire Click PLC series can be found at this URL: https://accautomation.ca/series/click-plc/ There are several reasons why we are using the Click PLC. Here are just a few. - Investment is low for the hardware and the software is free - Standalone PLC with built in I/O - Communication ability - Ethernet Port, RS232, RS485 - support for protocols such as Modbus RTU, Modbus TCP, etc. - Ability to expand the system with a variety of modules including RTD and Thermocouple inputs directly. https://www.accautomation.ca

Click PLC High Speed Counter Input Frequency Measurement Mod...
2K views · Oct 14, 2022 accautomation.ca
We will now look at the Click PLC high speed counter input. The Click PLC family has been updated, and now has the ability to use high speed counting. This is available on all of the Ethernet units that have DC inputs. The faster processer on the Ethernet unit (3 to 10 times faster than the basic unit) allows this capability. There are seven (7) different modes of operation for the high speed counter available so adaption to your automation solution is easy. The input can count Up, Down, Up/Down, Pulse/Direction or Quadrature (with Z). Maximum speed on the high speed counter inputs are 100 kHz. That is 100,000 pulses per second. We will be looking at the different high speed counter modes available in the click. This is all setup through a user friendly graphical user interface. Let’s get started! More information can be obtained on our website. This includes all of the links mentioned in this video. https://accautomation.ca/click-plc-high-speed-counting-part-1 Dart Magnetic Pick-up https://amzn.to/2rc9LiK https://ebay.to/2QqMFDh High Speed Count Mode https://youtu.be/P3l34unyAyU Interval Measurement Mode https://youtu.be/-t8JSKruilE Duration Measurement Mode https://youtu.be/znF6PRwGq-Y Frequency Measurement Mode https://youtu.be/m0I9P5AoFqE Previously we discussed: Click PLC System-Hardware. https://accautomation.ca/click-plc-system-hardware/ Click PLC Installing the Software https://accautomation.ca/click-plc-installing-the-software/ Click PLC Establish Communication https://accautomation.ca/click-plc-establish-communication/ Click PLC Numbering System and Addressing https://accautomation.ca/click-plc-numbering-system-and-addressing Click PLC Timers and Counters https://accautomation.ca/click-plc-timers-and-counters Click PLC Compare and Math Instructions https://accautomation.ca/click-plc-compare-and-math-instructions Click PLC Program Control Instructions https://accautomation.ca/click-plc-program-control-instructions Click PLC Shift Register Instruction https://accautomation.ca/click-plc-shift-register-instruction Click PLC Drum Instruction https://accautomation.ca/click-plc-drum-instruction Click PLC Send and Receive Instructions https://accautomation.ca/click-plc-send-and-receive-instructions Click PLC AdvancedHMI Communication https://accautomation.ca/click-plc-advancedhmi-communication Modbus RTU Click PLC Master to BRX PLC Slave Communication https://accautomation.ca/modbus-rtu-click-plc-master-to-brx-plc-slave-communication Video https://youtu.be/CIsj-Xppoog Click PLC - Update Firmware https://accautomation.ca/click-plc-update-firmware Video https://youtu.be/1X_kw4Rhokw Click PLC HMI Rotary Encoder Dial Input https://accautomation.ca/click-plc-hmi-rotary-encoder-dial-input Video https://youtu.be/mix9k2RTdII The entire Click PLC series can be found at this URL: https://accautomation.ca/series/click-plc/ There are several reasons why we are using the Click PLC. Here are just a few. - Investment is low for the hardware and the software is free - Standalone PLC with built in I/O - Communication ability - Ethernet Port, RS232, RS485 - support for protocols such as Modbus RTU, Modbus TCP, etc. - Ability to expand the system with a variety of modules including RTD and Thermocouple inputs directly. https://www.accautomation.ca
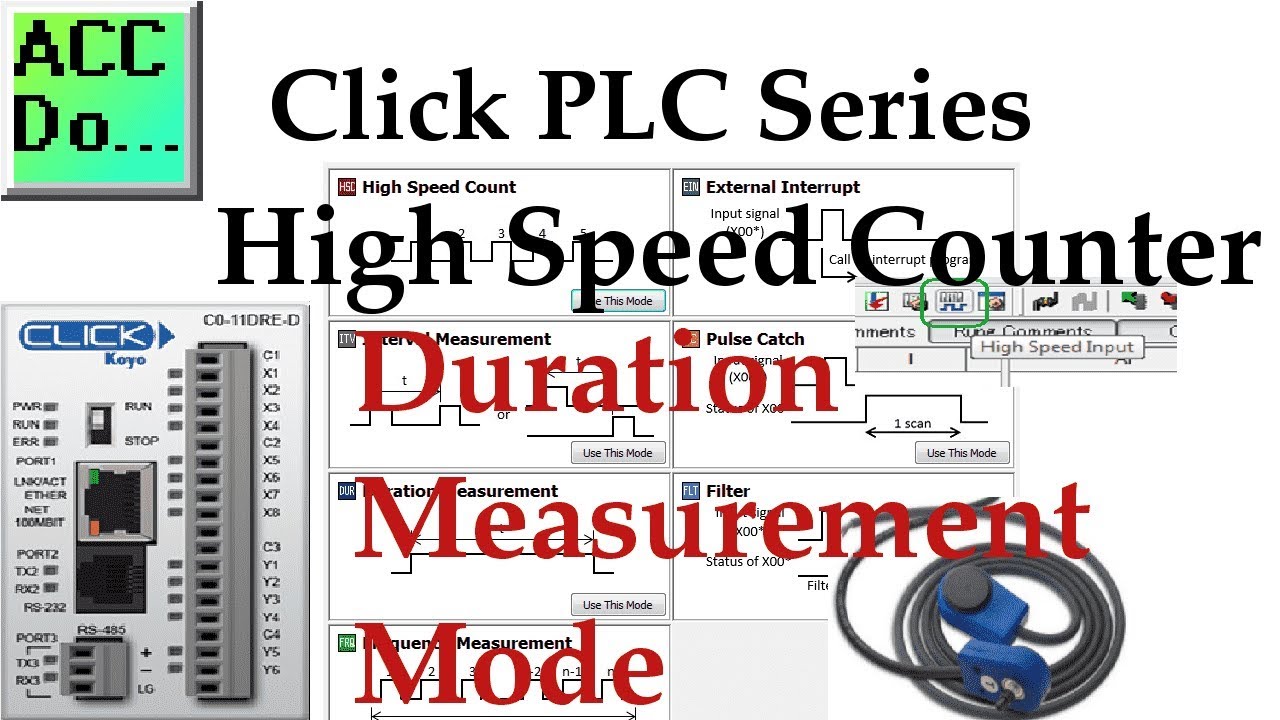
Click PLC High Speed Counter Input Duration Measurement Mode
30K views · Oct 14, 2022 accautomation.ca
We will now look at the Click PLC high-speed counter input. The Click PLC family has been updated, and now has the ability to use high-speed counting. This is available on all of the Ethernet units that have DC inputs. The faster processer on the Ethernet unit (3 to 10 times faster than the basic unit) allows this capability. There are seven (7) different modes of operation for the high-speed counter available so adaption to your automation solution is easy. The input can count Up, Down, Up/Down, Pulse/Direction, or Quadrature (with Z). The maximum speed on the high-speed counter inputs is 100 kHz. That is 100,000 pulses per second. We will be looking at the different high-speed counter modes available in the click. This is all set up through a user-friendly graphical user interface. Let’s get started! More information can be obtained on our website. This includes all of the links mentioned in this video. https://accautomation.ca/click-plc-high-speed-counting-part-1 Dart Magnetic Pick-up https://amzn.to/2rc9LiK https://ebay.to/2QqMFDh High-Speed Count Mode https://youtu.be/P3l34unyAyU Interval Measurement Mode https://youtu.be/-t8JSKruilE Duration Measurement Mode https://youtu.be/znF6PRwGq-Y Frequency Measurement Mode https://youtu.be/m0I9P5AoFqE Previously we discussed: Click PLC System-Hardware. https://accautomation.ca/click-plc-system-hardware/ Click PLC Installing the Software https://accautomation.ca/click-plc-installing-the-software/ Click PLC Establish Communication https://accautomation.ca/click-plc-establish-communication/ Click PLC Numbering System and Addressing https://accautomation.ca/click-plc-numbering-system-and-addressing Click PLC Timers and Counters https://accautomation.ca/click-plc-timers-and-counters Click PLC Compare and Math Instructions https://accautomation.ca/click-plc-compare-and-math-instructions Click PLC Program Control Instructions https://accautomation.ca/click-plc-program-control-instructions Click PLC Shift Register Instruction https://accautomation.ca/click-plc-shift-register-instruction Click PLC Drum Instruction https://accautomation.ca/click-plc-drum-instruction Click PLC Send and Receive Instructions https://accautomation.ca/click-plc-send-and-receive-instructions Click PLC AdvancedHMI Communication https://accautomation.ca/click-plc-advancedhmi-communication Modbus RTU Click PLC Master to BRX PLC Slave Communication https://accautomation.ca/modbus-rtu-click-plc-master-to-brx-plc-slave-communication Video https://youtu.be/CIsj-Xppoog Click PLC - Update Firmware https://accautomation.ca/click-plc-update-firmware Video https://youtu.be/1X_kw4Rhokw Click PLC HMI Rotary Encoder Dial Input https://accautomation.ca/click-plc-hmi-rotary-encoder-dial-input Video https://youtu.be/mix9k2RTdII The entire Click PLC series can be found at this URL: https://accautomation.ca/series/click-plc/ There are several reasons why we are using the Click PLC. Here are just a few. - Investment is low for the hardware and the software is free - Standalone PLC with built-in I/O - Communication ability - Ethernet Port, RS232, RS485 - support for protocols such as Modbus RTU, Modbus TCP, etc. - Ability to expand the system with a variety of modules including RTD and Thermocouple inputs directly. https://www.accautomation.ca
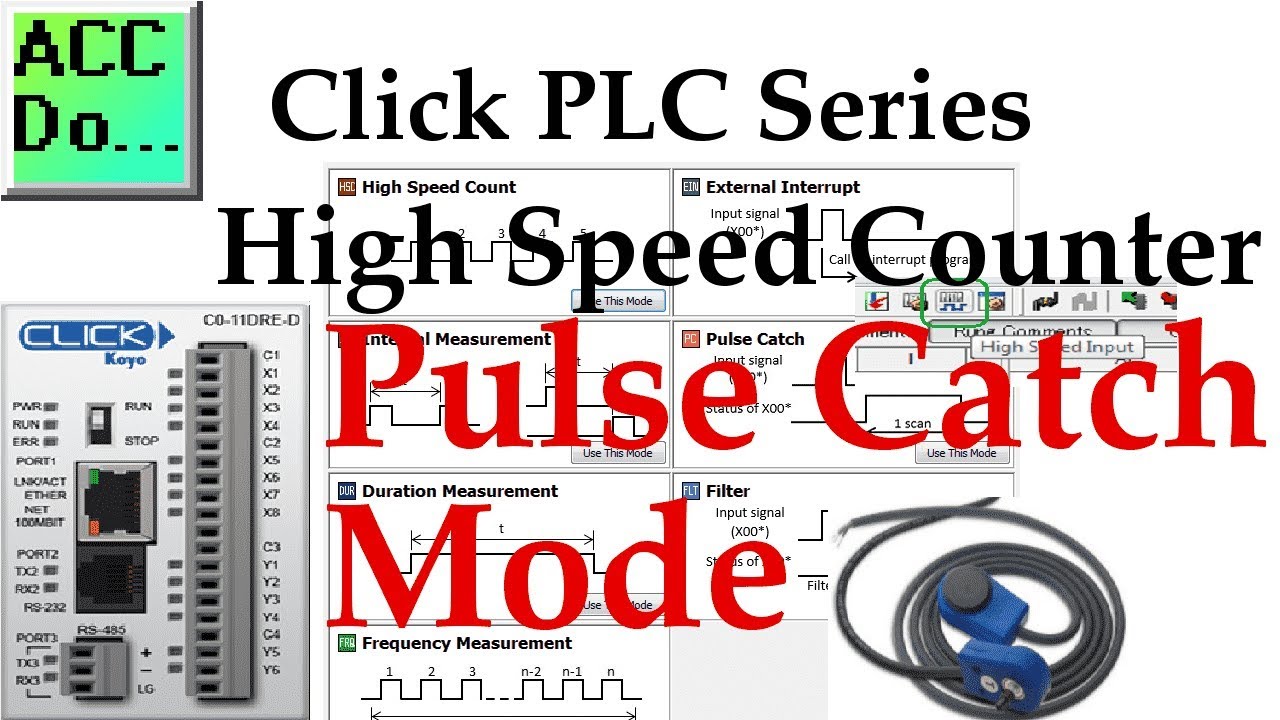
Click PLC High Speed Counter Input Pulse Catch Mode
6K views · Oct 13, 2022 accautomation.ca
We will now look at the Click PLC high-speed counter input. The Click PLC family has been updated, and now has the ability to use high speed counting. This is available on all of the Ethernet units that have DC inputs. The faster processer on the Ethernet unit (3 to 10 times faster than the basic unit) allows this capability. There are seven (7) different modes of operation for the high speed counter available so adaption to your automation solution is easy. The input can count Up, Down, Up/Down, Pulse/Direction or Quadrature (with Z). Maximum speed on the high speed counter inputs are 100 kHz. That is 100,000 pulses per second. We will be looking at the different high speed counter modes available in the click. This is all setup through a user friendly graphical user interface. Let’s get started! More information can be obtained on our website. This includes all of the links mentioned in this video. https://accautomation.ca/click-plc-high-speed-counting-part-2 Dart Magnetic Pick-up https://amzn.to/2rc9LiK https://ebay.to/2QqMFDh External Interrupt Mode https://youtu.be/UxFffVddUt4 Pulse Catch Mode https://youtu.be/2H0zwul1X3o Filter Pulse Mode https://youtu.be/FNbYAkBwIsQ Frequency Measurement and High-Speed Count Mode https://youtu.be/qV3jgRszghE Click PLC High-Speed Counter - Part 1 https://accautomation.ca/click-plc-high-speed-counting-part-1 High-Speed Count Mode https://youtu.be/P3l34unyAyU Interval Measurement Mode https://youtu.be/-t8JSKruilE Duration Measurement Mode https://youtu.be/znF6PRwGq-Y Frequency Measurement Mode https://youtu.be/m0I9P5AoFqE Previously we discussed: Click PLC System-Hardware. https://accautomation.ca/click-plc-system-hardware/ Click PLC Installing the Software https://accautomation.ca/click-plc-installing-the-software/ Click PLC Establish Communication https://accautomation.ca/click-plc-establish-communication/ Click PLC Numbering System and Addressing https://accautomation.ca/click-plc-numbering-system-and-addressing Click PLC Timers and Counters https://accautomation.ca/click-plc-timers-and-counters Click PLC Compare and Math Instructions https://accautomation.ca/click-plc-compare-and-math-instructions Click PLC Program Control Instructions https://accautomation.ca/click-plc-program-control-instructions Click PLC Shift Register Instruction https://accautomation.ca/click-plc-shift-register-instruction Click PLC Drum Instruction https://accautomation.ca/click-plc-drum-instruction Click PLC Send and Receive Instructions https://accautomation.ca/click-plc-send-and-receive-instructions Click PLC AdvancedHMI Communication https://accautomation.ca/click-plc-advancedhmi-communication Modbus RTU Click PLC Master to BRX PLC Slave Communication https://accautomation.ca/modbus-rtu-click-plc-master-to-brx-plc-slave-communication Video https://youtu.be/CIsj-Xppoog Click PLC - Update Firmware https://accautomation.ca/click-plc-update-firmware Video https://youtu.be/1X_kw4Rhokw Click PLC HMI Rotary Encoder Dial Input https://accautomation.ca/click-plc-hmi-rotary-encoder-dial-input Video https://youtu.be/mix9k2RTdII High-Speed Counter - Part 1 https://accautomation.ca/click-plc-high-speed-counting-part-1 High-Speed Count Mode Video https://youtu.be/P3l34unyAyU Interval Measurement Mode Video https://youtu.be/-t8JSKruilE Duration Measurement Mode Video https://youtu.be/znF6PRwGq-Y Frequency Measurement Mode Video https://youtu.be/m0I9P5AoFqE The entire Click PLC series can be found at this URL: https://accautomation.ca/series/click-plc/ There are several reasons why we are using the Click PLC. Here are just a few. - Investment is low for the hardware and the software is free - Standalone PLC with built-in I/O - Communication ability - Ethernet Port, RS232, RS485 - support for protocols such as Modbus RTU, Modbus TCP, etc. - Ability to expand the system with a variety of modules including RTD and Thermocouple inputs directly. https://www.accautomation.ca
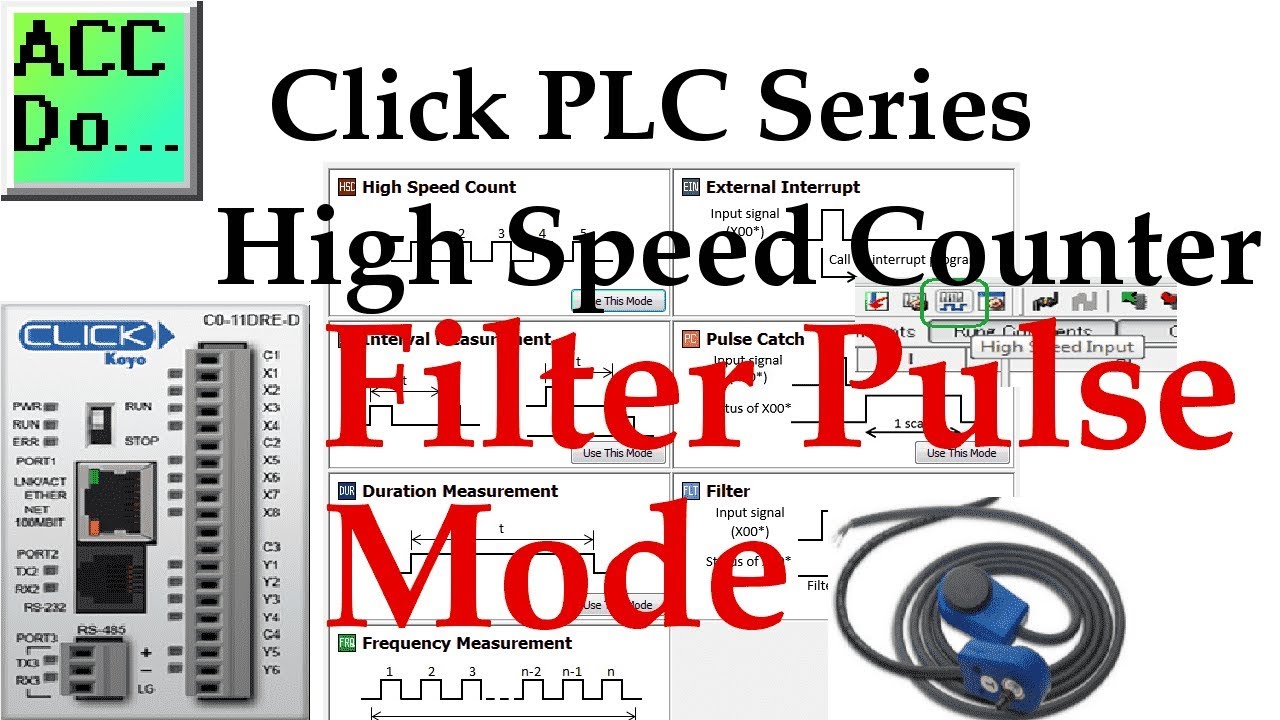
Click PLC High Speed Counter Input Filter Pulse Mode
2K views · Oct 13, 2022 accautomation.ca
We will now look at the Click PLC high-speed counter input. The Click PLC family has been updated, and now has the ability to use high-speed counting. This is available on all of the Ethernet units that have DC inputs. The faster processer on the Ethernet unit (3 to 10 times faster than the basic unit) allows this capability. There are seven (7) different modes of operation for the high-speed counter available so adaption to your automation solution is easy. The input can count Up, Down, Up/Down, Pulse/Direction, or Quadrature (with Z). The maximum speed on the high-speed counter inputs is 100 kHz. That is 100,000 pulses per second. We will be looking at the different high-speed counter modes available in the click. This is all set up through a user-friendly graphical user interface. Let’s get started! More information can be obtained on our website. This includes all of the links mentioned in this video. https://accautomation.ca/click-plc-high-speed-counting-part-2 Dart Magnetic Pick-up https://amzn.to/2rc9LiK https://ebay.to/2QqMFDh External Interrupt Mode https://youtu.be/UxFffVddUt4 Pulse Catch Mode https://youtu.be/2H0zwul1X3o Filter Pulse Mode https://youtu.be/FNbYAkBwIsQ Frequency Measurement and High-Speed Count Mode https://youtu.be/qV3jgRszghE Click PLC High-Speed Counter - Part 1 https://accautomation.ca/click-plc-high-speed-counting-part-1 High-Speed Count Mode https://youtu.be/P3l34unyAyU Interval Measurement Mode https://youtu.be/-t8JSKruilE Duration Measurement Mode https://youtu.be/znF6PRwGq-Y Frequency Measurement Mode https://youtu.be/m0I9P5AoFqE Previously we discussed: Click PLC System-Hardware. https://accautomation.ca/click-plc-system-hardware/ Click PLC Installing the Software https://accautomation.ca/click-plc-installing-the-software/ Click PLC Establish Communication https://accautomation.ca/click-plc-establish-communication/ Click PLC Numbering System and Addressing https://accautomation.ca/click-plc-numbering-system-and-addressing Click PLC Timers and Counters https://accautomation.ca/click-plc-timers-and-counters Click PLC Compare and Math Instructions https://accautomation.ca/click-plc-compare-and-math-instructions Click PLC Program Control Instructions https://accautomation.ca/click-plc-program-control-instructions Click PLC Shift Register Instruction https://accautomation.ca/click-plc-shift-register-instruction Click PLC Drum Instruction https://accautomation.ca/click-plc-drum-instruction Click PLC Send and Receive Instructions https://accautomation.ca/click-plc-send-and-receive-instructions Click PLC AdvancedHMI Communication https://accautomation.ca/click-plc-advancedhmi-communication Modbus RTU Click PLC Master to BRX PLC Slave Communication https://accautomation.ca/modbus-rtu-click-plc-master-to-brx-plc-slave-communication Video https://youtu.be/CIsj-Xppoog Click PLC - Update Firmware https://accautomation.ca/click-plc-update-firmware Video https://youtu.be/1X_kw4Rhokw Click PLC HMI Rotary Encoder Dial Input https://accautomation.ca/click-plc-hmi-rotary-encoder-dial-input Video https://youtu.be/mix9k2RTdII High-Speed Counter - Part 1 https://accautomation.ca/click-plc-high-speed-counting-part-1 High-Speed Count Mode Video https://youtu.be/P3l34unyAyU Interval Measurement Mode Video https://youtu.be/-t8JSKruilE Duration Measurement Mode Video https://youtu.be/znF6PRwGq-Y Frequency Measurement Mode Video https://youtu.be/m0I9P5AoFqE The entire Click PLC series can be found at this URL: https://accautomation.ca/series/click-plc/ There are several reasons why we are using the Click PLC. Here are just a few. - Investment is low for the hardware and the software is free - Standalone PLC with built-in I/O - Communication ability - Ethernet Port, RS232, RS485 - support for protocols such as Modbus RTU, Modbus TCP, etc. - Ability to expand the system with a variety of modules including RTD and Thermocouple inputs directly. https://www.accautomation.ca
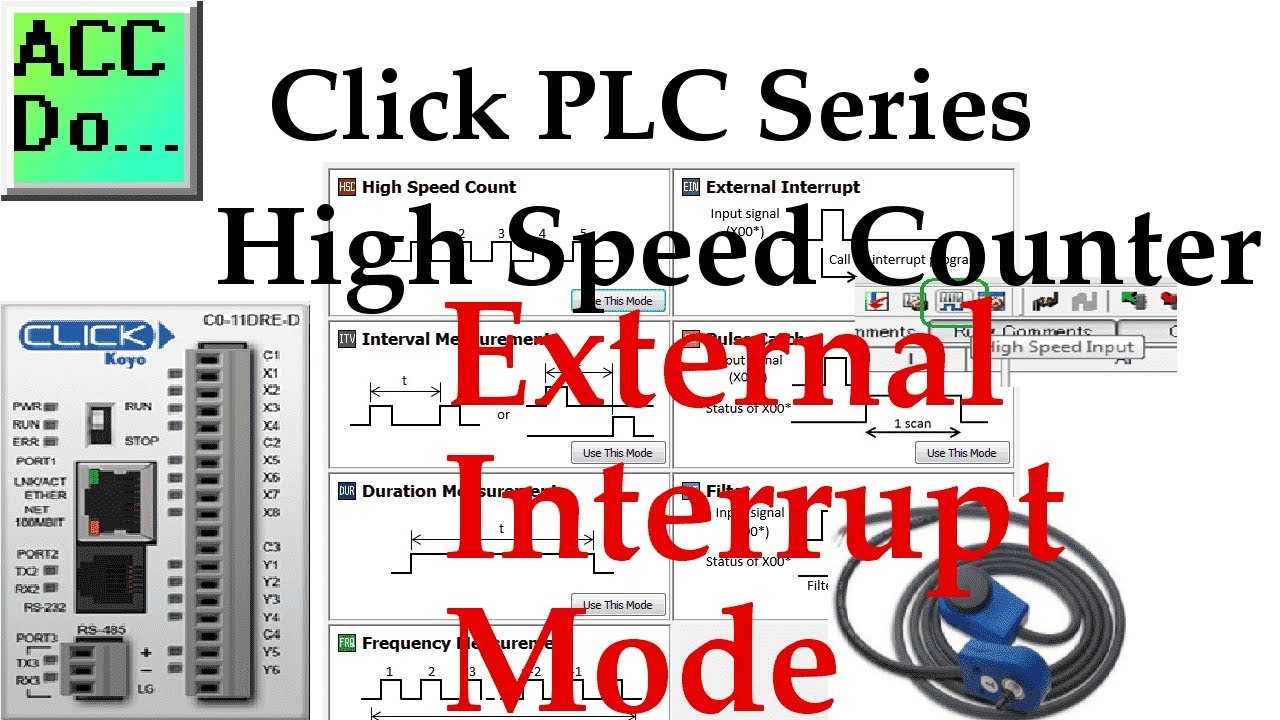
Click PLC High Speed Counter Input External Interrupt Mode
2K views · Oct 13, 2022 accautomation.ca
We will now look at the Click PLC high-speed counter input. The Click PLC family has been updated, and now has the ability to use high-speed counting. This is available on all of the Ethernet units that have DC inputs. The faster processer on the Ethernet unit (3 to 10 times faster than the basic unit) allows this capability. There are seven (7) different modes of operation for the high-speed counter available so adaption to your automation solution is easy. The input can count Up, Down, Up/Down, Pulse/Direction, or Quadrature (with Z). The maximum speed on the high-speed counter inputs is 100 kHz. That is 100,000 pulses per second. We will be looking at the different high-speed counter modes available in the click. This is all set up through a user-friendly graphical user interface. Let’s get started! More information can be obtained on our website. This includes all of the links mentioned in this video. https://accautomation.ca/click-plc-high-speed-counting-part-2 Dart Magnetic Pick-up https://amzn.to/2rc9LiK https://ebay.to/2QqMFDh External Interrupt Mode https://youtu.be/UxFffVddUt4 Pulse Catch Mode https://youtu.be/2H0zwul1X3o Filter Pulse Mode https://youtu.be/FNbYAkBwIsQ Frequency Measurement and High-Speed Count Mode https://youtu.be/qV3jgRszghE Click PLC High-Speed Counter - Part 1 https://accautomation.ca/click-plc-high-speed-counting-part-1 High-Speed Count Mode https://youtu.be/P3l34unyAyU Interval Measurement Mode https://youtu.be/-t8JSKruilE Duration Measurement Mode https://youtu.be/znF6PRwGq-Y Frequency Measurement Mode https://youtu.be/m0I9P5AoFqE Previously we discussed: Click PLC System-Hardware. https://accautomation.ca/click-plc-system-hardware/ Click PLC Installing the Software https://accautomation.ca/click-plc-installing-the-software/ Click PLC Establish Communication https://accautomation.ca/click-plc-establish-communication/ Click PLC Numbering System and Addressing https://accautomation.ca/click-plc-numbering-system-and-addressing Click PLC Timers and Counters https://accautomation.ca/click-plc-timers-and-counters Click PLC Compare and Math Instructions https://accautomation.ca/click-plc-compare-and-math-instructions Click PLC Program Control Instructions https://accautomation.ca/click-plc-program-control-instructions Click PLC Shift Register Instruction https://accautomation.ca/click-plc-shift-register-instruction Click PLC Drum Instruction https://accautomation.ca/click-plc-drum-instruction Click PLC Send and Receive Instructions https://accautomation.ca/click-plc-send-and-receive-instructions Click PLC AdvancedHMI Communication https://accautomation.ca/click-plc-advancedhmi-communication Modbus RTU Click PLC Master to BRX PLC Slave Communication https://accautomation.ca/modbus-rtu-click-plc-master-to-brx-plc-slave-communication Video https://youtu.be/CIsj-Xppoog Click PLC - Update Firmware https://accautomation.ca/click-plc-update-firmware Video https://youtu.be/1X_kw4Rhokw Click PLC HMI Rotary Encoder Dial Input https://accautomation.ca/click-plc-hmi-rotary-encoder-dial-input Video https://youtu.be/mix9k2RTdII High-Speed Counter - Part 1 https://accautomation.ca/click-plc-high-speed-counting-part-1 High-Speed Count Mode Video https://youtu.be/P3l34unyAyU Interval Measurement Mode Video https://youtu.be/-t8JSKruilE Duration Measurement Mode Video https://youtu.be/znF6PRwGq-Y Frequency Measurement Mode Video https://youtu.be/m0I9P5AoFqE The entire Click PLC series can be found at this URL: https://accautomation.ca/series/click-plc/ There are several reasons why we are using the Click PLC. Here are just a few. - Investment is low for the hardware and the software is free - Standalone PLC with built-in I/O - Communication ability - Ethernet Port, RS232, RS485 - support for protocols such as Modbus RTU, Modbus TCP, etc. - Ability to expand the system with a variety of modules including RTD and Thermocouple inputs directly. https://www.accautomation.ca
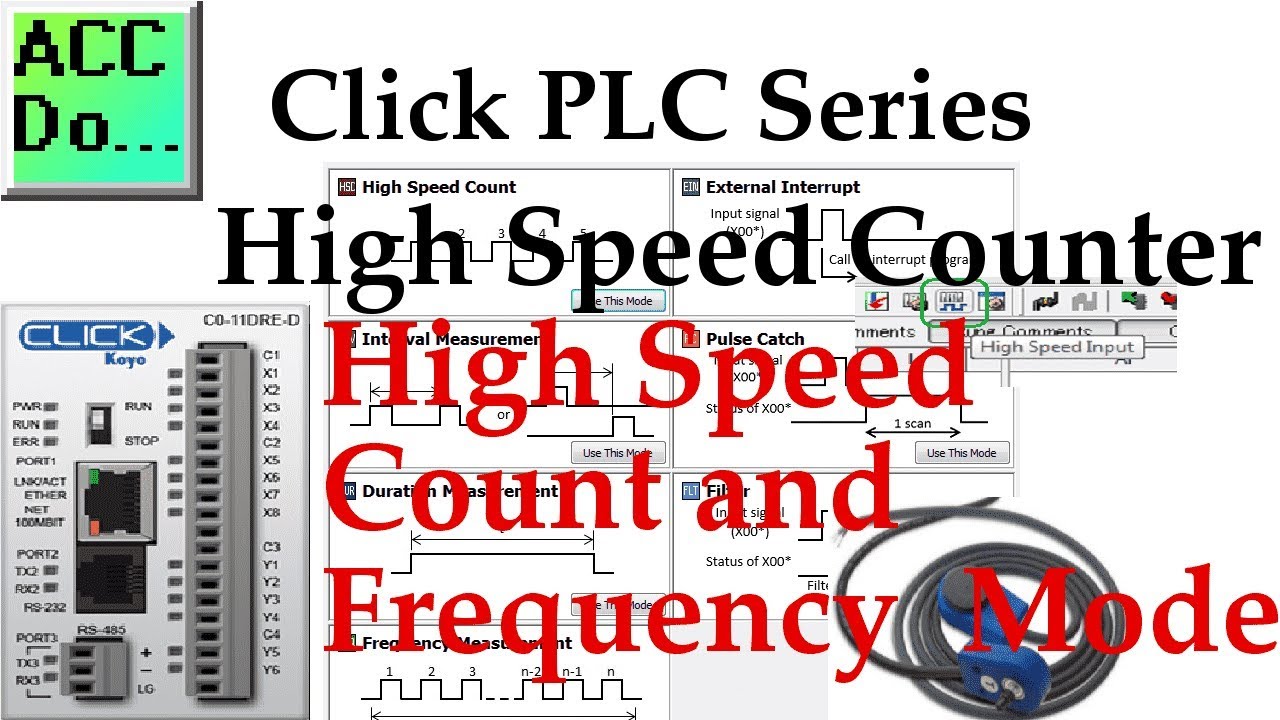
Click PLC High Speed Counter Input Frequency Measurement and...
24K views · Oct 13, 2022 accautomation.ca
We will now look at the Click PLC high-speed counter input. The Click PLC family has been updated, and now has the ability to use high-speed counting. This is available on all of the Ethernet units that have DC inputs. The faster processer on the Ethernet unit (3 to 10 times faster than the basic unit) allows this capability. There are seven (7) different modes of operation for the high-speed counter available so adaption to your automation solution is easy. The input can count Up, Down, Up/Down, Pulse/Direction, or Quadrature (with Z). The maximum speed on the high-speed counter inputs is 100 kHz. That is 100,000 pulses per second. We will be looking at the different high-speed counter modes available in the click. This is all set up through a user-friendly graphical user interface. Let’s get started! More information can be obtained on our website. This includes all of the links mentioned in this video. https://accautomation.ca/click-plc-high-speed-counting-part-2 Dart Magnetic Pick-up https://amzn.to/2rc9LiK https://ebay.to/2QqMFDh External Interrupt Mode https://youtu.be/UxFffVddUt4 Pulse Catch Mode https://youtu.be/2H0zwul1X3o Filter Pulse Mode https://youtu.be/FNbYAkBwIsQ Frequency Measurement and High-Speed Count Mode https://youtu.be/qV3jgRszghE Click PLC High-Speed Counter - Part 1 https://accautomation.ca/click-plc-high-speed-counting-part-1 High-Speed Count Mode https://youtu.be/P3l34unyAyU Interval Measurement Mode https://youtu.be/-t8JSKruilE Duration Measurement Mode https://youtu.be/znF6PRwGq-Y Frequency Measurement Mode https://youtu.be/m0I9P5AoFqE Previously we discussed: Click PLC System-Hardware. https://accautomation.ca/click-plc-system-hardware/ Click PLC Installing the Software https://accautomation.ca/click-plc-installing-the-software/ Click PLC Establish Communication https://accautomation.ca/click-plc-establish-communication/ Click PLC Numbering System and Addressing https://accautomation.ca/click-plc-numbering-system-and-addressing Click PLC Timers and Counters https://accautomation.ca/click-plc-timers-and-counters Click PLC Compare and Math Instructions https://accautomation.ca/click-plc-compare-and-math-instructions Click PLC Program Control Instructions https://accautomation.ca/click-plc-program-control-instructions Click PLC Shift Register Instruction https://accautomation.ca/click-plc-shift-register-instruction Click PLC Drum Instruction https://accautomation.ca/click-plc-drum-instruction Click PLC Send and Receive Instructions https://accautomation.ca/click-plc-send-and-receive-instructions Click PLC AdvancedHMI Communication https://accautomation.ca/click-plc-advancedhmi-communication Modbus RTU Click PLC Master to BRX PLC Slave Communication https://accautomation.ca/modbus-rtu-click-plc-master-to-brx-plc-slave-communication Video https://youtu.be/CIsj-Xppoog Click PLC - Update Firmware https://accautomation.ca/click-plc-update-firmware Video https://youtu.be/1X_kw4Rhokw Click PLC HMI Rotary Encoder Dial Input https://accautomation.ca/click-plc-hmi-rotary-encoder-dial-input Video https://youtu.be/mix9k2RTdII High-Speed Counter - Part 1 https://accautomation.ca/click-plc-high-speed-counting-part-1 High-Speed Count Mode Video https://youtu.be/P3l34unyAyU Interval Measurement Mode Video https://youtu.be/-t8JSKruilE Duration Measurement Mode Video https://youtu.be/znF6PRwGq-Y Frequency Measurement Mode Video https://youtu.be/m0I9P5AoFqE The entire Click PLC series can be found at this URL: https://accautomation.ca/series/click-plc/ There are several reasons why we are using the Click PLC. Here are just a few. - Investment is low for the hardware and the software is free - Standalone PLC with built-in I/O - Communication ability - Ethernet Port, RS232, RS485 - support for protocols such as Modbus RTU, Modbus TCP, etc. - Ability to expand the system with a variety of modules including RTD and Thermocouple inputs directly. https://www.accautomation.ca
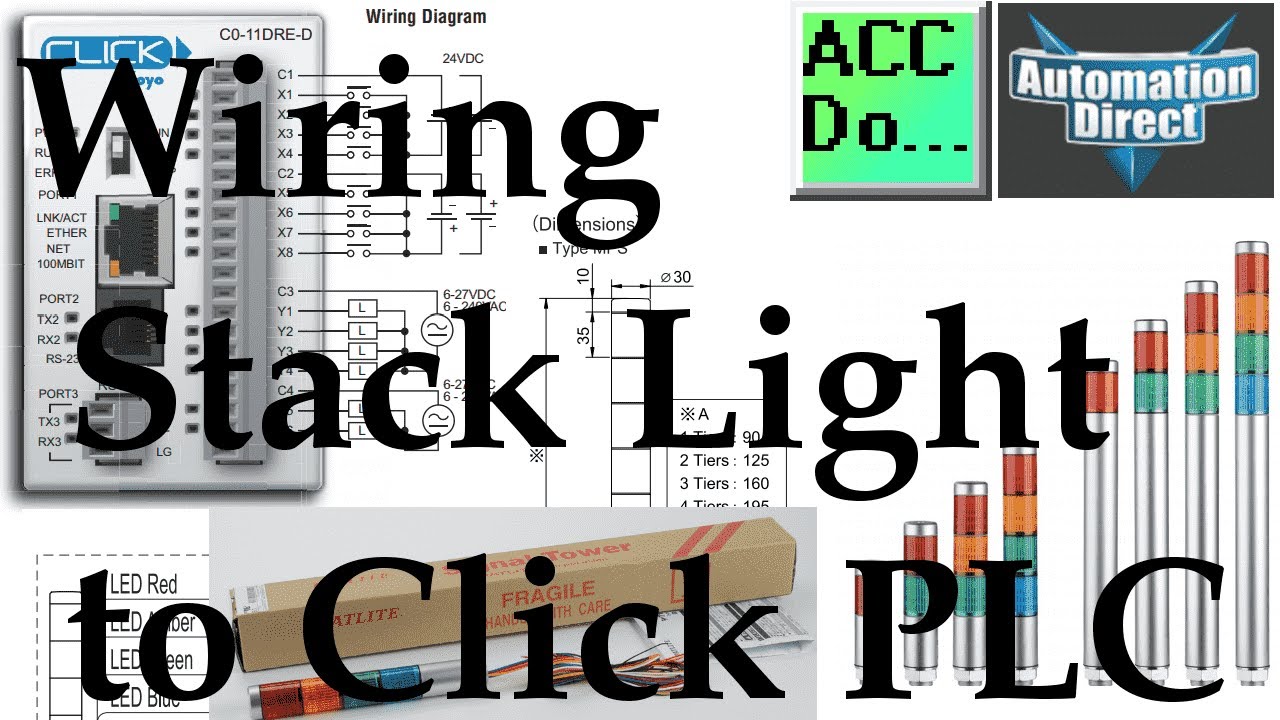
Wiring Stack Light to Click PLC
4K views · Oct 13, 2022 accautomation.ca
We will now wire a stack light to the Click PLC. Stack lights are usually modular stackable components that provide a visually illuminated and audible indication for machines, systems, and processes. They are usually located on top of equipment to provide this notification to personnel in the area. Stack lights are also known as signal tower lights, indicator lights, warning lights, industrial signal lights, tower lights, and light towers. We will be connecting a Patlite NPS-402-RYGB Super Slim stack light to our Click PLC. These stack lights come in preassembled units in the most popular combinations of colors with ABS resin main bodies that offer superior impact and heat resistance; double-insulated construction enhances durability and safety. Interchangeable light modules require no rewiring. Let’s get started. More information can be obtained on our website. This includes all of the links mentioned in this video. https://accautomation.ca/wiring-stack-light-to-click-plc/ Additional discrete component connections to PLC include the following: Here’s a Quick Way to Wire NPN and PNP Devices https://accautomation.ca/heres-a-quick-way-to-wire-npn-and-pnp-devices/ - Wiring NPN Sensor to PLC Video https://youtu.be/Z09l3HKMpqs - Wiring PNP Sensor to PLC Video https://youtu.be/nP33k5e_Y-k - Wiring Contact Discrete PLC Inputs Video https://youtu.be/xh5dE2Z09d0 Wiring Interposing Relays https://accautomation.ca/wiring-interposing-relays/ - Wiring NPN and PNP sensors into the PLC with an Interposing Relay Video https://youtu.be/abh_Q7eKT34 Click PLC HMI Rotary Encoder Dial Input - Video https://accautomation.ca/click-plc-hmi-rotary-encoder-dial-input/ https://youtu.be/mix9k2RTdII There are several reasons that we are using the Patlite NPS-402-RYGB Super Slim. Here are a few: • Super Slim • Prism-cut lens design for enhanced visibility from any direction • Double-insulated construction for enhanced durability and safety in the work environment. • Direct mount installation with just a single hole in the cabinet. • Interchangeable modules do not need re-wiring, even after installation • The main body is constructed of superior impact and heat-resistant ABS resin (not recommended for outdoor use). • The lens is made of superior weather-resistant and lights translucent AS resin. • Optional MP-B buzzer is available. Please see the accessories section for ordering information. • UL recognized File No. E215660 • IP65 ingress protection rating https://www.accautomation.ca
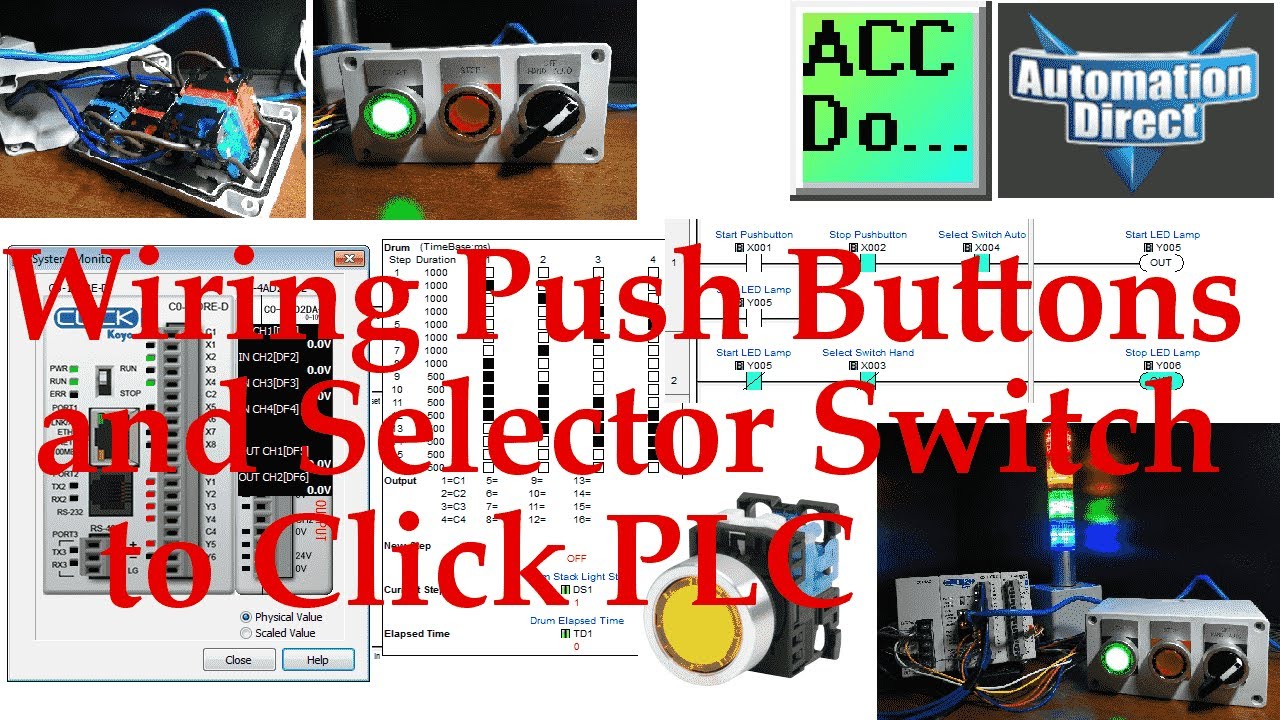
Wiring Push Buttons Switch to Click PLC
3K views · Oct 13, 2022 accautomation.ca
We will now look at wiring a click plc with selector switch and pushbuttons. A push-button (pushbutton) is a simple human interface for controlling some aspect of a machine or process. The push-button requires a force to push the button to change the electrical operation from off to on or vice versa. The condition of the output is usually momentarily. Some common everyday pushbuttons we use are keyboards keys. A selector switch is also a mechanical device that will require a force to turn the electrical operation from off to on or vice versa. The selector switch usually locks into a position. We will be wiring two illuminated pushbutton switches into our Click PLC. A selector switch will also be wired in. Let’s get started. More information can be obtained on our website. This includes all of the links mentioned in this video. https://accautomation.ca/wiring-push-buttons-and-selector-switch-to-click-plc/ 00:00 Wiring Push Buttons Switch to Click PLC 00:34 Push Buttons and Selector Switch Hardware 01:06 Wiring to the Click PLC 04:01Click PLC Program Operation 04:40 Monitoring the Click PLC Inputs and Outputs 05:42 Click PLC Program Test and Assembly of Push Buttons and a Selector Switch - Video https://youtu.be/UDed82RUULE Wiring Push Buttons and Selector Switch to Click PLC - Video https://youtu.be/vrb3EA0_Wvk Additional discrete component connections to PLC include the following: Here’s a Quick Way to Wire NPN and PNP Devices https://accautomation.ca/heres-a-quick-way-to-wire-npn-and-pnp-devices/ - Wiring NPN Sensor to PLC Video https://youtu.be/Z09l3HKMpqs - Wiring PNP Sensor to PLC Video https://youtu.be/nP33k5e_Y-k - Wiring Contact Discrete PLC Inputs Video https://youtu.be/xh5dE2Z09d0 Wiring Interposing Relays https://accautomation.ca/wiring-interposing-relays/ - Wiring NPN and PNP sensors into the PLC with an Interposing Relay Video https://youtu.be/abh_Q7eKT34 Click PLC HMI Rotary Encoder Dial Input - Video https://accautomation.ca/click-plc-hmi-rotary-encoder-dial-input/ https://youtu.be/mix9k2RTdII Wiring Stack Light to Click PLC https://accautomation.ca/wiring-stack-light-to-click-plc/ https://youtu.be/gwDIVtNSXfs There are several reasons that we are using the Fuji AR22 Series. Here are a few: - Mountable in a 22.3 or 25.5 mm diameter cutout (except joysticks and buzzers) - Fits 1mm to 6mm max panel thickness - Provided with the release arm - Terminal cover included for added safety - Wiring is possible in vertical and horizontal directions - Oil and dust-proof operator modules (IP65) (except buzzers) https://www.accautomation.ca
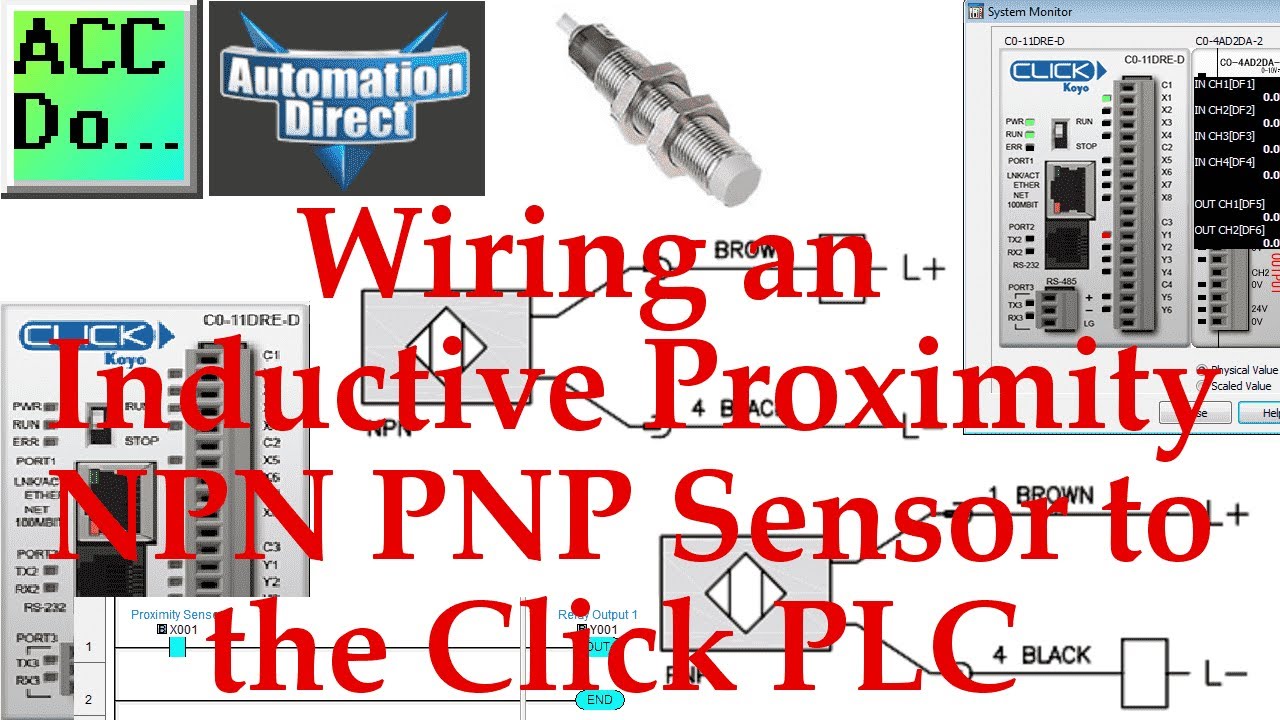
Wiring an Inductive NPN PNP Sensor to the Click PLC
2K views · Oct 13, 2022 accautomation.ca
We will now look at wiring an NPN and PNP inductive proximity sensor to the Click PLC. A proximity sensor (switch) is able to detect object presence without physical contact like a limit switch. No physical contact means that the switch has no parts that will wear out. The life span of the sensor is increased with less maintenance. An inductive proximity sensor will detect ferrous metals. The sensor develops an electric field when metal (sensing object) is introduced usually killing the oscillation circuit of the sensor triggering the output. We will be wiring an inductive proximity switch into the input of our Click PLC. The AM1-A0-4A is an extended range 12mm tubular sensor that can be wired into the PLC as a sink or source input. Let’s get started. More information can be obtained on our website. This includes all of the links mentioned in this video. https://accautomation.ca/wiring-an-inductive-proximity-npn-pnp-sensor-to-the-click-plc Additional discrete component connections to PLC include the following: Here’s a Quick Way to Wire NPN and PNP Devices https://accautomation.ca/heres-a-quick-way-to-wire-npn-and-pnp-devices/ - Wiring NPN Sensor to PLC Video https://youtu.be/Z09l3HKMpqs - Wiring PNP Sensor to PLC Video https://youtu.be/nP33k5e_Y-k - Wiring Contact Discrete PLC Inputs Video https://youtu.be/xh5dE2Z09d0 Wiring Interposing Relays https://accautomation.ca/wiring-interposing-relays/ - Wiring NPN and PNP sensors into the PLC with an Interposing Relay Video https://youtu.be/abh_Q7eKT34 Click PLC HMI Rotary Encoder Dial Input - Video https://accautomation.ca/click-plc-hmi-rotary-encoder-dial-input/ https://youtu.be/mix9k2RTdII Wiring Stack Light to Click PLC https://accautomation.ca/wiring-stack-light-to-click-plc/ https://youtu.be/gwDIVtNSXfs Wiring Push Buttons and Selector Switch to Click PLC https://accautomation.ca/wiring-push-buttons-and-selector-switch-to-click-plc/ Test and Assembly of Push Buttons and a Selector Switch - Video https://youtu.be/UDed82RUULE Wiring Push Buttons and Selector Switch to Click PLC - Video https://youtu.be/vrb3EA0_Wvk AM1 Series Sensors - Extended Sensing Distance (12mm) Features This proximity sensor has sink/ source, selectable wiring models. - Sink/ source 2-wire or NPN and PNP 3-wire models - Metal housing - Axial cable or M12 quick-disconnect models - Complete overload protection - LED status indicator - DC powered - 4mm shielded and 8mm unshielded extended sensing distances - 2-wire models work with sinking or sourcing PLC input modules, have very low leakage current - IEC IP67 protection rating - Lifetime warranty https://www.accautomation.ca
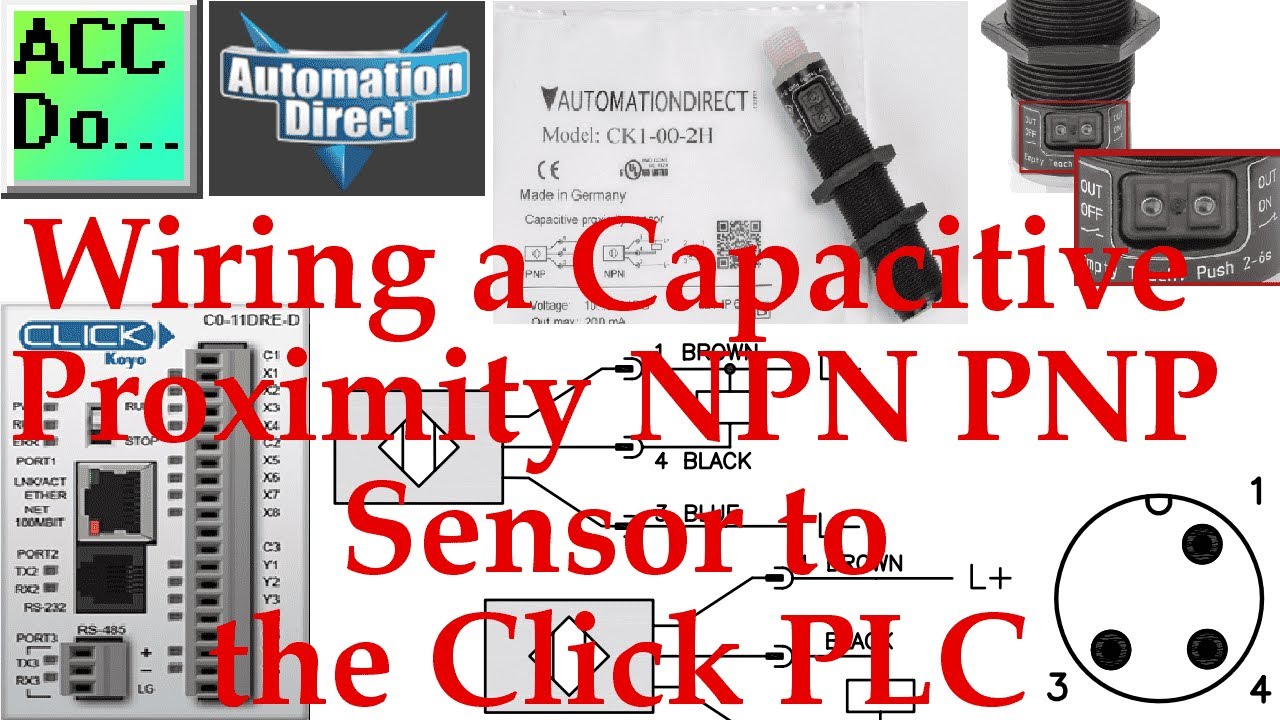
Wiring a Capacitive NPN PNP Sensor to the Click PLC
4K views · Oct 13, 2022 accautomation.ca
We will now look at wiring an NPN and PNP sensor to the Click PLC. A proximity sensor (switch) is able to detect object presence without physical contact like a limit switch. No physical contact means that the switch has no parts that will wear out. The life span of the sensor is increased with less maintenance. A capacitive proximity sensor will detect ferrous and non-ferrous objects. The sensor works by oscillating the charge on the plates in the sensor. When an object is placed in front of the surface, the amount of current flow is detected. (Capacitance) The dielectric of objects will determine the distance that the object can be detected. We will be wiring a capacitive proximity switch into the input of our Click PLC. The CK1-00-2H is an 18mm diameter, NPN/PNP N.O./N.C. selectable output with a 12mm sensing distance. That means that the sensor can be wired as a positive (Sourcing) or negative (Sinking) switch. This unshielded 10 Hz switching frequency sensor also has a 4-pin M12 quick disconnect. Let's get started. More information can be obtained on our website. This includes all of the links mentioned in this video. https://accautomation.ca/wiring-a-capacitive-proximity-npn-pnp-sensor-to-the-click-plc Additional discrete component connections to PLC include the following: Here’s a Quick Way to Wire NPN and PNP Devices https://accautomation.ca/heres-a-quick-way-to-wire-npn-and-pnp-devices/ - Wiring NPN Sensor to PLC Video https://youtu.be/Z09l3HKMpqs - Wiring PNP Sensor to PLC Video https://youtu.be/nP33k5e_Y-k - Wiring Contact Discrete PLC Inputs Video https://youtu.be/xh5dE2Z09d0 Wiring Interposing Relays https://accautomation.ca/wiring-interposing-relays/ - Wiring NPN and PNP sensors into the PLC with an Interposing Relay Video https://youtu.be/abh_Q7eKT34 Click PLC HMI Rotary Encoder Dial Input - Video https://accautomation.ca/click-plc-hmi-rotary-encoder-dial-input/ https://youtu.be/mix9k2RTdII Wiring Stack Light to Click PLC https://accautomation.ca/wiring-stack-light-to-click-plc/ https://youtu.be/gwDIVtNSXfs Wiring Push Buttons and Selector Switch to Click PLC https://accautomation.ca/wiring-push-buttons-and-selector-switch-to-click-plc/ Test and Assembly of Push Buttons and a Selector Switch - Video https://youtu.be/UDed82RUULE Wiring Push Buttons and Selector Switch to Click PLC - Video https://youtu.be/vrb3EA0_Wvk Wiring an Inductive Proximity NPN PNP Sensor to the Click PLC https://accautomation.ca/wiring-an-inductive-proximity-npn-pnp-sensor-to-the-click-plc https://youtu.be/r-hB_I6lWcM CK Series Capacitive Proximity Sensor Features: M18 (18 mm) plastic – DC • NO/NC selectable • Sensing distance: 12mm • Supply voltage: 10-36 VDC • Switching frequency: 10Hz • IP65/IP67 rated • LED status indicators • M12 quick-disconnect; purchase cable separately • Lifetime warranty • Auto-detect circuit • Push-button teach • Mounting accessories available • Agency approvals: cULus file E328811, CE, RoHS https://www.accautomation.ca
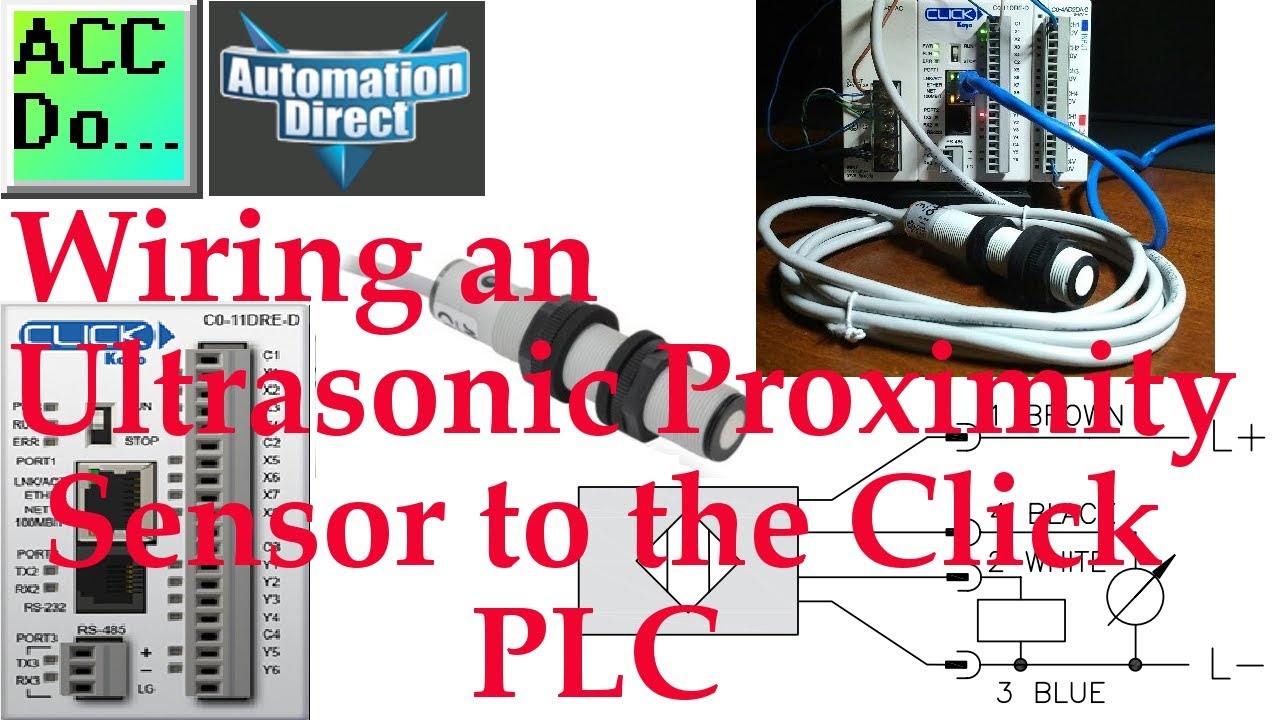
Wiring an Ultrasonic Proximity Sensor to the Click PLC
3K views · Oct 13, 2022 accautomation.ca
We will now look at wiring an ultrasonic proximity sensor to a Click PLC. An ultrasonic sensor (switch) is able to detect object presence without physical contact (limit switch). No physical contact means that the switch has no parts that will wear out. The life span of the sensor is increased with less maintenance. An ultrasonic sensor will use sound waves to detect objects. These sound waves are at a level that we cannot hear. Distance is measured by the time it takes to send and receive the ultrasonic wave. Objects can be measured the same no matter what the color, transparency, shininess, or lighting conditions of the application. We will be wiring an ultrasonic sensor into the input of our Click PLC. This will include a discrete and analog input signal. The UK1F-E7-0A is an 18mm diameter sensor that has a PNP N.O./N.C. selectable output with analog output of 0 -10 VDC. The sensing distance is 200mm to 2200mm and has a one-hertz switching capacity. A 4-pin M12 quick-disconnect is available but we will be wiring in our 2m wired version. Let's get started. More information can be obtained on our website. This includes all of the links mentioned in this video. https://accautomation.ca/wiring-an-ultrasonic-proximity-sensor-to-the-click-plc Unboxing our UK1F Ultrasonic Proximity Sensor - Video https://youtu.be/waUMGyjCG7g Additional discrete component connections to PLC include the following: Here’s a Quick Way to Wire NPN and PNP Devices https://accautomation.ca/heres-a-quick-way-to-wire-npn-and-pnp-devices/ - Wiring NPN Sensor to PLC Video https://youtu.be/Z09l3HKMpqs - Wiring PNP Sensor to PLC Video https://youtu.be/nP33k5e_Y-k - Wiring Contact Discrete PLC Inputs Video https://youtu.be/xh5dE2Z09d0 Wiring Interposing Relays https://accautomation.ca/wiring-interposing-relays/ - Wiring NPN and PNP sensors into the PLC with an Interposing Relay Video https://youtu.be/abh_Q7eKT34 Click PLC HMI Rotary Encoder Dial Input - Video https://accautomation.ca/click-plc-hmi-rotary-encoder-dial-input/ https://youtu.be/mix9k2RTdII Wiring Stack Light to Click PLC https://accautomation.ca/wiring-stack-light-to-click-plc/ https://youtu.be/gwDIVtNSXfs Wiring Push Buttons and Selector Switch to Click PLC https://accautomation.ca/wiring-push-buttons-and-selector-switch-to-click-plc/ Test and Assembly of Push Buttons and a Selector Switch - Video https://youtu.be/UDed82RUULE Wiring Push Buttons and Selector Switch to Click PLC - Video https://youtu.be/vrb3EA0_Wvk Wiring an Inductive Proximity NPN PNP Sensor to the Click PLC https://accautomation.ca/wiring-an-inductive-proximity-npn-pnp-sensor-to-the-click-plc https://youtu.be/r-hB_I6lWcM Wiring a Capacitive Proximity NPN PNP Sensor to the Click PLC https://accautomation.ca/wiring-a-capacitive-proximity-npn-pnp-sensor-to-the-click-plc https://youtu.be/KXdrp-y4baQ UK / SU Series Ultrasonic Proximity Sensors M18 (18 mm) plastic – DC • High resolution • 15 to 30 VDC operating voltage • Discrete models available with adjustable sensitivity • Analog output models available (0-10 VDC and 4-20 mA) • Ten different output types: Single PNP, Single NPN, Dual PNP, Dual NPN, PNP & 4-20mA, NPN & 4-20mA, PNP and 0-10V, NPN and 0-10V, 4-20mA only, 0-10V only • Sensing distances from 40 to 2200 mm • Complete overload protection • Multi-function LED status indicator • Programmable via teach button or programmable via wire (UK6 Series) • Mounting hex nuts included • 2m output cable or M12 (12mm) quick-disconnect connector (purchase cable separately) • CE, cULus file E187310, IP67 rated • Lifetime warranty https://www.accautomation.ca
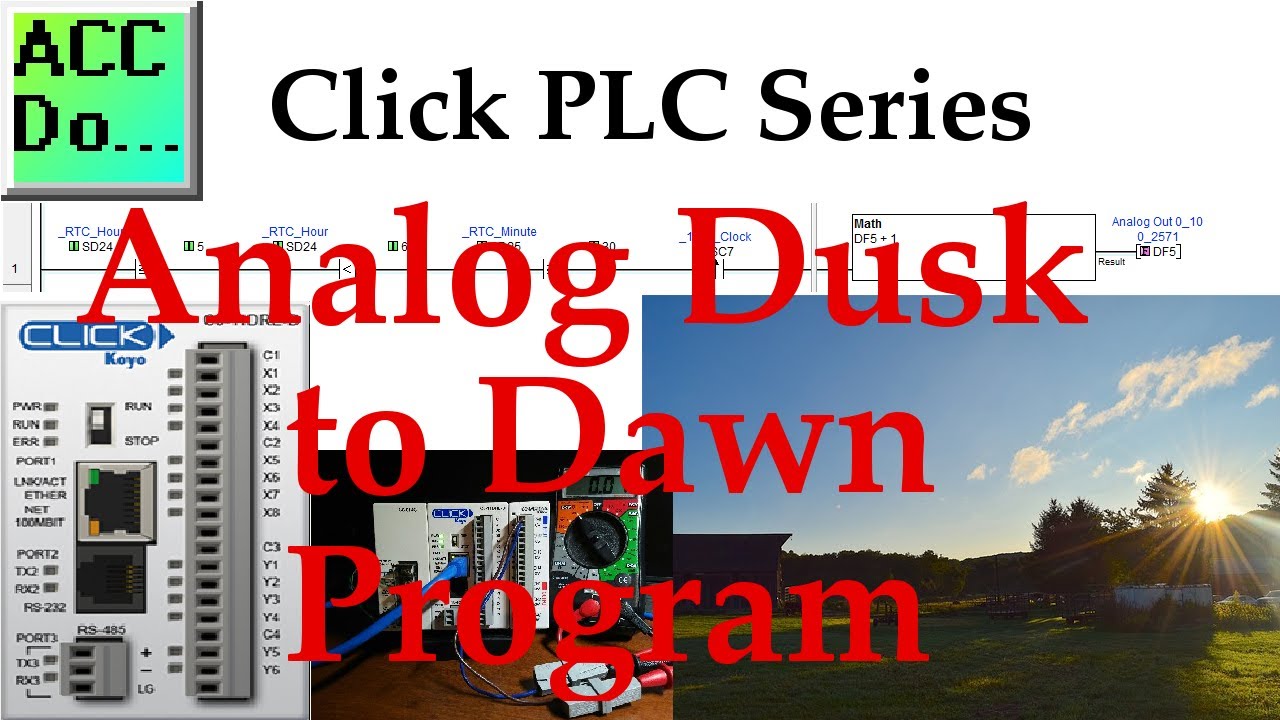
Click PLC Analog Dusk to Dawn Program Example
2K views · Oct 13, 2022 accautomation.ca
A dusk to dawn sensor usually is discrete on/off of the lighting control. If we want to vary the lights to mimic more of the sunset and rise, we would use an analog output to control the lights. I was recently asked about such a program. Every day they wanted the lights to go off at 10 pm and come back on at 6 am. At 9:30 pm the lights would be on at 70% or 7volts of a 0-10V signal. In the next half hour, the program will bring the lights from 70% down to 0%. In the morning the lights will come back on within the half-hour from 0% to 70%. Poultry Farms are one place that would utilize this program. We will be developing a program that will do this with our Click PLC. Let’s get started! More information can be obtained on our website. This includes all of the links mentioned in this video. https://accautomation.ca/click-plc-analog-dusk-to-dawn-program Previously we discussed: Click PLC System-Hardware. https://accautomation.ca/click-plc-system-hardware/ Click PLC Installing the Software https://accautomation.ca/click-plc-installing-the-software/ Click PLC Establish Communication https://accautomation.ca/click-plc-establish-communication/ Click PLC Numbering System and Addressing https://accautomation.ca/click-plc-numbering-system-and-addressing Click PLC Timers and Counters https://accautomation.ca/click-plc-timers-and-counters Click PLC Compare and Math Instructions https://accautomation.ca/click-plc-compare-and-math-instructions Click PLC Program Control Instructions https://accautomation.ca/click-plc-program-control-instructions Click PLC Shift Register Instruction https://accautomation.ca/click-plc-shift-register-instruction Click PLC Drum Instruction https://accautomation.ca/click-plc-drum-instruction Click PLC Send and Receive Instructions https://accautomation.ca/click-plc-send-and-receive-instructions Click PLC AdvancedHMI Communication https://accautomation.ca/click-plc-advancedhmi-communication Modbus RTU Click PLC Master to BRX PLC Slave Communication https://accautomation.ca/modbus-rtu-click-plc-master-to-brx-plc-slave-communication Video https://youtu.be/CIsj-Xppoog Click PLC - Update Firmware https://accautomation.ca/click-plc-update-firmware Video https://youtu.be/1X_kw4Rhokw Click PLC HMI Rotary Encoder Dial Input https://accautomation.ca/click-plc-hmi-rotary-encoder-dial-input Video https://youtu.be/mix9k2RTdII High-Speed Counter - Part 1 https://accautomation.ca/click-plc-high-speed-counting-part-1 High-Speed Count Mode Video https://youtu.be/P3l34unyAyU Interval Measurement Mode Video https://youtu.be/-t8JSKruilE Duration Measurement Mode Video https://youtu.be/znF6PRwGq-Y Frequency Measurement Mode Video https://youtu.be/m0I9P5AoFqE Click PLC High-Speed Counter - Part 2 https://accautomation.ca/click-plc-high-speed-counting-part-2 External Interrupt Mode https://youtu.be/UxFffVddUt4 Pulse Catch Mode https://youtu.be/2H0zwul1X3o Filter Pulse Mode https://youtu.be/FNbYAkBwIsQ Frequency Measurement and High-Speed Count Mode https://youtu.be/qV3jgRszghE The entire Click PLC series can be found at this URL: https://accautomation.ca/series/click-plc/ There are several reasons why we are using the Click PLC. Here are just a few. - Investment is low for the hardware and the software is free - Standalone PLC with built-in I/O - Communication ability - Ethernet Port, RS232, RS485 - support for protocols such as Modbus RTU, Modbus TCP, etc. - Ability to expand the system with a variety of modules including RTD and Thermocouple inputs directly. https://www.accautomation.ca
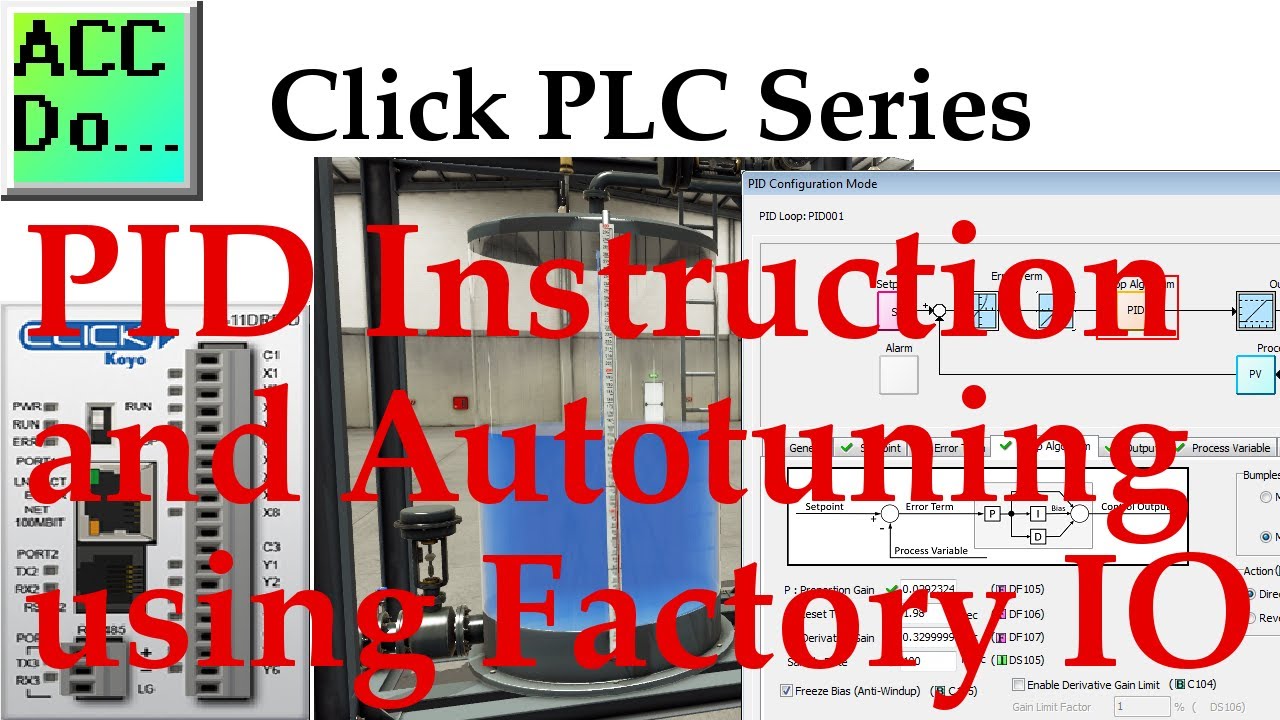
Click PLC PID Instruction and Autotuning using Factory IO
1K views · Oct 13, 2022 accautomation.ca
A PID (Proportional, Integral, and Derivative) control is possible with the Click PLC. The Click Programming Software version 2.50 now includes PID. This features 8 full-featured control loops with an easy graphical user interface (GUI). PID will run on all of the Ethernet-enabled Click PLCs. We will be using this PID along with a Factory IO scene to demonstrate PID control and Autotuning using our Click PLC. Here are some references on PID control: PID without a Ph.D. By Tim Wescott http://igor.chudov.com/manuals/Servo-Tuning/PID-without-a-PhD.pdf Understanding PID in 4 minutes https://www.youtube.com/watch?v=wbmEUi2p-nA PID Control – A brief introduction PID Controllers Explained https://www.youtube.com/watch?v=UR0hOmjaHp0 Who Else Wants to Learn about On-Off and PID Control? https://accautomation.ca/who-else-wants-to-learn-about-on-off-and-pid-control/ Our Factory IO scene will be controlling the level of water in a tank. PID will be used to maintain the level based on a dial pot knob on the control panel. Let’s get started! More information can be obtained on our website. This includes all of the links mentioned in this video. https://accautomation.ca/click-plc-pid-instruction-and-autotuning-using-factory-io Previously we discussed: Click PLC System-Hardware. https://accautomation.ca/click-plc-system-hardware/ Click PLC Installing the Software https://accautomation.ca/click-plc-installing-the-software/ Click PLC Establish Communication https://accautomation.ca/click-plc-establish-communication/ Click PLC Numbering System and Addressing https://accautomation.ca/click-plc-numbering-system-and-addressing Click PLC Timers and Counters https://accautomation.ca/click-plc-timers-and-counters Click PLC Compare and Math Instructions https://accautomation.ca/click-plc-compare-and-math-instructions Click PLC Program Control Instructions https://accautomation.ca/click-plc-program-control-instructions Click PLC Shift Register Instruction https://accautomation.ca/click-plc-shift-register-instruction Click PLC Drum Instruction https://accautomation.ca/click-plc-drum-instruction Click PLC Send and Receive Instructions https://accautomation.ca/click-plc-send-and-receive-instructions Click PLC AdvancedHMI Communication https://accautomation.ca/click-plc-advancedhmi-communication Modbus RTU Click PLC Master to BRX PLC Slave Communication https://accautomation.ca/modbus-rtu-click-plc-master-to-brx-plc-slave-communication Video https://youtu.be/CIsj-Xppoog Click PLC - Update Firmware https://accautomation.ca/click-plc-update-firmware Video https://youtu.be/1X_kw4Rhokw Click PLC HMI Rotary Encoder Dial Input https://accautomation.ca/click-plc-hmi-rotary-encoder-dial-input Video https://youtu.be/mix9k2RTdII High-Speed Counter - Part 1 https://accautomation.ca/click-plc-high-speed-counting-part-1 High-Speed Count Mode Video https://youtu.be/P3l34unyAyU Interval Measurement Mode Video https://youtu.be/-t8JSKruilE Duration Measurement Mode Video https://youtu.be/znF6PRwGq-Y Frequency Measurement Mode Video https://youtu.be/m0I9P5AoFqE Click PLC High-Speed Counter - Part 2 https://accautomation.ca/click-plc-high-speed-counting-part-2 External Interrupt Mode https://youtu.be/UxFffVddUt4 Pulse Catch Mode https://youtu.be/2H0zwul1X3o Filter Pulse Mode https://youtu.be/FNbYAkBwIsQ Frequency Measurement and High-Speed Count Mode https://youtu.be/qV3jgRszghE Analog Dusk to Dawn Program https://accautomation.ca/click-plc-analog-dusk-to-dawn-program https://youtu.be/JlxTBlk6IJY PID using Factory IO https://accautomation.ca/click-plc-pid-using-factory-io https://youtu.be/JGB9e__MWPc The entire Click PLC series can be found at this URL: https://accautomation.ca/series/click-plc/ There are several reasons why we are using the Click PLC. Here are just a few. - Investment is low for the hardware and the software is free - Standalone PLC with built-in I/O - Communication ability - Ethernet Port, RS232, RS485 - support for protocols such as Modbus RTU, Modbus TCP, etc. - Ability to expand the system with a variety of modules including RTD and Thermocouple inputs directly. https://www.accautomation.ca
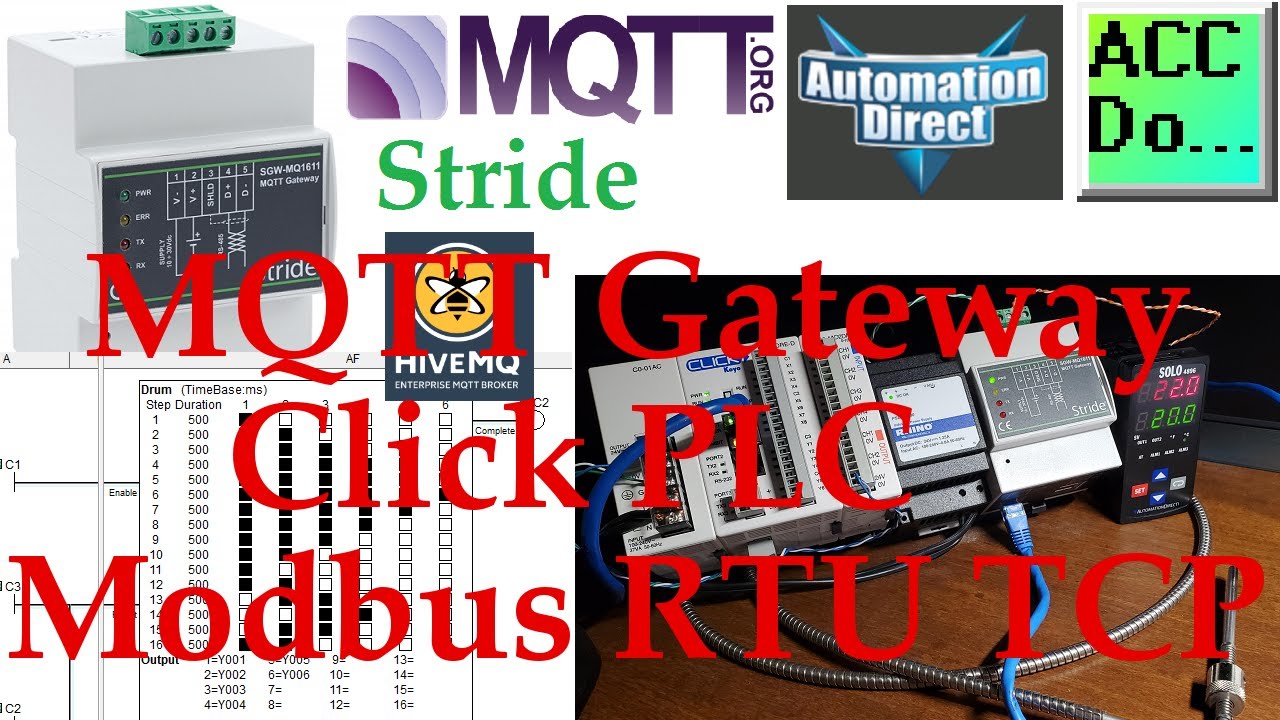
Stride MQTT Gateway Click PLC Modbus RTU TCP
6K views · Oct 13, 2022 accautomation.ca
We will use the Stride MQTT Gateway to connect to the Click PLC through Modbus TCP and RTU. MQTT protocol is used for machine-to-machine (M2M), internet of things (IoT) communication. This publish/subscribe messaging is used where limited device resources are available or network bandwidth is low. The MQTT protocol provides small size, low power usage, minimized data packets, and efficient distribution of information to one or many receivers. The Stride MQTT Gateway is an industrial 4.0 hardware component (IIoT - Industrial Internet of Things) that provides isolation and can easily interface with existing Modbus RTU and Modbus TCP communication protocols. We will be connecting a Stride MQTT Gateway to a Click PLC (Ethernet) via Modbus TCP. Previously we connected the Solo process temperature controller with Modbus RTU(RS485). We will leave this connection in place and add the Click PLC. The MQTT Gateway will communicate with HiveMQ Broker. MQTTBox Client will then read and write to the Click PLC and Solo process temperature controller. Let's get started. More information can be obtained on our website. This includes all of the links mentioned in this video. https://accautomation.ca/stride-mqtt-gateway-click-plc-modbus-rtu-tcp Previous MQTT discussions can be found at the following location: BRX Do-More Simulator MQTT Publish-Subscribe https://accautomation.ca/brx-do-more-simulator-mqtt-publish-subscribe https://youtu.be/assMcr7caa8 BRX Do-More PLC MQTT Communications https://accautomation.ca/brx-do-more-plc-mqtt-communications https://youtu.be/Tjtrxh1K-b4 Stride MQTT Gateway Modbus RTU TCP https://accautomation.ca/stride-mqtt-gateway-modbus-rtu-tcp Stride MQTT Gateway Unboxing - Video https://youtu.be/A2ae7Sq3DRE Stride MQTT Gateway Modbus RTU TCP - Video https://youtu.be/jBNobfsBaVg There are several reasons why we are using the STRIDE MQTT Gateway. Here are just a few. - Convert Modbus RTU/TCP to MQTT - IIoT MQTT protocol with SSL/TLS - Configurable via a web page - Hardware watchdog function - Full electrical isolation - MQTT cloud compatible with AWS, Mosquitto and more - Wired or Wi-Fi models available - CE and FCC agency approvals https://www.accautomation.ca
Click PLC Logging Data with Time and Date Stamp
2K views · Oct 13, 2022 accautomation.ca
We will now look at logging data with time and date in the Click PLC. The Click PLC can perform indirect addressing. This means that I can ask for information to be moved to and from locations in the PLC using a pointer that will indicate the address. Stephen Covey in The 7 Habits of Highly Effective People said: “Begin With the End in Mind.” This is especially true when looking at storing or logging data within the programmable logic controller. (PLC) It is important to fully define what you want to accomplish with your program. In our Click PLC example, we want to take a series of consecutive memory locations (DS1 to DS10) and store them in memory areas DS100 to DS4100 each minute. We will be able to store 400 entries (400 minutes) in our storage area. Every entry will include the real-time clock (RTC) of the Click. This will show the date and time of each entry. Let’s get started! More information can be obtained on our website. This includes all of the links mentioned in this video. https://accautomation.ca/click-plc-logging-data-with-time-and-date-stamp Previously we discussed: Click PLC System-Hardware. https://accautomation.ca/click-plc-system-hardware/ Click PLC Installing the Software https://accautomation.ca/click-plc-installing-the-software/ Click PLC Establish Communication https://accautomation.ca/click-plc-establish-communication/ Click PLC Numbering System and Addressing https://accautomation.ca/click-plc-numbering-system-and-addressing Click PLC Timers and Counters https://accautomation.ca/click-plc-timers-and-counters Click PLC Compare and Math Instructions https://accautomation.ca/click-plc-compare-and-math-instructions Click PLC Program Control Instructions https://accautomation.ca/click-plc-program-control-instructions Click PLC Shift Register Instruction https://accautomation.ca/click-plc-shift-register-instruction Click PLC Drum Instruction https://accautomation.ca/click-plc-drum-instruction Click PLC Send and Receive Instructions https://accautomation.ca/click-plc-send-and-receive-instructions Click PLC AdvancedHMI Communication https://accautomation.ca/click-plc-advancedhmi-communication Modbus RTU Click PLC Master to BRX PLC Slave Communication https://accautomation.ca/modbus-rtu-click-plc-master-to-brx-plc-slave-communication Video https://youtu.be/CIsj-Xppoog Click PLC - Update Firmware https://accautomation.ca/click-plc-update-firmware Video https://youtu.be/1X_kw4Rhokw Click PLC HMI Rotary Encoder Dial Input https://accautomation.ca/click-plc-hmi-rotary-encoder-dial-input Video https://youtu.be/mix9k2RTdII High-Speed Counter - Part 1 https://accautomation.ca/click-plc-high-speed-counting-part-1 High-Speed Count Mode Video https://youtu.be/P3l34unyAyU Interval Measurement Mode Video https://youtu.be/-t8JSKruilE Duration Measurement Mode Video https://youtu.be/znF6PRwGq-Y Frequency Measurement Mode Video https://youtu.be/m0I9P5AoFqE Click PLC High-Speed Counter - Part 2 https://accautomation.ca/click-plc-high-speed-counting-part-2 External Interrupt Mode https://youtu.be/UxFffVddUt4 Pulse Catch Mode https://youtu.be/2H0zwul1X3o Filter Pulse Mode https://youtu.be/FNbYAkBwIsQ Frequency Measurement and High-Speed Count Mode https://youtu.be/qV3jgRszghE Analog Dusk to Dawn Program https://accautomation.ca/click-plc-analog-dusk-to-dawn-program https://youtu.be/JlxTBlk6IJY PID using Factory IO https://accautomation.ca/click-plc-pid-using-factory-io https://youtu.be/JGB9e__MWPc PID Instruction and Autotuning using Factory IO https://accautomation.ca/click-plc-pid-instruction-and-autotuning-using-factory-io https://youtu.be/QoMw1SGW-gA The entire Click PLC series can be found at this URL: https://accautomation.ca/series/click-plc/ There are several reasons why we are using the Click PLC. Here are just a few. - Investment is low for the hardware and the software is free - Standalone PLC with built-in I/O - Communication ability - Ethernet Port, RS232, RS485 - support for protocols such as Modbus RTU, Modbus TCP, etc. - Ability to expand the system with a variety of modules including RTD and Thermocouple inputs directly. https://www.accautomation.ca
Click PLC to Stride Modbus TCP Remote IO
5K views · Oct 13, 2022 accautomation.ca
The Click PLC can use remote inputs and outputs from Stride. The Stride Field I/O Modules are simple and compact. They provide an economical means to connect inputs and outputs to an Ethernet Modbus TCP communication network. Every module operates as a standalone Modbus TCP server and can be configured via a built-in web server. Previously we looked at the Stride Field Remote IO Modules Modbus TCP Ethernet wiring and configuration. Stride Field Remote IO Modules Modbus TCP Ethernet - Unboxing SIO MB12CDR and SIO MB04ADS Video - Powering and Configuring Video We will be connecting two Stride remote inputs and outputs to the Click PLC. Modbus TCP will be the protocol over Ethernet to communicate to the SIO-MB12CDR and SIO-MB04ADS units. SIO-MB12CDR - STRIDE discrete combo module, Input: 8-point, 12-24 VDC, sinking, Output: 4-point, relay, (4) Form C (SPDT) relays, 2A/point, (1) Ethernet (RJ45) port(s), Modbus TCP server. SIO-MB04ADS - STRIDE analog input module, 4-channel, current/voltage, 16-bit, isolated, input current signal range(s) of +/- 20 mA, input voltage signal range(s) of +/- 10 VDC, (1) Ethernet (RJ45) port(s), Modbus TCP server. We will be reading an analog voltage into the Click PLC from the remote IO unit. We will then set an output to pulse on and off at a time range indicated by this analog signal. The output will be on the other remote IO unit and will trigger the input to signal. We will look at the Frequency, Count, and Status of this input. Our Click PLC program will also take into consideration watchdog (communication time out) and power-up events for the Stride remote input and output units. Let’s get started! More information can be obtained on our website. This includes all of the links mentioned in this video. https://accautomation.ca/click-plc-to-stride-field-io-modbus-tcp Previously we discussed: Click PLC Numbering System and Addressing https://accautomation.ca/click-plc-numbering-system-and-addressing Click PLC Timers and Counters https://accautomation.ca/click-plc-timers-and-counters Click PLC Compare and Math Instructions https://accautomation.ca/click-plc-compare-and-math-instructions Click PLC Program Control Instructions https://accautomation.ca/click-plc-program-control-instructions Click PLC Shift Register Instruction https://accautomation.ca/click-plc-shift-register-instruction Click PLC Drum Instruction https://accautomation.ca/click-plc-drum-instruction Click PLC Send and Receive Instructions https://accautomation.ca/click-plc-send-and-receive-instructions Click PLC AdvancedHMI Communication https://accautomation.ca/click-plc-advancedhmi-communication Modbus RTU Click PLC Master to BRX PLC Slave Communication https://accautomation.ca/modbus-rtu-click-plc-master-to-brx-plc-slave-communication Video https://youtu.be/CIsj-Xppoog Click PLC HMI Rotary Encoder Dial Input https://accautomation.ca/click-plc-hmi-rotary-encoder-dial-input Video https://youtu.be/mix9k2RTdII High-Speed Counter - Part 1 https://accautomation.ca/click-plc-high-speed-counting-part-1 High-Speed Count Mode Video https://youtu.be/P3l34unyAyU Interval Measurement Mode Video https://youtu.be/-t8JSKruilE Duration Measurement Mode Video https://youtu.be/znF6PRwGq-Y Frequency Measurement Mode Video https://youtu.be/m0I9P5AoFqE Click PLC High-Speed Counter - Part 2 https://accautomation.ca/click-plc-high-speed-counting-part-2 External Interrupt Mode https://youtu.be/UxFffVddUt4 Pulse Catch Mode https://youtu.be/2H0zwul1X3o Filter Pulse Mode https://youtu.be/FNbYAkBwIsQ Frequency Measurement and High-Speed Count Mode https://youtu.be/qV3jgRszghE Analog Dusk to Dawn Program https://accautomation.ca/click-plc-analog-dusk-to-dawn-program https://youtu.be/JlxTBlk6IJY PID using Factory IO https://accautomation.ca/click-plc-pid-using-factory-io https://youtu.be/JGB9e__MWPc PID Instruction and Autotuning using Factory IO https://accautomation.ca/click-plc-pid-instruction-and-autotuning-using-factory-io https://youtu.be/QoMw1SGW-gA Logging Data with Time and Date Stamp https://accautomation.ca/click-plc-logging-data-with-time-and-date-stamp https://youtu.be/CQ5xa5UZPng Stride Field Remote IO Modules Modbus TCP Ethernet https://accautomation.ca/stride-field-remote-io-modules-modbus-tcp-ethernet Stride Field Remote IO Modules Unboxing SIO MB12CDR and SIO MB04ADS https://youtu.be/GbZNgcbVaLM Stride Field Remote IO Modules Powering and Configuring https://youtu.be/oVzWgkUn-D0 The entire Click PLC series can be found at this URL: https://accautomation.ca/series/click-plc/ There are several reasons why we are using the Click PLC. Here are just a few. - Investment is low for the hardware and the software is free - Standalone PLC with built-in I/O - Communication ability - Ethernet Port, RS232, RS485 - support for protocols such as Modbus RTU, Modbus TCP, etc. - Ability to expand the system with a variety of modules including RTD and Thermocouple inputs directly. https://www.accautomation.ca
Click PLC to Modbus TCP RTU Remote IO Controller BX MBIO
1K views · Oct 13, 2022 accautomation.ca
The Click PLC can communicate to remote I/O (input and output) controller modules using the Modbus protocol for communications. The BX-MBIO provides both Modbus RTU and Modbus TCP interfaces for remote IO. Modbus RTU is a serial communication and Modbus TCP is an Ethernet communication. More information can be obtained on our website. This includes all of the links mentioned in this video. https://accautomation.ca/click-plc-to-modbus-tcp-rtu-remote-io-controller-bx-mbio Modbus RTU is supported over an RS-485 serial connection. Modbus TCP is supported over an Ethernet connection. They function as listening/replying devices (slave, server) and can connect with any mastering (master, client) device that communicates using the Modbus protocol. Previously we looked at the BX-MBIO Modbus RTU TCP Remote IO Controller wiring and configuration. Modbus RTU TCP Remote IO Controller BX-MBIO https://accautomation.ca/modbus-rtu-tcp-remote-io-controller-bx-mbio - BX-MBIO Hardware Video https://youtu.be/cqP78u4YVGQ - BX-MBIO Powering and Configuring Video https://youtu.be/XIsL86ou44U We will connect the Click Ethernet PLC to the Modbus remote IO. This will be done using the Modbus TCP and Modbus RTU protocol. Ethernet and serial RS485 communication to the BX-MBIO unit will be the media. The BX-MBIO remote I/O expansion units feature the following: • RJ45 Ethernet port for communications via Modbus TCP • RS485 serial port for communications via Modbus RTU • Supports up to 8 additional Expansion Modules (Add the discrete or analog I/O you require) • AC and DC powered units available • AC powered units include an integral 24VDC auxiliary output power supply • Power connector and serial port connector included Let's get started. Previously we discussed: Click PLC Installing the Software https://accautomation.ca/click-plc-installing-the-software/ Click PLC Establish Communication https://accautomation.ca/click-plc-establish-communication/ Click PLC Numbering System and Addressing https://accautomation.ca/click-plc-numbering-system-and-addressing Click PLC Timers and Counters https://accautomation.ca/click-plc-timers-and-counters Click PLC Program Control Instructions https://accautomation.ca/click-plc-program-control-instructions Click PLC Shift Register Instruction https://accautomation.ca/click-plc-shift-register-instruction Click PLC Drum Instruction https://accautomation.ca/click-plc-drum-instruction Click PLC Send and Receive Instructions https://accautomation.ca/click-plc-send-and-receive-instructions Click PLC AdvancedHMI Communication https://accautomation.ca/click-plc-advancedhmi-communication Modbus RTU Click PLC Master to BRX PLC Slave Communication https://accautomation.ca/modbus-rtu-click-plc-master-to-brx-plc-slave-communication Video https://youtu.be/CIsj-Xppoog Click PLC - Update Firmware https://accautomation.ca/click-plc-update-firmware Video https://youtu.be/1X_kw4Rhokw Click PLC HMI Rotary Encoder Dial Input https://accautomation.ca/click-plc-hmi-rotary-encoder-dial-input Video https://youtu.be/mix9k2RTdII High-Speed Counter - Part 1 https://accautomation.ca/click-plc-high-speed-counting-part-1 High-Speed Count Mode Video https://youtu.be/P3l34unyAyU Interval Measurement Mode Video https://youtu.be/-t8JSKruilE Duration Measurement Mode Video https://youtu.be/znF6PRwGq-Y Frequency Measurement Mode Video https://youtu.be/m0I9P5AoFqE Click PLC High-Speed Counter - Part 2 https://accautomation.ca/click-plc-high-speed-counting-part-2 External Interrupt Mode https://youtu.be/UxFffVddUt4 Pulse Catch Mode https://youtu.be/2H0zwul1X3o Filter Pulse Mode https://youtu.be/FNbYAkBwIsQ Frequency Measurement and High-Speed Count Mode https://youtu.be/qV3jgRszghE Analog Dusk to Dawn Program https://accautomation.ca/click-plc-analog-dusk-to-dawn-program https://youtu.be/JlxTBlk6IJY PID using Factory IO https://accautomation.ca/click-plc-pid-using-factory-io https://youtu.be/JGB9e__MWPc PID Instruction and Autotuning using Factory IO https://accautomation.ca/click-plc-pid-instruction-and-autotuning-using-factory-io https://youtu.be/QoMw1SGW-gA Logging Data with Time and Date Stamp https://accautomation.ca/click-plc-logging-data-with-time-and-date-stamp https://youtu.be/CQ5xa5UZPng The entire Click PLC series can be found at this URL: https://accautomation.ca/series/click-plc/ There are several reasons why we are using the Click PLC. Here are just a few. - Investment is low for the hardware and the software is free - Standalone PLC with built-in I/O - Communication ability - Ethernet Port, RS232, RS485 - support for protocols such as Modbus RTU, Modbus TCP, etc. - Ability to expand the system with a variety of modules including RTD and Thermocouple inputs directly. https://www.accautomation.ca
Click PLC Modbus ASCII Protocol
15K views · Oct 13, 2022 accautomation.ca
We will now look at the click plc Modbus ascii protocol. This communication will happen in PLC ladder logic and communicate through the serial port (RS485) to a Solo process temperature controller. Modbus ASCII will be the communication protocol. More information can be obtained on our website. This includes all of the links mentioned in this video. https://accautomation.ca/click-plc-modbus-ascii-protocol Modbus is a communication method used for transmitting information over serial lines between electronic devices. The device requesting the information is called the Modbus Master (Client) and the devices supplying information are Modbus Slaves (Servers). This protocol was originally developed by Modicon systems. Modbus protocol comes in basically three different types. Ethernet (Modbus TCP) or Serial (Modbus RTU or Modbus ASCII). Modbus TCP and Modbus RTU come as standard protocols in the productivity series of PLCs. We will connect the Click PLC to a Solo process temperature controller. This will be done using the Modbus ASCII protocol over serial RS485 communication wire. (Media) The present and set values (PV / SV) will be read from the Solo controller and the set value will be written when required. Let's get started. Previously we discussed: Click PLC Installing the Software https://accautomation.ca/click-plc-installing-the-software/ Click PLC Establish Communication https://accautomation.ca/click-plc-establish-communication/ Click PLC Numbering System and Addressing https://accautomation.ca/click-plc-numbering-system-and-addressing Click PLC Timers and Counters https://accautomation.ca/click-plc-timers-and-counters Click PLC Program Control Instructions https://accautomation.ca/click-plc-program-control-instructions Click PLC Shift Register Instruction https://accautomation.ca/click-plc-shift-register-instruction Click PLC Drum Instruction https://accautomation.ca/click-plc-drum-instruction Click PLC Send and Receive Instructions https://accautomation.ca/click-plc-send-and-receive-instructions Click PLC AdvancedHMI Communication https://accautomation.ca/click-plc-advancedhmi-communication Modbus RTU Click PLC Master to BRX PLC Slave Communication https://accautomation.ca/modbus-rtu-click-plc-master-to-brx-plc-slave-communication Video https://youtu.be/CIsj-Xppoog Click PLC HMI Rotary Encoder Dial Input https://accautomation.ca/click-plc-hmi-rotary-encoder-dial-input Video https://youtu.be/mix9k2RTdII High-Speed Counter - Part 1 https://accautomation.ca/click-plc-high-speed-counting-part-1 High-Speed Count Mode Video https://youtu.be/P3l34unyAyU Interval Measurement Mode Video https://youtu.be/-t8JSKruilE Duration Measurement Mode Video https://youtu.be/znF6PRwGq-Y Frequency Measurement Mode Video https://youtu.be/m0I9P5AoFqE Click PLC High-Speed Counter - Part 2 https://accautomation.ca/click-plc-high-speed-counting-part-2 External Interrupt Mode https://youtu.be/UxFffVddUt4 Pulse Catch Mode https://youtu.be/2H0zwul1X3o Filter Pulse Mode https://youtu.be/FNbYAkBwIsQ Frequency Measurement and High-Speed Count Mode https://youtu.be/qV3jgRszghE Analog Dusk to Dawn Program https://accautomation.ca/click-plc-analog-dusk-to-dawn-program https://youtu.be/JlxTBlk6IJY PID using Factory IO https://accautomation.ca/click-plc-pid-using-factory-io https://youtu.be/JGB9e__MWPc PID Instruction and Autotuning using Factory IO https://accautomation.ca/click-plc-pid-instruction-and-autotuning-using-factory-io https://youtu.be/QoMw1SGW-gA Logging Data with Time and Date Stamp https://accautomation.ca/click-plc-logging-data-with-time-and-date-stamp https://youtu.be/CQ5xa5UZPng Stride Field Remote IO Modules Modbus TCP Ethernet https://accautomation.ca/stride-field-remote-io-modules-modbus-tcp-ethernet Stride Field Remote IO Modules Unboxing SIO MB12CDR and SIO MB04ADS https://youtu.be/GbZNgcbVaLM Stride Field Remote IO Modules Powering and Configuring https://youtu.be/oVzWgkUn-D0 Modbus RTU TCP Remote IO Controller BX-MBIO https://accautomation.ca/modbus-rtu-tcp-remote-io-controller-bx-mbio Modbus RTU TCP Remote IO Controller BX-MBIO Hardware https://youtu.be/cqP78u4YVGQ Modbus RTU TCP Remote IO Controller BX-MBIO Powering and Configuring https://youtu.be/XIsL86ou44U Click PLC to Modbus TCP RTU Remote IO Controller BX-MBIO https://accautomation.ca/click-plc-to-modbus-tcp-rtu-remote-io-controller-bx-mbio https://youtu.be/tOYg97PcMbc The entire Click PLC series can be found at this URL: https://accautomation.ca/series/click-plc/ There are several reasons why we are using the Click PLC. Here are just a few. - Investment is low for the hardware and the software is free - Standalone PLC with built-in I/O - Communication ability - Ethernet Port, RS232, RS485 - support for protocols such as Modbus RTU, Modbus TCP, etc. - Ability to expand the system with a variety of modules including RTD and Thermocouple inputs directly. https://www.accautomation.ca
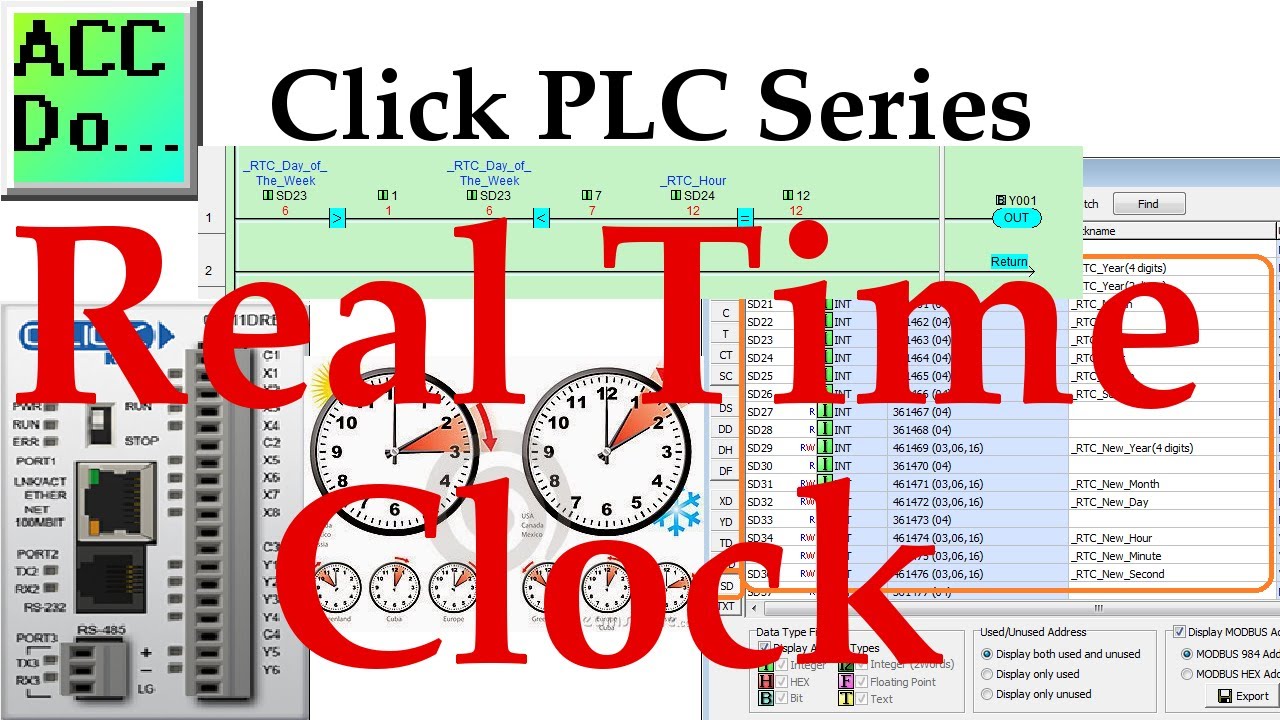
Click PLC Real Time Clock (RTC) - Ladder Logic
12K views · Oct 12, 2022 accautomation.ca
The click plc has a real time clock that will allow us to control outputs based on the time of day. More information can be obtained on our website. This includes all of the links mentioned in this video. https://accautomation.ca/click-plc-real-time-clock This real-time clock (RTC) can be set from the click programming software or through the program of the controller. Our programs in the click can use the following calendar and clock values: SD19 – RTC Year – 4 digits (2021) SD20 – RTC Year – 2 digits (21) SD21 – RTC Month – (00 to 12) SD22 – RTC Day – (00 to 31) SD23 – RTC Day of the Week – 1 Sunday to 7 Saturday SD24 – RTC Hour – (00 to 23) SD25 – RTC Minute – (00 to 59) SD26 – RTC Second – (00 to 59) 00:00 Introduction 01:00 Hardware - C0-11DRE-D 01:47 Addresses (Address Picker - SD / SC) 04:30 Data View - Monitor RTC 05:11 Sample Program - Overview 05:46 Program - RTC - Testing 09:02 Program DST daylight savings time - Testing 15:01 Ending We will be using the RTC - Real Time Clock in a sample program. This program will turn on an output Monday to Friday from noon until 1 pm. It will also adjust for daylight savings time. Let’s get started. Previously we discussed: System-Hardware. https://accautomation.ca/click-plc-system-hardware/ Installing the Software https://accautomation.ca/click-plc-installing-the-software/ Establish Communication https://accautomation.ca/click-plc-establish-communication/ Numbering System and Addressing https://accautomation.ca/click-plc-numbering-system-and-addressing Click PLC Timers and Counters https://accautomation.ca/click-plc-timers-and-counters Compare and Math Instructions https://accautomation.ca/click-plc-compare-and-math-instructions Program Control Instructions https://accautomation.ca/click-plc-program-control-instructions Shift Register Instruction https://accautomation.ca/click-plc-shift-register-instruction Drum Instruction https://accautomation.ca/click-plc-drum-instruction Send and Receive Instructions https://accautomation.ca/click-plc-send-and-receive-instructions AdvancedHMI Communication https://accautomation.ca/click-plc-advancedhmi-communication Modbus RTU Click PLC Master to BRX PLC Slave Communication https://accautomation.ca/modbus-rtu-click-plc-master-to-brx-plc-slave-communication Video https://youtu.be/CIsj-Xppoog Update Firmware https://accautomation.ca/click-plc-update-firmware Video https://youtu.be/1X_kw4Rhokw HMI Rotary Encoder Dial Input https://accautomation.ca/click-plc-hmi-rotary-encoder-dial-input Video https://youtu.be/mix9k2RTdII High-Speed Counter - Part 1 https://accautomation.ca/click-plc-high-speed-counting-part-1 High-Speed Count Mode Video https://youtu.be/P3l34unyAyU Interval Measurement Mode Video https://youtu.be/-t8JSKruilE Duration Measurement Mode Video https://youtu.be/znF6PRwGq-Y Frequency Measurement Mode Video https://youtu.be/m0I9P5AoFqE Click PLC High-Speed Counter - Part 2 https://accautomation.ca/click-plc-high-speed-counting-part-2 External Interrupt Mode https://youtu.be/UxFffVddUt4 Pulse Catch Mode https://youtu.be/2H0zwul1X3o Filter Pulse Mode https://youtu.be/FNbYAkBwIsQ Frequency Measurement and High-Speed Count Mode https://youtu.be/qV3jgRszghE Analog Dusk to Dawn Program https://accautomation.ca/click-plc-analog-dusk-to-dawn-program https://youtu.be/JlxTBlk6IJY PID using Factory IO https://accautomation.ca/click-plc-pid-using-factory-io https://youtu.be/JGB9e__MWPc PID Instruction and Autotuning using Factory IO https://accautomation.ca/click-plc-pid-instruction-and-autotuning-using-factory-io https://youtu.be/QoMw1SGW-gA Logging Data with Time and Date Stamp https://accautomation.ca/click-plc-logging-data-with-time-and-date-stamp https://youtu.be/CQ5xa5UZPng Click PLC Modbus ASCII Protocol https://accautomation.ca/click-plc-modbus-ascii-protocol https://youtu.be/T4oiXG-XqL4 The entire Click PLC series can be found at this URL: https://accautomation.ca/series/click-plc/ There are several reasons why we are using the Click PLC. Here are just a few. - Investment is low for the hardware and the software is free - Standalone PLC with built-in I/O - Communication ability - Ethernet Port, RS232, RS485 - support for protocols such as Modbus RTU, Modbus TCP, etc. - Ability to expand the system with a variety of modules including RTD and Thermocouple inputs directly. https://www.accautomation.ca
Productivity Open P1AM Arduino Modbus TCP Client to Click PL...
53K views · Oct 12, 2022 accautomation.ca
We will now connect our Productivity Open P1AM Arduino to a Click PLC. Using Modbus TCP the Arduino will be the Client (Master) and the Click will be the Server (Slave). We will explain how to connect our P1AM-ETH Industrial Arduino Ethernet Shield to the Click PLC. The protocol will be Modbus TCP on an Ethernet communication network. Modbus is a master-slave type of communication. Masters will always send the commands to read or write to the slaves on the network. The slaves will respond if the communication is directed at them. Since this is an Ethernet network our master is known as a client and the slave as a server. The P1AM Example from Automation Direct on GitHub will be used. It will be modified to write to holding registers and coils in the Click PLC. The temperature from the thermocouple input unit on the P1AM will be written to the Click PLC. Inputs from the simulator input card on our Arduino P1AM will be written to the Click PLC outputs directly. The Click PLC will also be programmed with a heartbeat circuit. This will detect if communications have been severed and will reset the outputs after 5 seconds. Let's get started with our Arduino P1AM Modbus client to Click Modbus server. More information can be obtained on our website. This includes all of the links mentioned in this video. https://accautomation.ca/productivity-open-p1am-arduino-modbus-tcp-client-to-click-plc/ 00:00 Arduino P1AM Modbus client to Click server 00:38 Click Modbus server configuration 01:55 Click Modbus addresses 04:05 Arduino P1AM Modbus client program 13:34 Click communication heartbeat program 18:00 Arduino Click Modbus communication testing Here are previous posts in this Productivity Open Arduino Compatible Industrial Controller Series. A full list can be obtained at the following location: https://accautomation.ca/series/productivity-open-arduino-compatible-industrial-controller Industrial Controller Hardware https://accautomation.ca/productivity-open-arduino-compatible-industrial-controller-hardware Installing the Software https://accautomation.ca/productivity-open-arduino-compatible-industrial-controller-installing-the-Software https://youtu.be/M7Agvhq69og First Program https://accautomation.ca/productivity-open-p1am-industrial-arduino-first-program https://youtu.be/x2yKEw1lWGg Program Structure https://accautomation.ca/productivity-open-p1am-industrial-arduino-program-structure https://youtu.be/a1eimdZpfLg Serial Monitor COM https://accautomation.ca/productivity-open-p1am-industrial-arduino-serial-monitor-com https://youtu.be/eDngjuBYCBg Program Control https://accautomation.ca/productivity-open-p1am-industrial-arduino-program-control/ https://youtu.be/-J-Ikt3yWhU Operators https://accautomation.ca/productivity-open-p1am-industrial-arduino-operators https://youtu.be/Q9J7RUXdeEk GPIO Inputs and Outputs https://accautomation.ca/productivity-open-p1am-industrial-arduino-gpio-inputs-and-outputs https://youtu.be/49QPNQu6aaY Time Instructions https://accautomation.ca/productivity-open-p1am-industrial-arduino-time-instructions https://youtu.be/ql9ShzOIrqQ P1000 Expansion Analog Combination Module https://accautomation.ca/productivity-open-p1am-industrial-arduino-p1000-expansion-analog-combination-module https://youtu.be/f7myzcPP0_8 PP1000 Expansion Digital Inputs and Outputs Part 1 https://accautomation.ca/productivity-open-p1am-industrial-arduino-p1000-expansion-digital-inputs-and-outputs-part-1 https://youtu.be/Pub7M_NP4rw P1000 Expansion Digital Inputs and Outputs Part 2 https://accautomation.ca/productivity-open-p1am-industrial-arduino-p1000-expansion-digital-inputs-and-outputs-part-2 https://youtu.be/K65luk051gQ Watchdog Timer https://accautomation.ca/productivity-open-p1am-industrial-arduino-watchdog-timer https://youtu.be/t0SydLhJfg4 PID Control https://accautomation.ca/productivity-open-p1am-industrial-arduino-pid-control https://youtu.be/QVOwlcccJu0 Arduino Modbus TCP to C-More EA9 https://accautomation.ca/p1am-arduino-modbus-tcp-to-c-more-ea9 https://youtu.be/CQOAzVfLzjE Arduino Ethernet Shield Web Server https://accautomation.ca/productivity-open-p1am-web-server/ https://youtu.be/1nfyzraHuRE There are several reasons why we are using the Productivity Open Arduino Compatible Industrial Controller. Here are just a few. - CE and UL certified - Designed to be MKRZero compatible - Industrial shields available - Ethernet and general-purpose IO - 15 Productivity 1000 PLC modules can be added - Customize your system - Use your Arduino programs in the industrial environment - Micro USB port - Power the CPU only and programming - Micro SD card slot - Programmable toggle switch - CPU LED light - Free software - Arduino IDE - Productivity blocks - Program Development Time Saver The Productivity Open Arduino Compatible Industrial Controller currently has all of these features built into the P1AM-100 CPU. https://www.accautomation.ca
Productivity 1000 Series PLC Click EtherNet/IP Remote IO
4K views · Oct 12, 2022 accautomation.ca
We will now utilize Ethernet/IP to connect a Click PLC as remote I/O on a Productivity system. The productivity series of controllers can use explicit and implicit messaging techniques of EtherNet/IP to optimize data exchanges across the network. Explicit messaging means that the data messages that are transmitted will contain everything needed in order to respond or decode the message. It is a normal client/server relationship with instructions explicitly spelled out in the data messages. This communication happens at times that the Client requests the information. Implicit messaging means the data messages are streamlined. The device is configured ahead of time to know what to do with the data. This is used for time-critical messages and it functions as a typical scanner/adapter relationship. Implicit messaging is real-time. It has the ability to copy data with minimal additional information because both ends already know exactly what each bit and byte. A Click PLC will be set up as remote distributed inputs and outputs for our Productivity 1000 controller. Implicit Ethernet IP will be set up. The Click will be the Ethernet IP adapter and the Productivity will be the Ethernet IP scanner. Let's get started. 00:00 Productivity - Click EtherNet/IP Remote I/O 01:58 Click EtherNet/IP setup 08:28 Productivity IO Messaging 14:28 Monitoring Remote IO - Testing Here are some previous posts in this Productivity 1000 PLC Series. A full list can be obtained at the following location: https://accautomation.ca/series/productivity-1000-plc/ Installing the Software https://accautomation.ca/productivity-1000-series-plc-installing-the-software https://youtu.be/gh5X7_EeCdg Establishing Communication https://accautomation.ca/productivity-1000-series-plc-establishing-communication https://youtu.be/HWtN189JLgI First Program https://accautomation.ca/productivity-1000-series-plc-first-program https://youtu.be/txr_wfd7y2w Monitoring and Testing the Program https://accautomation.ca/productivity-1000-series-plc-monitoring-and-testing-the-program https://youtu.be/o9gdrrEMexw Online Editing and Debug Mode https://accautomation.ca/productivity-1000-series-plc-online-editing-and-debug-mode https://youtu.be/D-sDKMnw1gQ Numbering Systems and Tag Database https://accautomation.ca/productivity-1000-series-plc-numbering-systems-and-tag-database https://youtu.be/s-TAWomBeIs Contact and Coil Instructions https://accautomation.ca/productivity-1000-series-plc-contact-and-coil-instructions https://youtu.be/xMP9EEVlm1k Timer Instructions https://accautomation.ca/productivity-1000-series-plc-timer-instructions https://youtu.be/egUnU8paLCA Counter Instructions https://accautomation.ca/productivity-1000-series-plc-counter-instructions https://youtu.be/tEWAXWugxqI Program Control https://accautomation.ca/productivity-1000-series-plc-program-control https://youtu.be/QPrIzxDq16A Data Logger https://accautomation.ca/productivity-1000-series-plc-data-logger https://youtu.be/mM1zbbX7zVg Web Server https://accautomation.ca/productivity-1000-series-plc-web-server https://youtu.be/ZuZd3lqp87c Modbus TCP Ethernet Communication https://accautomation.ca/productivity-1000-series-plc-modbus-tcp-ethernet-communication https://youtu.be/CEyIJUmpqcI AdvancedHMI Modbus TCP Ethernet Communication https://accautomation.ca/productivity-1000-series-plc-advancedhmi-modbus-tcp-ethernet-communication https://youtu.be/derBxqOc-a8 Email Text Communication https://accautomation.ca/productivity-1000-series-plc-email-and-text-communication https://youtu.be/dEnL5tNbXmM Productivity Suite PLC Simulator Software Free Download https://accautomation.ca/productivity-suite-plc-simulator-software-free-download https://youtu.be/9TyA5FOcvrE There are several reasons why we are using the Productivity 1000 Series Controller. Here are just a few. - 50MB user memory - Can handle very complex applications easily. - 4 built-in communication ports – Easy connectivity to your network. - Data logging up to 32 GB on a microSD card - Add up to 8 IP modules to communicate to your field sensors. This will give you a total of 128 discrete IO points or 32 analog IO channels. - Free Software and 30 days of free training with every CPU from Automation Direct. - Interactive PLC Configuration Tool - Tag Names - Auto-discovery IO – Physical I/O tags will be generated based on each module’s position in the base. - I/O Modules have QR codes under the wiring cover. This can be scanned so you can have the latest specifications/wiring diagrams for the module. - Limitless PID – Autotuning – Individual or Cascade Mode - etc - Web Server and Mobile Access - Advanced Software instruction set The Productivity 1000 series of programmable logic controllers currently has all of these features built into the P1-540 CPU. This CPU (Central Processing Unit) is also known as MPU (Multi-Processing Units) because of its communication capabilities. https://www.accautomation.ca
Click PLC Modbus Addresses
450 views · Oct 12, 2022 accautomation.ca
Using the Address Picker in the Click Programming Software we can see all of the PLC Modbus Addresses. Start the Click PLC programming software Select main menu | Program | Address Picker... Alternatively: Ctrl + T or Navigation Window | Ladder Program | Address Picker Select display MODBUS Address on the bottom right of the Address Picker: Edit Mode window. The Modbus address can now be displayed as 984 or HEX Addressing The Click and Click PLUS PLC series can be found at this URL: https://accautomation.ca/series/click-plc/ There are several reasons why we are using the Click and Click PLUS PLCs. Here are just a few. - Investment is low for the hardware and the software is free - Standalone PLC with built-in I/O - Communication ability - Ethernet Port, RS232, RS485 - support for protocols such as Modbus RTU, Modbus TCP, etc. - Ability to expand the system with a variety of modules including RTD and Thermocouple inputs directly. #shorts ACC Automation https://accautomation.ca/
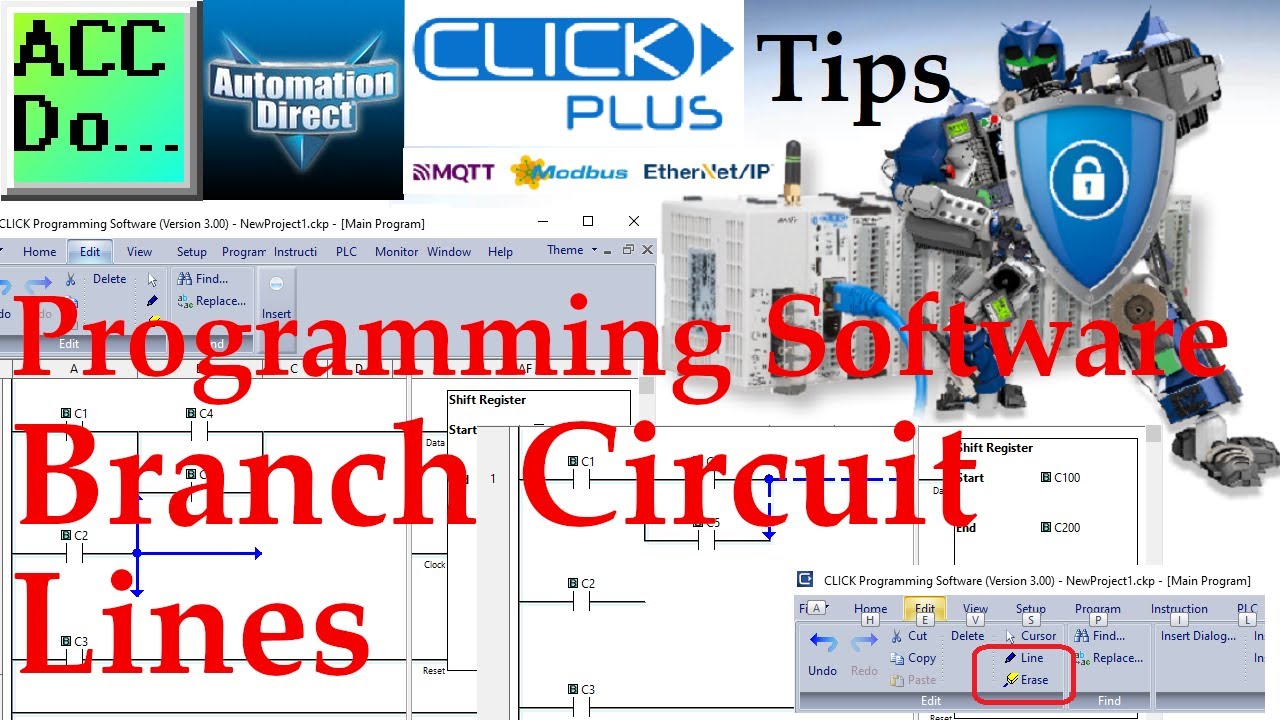
Click Programming Software Branch Circuit Lines
202 views · Oct 12, 2022 accautomation.ca
The click programming software branch circuit lines can be drawn in two different ways. You can enable the line drawing tool from the Menu menu Edit | Line or click the icon. There is also an Edit | Erase Line tool or click the icon. The second and my preferred method is to use the keyboard shortcut keys for drawing lines in the ladder logic. To draw a line using Crtl+arrow keys so the line draws in the direction of the arrow key you press. Ctrl+Shift+arrow key will erase lines (rungs or branches) The Click and Click PLUS PLC series can be found at this URL: https://accautomation.ca/series/click-plc/ There are several reasons why we are using the Click and Click PLUS PLCs. Here are just a few. - Investment is low for the hardware and the software is free - Standalone PLC with built-in I/O - Communication ability - Ethernet Port, RS232, RS485 - support for protocols such as Modbus RTU, Modbus TCP, etc. - Ability to expand the system with a variety of modules including RTD and Thermocouple inputs directly. #shorts ACC Automation https://accautomation.ca/
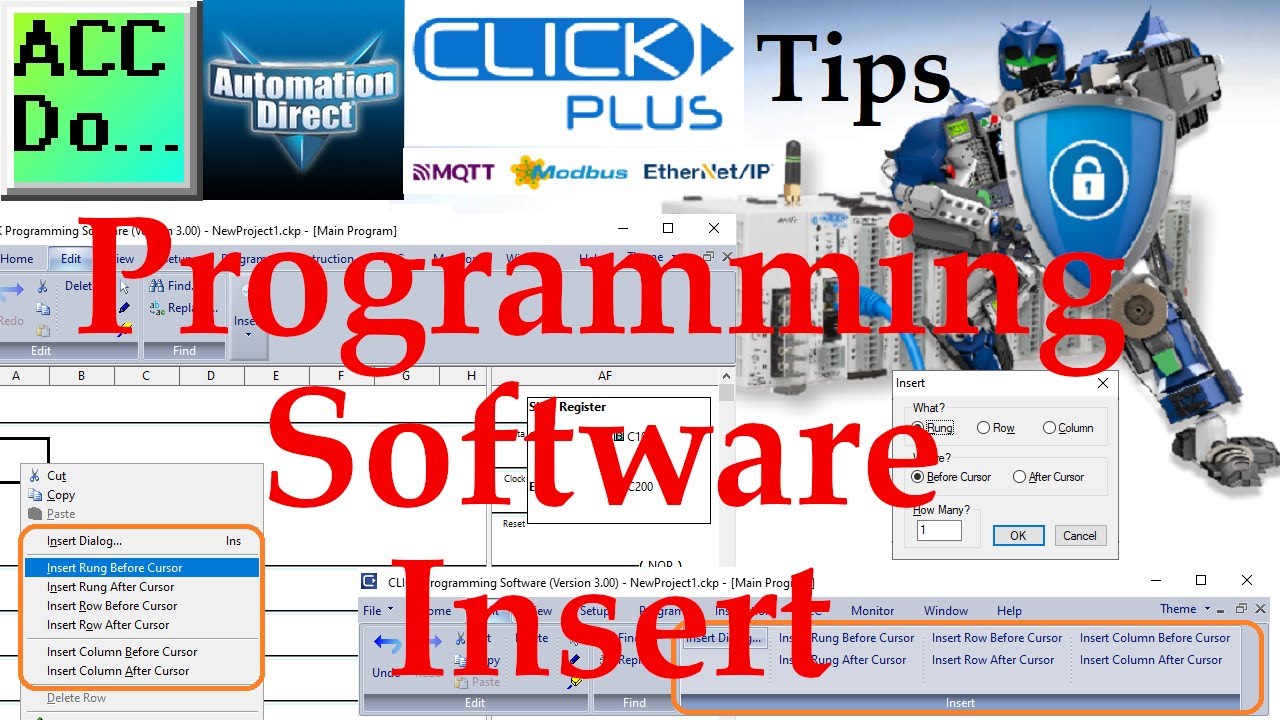
Click Programming Software Insert
758 views · Oct 12, 2022 accautomation.ca
The click programming software can insert rungs, rows, or columns. This can be done in two different ways. You can insert from the Menu structure Edit | Insert (item). The second and my preferred method is to use the right mouse key in the ladder logic. Besides your copy and paste commands, you will have the insert rung, row, and column. These all can be selected before or after the current cursor location. The Click and Click PLUS PLC series can be found at this URL: https://accautomation.ca/series/click-plc/ There are several reasons why we are using the Click and Click PLUS PLCs. Here are just a few. - Investment is low for the hardware and the software is free - Standalone PLC with built-in I/O - Communication ability - Ethernet Port, RS232, RS485 - support for protocols such as Modbus RTU, Modbus TCP, etc. - Ability to expand the system with a variety of modules including RTD and Thermocouple inputs directly. #shorts ACC Automation https://accautomation.ca/
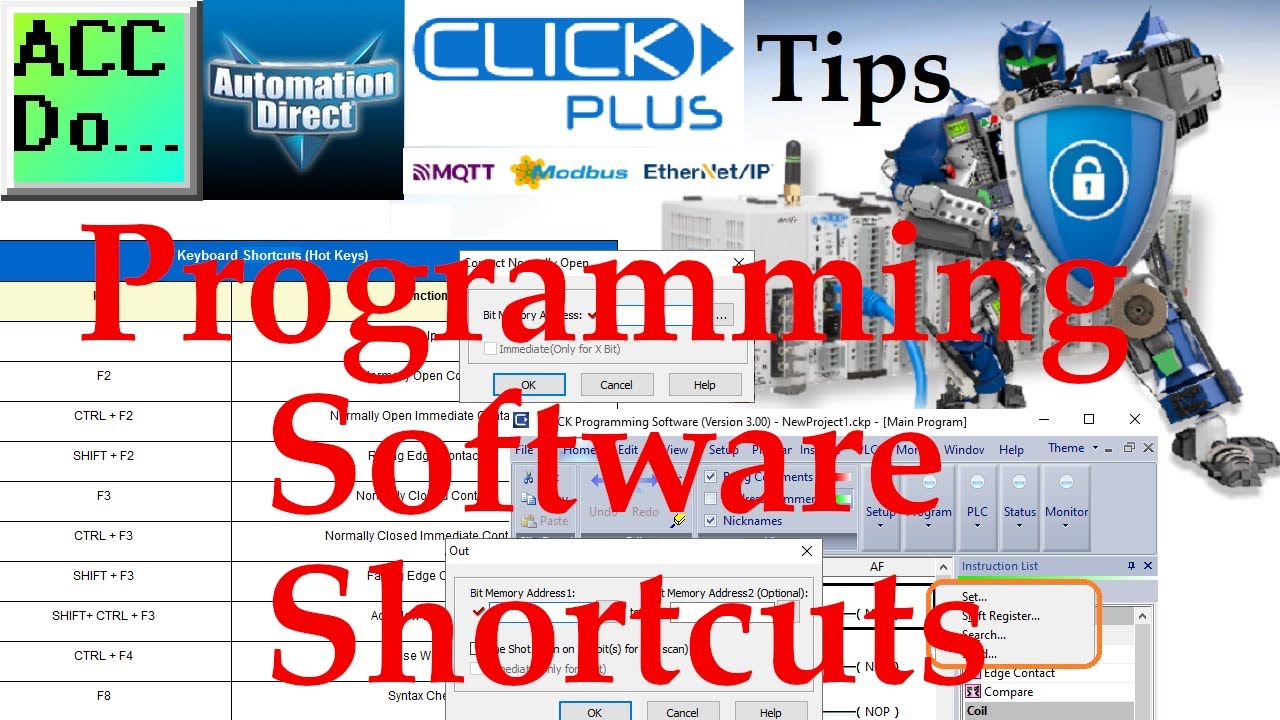
Click Programming Software Shortcuts
229 views · Oct 12, 2022 accautomation.ca
The Click programming software will allow you to type the instruction abbreviation directly into the ladder at the cursor position. There is an auto-complete feature on these shortcuts, so when there are no other possible combinations it will display the instruction dialog box. You can also type certain data addresses directly. For a normally open contact, you can type any address for an input (X001), output (Y001), internal contact (C1), Timer (T1), or Counter (CT1). For a coil, you can type any address for an output (Y001). Instruction keyboard shortcuts include: NO (F2) Normally Open Ctrl+F2 Immediate NC (F3) Normally Closed Ctrl+F3 Immediate Shft+F2 Raising Edge Shift+F3 Falling Edge =, !, (Greater or Less Than) Compare Contact OUT Out coil SET Set coil RESET Reset coil TMR Timer CNT Counter MATH Math DRUM Drum SR Shift Register COPY Copy Data SRCH Search CALL Call Sub-routine FOR For loop NEXT Next instruction END End instruction RD Network Read SD Network Send The Click and Click PLUS PLC series can be found at this URL: https://accautomation.ca/series/click-plc/ There are several reasons why we are using the Click and Click PLUS PLCs. Here are just a few. - Investment is low for the hardware and the software is free - Standalone PLC with built-in I/O - Communication ability - Ethernet Port, RS232, RS485 - support for protocols such as Modbus RTU, Modbus TCP, etc. - Ability to expand the system with a variety of modules including RTD and Thermocouple inputs directly. #shorts ACC Automation https://accautomation.ca/
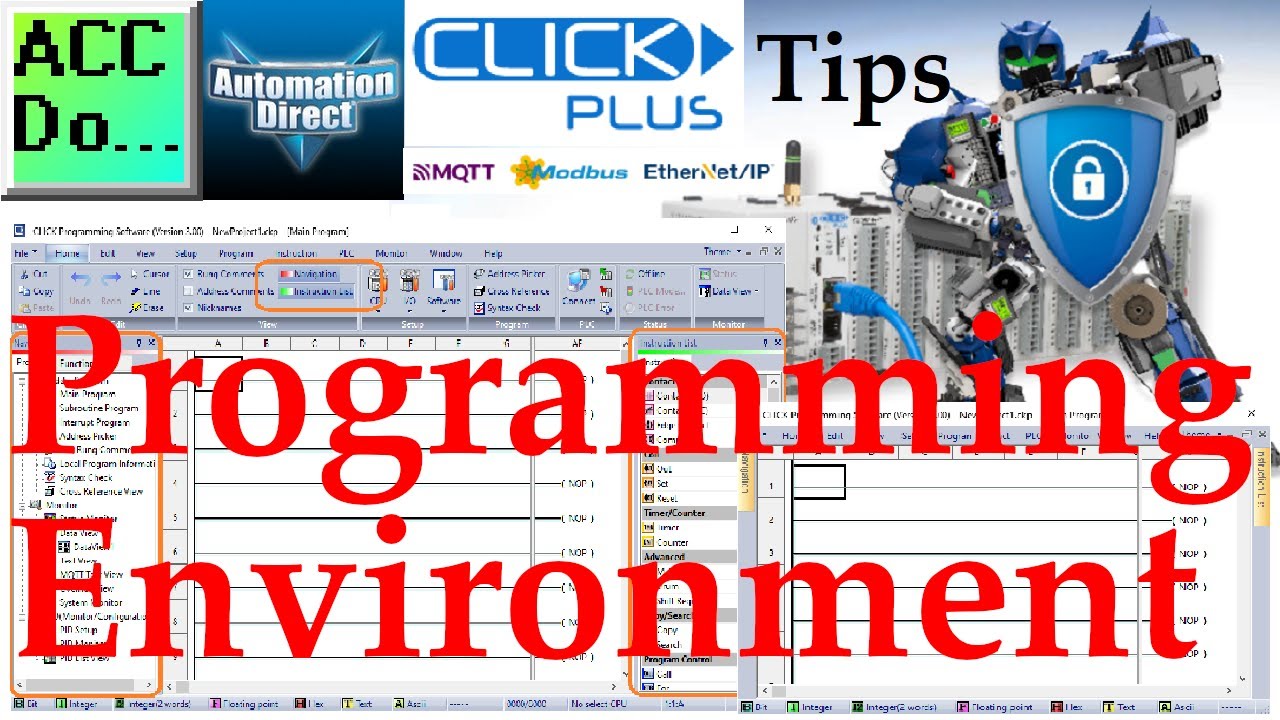
Click Programming Environment
58 views · Oct 12, 2022 accautomation.ca
You can customize the click programming software environment. The navigation pane and instruction list pane can be turned on and off by using the main menu | View. Select the item that will highlight or not. This can also be done on the home main menu tab. Auto-hide can also be used on the navigation pane and instruction list pane. This is a nice feature to give you more room for your ladder logic programming but still be available when needed. The Click software ribbon can be toggled off and on by double-clicking the tab. Colors and programming environment can be set by the main menu | Setup | Software Setup... This is also on the Home menu under software setup The Click and Click PLUS PLC series can be found at this URL: https://accautomation.ca/series/click-plc/ There are several reasons why we are using the Click and Click PLUS PLCs. Here are just a few. - Investment is low for the hardware and the software is free - Standalone PLC with built-in I/O - Communication ability - Ethernet Port, RS232, RS485 - support for protocols such as Modbus RTU, Modbus TCP, etc. - Ability to expand the system with a variety of modules including RTD and Thermocouple inputs directly. #shorts ACC Automation https://accautomation.ca/
Click Plus PLC Software Installation
10K views · Oct 12, 2022 accautomation.ca
The Click Plus PLC has now been released. This can only be programmed with version 3.00 or higher of the Click Programming Software. Version 3.00 will program all of the Click PLC CPU units and add additional features to the Click Ethernet CPU units. Features of the new Click PLUS PLC (C2-0xCPU) includes the following: • Micro USB • DHCP support • DNS support • Wi-Fi (programming and Modbus TCP) • Bluetooth (Wi-Fi) provisioning • SD Card (Data Logging) • Data Logger • Network Time Service • MQTT (Publish/Subscribe) • Required PLC Password • Disable Ports • Strong Password Support • Disable Ping Response • Encrypted Password Transfer We will be installing version 3.00 of the Click programming software on our windows 10 computer. After starting the software we will review some of the new features. Let’s get started. More information can be obtained at our website. This includes all of the links mentioned in this video. https://accautomation.ca/click-plc-real-time-clock 00:00 Click Plus Software Installation 00:28 Download the Click Software 01:33 Install Click Software 03:02 Start Click Software CLICK PLCs were designed with simplicity in mind, providing reliable control at a low, low cost and with little to no learning curve. This simplicity makes CLICK a perfect solution for small machines, home automation projects, pneumatic applications, or anywhere a simple system needs a budget-saving control solution. Building on the original CLICK’s simple design, the new CLICK PLUS PLCs offer the same practical control but with some surprising bells and whistles. Using the same FREE, streamlined PLC programming software as its predecessor, the CLICK PLUS PLCs provide no-headache programming combined with advanced capabilities like Wi-Fi communication and data logging. The Click and Click PLUS PLC series can be found at this URL: https://accautomation.ca/series/click-plc/ There are several reasons why we are using the Click and Click PLUS PLCs. Here are just a few. - Investment is low for the hardware and the software is free - Standalone PLC with built-in I/O - Communication ability - Ethernet Port, RS232, RS485 - support for protocols such as Modbus RTU, Modbus TCP, etc. - Ability to expand the system with a variety of modules including RTD and Thermocouple inputs directly. https://www.accautomation.ca
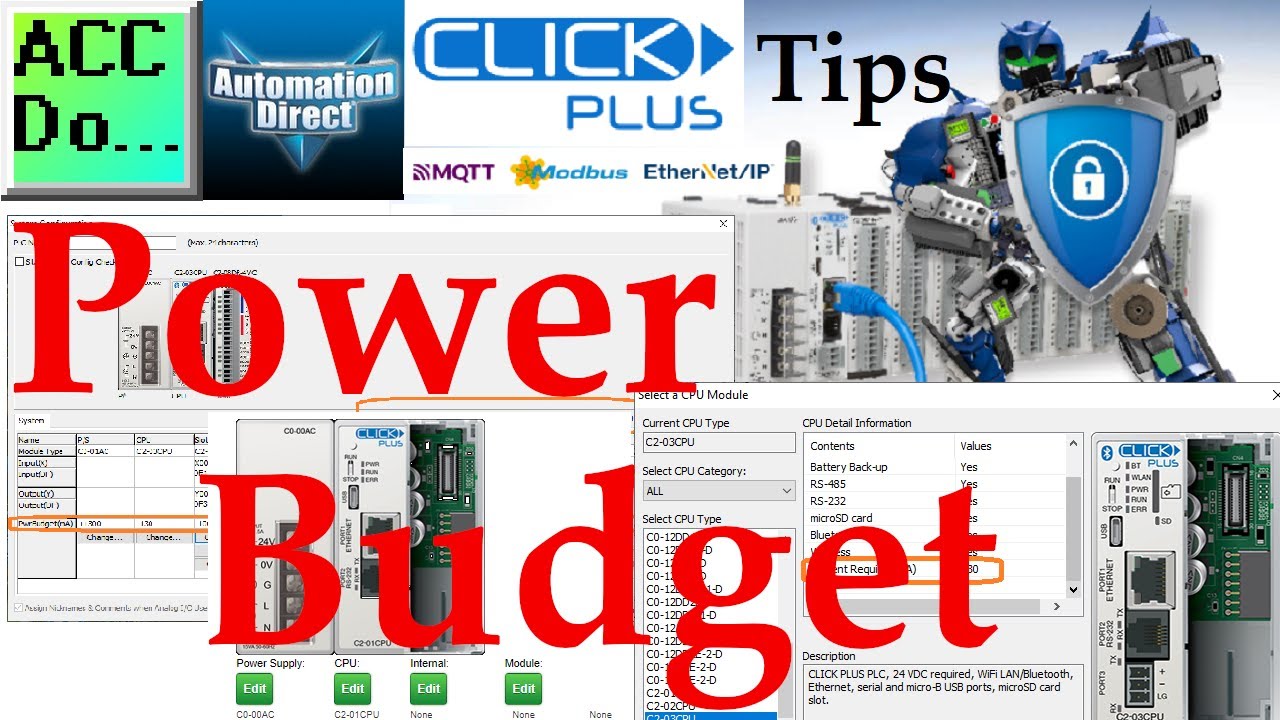
Click Power Budget - Supply
7 views · Oct 12, 2022 accautomation.ca
You can add up to 8 I/O modules for each CLICK PLC CPU unit. If using the C0-01AC CLICK power supply there are no power budget concerns. The 1.3 amps supplied more than adequately handles any possible I/O module configuration. If you are using the C0-00AC CLICK or external manufactures power supply there might be power budget considerations. The System Configuration Setup window in the CLICK PLC software will calculate the power budget for you, either online or offline. General information on the Click series of controllers: www.clickplcs.com/config There are also system configuration tools that will calculate the power budget, I/O count, and price. Click PLUS PLC Configuration: https://www.automationdirect.com/clickplcs/config/clickplusconfig Click PLC Configuration: https://www.automationdirect.com/clickplcs/config Programming and examples of the Click and Click PLUS PLC series can be found at this URL: https://accautomation.ca/series/click-plc/ There are several reasons why we are using the Click and Click PLUS PLCs. Here are just a few. - Investment is low for the hardware and the software is free - Standalone PLC with built-in I/O - Communication ability - Ethernet Port, RS232, RS485 - support for protocols such as Modbus RTU, Modbus TCP, etc. - Ability to expand the system with a variety of modules including RTD and Thermocouple inputs directly. #shorts ACC Automation https://accautomation.ca/
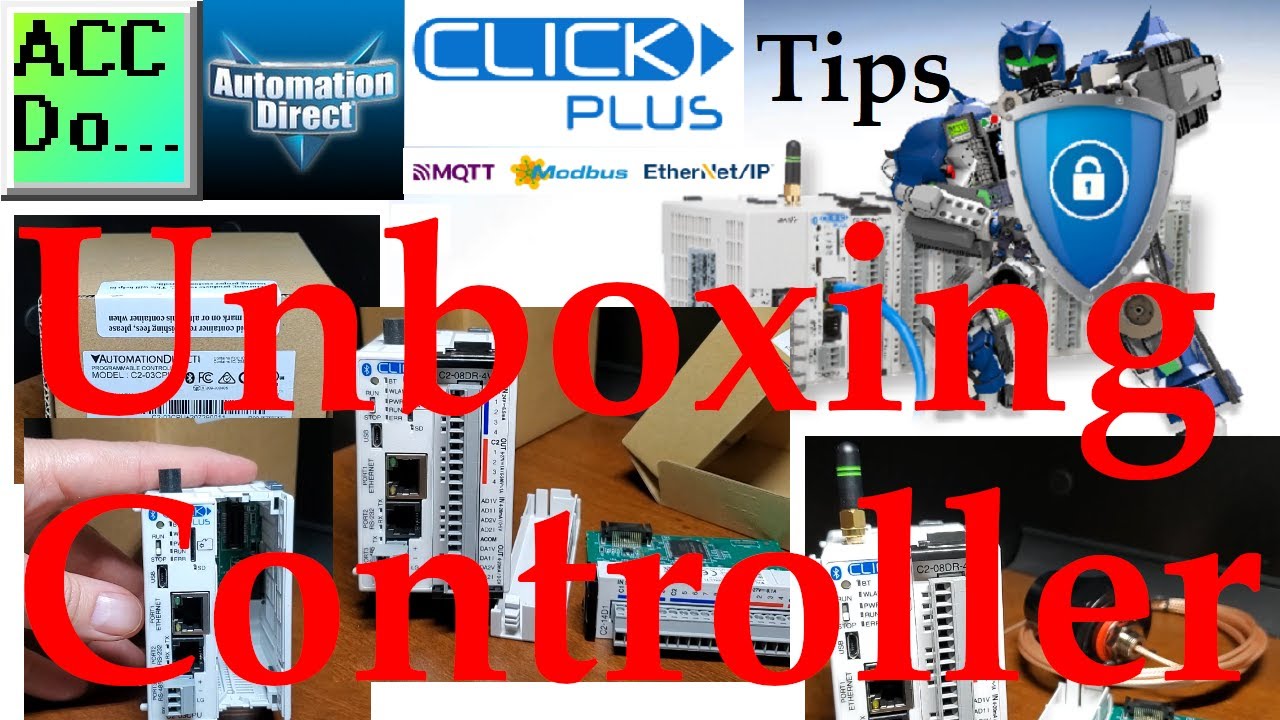
Click Plus PLC Unboxing Controller
405 views · Oct 12, 2022 accautomation.ca
Click Plus PLC Unboxing Controller CLICK PLUS PLCs provide simple programming with advanced capabilities like Wi-Fi communication and data logging. Programming can also be done through the Wi-Fi and Micro USB on the CPU. A card slot on the CPU unit can add additional cards to suit your automation control project. In our case, we have a combination of digital and analog inputs and outputs. Blank covers can be added if no card is used in the slot. These cards come in a variety of options. See the configuration guide. An antenna can be mounted directly to the CPU. If the WiFi signal is not strong inside the electrical cabinet, an external antenna can be used. General information on the Click series of controllers: www.clickplcs.com/config There are also system configuration tools that will calculate the power budget, I/O count, and price. Click PLUS PLC Configuration: https://www.automationdirect.com/clickplcs/config/clickplusconfig Click PLC Configuration: https://www.automationdirect.com/clickplcs/config Programming and examples of the Click and Click PLUS PLC series can be found at this URL: https://accautomation.ca/series/click-plc/ There are several reasons why we are using the Click and Click PLUS PLCs. Here are just a few. - Investment is low for the hardware and the software is free - Standalone PLC with built-in I/O - Communication ability - Ethernet Port, RS232, RS485 - support for protocols such as Modbus RTU, Modbus TCP, etc. - Ability to expand the system with a variety of modules including RTD and Thermocouple inputs directly. #shorts ACC Automation https://accautomation.ca/
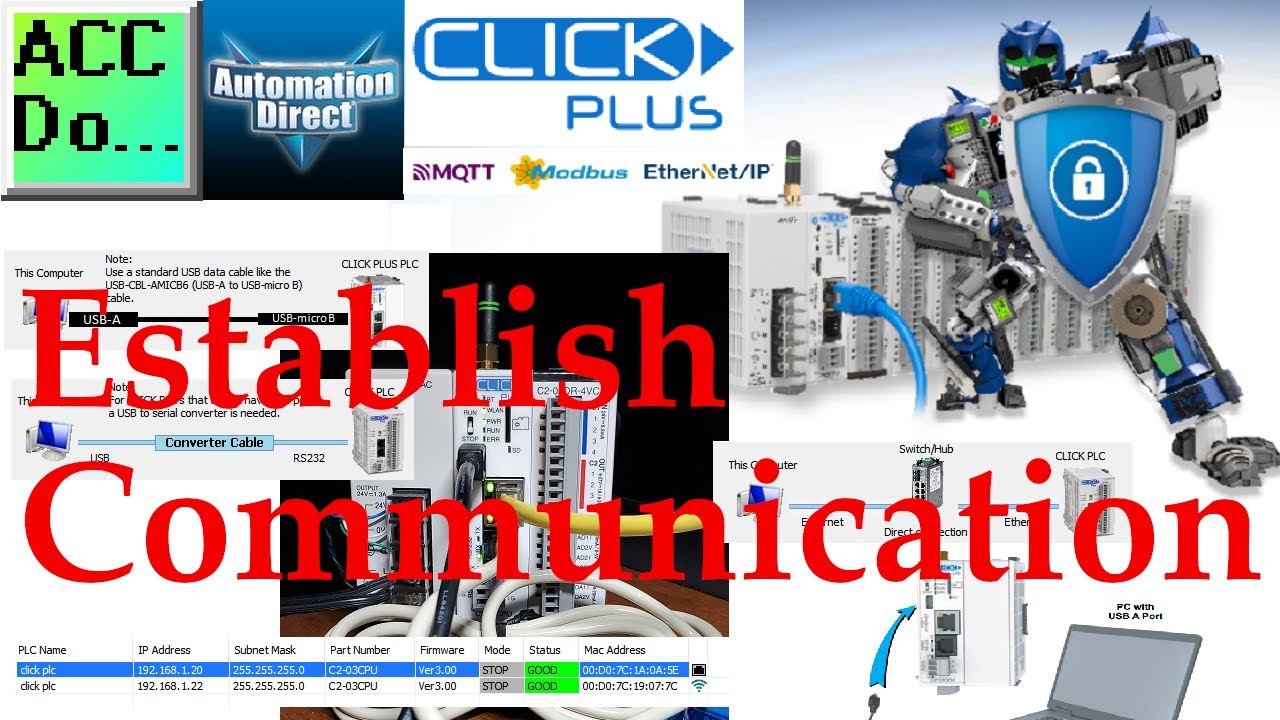
Click Plus Establish Communication
1K views · Oct 12, 2022 accautomation.ca
We will now establish communication using four different methods from our computer to the new Click Plus controller. The click programming software version 3.00 will be used for the communication methods. Click Plus controllers allow you to program them through the micro USB port on every CPU. WiFi (Bluetooth Provisioning) is also available on some controllers. Ethernet and Serial ports may also be used for programming if they are present on your model of Click Plus. We will be establishing PC to PLC communications using version 3.00 of the click programming software. Four different ways will be discussed on getting connected to the Click Plus controller to program. Let’s get started. The Click Plus can only be programmed with version 3.00 or higher of the Click Programming Software. Version 3.00 will program all of the Click PLC CPU units and add additional features to the Click Ethernet CPU units. Features of the new Click PLUS PLC (C2-0xCPU) includes the following: • Micro USB • DHCP support • DNS support • Wi-Fi (programming and Modbus TCP) • Bluetooth (Wi-Fi) provisioning • SD Card (Data Logging) • Data Logger • Network Time Service • MQTT (Publish/Subscribe) • Required PLC Password • Disable Ports • Strong Password Support • Disable Ping Response • Encrypted Password Transfer More information can be obtained at our website. This includes all of the links mentioned in this video. https://accautomation.ca/click-plus-establish-communication/ Previously we looked at the following: Click Plus Software Installation https://accautomation.ca/click-plus-software-installation-version-3-00/ https://youtu.be/6uQQzyZ-O3s 00:00 Click Plus Establish Communication 01:50 Click Plus USB 03:33 Click Plus WiFi (BlueTooth Provisioning) 07:21 Click Plus Ethernet 08:40 Click Plus Serial CLICK PLCs were designed with simplicity in mind, providing reliable control at a low, low cost and with little to no learning curve. This simplicity makes CLICK a perfect solution for small machines, home automation projects, pneumatic applications, or anywhere a simple system needs a budget-saving control solution. Building on the original CLICK’s simple design, the new CLICK PLUS PLCs offer the same practical control but with some surprising bells and whistles. Using the same FREE, streamlined PLC programming software as its predecessor, the CLICK PLUS PLCs provide no-headache programming combined with advanced capabilities like Wi-Fi communication and data logging. The Click and Click PLUS PLC series can be found at this URL: https://accautomation.ca/series/click-plc/ There are several reasons why we are using the Click and Click PLUS PLCs. Here are just a few. - Investment is low for the hardware and the software is free - Standalone PLC with built-in I/O - Communication ability - Ethernet Port, RS232, RS485 - support for protocols such as Modbus RTU, Modbus TCP, etc. - Ability to expand the system with a variety of modules including RTD and Thermocouple inputs directly. https://www.accautomation.ca
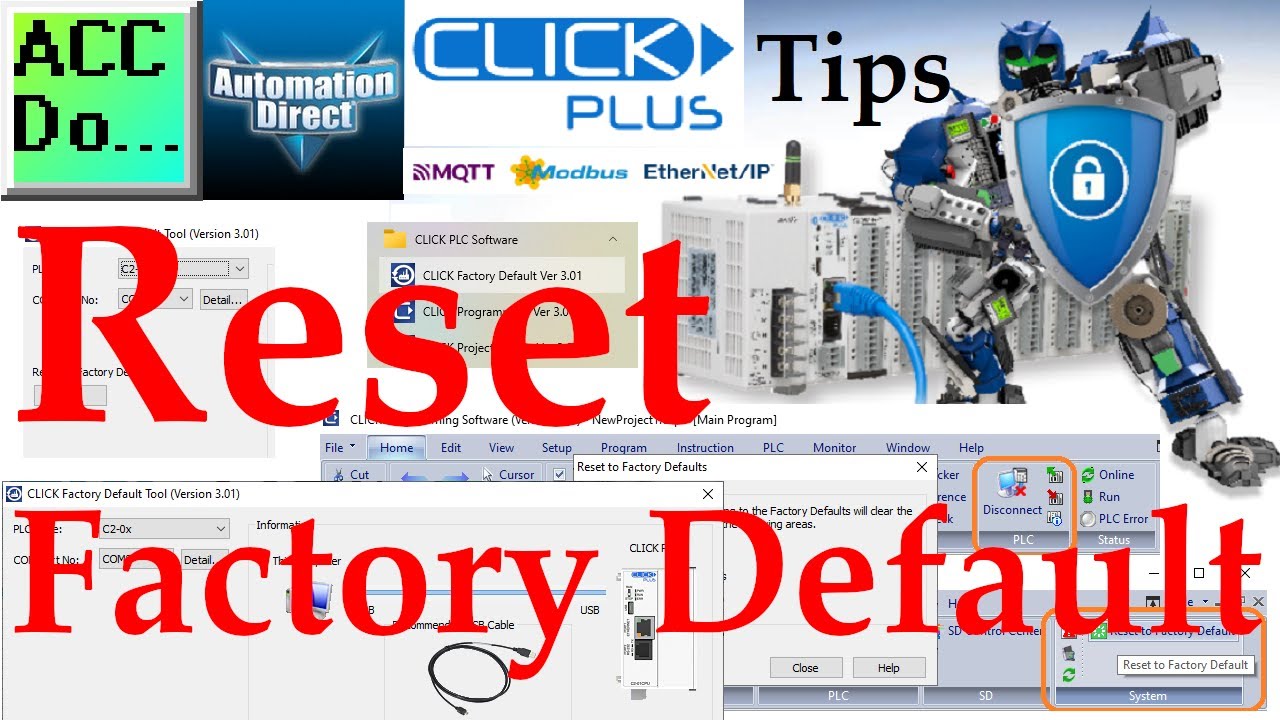
Click PLC Reset Factory Default
59 views · Oct 12, 2022 accautomation.ca
Click Reset Factory Default There are two ways to reset your Click to factory default. Using the Click programming software get connected to the controller that you wish to reset. Using the main menu | PLC | System, select Reset to Factory Default. When the Click programming software was installed, another program called CLICK Factory Default Tool was installed. Call this software up and select the appropriate serial communication for your Click model. Then select OK to reset to factory defaults. General information on the Click series of controllers: www.clickplcs.com/config There are also system configuration tools that will calculate the power budget, I/O count, and price. Click PLUS PLC Configuration: https://www.automationdirect.com/clickplcs/config/clickplusconfig Click PLC Configuration: https://www.automationdirect.com/clickplcs/config Programming and examples of the Click and Click PLUS PLC series can be found at this URL: https://accautomation.ca/series/click-plc/ There are several reasons why we are using the Click and Click PLUS PLCs. Here are just a few. - Investment is low for the hardware and the software is free - Standalone PLC with built-in I/O - Communication ability - Ethernet Port, RS232, RS485 - support for protocols such as Modbus RTU, Modbus TCP, etc. - Ability to expand the system with a variety of modules including RTD and Thermocouple inputs directly. #shorts ACC Automation https://accautomation.ca/
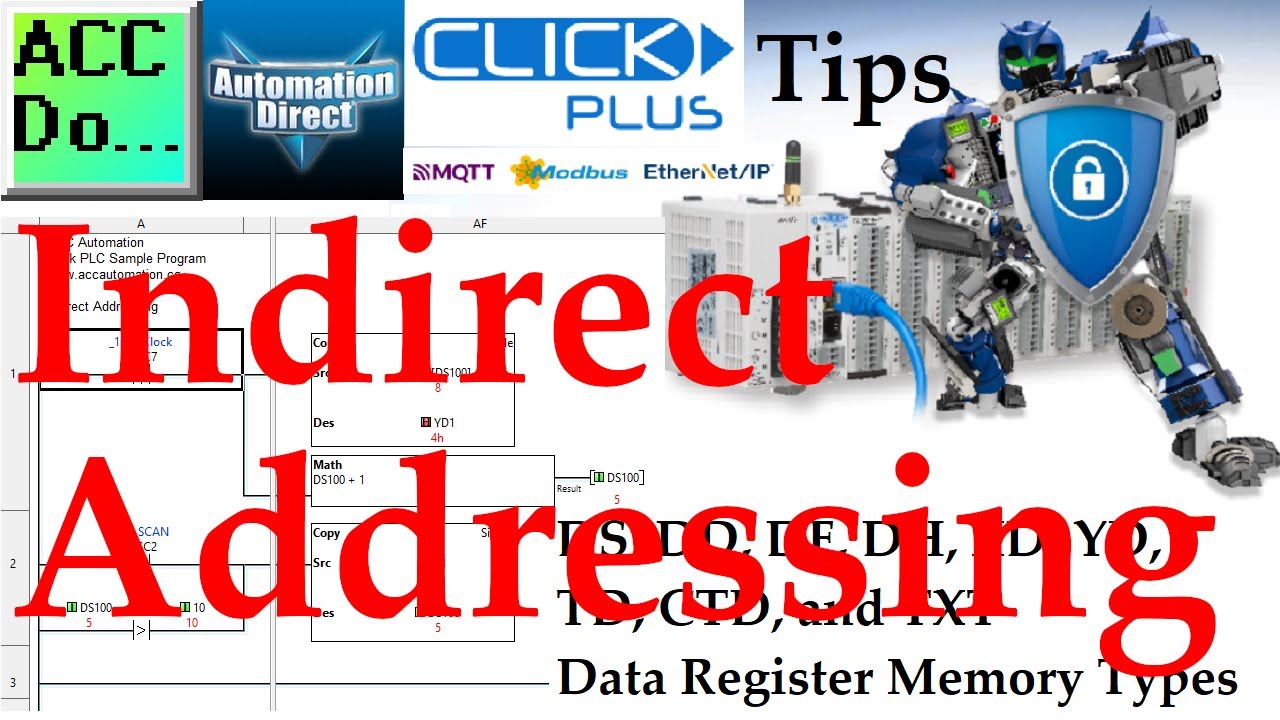
Click Indirect Addressing
50 views · Oct 12, 2022 accautomation.ca
Indirect addressing is supported in the Click PLC. The manuals refer to this as ‘Pointer Addressing’. It will utilize the DS registers as the offset value and can be used with the DS, DD, DF, DH, XD, YD, TD, CTD, and TXT data register memory types. Example: DS[DS100] – This will point to the address in DS that the DS100 value contains. If DS100 has a value of ‘5’ then the address will use DS5. As we change DS100 the corresponding address of DS will change as well. We can copy values to that location (logging) and read values from that location (retrieving). https://accautomation.ca/click-plc-logging-data-with-time-and-date-stamp/ General information on the Click series of controllers: www.clickplcs.com/config There are also system configuration tools that will calculate the power budget, I/O count, and price. Click PLUS PLC Configuration: https://www.automationdirect.com/clickplcs/config/clickplusconfig Click PLC Configuration: https://www.automationdirect.com/clickplcs/config Programming and examples of the Click and Click PLUS PLC series can be found at this URL: https://accautomation.ca/series/click-plc/ There are several reasons why we are using the Click and Click PLUS PLCs. Here are just a few. - Investment is low for the hardware and the software is free - Standalone PLC with built-in I/O - Communication ability - Ethernet Port, RS232, RS485 - support for protocols such as Modbus RTU, Modbus TCP, etc. - Ability to expand the system with a variety of modules including RTD and Thermocouple inputs directly. #shorts ACC Automation https://accautomation.ca/
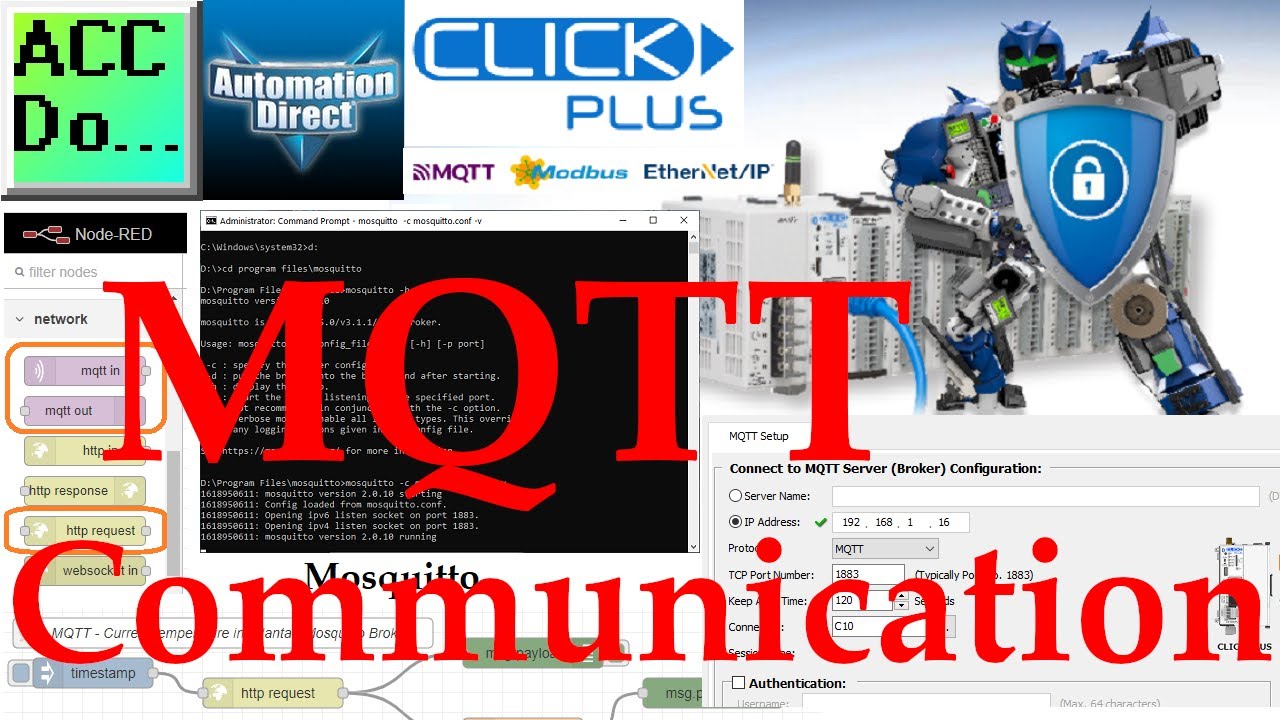
Click Plus PLC MQTT Communication
20K views · Oct 12, 2022 accautomation.ca
We will now look at the MQTT communication capability using our Click plus PLC. MQTT stands for Message Queuing Telemetry Transport. This simple, publish, and subscribe communication protocol does not take too many resources. Constrained devices with low bandwidth are ideal for MQTT. This protocol provides machine-to-machine (M2M) connectivity which is ideal for the Internet of Things. (IoT) This protocol is not for remote IO or real-time (deterministic) applications. MQTT is a good solution for applications that move data from hundreds or thousands of machines (sensors) to clients in many networks. We will be installing a windows based broker called Mosquitto. The Click Plus PLC will be one of the clients publishing and subscribing to the MQTT broker. Node-RED will be the other client publishing and subscribing to the MQTT broker. Each client will share information. Let’s get started. The Click Plus can only be programmed with version 3.00 or higher of the Click Programming Software. Version 3.00 will program all of the Click PLC CPU units and add additional features to the Click Ethernet CPU units. Features of the new Click PLUS PLC (C2-0xCPU) includes the following: • Micro USB • DHCP support • DNS support • Wi-Fi (programming and Modbus TCP) • Bluetooth (Wi-Fi) provisioning • SD Card (Data Logging) • Data Logger • Network Time Service • MQTT (Publish/Subscribe) • Required PLC Password • Disable Ports • Strong Password Support • Disable Ping Response • Encrypted Password Transfer More information can be obtained at our website. This includes all of the links mentioned in this video. https://accautomation.ca/click-plus-plc-mqtt-communication/ 00:00 Click Plus PLC MQTT Communication 02:03 Eclipse Mosquitto - Open Source MQTT Broker 02:17 Installing Mosquitto Broker Windows 02:49 Mosquitto Broker Windows Service 04:08 MQTT Broker Configuration and Help 06:26 Node-RED MQTT Client 11:20 Click Plus MQTT Client 16:25 Click Plus MQTT Program Previously we looked at the following: Click Plus Software Installation https://accautomation.ca/click-plus-software-installation-version-3-00/ https://youtu.be/6uQQzyZ-O3s Click Plus Establish Communication https://accautomation.ca/click-plus-establish-communication/ https://youtu.be/1Bnx3IROCqk CLICK PLCs were designed with simplicity in mind, providing reliable control at a low, low cost and with little to no learning curve. This simplicity makes CLICK a perfect solution for small machines, home automation projects, pneumatic applications, or anywhere a simple system needs a budget-saving control solution. Building on the original CLICK’s simple design, the new CLICK PLUS PLCs offer the same practical control but with some surprising bells and whistles. Using the same FREE, streamlined PLC programming software as its predecessor, the CLICK PLUS PLCs provide no-headache programming combined with advanced capabilities like Wi-Fi communication and data logging. The Click and Click PLUS PLC series can be found at this URL: https://accautomation.ca/series/click-plc/ There are several reasons why we are using the Click and Click PLUS PLCs. Here are just a few. - Investment is low for the hardware and the software is free - Standalone PLC with built-in I/O - Communication ability - Ethernet Port, RS232, RS485 - support for protocols such as Modbus RTU, Modbus TCP, etc. - Ability to expand the system with a variety of modules including RTD and Thermocouple inputs directly. https://www.accautomation.ca
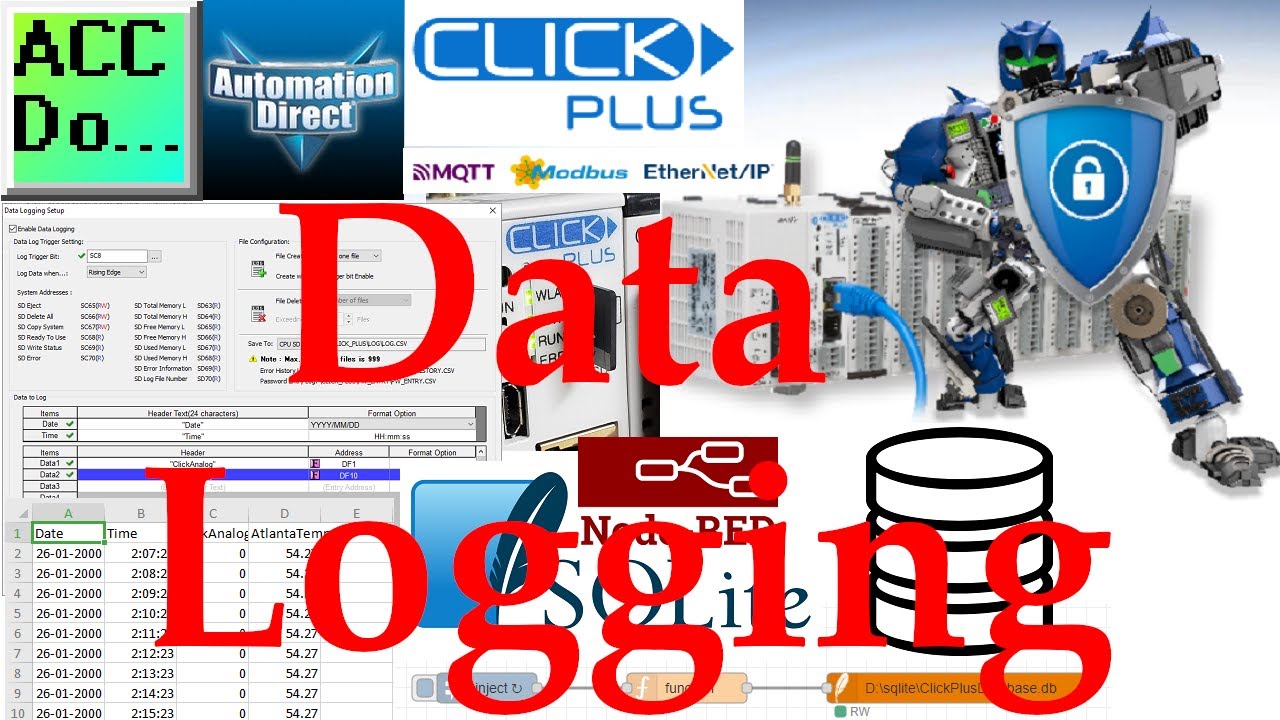
Click Plus Data Logging
4K views · Oct 12, 2022 accautomation.ca
We will now look at the data logging capability using our Click plus PLC. Data logging is the collection of data over time. This is usually used for data analysis at a later time. The amount of data (System Information) stored and the frequency of the storage will depend on your specific application. The hardware used to store the data is usually called a data logger. Using the information from our last post, the MQTT information collected (Temperature in Atlanta and Click Analog) will now be logged in two different ways. A micro SD card on the Click Plus will be used to store the data every minute in a CSV (Comma Separated Value) file. Node-RED will also be used to store the same data in a SQL database. Let’s get started on how to use these data loggers. Features of the new Click PLUS PLC (C2-0xCPU) includes the following: • Micro USB • DHCP support • DNS support • Wi-Fi (programming and Modbus TCP) • Bluetooth (Wi-Fi) provisioning • SD Card (Data Logging) • Data Logger • Network Time Service • MQTT (Publish/Subscribe) • Required PLC Password • Disable Ports • Strong Password Support • Disable Ping Response • Encrypted Password Transfer More information can be obtained at our website. This includes all of the links mentioned in this video. https://accautomation.ca/click-plus-data-logging-csv-file-sql-database/ 00:00 Click Plus Data Logging 01:20 Click Plus Hardware 02:37 Click Plus Data Logging Setup 05:14 Click Plus Data View / PLC | SD Control Center 06:15 Click Plus Data Logging Log 08:49 SQLite Database Setup 09:40 Node-RED SQLite Previously we looked at the following: Click Plus Software Installation https://accautomation.ca/click-plus-software-installation-version-3-00/ https://youtu.be/6uQQzyZ-O3s Establish Communication https://accautomation.ca/click-plus-establish-communication/ https://youtu.be/1Bnx3IROCqk MQTT Communication https://accautomation.ca/click-plus-plc-mqtt-communication/ https://youtu.be/wzUBolN9KjQ CLICK PLCs were designed with simplicity in mind, providing reliable control at a low, low cost and with little to no learning curve. This simplicity makes CLICK a perfect solution for small machines, home automation projects, pneumatic applications, or anywhere a simple system needs a budget-saving control solution. Building on the original CLICK’s simple design, the new CLICK PLUS PLCs offer the same practical control but with some surprising bells and whistles. Using the same FREE, streamlined PLC programming software as its predecessor, the CLICK PLUS PLCs provide no-headache programming combined with advanced capabilities like Wi-Fi communication and data logging. The Click and Click PLUS PLC series can be found at this URL: https://accautomation.ca/series/click-plc/ There are several reasons why we are using the Click and Click PLUS PLCs. Here are just a few. - Investment is low for the hardware and the software is free - Standalone PLC with built-in I/O - Communication ability - Ethernet Port, RS232, RS485 - support for protocols such as Modbus RTU, Modbus TCP, etc. - Ability to expand the system with a variety of modules including RTD and Thermocouple inputs directly. https://www.accautomation.ca
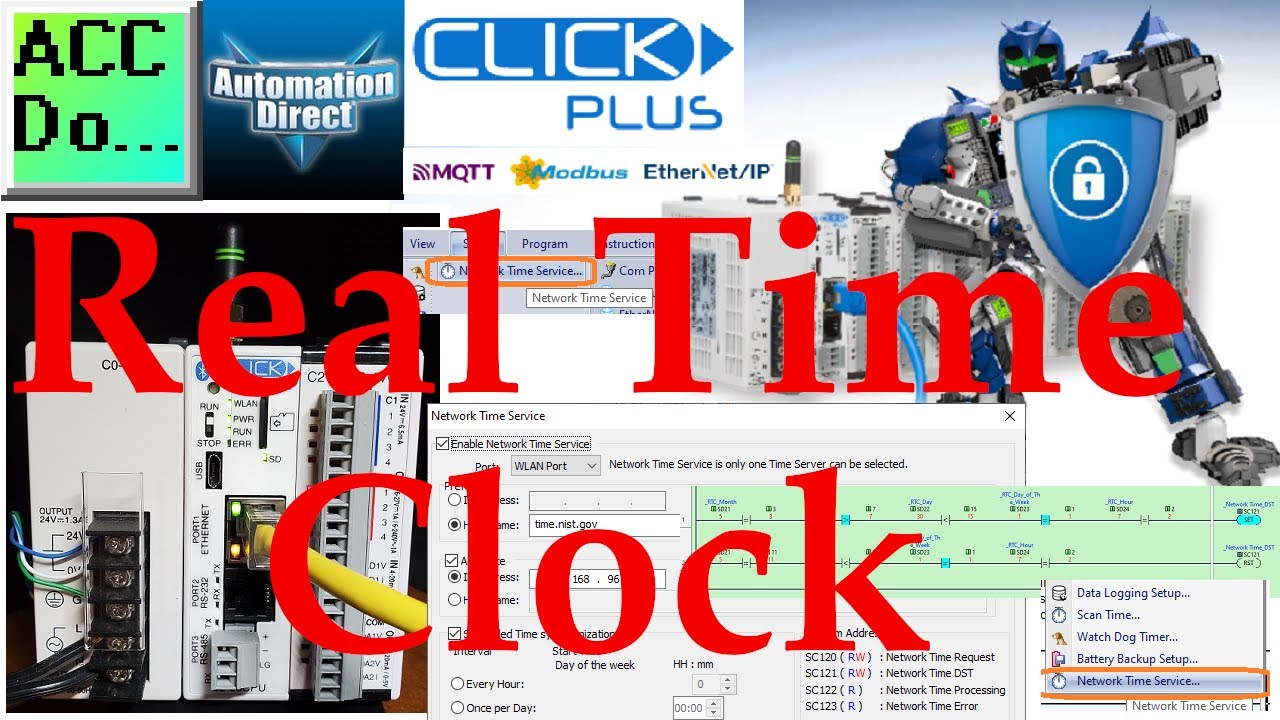
Click Plus PLC Real-Time Clock
2K views · Oct 12, 2022 accautomation.ca
The real-time clock on the Click Plus can now be more accurate. A network time service (NTP or SNTP) has been added to the Click Plus controller. This will allow the time to be synchronized with an internet time server or local network. Daylight savings time is quickly implemented with just a memory retentive bit that we can turn on and off based on the time change in the area. We will be setting up the network time service on our Click Plus. The real-time clock (RTC) will be updated via the internet time service. Daylight savings time and the RTC will also be programmed. This will be based on our previous Click Real-Time Clock post. Let’s get started. Features of the new Click PLUS PLC (C2-0xCPU) includes the following: • Micro USB • DHCP support • DNS support • Wi-Fi (programming and Modbus TCP) • Bluetooth (Wi-Fi) provisioning • SD Card (Data Logging) • Data Logger • Network Time Service • MQTT (Publish/Subscribe) • Required PLC Password • Disable Ports • Strong Password Support • Disable Ping Response • Encrypted Password Transfer More information can be obtained at our website. This includes all of the links mentioned in this video. https://accautomation.ca/click-plus-real-time-clock-setup-and-use/ 00:00 Click Plus Real-Time Clock 01:16 Click Plus Network Time Service 04:42 Click Plus DST 07:35 Click Plus Hardware 09:13 Real-Time Clock Program Previously we looked at the following: Click Plus Software Installation https://accautomation.ca/click-plus-software-installation-version-3-00/ https://youtu.be/6uQQzyZ-O3s Establish Communication https://accautomation.ca/click-plus-establish-communication/ https://youtu.be/1Bnx3IROCqk MQTT Communication https://accautomation.ca/click-plus-plc-mqtt-communication/ https://youtu.be/wzUBolN9KjQ Data Logging https://accautomation.ca/click-plus-data-logging-csv-file-sql-database/ https://youtu.be/ydoWvMzHSKc CLICK PLCs were designed with simplicity in mind, providing reliable control at a low, low cost and with little to no learning curve. This simplicity makes CLICK a perfect solution for small machines, home automation projects, pneumatic applications, or anywhere a simple system needs a budget-saving control solution. Building on the original CLICK’s simple design, the new CLICK PLUS PLCs offer the same practical control but with some surprising bells and whistles. Using the same FREE, streamlined PLC programming software as its predecessor, the CLICK PLUS PLCs provide no-headache programming combined with advanced capabilities like Wi-Fi communication and data logging. The Click and Click PLUS PLC series can be found at this URL: https://accautomation.ca/series/click-plc/ There are several reasons why we are using the Click and Click PLUS PLCs. Here are just a few. - Investment is low for the hardware and the software is free - Standalone PLC with built-in I/O - Communication ability - Ethernet Port, RS232, RS485 - support for protocols such as Modbus RTU, Modbus TCP, etc. - Ability to expand the system with a variety of modules including RTD and Thermocouple inputs directly. https://www.accautomation.ca
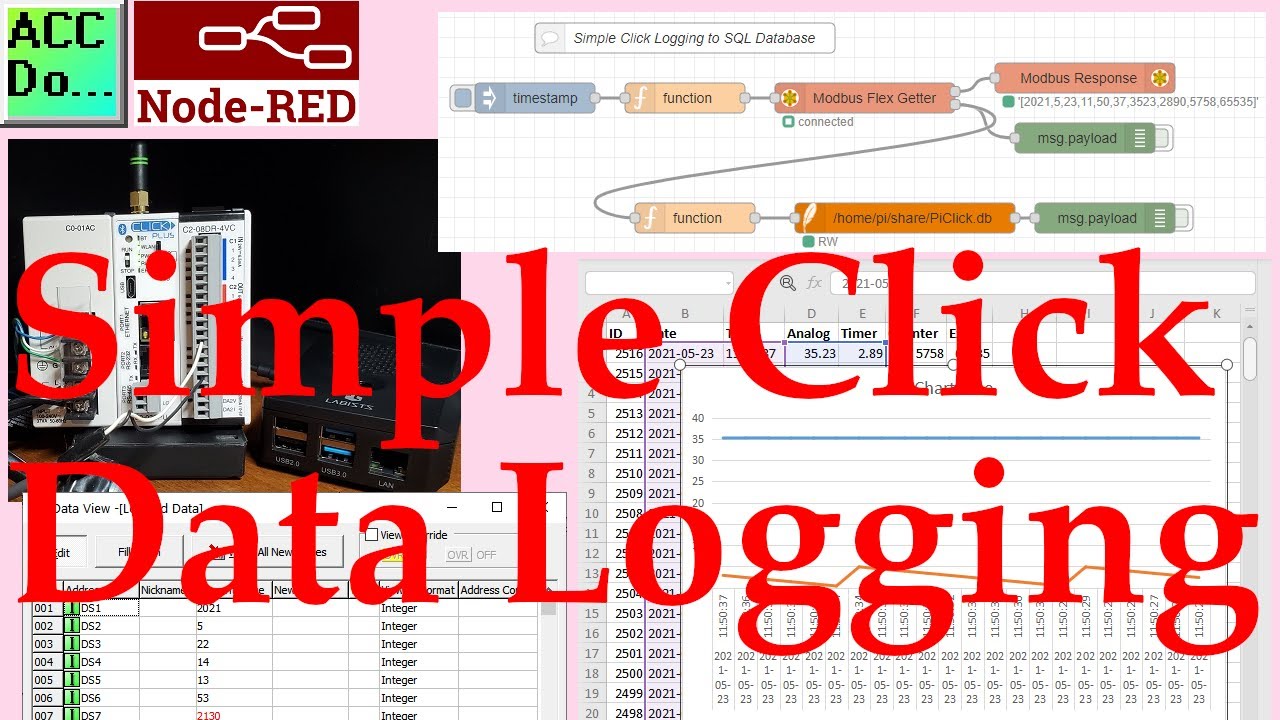
Simple Click PLC Data Logging
15K views · Oct 12, 2022 accautomation.ca
We will now be looking at simple data logging using a Click PLC with an Ethernet port. Node-RED will be used to communicate to the controller via Modbus TCP protocol. Information collected will be then stored in an SQLite SQL database. A Raspberry Pi 4 single-board computer will be used for the Node-RED collecting and storing. The update time will be two times a second (500 mSec). This method is ideal for quickly determining how things are operating. https://accautomation.ca/series/node-red-iot-enabling-software/ Analysis or display of the information will be done with a spreadsheet. The spreadsheet will be run on a windows computer. Let’s get started. More information can be obtained at our website. This includes all of the links mentioned in this video. https://accautomation.ca/simple-click-data-logging-node-red/ In this series we started using Node-RED in some of the following ways: Installing the Windows Software https://accautomation.ca/node-red-installing-the-windows-software/ https://youtu.be/xGzH2Hv31WA Modbus RTU / TCP Communication https://accautomation.ca/node-red-modbus-communication/ https://youtu.be/yX1w5vcV6cc User Interface - Dashboards https://accautomation.ca/node-red-user-interface-dashboards/ https://youtu.be/8zAG2wXwGOc SQL Database Log https://accautomation.ca/node-red-sql-database-log-modbus-logging/ https://youtu.be/QHjcNj1S_Mo SQL Database Spreadsheet Connection https://accautomation.ca/node-red-sql-database-spreadsheet-connection/ https://youtu.be/Cd3LvhoMaCI Install Node-RED on Raspberry Pi 4 https://accautomation.ca/install-node-red-on-raspberry-pi-4/ https://youtu.be/KleNtxvJkU4 We will continue with the following: Simple Click Data Logging 00:00 Simple Click Data Logging 01:05 Click PLC Logging Program 04:32 Simple Click Data Logging Hardware 05:43 SQLite SQL Database Setup 07:28 Node-RED Click Logging Program 15:03 Viewing the SQL Database Information on a Spreadsheet There are several reasons why we are using Node-RED. Here are just a few. - Built on top of the most dependable programming language JavaScript. - JavaScript is flexible and easy to work with on web browsers, server-side, IoT, IIoT projects, and more. - Visual flow type interface making programming easy. - Node will allow JavaScript code to run directly on a computer. - Node-RED is a free, open-source logic engine. - Connect to PLC, PAC, Temperature Controllers, Process Controllers using standard protocols. - Save and read from databases - Easily make the Internet of Things (IoT, IIoT) industrial solutions. Node-RED provides the ability for you to quickly create custom control solutions. https://accautomation.ca/
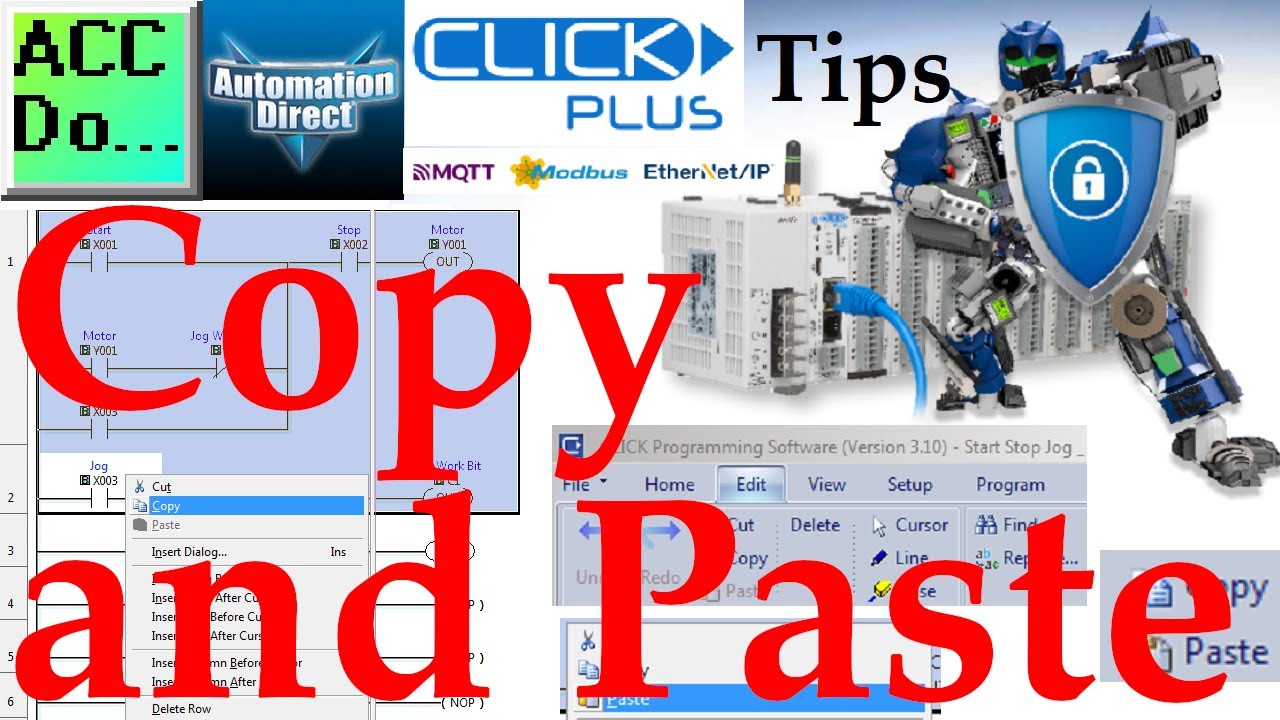
Click PLC Software Copy and Paste
152 views · Oct 12, 2022 accautomation.ca
The Copy selection is used to place a copy of a selected object on the Clipboard. The Clipboard saves the Copy in memory so it is available when the Paste function is selected. The Copy stays in the Clipboard until a new Copy is made of another object or until you Exit the program. The Copy and Paste options are located on the Edit Toolbar. Main menu | Edit | Copy or Paste... Alternatively, you can right-click the mouse on a selected object, or rung and select copy or paste. Several rungs can be selected by using the shift key plus the up or down arrow on the keyboard. Once highlighted then right-click to copy or paste. General information on the Click series of controllers: www.clickplcs.com/config There are also system configuration tools that will calculate the power budget, I/O count, and price. Click PLUS PLC Configuration: https://www.automationdirect.com/clickplcs/config/clickplusconfig Click PLC Configuration: https://www.automationdirect.com/clickplcs/config Programming and examples of the Click and Click PLUS PLC series can be found at this URL: https://accautomation.ca/series/click-plc/ There are several reasons why we are using the Click and Click PLUS PLCs. Here are just a few. - Investment is low for the hardware and the software is free - Standalone PLC with built-in I/O - Communication ability - Ethernet Port, RS232, RS485 - support for protocols such as Modbus RTU, Modbus TCP, etc. - Ability to expand the system with a variety of modules including RTD and Thermocouple inputs directly. #shorts ACC Automation https://accautomation.ca/
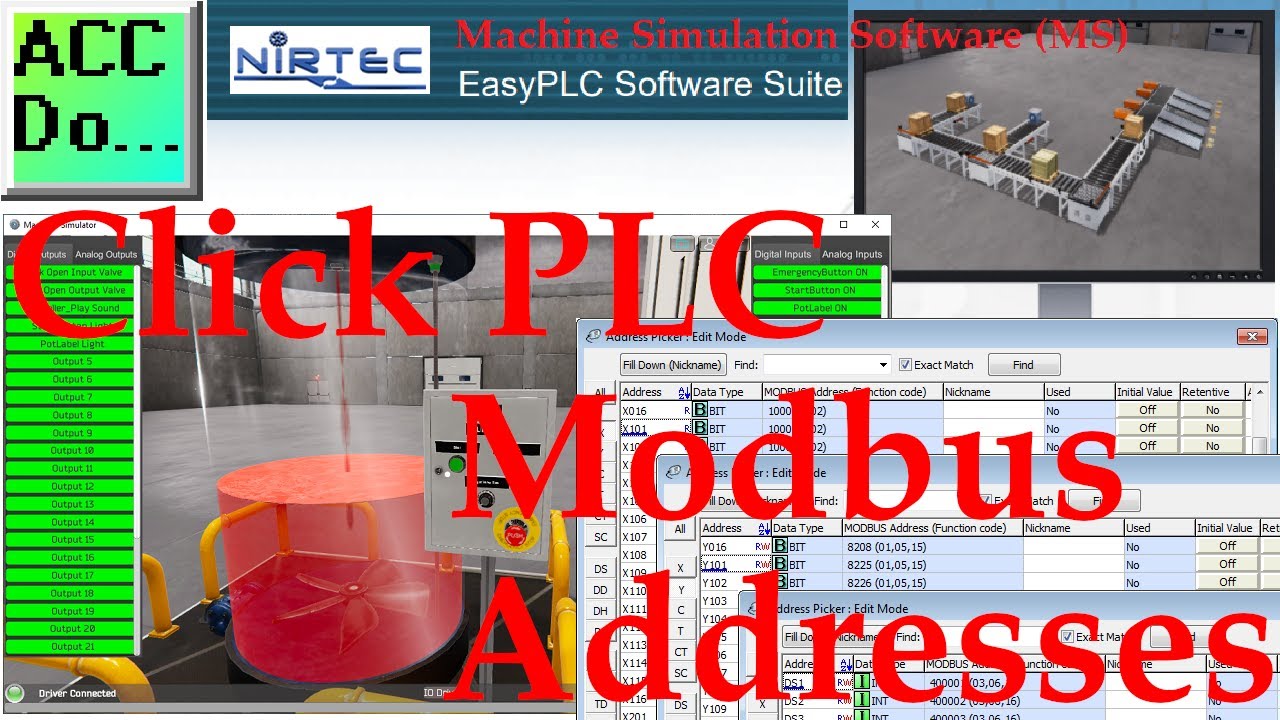
Machines Simulator (MS) Click PLC Modbus Addresses
73 views · Oct 12, 2022 accautomation.ca
We will be using the Tank Level scene in start mode. After selecting the IO Drivers on the bottom menu and entering the ModbusDriver option, we can now enter the Modbus addresses. Select the starting addresses for the Digital and Analog inputs and outputs. Call up the Address Picker of the Click programming software. We will be using inputs starting at X101 which is starting at 32. Outputs will start at Y101 which has a starting address of 8224. Analog inputs and outputs start at address DS1 which is 0. Assign the Modbus address to the Machines Simulator by selecting Driver | Automatic Assignment. Select Exit | Start Driver and Exit. This will now connect to the PLC. An indication is at the bottom of the screen. Select View I/O to see the Modbus Address Tags. Now you can write your PLC program with the Machines Simulator. EasyPLC Software Suite is a complete PLC, HMI, and Machine Simulator Software package. This PLC learning package includes the following: Easy PLC - PLC Simulation that will allow programming in Ladder, Grafcet, Logic Blocks, or Script. HMI System - Easily create a visual human-machine interface (HMI), Machine Simulator - A virtual 3D world with real-time graphics and physical properties. PLC programs can be tested using the EasyPLC or through other interfaces. (Modbus RTU, TCP, etc.) Machine Simulator Lite - Designed to run on Android Devices. Machine Simulator VR - Virtual Reality comes to life so you can test, train or practice your PLC programming. Purchase your copy of this learning package for less than $75 USD for a single computer install, or less than $100 USD to allow different computers. Receive 10% off the price by typing in ACC in the comment section when you order. http://www.nirtec.com/index.php/purchase-price/ Learn PLC programming the easy way. Invest in yourself today. System Requirements: Minimum Hardware Requirements: Processor: Compatible with the SSE2 instruction set RAM: 1 Gb. Disk Space: 2 Gb of free disk space. Graphics card: Support DX9 (shader model 3.0) or DX11 with level 9.3 function capabilities A Sound card installed is necessary. Operative System Compatibility: Windows 7, 8, and 10. All 32 & 64 bits versions. Machines Simulator Lite is designed for Android devices. #shorts ACC Automation https://accautomation.ca/
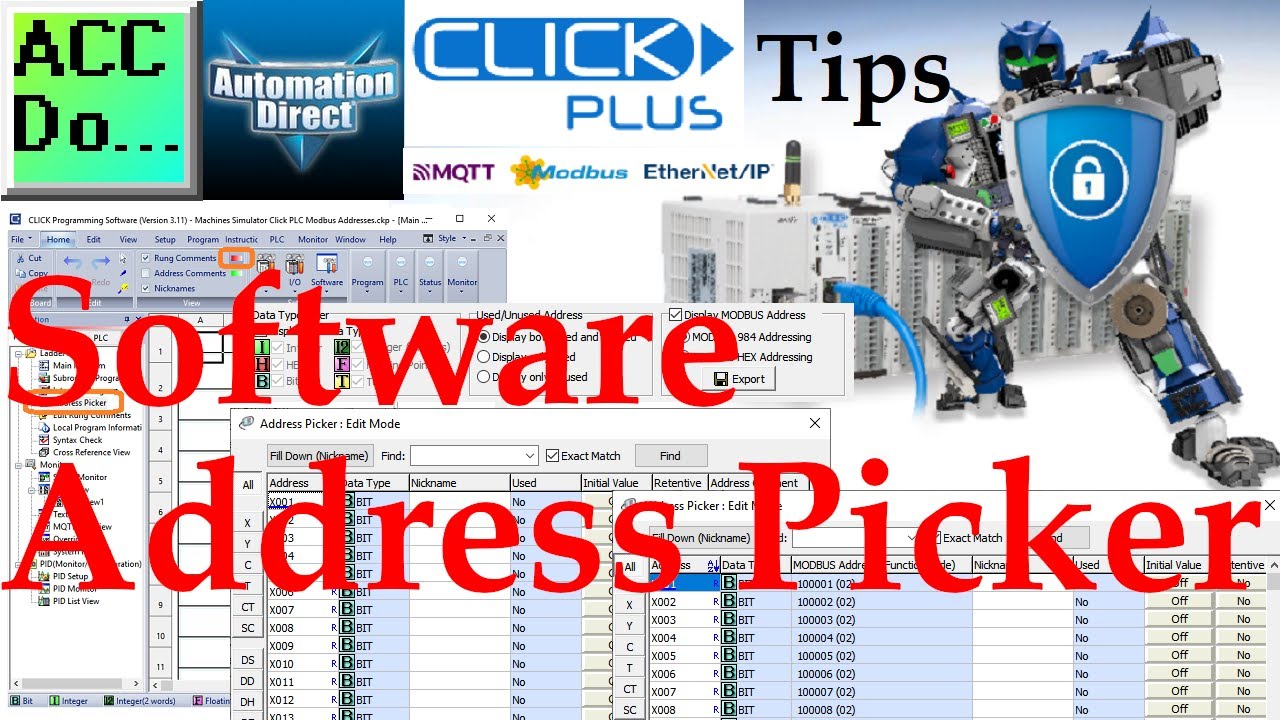
Click PLC Software Address Picker
68 views · Oct 12, 2022 accautomation.ca
Using the Address Picker in the Click Programming Software we can see all of the memory addresses available for your program. Start the Click PLC programming software Select Address Picker under the Navigation Window | Ladder Program. Alternatively, you can also select it by the main menu | Program | Address Picker... or Ctrl + T. Select display MODBUS Address on the bottom right of the Address Picker: Edit Mode window. The Modbus address can now be displayed as 984 or HEX Addressing Programming and examples of the Click and Click PLUS PLC series can be found at this URL: https://accautomation.ca/series/click-plc/ There are several reasons why we are using the Click and Click PLUS PLCs. Here are just a few. - Investment is low for the hardware and the software is free - Standalone PLC with built-in I/O - Communication ability - Ethernet Port, RS232, RS485 - support for protocols such as Modbus RTU, Modbus TCP, etc. - Ability to expand the system with a variety of modules including RTD and Thermocouple inputs directly. General information on the Click series of controllers: www.clickplcs.com/config There are also system configuration tools that will calculate the power budget, I/O count, and price. Click PLUS PLC Configuration: https://www.automationdirect.com/clickplcs/config/clickplusconfig Click PLC Configuration: https://www.automationdirect.com/clickplcs/config #shorts ACC Automation https://accautomation.ca/
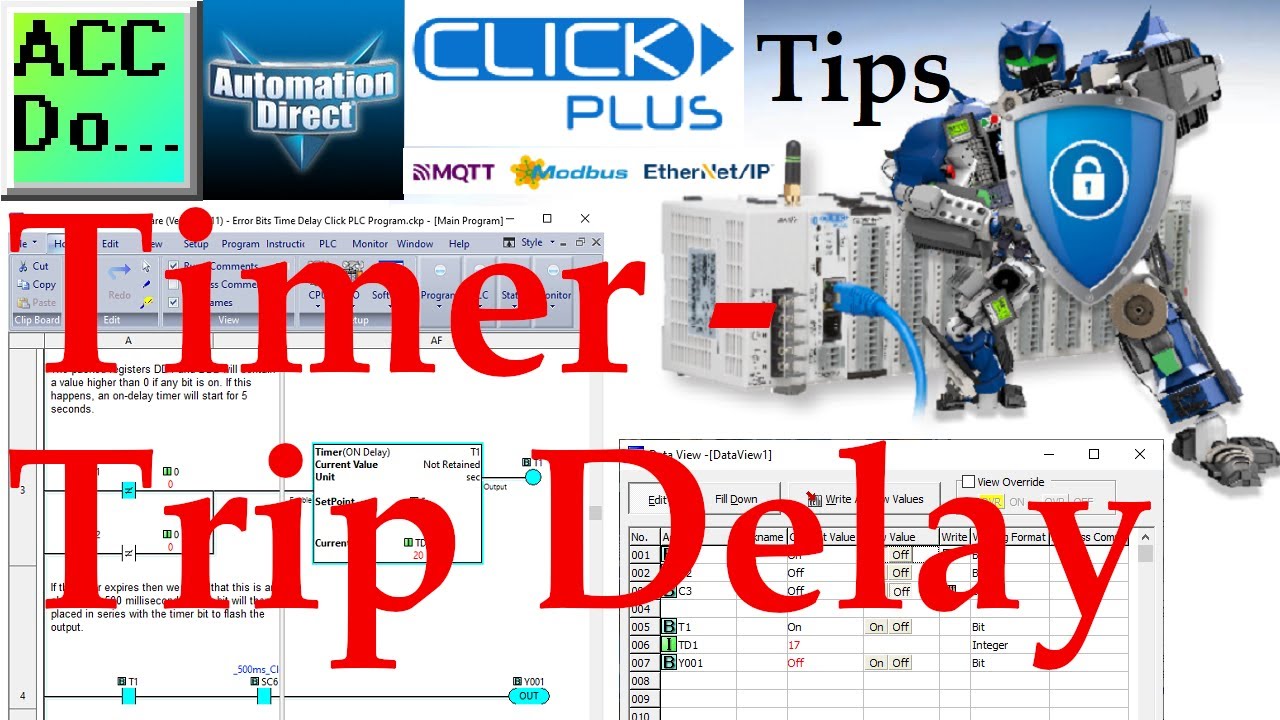
Click PLC Timer - Trip Delay
52 views · Oct 12, 2022 accautomation.ca
Click PLC Timers / Trip Delay This PLC program will monitor multiple error bits. If any of them are on for an extended period of time, then a timer will start timing. Once the timer expires we know that the bit has been on too long activating an output. This program will pack all of the error bits into a double-word address. A comparison is used to determine if any of the bits are activated. The timer times out after a set time to indicate an error has occurred. Download this Click PLC sample program from the link below. Programming and examples of the Click and Click PLUS PLC series can be found at this URL: https://accautomation.ca/series/click-plc/ There are several reasons why we are using the Click and Click PLUS PLCs. Here are just a few. - Investment is low for the hardware and the software is free - Standalone PLC with built-in I/O - Communication ability - Ethernet Port, RS232, RS485 - support for protocols such as Modbus RTU, Modbus TCP, etc. - Ability to expand the system with a variety of modules including RTD and Thermocouple inputs directly. General information on the Click series of controllers: www.clickplcs.com/config There are also system configuration tools that will calculate the power budget, I/O count, and price. Click PLUS PLC Configuration: https://www.automationdirect.com/clickplcs/config/clickplusconfig Click PLC Configuration: https://www.automationdirect.com/clickplcs/config #shorts ACC Automation https://accautomation.ca/
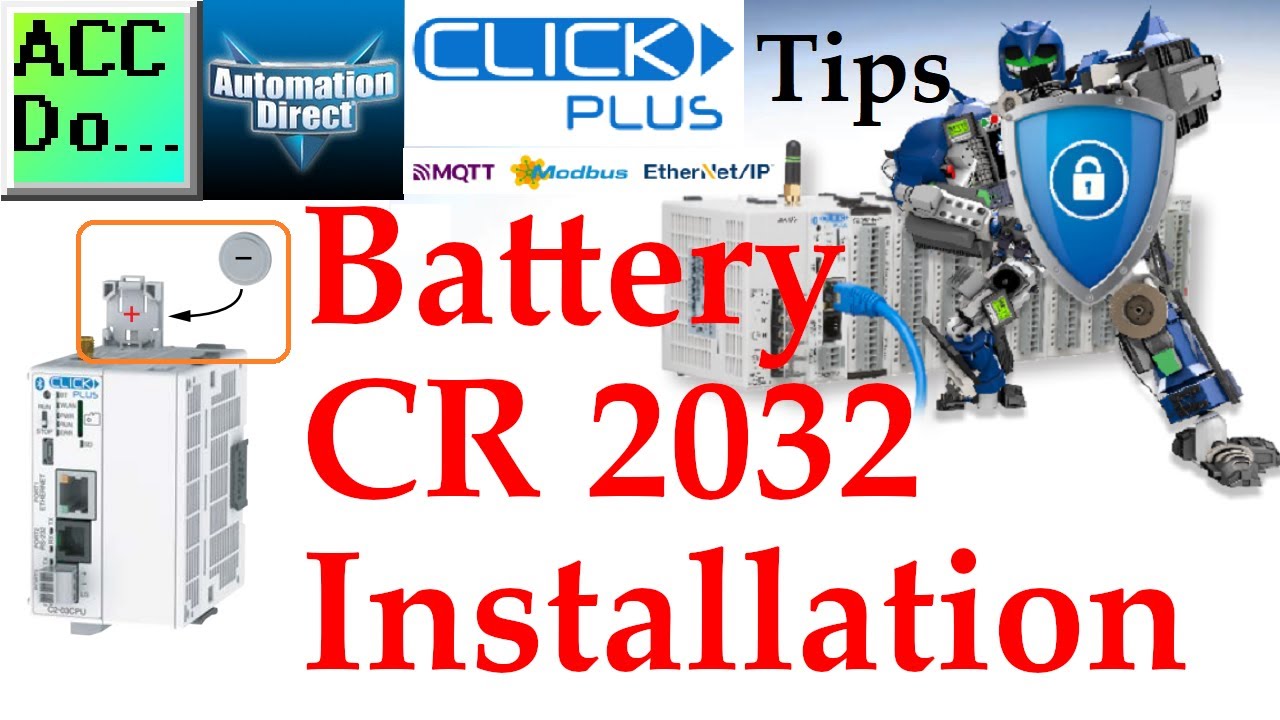
Click PLUS PLC Battery CR 2032 Installation
460 views · Oct 11, 2022 accautomation.ca
Click PLUS PLC Battery CR 2032 Installation To install or replace the D0-MC-BAT (CR 2032) battery: 1. Power up the CPU for at least 10 minutes to charge the CPU’s capacitor prior to removing the battery. This will retain function memories. It is recommended you backup data memory before replacing the battery. Plan to complete the battery replacement within 10 minutes of power off. 2. Power off the CPU. 3. Pull out the battery holder. (This may require a small screwdriver to push in the tab and lift it when the unit is mounted.) 4. Put in a new battery, with the positive (+) polarity side facing the battery holder. This should snap into place. 5. Insert the battery holder into the CPU and push it all the way in. 6. Power on the CPU. 7. Make a note of the date the battery was installed. (Battery life is about 3 years.) The battery backup is now available. Programming and examples of the Click and Click PLUS PLC series can be found at this URL: https://accautomation.ca/series/click-plc/ There are several reasons why we are using the Click and Click PLUS PLCs. Here are just a few. - Investment is low for the hardware and the software is free - Standalone PLC with built-in I/O - Communication ability - Ethernet Port, RS232, RS485 - support for protocols such as Modbus RTU, Modbus TCP, etc. - Ability to expand the system with a variety of modules including RTD and Thermocouple inputs directly. General information on the Click series of controllers: www.clickplcs.com/config There are also system configuration tools that will calculate the power budget, I/O count, and price. Click PLUS PLC Configuration: https://www.automationdirect.com/clickplcs/config/clickplusconfig Click PLC Configuration: https://www.automationdirect.com/clickplcs/config #shorts ACC Automation https://accautomation.ca/
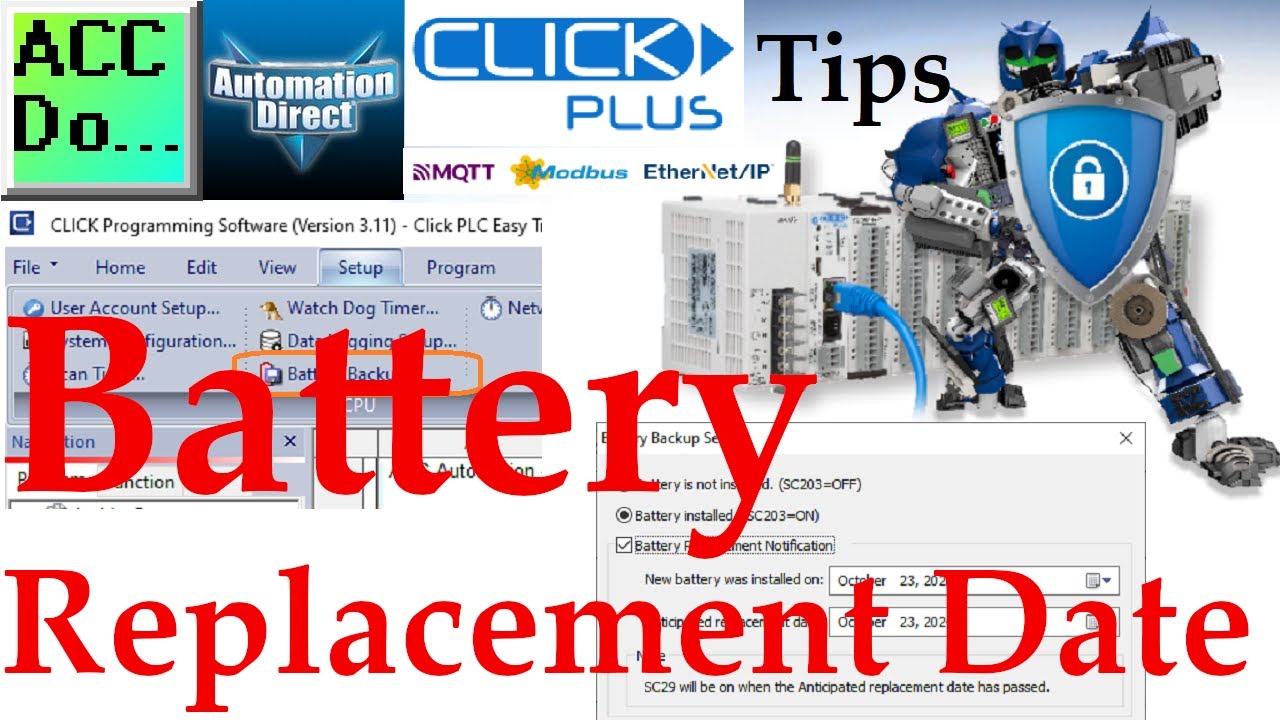
Click PLC Programming Battery Replacement Date
115 views · Oct 11, 2022 accautomation.ca
Click PLC Programming Battery Replacement Date The CLICK PLC has a feature that indicates the pre-scheduled battery replacement date has passed. This will activate an error light on the CPU. In the CLICK programming software, go to the pull-down menu: Setup | Battery backup Setup Select the Battery Installed option. This will enable the low battery detection feature of the CPU. Select the Battery Replacement Notification. Enter the dates depending on what battery you are enstalling. The Click PLUS CR2032 battery is good for three years. Select OK and download the project file to the PLC. The ERR light on the CPU module will start flickering when the Anticipated Date has passed. Programming and examples of the Click and Click PLUS PLC series can be found at this URL: https://accautomation.ca/series/click-plc/ There are several reasons why we are using the Click and Click PLUS PLCs. Here are just a few. - Investment is low for the hardware and the software is free - Standalone PLC with built-in I/O - Communication ability - Ethernet Port, RS232, RS485 - support for protocols such as Modbus RTU, Modbus TCP, etc. - Ability to expand the system with a variety of modules including RTD and Thermocouple inputs directly. General information on the Click series of controllers: www.clickplcs.com/config There are also system configuration tools that will calculate the power budget, I/O count, and price. Click PLUS PLC Configuration: https://www.automationdirect.com/clickplcs/config/clickplusconfig Click PLC Configuration: https://www.automationdirect.com/clickplcs/config #shorts ACC Automation https://accautomation.ca/
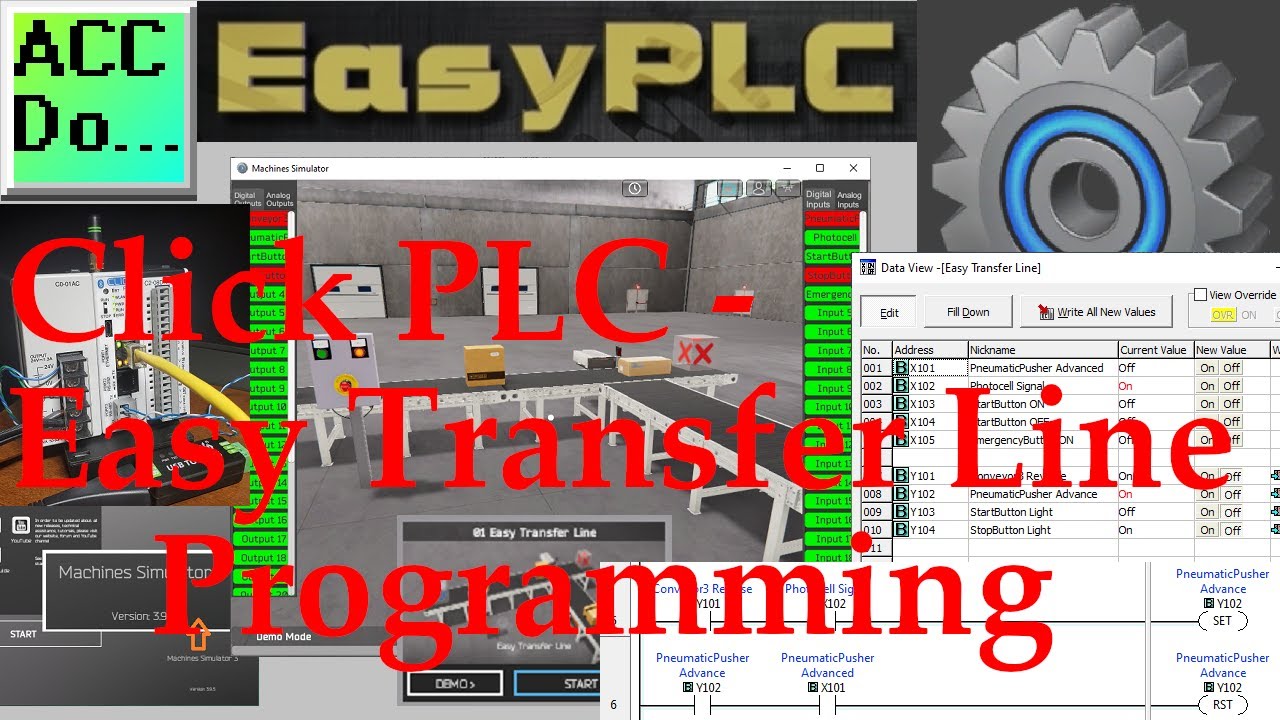
Click PLC – Easy Transfer Line Programming
2K views · Oct 11, 2022 accautomation.ca
EasyPLC Software Suite is a complete PLC, HMI, and Machine Simulator Software package. This PLC learning package includes a Machine Simulator (MS). This virtual 3D world with real-time graphics and physical properties can communicate to several different programmable logic controllers. (PLC) We will be developing a Click PLC program for a transfer line. This is just one of the prebuilt machines in the simulator to learn PLC programming. We will be developing the ladder logic, connecting via Modbus RTU, and testing our program. This will be done using the five steps to PLC program development. Let’s get started. More information can be obtained on our website. This includes all of the links mentioned in this video. https://accautomation.ca/click-plc-easy-transfer-line-programming/ 00:00 Click PLC – Easy Transfer Line Programming 01:12 Machine Simulation - EasyPLC Software Suite 02:04 Define the task: (Step 1 – Easy Transfer Line) 05:34 Define the Inputs and Outputs: (Step 2 – Easy Transfer Line) 07:32 Develop a logical sequence of operation: (Step 3 – Easy Transfer Line) 10:07 Develop the PLC program: (Step 4 – Easy Transfer Line) 11:52 Test the program: (Step 5 – Easy Transfer Line) 12:15 Click PLC Hardware 13:15 Click PLC Modbus RTU to EasyPLC Machine Simulator 15:31 Testing PLC IO Connections 17:10 Running our Easy Transfer Line Program Previous posts include the following: EasyPLC Installing the Software https://accautomation.ca/easyplc-installing-the-software/ https://youtu.be/EbWS_elbI2w EasyPLC Software Suite is a complete PLC, HMI, and Machine Simulator Software package. This PLC learning package includes the following: Easy PLC - PLC Simulation that will allow programming in Ladder, Grafcet, Logic Blocks, or Script. HMI System - Easily create a visual human-machine interface (HMI), Machine Simulator - A virtual 3D world with real-time graphics and physical properties. PLC programs can be tested using the EasyPLC or through other interfaces. (Modbus RTU, TCP, etc.) Machine Simulator Lite - Designed to run on Android Devices. Machine Simulator VR - Virtual Reality comes to life so you can test, train or practice your PLC programming. Purchase your copy of this learning package for less than $75 USD for a single computer install, or less than $100 USD to allow different computers. Receive 10% off the price by typing in ACC in the comment section when you order. http://www.nirtec.com/index.php/purchase-price/ Learn PLC programming the easy way. Invest in yourself today. Here is a list of YouTube Shorts about EasyPLC Software Suite including the Machine Simulator. https://www.youtube.com/playlist?list=PL3y71jAPOdZAvTC8-TWNifAHpgEkAfqZQ ACC Automation https://accautomation.ca/
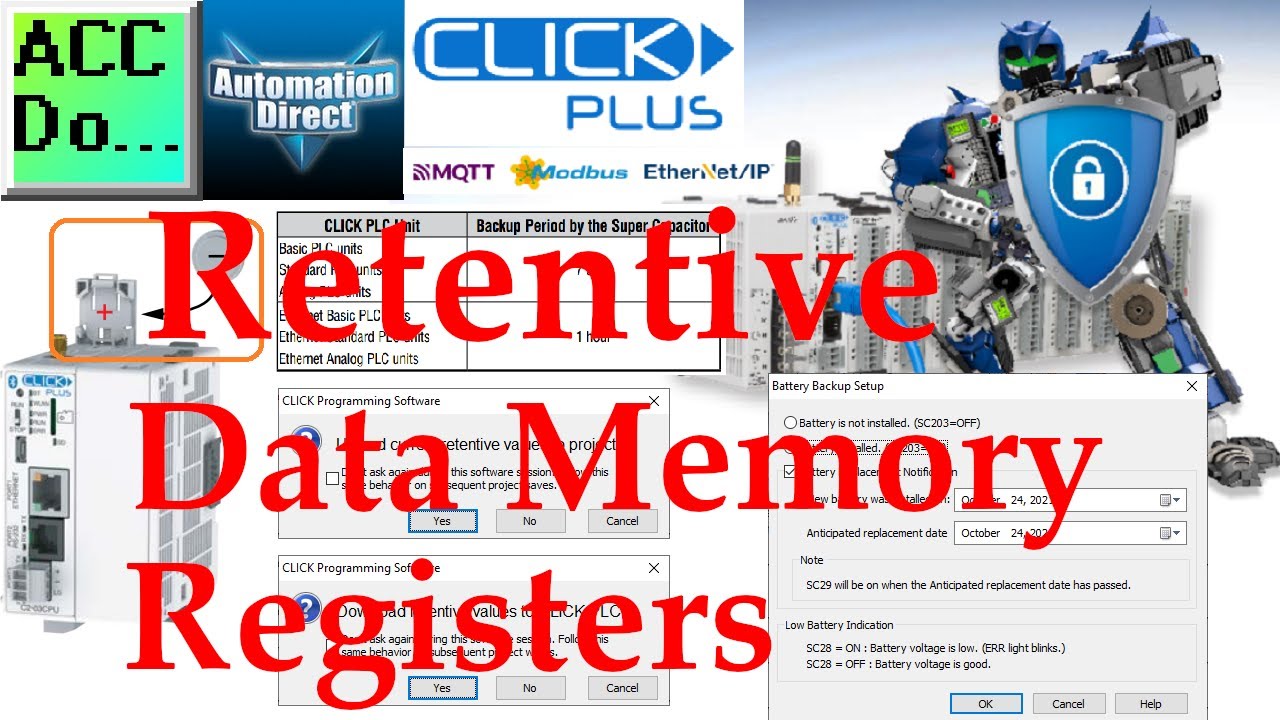
Click PLC Retentive Data Memory Registers
3K views · Oct 11, 2022 accautomation.ca
The Click PLC retentive data memory registers are not included in the program file by default. All Click PLC CPUs are included. This option must be selected to include the C, CT, DS, DD, DH, DF, CTD, and TXT memory in the Click project file. We will be enabling the option to include the retentive data memory in the Click program file from the Click programming software. We will also be installing a battery and programming an expiry date. This will indicate when the battery will need to be replaced. Let’s get started. More information can be obtained at our website. This includes all of the links mentioned in this video. https://accautomation.ca/click-plc-retentive-data-memory-registers/ 00:00 Click PLC Retentive Data Memory Registers 01:30 Maintain Retentive Values in the Project File 03:17 Click PLC - SRAM Memory Retention 04:30 Click PLC Battery Installation 07:10 Click PLC Programming Battery Replacement Date Previously we looked at the following: Click Plus Software Installation https://accautomation.ca/click-plus-software-installation-version-3-00/ https://youtu.be/6uQQzyZ-O3s Establish Communication https://accautomation.ca/click-plus-establish-communication/ https://youtu.be/1Bnx3IROCqk MQTT Communication https://accautomation.ca/click-plus-plc-mqtt-communication/ https://youtu.be/wzUBolN9KjQ Data Logging https://accautomation.ca/click-plus-data-logging-csv-file-sql-database/ https://youtu.be/ydoWvMzHSKc Click Plus Real-Time Clock https://accautomation.ca/click-plus-real-time-clock-setup-and-use/ https://youtu.be/0Vlqo8p0vCI Click PLC Serial Communication Timing https://accautomation.ca/click-plc-serial-communication-timing/ https://youtu.be/wbG_BKcdU1k CLICK PLCs were designed with simplicity in mind, providing reliable control at a low, low cost and with little to no learning curve. This simplicity makes CLICK a perfect solution for small machines, home automation projects, pneumatic applications, or anywhere a simple system needs a budget-saving control solution. Building on the original CLICK’s simple design, the new CLICK PLUS PLCs offer the same practical control but with some surprising bells and whistles. Using the same FREE, streamlined PLC programming software as its predecessor, the CLICK PLUS PLCs provide no-headache programming combined with advanced capabilities like Wi-Fi communication and data logging. The Click and Click PLUS PLC series can be found at this URL: https://accautomation.ca/series/click-plc/ Features of the new Click PLUS PLC (C2-0xCPU) includes the following: • Micro USB • DHCP support • DNS support • Wi-Fi (programming and Modbus TCP) • Bluetooth (Wi-Fi) provisioning • SD Card (Data Logging) • Data Logger • Network Time Service • MQTT (Publish/Subscribe) • Required PLC Password • Disable Ports • Strong Password Support • Disable Ping Response • Encrypted Password Transfer There are several reasons why we are using the Click and Click PLUS PLCs. Here are just a few. - Investment is low for the hardware and the software is free - Standalone PLC with built-in I/O - Communication ability - Ethernet Port, RS232, RS485 - support for protocols such as Modbus RTU, Modbus TCP, etc. - Ability to expand the system with a variety of modules including RTD and Thermocouple inputs directly. https://www.accautomation.ca
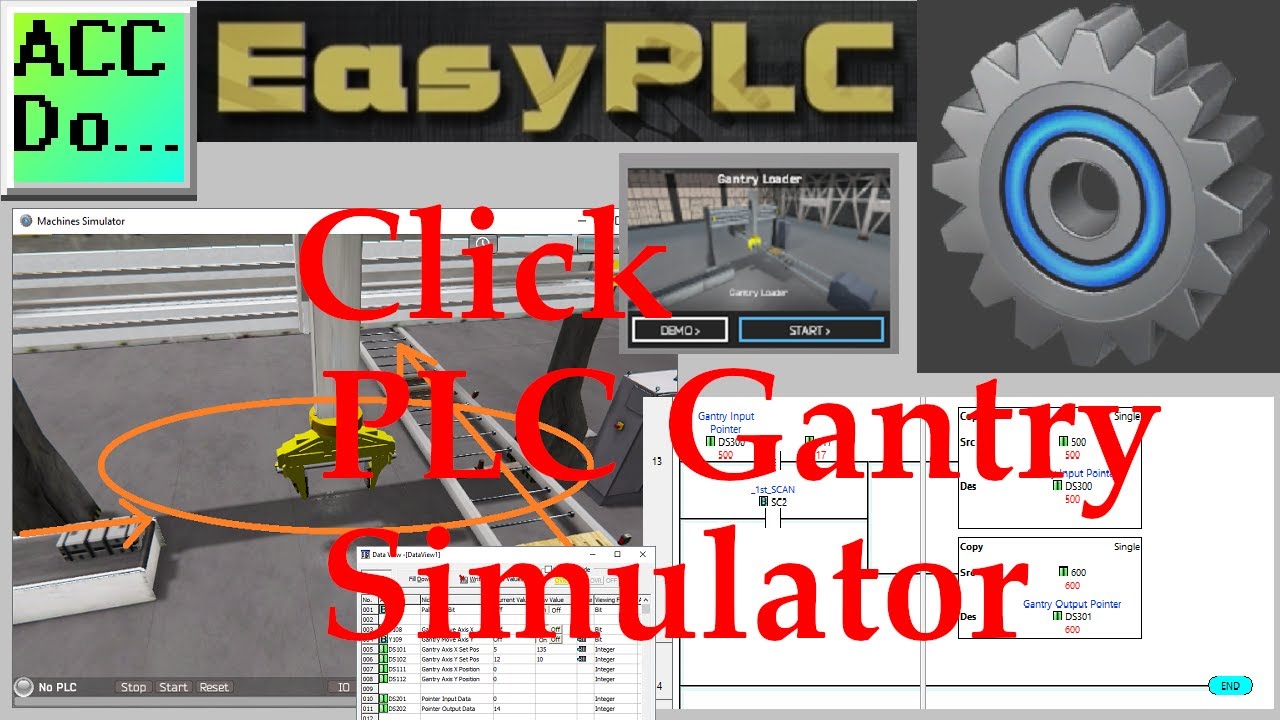
Click PLC EasyPLC Gantry Simulator
3K views · Oct 11, 2022 accautomation.ca
EasyPLC Software Suite is a complete PLC, HMI, and Machine Simulator Software package. This PLC learning package includes a Machine Simulator (MS). This virtual 3D world with real-time graphics and physical properties can communicate to several different programmable logic controllers. (PLC) The Machine Simulator (MS) is part of the EasyPLC software suite. It has many built-in machines that can be programmed. The gantry loader is one of these machines. It will pick up metal boxes from a conveyor and place two on a wooden pallet. The Click PLC will be used to program this virtual machine. Using the Click Plus PLC, we will connect the simulator to the gantry loader machine. This will be done using Modbus TCP (Ethernet) for communications. Using the five steps for program development we will show how this is programmed. The logical sequence step will include a flow chart and a sequence of operations. The sequence of operations will be done using indirect addressing in the Click PLC. Let’s get started. More information can be obtained on our website. This includes all of the links mentioned in this video. https://accautomation.ca/click-plc-easyplc-gantry-simulator/ 00:00 Click PLC EasyPLC Gantry Simulator 01:11 Define the task: (Step 1 – Gantry Loader) 02:58 Define the Inputs and Outputs: (Step 2 – Gantry Loader) 06:16 Develop a logical sequence of operation: (Step 3 – Gantry Loader) 08:20 Click PLC Sequence of Operation 11:28 Develop the PLC program: (Step 4 – Gantry Loader) 16:34 Test the program: (Step 5 – Gantry Loader) 20:21 Running the Click Gantry PLC Program Previous posts include the following: EasyPLC Installing the Software https://accautomation.ca/easyplc-installing-the-software/ https://youtu.be/EbWS_elbI2w Click PLC – Easy Transfer Line Programming https://accautomation.ca/click-plc-easy-transfer-line-programming/ https://youtu.be/o7G_ZtPBjbg Productivity PLC Simulator - Chain Conveyor MS https://accautomation.ca/productivity-plc-simulator-chain-conveyor-ms/ https://youtu.be/wp16dsrCvb8 Do-More PLC – EasyPLC Box Selection Program https://accautomation.ca/do-more-plc-easyplc-box-selection-program/ https://youtu.be/4QP4d3vD930 EasyPLC Software Suite is a complete PLC, HMI, and Machine Simulator Software package. This PLC learning package includes the following: Easy PLC - PLC Simulation that will allow programming in Ladder, Grafcet, Logic Blocks, or Script. HMI System - Easily create a visual human-machine interface (HMI), Machine Simulator - A virtual 3D world with real-time graphics and physical properties. PLC programs can be tested using the EasyPLC or through other interfaces. (Modbus RTU, TCP, etc.) Machine Simulator Lite - Designed to run on Android Devices. Machine Simulator VR - Virtual Reality comes to life so you can test, train or practice your PLC programming. Purchase your copy of this learning package for less than $75 USD for a single computer install, or less than $100 USD to allow different computers. Receive 10% off the price by typing in ACC in the comment section when you order. http://www.nirtec.com/index.php/purchase-price/ Learn PLC programming the easy way. Invest in yourself today. Here is a list of YouTube Shorts about EasyPLC Software Suite including the Machine Simulator. https://www.youtube.com/playlist?list=PL3y71jAPOdZAvTC8-TWNifAHpgEkAfqZQ ACC Automation https://accautomation.ca/
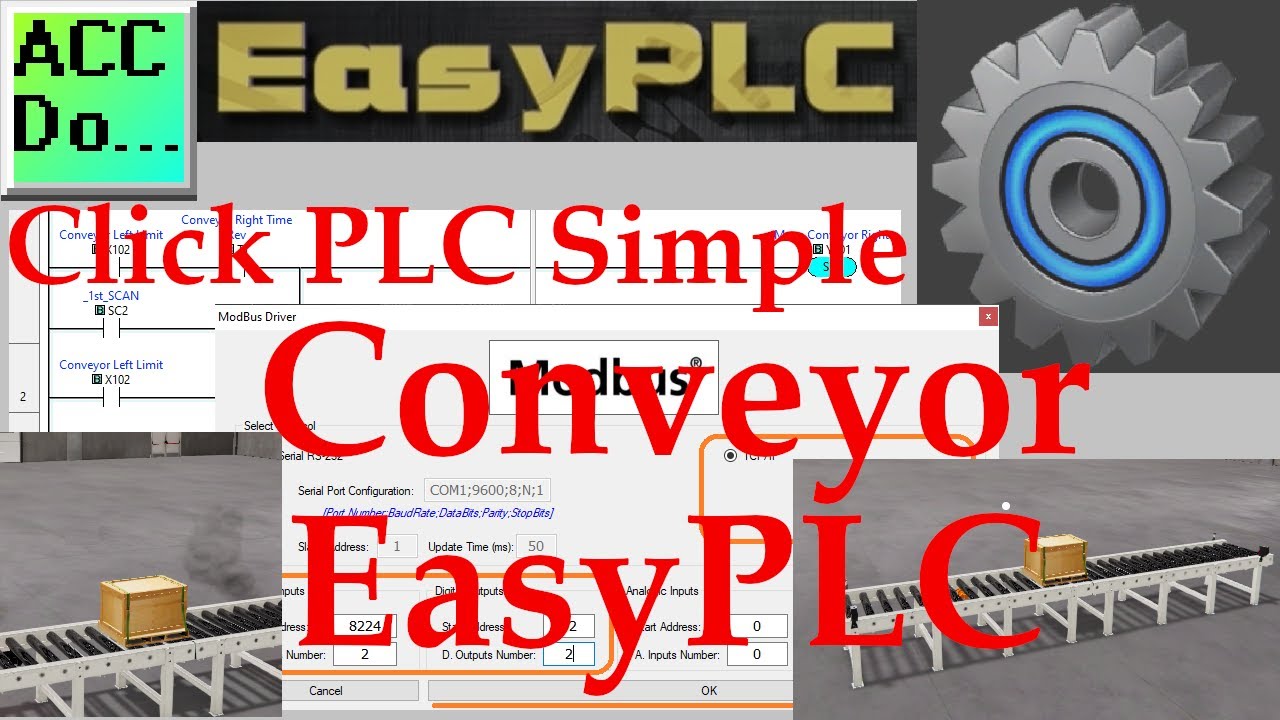
Click PLC Simple Conveyor EasyPLC
4K views · Oct 11, 2022 accautomation.ca
EasyPLC Software Suite is a complete PLC, HMI, and Machine Simulator Software package. This PLC learning package includes a Machine Simulator (MS). This virtual 3D world with real-time graphics and physical properties can communicate to several different programmable logic controllers. (PLC) The Machine Simulator (MS) is part of the EasyPLC software suite. It has many built-in machines that can be programmed. A simple conveyor is one of these machines. This is usually the starting point for learning about the machine simulator. This conveyor example will use two digital inputs and two digital outputs. A pallet will move back and forth on the conveyor. When the pallet is detected on each end it will stop and reverse direction. If both motors are started at the same time, the motors will burn up. This will be demonstrated. The machine simulator will allow you as the programmer to make mistakes before trying your program in the physical world. The Click PLC will be used to program this virtual machine. Using the Click Plus PLC, we will connect the simulator to the simple conveyor machine. This will be done using Modbus TCP (Ethernet) for communications. Using the five steps for program development we will show how this is programmed. Let’s get started. More information can be obtained on our website. This includes all of the links mentioned in this video. https://accautomation.ca/click-plc-simple-conveyor-easyplc/ 00:00 Click PLC Simple Conveyor EasyPLC 01:25 Define the task: (Step 1 – Simple Conveyor) 03:36 Turning Both Conveyor Motors On - Burning 04:21 Define the Inputs and Outputs: (Step 2 – Simple Conveyor) 04:39 Develop a logical sequence of operation: (Step 3 – Simple Conveyor) 05:41 Develop the Click PLC program: (Step 4 – Simple Conveyor) 07:18 Click PLC Modbus Addresses - Address Picker 08:10 Click PLC Ethernet Port Setup - Modbus Server (Slave) 09:35 Click PLC Hardware 10:42 Connecting EasyPLC Machine Simulator to Click PLC 12:32 Test the program: (Step 5 – Simple Conveyor) Previous posts include the following: EasyPLC Installing the Software https://accautomation.ca/easyplc-installing-the-software/ https://youtu.be/EbWS_elbI2w Click PLC – Easy Transfer Line Programming https://accautomation.ca/click-plc-easy-transfer-line-programming/ https://youtu.be/o7G_ZtPBjbg Productivity PLC Simulator - Chain Conveyor MS https://accautomation.ca/productivity-plc-simulator-chain-conveyor-ms/ https://youtu.be/wp16dsrCvb8 Do-More PLC – EasyPLC Box Selection Program https://accautomation.ca/do-more-plc-easyplc-box-selection-program/ https://youtu.be/4QP4d3vD930 Click PLC EasyPLC Gantry Simulator https://accautomation.ca/click-plc-easyplc-gantry-simulator/ https://youtu.be/QLdAxAnh9ps EasyPLC Software Suite is a complete PLC, HMI, and Machine Simulator Software package. This PLC learning package includes the following: Easy PLC - PLC Simulation that will allow programming in Ladder, Grafcet, Logic Blocks, or Script. HMI System - Easily create a visual human-machine interface (HMI), Machine Simulator - A virtual 3D world with real-time graphics and physical properties. PLC programs can be tested using the EasyPLC or through other interfaces. (Modbus RTU, TCP, etc.) Machine Simulator Lite - Designed to run on Android Devices. Machine Simulator VR - Virtual Reality comes to life so you can test, train or practice your PLC programming. Purchase your copy of this learning package for less than $75 USD for a single computer install, or less than $100 USD to allow different computers. Receive 10% off the price by typing in ACC in the comment section when you order. http://www.nirtec.com/index.php/purchase-price/ Learn PLC programming the easy way. Invest in yourself today. Here is a list of YouTube Shorts about EasyPLC Software Suite including the Machine Simulator. https://www.youtube.com/playlist?list=PL3y71jAPOdZAvTC8-TWNifAHpgEkAfqZQ ACC Automation https://accautomation.ca/
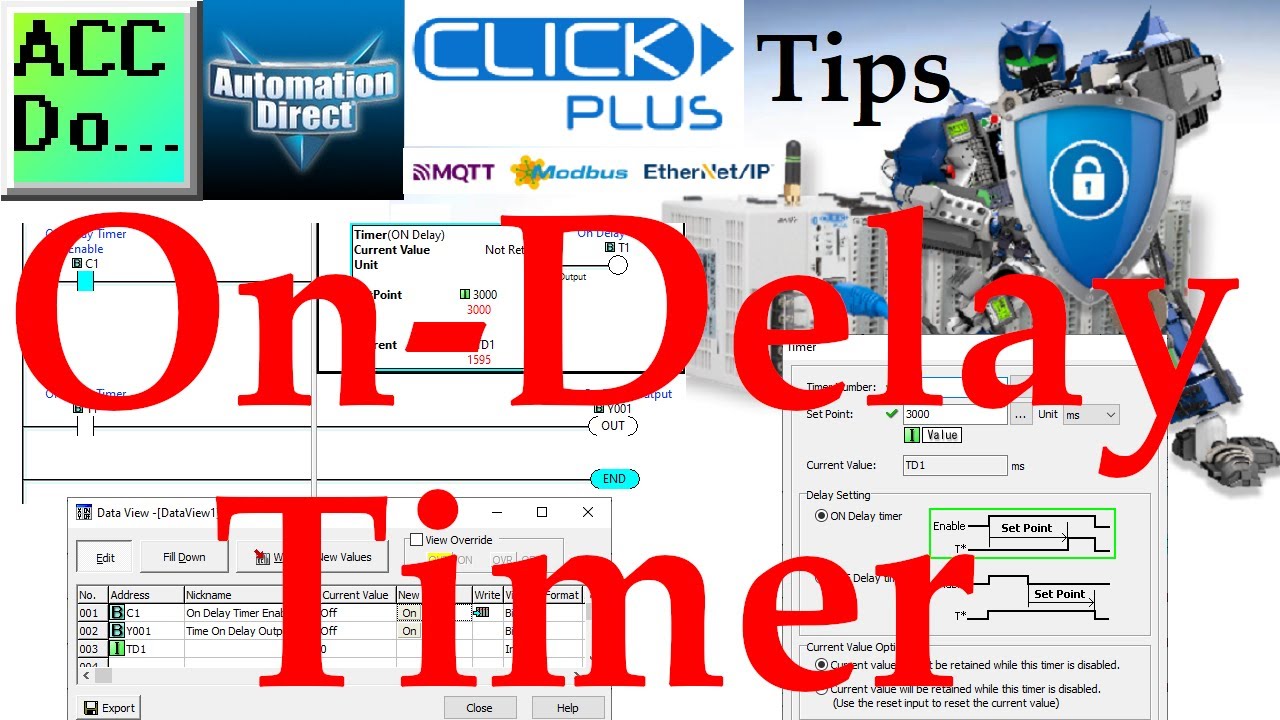
Click PLC On-Delay Timer
97 views · Oct 11, 2022 accautomation.ca
Click PLC On-Delay Timer Timers in the Click PLC have their own assigned memory location. You can have 500 timers in the Click PLC (T1 to T500). The current value of the timer can be found in addresses TD1 to TD500. A setpoint for the timer can be set directly or a memory area can contain the value. The setpoint can have the unit of measure of milliseconds, seconds, minutes, hours, or days. An ON DelayTimer measures the time duration that begins with a transition of the enable rung from OFF to ON. After this is enabled, the Timer increases the Current Value. When it reaches the Set Point, the Timer Bit is turned ON. The current value of the timer can be set to be memory retentive. It will remember the current value of the timer by using a separate reset for the Timer instruction. Programming and examples of the Click and Click PLUS PLC series can be found at this URL: https://accautomation.ca/series/click-plc/ There are several reasons why we are using the Click and Click PLUS PLCs. Here are just a few. - Investment is low for the hardware and the software is free - Standalone PLC with built-in I/O - Communication ability - Ethernet Port, RS232, RS485 - support for protocols such as Modbus RTU, Modbus TCP, etc. - Ability to expand the system with a variety of modules including RTD and Thermocouple inputs directly. General information on the Click series of controllers: www.clickplcs.com/config There are also system configuration tools that will calculate the power budget, I/O count, and price. Click PLUS PLC Configuration: https://www.automationdirect.com/clickplcs/config/clickplusconfig Click PLC Configuration: https://www.automationdirect.com/clickplcs/config #shorts ACC Automation https://accautomation.ca/
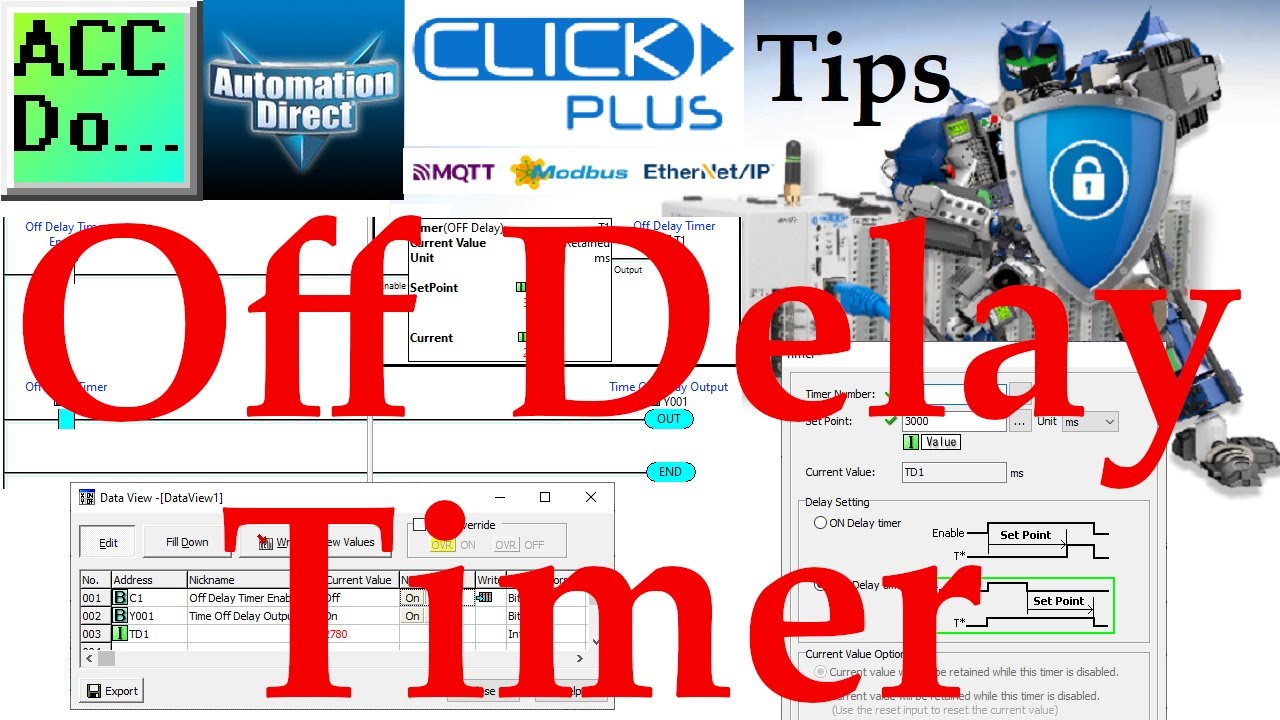
Click PLC Off Delay Timer
21 views · Oct 11, 2022 accautomation.ca
Click PLC Off-Delay Timer Timers in the Click PLC have their own assigned memory location. You can have 500 timers in the Click PLC (T1 to T500). The current value of the timer can be found in addresses TD1 to TD500. A setpoint for the timer can be set directly or a memory area can contain the value. The setpoint can have the unit of measure of milliseconds, seconds, minutes, hours, or days. An OFF DelayTimer measures the time duration that begins with a transition of the enable rung from ON to OFF. At this transition point, the Timer increases the Current Value, when it reaches the Set Point, the Timer Bit is turned OFF. The current value of the timer can be set to be memory retentive. It will remember the current value of the timer by using a separate reset for the Timer instruction. Programming and examples of the Click and Click PLUS PLC series can be found at this URL: https://accautomation.ca/series/click-plc/ There are several reasons why we are using the Click and Click PLUS PLCs. Here are just a few. - Investment is low for the hardware and the software is free - Standalone PLC with built-in I/O - Communication ability - Ethernet Port, RS232, RS485 - support for protocols such as Modbus RTU, Modbus TCP, etc. - Ability to expand the system with a variety of modules including RTD and Thermocouple inputs directly. General information on the Click series of controllers: www.clickplcs.com/config There are also system configuration tools that will calculate the power budget, I/O count, and price. Click PLUS PLC Configuration: https://www.automationdirect.com/clickplcs/config/clickplusconfig Click PLC Configuration: https://www.automationdirect.com/clickplcs/config #shorts ACC Automation https://accautomation.ca/
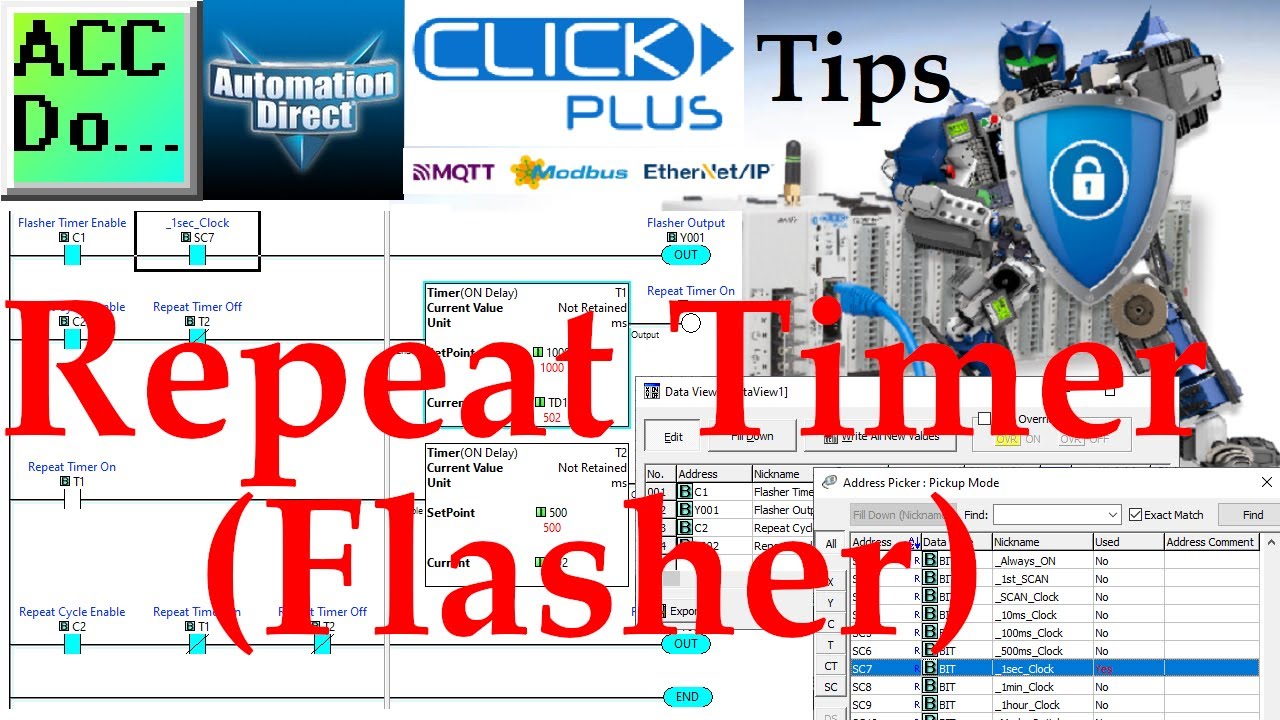
Click PLC Repeat Timer Flasher
149 views · Oct 11, 2022 accautomation.ca
Click PLC Repeat Timer (Flasher) The Click PLC has built-in system bit flashers. These bits will turn on and off at a fixed time cycle. 10, 100, and 500 milliseconds are available. There is also a 1 second, 1 minute, and one-hour system bit timer flashers. If you want different on and off times we can make this with two on-delay timers. In our example, we have bit C2 as the enable. This will be in series with the normally closed timer 2 to timer 1. This will be our on time for the repeat cycle time. The next rung will use the normally open timer 1 to activate timer 2. You will see that the timers will self reset each other. The output Y2 will be driven by the enable bit C2 and not timer 1 and not timer 2. Programming and examples of the Click and Click PLUS PLC series can be found at this URL: https://accautomation.ca/series/click-plc/ There are several reasons why we are using the Click and Click PLUS PLCs. Here are just a few. - Investment is low for the hardware and the software is free - Standalone PLC with built-in I/O - Communication ability - Ethernet Port, RS232, RS485 - support for protocols such as Modbus RTU, Modbus TCP, etc. - Ability to expand the system with a variety of modules including RTD and Thermocouple inputs directly. General information on the Click series of controllers: www.clickplcs.com/config There are also system configuration tools that will calculate the power budget, I/O count, and price. Click PLUS PLC Configuration: https://www.automationdirect.com/clickplcs/config/clickplusconfig Click PLC Configuration: https://www.automationdirect.com/clickplcs/config #shorts ACC Automation https://accautomation.ca/
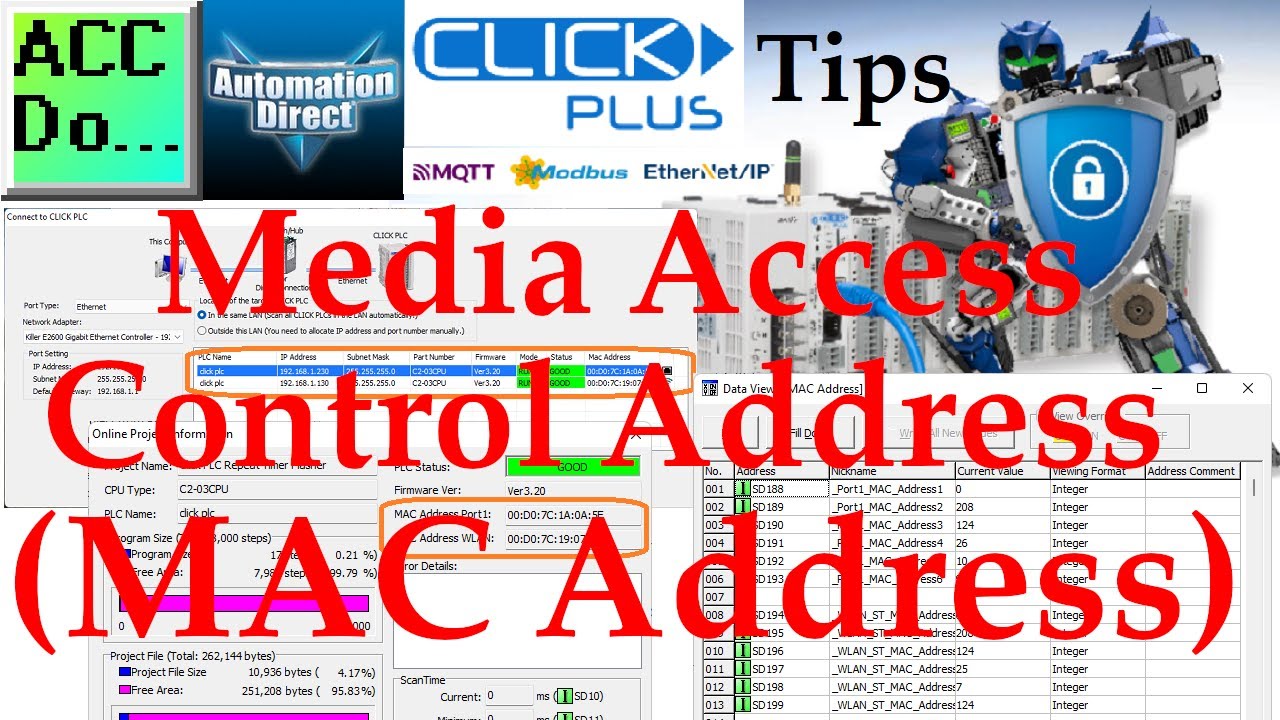
Click PLC Media Access Control Address (MAC Address)
11K views · Oct 11, 2022 accautomation.ca
The Click PLC Media Access Control Address or MAC address is a unique number that can identify the device on your network. It is often used for assigning IP addresses by the DHCP (Router) on the network. There are three ways to view your MAC addresses in the Click PLC using the Click PLC programming software. 1. Connect to the Click PLC - The discoverable ports will be displayed. 2. The online project information screen will contain the MAC addresses. 3. System Data Registers through the Data View monitoring will display the MAC address. - Port 1 MAC - SD188 to SD193 - WLAN MAC - SD194 to SD199 Programming and examples of the Click and Click PLUS PLC series can be found at this URL: https://accautomation.ca/series/click-plc/ There are several reasons why we are using the Click and Click PLUS PLCs. Here are just a few. - Investment is low for the hardware and the software is free - Standalone PLC with built-in I/O - Communication ability - Ethernet Port, RS232, RS485 - support for protocols such as Modbus RTU, Modbus TCP, etc. - Ability to expand the system with a variety of modules including RTD and Thermocouple inputs directly. General information on the Click series of controllers: www.clickplcs.com/config There are also system configuration tools that will calculate the power budget, I/O count, and price. Click PLUS PLC Configuration: https://www.automationdirect.com/clickplcs/config/clickplusconfig Click PLC Configuration: https://www.automationdirect.com/clickplcs/config #shorts ACC Automation https://accautomation.ca/
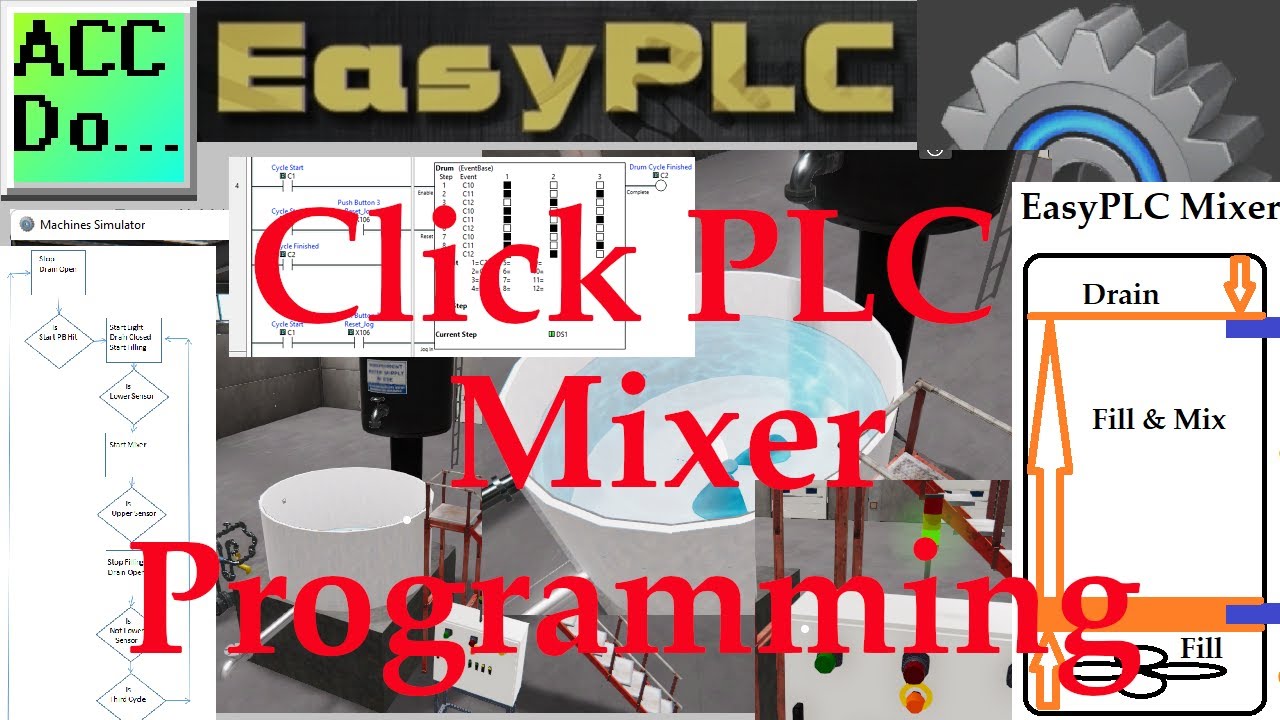
Click PLC - EasyPLC PLC Mixer Programming
2K views · Oct 11, 2022 accautomation.ca
The Machine Simulator (MS) is part of the EasyPLC software suite. It has many built-in machines that are used to show different programming techniques. The industrial mixer is one of these machines. When the start pushbutton is energized it will fill up a tank until the lower level sensor is detected. The mixer blades will then be turned on until the top sensor is detected. The tank is then drained past the low sensor and the process repeats for 3 cycle times. Once the sequence is complete, the tank is completely drained and ready to start again. The Click PLC will be used to program this virtual 3D mixer machine. A DRUM instruction will be used in the PLC for the sequencing. Using the Click Plus PLC, we will connect to the mixing machine. This will be done using Modbus TCP (Ethernet) for communications. Using the five steps for program development we will show how this is programmed. Let’s get started. More information can be obtained on our website. This includes all of the links mentioned in this video. https://accautomation.ca/click-plc-easyplc-plc-mixer-programming/ 00:00 Click PLC - EasyPLC PLC Mixer Programming 01:24 Define the task: (Step 1 – EasyPLC Mixer) 03:33 Define the Inputs and Outputs: (Step 2 – EasyPLC Mixer) 06:06 Develop a logical sequence of operation: (Step 3 – EasyPLC Mixer) 08:31 Develop the Click PLC program: (Step 4 – EasyPLC Mixer) 14:31 Test the program: (Step 5 – EasyPLC Mixer) Previous posts include the following: EasyPLC Installing the Software https://accautomation.ca/easyplc-installing-the-software/ https://youtu.be/EbWS_elbI2w EasyPLC Quick Start Software Suite https://accautomation.ca/easyplc-software-suite-quick-start/ https://youtu.be/dK9IS1Ir7c0 Click PLC – Easy Transfer Line Programming https://accautomation.ca/click-plc-easy-transfer-line-programming/ https://youtu.be/o7G_ZtPBjbg Productivity PLC Simulator - Chain Conveyor MS https://accautomation.ca/productivity-plc-simulator-chain-conveyor-ms/ https://youtu.be/wp16dsrCvb8 Do-More PLC – EasyPLC Box Selection Program https://accautomation.ca/do-more-plc-easyplc-box-selection-program/ https://youtu.be/4QP4d3vD930 Click PLC EasyPLC Gantry Simulator https://accautomation.ca/click-plc-easyplc-gantry-simulator/ https://youtu.be/QLdAxAnh9ps Click PLC Simple Conveyor EasyPLC https://accautomation.ca/click-plc-simple-conveyor-easyplc/ https://youtu.be/pfR5zgUZS7A EasyPLC Paint Line Bit Shift - BRX Do-More PLC https://accautomation.ca/easyplc-paint-line-bit-shift-brx-do-more-plc/ https://youtu.be/5avWZ1RpCRc EasyPLC Software Suite is a complete PLC, HMI, and Machine Simulator Software package. This PLC learning package includes the following: Easy PLC - PLC Simulation that will allow programming in Ladder, Grafcet, Logic Blocks, or Script. HMI System - Easily create a visual human-machine interface (HMI), Machine Simulator - A virtual 3D world with real-time graphics and physical properties. PLC programs can be tested using the EasyPLC or through other interfaces. (Modbus RTU, TCP, etc.) Machine Simulator Lite - Designed to run on Android Devices. Machine Simulator VR - Virtual Reality comes to life so you can test, train or practice your PLC programming. Purchase your copy of this learning package for less than $75 USD for a single computer install, or less than $100 USD to allow different computers. Receive 10% off the price by typing in ACC in the comment section when you order. http://www.nirtec.com/index.php/purchase-price/ Learn PLC programming the easy way. Invest in yourself today. Here is a list of YouTube Shorts about EasyPLC Software Suite including the Machine Simulator. https://www.youtube.com/playlist?list=PL3y71jAPOdZAvTC8-TWNifAHpgEkAfqZQ ACC Automation https://accautomation.ca/
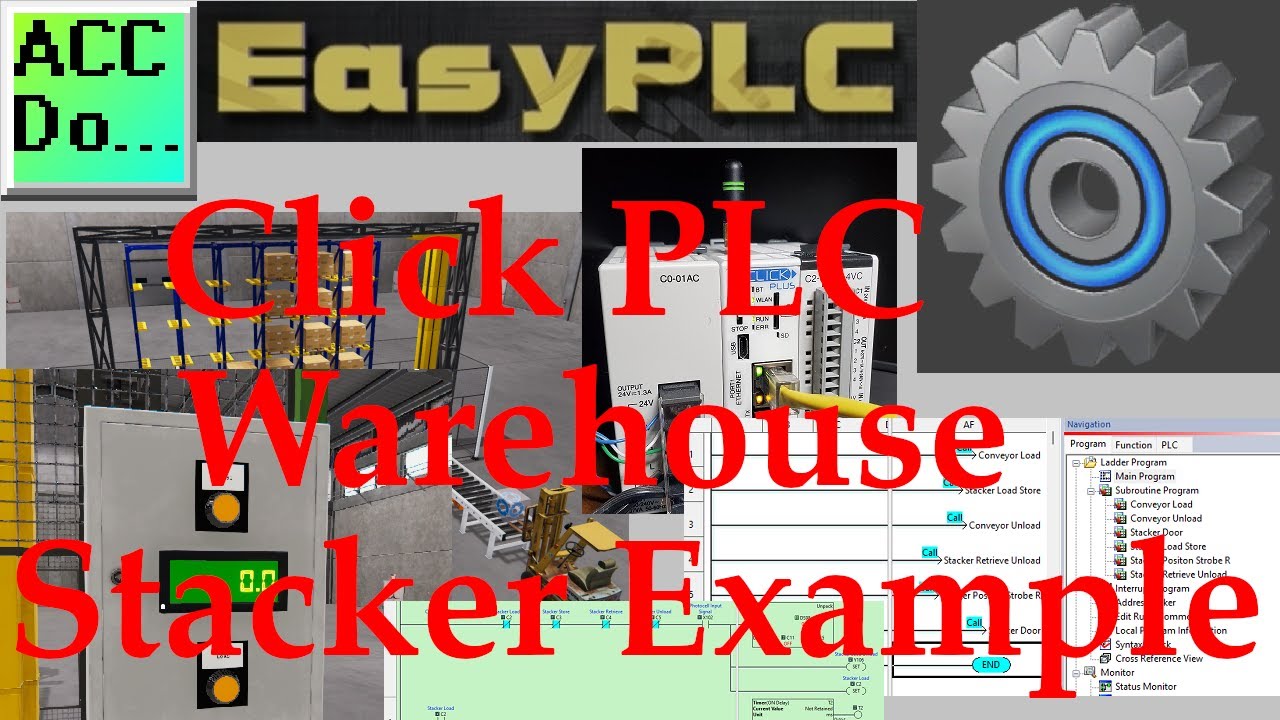
Click PLC EasyPLC Warehouse Stacker Example
3K views · Oct 11, 2022 accautomation.ca
The Machine Simulator (MS) is part of the EasyPLC software suite. It has many built-in machines that are used to show different programming techniques. The warehouse stacker example is one of these machines. Pallets are loaded and unloaded into the stacker machine. A maximum of 30 pallets can be stored. The stacker will work as a FIFO (First In First Out) device. This means that the pallets are stored in a sequence and retrieved in a sequence. The Click PLC will be used to program this virtual 3D stacker machine. Indirect addressing (pointers) will be used to track the positions on the stacker to store and retrieve the pallets. Using the Click Plus PLC, we will connect to the warehouse stacking machine. This will be done using Modbus TCP (Ethernet) for communications. Using the five steps for program development we will show how this FIFO is programmed. Let’s get started. More information can be obtained on our website. This includes all of the links mentioned in this video. https://accautomation.ca/click-plc-easyplc-warehouse-stacker-example/ The operation of the Click PLC EasyPLC Warehouse Stacker can be found here. https://youtu.be/nUSF4yZ12xg 00:00 Click PLC EasyPLC Warehouse Stacker Example 01:26 Define the task: (Step 1 – EasyPLC Warehouse Stacker) 02:55 Define the Inputs and Outputs: (Step 2 – EasyPLC Warehouse Stacker) 07:50 Develop a logical sequence of operation: (Step 3 – EasyPLC Warehouse Stacker) 09:10 Develop the Click PLC program: (Step 4 – EasyPLC Warehouse Stacker) 22:20 Test the program: (Step 5 – EasyPLC Warehouse Stacker) Previous posts include the following: EasyPLC Installing the Software https://accautomation.ca/easyplc-installing-the-software/ https://youtu.be/EbWS_elbI2w EasyPLC Quick Start Software Suite https://accautomation.ca/easyplc-software-suite-quick-start/ https://youtu.be/dK9IS1Ir7c0 Click PLC – Easy Transfer Line Programming https://accautomation.ca/click-plc-easy-transfer-line-programming/ https://youtu.be/o7G_ZtPBjbg Productivity PLC Simulator - Chain Conveyor MS https://accautomation.ca/productivity-plc-simulator-chain-conveyor-ms/ https://youtu.be/wp16dsrCvb8 Do-More PLC – EasyPLC Box Selection Program https://accautomation.ca/do-more-plc-easyplc-box-selection-program/ https://youtu.be/4QP4d3vD930 Click PLC EasyPLC Gantry Simulator https://accautomation.ca/click-plc-easyplc-gantry-simulator/ https://youtu.be/QLdAxAnh9ps Click PLC Simple Conveyor EasyPLC https://accautomation.ca/click-plc-simple-conveyor-easyplc/ https://youtu.be/pfR5zgUZS7A EasyPLC Paint Line Bit Shift - BRX Do-More PLC https://accautomation.ca/easyplc-paint-line-bit-shift-brx-do-more-plc/ https://youtu.be/5avWZ1RpCRc Click PLC - EasyPLC PLC Mixer Programming https://accautomation.ca/click-plc-easyplc-plc-mixer-programming/ https://youtu.be/JyVHBoPxaAE EasyPLC Software Suite is a complete PLC, HMI, and Machine Simulator Software package. This PLC learning package includes the following: Easy PLC - PLC Simulation that will allow programming in Ladder, Grafcet, Logic Blocks, or Script. HMI System - Easily create a visual human-machine interface (HMI), Machine Simulator - A virtual 3D world with real-time graphics and physical properties. PLC programs can be tested using the EasyPLC or through other interfaces. (Modbus RTU, TCP, etc.) Machine Simulator Lite - Designed to run on Android Devices. Machine Simulator VR - Virtual Reality comes to life so you can test, train or practice your PLC programming. Purchase your copy of this learning package for less than $75 USD for a single computer install, or less than $100 USD to allow different computers. Receive 10% off the price by typing in ACC in the comment section when you order. http://www.nirtec.com/index.php/purchase-price/ Learn PLC programming the easy way. Invest in yourself today. Here is a list of YouTube Shorts about EasyPLC Software Suite including the Machine Simulator. https://www.youtube.com/playlist?list=PL3y71jAPOdZAvTC8-TWNifAHpgEkAfqZQ ACC Automation https://accautomation.ca/
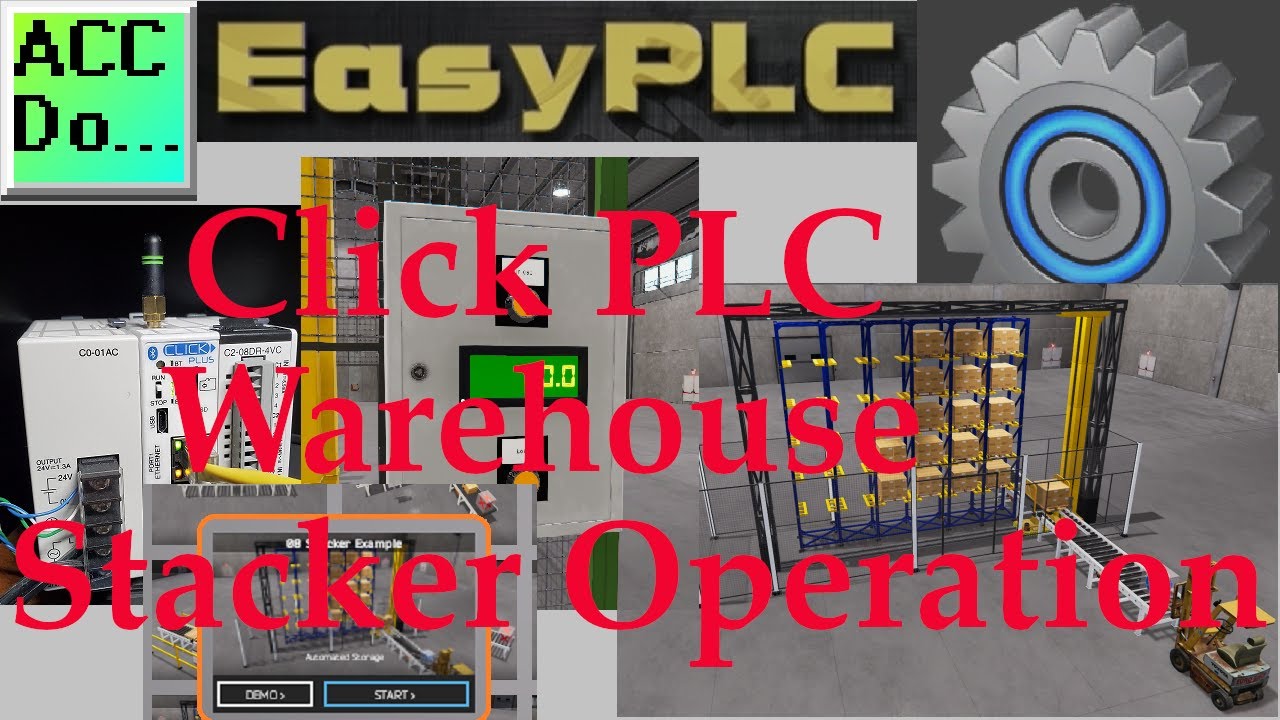
Click PLC EasyPLC Warehouse Stacker Operation
11K views · Oct 11, 2022 accautomation.ca
The Machine Simulator (MS) is part of the EasyPLC software suite. It has many built-in machines that are used to show different programming techniques. The warehouse stacker example is one of these machines. Pallets are loaded and unloaded into the stacker machine. A maximum of 30 pallets can be stored. The stacker will work as a FIFO (First In First Out) device. This means that the pallets are stored in a sequence and retrieved in a sequence. The Click PLC will be used to program this virtual 3D stacker machine. Indirect addressing (pointers) will be used to track the positions on the stacker to store and retrieve the pallets. Using the Click Plus PLC, we will connect to the warehouse stacking machine. This will be done using Modbus TCP (Ethernet) for communications. Using the five steps for program development we will show how this FIFO is programmed. Let’s get started. More information can be obtained on our website. This includes all of the links mentioned in this video. https://accautomation.ca/click-plc-easyplc-warehouse-stacker-example/ The example of the Click PLC EasyPLC Warehouse Stacker showing the five steps to program development can be found here. https://youtu.be/TlZxC7hDO0Q 00:00 Click PLC EasyPLC Warehouse Stacker Operation 00:26 Hardware and Inputs and Outputs Used 01:25 EasyPLC Control Panel 02:54 Loading the EasyPLC Warehouse Stacker 06:35 Unloading the EasyPLC Warehouse Stacker - FIFO 07:51 Stacker Door Test Previous posts include the following: EasyPLC Installing the Software https://accautomation.ca/easyplc-installing-the-software/ https://youtu.be/EbWS_elbI2w EasyPLC Quick Start Software Suite https://accautomation.ca/easyplc-software-suite-quick-start/ https://youtu.be/dK9IS1Ir7c0 Click PLC – Easy Transfer Line Programming https://accautomation.ca/click-plc-easy-transfer-line-programming/ https://youtu.be/o7G_ZtPBjbg Productivity PLC Simulator - Chain Conveyor MS https://accautomation.ca/productivity-plc-simulator-chain-conveyor-ms/ https://youtu.be/wp16dsrCvb8 Do-More PLC – EasyPLC Box Selection Program https://accautomation.ca/do-more-plc-easyplc-box-selection-program/ https://youtu.be/4QP4d3vD930 Click PLC EasyPLC Gantry Simulator https://accautomation.ca/click-plc-easyplc-gantry-simulator/ https://youtu.be/QLdAxAnh9ps Click PLC Simple Conveyor EasyPLC https://accautomation.ca/click-plc-simple-conveyor-easyplc/ https://youtu.be/pfR5zgUZS7A EasyPLC Paint Line Bit Shift - BRX Do-More PLC https://accautomation.ca/easyplc-paint-line-bit-shift-brx-do-more-plc/ https://youtu.be/5avWZ1RpCRc Click PLC - EasyPLC PLC Mixer Programming https://accautomation.ca/click-plc-easyplc-plc-mixer-programming/ https://youtu.be/JyVHBoPxaAE EasyPLC Software Suite is a complete PLC, HMI, and Machine Simulator Software package. This PLC learning package includes the following: Easy PLC - PLC Simulation that will allow programming in Ladder, Grafcet, Logic Blocks, or Script. HMI System - Easily create a visual human-machine interface (HMI), Machine Simulator - A virtual 3D world with real-time graphics and physical properties. PLC programs can be tested using the EasyPLC or through other interfaces. (Modbus RTU, TCP, etc.) Machine Simulator Lite - Designed to run on Android Devices. Machine Simulator VR - Virtual Reality comes to life so you can test, train or practice your PLC programming. Purchase your copy of this learning package for less than $75 USD for a single computer install, or less than $100 USD to allow different computers. Receive 10% off the price by typing in ACC in the comment section when you order. http://www.nirtec.com/index.php/purchase-price/ Learn PLC programming the easy way. Invest in yourself today. Here is a list of YouTube Shorts about EasyPLC Software Suite including the Machine Simulator. https://www.youtube.com/playlist?list=PL3y71jAPOdZAvTC8-TWNifAHpgEkAfqZQ ACC Automation https://accautomation.ca/
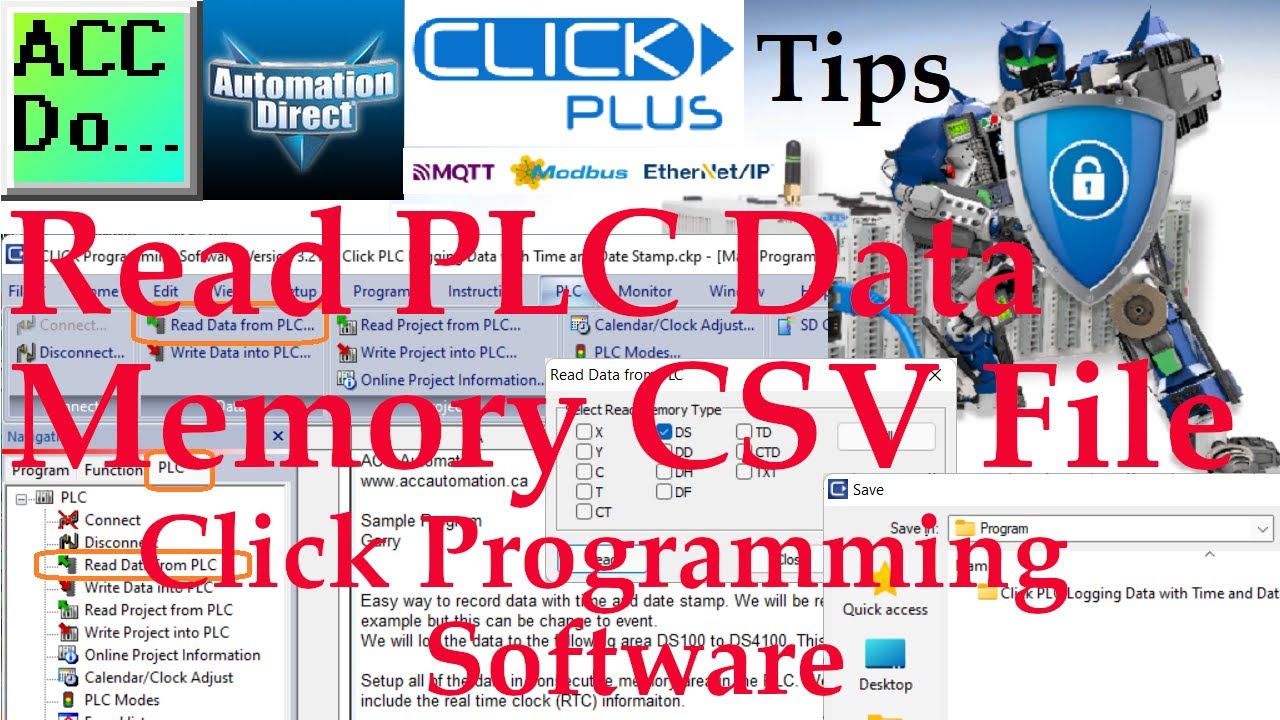
Read PLC Data Memory CSV File Using Click Programming Softwa...
351 views · Oct 10, 2022 accautomation.ca
The Click programming software can be used to save any or all data memory locations in the PLC to a comma-separated value (CSV) file. Connect to the Click or Click PLUS PLC. Select read data from PLC under the PLC tab of the navigation window or through the main menu | PLC. Select any or all of the data memory locations that you wish to save. Select the read button. The save window will now be displayed. Enter the name of the CSV file to save and press the save button. This file can then be viewed through any spreadsheet program like Excel. Simple logging information can be quickly viewed. You can also write data memory back into the PLC using the write data to PLC. Programming and examples of the Click and Click PLUS PLC series can be found at this URL: https://accautomation.ca/series/click-plc/ Here is a post with a simple log using indirect addressing (pointers) in the Click PLC. https://accautomation.ca/click-plc-logging-data-with-time-and-date-stamp/ There are several reasons why we are using the Click and Click PLUS PLCs. Here are just a few. - Investment is low for the hardware and the software is free - Standalone PLC with built-in I/O - Communication ability - Ethernet Port, RS232, RS485 - support for protocols such as Modbus RTU, Modbus TCP, etc. - Ability to expand the system with a variety of modules including RTD and Thermocouple inputs directly. General information on the Click series of controllers: www.clickplcs.com/config There are also system configuration tools that will calculate the power budget, I/O count, and price. Click PLUS PLC Configuration: https://www.automationdirect.com/clickplcs/config/clickplusconfig Click PLC Configuration: https://www.automationdirect.com/clickplcs/config #shorts ACC Automation https://accautomation.ca/
Click PLC Motor Warning Delay Time Example
164 views · Oct 10, 2022 accautomation.ca
Click PLC Motor Warning Delay Time Example Many times a warning delay timing circuit is used before starting any machine movement from motors or actuators. Looking at rung 3 of our ladder logic sample, if the start internal bit C1 is on and the 10-second timer has completed then the motor output is turned on. Rung 4 will control the red light output. If C1 is on and the timer is not finished the light will flash with the 1-second clock pulse. If C1 is off then the light is on. Rung 2 controls the on-delay timer. C1 will start the 10-second timer. The first rung has a pushbutton start (X1). This passes through the pushbutton stop (X2) to turn on C1. C1 is then used to latch itself so that the X1 condition does not matter. This is a common circuit in many applications. Programming and examples of the Click and Click PLUS PLC series can be found at this URL: https://accautomation.ca/series/click-plc/ https://accautomation.ca/click-plc-timers-and-counters/ There are several reasons why we are using the Click and Click PLUS PLCs. Here are just a few. - Investment is low for the hardware and the software is free - Standalone PLC with built-in I/O - Communication ability - Ethernet Port, RS232, RS485 - support for protocols such as Modbus RTU, Modbus TCP, etc. - Ability to expand the system with a variety of modules including RTD and Thermocouple inputs directly. General information on the Click series of controllers: www.clickplcs.com/config There are also system configuration tools that will calculate the power budget, I/O count, and price. Click PLUS PLC Configuration: https://www.automationdirect.com/clickplcs/config/clickplusconfig Click PLC Configuration: https://www.automationdirect.com/clickplcs/config #shorts ACC Automation https://accautomation.ca/

Click PLC Production Rate Calculation
506 views · Oct 10, 2022 accautomation.ca
Click PLC Production Rate Calculation Many times you need a simple rate per second, minute, or hour for the products being produced. This can easily be programmed in the Click PLC. The 1-second pulse bit will be our product being produced. This can come from a sensor on the machine to see the widgets. This program will calculate the rate of widgets per minute. The time per widget is from the leading edge of the input to the next leading edge of the input. When our input first turns on (leading edge) we will take the current time and store this in DS1. This will display the time per widget. The timer is then reset to 0. Our calculation for rate will be the product (widgets) per minute 1 second = 1000 milliseconds 60 seconds (1 minute) = 60000 milliseconds 60,000 / Current time per product = Products per minute This is the formula in the Click PLC math instruction Here is a link to download the Click ladder logic program: https://www.dropbox.com/s/7m3xxz1p77j9oy0/Click%20PLC%20Production%20Rate%20Calculation%20Example.zip?dl=0 Programming and examples of the Click and Click PLUS PLC series can be found at this URL: https://accautomation.ca/series/click-plc/ https://accautomation.ca/click-plc-timers-and-counters/ There are several reasons why we are using the Click and Click PLUS PLCs. Here are just a few. - Investment is low for the hardware and the software is free - Standalone PLC with built-in I/O - Communication ability - Ethernet Port, RS232, RS485 - support for protocols such as Modbus RTU, Modbus TCP, etc. - Ability to expand the system with a variety of modules including RTD and Thermocouple inputs directly. General information on the Click series of controllers: www.clickplcs.com/config There are also system configuration tools that will calculate the power budget, I/O count, and price. Click PLUS PLC Configuration: https://www.automationdirect.com/clickplcs/config/clickplusconfig Click PLC Configuration: https://www.automationdirect.com/clickplcs/config #shorts ACC Automation https://accautomation.ca/
EasyPLC Simulator Robotic Cell Click PLC
2K views · Oct 10, 2022 accautomation.ca
The Machine Simulator (MS) is part of the EasyPLC software suite. It has many built-in machines that are used to show different programming techniques. The robotic cell example is one of these machines. This will demonstrate a sequencer example. The logic will step through different steps in order to perform the task. In this case, an engine is lifted and placed onto a rack. We will be using a Click PLUS PLC and the Click programming software to program this EasyPLC machine simulator engine loader of the robotic cell. This will be done using Modbus TCP (Ethernet) for communications. The program will allow you to start, stop and jog the sequencer. Using the five steps for program development we will show how this sequencer is programmed. Let’s get started. More information can be obtained on our website. This includes all of the links mentioned in this video. https://accautomation.ca/easyplc-simulator-robotic-cell-click-plc/ The entire EasyPLC Software Suite series can be found here: https://accautomation.ca/series/easyplc-software-suite/ 00:00 EasyPLC Simulator Robotic Cell Click PLC 01:15 Define the task: (Step 1 – Easyplc Robotic Cell) 03:10 Define the Inputs and Outputs: (Step 2 – Easyplc Robotic Cell) 06:00 Develop a logical sequence of operation: (Step 3 – Easyplc Robotic Cell) 08:26 Develop the Click PLC program: (Step 4 – Easyplc Robotic Cell) 17:13 Test the program: (Step 5 – Easyplc Robotic Cell) Previous posts include the following: EasyPLC Installing the Software https://accautomation.ca/easyplc-installing-the-software/ https://youtu.be/EbWS_elbI2w EasyPLC Quick Start Software Suite https://accautomation.ca/easyplc-software-suite-quick-start/ https://youtu.be/dK9IS1Ir7c0 Click PLC – Easy Transfer Line Programming https://accautomation.ca/click-plc-easy-transfer-line-programming/ https://youtu.be/o7G_ZtPBjbg Productivity PLC Simulator - Chain Conveyor MS https://accautomation.ca/productivity-plc-simulator-chain-conveyor-ms/ https://youtu.be/wp16dsrCvb8 Do-More PLC – EasyPLC Box Selection Program https://accautomation.ca/do-more-plc-easyplc-box-selection-program/ https://youtu.be/4QP4d3vD930 Click PLC EasyPLC Gantry Simulator https://accautomation.ca/click-plc-easyplc-gantry-simulator/ https://youtu.be/QLdAxAnh9ps Click PLC Simple Conveyor EasyPLC https://accautomation.ca/click-plc-simple-conveyor-easyplc/ https://youtu.be/pfR5zgUZS7A EasyPLC Paint Line Bit Shift - BRX Do-More PLC https://accautomation.ca/easyplc-paint-line-bit-shift-brx-do-more-plc/ https://youtu.be/5avWZ1RpCRc Click PLC - EasyPLC PLC Mixer Programming https://accautomation.ca/click-plc-easyplc-plc-mixer-programming/ https://youtu.be/JyVHBoPxaAE Click PLC EasyPLC Warehouse Stacker Example https://accautomation.ca/click-plc-easyplc-warehouse-stacker-example/ https://youtu.be/TlZxC7hDO0Q Operation Video https://youtu.be/nUSF4yZ12xg EasyPLC Machine Simulator Productivity PLC Robotic Cell https://accautomation.ca/easyplc-simulator-productivity-plc-robotic-cell/ https://youtu.be/vgwqrXv0EiU EasyPLC Software Suite is a complete PLC, HMI, and Machine Simulator Software package. This PLC learning package includes the following: Easy PLC - PLC Simulation that will allow programming in Ladder, Grafcet, Logic Blocks, or Script. HMI System - Easily create a visual human-machine interface (HMI), Machine Simulator - A virtual 3D world with real-time graphics and physical properties. PLC programs can be tested using the EasyPLC or through other interfaces. (Modbus RTU, TCP, etc.) Machine Simulator Lite - Designed to run on Android Devices. Machine Simulator VR - Virtual Reality comes to life so you can test, train or practice your PLC programming. Purchase your copy of this learning package for less than $75 USD for a single computer install, or less than $100 USD to allow different computers. Receive 10% off the price by typing in ACC in the comment section when you order. http://www.nirtec.com/index.php/purchase-price/ Learn PLC programming the easy way. Invest in yourself today. Here is a list of YouTube Shorts about EasyPLC Software Suite including the Machine Simulator. https://www.youtube.com/playlist?list=PL3y71jAPOdZAvTC8-TWNifAHpgEkAfqZQ ACC Automation https://accautomation.ca/

Click PLC Stop the Timer at the Set Value
122 views · Oct 9, 2022 accautomation.ca
Click PLC stop the timer at the Set Value (SV) When the Click PLC timer reaches the set value the timer output bit is turned on. However, the present value of the timer continues to increase until the timer is reset. This is generally not a problem unless you are displaying this on an external device like an HMI. (Human Machine Interface) To stop the Click PLC timer at the set value, use the output bit to copy the set value into the present value. In this example when the T1 output bit turns on then the value of 3000 (3 seconds) is copied to the TD1 address. This will hold the timer at the set value. Programming and examples of the Click and Click PLUS PLC series can be found at this URL: https://accautomation.ca/series/click-plc/ https://accautomation.ca/click-plc-timers-and-counters/ There are several reasons why we are using the Click and Click PLUS PLCs. Here are just a few. - Investment is low for the hardware and the software is free - Standalone PLC with built-in I/O - Communication ability - Ethernet Port, RS232, RS485 - support for protocols such as Modbus RTU, Modbus TCP, etc. - Ability to expand the system with a variety of modules including RTD and Thermocouple inputs directly. General information on the Click series of controllers: www.clickplcs.com/config There are also system configuration tools that will calculate the power budget, I/O count, and price. Click PLUS PLC Configuration: https://www.automationdirect.com/clickplcs/config/clickplusconfig Click PLC Configuration: https://www.automationdirect.com/clickplcs/config #shorts ACC Automation https://accautomation.ca/

Click PLC Pulse Timer
43 views · Oct 10, 2022 accautomation.ca
Click PLC Pulse Timer A pulse timer is often used in PLC programming. To create a pulse timer, we use a self-resetting timer at the time base rate that we want. Our example has a normally closed timer contact as the condition for the timer itself. This will create a self-resetting timer. We have this set for 3000 milliseconds (3 seconds). This timer output T1 will be on for one scan at the end of each time duration, creating a pulse. Output is set after the pulse from the timer. This output is then timed for 1000 milliseconds (1 second) before resetting the output. This sets the output on for 1 second and off for 2 seconds. Programming and examples of the Click and Click PLUS PLC series can be found at this URL: https://accautomation.ca/series/click-plc/ https://accautomation.ca/click-plc-timers-and-counters/ There are several reasons why we are using the Click and Click PLUS PLCs. Here are just a few. - Investment is low for the hardware, and the software is free - Standalone PLC with built-in I/O - Communication ability - Ethernet Port, RS232, RS485 - support for protocols such as Modbus RTU, Modbus TCP, etc. Ability to expand the system with various modules, including RTD and Thermocouple inputs directly. General information on the Click series of controllers: www.clickplcs.com/config System configuration tools will also calculate the power budget, I/O count, and price. Click PLUS PLC Configuration: https://www.automationdirect.com/clickplcs/config/clickplusconfig Click PLC Configuration: https://www.automationdirect.com/clickplcs/config #shorts ACC Automation https://accautomation.ca/
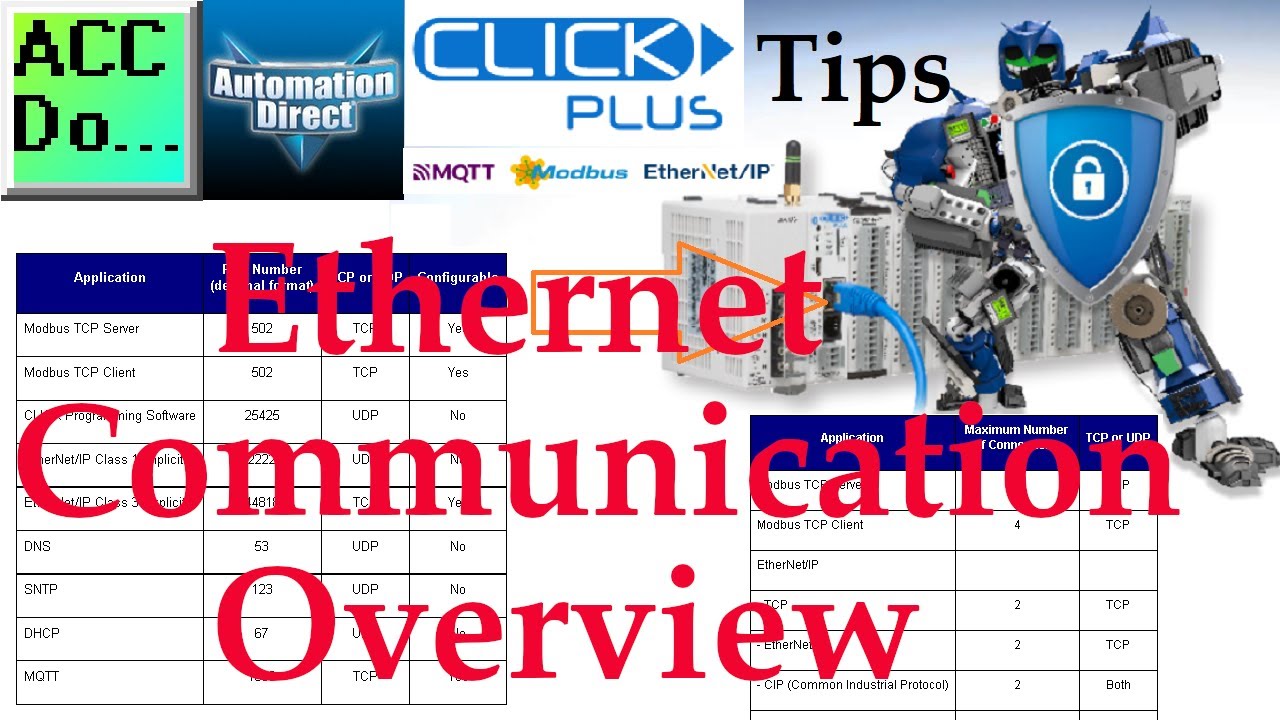
Click PLC Ethernet Communication Overview
41 views · Oct 9, 2022 accautomation.ca
Click PLC Ethernet Communication Overview The CLICK and Click PLUS PLCs that can communicate over Ethernet use the TCP and UDP protocols. The port numbers used by the CLICK are listed in the table. This information is sometimes necessary for firewalls and router NAT (Network Address Translation) tables. For TCP and UDP communications such as Modbus TCP and EtherNet/IP, there are limits to the number of “connections” allowed. Each connection uses memory and time in the Click PLC which will affect its overall performance. EtherNet/IP also has the concept of a “CIP” (Common Industrial Protocol) connection. This table displayed lists the connection limits for the CLICK or Click PLUS PLC. Programming and examples of the Click and Click PLUS PLC series can be found at this URL: https://accautomation.ca/series/click-plc/ https://accautomation.ca/click-plus-plc-mqtt-communication/ https://accautomation.ca/productivity-1000-plc-click-ethernetip-remote-io/ https://accautomation.ca/click-plc-send-and-receive-instructions/ There are several reasons why we are using the Click and Click PLUS PLCs. Here are just a few. - Investment is low for the hardware and the software is free - Standalone PLC with built-in I/O - Communication ability - Ethernet Port, RS232, RS485 - support for protocols such as Modbus RTU, Modbus TCP, etc. - Ability to expand the system with a variety of modules including RTD and Thermocouple inputs directly. General information on the Click series of controllers: www.clickplcs.com/config There are also system configuration tools that will calculate the power budget, I/O count, and price. Click PLUS PLC Configuration: https://www.automationdirect.com/clickplcs/config/clickplusconfig Click PLC Configuration: https://www.automationdirect.com/clickplcs/config #shorts ACC Automation https://accautomation.ca/
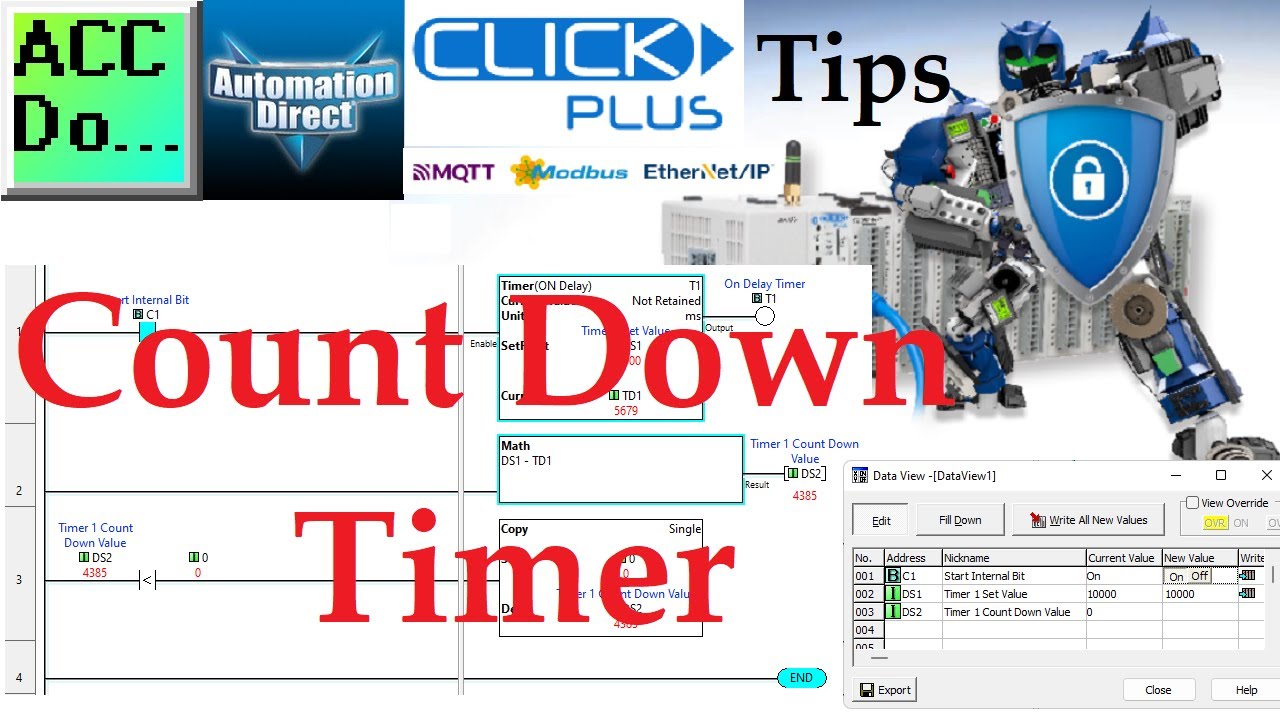
Click PLC Count Down Timer
1K views · Oct 9, 2022 accautomation.ca
Click PLC Count Down Timer The CLICK and Click PLUS PLCs can have a count-down timer. This is helpful when displaying on an HMI (Human Machine Interface). Using the math instruction with the timer instruction in the Click PLC Programming Software, we can create a count-down timer. In our example, we use an On-Delay timer with a time base rate of milliseconds (ms). This is being controlled by internal memory bit C1. The set value comes from memory address DS1, which contains the value 10,000, meaning 10 seconds. The second rung of our example will take the Set value (DS1) and subtract the timer's current value (TD1). DS2 memory location Will contain the count-down value of the timer. Once the timer has reached the set value, you will notice that it continues timing. This causes a negative number that we detect in rung 3 and move a 0 deal into DS2 for our display. Programming and examples of the Click and Click PLUS PLC series can be found at this URL: https://accautomation.ca/series/click-plc/ https://accautomation.ca/click-plc-timers-and-counters/ We are using the Click and Click PLUS PLCs for several reasons. Here are just a few. - Investment is low for the hardware, and the software is free - Standalone PLC with built-in I/O - Communication ability - Ethernet Port, RS232, RS485 - support for protocols such as Modbus RTU, Modbus TCP, etc. - Ability to directly expand the system with various modules, including RTD and Thermocouple inputs. General information on the Click series of controllers: www.clickplcs.com/config System configuration tools will also calculate the power budget, I/O count, and price. Click PLUS PLC Configuration: https://www.automationdirect.com/clickplcs/config/clickplusconfig Click PLC Configuration: https://www.automationdirect.com/clickplcs/config #shorts ACC Automation https://accautomation.ca/
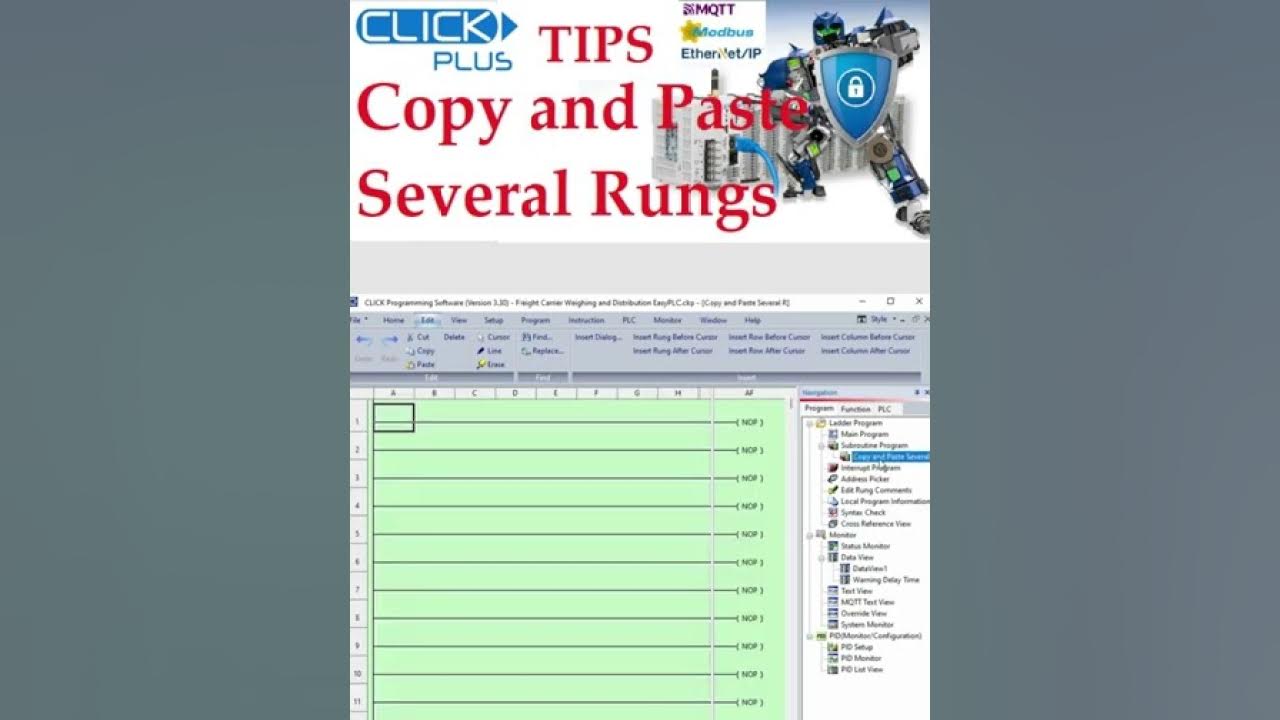
Click PLC Software Copy and Paste Several Rungs
5 views · Oct 8, 2022 accautomation.ca
Select the starting rung by clicking on the rung number. This will highlight the rung. The Click PLC programming software can copy and paste several rungs at a time. Press and hold the shift key and use the down arrow key to select each additional rung. Use the copy command from the edit menu on the main menu or right-click on the highlighted selection and select copy. This will place the chosen rungs on the clipboard. Move to the new location for your copied rungs of ladder logic. Use the paste command from the Edit menu or right-click on the location and select paste. The clipboard information will now be inserted into your code. Programming and examples of the Click and Click PLUS PLC series can be found at this URL: https://accautomation.ca/series/click-plc/ General information on the Click series of controllers: www.clickplcs.com/config System configuration tools will also calculate the power budget, I/O count, and price. Click PLUS PLC Configuration: https://www.automationdirect.com/clickplcs/config/clickplusconfig Click PLC Configuration: https://www.automationdirect.com/clickplcs/config We are using the Click and Click PLUS PLCs for several reasons. Here are just a few. - Investment is low for the hardware, and the software is free - Standalone PLC with built-in I/O - Communication ability - Ethernet Port, RS232, RS485 - support for protocols such as Modbus RTU, Modbus TCP, etc. - Ability to directly expand the system with various modules, including RTD and Thermocouple inputs. #shorts ACC Automation https://accautomation.ca/

Click PLC Local Expansion or Remote I/O?
9 views · Oct 8, 2022 accautomation.ca
Does the Click PLC have local expansion or remote inputs and outputs? The Click PLC can have a maximum of 8 I/O modules for each CPU. It does not have remote I/O but can be used in distributed I/O systems. Distributed I/O will not update every scan of the PLC. The Click PLC can have its own distributed I/O via the communication ports to itself or through a variety of devices like the Stride Remote I/O. It can be used as distributed I/O through Modbus TCP/ RTU, Ethernet IP, or MQTT to other systems like a BRX Do-More or Productivity Series PLCs. See the comments below for examples of these configurations. Stride Remote I/O with Solo Temperature Controller https://accautomation.ca/stride-mqtt-gateway-click-plc-modbus-rtu-tcp/ Click PLC to Modbus TCP RTU Remote IO BX-MBIO (Distributed I/O) https://accautomation.ca/click-plc-to-modbus-tcp-rtu-remote-io-controller-bx-mbio/ Productivity 1000 Series PLC Click EtherNet/IP Remote I/O (Distributed I/O) https://accautomation.ca/productivity-1000-plc-click-ethernetip-remote-io/ Programming and examples of the Click and Click PLUS PLC series can be found at this URL: https://accautomation.ca/series/click-plc/ General information on the Click series of controllers: www.clickplcs.com/config System configuration tools will also calculate the power budget, I/O count, and price. Click PLUS PLC Configuration: https://www.automationdirect.com/clickplcs/config/clickplusconfig Click PLC Configuration: https://www.automationdirect.com/clickplcs/config We are using the Click and Click PLUS PLCs for several reasons. Here are just a few. - Investment is low for the hardware, and the software is free - Standalone PLC with built-in I/O - Communication ability - Ethernet Port, RS232, RS485 - support for protocols such as Modbus RTU, Modbus TCP, etc. - Ability to directly expand the system with various modules, including RTD and Thermocouple inputs. #shorts ACC Automation https://accautomation.ca/
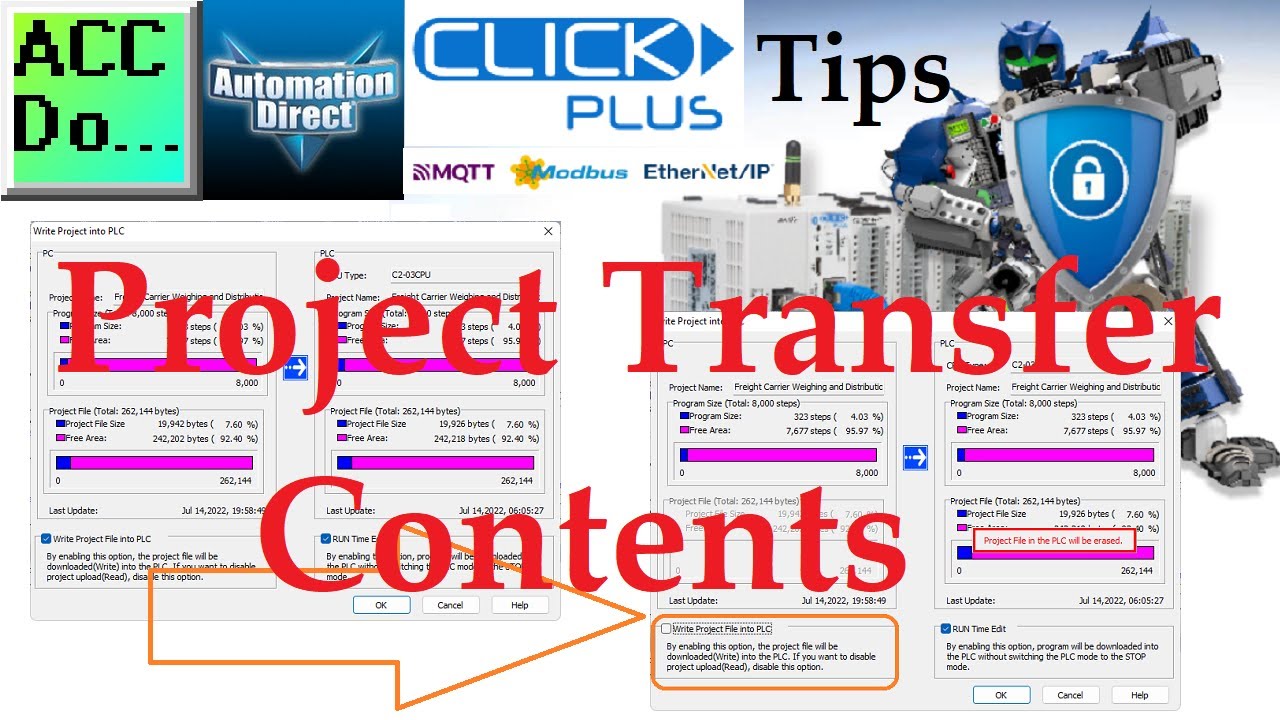
Click / Click Plus Project Transfer Contents
26 views · Oct 8, 2022 accautomation.ca
Click / Click Plus Project Transfer Contents When Writing the project into the PLC, the default setting is to include the entire Project File (documentation, tag names, rung comments, data view, etc.) This can be read from the PLC and will be exactly the same as the previously saved PC project file. During the download, there is an option to not include the Project File. This will only download the program ladder, which cannot be uploaded. Programming and examples of the Click and Click PLUS PLC series can be found at this URL: https://accautomation.ca/series/click-plc/ General information on the Click series of controllers: www.clickplcs.com/config System configuration tools will also calculate the power budget, I/O count, and price. Click PLUS PLC Configuration: https://www.automationdirect.com/clickplcs/config/clickplusconfig Click PLC Configuration: https://www.automationdirect.com/clickplcs/config We are using the Click and Click PLUS PLCs for several reasons. Here are just a few. - Investment is low for the hardware, and the software is free - Standalone PLC with built-in I/O - Communication ability - Ethernet Port, RS232, RS485 - support for protocols such as Modbus RTU, Modbus TCP, etc. - Ability to directly expand the system with various modules, including RTD and Thermocouple inputs. #shorts ACC Automation
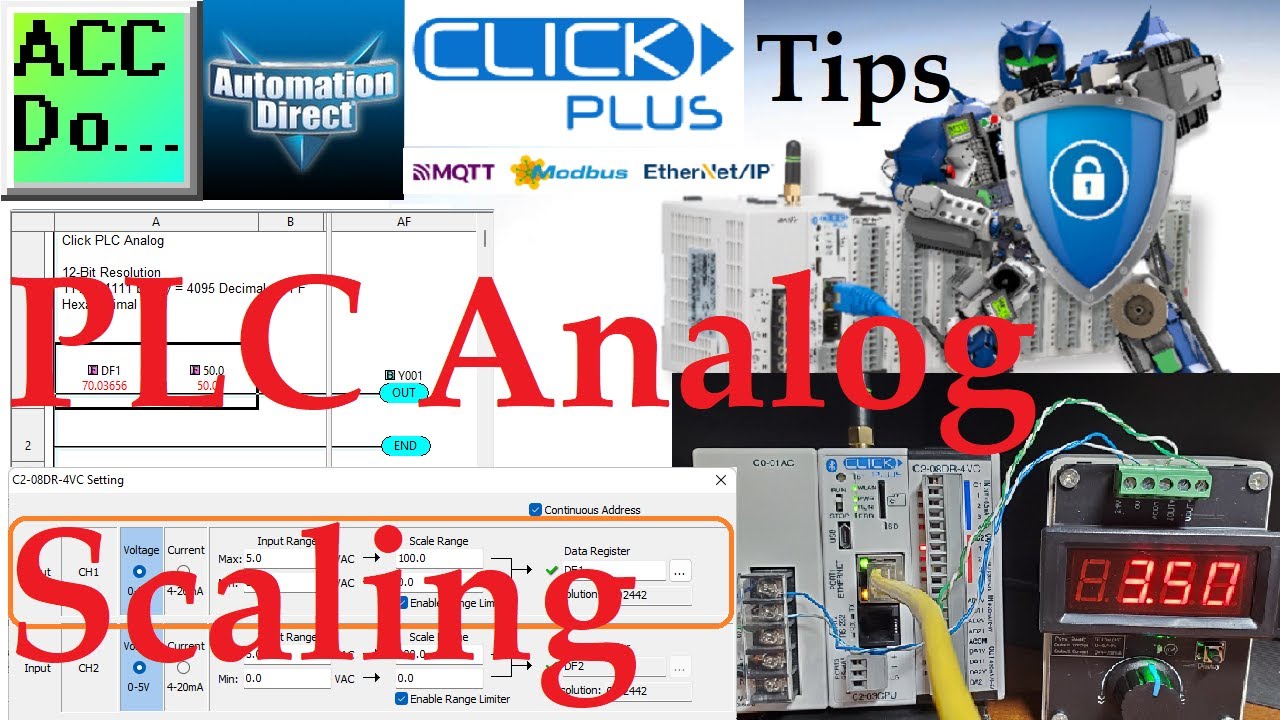
Click / Click PLUS PLC Analog Scaling
2K views · Oct 8, 2022 accautomation.ca
CLICK PLC analog modules are available in 12, 13, or 16-bit resolution current, voltage, and temperature models. These support a wide range of signals. 12-Bit resolution refers to the binary bits for the input reference. If we look at the windows programming calculator and enter the binary value of the 12 bits, we will get a decimal value of 4095. This analog value of voltage, current, or temperature is converted into this many equal segments. The Click PLC has a linear scaling feature built in so that you can quickly convert your analog signal to engineering units or a percentage. Using the analog signal generator, you can see that our 0 to 5 VDC signal is converted to 0 to 100.0 percent. Our ladder logic program will use the compare instruction to activate outputs based on this linearly scaled signal. Programming and examples of the Click and Click PLUS PLC series can be found at this URL: https://accautomation.ca/series/click-plc/ General information on the Click series of controllers: www.clickplcs.com/config System configuration tools will also calculate the power budget, I/O count, and price. Click PLUS PLC Configuration: https://www.automationdirect.com/clickplcs/config/clickplusconfig Click PLC Configuration: https://www.automationdirect.com/clickplcs/config We are using the Click and Click PLUS PLCs for several reasons. Here are just a few. - Investment is low for the hardware, and the software is free - Standalone PLC with built-in I/O - Communication ability - Ethernet Port, RS232, RS485 - support for protocols such as Modbus RTU, Modbus TCP, etc. - Ability to expand the system with various modules, including RTD and Thermocouple inputs. #shorts ACC Automation https://accautomation.ca/
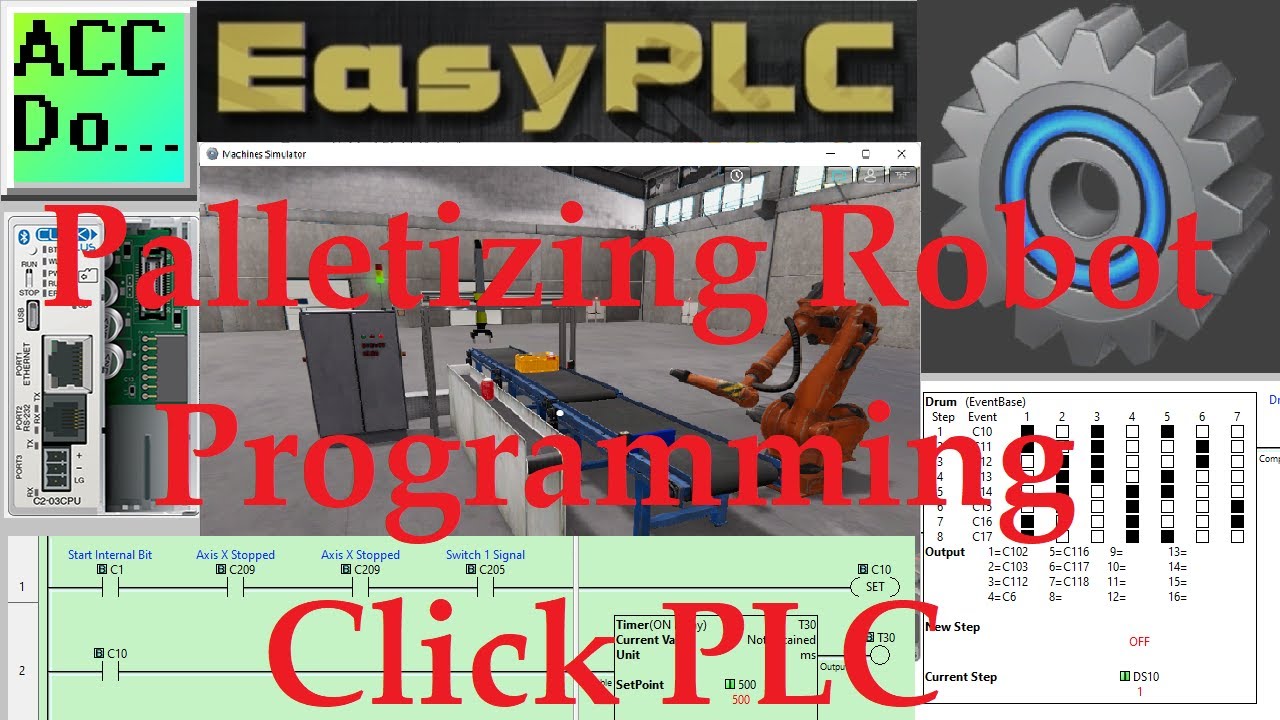
EasyPLC Palletizing Robot Programming Click PLC
4K views · Oct 8, 2022 accautomation.ca
The EasyPLC palletizing robot will demonstrate sequencing and robot control using a PLC. This palletization process will fill a box container with six cans. A servo-controlled gantry robot using x and y is used to do this operation. The complete box will then travel along to another conveyor to an unloading area. A robot will then pick up the box and place this on a pallet. We will discuss and show you how to program this EasyPLC palletizing robot machine using the five steps for PLC program development. This will involve all the ladder logic to load and unload using the robot simulator. This PLC simulator will show sequencing instructions. A drum instruction in the PLC will be used with events and a counter to load the box with six cans. Another drum instruction in the PLC, with time, will be used to unload the container onto a pallet. An Automation Direct Click PLC will be used for this application, but the general methods can be used for just about any PLC on the market. Serial Modbus RTU communication will be used between the machine simulator and the Click PLC. An Ethernet connection will be used with the Click programming software. Let's get started. More information can be obtained on our website. This includes all of the links mentioned in this video. https://accautomation.ca/easyplc-palletizing-robot-programming-click-plc/ 00:00 EasyPLC Palletizing Robot Programming Click PLC 01:30 Define the task: (Step 1 – EasyPLC Palletizing Robot) 05:05 Define the Inputs and Outputs: (Step 2 – EasyPLC Palletizing Robot) 08:22 Develop a logical sequence of operation: (Step 3 – EasyPLC Palletizing Robot) 10:53 Develop the Click PLC program: (Step 4 – EasyPLC Palletizing Robot) 16:23 Test the program: (Step 5 – EasyPLC Palletizing Robot) The EasyPLC Software Suite Series can be found here... https://accautomation.ca/series/easyplc-software-suite/ Previous posts include the following: EasyPLC Installing the Software https://accautomation.ca/easyplc-installing-the-software/ https://youtu.be/EbWS_elbI2w EasyPLC Quick Start Software Suite https://accautomation.ca/easyplc-software-suite-quick-start/ https://youtu.be/dK9IS1Ir7c0 Click PLC – Easy Transfer Line Programming https://accautomation.ca/click-plc-easy-transfer-line-programming/ https://youtu.be/o7G_ZtPBjbg Click PLC EasyPLC Gantry Simulator https://accautomation.ca/click-plc-easyplc-gantry-simulator/ https://youtu.be/QLdAxAnh9ps Click PLC Simple Conveyor EasyPLC https://accautomation.ca/click-plc-simple-conveyor-easyplc/ https://youtu.be/pfR5zgUZS7A Click PLC - EasyPLC PLC Mixer Programming https://accautomation.ca/click-plc-easyplc-plc-mixer-programming/ https://youtu.be/JyVHBoPxaAE Click PLC EasyPLC Warehouse Stacker Example https://accautomation.ca/click-plc-easyplc-warehouse-stacker-example/ https://youtu.be/TlZxC7hDO0Q Operation Video https://youtu.be/nUSF4yZ12xg EasyPLC Machine Simulator Productivity PLC Robotic Cell https://accautomation.ca/easyplc-simulator-productivity-plc-robotic-cell/ https://youtu.be/vgwqrXv0EiU EasyPLC Simulator Robotic Cell Click PLC https://accautomation.ca/easyplc-simulator-robotic-cell-click-plc/ https://youtu.be/IyGlM0Griac EasyPLC Factory Editor Robotic Cell Additions https://youtu.be/y50gSa_KAog 4 Way Traffic Light PLC Program EasyPLC https://accautomation.ca/4-way-traffic-light-plc-program-easyplc/ https://youtu.be/DV-9Qq1lT0I Freight Carrier Weighing & Distribution EasyPLC https://accautomation.ca/freight-carrier-weighing-distribution-easyplc/ https://youtu.be/X5LeefmYz6A EasyPLC Machining Center Loading Robots https://accautomation.ca/easyplc-machining-center-loading-robots/ https://youtu.be/Do-Y2eZztN4 EasyPLC Software Suite is a complete PLC, HMI, and Machine Simulator Software package. This PLC learning package includes the following: Easy PLC - PLC Simulation that will allow programming in Ladder, Grafcet, Logic Blocks, or Script. HMI System - Easily create a visual human-machine interface (HMI), Machine Simulator - A virtual 3D world with real-time graphics and physical properties. PLC programs can be tested using the EasyPLC or through other interfaces. (Modbus RTU, TCP, etc.) Machine Simulator Lite - Designed to run on Android Devices. Machine Simulator VR - Virtual Reality comes to life so you can test, train or practice your PLC programming. Purchase your copy of this learning package for less than $75 USD for a single computer install, or less than $100 USD to allow different computers. Receive 10% off the price by typing in ACC in the comment section when you order. http://www.nirtec.com/index.php/purchase-price/ Learn PLC programming the easy way. Invest in yourself today. Here is a list of YouTube Shorts about EasyPLC Software Suite including the Machine Simulator. https://www.youtube.com/playlist?list=PL3y71jAPOdZAvTC8-TWNifAHpgEkAfqZQ ACC Automation https://accautomation.ca/
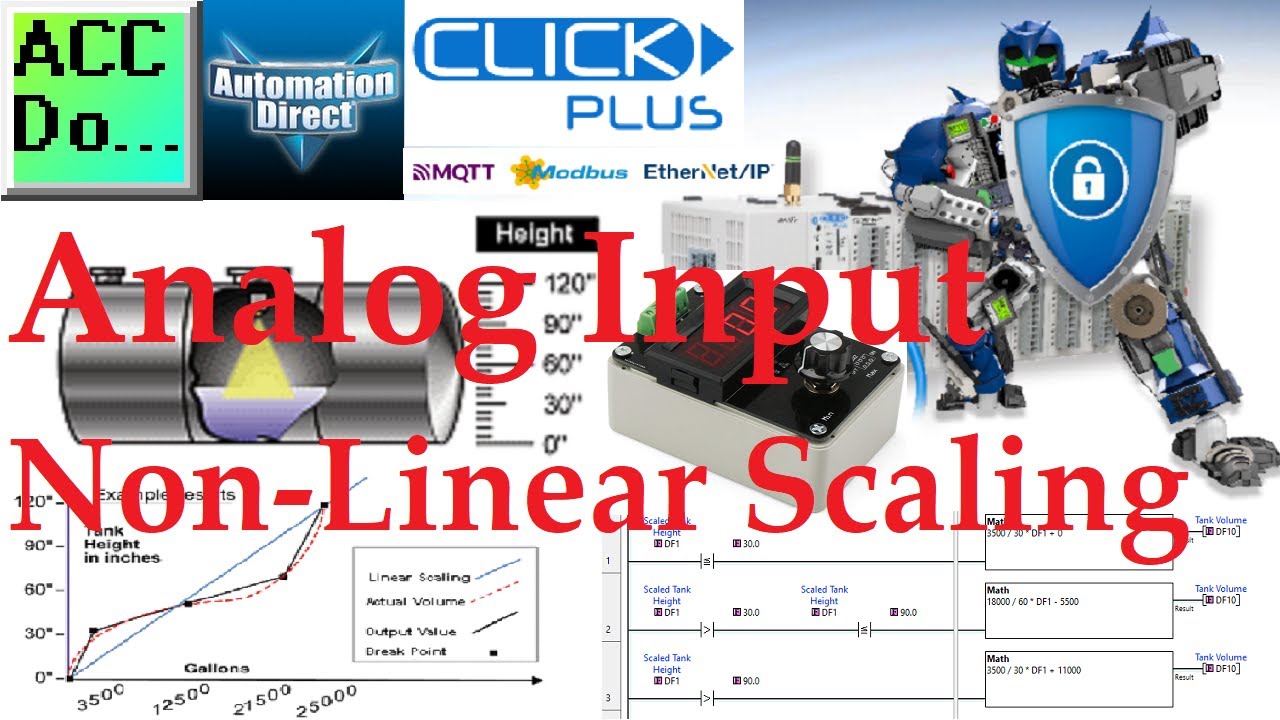
Click PLC Analog Input Non-Linear Scaling
20K views · Oct 8, 2022 accautomation.ca
The Click PLC has automatic linear scaling for the analog inputs and outputs. What if the analog input or output is not linear? How do you handle this in the PLC? Look at the following tank. We can measure the height, which is linear, but the volume will not because of the shape of the tank. We will look at an application to determine the volume in this tank. This will be based on the height of the liquid in the tank. We will then scale this non-linear volume of the tank to display the actual volume. Let's get started. More information can be obtained at our website. This includes all of the links mentioned in this video. https://accautomation.ca/click-plc-analog-input-non-linear-scaling/ 00:00 Click PLC Analog Input Non-Linear Scaling 01:03 What are Analog Signals? 01:38 Click PLC Analog Specifications 02:24 What is Meant by 12-Bit Resolution? 04:19 Click PLC Analog Setup 05:30 Analog Linear Math Equation 06:48 Click PLC Ladder Logic Non-Linear Analog Program DROK Adjustable Signal Generator The multifunctional DROK signal generator can generate both an amp & voltage in the same unit. https://amzn.to/3Ab7fOh Video on the signal generator. https://youtube.com/shorts/0KPvdTxj3EA Previously we looked at the following: Click Plus Software Installation https://accautomation.ca/click-plus-software-installation-version-3-00/ https://youtu.be/6uQQzyZ-O3s Establish Communication https://accautomation.ca/click-plus-establish-communication/ https://youtu.be/1Bnx3IROCqk MQTT Communication https://accautomation.ca/click-plus-plc-mqtt-communication/ https://youtu.be/wzUBolN9KjQ Data Logging https://accautomation.ca/click-plus-data-logging-csv-file-sql-database/ https://youtu.be/ydoWvMzHSKc Click Plus Real Time Clock https://accautomation.ca/click-plus-real-time-clock-setup-and-use/ https://youtu.be/0Vlqo8p0vCI Click PLC Serial Communication Timing https://accautomation.ca/click-plc-serial-communication-timing/ https://youtu.be/wbG_BKcdU1k Retentive Data Memory Registers https://accautomation.ca/click-plc-retentive-data-memory-registers/ https://youtu.be/9sCfu10xyu0 CLICK PLCs were designed with simplicity in mind, providing reliable control at a low, low cost and with little to no learning curve. This simplicity makes CLICK a perfect solution for small machines, home automation projects, pneumatic applications, or anywhere a simple system needs a budget-saving control solution. Building on the original CLICK’s simple design, the new CLICK PLUS PLCs offer the same practical control but with some surprising bells and whistles. Using the same FREE, streamlined PLC programming software as its predecessor, the CLICK PLUS PLCs provide no-headache programming combined with advanced capabilities like Wi-Fi communication and data logging. The Click and Click PLUS PLC series can be found at this URL: https://accautomation.ca/series/click-plc/ Features of the new Click PLUS PLC (C2-0xCPU) include the following: • Micro USB • DHCP support • DNS support • Wi-Fi (programming and Modbus TCP) • Bluetooth (Wi-Fi) provisioning • SD Card (Data Logging) • Data Logger • Network Time Service • MQTT (Publish/Subscribe) • Required PLC Password • Disable Ports • Strong Password Support • Disable Ping Response • Encrypted Password Transfer There are several reasons why we are using the Click and Click PLUS PLCs. Here are just a few. - Investment is low for the hardware and the software is free - Standalone PLC with built-in I/O - Communication ability - Ethernet Port, RS232, RS485 - support for protocols such as Modbus RTU, Modbus TCP, etc. - Ability to expand the system with a variety of modules including RTD and Thermocouple inputs directly. ACC Automation https://www.accautomation.ca

Click PLC to Click PLC Communication WiFi
11K views · Dec 2, 2022 accautomation.ca
This video will show you how to use WiFi with Click PLC to Click PLC communication. This communication method lets you remotely control Click PLC using Modbus TCP wirelessly. By showing you this example, we hope to provide you with a better understanding of how this communication method works and help you to use it in your own projects. More information can be obtained at our website. This includes all of the links mentioned in this video. https://accautomation.ca/click-to-click-plc-communication-remote-io/ We will connect two Click PLUS PLCs and communicate in three different ways. Using the send and receive commands, we will set up one PLC to be the master (client) and communicate with the slave (server). WiFi, Ethernet, and Serial communication will share common memory areas between the Click PLCs. The send and receive commands have been covered before in our Click PLC Series, but we will look further at the timing of the communication. Detecting and correcting communication errors will be discussed and implemented. We will also create a heartbeat for the remote Click slave (server) PLC. This will allow the remote controller to determine if communications have stopped with the Click master (client). Wiring a pushbutton and some ladder logic code will allow us to time the throughput of each of the communication methods. CLICK PLCs were designed with simplicity, providing reliable control at a low cost and with little to no learning curve. This simplicity makes CLICK a perfect solution for small machines, home automation projects, pneumatic applications, or anywhere a simple system needs a budget-saving control solution. Building on the original CLICK’s simple design, the new CLICK PLUS PLCs offer the same practical control but with some surprising bells and whistles. Using the same FREE, streamlined PLC programming software as its predecessor, the CLICK PLUS PLCs provide no-headache programming combined with advanced capabilities like Wi-Fi communication and data logging. The Click and Click PLUS PLC series can be found at this URL: https://accautomation.ca/series/click-plc/ Features of the new Click PLUS PLC (C2-0xCPU) include the following: • Micro USB • DHCP support • DNS support • Wi-Fi (programming and Modbus TCP) • Bluetooth (Wi-Fi) provisioning • SD Card (Data Logging) • Data Logger • Network Time Service • MQTT (Publish/Subscribe) • Required PLC Password • Disable Ports • Strong Password Support • Disable Ping Response • Encrypted Password Transfer We are using the Click and Click PLUS PLCs for several reasons. Here are just a few. - Investment is low for the hardware, and the software is free - Standalone PLC with built-in I/O - Communication ability - Ethernet Port, RS232, RS485 - support for protocols such as Modbus RTU, Modbus TCP, etc. - Ability to directly expand the system with various modules, including RTD and Thermocouple inputs. ACC Automation https://www.accautomation.ca
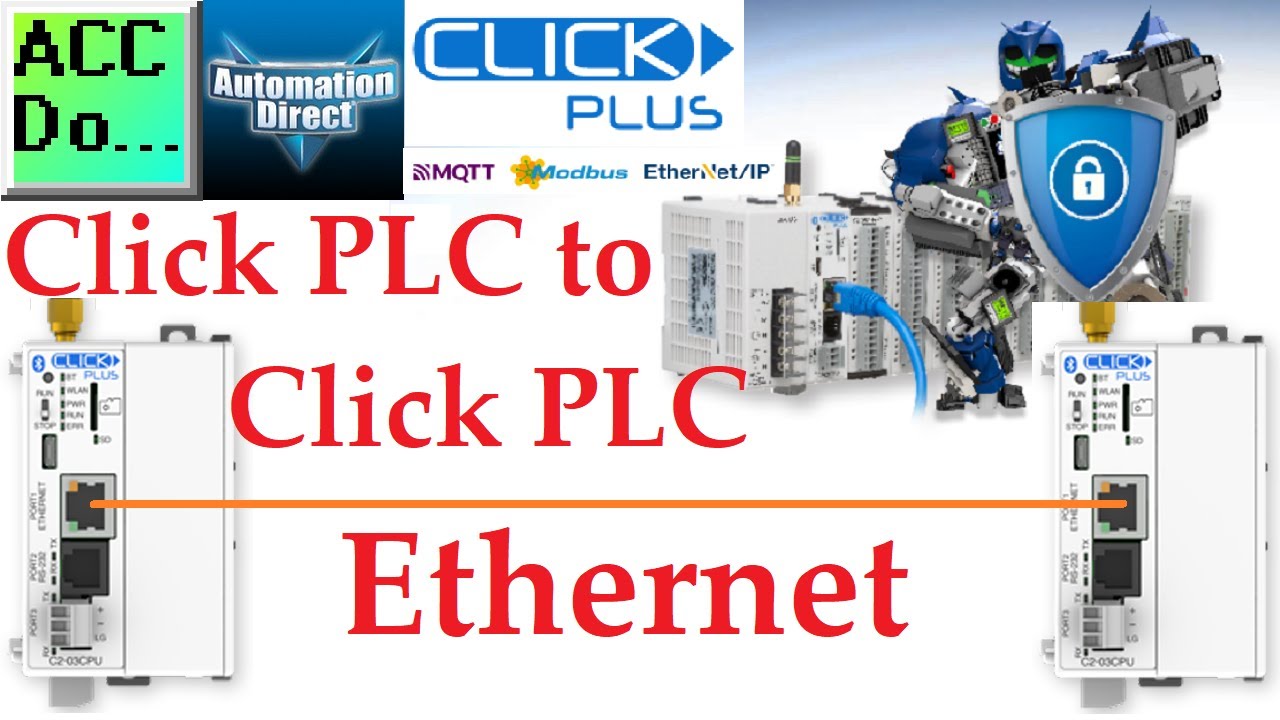
Click PLC to Click PLC Communication Ethernet
2K views · Nov 28, 2022 accautomation.ca
This video will show you how to use Ethernet to use Click PLC to Click PLC communication. This communication method allows you to control Click PLC remotely using Modbus TCP. By showing you this example, we hope to provide you with a better understanding of how this communication method works and help you to use it in your own projects. More information can be obtained at our website. This includes all of the links mentioned in this video. https://accautomation.ca/click-to-click-plc-communication-remote-io/ We will connect two Click PLUS PLCs and communicate in three different ways. Using the send and receive commands, we will set up one PLC to be the master (client) and communicate with the slave (server). WiFi, Ethernet, and Serial communication will share common memory areas between the Click PLCs. The send and receive commands have been covered before in our Click PLC Series, but we will look further at the timing of the communication. Detecting and correcting communication errors will be discussed and implemented. We will also create a heartbeat for the remote Click slave (server) PLC. This will allow the remote controller to determine if communications have stopped with the Click master (client). Wiring a pushbutton and some ladder logic code will allow us to time the throughput of each of the communication methods. CLICK PLCs were designed with simplicity, providing reliable control at a low cost and with little to no learning curve. This simplicity makes CLICK a perfect solution for small machines, home automation projects, pneumatic applications, or anywhere a simple system needs a budget-saving control solution. Building on the original CLICK’s simple design, the new CLICK PLUS PLCs offer the same practical control but with some surprising bells and whistles. Using the same FREE, streamlined PLC programming software as its predecessor, the CLICK PLUS PLCs provide no-headache programming combined with advanced capabilities like Wi-Fi communication and data logging. The Click and Click PLUS PLC series can be found at this URL: https://accautomation.ca/series/click-plc/ Features of the new Click PLUS PLC (C2-0xCPU) include the following: • Micro USB • DHCP support • DNS support • Wi-Fi (programming and Modbus TCP) • Bluetooth (Wi-Fi) provisioning • SD Card (Data Logging) • Data Logger • Network Time Service • MQTT (Publish/Subscribe) • Required PLC Password • Disable Ports • Strong Password Support • Disable Ping Response • Encrypted Password Transfer We are using the Click and Click PLUS PLCs for several reasons. Here are just a few. - Investment is low for the hardware, and the software is free - Standalone PLC with built-in I/O - Communication ability - Ethernet Port, RS232, RS485 - support for protocols such as Modbus RTU, Modbus TCP, etc. - Ability to directly expand the system with various modules, including RTD and Thermocouple inputs. ACC Automation https://www.accautomation.ca

Click PLC to Click PLC Communication RS485
3K views · Nov 25, 2022 accautomation.ca
This video will show you how to use Click PLC to Click PLC communication using serial RS485. This communication method allows you to control Click PLC remotely using Modbus RTU. By showing you this example, we hope to provide you with a better understanding of how this communication method works and help you to use it in your own projects. More information can be obtained at our website. This includes all of the links mentioned in this video. https://accautomation.ca/click-to-click-plc-communication-remote-io/ We will connect two Click PLUS PLCs and communicate in three different ways. Using the send and receive commands, we will set up one PLC to be the master (client) and communicate with the slave (server). WiFi, Ethernet, and Serial communication will share common memory areas between the Click PLCs. The send and receive commands have been covered before in our Click PLC Series, but we will look further at the timing of the communication. Detecting and correcting communication errors will be discussed and implemented. We will also create a heartbeat for the remote Click slave (server) PLC. This will allow the remote controller to determine if communications have stopped with the Click master (client). Wiring a pushbutton and some ladder logic code will allow us to time the throughput of each of the communication methods. CLICK PLCs were designed with simplicity, providing reliable control at a low cost and with little to no learning curve. This simplicity makes CLICK a perfect solution for small machines, home automation projects, pneumatic applications, or anywhere a simple system needs a budget-saving control solution. Building on the original CLICK’s simple design, the new CLICK PLUS PLCs offer the same practical control but with some surprising bells and whistles. Using the same FREE, streamlined PLC programming software as its predecessor, the CLICK PLUS PLCs provide no-headache programming combined with advanced capabilities like Wi-Fi communication and data logging. The Click and Click PLUS PLC series can be found at this URL: https://accautomation.ca/series/click-plc/ Features of the new Click PLUS PLC (C2-0xCPU) include the following: • Micro USB • DHCP support • DNS support • Wi-Fi (programming and Modbus TCP) • Bluetooth (Wi-Fi) provisioning • SD Card (Data Logging) • Data Logger • Network Time Service • MQTT (Publish/Subscribe) • Required PLC Password • Disable Ports • Strong Password Support • Disable Ping Response • Encrypted Password Transfer We are using the Click and Click PLUS PLCs for several reasons. Here are just a few. - Investment is low for the hardware, and the software is free - Standalone PLC with built-in I/O - Communication ability - Ethernet Port, RS232, RS485 - support for protocols such as Modbus RTU, Modbus TCP, etc. - Ability to directly expand the system with various modules, including RTD and Thermocouple inputs. ACC Automation https://www.accautomation.ca
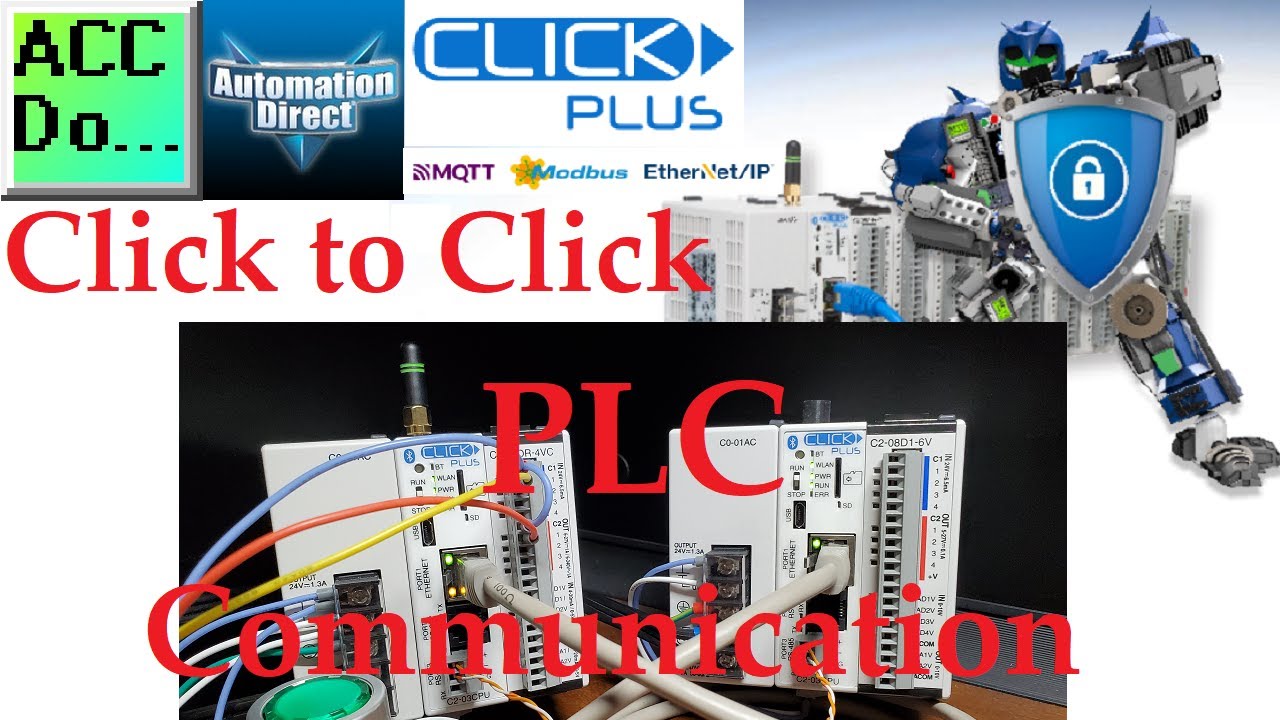
Click to Click PLC Communication
4K views · Nov 21, 2022 accautomation.ca
We will connect two Click PLUS PLCs and communicate in three different ways. Using the send and receive commands, we will set up one PLC to be the master (client) and communicate with the slave (server). WiFi, Ethernet, and Serial communication will share common memory areas between the Click PLCs. The send and receive commands have been covered before in our Click PLC Series, but we will look further at the timing of the communication. Detecting and correcting communication errors will be discussed and implemented. We will also create a heartbeat for the remote Click slave (server) PLC. This will allow the remote controller to determine if communications have stopped with the Click master (client). Wiring a pushbutton and some ladder logic code will allow us to time the throughput of each of the communication methods. Let’s get started. More information can be obtained at our website. This includes all of the links mentioned in this video. https://accautomation.ca/click-to-click-plc-communication-remote-io/ 00:00 Click to Click PLC Communication 01:22 What is PLC to PLC Communication? 04:14 Click to Click Remote IO Hardware 06:01 Send and Receive Command Timing 07:55 Click to Click RS485 Modbus RTU 17:10 Click to Click Ethernet Modbus TCP 26:55 Click to Click WiFi Wireless Modbus TCP Previously we looked at the following: Click Plus Software Installation https://accautomation.ca/click-plus-software-installation-version-3-00/ https://youtu.be/6uQQzyZ-O3s Establish Communication https://accautomation.ca/click-plus-establish-communication/ https://youtu.be/1Bnx3IROCqk MQTT Communication https://accautomation.ca/click-plus-plc-mqtt-communication/ https://youtu.be/wzUBolN9KjQ Data Logging https://accautomation.ca/click-plus-data-logging-csv-file-sql-database/ https://youtu.be/ydoWvMzHSKc Click Plus Real Time Clock https://accautomation.ca/click-plus-real-time-clock-setup-and-use/ https://youtu.be/0Vlqo8p0vCI Click PLC Serial Communication Timing https://accautomation.ca/click-plc-serial-communication-timing/ https://youtu.be/wbG_BKcdU1k Retentive Data Memory Registers https://accautomation.ca/click-plc-retentive-data-memory-registers/ https://youtu.be/9sCfu10xyu0 Click PLC Analog Input Non-Linear Scaling https://accautomation.ca/click-plc-analog-input-non-linear-scaling/ https://youtu.be/aRaugN3DYfs How to Connect Pushbutton Switch to Programmable Controller https://accautomation.ca/how-to-connect-pushbutton-switch-to-plc/ https://youtu.be/dSctVgxelZI CLICK PLCs were designed with simplicity, providing reliable control at a low cost and with little to no learning curve. This simplicity makes CLICK a perfect solution for small machines, home automation projects, pneumatic applications, or anywhere a simple system needs a budget-saving control solution. Building on the original CLICK’s simple design, the new CLICK PLUS PLCs offer the same practical control but with some surprising bells and whistles. Using the same FREE, streamlined PLC programming software as its predecessor, the CLICK PLUS PLCs provide no-headache programming combined with advanced capabilities like Wi-Fi communication and data logging. The Click and Click PLUS PLC series can be found at this URL: https://accautomation.ca/series/click-plc/ Features of the new Click PLUS PLC (C2-0xCPU) include the following: • Micro USB • DHCP support • DNS support • Wi-Fi (programming and Modbus TCP) • Bluetooth (Wi-Fi) provisioning • SD Card (Data Logging) • Data Logger • Network Time Service • MQTT (Publish/Subscribe) • Required PLC Password • Disable Ports • Strong Password Support • Disable Ping Response • Encrypted Password Transfer We are using the Click and Click PLUS PLCs for several reasons. Here are just a few. - Investment is low for the hardware, and the software is free - Standalone PLC with built-in I/O - Communication ability - Ethernet Port, RS232, RS485 - support for protocols such as Modbus RTU, Modbus TCP, etc. - Ability to directly expand the system with various modules, including RTD and Thermocouple inputs. ACC Automation https://www.accautomation.ca
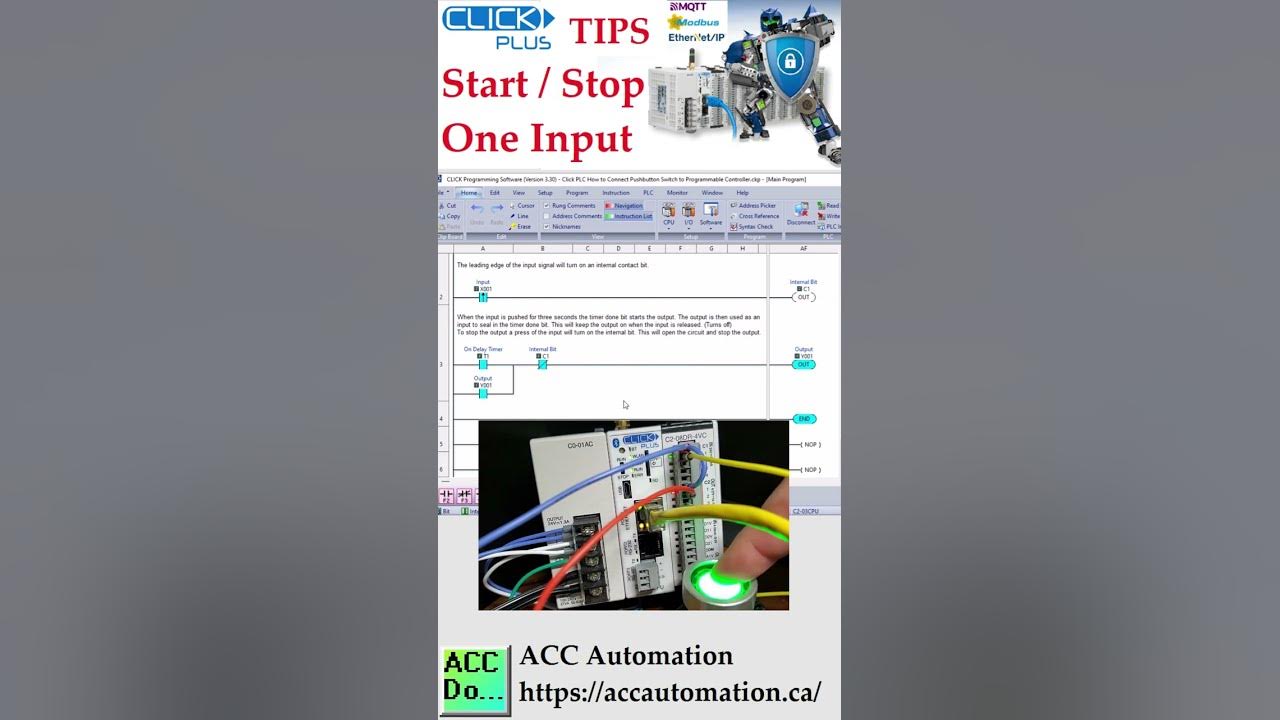
Click PLC Start Stop One Input
793 views · Nov 17, 2022 accautomation.ca
Click PLC Start Stop One Input This circuit is the safest way to start and stop a physical output using just one input. You can use a standard flip-flop circuit if this is internal and not a physical output. Links are provided in the description below. An on-delay timer will start the output. The operator will press and hold the input to start (turn on) the output. The leading edge of the input signal is detected, and an internal bit is set for one PLC scan. This will stop the output. The timer done bit will start the output, and the output will seal in the timer done a bit, making the output stay on. The normally closed one-shot internal bit will stop the output. PLC Ladder Logic Flip Flop Circuit https://accautomation.ca/creating-a-flip-flop-circuit-in-the-plc/ Download this Click PLC Sample program: https://www.dropbox.com/s/03or90n2bzjqn0v/Click%20PLC%20How%20to%20Connect%20Pushbutton%20Switch%20to%20Programmable%20Controller.zip?dl=0 Programming and examples of the Click and Click PLUS PLC series can be found at this URL: https://accautomation.ca/series/click-plc/ General information on the Click series of controllers: www.clickplcs.com/config System configuration tools will also calculate the power budget, I/O count, and price. Click PLUS PLC Configuration: https://www.automationdirect.com/clickplcs/config/clickplusconfig Click PLC Configuration: https://www.automationdirect.com/clickplcs/config We are using the Click and Click PLUS PLCs for several reasons. Here are just a few. - Investment is low for the hardware, and the software is free - Standalone PLC with built-in I/O - Communication ability - Ethernet Port, RS232, RS485 - support for protocols such as Modbus RTU, Modbus TCP, etc. - Ability to directly expand the system with various modules, including RTD and Thermocouple inputs. #shorts ACC Automation https://accautomation.ca/
Click PLC Communication Windows 11 Serial Driver
88 views · Oct 27, 2022 accautomation.ca
Click PLC Communication Windows 11 Serial Driver The Click PLC Programming Software V3.21 or older does not come with a Windows 11 USB Driver for Serial Communication. Looking at the Device Manager under the Ports (COM & LPT) it will show the following: "Please install the corresponding PL2303 driver to support Windows 11 and further OS." How to Install the Driver that works with Windows 11. 1. Disconnect the USB cable from the computer. 2. Download the Prolific Driver from the link below. This is in a zip format so it must be extracted first. Run the PL2303 Prolific Driver Installation file to install the driver on your computer. 3. Reboot your computer. 4. Connect your USB cable to the computer. You will now be able to program using Windows 11. Here is the Prolific Driver that will work with the Click PLC Serial Communication Windows 11: AD has now updated the driver to work with Windows 11. Please use this driver. https://ftp.automationdirect.com/pub/EA-MG-PGM-CBL_drivers.zip Video Link: http://www.prolific.com.tw/UserFiles/files/PL2303_Prolific_DriverInstaller_v1_12_0.zip Programming and examples of the Click and Click PLUS PLC series can be found at this URL: https://accautomation.ca/series/click-plc/ There are several reasons why we are using the Click and Click PLUS PLCs. Here are just a few. - Investment is low for the hardware and the software is free - Standalone PLC with built-in I/O - Communication ability - Ethernet Port, RS232, RS485 - support for protocols such as Modbus RTU, Modbus TCP, etc. - Ability to expand the system with a variety of modules including RTD and Thermocouple inputs directly. General information on the Click series of controllers: www.clickplcs.com/config There are also system configuration tools that will calculate the power budget, I/O count, and price. Click PLUS PLC Configuration: https://www.automationdirect.com/clickplcs/config/clickplusconfig Click PLC Configuration: https://www.automationdirect.com/clickplcs/config #shorts ACC Automation https://accautomation.ca/
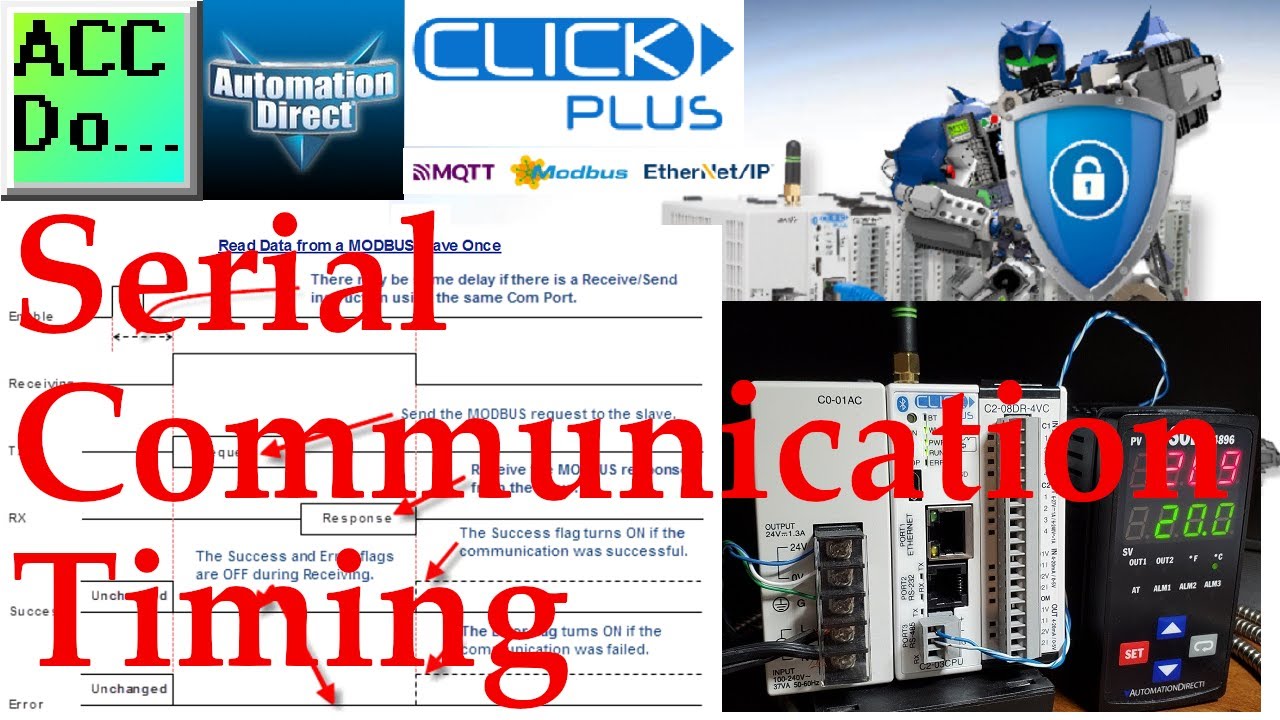
Click PLC Serial Communication Timing
2K views · Oct 24, 2022 accautomation.ca
Many questions come from serial communications using the Click PLC. Most of these questions deal with communication timing when using multiple send and receive instructions. We will show you how to deal with serial communication timing in the Click PLC. Receive and Send instructions will allow you to send and receive serial data to an external device. The communication method that you set up can be ASCII or Modbus. ASCII (American Standard Communication for Information Interchange) can be used to send to devices such as a printer. Receiving ASCII can be used for connecting barcode scanners to the PLC. The barcode will be read as an ASCII string in the PLC. Modbus serial communication (Modbus RTU) is a standard protocol used in many automation devices. We will demonstrate the Send and Receive instruction by communicating Modbus RTU to a Solo Temperature Controller. Parameters from the Solo process temperature controller will be read using multiple receive instructions. The send instruction will be used multiple times as well to set the Set Value (SV) and Limits of the SV value entered in the temperature controller. The set values will only be changed when required. Let’s get started. Features of the new Click PLUS PLC (C2-0xCPU) includes the following: • Micro USB • DHCP support • DNS support • Wi-Fi (programming and Modbus TCP) • Bluetooth (Wi-Fi) provisioning • SD Card (Data Logging) • Data Logger • Network Time Service • MQTT (Publish/Subscribe) • Required PLC Password • Disable Ports • Strong Password Support • Disable Ping Response • Encrypted Password Transfer More information can be obtained at our website. This includes all of the links mentioned in this video. https://accautomation.ca/click-plc-serial-communication-timing/ 00:00 Click PLC Serial Communication Timing 01:47 Click Solo Hardware - Serial Wiring 02:28 Solo Temperature Controller RS485 Setup 03:25 Click PLC RS485 Setup 04:02 Slave Modbus Addresses 04:41 Click PLC Serial Port Programming 10:03 Testing the Click to Solo Communication Program Previously we looked at the following: Click Plus Software Installation https://accautomation.ca/click-plus-software-installation-version-3-00/ https://youtu.be/6uQQzyZ-O3s Establish Communication https://accautomation.ca/click-plus-establish-communication/ https://youtu.be/1Bnx3IROCqk MQTT Communication https://accautomation.ca/click-plus-plc-mqtt-communication/ https://youtu.be/wzUBolN9KjQ Data Logging https://accautomation.ca/click-plus-data-logging-csv-file-sql-database/ https://youtu.be/ydoWvMzHSKc Click Plus Real-Time Clock https://accautomation.ca/click-plus-real-time-clock-setup-and-use/ https://youtu.be/0Vlqo8p0vCI CLICK PLCs were designed with simplicity in mind, providing reliable control at a low, low cost and with little to no learning curve. This simplicity makes CLICK a perfect solution for small machines, home automation projects, pneumatic applications, or anywhere a simple system needs a budget-saving control solution. Building on the original CLICK’s simple design, the new CLICK PLUS PLCs offer the same practical control but with some surprising bells and whistles. Using the same FREE, streamlined PLC programming software as its predecessor, the CLICK PLUS PLCs provide no-headache programming combined with advanced capabilities like Wi-Fi communication and data logging. The Click and Click PLUS PLC series can be found at this URL: https://accautomation.ca/series/click-plc/ There are several reasons why we are using the Click and Click PLUS PLCs. Here are just a few. - Investment is low for the hardware and the software is free - Standalone PLC with built-in I/O - Communication ability - Ethernet Port, RS232, RS485 - support for protocols such as Modbus RTU, Modbus TCP, etc. - Ability to expand the system with a variety of modules including RTD and Thermocouple inputs directly. https://accautomation.ca/
Click PLC PID using Factory IO (3D)
2K views · Oct 20, 2022 accautomation.ca
We will be looking at using a Click PLC PID loop controlling a tank in Factory IO. A PID (Proportional, Integral, and Derivative) control is possible with the Click PLC. A sample program was written for this PLC by Bernie Carlton in the following thread from the Automation Direct Forum. This was based on the math/process presented by Tim Wescott in his paper titled PID without a Ph.D. We will be using this sample program along with a Factory IO scene to demonstrate PID control using our Click PLC. Here are some references on PID control: PID without a Ph.D. By Tim Wescott http://igor.chudov.com/manuals/Servo-Tuning/PID-without-a-PhD.pdf Understanding PID in 4 minutes https://www.youtube.com/watch?v=wbmEUi2p-nA PID Control – A brief introduction PID Controllers Explained https://www.youtube.com/watch?v=UR0hOmjaHp0 Who Else Wants to Learn about On-Off and PID Control? https://accautomation.ca/who-else-wants-to-learn-about-on-off-and-pid-control/ Our Factory IO scene will be controlling the level of water in a tank. PID will be used to maintain the level based on a dial pot knob on the control panel. We will also discuss the math that the PID loop uses. Let’s get started! More information can be obtained on our website. This includes all of the links mentioned in this video. https://accautomation.ca/click-plc-pid-using-factory-io Previously we discussed: Click PLC System-Hardware https://accautomation.ca/click-plc-system-hardware/ Click PLC Installing the Software https://accautomation.ca/click-plc-installing-the-software/ Click PLC Establish Communication https://accautomation.ca/click-plc-establish-communication/ Click PLC Numbering System and Addressing https://accautomation.ca/click-plc-numbering-system-and-addressing Click PLC Timers and Counters https://accautomation.ca/click-plc-timers-and-counters Click PLC Compare and Math Instructions https://accautomation.ca/click-plc-compare-and-math-instructions Click PLC Program Control Instructions https://accautomation.ca/click-plc-program-control-instructions Click PLC Shift Register Instruction https://accautomation.ca/click-plc-shift-register-instruction Click PLC Drum Instruction https://accautomation.ca/click-plc-drum-instruction Click PLC Send and Receive Instructions https://accautomation.ca/click-plc-send-and-receive-instructions Click PLC AdvancedHMI Communication https://accautomation.ca/click-plc-advancedhmi-communication Modbus RTU Click PLC Master to BRX PLC Slave Communication https://accautomation.ca/modbus-rtu-click-plc-master-to-brx-plc-slave-communication Video https://youtu.be/CIsj-Xppoog Click PLC - Update Firmware https://accautomation.ca/click-plc-update-firmware Video https://youtu.be/1X_kw4Rhokw Click PLC HMI Rotary Encoder Dial Input https://accautomation.ca/click-plc-hmi-rotary-encoder-dial-input Video https://youtu.be/mix9k2RTdII High-Speed Counter - Part 1 https://accautomation.ca/click-plc-high-speed-counting-part-1 High-Speed Count Mode Video https://youtu.be/P3l34unyAyU Interval Measurement Mode Video https://youtu.be/-t8JSKruilE Duration Measurement Mode Video https://youtu.be/znF6PRwGq-Y Frequency Measurement Mode Video https://youtu.be/m0I9P5AoFqE Click PLC High-Speed Counter - Part 2 https://accautomation.ca/click-plc-high-speed-counting-part-2 External Interrupt Mode https://youtu.be/UxFffVddUt4 Pulse Catch Mode https://youtu.be/2H0zwul1X3o Filter Pulse Mode https://youtu.be/FNbYAkBwIsQ Frequency Measurement and High-Speed Count Mode https://youtu.be/qV3jgRszghE Analog Dusk to Dawn Program https://accautomation.ca/click-plc-analog-dusk-to-dawn-program https://youtu.be/JlxTBlk6IJY The entire Click PLC series can be found at this URL: https://accautomation.ca/series/click-plc/ There are several reasons why we are using the Click PLC. Here are just a few. - Investment is low for the hardware and the software is free - Standalone PLC with built-in I/O - Communication ability - Ethernet Port, RS232, RS485 - support for protocols such as Modbus RTU, Modbus TCP, etc. - Ability to expand the system with a variety of modules including RTD and Thermocouple inputs directly. https://www.accautomation.ca
Click PLC Retentive Registers
132 views · Oct 20, 2022 accautomation.ca
The Click programming software can maintain your retentive registers in the program. This option is not set when you first install the Click software. To turn it on using the main menu | Setup | Software Setup... Select the System tab. Select the Maintain Retentive values in the Project File. "Read Project from PLC" will optionally read all Retentive Addresses from the PLC. "Write Project to PLC" will optionally write all Retentive Addresses to the PLC. Programming and examples of the Click and Click PLUS PLC series can be found at this URL: https://accautomation.ca/series/click-plc/ There are several reasons why we are using the Click and Click PLUS PLCs. Here are just a few. - Investment is low for the hardware and the software is free - Standalone PLC with built-in I/O - Communication ability - Ethernet Port, RS232, RS485 - support for protocols such as Modbus RTU, Modbus TCP, etc. - Ability to expand the system with a variety of modules including RTD and Thermocouple inputs directly. #shorts ACC Automation https://accautomation.ca/
Learn the 4 Basic Variable Types in PLC Programming
7K views · Jan 23, 2023 accautomation.ca
There are four fundamental variable types in PLC programming: Boolean, Integer, Real, and String. This is a universal concept for all PLC programming but needs to be clarified due to the acronyms and various names used by manufacturers and PLC hardware. Your controller programming manual will help you understand the terms of the variables in your hardware. It is essential to understand the different types of variables available to you, the programmer. We will explore each of the four variable types, breaking down what they are and how they are used in programming your controller. Let's dive in! Detailed information and links can be found on the corresponding post located here. https://accautomation.ca/learn-4-basic-variable-types-in-plc-programming/ 00:00 Learn 4 Basic Variable Types in PLC Programming 00:58 Boolean (On / Off) PLC Variable 02:10 Integer (Number) PLC Variable 03:51 Real (Very Large or Small Number) PLC Variable 04:46 String (Character) PLC Variable Here are the controllers that we have covered at ACC Automation: Productivity Series https://accautomation.ca/series/productivity-1000-plc/ https://accautomation.ca/series/productivity-2000-series-plc-p2000/ BRX Do-More Series (Do-More Designer Software + Simulator) https://accautomation.ca/series/brx-do-more-plc/ Click PLC Series https://accautomation.ca/series/click-plc/ Omron CP1H Series https://accautomation.ca/series/omron-plc-cp1h-series/ Horner XL4 PLC Series https://accautomation.ca/series/horner-xl4-series/ https://accautomation.ca/series/easyplc-software-suite/ EasyPLC Software Suite is a complete PLC, HMI, and Machine Simulator Software package. See below to receive 10% off this software. This PLC learning package includes the following: Easy PLC – PLC Simulation will allow programming in Ladder, Grafcet, Logic Blocks, or Script. HMI System – Easily create a visual human-machine interface (HMI) Machine Simulator – A virtual 3D world with real-time graphics and physical properties. PLC programs can be tested using EasyPLC or through other interfaces. (Modbus RTU, TCP, etc.) Machine Simulator Lite – Designed to run on Android Devices. Machine Simulator VR – Virtual Reality comes to life so you can test, train or practice your PLC programming. Purchase your copy of this learning package for less than USD 75 for a single computer install or less than USD 100 to allow different computers. Receive 10% off the investment by typing in ACC in the comment section when you order. http://www.nirtec.com/index.php/purchase-price/ Learn PLC programming the easy way. Invest in yourself today. Regards, Garry ACC Automation https://accautomation.ca/
The Most Powerful PLC Instruction?
250 views · Mar 25, 2024 accautomation.ca
What is the most powerful PLC instruction? What instruction or concept is the most powerful when programming any manufacturer's PLCs? Many people will guess timers, counters, or the set and reset bit instructions. These are all great instructions, but indirect or pointer instruction is the most powerful. In PLC programming, pointers, also called indirect addressing, store or retrieve memory addresses of data or instructions. They are instrumental when dealing with large amounts of data or performing complex calculations. Machine recipes, sequence control, and test result storage are just a few examples of where this powerful PLC instruction is used. We will examine how indirect addressing works in the Click, Do-More, and Productivity PLCs. You will discover how easily and powerful pointers are when programming. Let's get started. Detailed information and links can be found in the corresponding post here. https://accautomation.ca/the-most-powerful-plc-instruction/ 00:00 The Most Powerful PLC Instruction? 01:17 Powerful PLC Indirect (Pointer) Instruction 02:46 Click PLC Indirect Pointer 03:43 Productivity PLC Indirect Pointer 04:59 Do-More (BRX) PLC Indirect Pointer PLC Beginner’s Guide to PLC Programming https://accautomation.ca/programming/plc-beginners-guide/ Here are the controllers that we have covered at ACC Automation: BRX Do-More Series (Do-More Designer Software + Simulator) https://accautomation.ca/series/brx-do-more-plc/ Productivity Series https://accautomation.ca/series/productivity-1000-plc/ https://accautomation.ca/series/productivity-2000-series-plc-p2000/ Click PLC Series https://accautomation.ca/series/click-plc/ Omron CP1H Series https://accautomation.ca/series/omron-plc-cp1h-series/ Horner XL4 PLC Series https://accautomation.ca/series/horner-xl4-series/ https://accautomation.ca/series/easyplc-software-suite/ EasyPLC Software Suite is a complete PLC, HMI, and Machine Simulator Software package. See below to receive 10% off this software. This PLC learning package includes the following: Easy PLC – PLC Simulation will allow Ladder, Grafcet, Logic Blocks, or Script programming. HMI System – Easily create a visual human-machine interface (HMI) Machine Simulator – A virtual 3D world with real-time graphics and physical properties. PLC programs can be tested using the EasyPLC or through other interfaces. (Modbus RTU, TCP, etc.) Machine Simulator Lite – Designed to run on Android Devices. Machine Simulator VR – Virtual Reality comes to life so you can test, train, or practice your PLC programming. Purchase your copy of this learning package for less than USD 95 for a single computer install or less than USD 110 to allow different computers. Receive 10% off the investment by typing in ACC in the comment section when you order. http://www.nirtec.com/index.php/purchase-price/ Learn PLC programming the easy way. Invest in yourself today. Regards, Garry ACC Automation https://accautomation.ca/
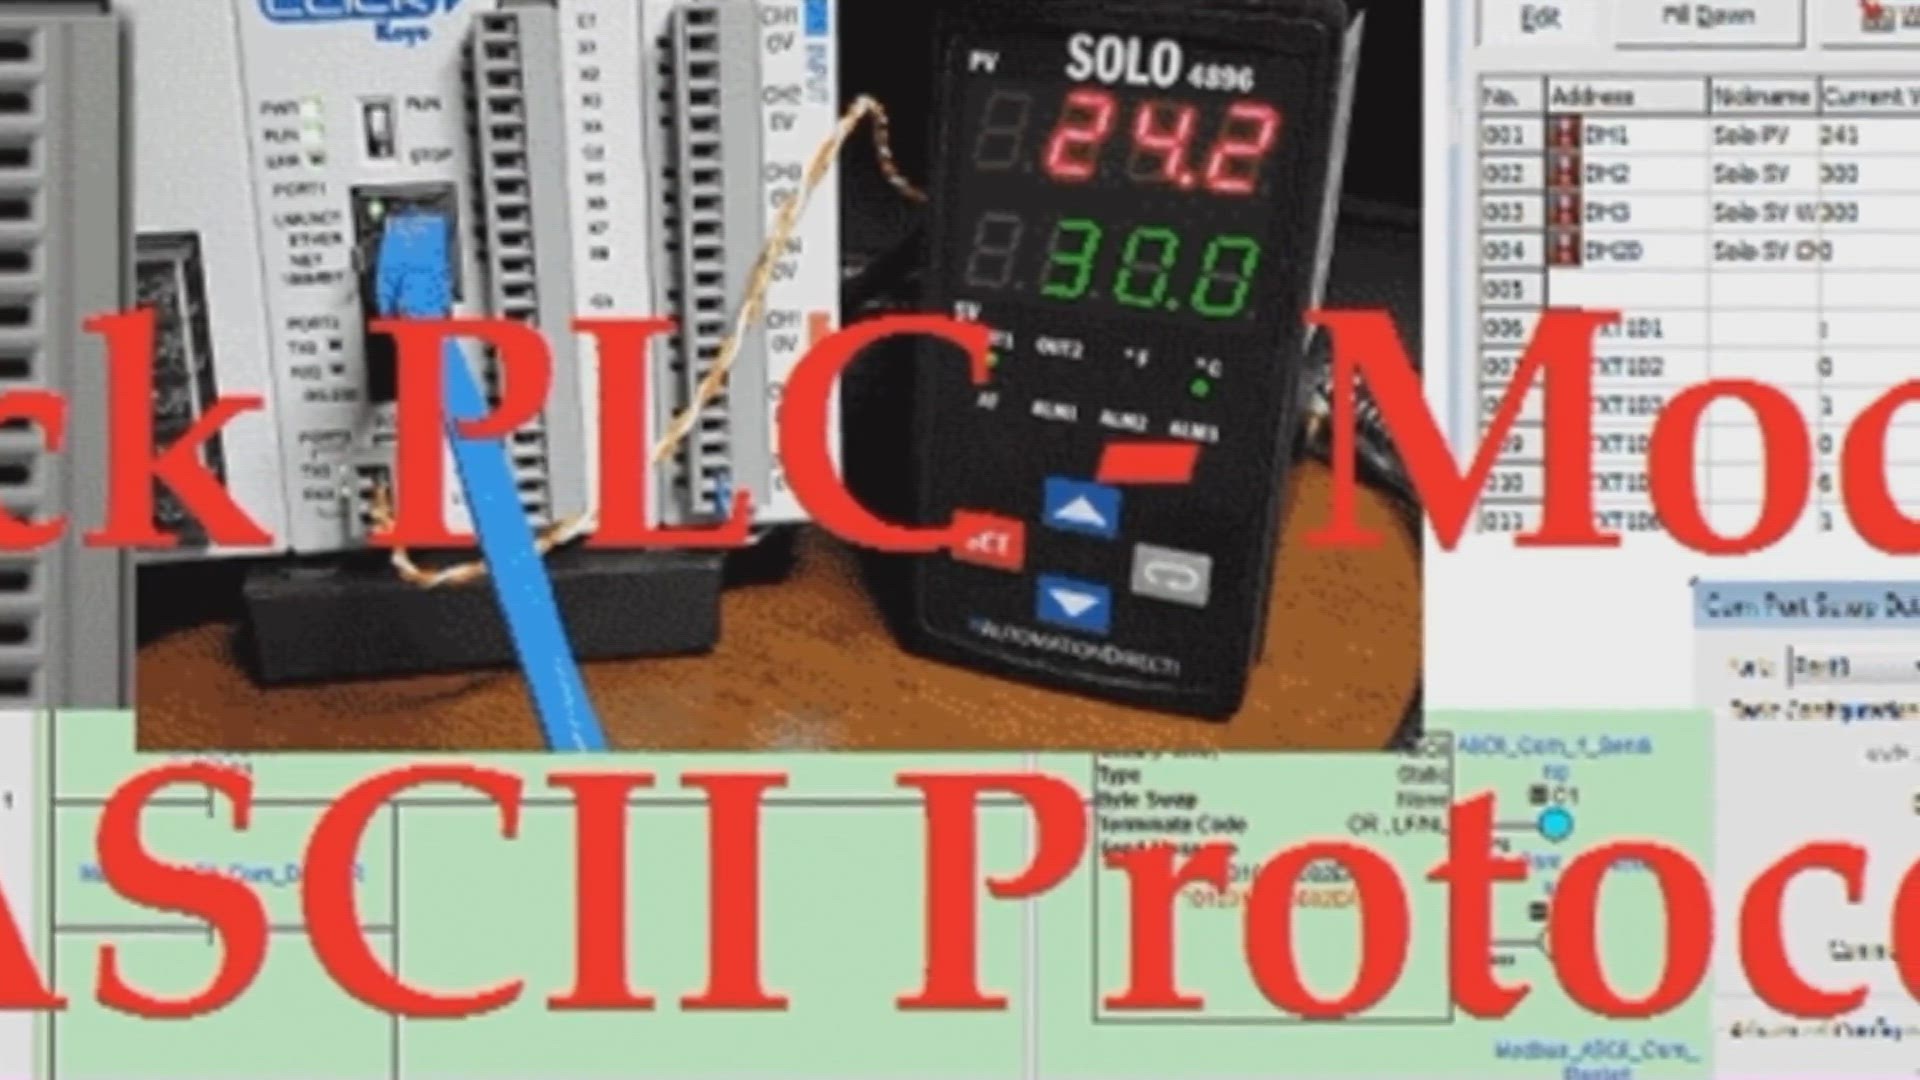
Mastering Click PLC Modbus ASCII Protocol with Solo Temperat...
2K views · Jun 3, 2024 accautomation.ca
In this video, we dive into the Click PLC Modbus ASCII protocol, demonstrating how to implement it in PLC ladder logic for communication with a Solo process temperature controller via RS485 serial port. We'll guide you through setting up communication parameters, configuring the Solo Temperature Controller, and programming the Click PLC to read and write values using Modbus ASCII. Watch the full tutorial to see the setup, running, and troubleshooting of Modbus ASCII Serial Communication between Click PLC and Solo Process Temperature Controller. Links to resources and software are provided in the description.
Unleashing the Power of Indirect Addressing in PLC Programmi...
214 views · Jun 24, 2024 accautomation.ca
What is the most powerful PLC instruction? What instruction or concept is the most powerful when programming any manufacturer's PLCs? Many people will guess timers, counters, or the set and reset bit instructions. These are all great instructions, but indirect or pointer instruction is the most powerful. In PLC programming, pointers, also called indirect addressing, store or retrieve memory addresses of data or instructions. They are instrumental when dealing with large amounts of data or performing complex calculations. Machine recipes, sequence control, and test result storage are just a few examples of where this powerful PLC instruction is used. We will examine how indirect addressing works in the Click, Do-More, and Productivity PLCs. You will discover how easily and powerful pointers are when programming. Let's get started. Detailed information and links can be found in the corresponding post here. https://accautomation.ca/the-most-powerful-plc-instruction/ PLC Beginner’s Guide to PLC Programming https://accautomation.ca/programming/plc-beginners-guide/ Here are the controllers that we have covered at ACC Automation: BRX Do-More Series (Do-More Designer Software + Simulator) https://accautomation.ca/series/brx-do-more-plc/ Productivity Series https://accautomation.ca/series/productivity-1000-plc/ https://accautomation.ca/series/productivity-2000-series-plc-p2000/ Click PLC Series https://accautomation.ca/series/click-plc/ Omron CP1H Series https://accautomation.ca/series/omron-plc-cp1h-series/ Horner XL4 PLC Series https://accautomation.ca/series/horner-xl4-series/ https://accautomation.ca/series/easyplc-software-suite/ EasyPLC Software Suite is a complete PLC, HMI, and Machine Simulator Software package. See below to receive 10% off this software. This PLC learning package includes the following: Easy PLC – PLC Simulation will allow Ladder, Grafcet, Logic Blocks, or Script programming. HMI System – Easily create a visual human-machine interface (HMI) Machine Simulator – A virtual 3D world with real-time graphics and physical properties. PLC programs can be tested using the EasyPLC or through other interfaces. (Modbus RTU, TCP, etc.) Machine Simulator Lite – Designed to run on Android Devices. Machine Simulator VR – Virtual Reality comes to life so you can test, train, or practice your PLC programming. Purchase your copy of this learning package for less than USD 95 for a single computer install or less than USD 110 to allow different computers. Receive 10% off the investment by typing in ACC in the comment section when you order. http://www.nirtec.com/index.php/purchase-price/ Learn PLC programming the easy way. Invest in yourself today. Regards, Garry ACC Automation https://accautomation.ca/
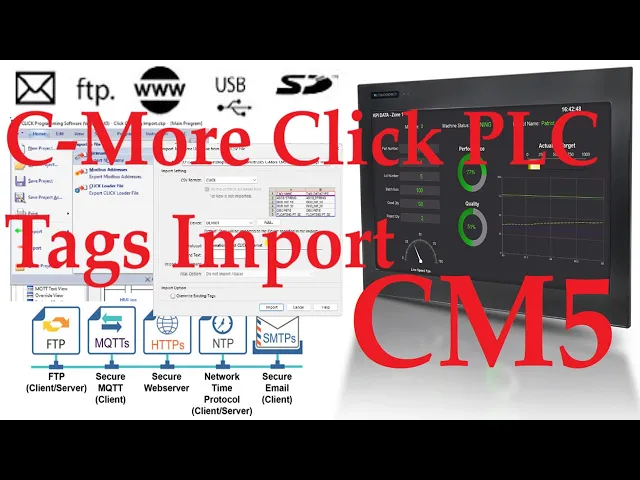
C-More CM5 HMI Click PLC Tags Import
818 views · Sep 9, 2024 accautomation.ca
The C-More CM5 HMI programming software will allow tags to be imported. This can save you hours of work when establishing communications with different PLC controllers. Instead of creating and labeling tags in the PLC and the HMI, we can export them from the PLC and import them into the HMI. This saves you time, money, and mistakes. We will be exporting tags from a Click PLC start-stop circuit. The export tags will then be imported into our HMI program. We will program a start-stop jog circuit on our C-More CM5 HMI screen. Let's get started. More information can be obtained at our website. This includes all of the links mentioned in this video. https://accautomation.ca/c-more-cm5-hmi-click-plc-tags-import/ 00:00 C-More CM5 HMI Click PLC Tags Import 00:57 Modification of Click PLC program for CM5 HMI 02:57 Export Program Tags from the Click PLC 04:04 Start a New Project in the C-more HMI Programming Software 04:59 Import the Click PLC Tags into the C-More CM5 HMI 06:42 Program the C-More CM5 HMI 07:30 Transfer and Test the C-More HMI / Click PLC Program The C-More CM5 HMI series can be found at this URL: https://accautomation.ca/series/c-more-cm5-hmi-series/ C-More CM5 Quick Features: 4″, 7″, 10″, 12″, 15″, and 22″ widescreen options 16.7M colors and LED backlights 800MHz or 1.6GHz Quad Core CPU 43MB project memory 12 to 24 VDC powered Built-in real-time clock with 30-day backup (no battery required) NEMA 4/4X (indoor use only), IP65 FREE HMI programming software with powerful design tools and a project simulator CM5 series HMIs support any EA9 series project (created with V6.73 or later) for an easy panel upgrade Support Links: C-More CM5 Frequently Asked Questions (FAQ) https://accautomation.ca/series/c-more-cm5-hmi-series/c-more-cm5-faq/ CM5-T7W Cut Sheet - Tech Specifications / Protocols https://cdn.automationdirect.com/static/specs/cutsheet/CM5-T7W_cutsheet.pdf C-more CM5 Overview https://cdn.automationdirect.com/static/specs/cm5t7w.pdf CM5 User Manual - Hardware https://cdn.automationdirect.com/static/manuals/cm5userm/cm5userm.html CM5 Quick Start Guide https://cdn.automationdirect.com/static/manuals/cm5userm/cm5qsg.pdf Product Brochure https://cdn.automationdirect.com/static/catalog/images/product-pdf/CM5-C-more-Overview.pdf C-More Programming Software (CM5 Series) https://www.automationdirect.com/support/software-downloads?itemcode=C-more%20CM5%20Series CM5 User Manual - Software On-Line https://www.automationdirect.com/c-more/cm5/software-help AD C-More CM5 Sample Projects https://www.automationdirect.com/adc/shopping/catalog/hmi_(human_machine_interface)/graphical_hmi_devices/hmi_panels/cm5-t7w# ACC Automation https://www.accautomation.ca Helping you with your automation control tasks...
Master Click PLC Communication: Ignite your Modbus RS485 pas...
457 views · Jan 9, 2025 accautomation.ca
90% of industrial automation systems use Modbus for communication. This open standard protocol is used for everyday applications, including monitoring and controlling equipment such as PLCs (Programmable Logic Controllers), remote terminal units, sensors, and more in automation and process control environments. RS-485 typically utilizes twisted pair cables, which consist of two insulated copper wires twisted together. This configuration helps to reduce electromagnetic interference (EMI) and crosstalk from external sources, ensuring a more reliable signal over long distances. Peer-to-peer (P2P) communication is a decentralized communication where two or more devices connect directly to share data or resources without needing a central server. Using the Modbus RTU Serial Protocol, we will connect two Click PLUS PLCs through RS485 in a peer-to-peer fashion. We will share the following information between the two PLCs: One hundred individual bits (0/1—On/Off) will be written and read between the controllers. We will also share ten words (16-bit), which will also be written and read between the PLCs. In this manner, the individual controls can see all the data from each other. Let's get started. More information can be obtained at our website. This includes all of the links mentioned in this video. https://accautomation.ca/mastering-click-plc-communication-modbus-rs485/ 00:00 Mastering Click PLC Communication Modbus RS485! 01:41 Wiring Click PLC RS485 Ports 04:20 Click PLC PLUS Client (Master) Modbus RTU Program 13:40 Click PLC PLUS Server (Slave) Modbus RTU Program 16:57 Monitoring the Click Modbus RTU RS485 Network using Data View 19:44 Creating a Heartbeat for Modbus RTU Serial Communications 26:28 Monitoring and Resetting the Modbus Client Communication Previously, we looked at the following: Click Plus Software Installation https://accautomation.ca/click-plus-software-installation-version-3-00/ https://youtu.be/6uQQzyZ-O3s Establish Communication https://accautomation.ca/click-plus-establish-communication/ https://youtu.be/1Bnx3IROCqk MQTT Communication https://accautomation.ca/click-plus-plc-mqtt-communication/ https://youtu.be/wzUBolN9KjQ Data Logging https://accautomation.ca/click-plus-data-logging-csv-file-sql-database/ https://youtu.be/ydoWvMzHSKc Click Plus Real Time Clock https://accautomation.ca/click-plus-real-time-clock-setup-and-use/ https://youtu.be/0Vlqo8p0vCI Click PLC Serial Communication Timing https://accautomation.ca/click-plc-serial-communication-timing/ https://youtu.be/wbG_BKcdU1k Click PLC Analog Input Non-Linear Scaling https://accautomation.ca/click-plc-analog-input-non-linear-scaling/ https://youtu.be/aRaugN3DYfs How to Connect Pushbutton Switch to Programmable Controller https://accautomation.ca/how-to-connect-pushbutton-switch-to-plc/ https://youtu.be/dSctVgxelZI Click to Click PLC Communication https://accautomation.ca/click-to-click-plc-communication-remote-io/ https://youtu.be/fMg1mz19-B0 Click PLC to Click PLC Communication RS485 https://youtu.be/EySxKZjm6uE Click PLC to Click PLC Communication Ethernet https://youtu.be/zLvJKxUrjww Click PLC to Click PLC Communication WiFi https://youtu.be/1cs8O8HLE6Q Click Remote PLC Mobile App https://accautomation.ca/click-remote-plc-mobile-application/ https://youtu.be/vhfcsu_bjdc CLICK PLCs were designed with simplicity in mind. They provide reliable control at a low cost and with little to no learning curve. This simplicity makes CLICK a perfect solution for small machines, home automation projects, pneumatic applications or anywhere a simple system needs a budget-saving control solution. Building on the original CLICK's simple design, the new CLICK PLUS PLCs offer the same practical control but with some surprising bells and whistles. Using the same FREE, streamlined PLC programming software as their predecessor, the CLICK PLUS PLCs provide no-headache programming combined with advanced capabilities like Wi-Fi communication and data logging. The Click and Click PLUS PLC series can be found at this URL: https://accautomation.ca/series/click-plc/ Features of the new Click PLUS PLC (C2-0xCPU) include the following: Micro USB DHCP support DNS support Wi-Fi (programming and Modbus TCP) Bluetooth (Wi-Fi) provisioning SD Card (Data Logging) Data Logger Network Time Service MQTT (Publish/Subscribe) Required PLC Password Disable Ports Strong Password Support Disable Ping Response Encrypted Password Transfer We are using the Click and Click PLUS PLCs for several reasons. Here are just a few. - Investment is low for the hardware, and the software is free - Standalone PLC with built-in I/O - Communication ability - Ethernet Port, RS232, RS485 - support for Modbus RTU, Modbus TCP, etc. - Ability to expand the system with various modules, including RTD and Thermocouple inputs directly. Regards, Garry ACC Automation https://www.accautomation.ca
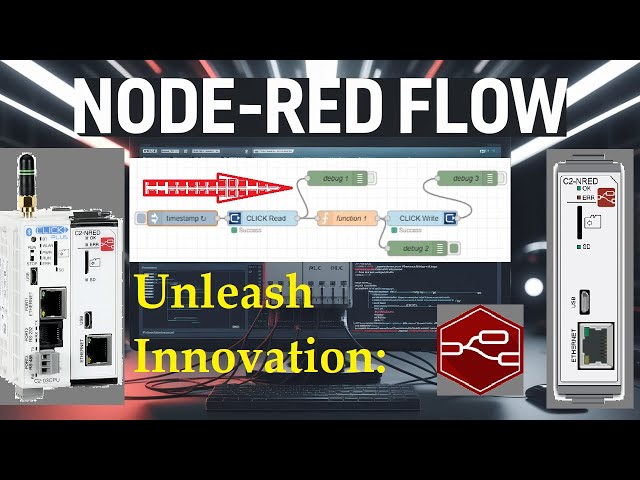
Unleash Innovation: Node-RED Flow in Click PLC
662 views · Mar 17, 2025 accautomation.ca
Creating a Node-RED Flow Program in the Click PLUS PLC C2-NRED Module Node-RED is an innovative and powerful tool for connecting hardware devices, APIs, and online services. Regarding industrial automation, the Click PLUS PLC C2-NRED module takes things up a notch by integrating Node-RED, allowing users to create flows via a visual programming interface. Previously, we updated the Click Programming Software to version 3.70. The firmware in the Click CPU and C2-NRED Module were then updated to their latest versions. We will guide you through creating your first Node-RED flow program in the Click PLUS PLC C2-NRED module. We will read and write information to and from the Click PLC CPU. We will discuss saving and retrieving our flow programs and troubleshooting. Let's get started. More information can be obtained at our website. This includes all of the links mentioned in this video. https://accautomation.ca/unleash-innovation-node-red-flow-in-click-plc/ 00:00 Unleash Innovation: Node-RED Flow in Click PLC 01:11 Accessing Node-RED 02:23 What is Flow Programming? 03:29 Understanding the Node-RED Interface 05:09 Building Your First CLICK Read Flow 07:54 Adding A CLICK Write To Our Flow 11:39 Configure The Inject Node 12:22 Saving The Node-RED Flow - Export / Import Previously, we looked at the following: Data Logging https://accautomation.ca/click-plus-data-logging-csv-file-sql-database/ https://youtu.be/ydoWvMzHSKc Click Plus Real Time Clock https://accautomation.ca/click-plus-real-time-clock-setup-and-use/ https://youtu.be/0Vlqo8p0vCI Click PLC Serial Communication Timing https://accautomation.ca/click-plc-serial-communication-timing/ https://youtu.be/wbG_BKcdU1k Retentive Data Memory Registers https://accautomation.ca/click-plc-retentive-data-memory-registers/ https://youtu.be/9sCfu10xyu0 Click PLC Analog Input Non-Linear Scaling https://accautomation.ca/click-plc-analog-input-non-linear-scaling/ https://youtu.be/aRaugN3DYfs How to Connect Pushbutton Switch to Programmable Controller https://accautomation.ca/how-to-connect-pushbutton-switch-to-plc/ https://youtu.be/dSctVgxelZI Click to Click PLC Communication https://accautomation.ca/click-to-click-plc-communication-remote-io/ https://youtu.be/fMg1mz19-B0 Click PLC to Click PLC Communication RS485 https://youtu.be/EySxKZjm6uE Click PLC to Click PLC Communication Ethernet https://youtu.be/zLvJKxUrjww Click PLC to Click PLC Communication WiFi https://youtu.be/1cs8O8HLE6Q Integrating an XY-MD02 Sensor with Modbus RTU into Click PLC https://accautomation.ca/integrating-xy-md02-sensor-modbus-rtu-click-plc/ https://youtu.be/fMfWQZ90X8o Click Remote PLC Mobile App https://accautomation.ca/click-remote-plc-mobile-application/ https://youtu.be/vhfcsu_bjdc Mastering Click PLC Communication Modbus RS485! https://accautomation.ca/mastering-click-plc-communication-modbus-rs485/ https://youtu.be/RQ4ik2UoRns CLICK PLUS C2-NRED: Easy Install for PLC Module! https://accautomation.ca/click-plus-c2-nred-easy-install-for-plc-module/ https://youtu.be/ZFgcVwCYCRk CLICK PLCs were designed with simplicity in mind, providing reliable control at a low cost and with little to no learning curve. This simplicity makes CLICK a perfect solution for small machines, home automation projects, pneumatic applications, or anywhere a simple system needs a budget-saving control solution. Building on the original CLICK's simple design, the new CLICK PLUS PLCs offer the same practical control but with surprising bells and whistles. Using the same FREE, streamlined PLC programming software as its predecessor, the CLICK PLUS PLCs provide no-headache programming combined with advanced capabilities like Wi-Fi communication and data logging. The Click and Click PLUS PLC series can be found at this URL: https://accautomation.ca/series/click-plc/ Features of the new Click PLUS PLC (C2-0xCPU) include the following: Micro USB DHCP support DNS support Wi-Fi (programming and Modbus TCP) Bluetooth (Wi-Fi) provisioning SD Card (Data Logging) Data Logger Network Time Service MQTT (Publish/Subscribe) Required PLC Password Disable Ports Strong Password Support Disable Ping Response Encrypted Password Transfer We are using the Click and Click PLUS PLCs for several reasons. Here are just a few. - Investment is low for the hardware, and the software is free - Standalone PLC with built-in I/O - Communication ability - Ethernet Port, RS232, RS485 - support for Modbus RTU, Modbus TCP, etc. - Ability to expand the system with various modules, including RTD and Thermocouple inputs directly. Regards, Garry ACC Automation https://www.accautomation.ca
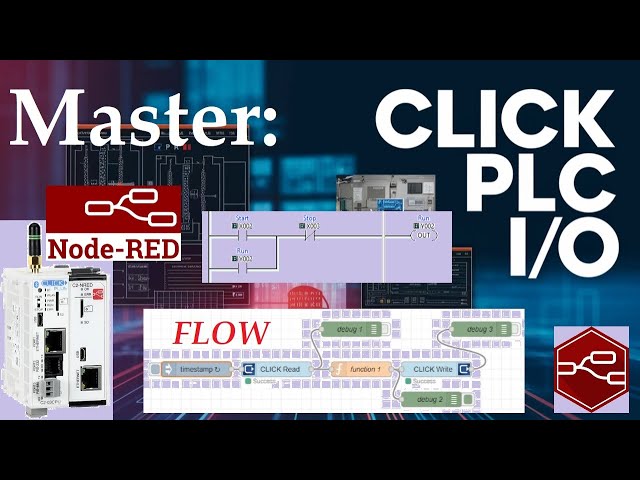
Master Node-Red C2-NRED Control of Click PLC I/O
1K views · Mar 31, 2025 accautomation.ca
Controlling the outputs of a PLC by observing the inputs is a fundamental concept in automation and programming. This guide will examine how the C2-NRED Node-RED module works with the Click PLC inputs and outputs. This is an exciting step into the world of automation and control systems. Imagine efficiently managing inputs and outputs using the C2-NRED module and the Click PLUS PLC. This powerful pairing helps streamline processes and boost efficiency in many different applications. We will explore how these technologies work together and how they can transform control systems. You might wonder how flow and ladder logic programming can control the same output using the same inputs. Stay tuned to learn how the seamless integration of the C2-NRED module and Click PLUS PLC can improve your control processes with greater precision and effectiveness. Let's dive in! More information can be obtained at our website. This includes all of the links mentioned in this video. https://accautomation.ca/master-node-red-c2-nred-control-of-click-plc-i-o/ 00:00 Master Node-Red C2-NRED Control of Click PLC I/O 01:10 What is a PLC Scan? 02:41 C2-NRED Full Control 03:40 Click PLUS PLC Ladder Logic 05:01 Modifying the Flow Program 06:11 Click PLUS PLC Ladder Logic Program Previously, we looked at the following using C2-NRED Node-RED: CLICK PLUS C2-NRED: Easy Install for PLC Module! https://accautomation.ca/click-plus-c2-nred-easy-install-for-plc-module/ https://youtu.be/ZFgcVwCYCRk Unleash Innovation: Node-RED Flow in Click PLC https://accautomation.ca/unleash-innovation-node-red-flow-in-click-plc/ https://youtu.be/JcFX6kK36p4 CLICK PLCs were designed with simplicity in mind, providing reliable control at a low cost and with little to no learning curve. This simplicity makes CLICK a perfect solution for small machines, home automation projects, pneumatic applications, or anywhere a simple system needs a budget-saving control solution. Building on the original CLICK's simple design, the new CLICK PLUS PLCs offer the same practical control but with surprising bells and whistles. Using the same FREE, streamlined PLC programming software as its predecessor, the CLICK PLUS PLCs provide no-headache programming combined with advanced capabilities like Wi-Fi communication and data logging. The Click and Click PLUS PLC series can be found at this URL: https://accautomation.ca/series/click-plc/ Features of the new Click PLUS PLC (C2-0xCPU) include the following: Micro USB DHCP support DNS support Wi-Fi (programming and Modbus TCP) Bluetooth (Wi-Fi) provisioning SD Card (Data Logging) Data Logger Network Time Service MQTT (Publish/Subscribe) Required PLC Password Disable Ports Strong Password Support Disable Ping Response Encrypted Password Transfer We are using the Click and Click PLUS PLCs for several reasons. Here are just a few. - Investment is low for the hardware, and the software is free - Standalone PLC with built-in I/O - Communication ability - Ethernet Port, RS232, RS485 - support for Modbus RTU, Modbus TCP, etc. - Ability to expand the system with various modules, including RTD and Thermocouple inputs directly. Regards, Garry ACC Automation https://www.accautomation.ca
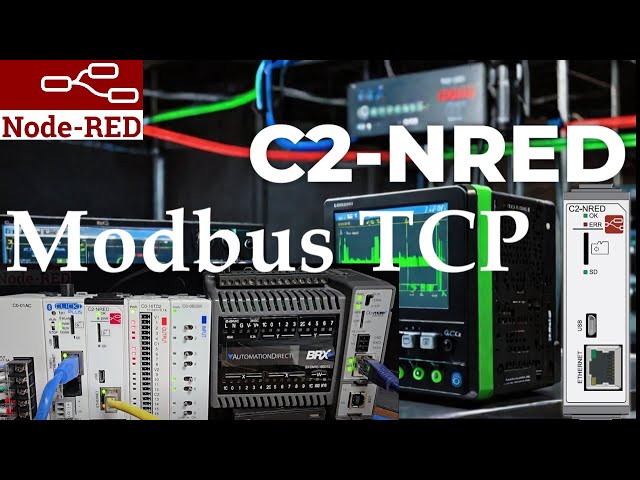
How to Master Modbus TCP Communication with Node-RED?
1K views · May 19, 2025 accautomation.ca
How to Master Modbus TCP Communication with Node-RED? We will now establish communication using Modbus TCP from the C2-NRED module to the Ethernet ports of the BRX Do-More and Click PLCs. Previously, we installed version 5.31.0 of the node-red-modbus-contrib package. We utilized the C2-NRED Package Compatibility Finder to locate and download this Node-RED package. Efficient PLC communication is essential for seamless operations. In this process, we will use the installed Modbus nodes to read 10 registers from the BRX Do-More PLC and write these values to the Click PLUS PLC. This will be done through the Ethernet port on the C2-NRED module. The C2-NRED Node-RED module is a versatile platform for integrating different systems and enhancing the overall efficiency of industrial setups. Let's get started. More information can be obtained at our website. This includes all of the links mentioned in this video. https://accautomation.ca/c2-nred-to-brx-do-more-click-plcs-modbus-tcp/ 00:00 C2-NRED to BRX Do-More & Click PLCs: Modbus TCP! 01:13 Setting up the BRX Do-More PLC 02:46 Node-RED C2-NRED Modbus Flow 04:22 C2-NRED Modbus TCP Flow to Read BRX Do-More PLC 07:39 Setting up the Click PLUS PLC 08:42 C2-NRED Modbus TCP Flow to Write to Click PLUS PLC Previously, we looked at the following using C2-NRED Node-RED: CLICK PLUS C2-NRED: Easy Install for PLC Module! https://accautomation.ca/click-plus-c2-nred-easy-install-for-plc-module/ https://youtu.be/ZFgcVwCYCRk Unleash Innovation: Node-RED Flow in Click PLC https://accautomation.ca/unleash-innovation-node-red-flow-in-click-plc/ https://youtu.be/JcFX6kK36p4 Master Node-Red C2-NRED Control of Click PLC I/O https://accautomation.ca/master-node-red-c2-nred-control-of-click-plc-i-o/ https://youtu.be/AGiDeqQ8PTg Click PLC & AEDES MQTT: What is the Big Deal? https://accautomation.ca/click-plc-aedes-mqtt-what-is-the-big-deal/ https://youtu.be/Ilb5IFqOrNo How to Use the Click PLC C2-NRED Package Finder https://accautomation.ca/how-to-use-the-click-plc-c2-nred-package-finder/ https://youtu.be/q9etRrsnQ9w CLICK PLCs were designed with simplicity in mind, providing reliable control at a low, low cost and with little to no learning curve. This simplicity makes CLICK a perfect solution for small machines, home automation projects, pneumatic applications or anywhere a simple system needs a budget-saving control solution. Building on the original CLICK s simple design, the new CLICK PLUS PLCs offer the same practical control but with some surprising bells and whistles. Using the same FREE, streamlined PLC programming software as its predecessor, the CLICK PLUS PLCs provide no-headache programming combined with advanced capabilities like Wi-Fi communication and data logging. The Click and Click PLUS PLC series can be found at this URL: https://accautomation.ca/series/click-plc/ Features of the new Click PLUS PLC (C2-0xCPU) includes the following: Micro USB DHCP support DNS support Wi-Fi (programming and Modbus TCP) Bluetooth (Wi-Fi) provisioning SD Card (Data Logging) Data Logger Network Time Service MQTT (Publish/Subscribe) Required PLC Password Disable Ports Strong Password Support Disable Ping Response Encrypted Password Transfer We are using the Click and Click PLUS PLCs for several reasons. Here are just a few. - Investment is low for the hardware, and the software is free - Standalone PLC with built-in I/O - Communication ability - Ethernet Port, RS232, RS485 - support for Modbus RTU, Modbus TCP, etc. - Ability to expand the system with various modules, including RTD and Thermocouple inputs directly. Regards, Garry ACC Automation https://www.accautomation.ca