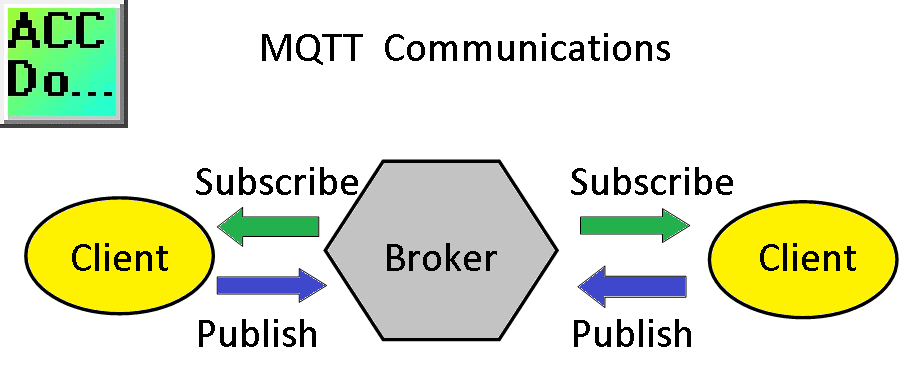
MQTT protocol is used for machine to machine (M2M), internet of things (IoT) communication. This publish/subscribe messaging is used where limited device resources are available or network bandwidth is low. The MQTT protocol provides small size, low power usage, minimized data packets, and efficient distribution of information to one or many receivers.
The Stride MQTT Gateway is an industrial 4.0 hardware component (IIoT – Industrial Internet of Things) that provides isolation and can easily interface with existing Modbus RTU and Modbus TCP communication protocols.
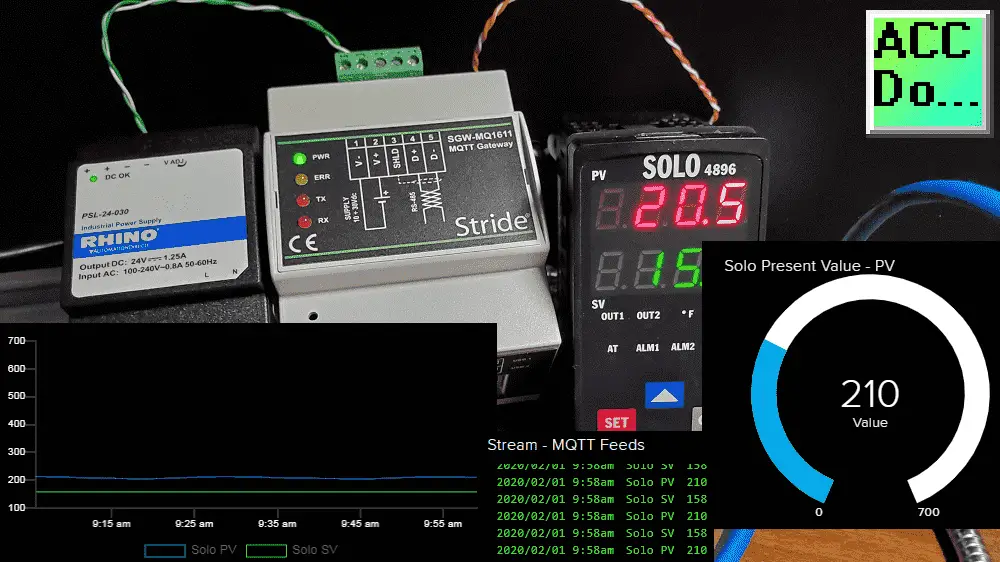
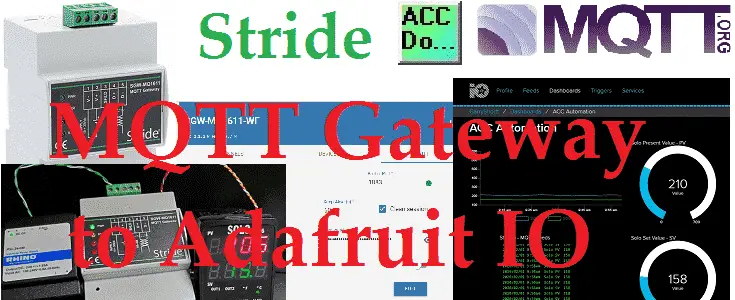
We will again be connecting a Stride MQTT Gateway to a Solo process temperature controller with Modbus RTU(RS485). The MQTT Gateway will communicate to the Adafruit IO Broker. The broker can display, log, and allow us to control the data. This is done in an easily configured interface. Let’s get started.
Previously we have discussed the following for MQTT:
Do-More Simulator MQTT Publish / Subscribe – Video
(Designer Simulator Client – HiveMQ Broker – HiveMQ Client)
BRX Do-More PLC MQTT Communications – Video
(BRX Client – Mosquito Broker – MQTTLens)
Stride MQTT Gateway Unboxing Video
Stride MQTT Gateway Modbus RTU TCP – Video
(Solo Process Temperature Controller – Mosquitto Broker – MQTTlens)
Stride MQTT Gateway Click PLC Modbus RTU TCP – Video
Watch the video below to see the MQTT Gateway communicating to our Solo process temperature controller and Adafruit IO.
What is Adafruit IO
Adafruit IO is the internet of things (IoT) for everyone. It gives you the easiest way to stream, log, and interact with your data and devices. Adafruit IO will act as an MQTT broker on a system.
Watch on YouTube: Introduction to Adafruit IO Video
Adafruit IO Account
io.adafruit.com is the URL to get started.
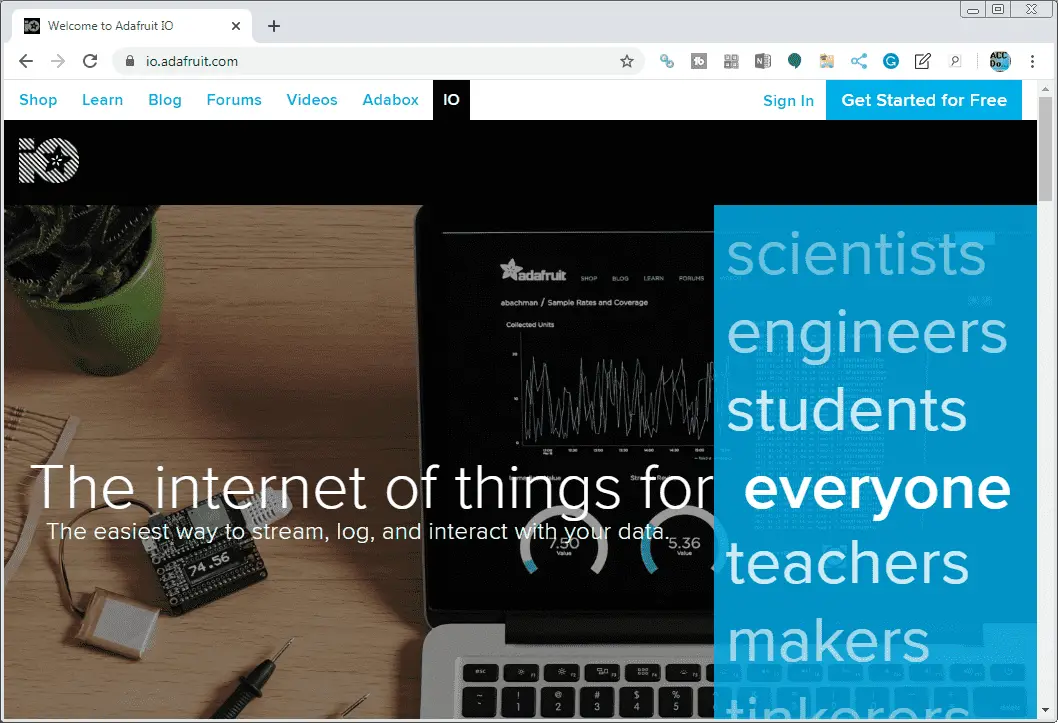
If you do not have an account click ‘Get Started for Free’.
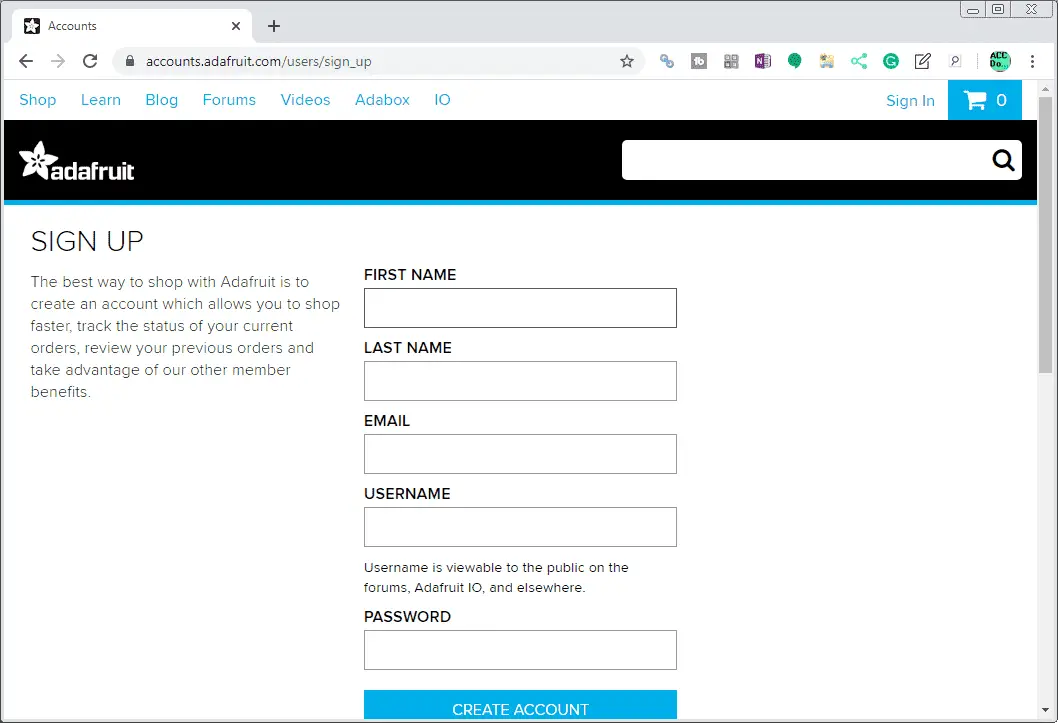
Fill in your first name, last name, email, username, and password to create an account. The USERNAME that you select here will be part of your feed address for MQTT.
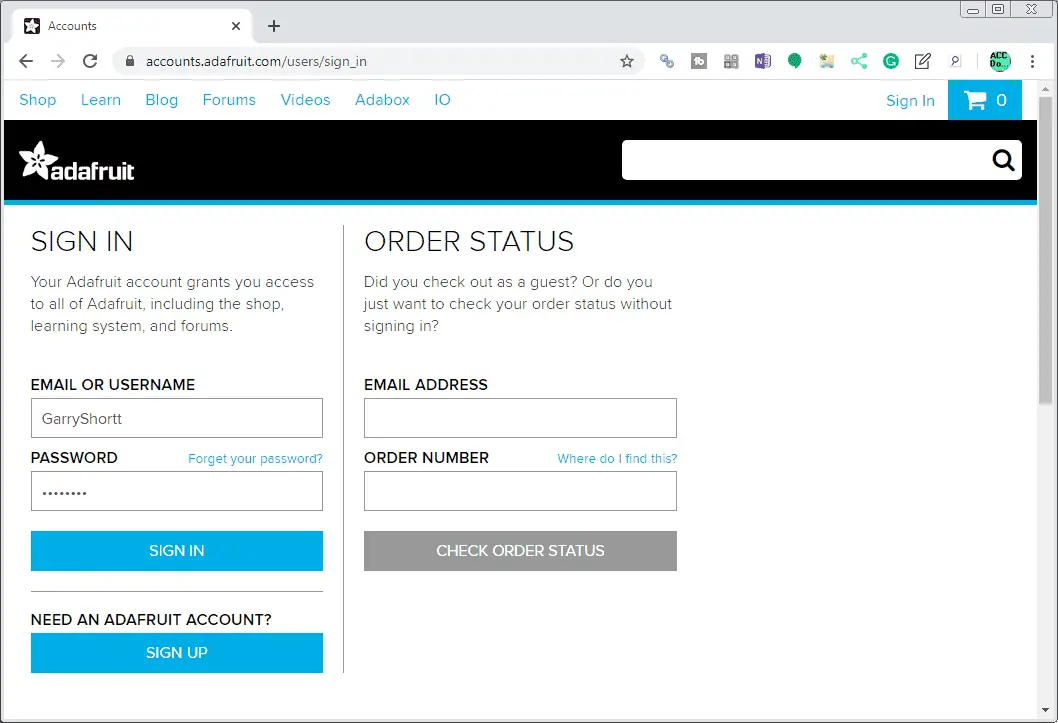
When coming back to the Adafruit IO website, click the sign-in button. You can enter your username or email along with your password to log into the site.
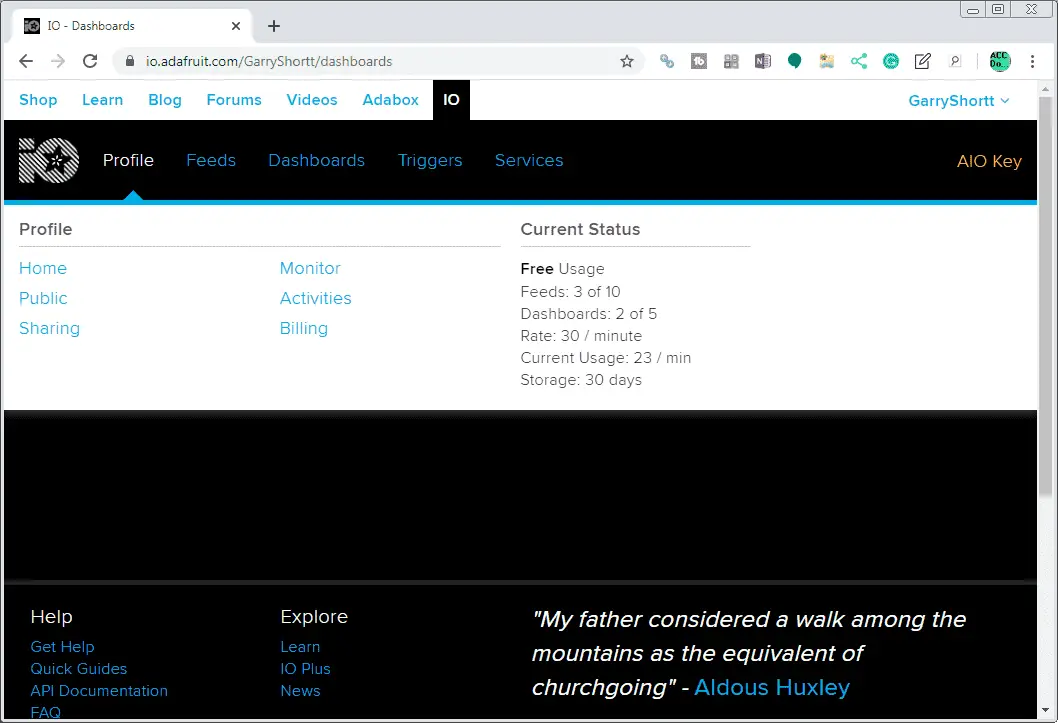
Once you are logged in, you can look at your profile. This will show you your current status. The free usage will allow you to create 10 feeds and 5 dashboards. The feeds (information parameters) rate can be a maximum of 30 per minute. Information will be stored (logged) for 30 days.
Adafruit IO Create Dashboard
A data dashboard is an information tool that visually tracks, analyzes, and displays key performance indicators (KPI). The monitoring of a business, department, or specific process can be achieved.
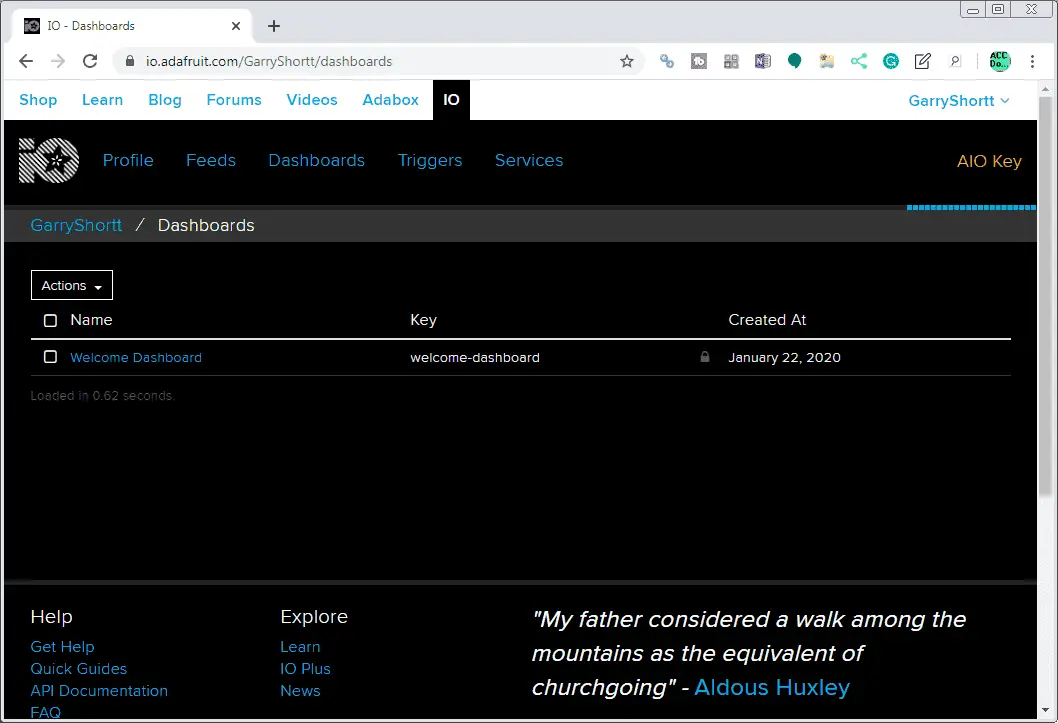
Select dashboards on the main menu. A welcome dashboard will be displayed as a quick introduction to the site.
We will be creating a new dashboard for our information from the Solo process temperature controller.
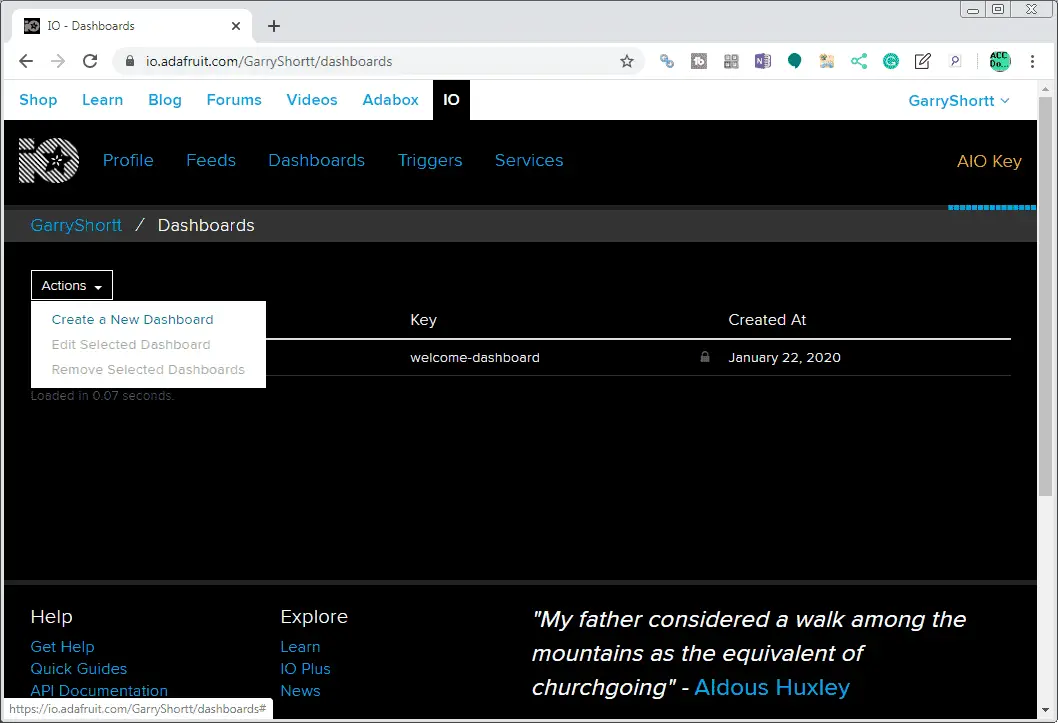
Select the actions button and select ‘Create a New Dashboard’.
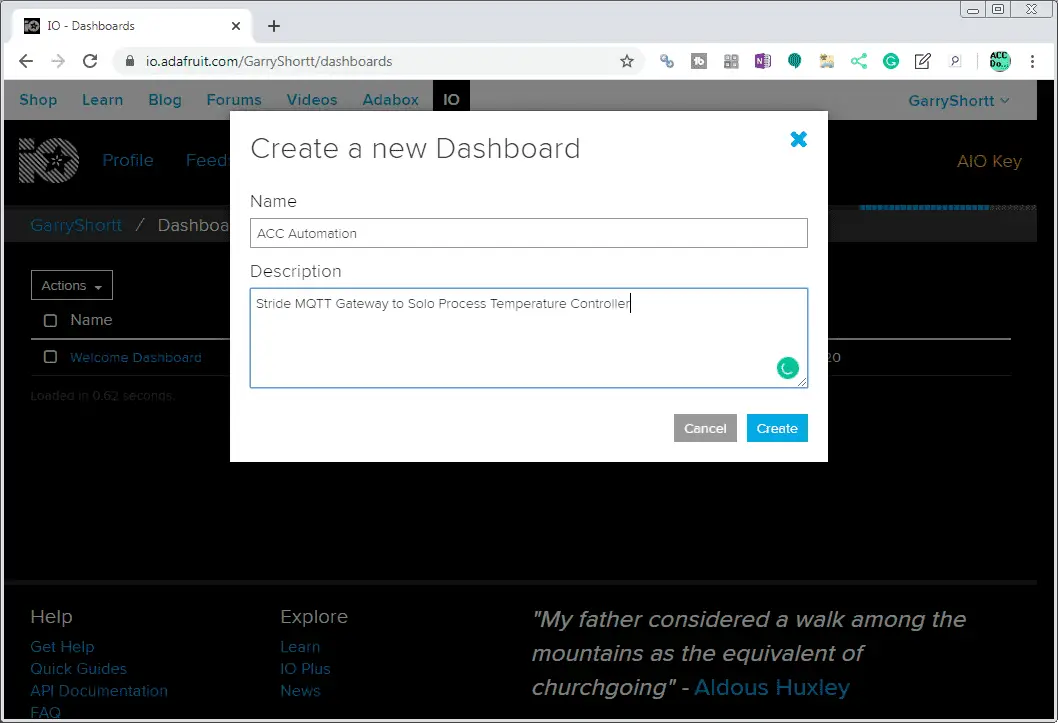
We can now fill in the name and description of our dashboard. In our case, I will name this ACC Automation and describe the following: Stride MQTT Gateway to Solo Process Temperature Controller. Select the Create button.
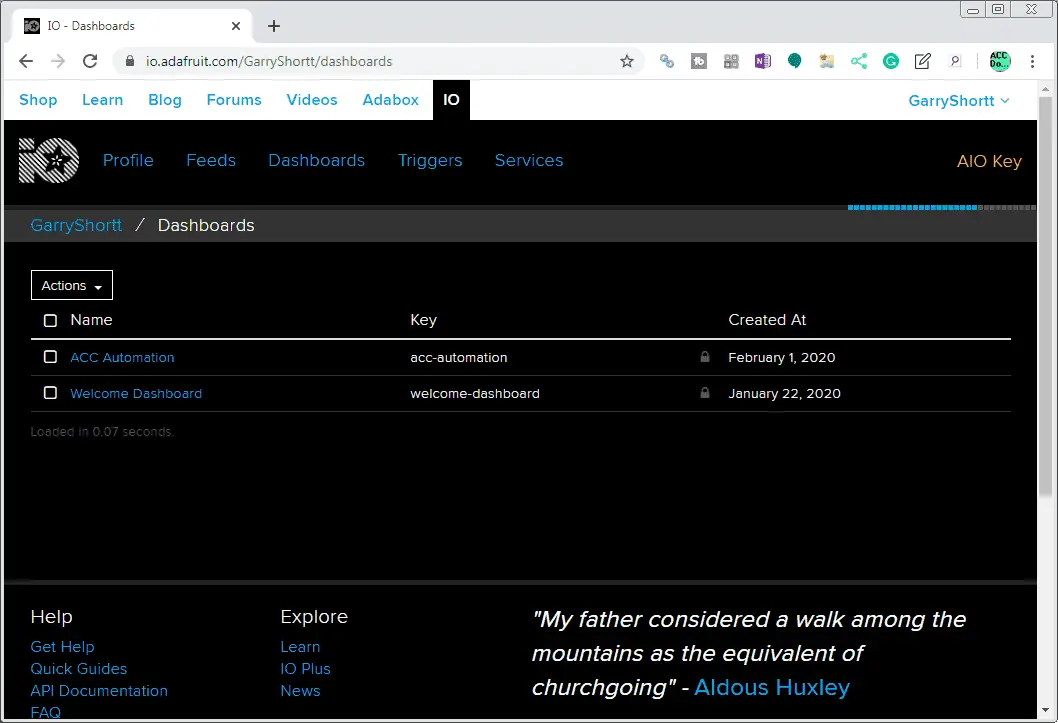
Our new dashboard will now be available on the list. Click on our new dashboard.
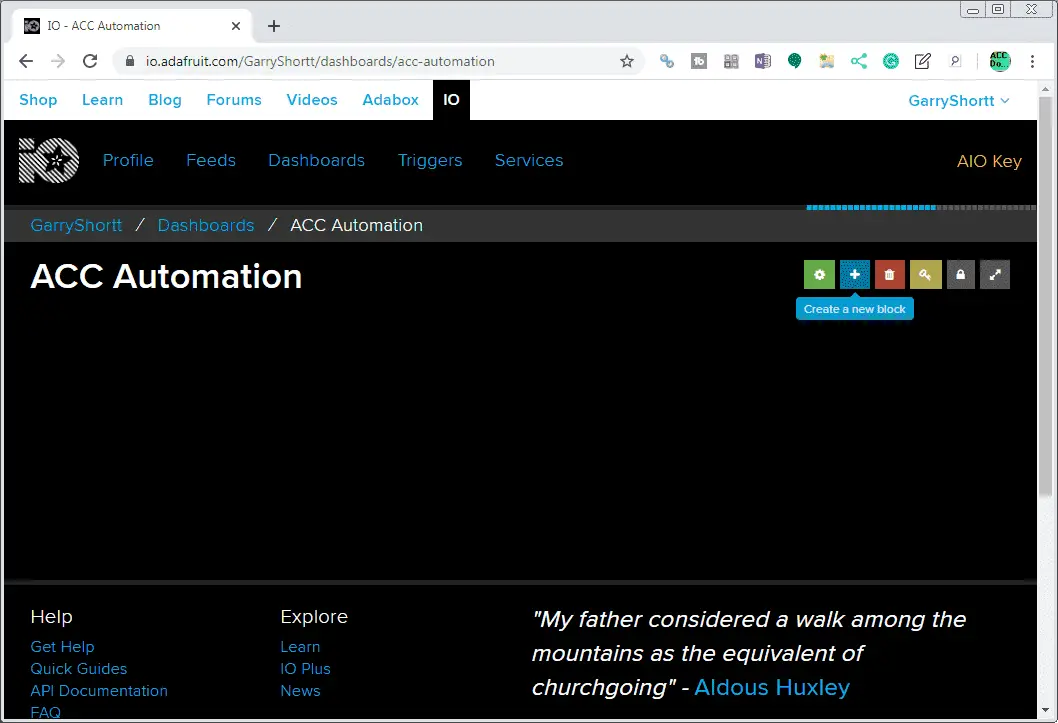
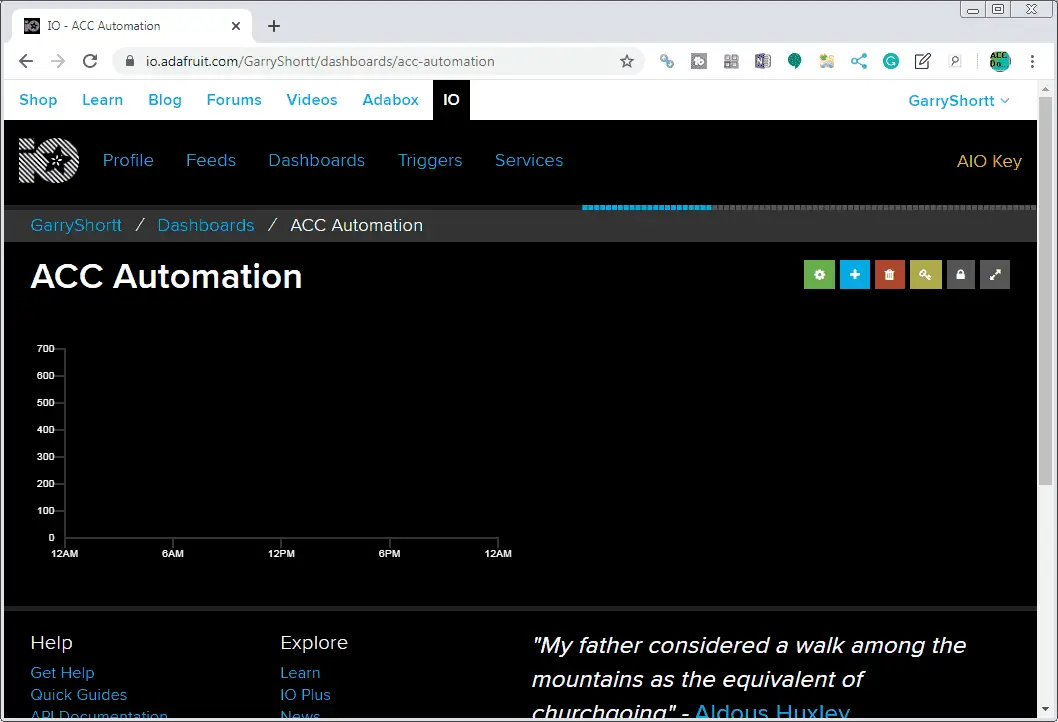
The blank dashboard will be displayed. To the right-hand side, you will see a series of icons. As your cursor passes over them the tool name will be displayed. Select the + sign icon. This is the ‘Create a new block’ icon.
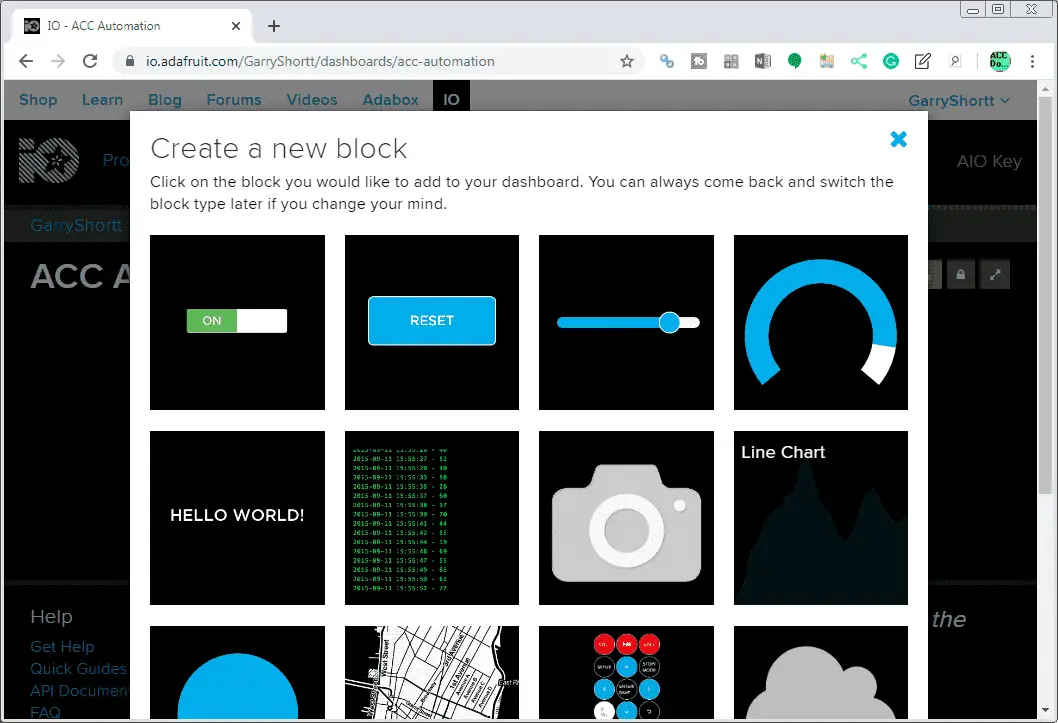
All of the different block items will be shown that you can add to your dashboard. Select the Line Chart.
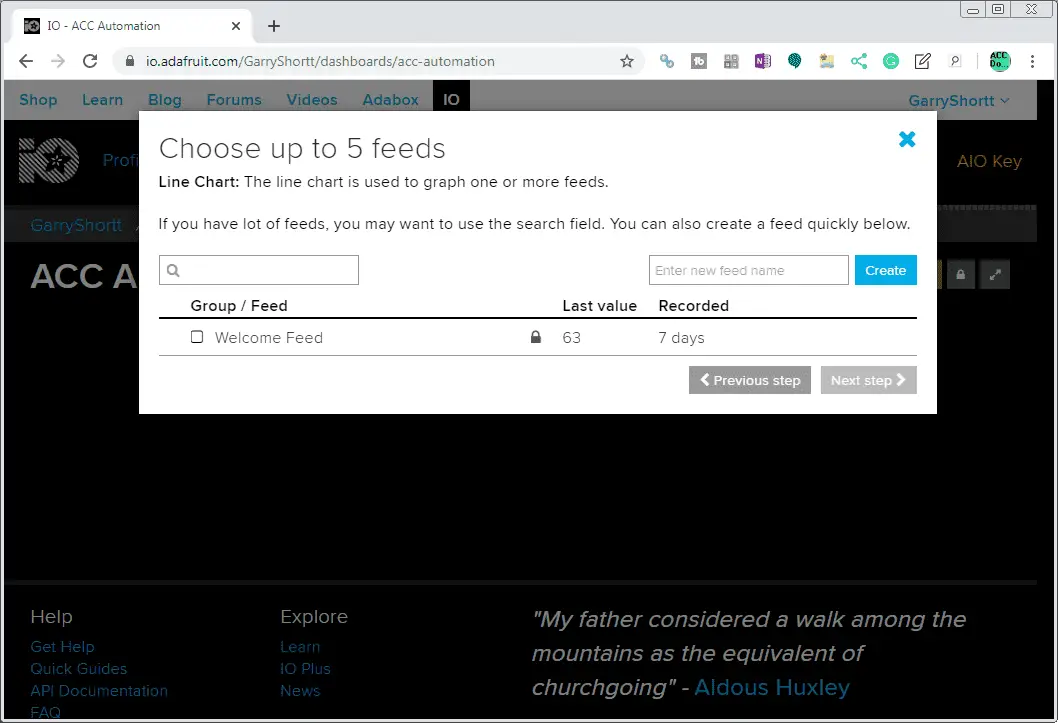
Since we selected the line chart, a maximum of 5 feeds can be selected to display on the chart. We will need to create the feeds that we will display. Enter Solo PV (Solo Present Value) and select the create button. This will add the feed to the list. Also, enter Solo SV (Solo Set Value) and select the create button.
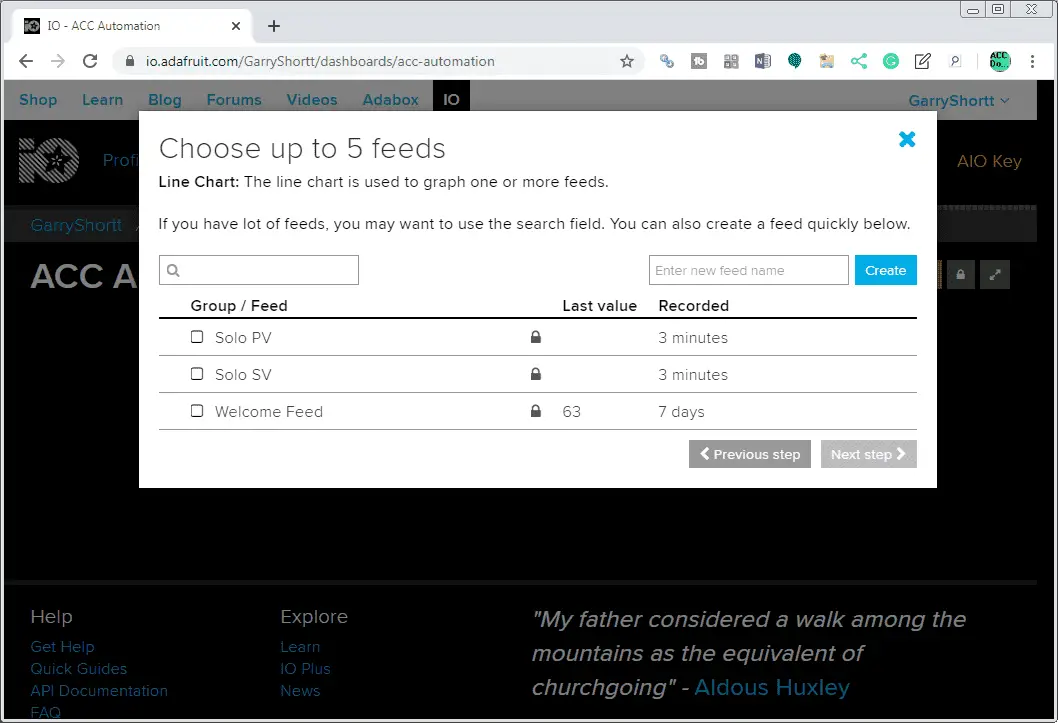
Here are our two new feeds. Select Solo PV and Solo SV.
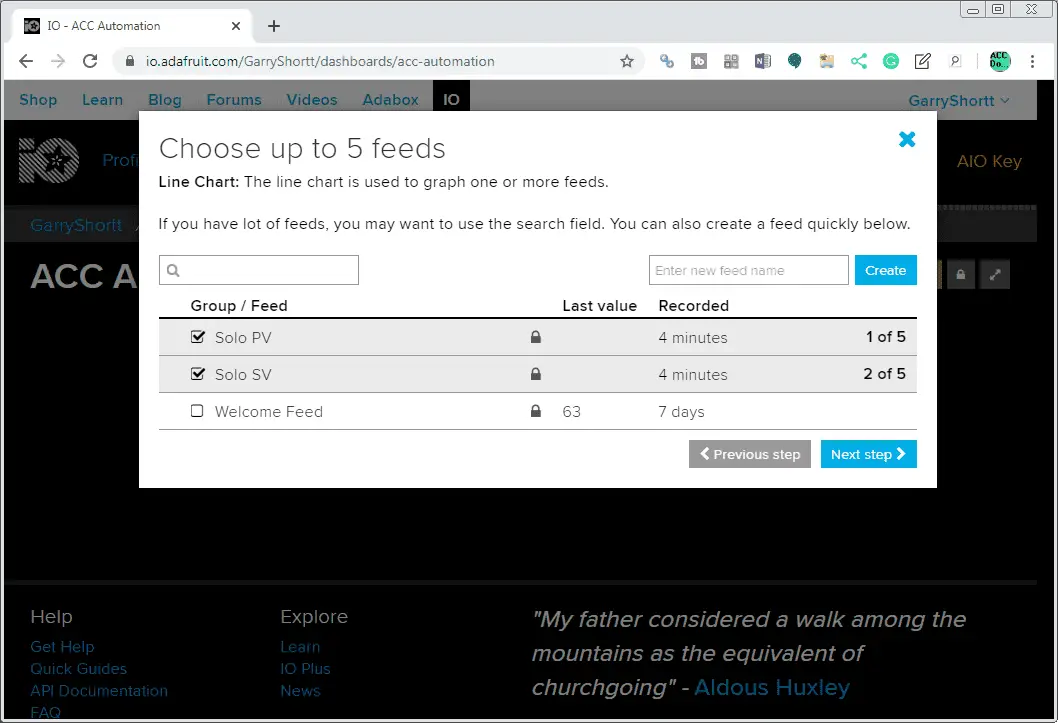
You will notice that the far right of your selection will keep track of the number of feeds selected. Select the ‘Next step’ button.
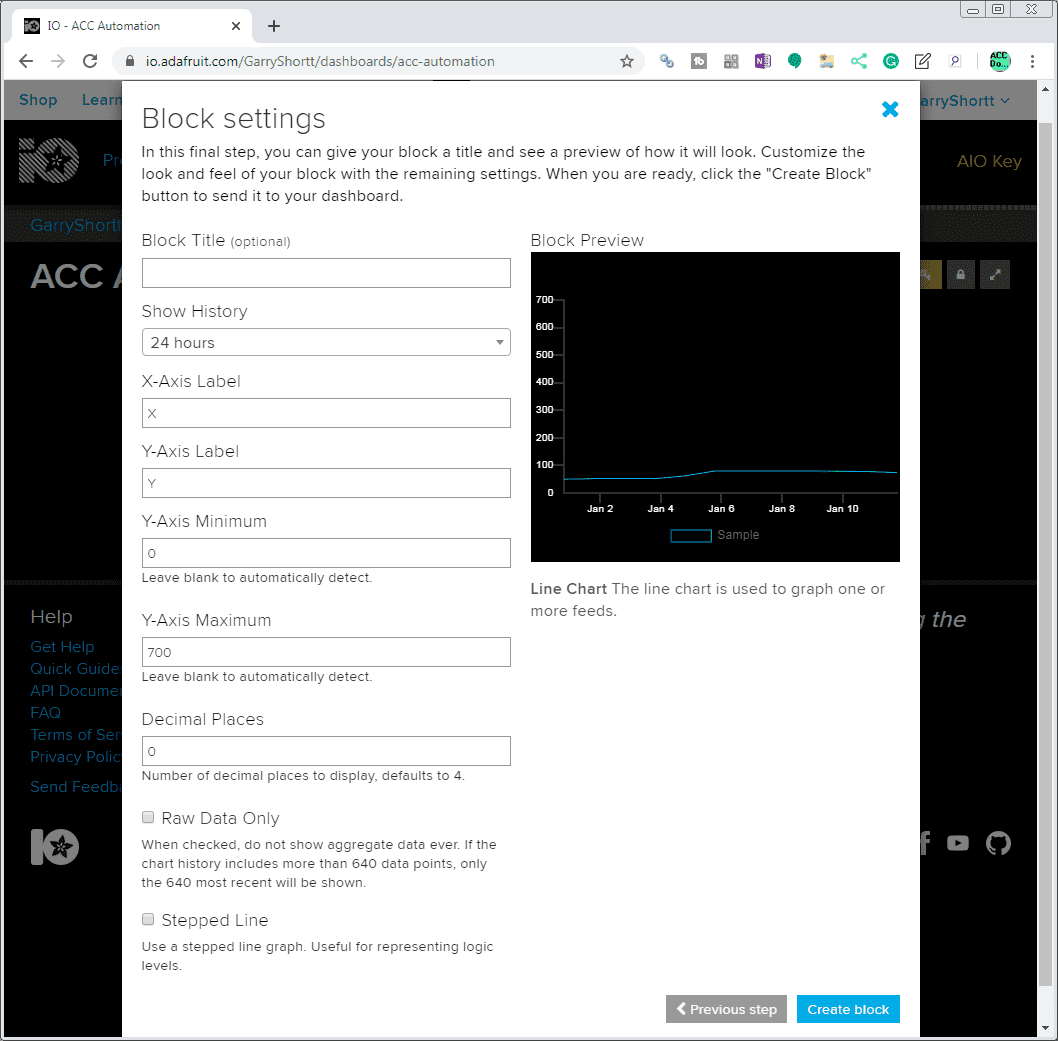
The Block Settings will now be displayed. We can enter a title for our line chart if we want. The Block Preview will show you what your chart will look like on the dashboard. Along the X-axis will be the time. The Y-axis can be set or left blank to automatically detect the range. We will put in 0 and 700 for the minimum and maximum.
Note: 700 will represent 70.0 on our Solo unit.
Select ‘Create block’.
Our dashboard now has its first block to display. Select the + sign icon again to add additional blocks.
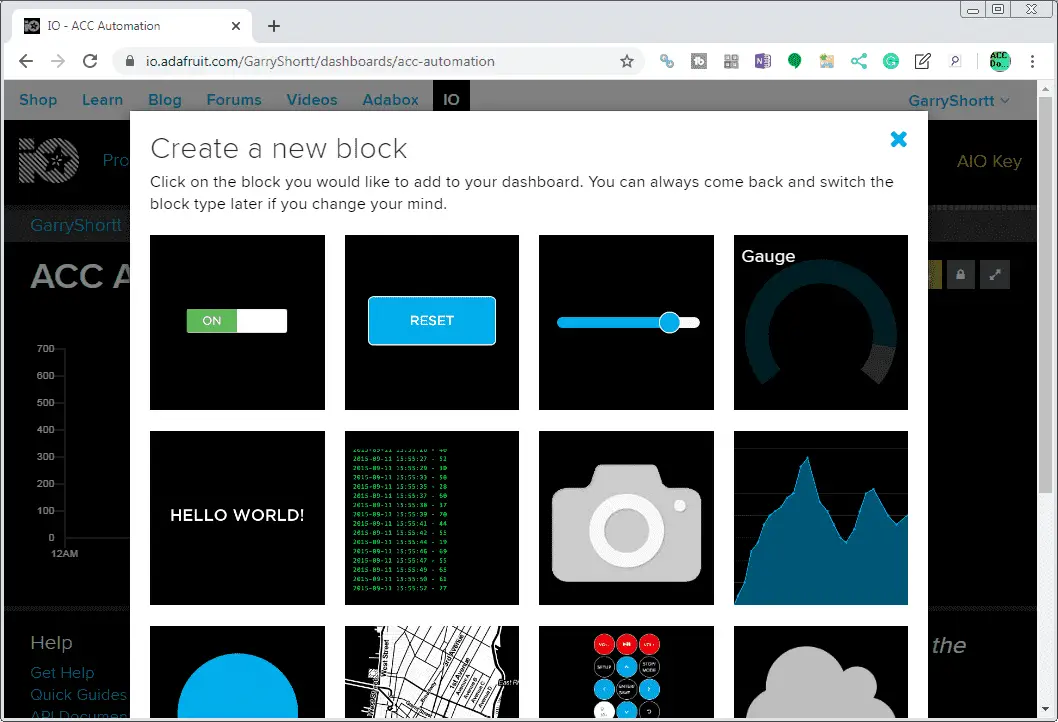
Select the Gauge.
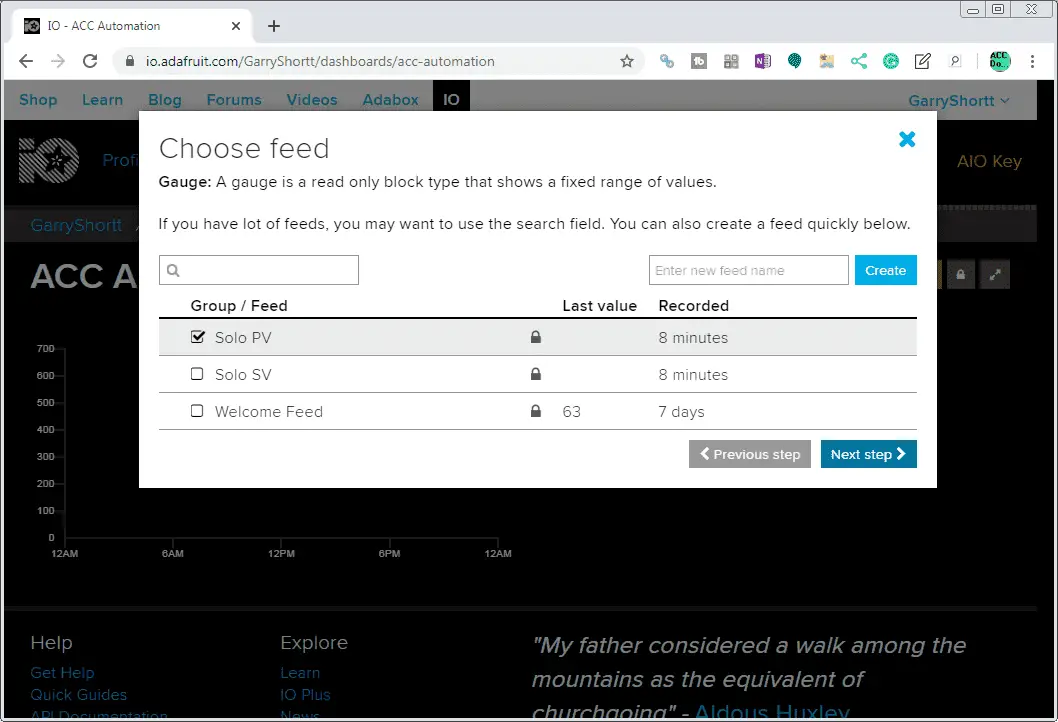
When asked to choose the feed, select Solo PV and click ‘Next step’.
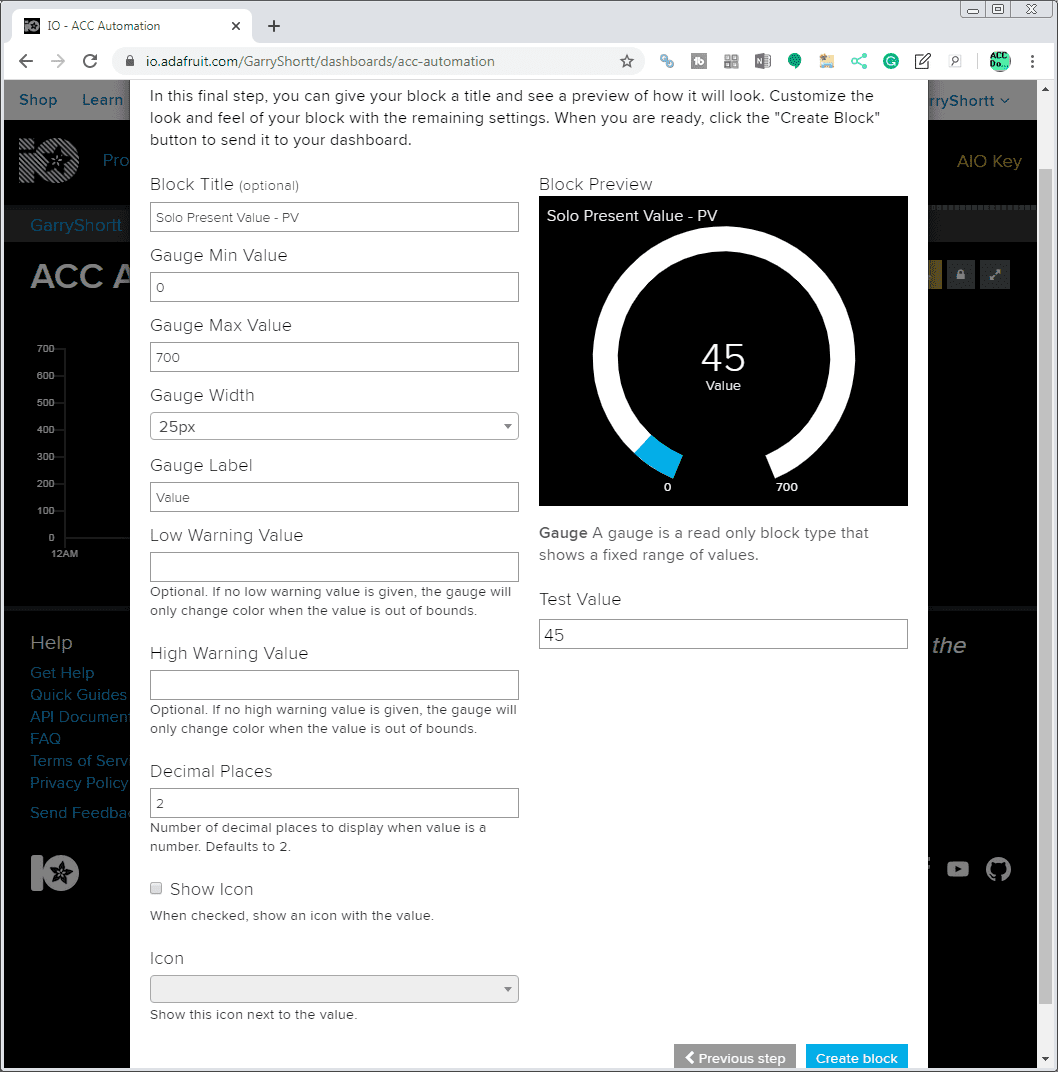
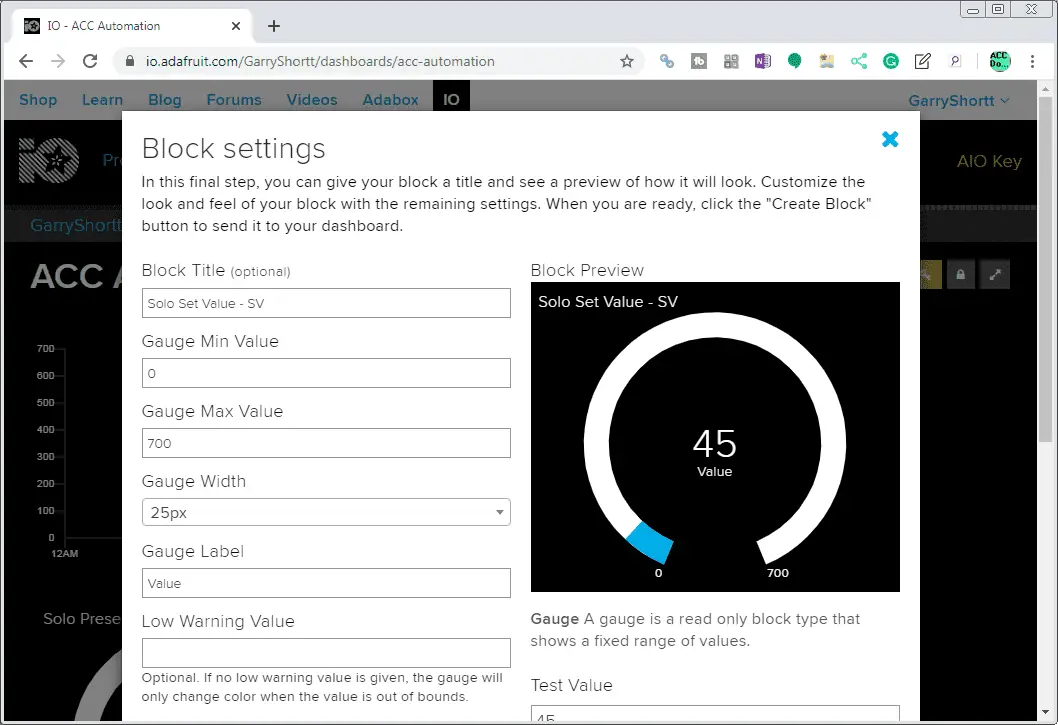
We will name the title ‘Solo Present Value – PV’. Our gauge min and max values will match our line graph. ( 0 and 700)
Select ‘Create block’.
Create another gauge for the Solo Set Value – SV.
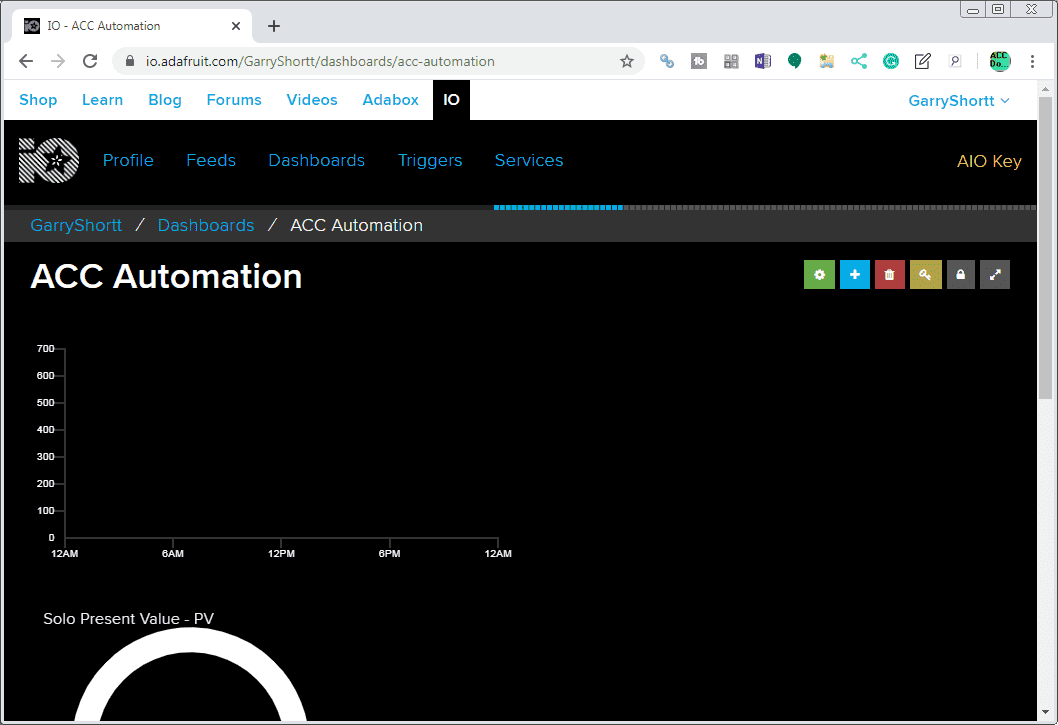
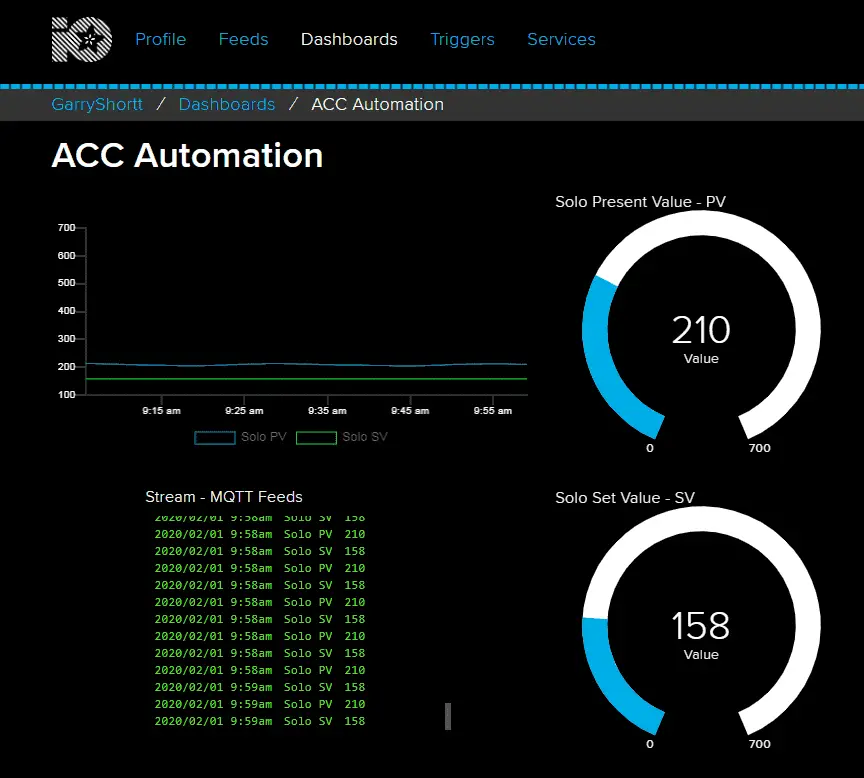
We now have our line chart and two gauges created on our dashboard.
Select the + icon again.
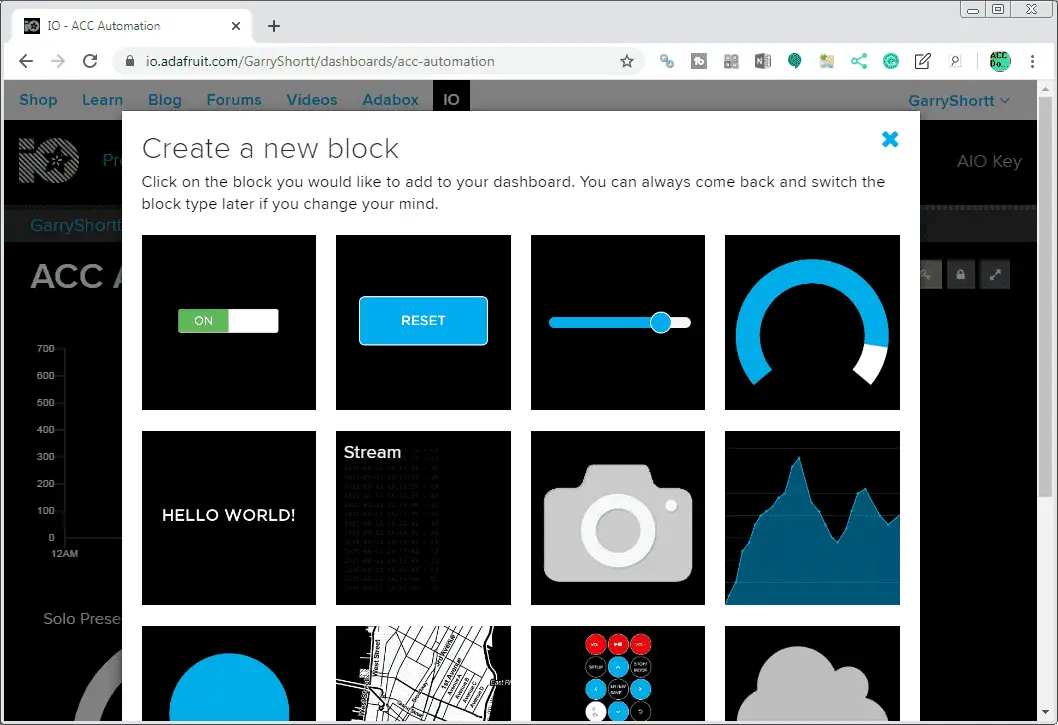
Select the Stream block.
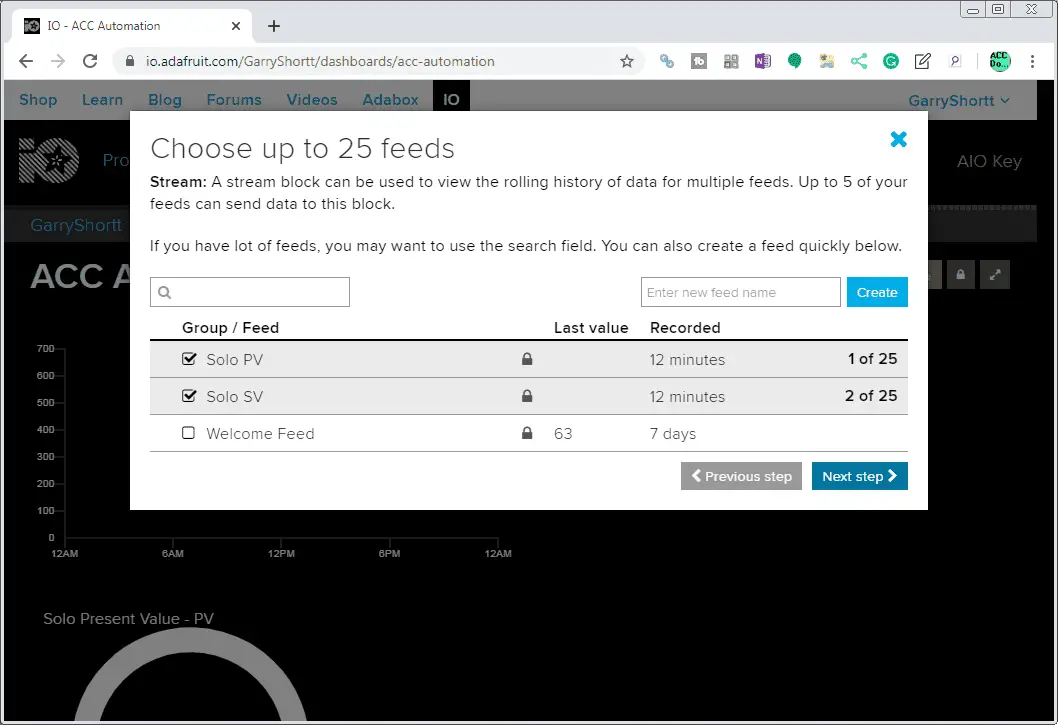
We can have up to 25 feeds for the stream. This will show us the information coming in from our feeds. Select our solo PV and SV feeds and click the ‘Next step’.

Label the block title ‘Stream – MQTT Feeds’ and select ‘Create Block’.
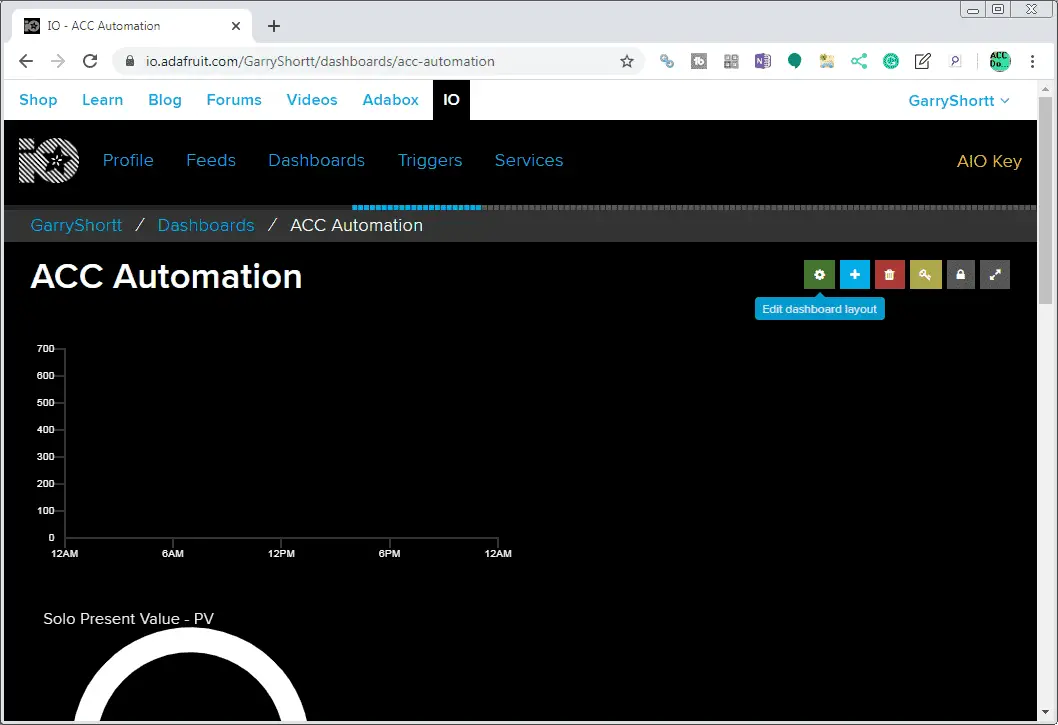
All of our blocks have now been created. We will now arrange the blocks on our dashboard the way we would like them to display. Select the first icon (gear) ‘Edit dashboard layout’.
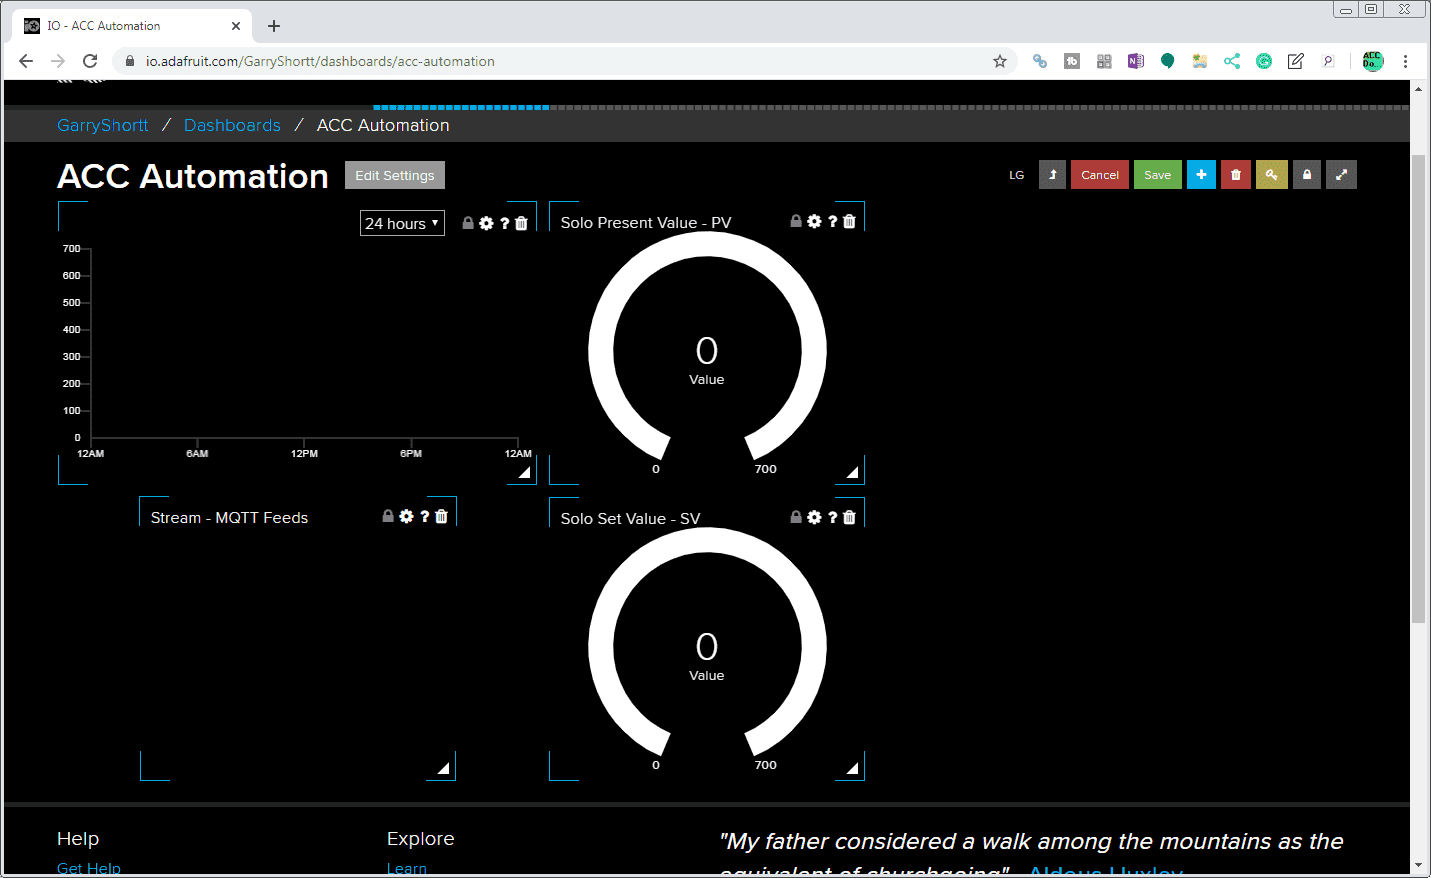
We can now use our mouse to arrange our blocks on the dashboard. When finished click the Save button on the icons.
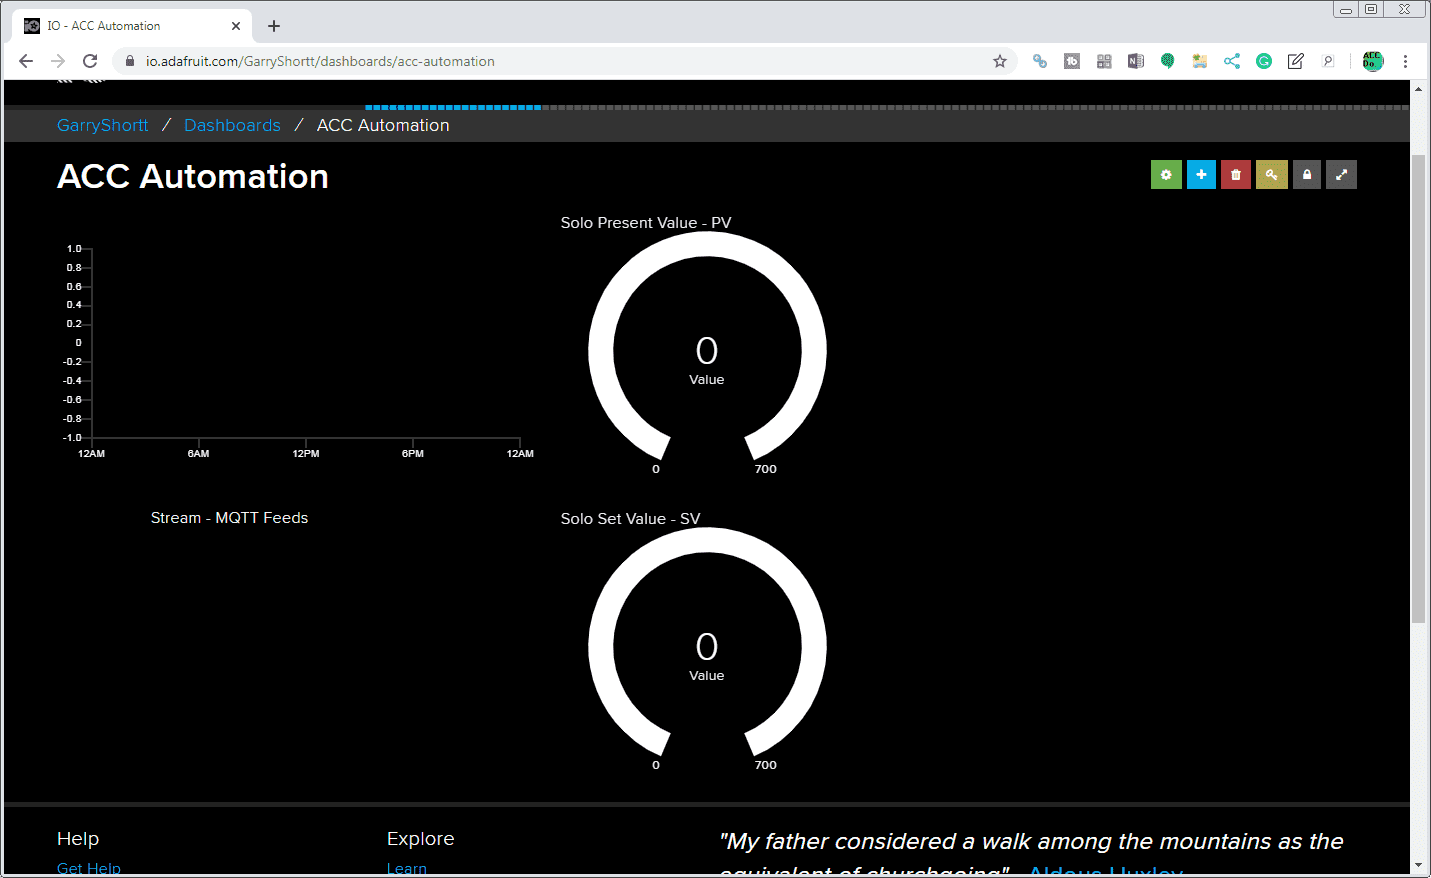
Here is our competed Adafruit IO dashboard.
Watch the video below to see the Adafuit IO dashboard in action.
Adafruit IO Feeds and Passwords
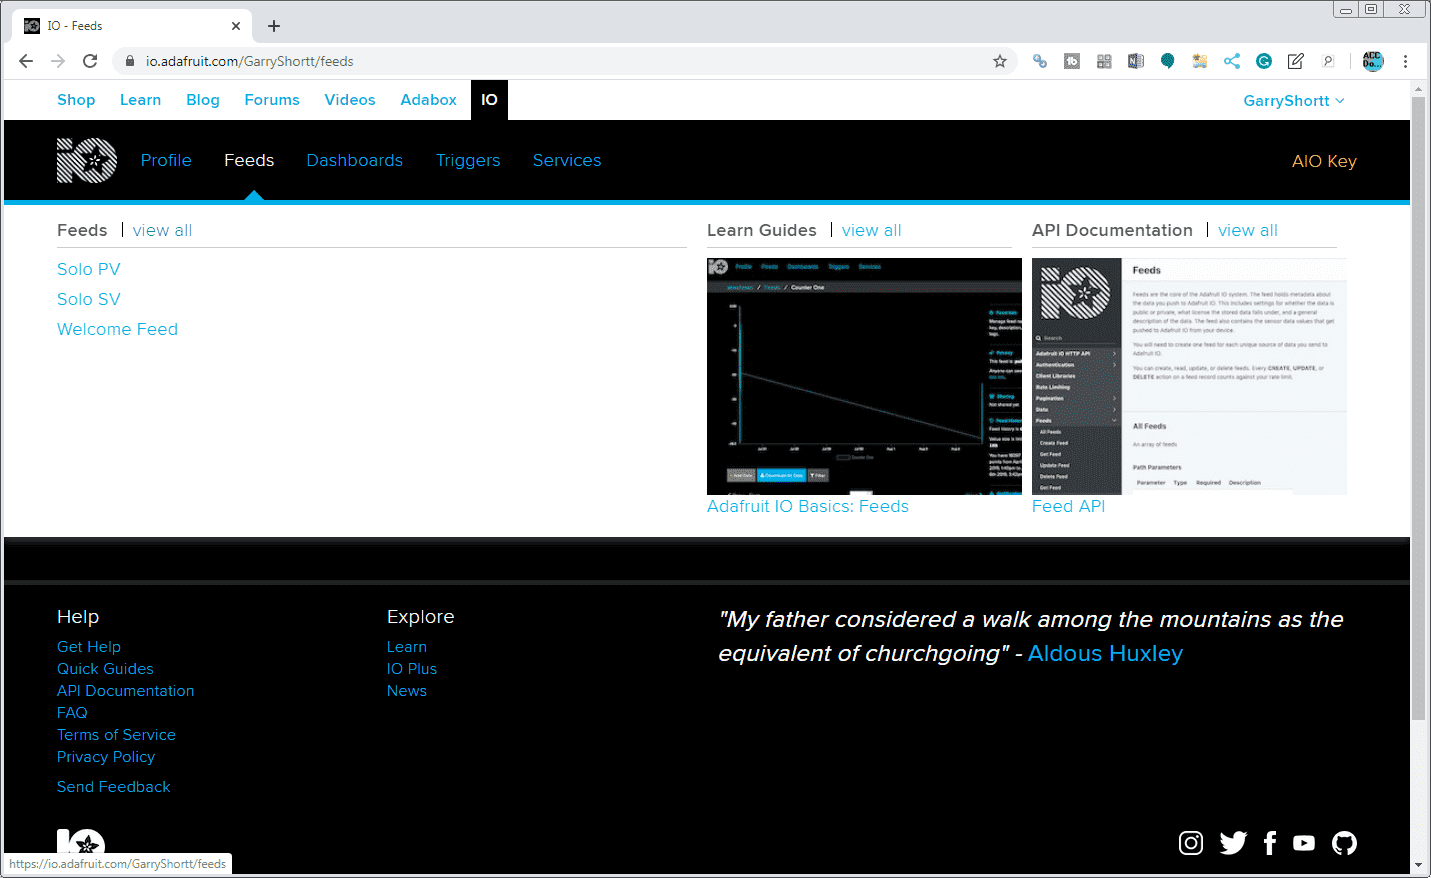
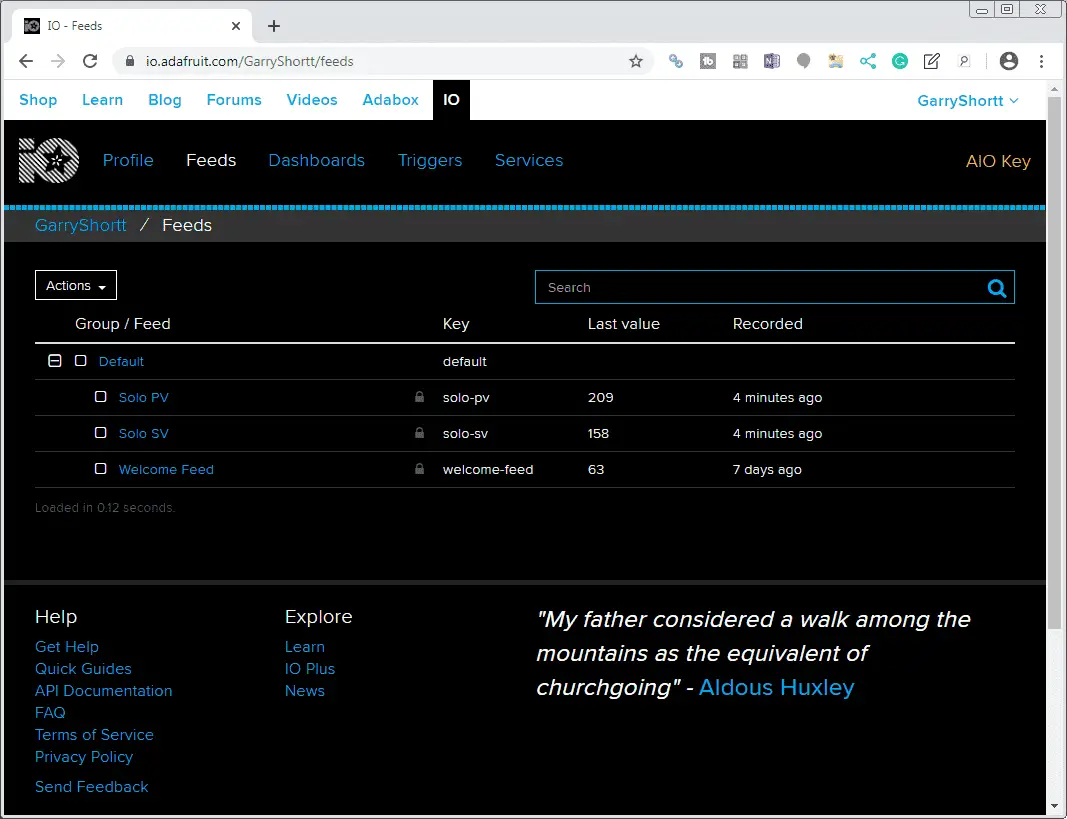
Select the Feeds from the main menu. Select view all.
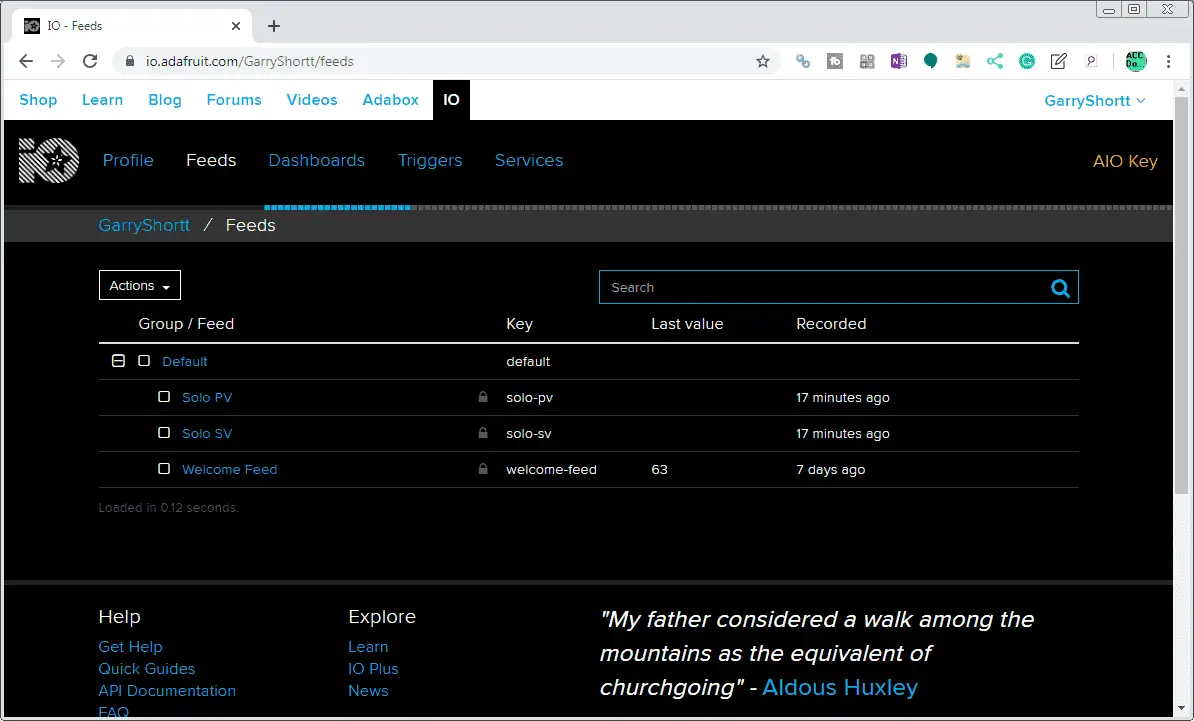
The list of our feeds will now be displayed. Solo PV is solo-pv and Solo SV is solo-SV for the feed name. When requesting feed information from Adafruit IO we will use the following format. USERNAME/feeds/key
Solo PV = GarryShortt/feeds/solo-pv
Solo SV = GarryShortt/feeds/solo-sv
Select the AIO key.
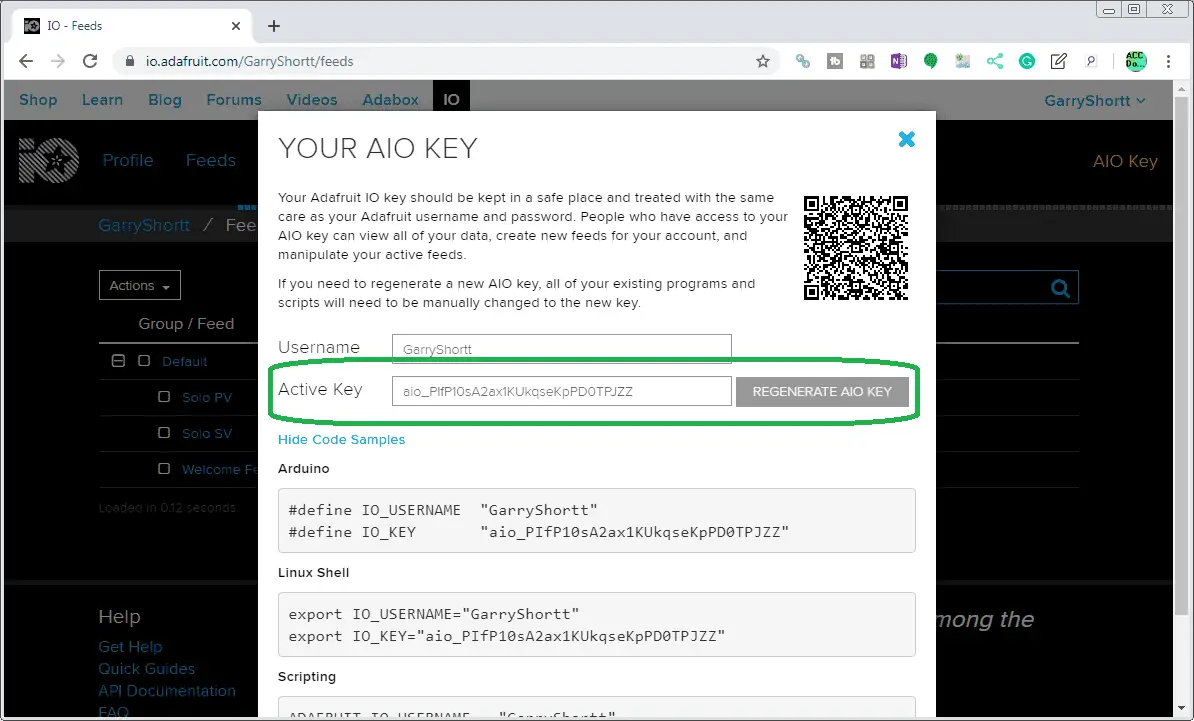
This will show you your username and password (Active Key). Connecting to the Adafruit IO MQTT broker will require this information.
Stride MQTT Gateway Setup
We will modify our existing Stride MQTT Gateway program. Using a web browser we will call up the default IP address of our MQTT Gateway. Our user name is admin and the password is accautomation.
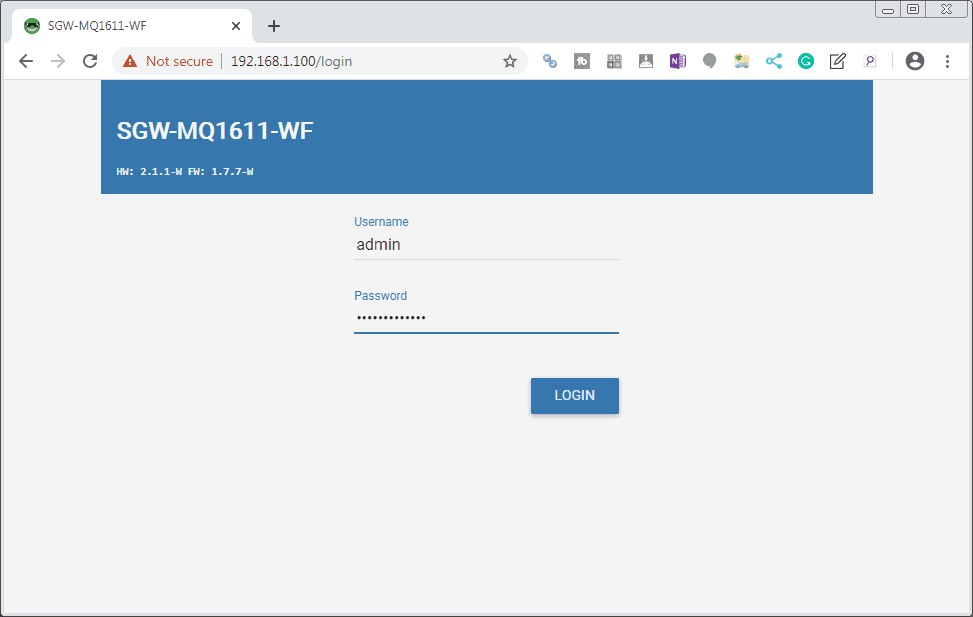
Select Login.
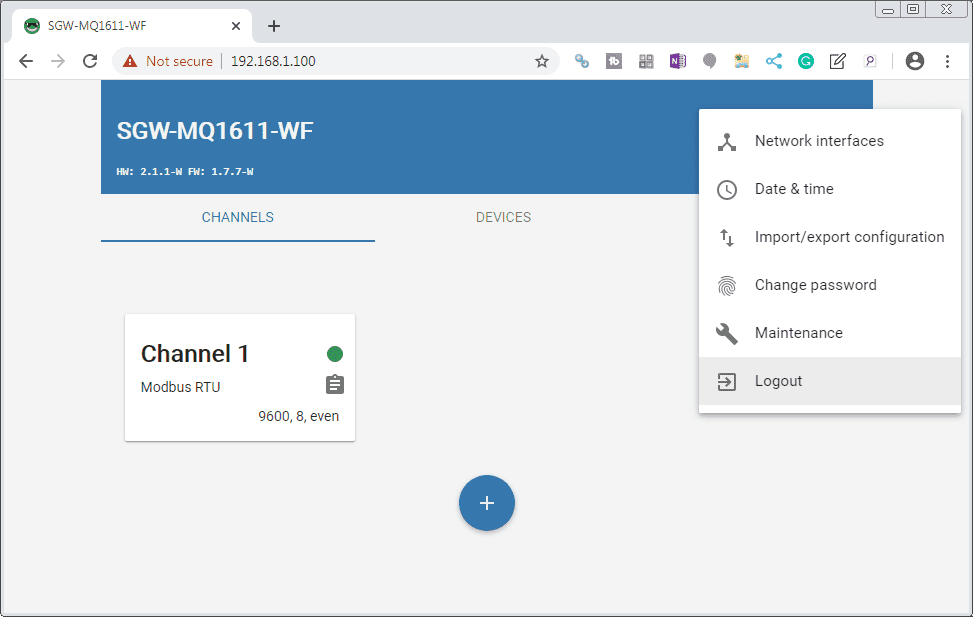
Network Interfaces
Select the three dots in the upper left corner and select network interfaces.
Confirm that we have the preferred and alternate DNS servers specified. These were set last time to the Google Domain Name System (DNS) server.
MQTT Settings
Select the MQTT tab.
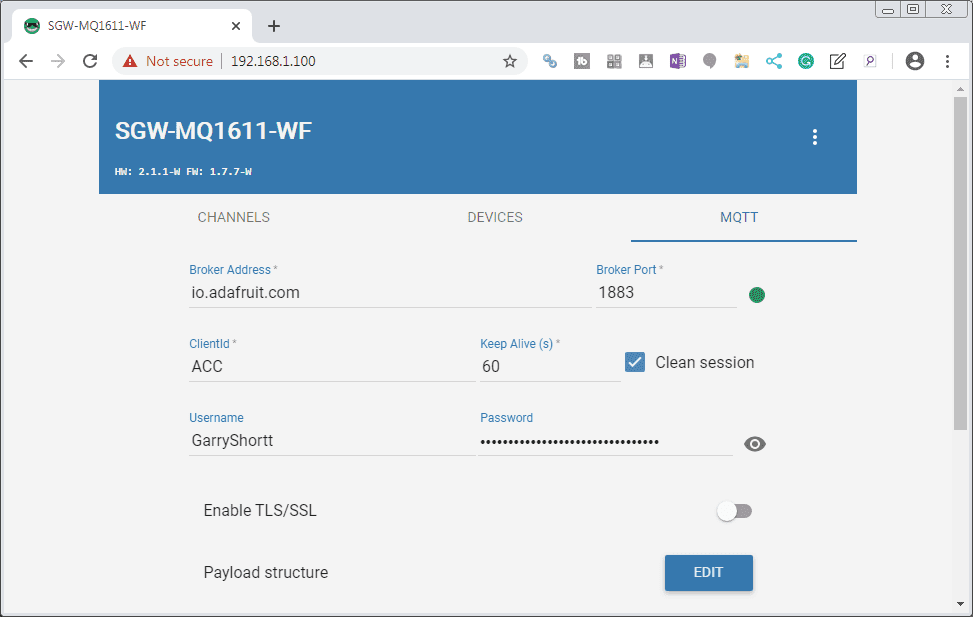
The broker address for Adafruit IO is io.adafruit.com. The broker port will be left as the default 1883. A more secure selection can be made if required.
Our username and password (Active Key) can be entered here.
Once we have communication with adafruit IO, you will see the green led indicator light.
Devices Settings
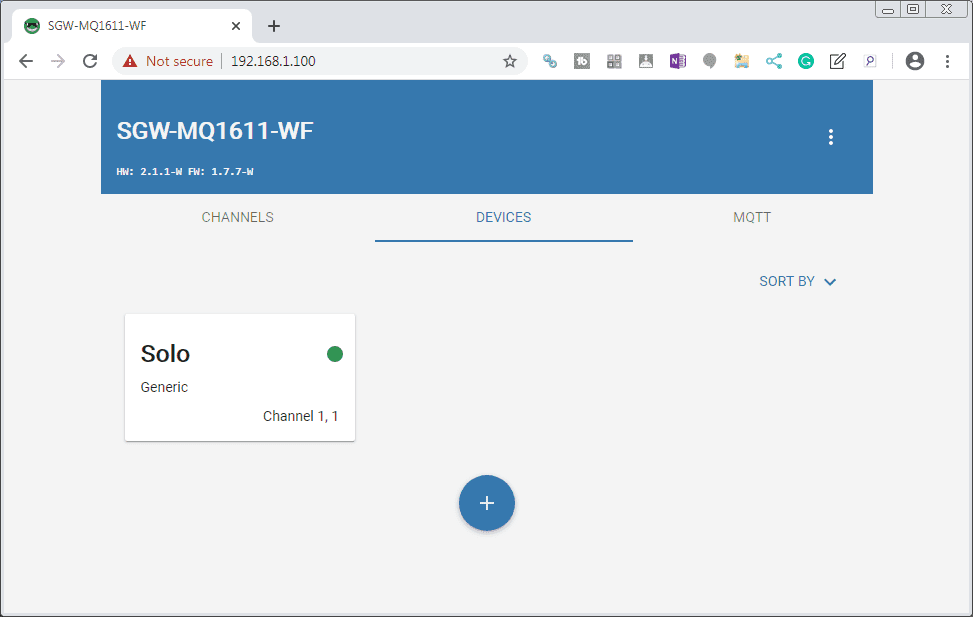
Select the solo device that we have programmed previously. See above for links for setting up the Modbus RTU addresses for the Solo.
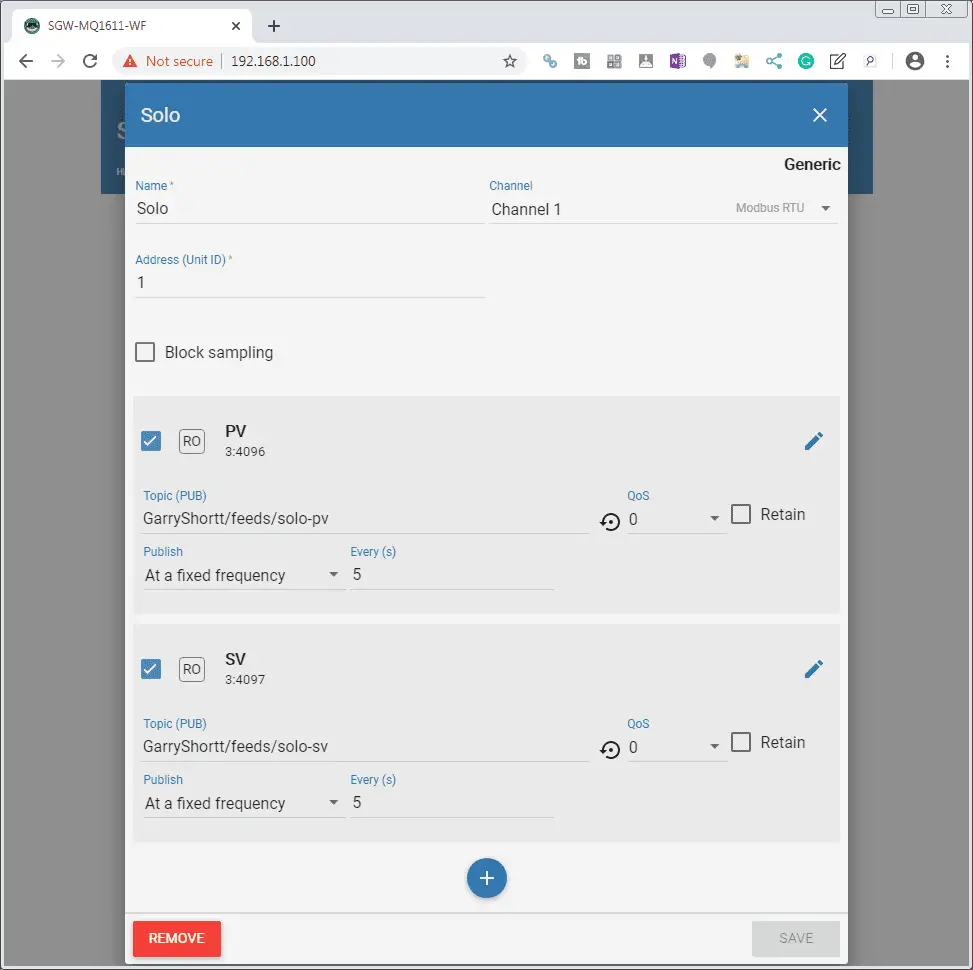
Our solo PV and SV will be set to read-only. The topic (publish) will be set for the feed locations mentioned above.
The publish frequency will be set at a fixed interval of 5 seconds. This means that we will have 12 updates per minute for the present and set values. 24 updates per minute will below our 30 allowed by our free Adafruit IO account.
Channels
Our channel for our MQTT Gateway on Modbus RTU has already been set up previously. See the above links for details.
Export our MQTT Gateway Configuration
We can export our configuration to ensure that we may restore it if anything happens to our Stride MQTT Gateway unit.
Logout of the MQTT Gateway.
We have now completed our Stride MQTT Gateway programming for Adafruit IO.
Watch the video below to see the Stride MQTT Gateway gathering information from our temperature controller and displaying it on our Adafuit IO dashboard.
Viewing our Adafruit IO Dashboard
As our gateway collects data from the solo process temperature controller, it will publish this to our Adafruit IO dashboard.
Here is our working dashboard.
Downloading our Logged Files from Adafruit IO
Adafruit IO will log our feeds for 30 days. We can download the logged files for each of our feeds.
Select feeds from the main menu.
Select the feed that we want to view. In our case, we will select the Solo PV.
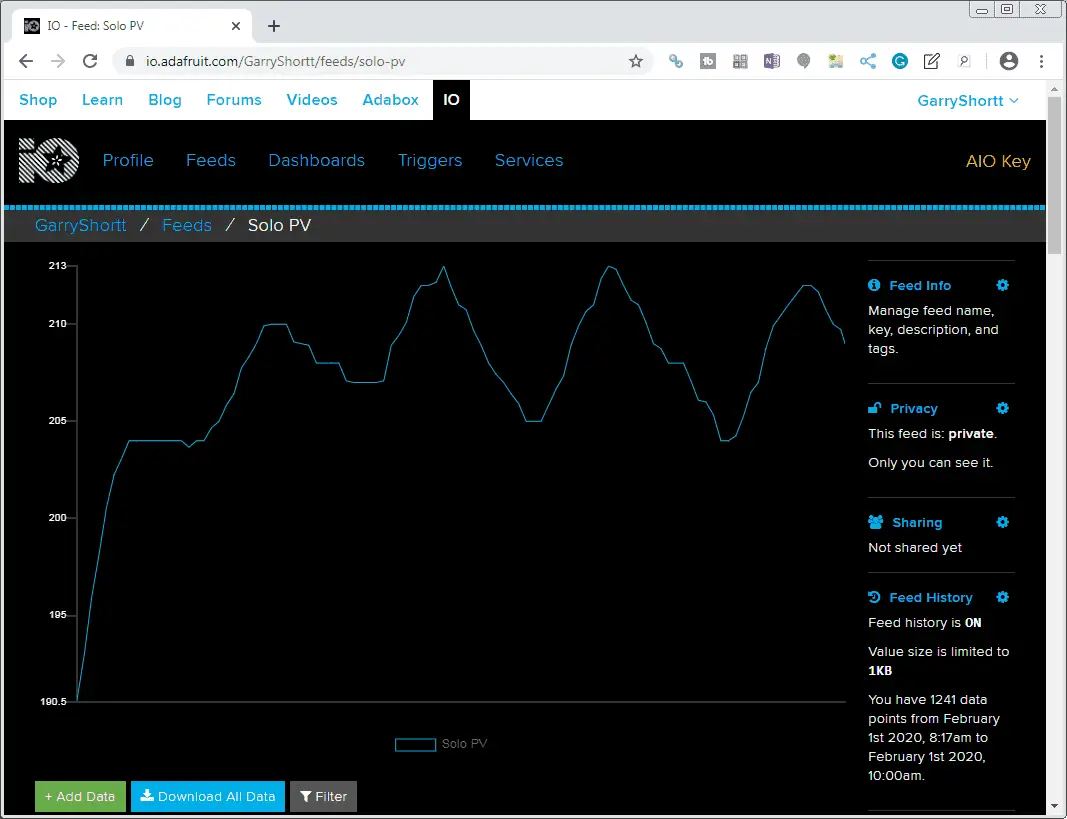
A graph of the feed will be displayed. At the bottom of the graph, you will see the button for ‘Download All Data’. Select this button.
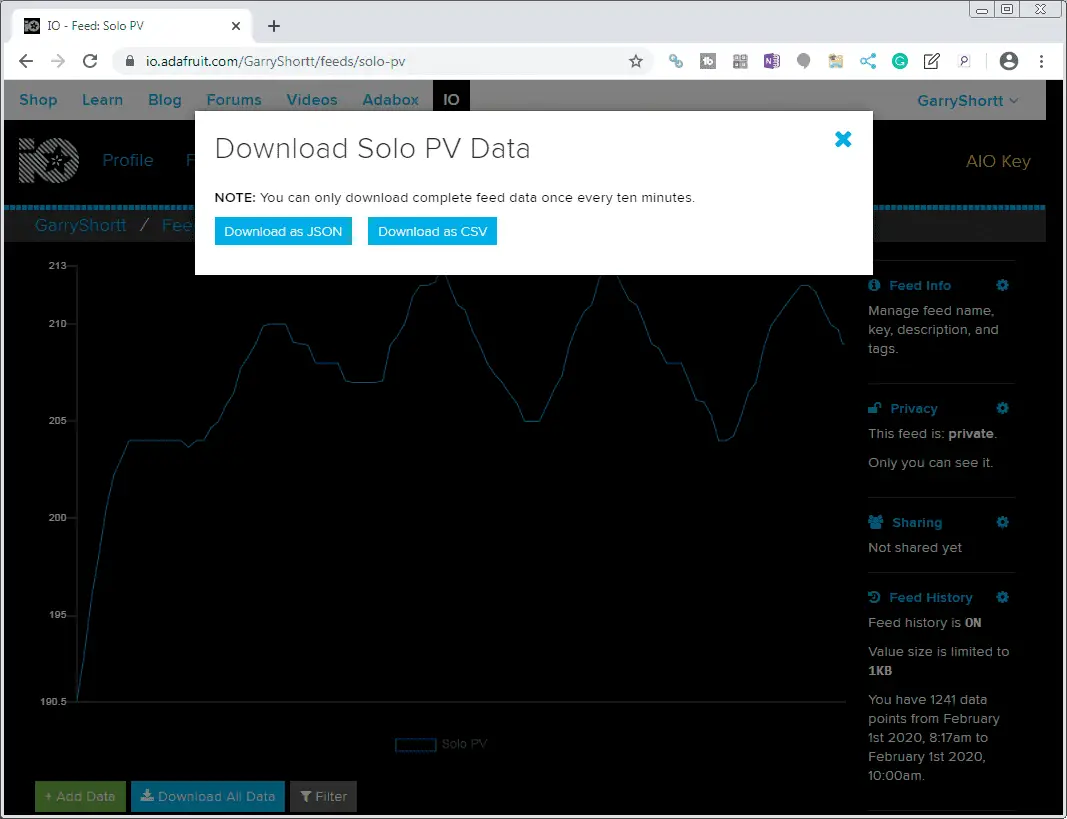
We are then given a choice between a download as JSON or CSV. We will choose CSV (comma-separated value).
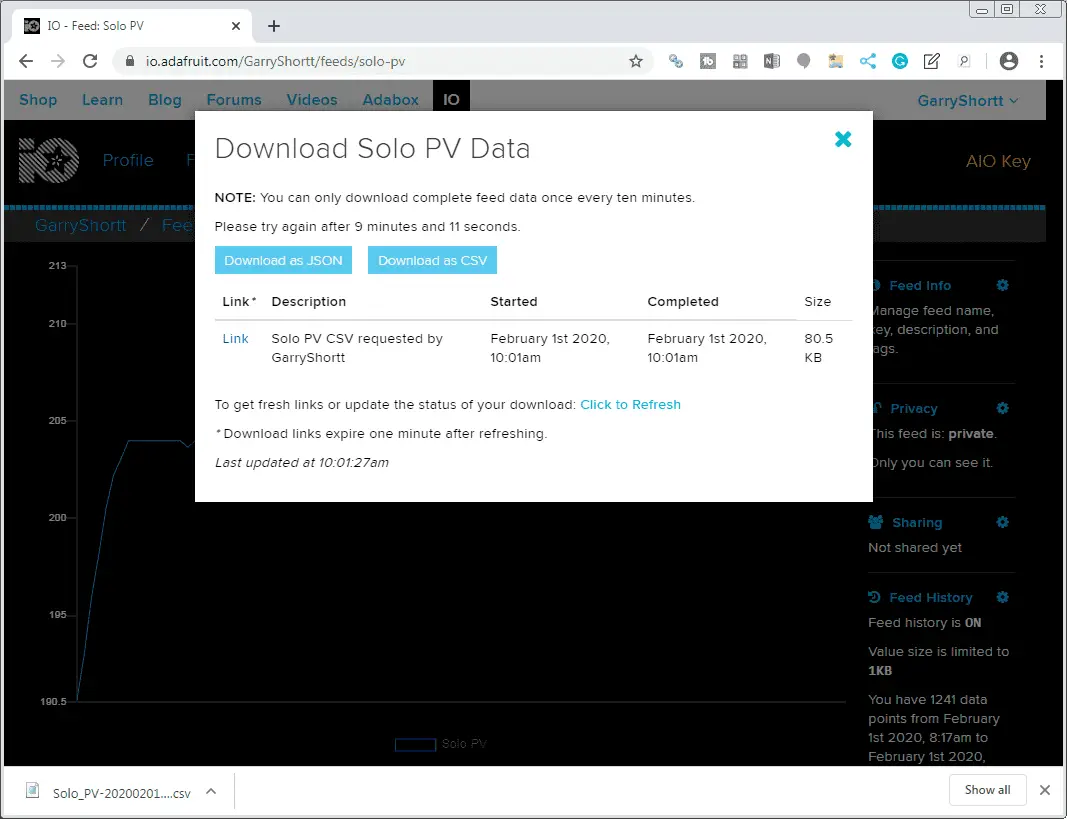
Our file will then be downloaded into the computer with a CSV file extension. This then can be read from any spreadsheet software or database.
Watch the video below to see the Stride MQTT Gateway gathering information from our temperature controller and displaying it on our Adafuit IO dashboard.
STRIDE MQTT Gateway Features
– Convert Modbus RTU/TCP to MQTT
– IIoT MQTT protocol with SSL/TLS
– Configurable via a web page
– Hardware watchdog function
– Full electrical isolation
– MQTT cloud compatible with AWS, Mosquitto and more
– Wired or Wi-Fi models available
– CE and FCC agency approvals
Stride MQTT Gateway Specifications
Stride MQTT Gateway Manual
Purchase – Stride MQTT Gateway
Stride MQTT Gateway Firmware Update
Watch on YouTube: Stride MQTT Gateway to Adafruit IO
If you have any questions or need further information please contact me.
Thank you,
Garry
If you’re like most of my readers, you’re committed to learning about technology. Numbering systems used in PLC’s are not difficult to learn and understand. We will walk through the numbering systems used in PLCs. This includes Bits, Decimal, Hexadecimal, ASCII and Floating Point.
To get this free article, subscribe to my free email newsletter.
Use the information to inform other people how numbering systems work. Sign up now.

The ‘Robust Data Logging for Free’ eBook is also available as a free download. The link is included when you subscribe to ACC Automation.