We will now install software to program our arduino uno. This arduino uno software is a free download and will operate on several operating systems. The IDE (Integrated Development Environment) software uses a streamlined version of C++ to write and upload code to the boards. This software is open-sourced and available free of charge. It will run on Windows, Mac, or Linux.

We will be installing the Arduino IDE on a Windows 7 machine. Connecting to our Arduino Uno, we will modify the blink program. (sketch) Let’s get started.
A full list of posts in this series can be obtained at the following location:
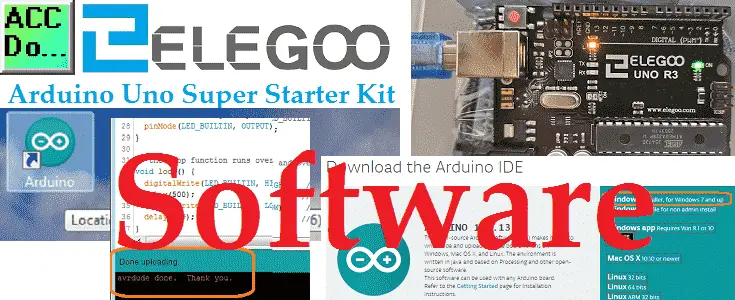
Arduino Uno Software Super Starter Kit
Previous posts in this Arduino Uno Super Starter Kit Series:
Hardware and Powering – Video
Watch the video below of the installation of the software for our starter kit. Elegoo Super Starter Kit UNO R3.
Installing the Arduino IDE
The Arduino software can be downloaded for Windows, Mac, and Linux. Download Here. We will be using the windows installer for Windows XP and up.

Consider supporting the Arduino software by contributing. Click on contribute and download or just download.

The latest version of the Arduino IDE software will now download to your computer.
Double click the downloaded file to start the installation.
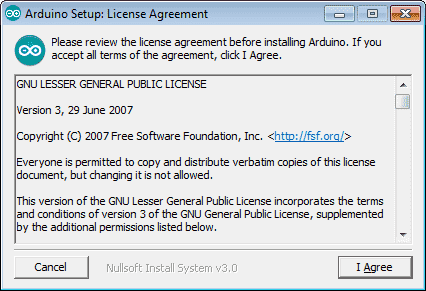
The Arduino Setup: Licence Agreement window will now be displayed. You must agree to continue the installation.
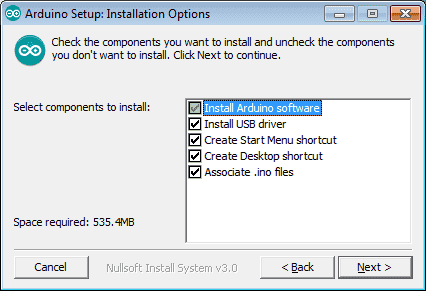
Installation Options window will now appear. This will show you the selected components to install. We will leave this as the default of all options. Click the next button.
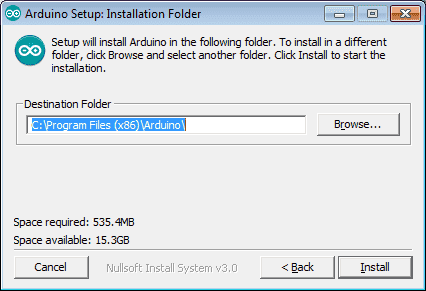
The Installation Folder window will allow you to change the default destination folder. We will leave this as the default and select the Install button.
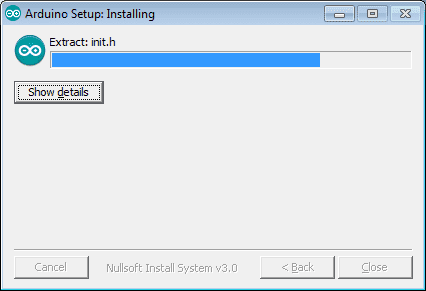
Our Arduino software will now start installing.
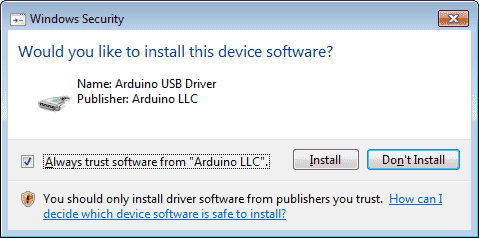
During the installation, it will ask you to install device software. Select Install for each of the devices requested.
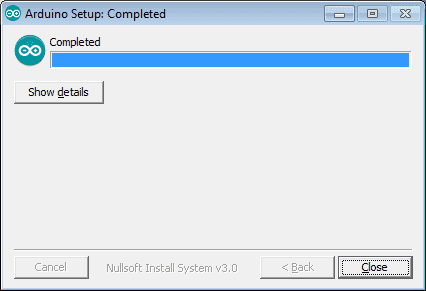
When the software is finished installing, the complete window will be displayed. Click the close button.
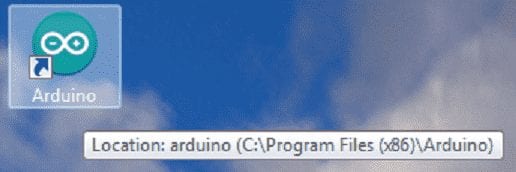
An icon will be placed on your desktop for the Arduino IDE software.
Starting the Arduino IDE Software
Double click on the desktop icon or go to the windows start orb and select Arduino.
The splash screen will be displayed and then the IDE will be shown.
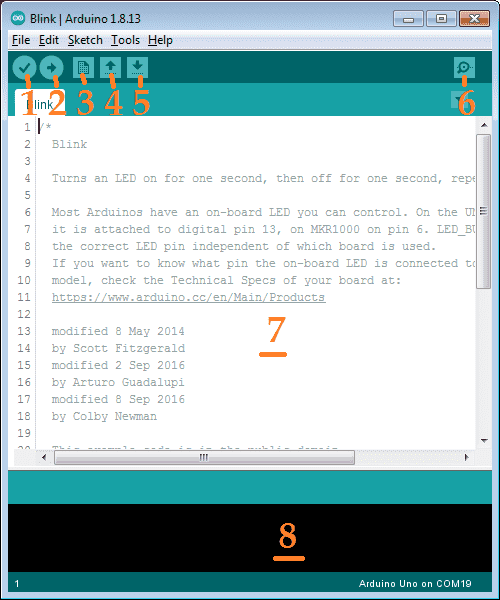
Here are the main components of the IDE main screen/
1 – Program verification
2 – Program upload – write a program to arduino board.
3 – New file
4 – Open
5 – Save
6 – Serial port
7 – Code writing area
8 – Information bar – Note that the bottom left corner will show the current line number in the writing area.
Connect the computer to the Arduino Uno
Using the supplied USB cable, connect the computer to the Arduino Uno development board.
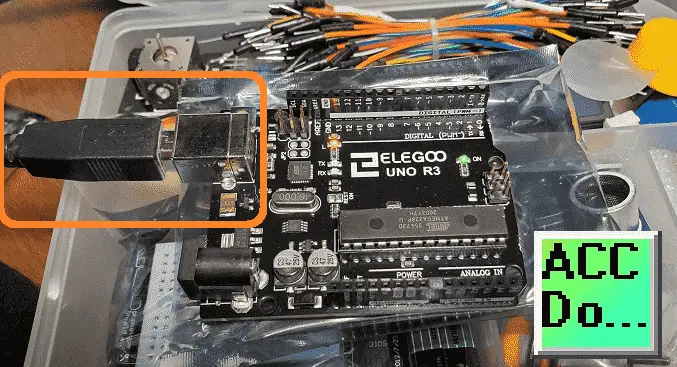
The Arduino Uno will get its power from the computer through the USB cable attached.
Select Arduino Uno Board and Port
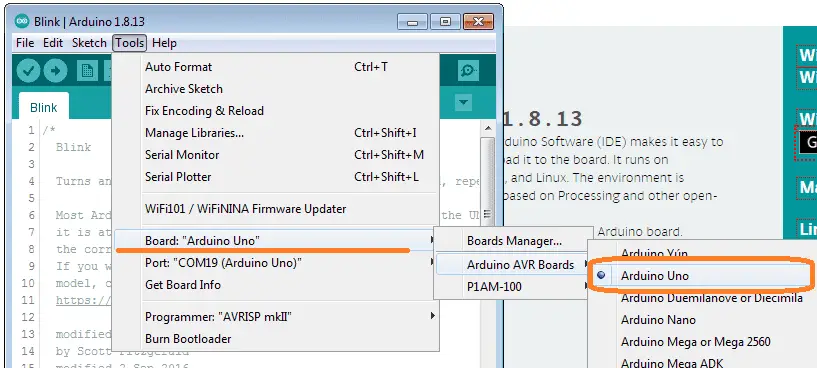
We must select the board that we are connecting, so the software will know how to compile the program. Using the main menu select Tools | Arduino AVR Boards | Arduino Uno.
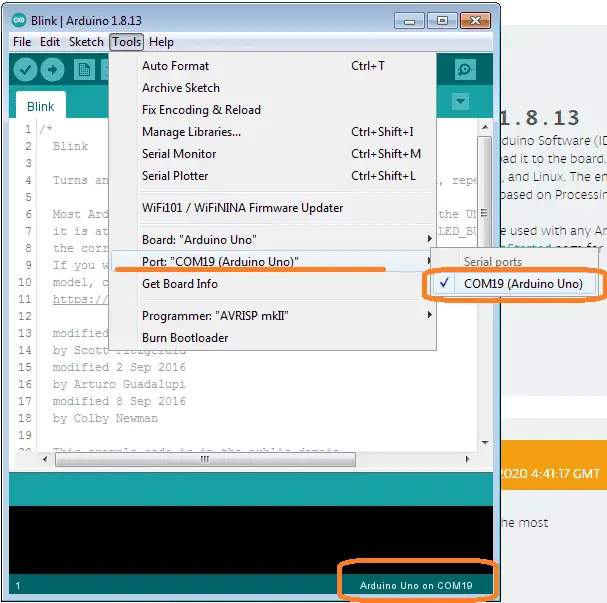
In tools on the main menu select the communication port that has the Arduino Uno attached. If your communication board port is not automatically assigning when the USB cable is plugged in then you will need to manually install the USB driver. See the documentation that came with the super starter kit.
Opening the Sample Program
As mentioned last time the Blink program is automatically loaded onto the board. We can load this into our IDE software

Select main menu | File | Examples | 01 Basics | Blink
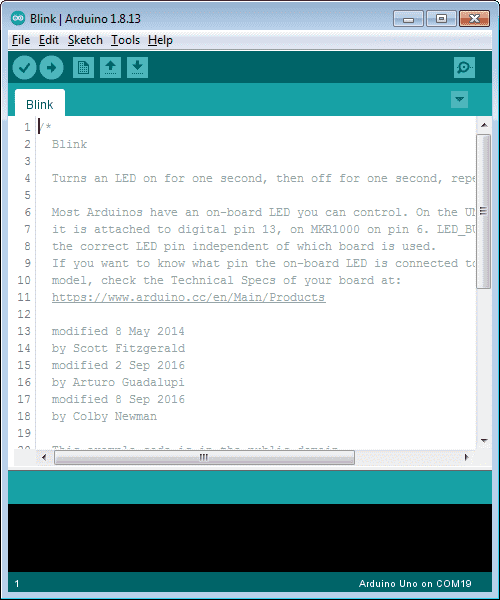
The program (sketch) for our arduino gets loaded into our software.

Move down to line 34 in our code writing area. Remember that this code will blink the LED for one second on and then one second off. Let’s change this to 1/2 second on and 1/2 second off.
delay(1000); – Delay is a command that will stop for a time period. This is displayed in milliseconds. (1000 milliseconds = 1 second so 500 milliseconds = 1/2 second)
Change line 34 and 36 to the following:
delay(500); – Delay 1/2 second.
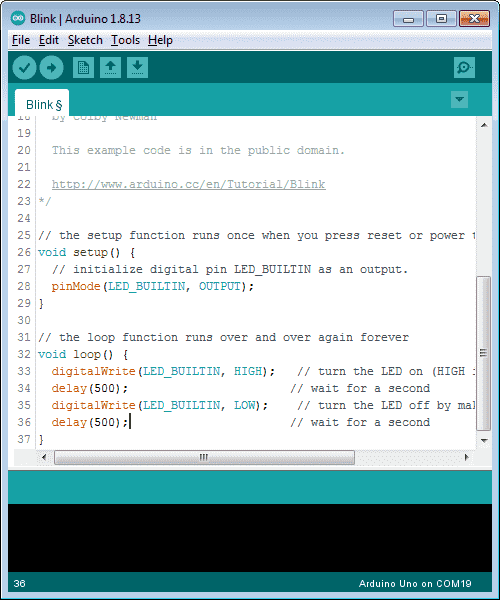
Here is our completed sketch. (program)
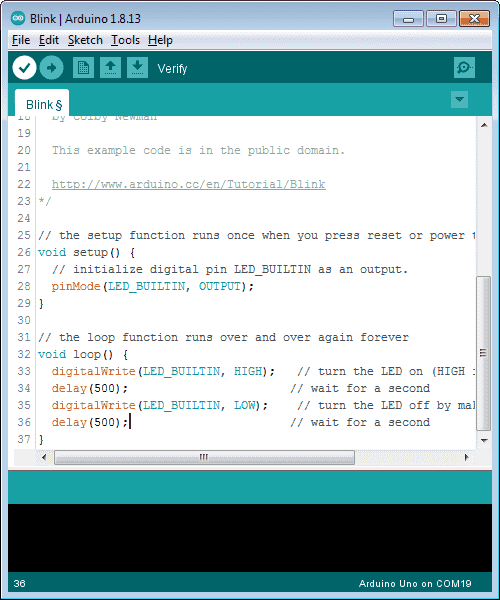
Click the verify icon to ensure that we have not made a mistake in our syntax.
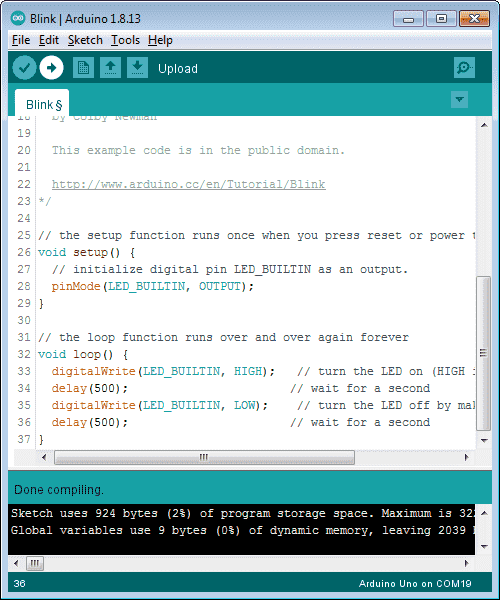
Once our sketch has been verified, we can now upload this to our arduino uno.
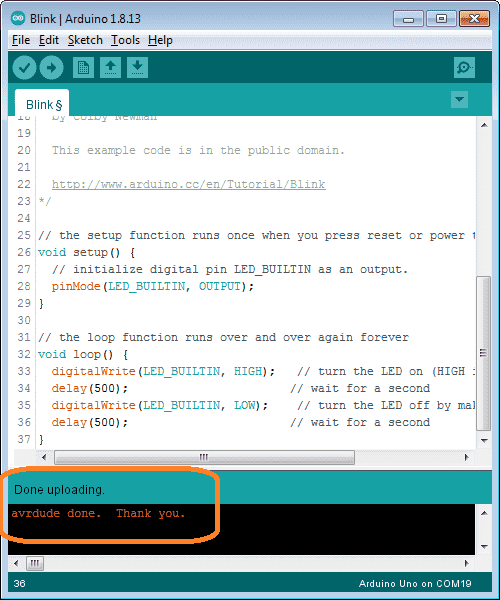
When the upload is complete, a message in the information bar will inform us. Our LED light on the board will now be blinking every half second.
Watch the video below of the software installation and modification of the blink program on our starter kit.
Elegoo Links:
Service
service@elegoo.com (USA and Canada)
EUservice@elegoo.com (Europe)
Arduino Compatible Links:
Product Hardware
Elegoo UNO Project Super Starter Kit
Elegoo Download Page
Amazon.com
Amazon.ca
Software
– Arduino IDE (Integrated Development Environment)
– Productivity Blocks (Development Timesaver)
– Productivity Blocks Documentation (Wiki)
Community
– Arduino Blog
– Arduino Forum
– Arduino UNO Facebook
Next time we will look at LEDs for our Arduino Elegoo super starter kit UNO R3.
Watch on YouTube: Arduino Uno Super Starter Kit Software
If you have any questions or need further information please contact me.
Thank you,
Garry
If you’re like most of my readers, you’re committed to learning about technology. Numbering systems used in PLC’s are not difficult to learn and understand. We will walk through the numbering systems used in PLCs. This includes Bits, Decimal, Hexadecimal, ASCII, and Floating Point. To get this free article, subscribe to my free email newsletter.
Use the information to inform other people how numbering systems work. Sign up now. The ‘Robust Data Logging for Free’ eBook is also available as a free download. The link is included when you subscribe to ACC Automation.