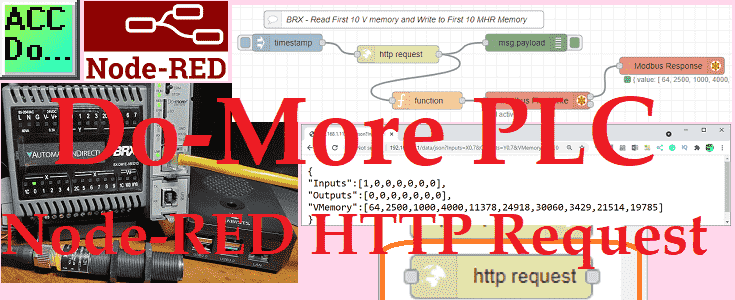
Node-RED HTTP Request can be used to read any BRX Do-More PLC memory area. This HTTP (Hypertext Transfer Protocol) communication will only read information from our controller.
The BRX Do-More REST API is used to read information using a URL (Uniform Resource Locator) or web address. We will be using the HTTP request node in Node-RED to read information from our BRX Do-More REST API-enabled controller. Writing using Modbus will also be shown. This will all be done on our Raspberry Pi 4 single-board computer. Let’s get started.
In this series we used Node-RED in some of the following ways:
Installing the Windows Software – Video
Modbus Communication – Video
User Interface – Dashboards – Video
SQL Database Log – Video
SQL Database Spreadsheet Connection – Video
Install Node-RED on Raspberry Pi – Video
We will now look at reading and writing information from a BRX Do-More controller using Node-RED. Node-RED will be run on a Raspberry Pi. REST API will be used to read 10 V memory registers in the BRX Do-More PLC. Modbus TCP will be then used to write these registers back to the MHR area of the Do-More.
Watch the video below to see the Do-More PLC Node-RED HTTP Request on the Raspberry Pi.
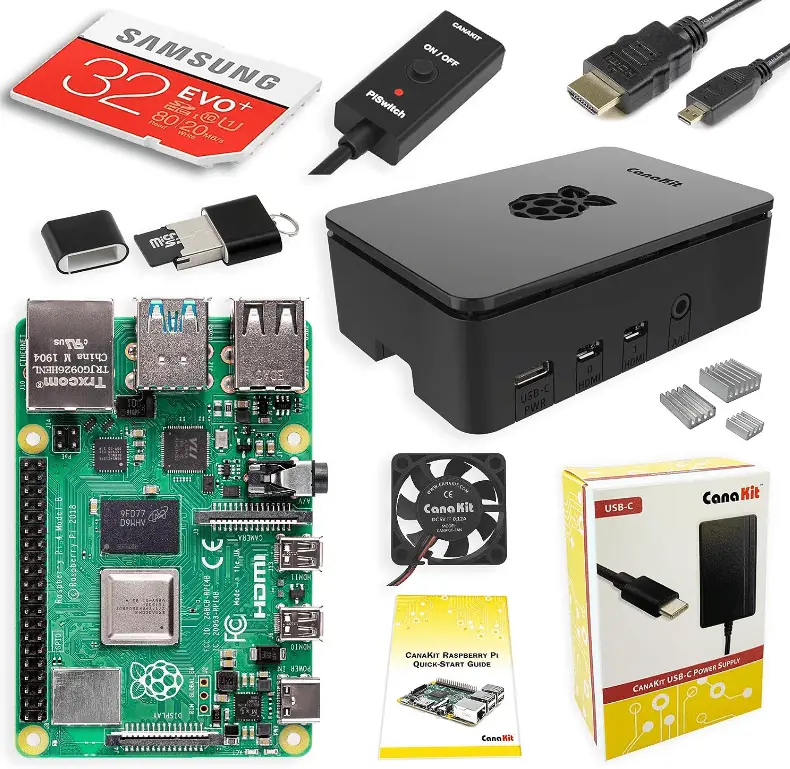
Purchase Raspberry Pi 4 Starter Kit
Amazon USA
https://amzn.to/3I5jIpz
Amazon Canada
https://amzn.to/42MyPxR
The following are short videos on how to get your Raspberry Pi kit assembled and running.
Raspberry Pi4 Unboxing Starter Kit
Raspberry Pi 4 Kit Assembly
Raspberry Pi 4 First Power Up
Raspberry Pi 4 Remote Access
Do-More REST API Setup
REST API stands for Representational State Transfer and Application Programming Interface. This will allow you to use a URL with some parameters to read data from the BRX Do-More controller. This is available in version 2.8 or higher of the Do-More Designer Software and only applies to the BRX Do-More controllers.
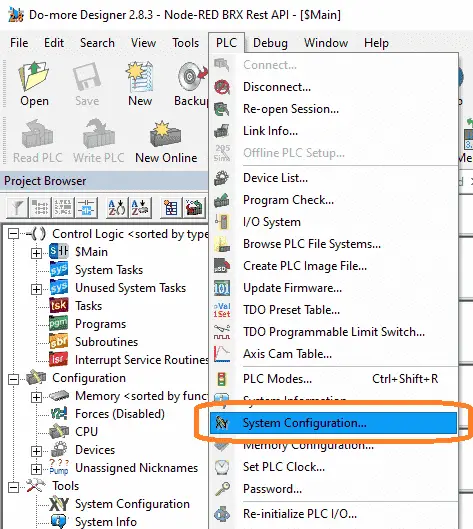
Call up the system configuration menu by using the Main Menu | PLC | System Configuration…
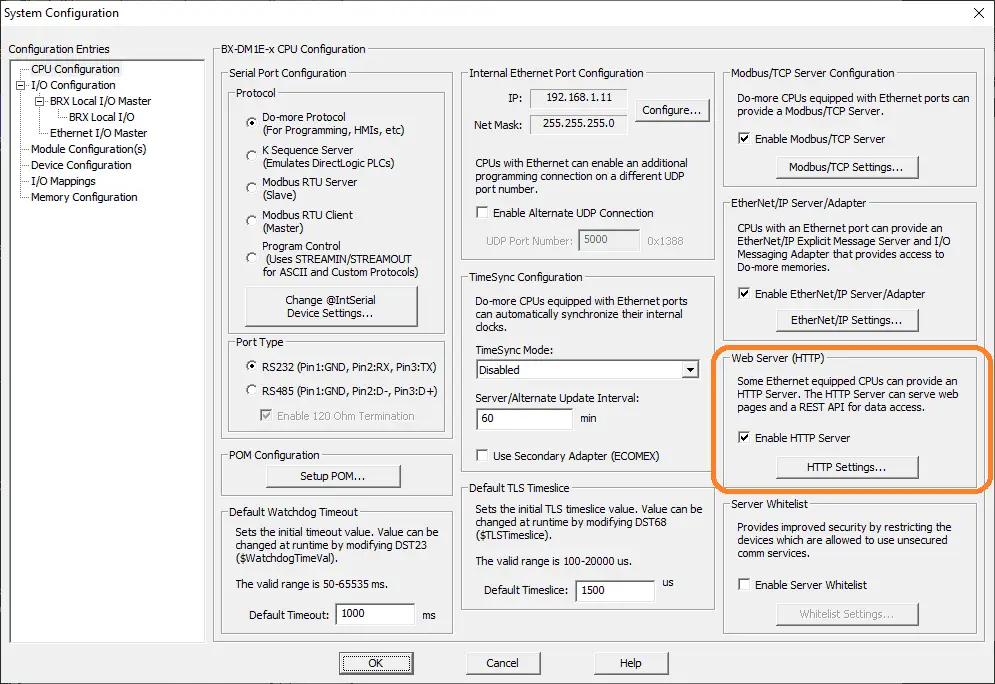
Under the heading Web Server (HTTP), enable HTTP Server. Select the HTTP Settings button.
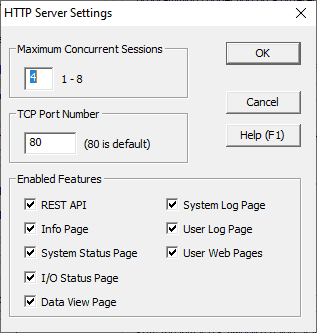
The HTTP server settings window will allow you to turn off any of the features listed. All of the features are set on as default. Ensure that your settings have the REST API enabled. Select OK to return to the system configuration page. Our Do-More controller is now set to use the REST API interface to communicate.
Do-More Ethernet Security
The Do-More includes a server whitelist.
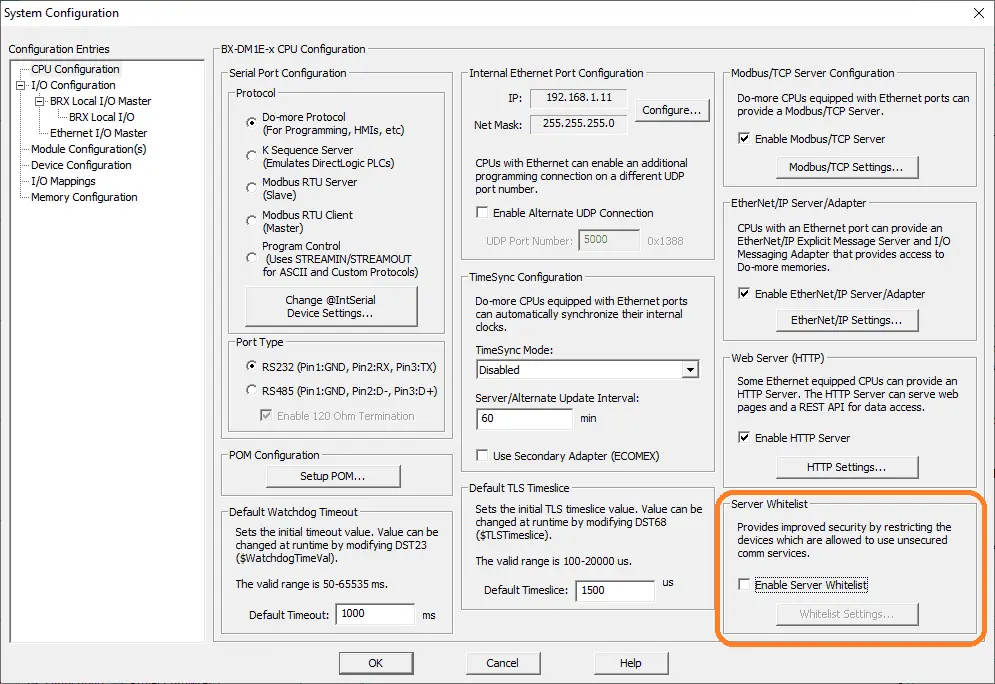
This will allow you to specify an IP address or range of IP addresses that are allowed to access the services on the Ethernet port.
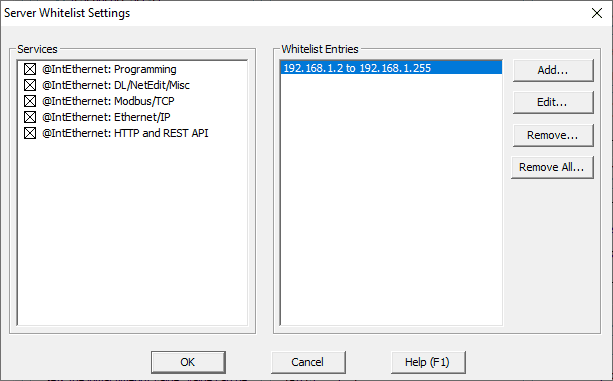
Enable Server Whitelist to specify the services and IP address that are allowed to use the service. Our sample application will not use the whitelist but in production, this is a good option to implement on your network.
Do-More Modbus TCP Server Configuration
The Ethernet Modbus TCP Server is selected by default on the configuration menu.
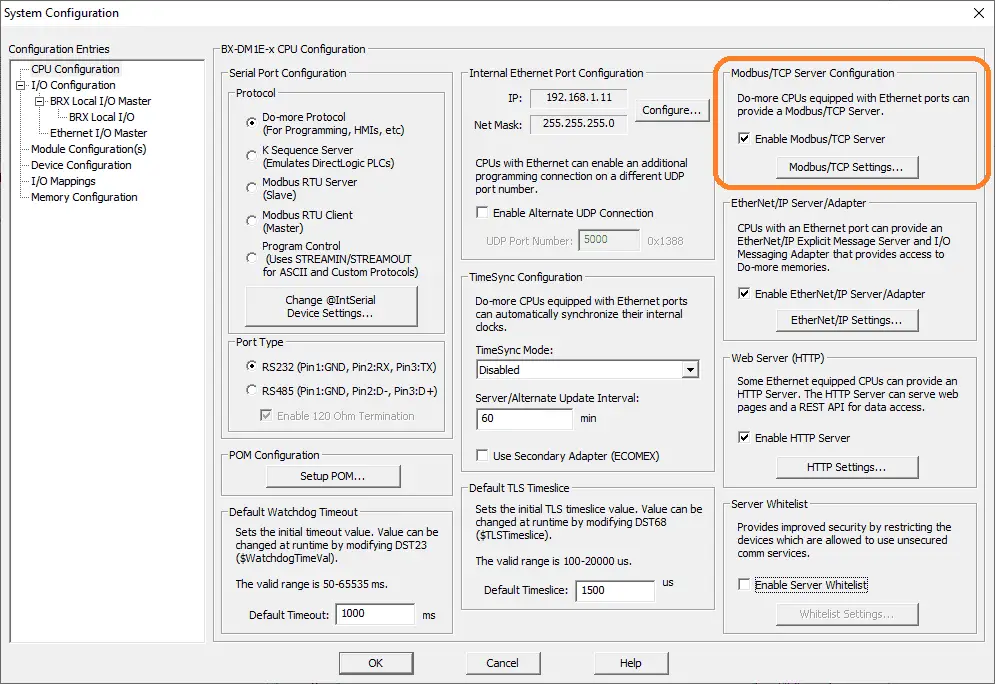
Ensure that the ‘Enable Modbus/TCP Server’ is selected. Select the Modbus/TCP Settings button.
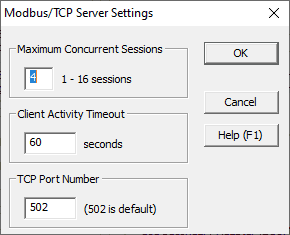
Here are the default parameters for the Modbus TCP server on the Do-More controller. 502 is the default port number and 60 seconds is the client activity timeout. Increase this number to a value greater than the communicating frequency of the Modbus client.
Note: Modbus is a master/slave type of arrangement. When dealing with Modbus TCP (Ethernet) the master is a Client and the slave is a Server.
Do-More Static IP Address
A static IP address should be set in the Do-More controller. This will allow other programs like Node-RED to know the location of the controller.
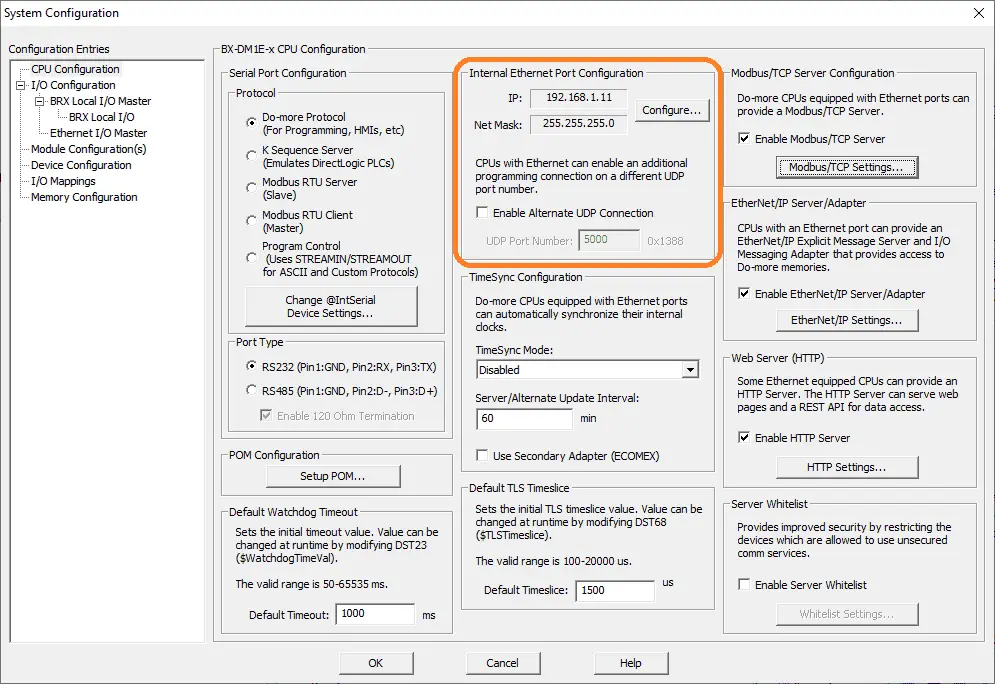
On the configuration page under Internal Ethernet Port Configuration select the configure button.
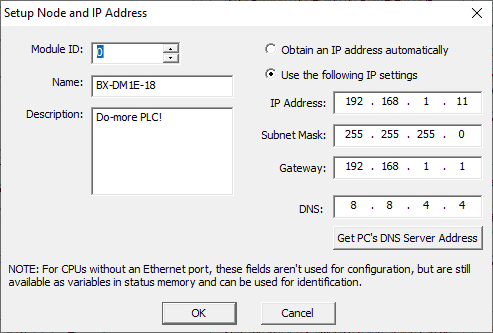
We have set the IP settings manually for our example. You could also send the IP address via your router based on the MAC address of the controller.
In order to find the MAC address of your Ethernet port, use the NetEdit3 program that is located in the Do-More Designer software.
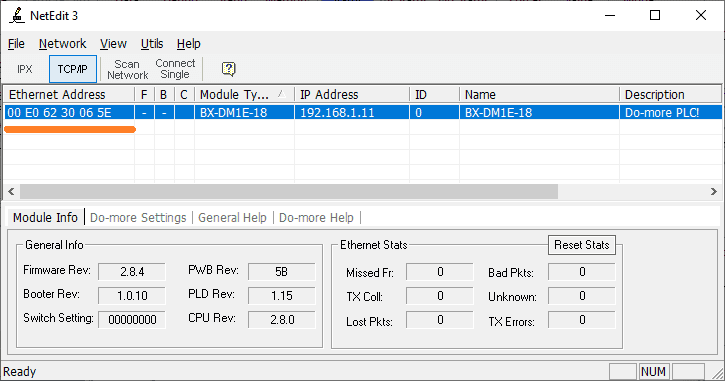
The MAC address is listed under the Ethernet address heading.
The configuration is now set for our controller. Our program will only have an end statement. Save the program and configuration. Transfer this to the Do-More controller.
Testing Do-More REST API
Testing the REST API can be easily done by calling up your web browser on the same network as the Do-More controller and type in the following address.
http://192.168.1.11/data/json?Inputs=X0,7
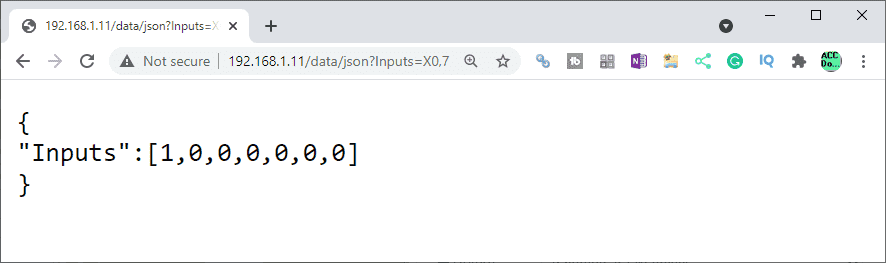
This will instruct the BRX Do-More to retrieve in JSON (JavaScript Object Notation) an array called inputs. The starting address is X0 and 7 bits will be retrieved.
You can easily test all of your requests by this method. Additional parameters can be obtained by using the & sign in your statement.
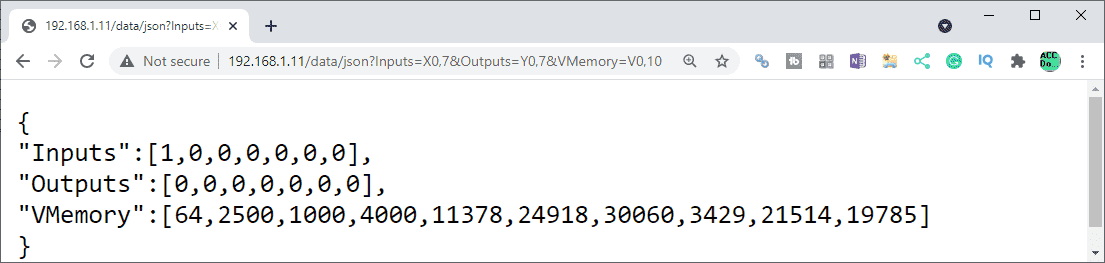
This example reads the first 7 input and output bits along with 10 of the V memory registers.
Here is a good video on using the REST API.
Additional information on the REST API commands can be obtained from the help menu in the Do-More Designer software. Search for REST.
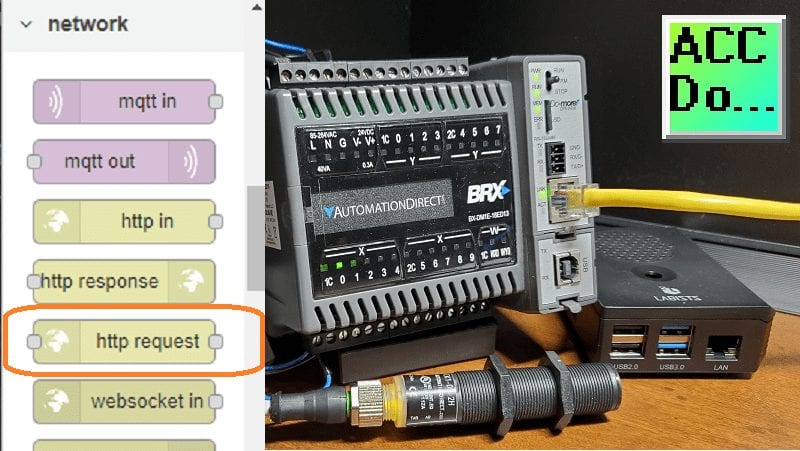
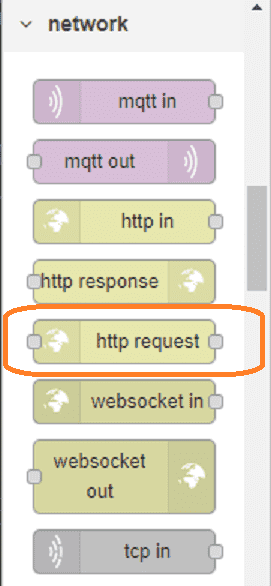
Node-Red HTTP Request
The HTTP request node is installed with the initial installation of Node-RED. Information can be requested just like you can with your web browser. The information returned from the HTTP request node can be set in different formats.
JSON format will be used for the Do-More REST API. This is only for reading information from the BRX Do-More controller.
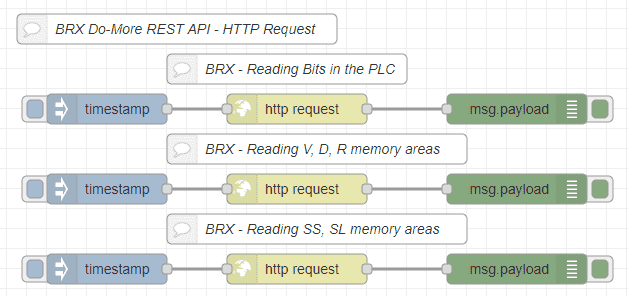
The first part of our Node-RED program will demonstrate the reading of different types of memory areas in the BRX Do-More controller. Information is returned in a JSON format which is easy to implement in other parts of your program.
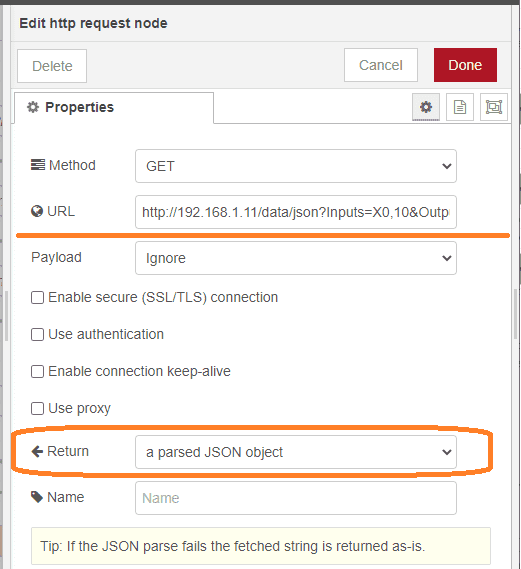
Looking at the HTTP Request node, the URL determines the information returned. A parsed JSON object is selected for the return.
We are using the following for reading memory bits in the controller.
http://192.168.1.11/data/json?Inputs=X0,10&Outputs=Y0,8&CBits=C0,128
JSON arrays are returned that contain the information for Inputs, Outputs, and CBits.
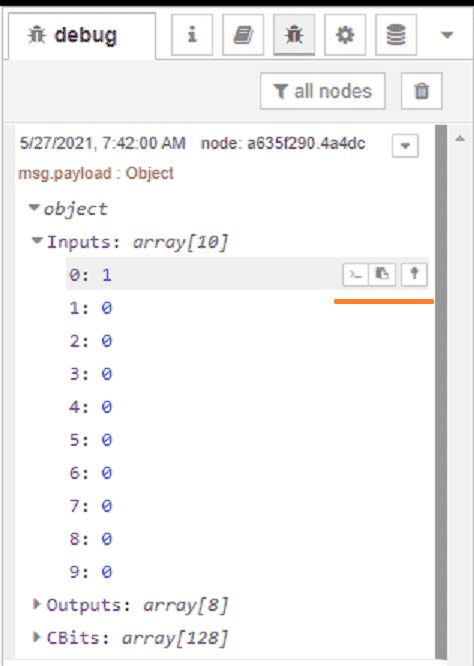
Here is an example of the return arrays using the debug mode. The icons to the right of the data in the debug mode will allow you to copy the Path or Data. You can also Pin the information in the debug window.
http://192.168.1.11/data/json?Vmemory=V0,128&Dmemory=D0,128&Rmemory=R0,128
Here is the URL that will return V, D, and R memory areas. We are returning 128 elements each.
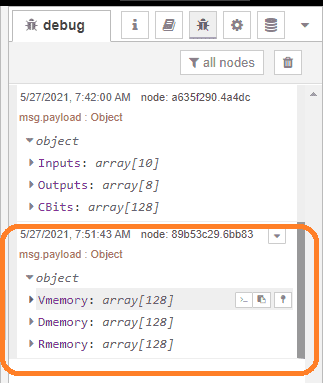
Here are the arrays returned shown in the debug window. 128 memory areas are returned at once for each memory area specified.
http://192.168.1.11/data/json?SSmemory=SS0,10&SLmemory=SL0,10
This URL will return text memory areas. SS0 to SS9 and SL0 to SL9 are returned in JSON arrays. I have separated all of these memory areas apart for demonstration but you can combine them using the formats above.
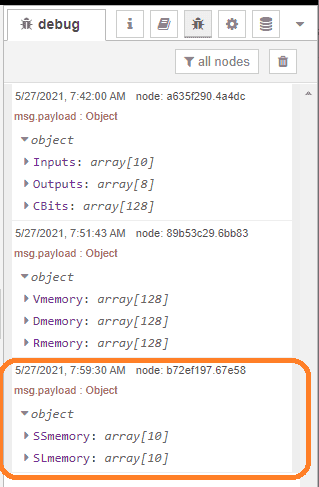
Here are the arrays returned shown in the debug window.
Note: Any special ASCII characters that are not printable will return a JSON error when using the Text memory areas. This includes the carriage return and line feed.
Watch the video below to see the HTTP request in action on Node-RED.
Node-RED Read Write Do-More PLC
The HTTP request is only for reading information from the BRX Do-More. In order to write information, we must use a Modbus protocol.
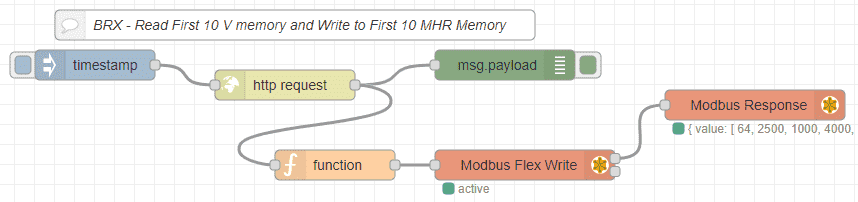
An HTTP request is used to read the first 10 V memory addresses. Here is the URL.
http://192.168.1.11/data/json?VMemory=V0,10
After the HTTP request, we use a function node to set up the parameters for the Modbus Write function node. Here is the code for the function node.
msg.payload = {
value: msg.payload.VMemory,
'fc': 16,
'unitid': 1,
'address': 0 ,
'quantity': 10
}
return msg;
The Modbus Flex Write will be used to actually write the information into the BRX Do-More controller.
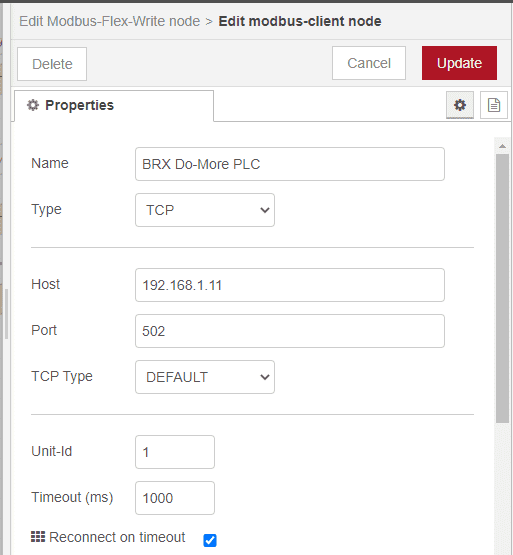
Here are the settings for the Modbus Client node used in the Modbus Flex Write node.
The following post explained how to use Modbus in Node-RED.
Watch the video below to see the Do-More PLC Node-RED HTTP Request on our Raspberry Pi 4 Model B in action.
Download the BRX Do-More and Node-RED Programs here.
Node-RED Links
Node-RED Organization Home Page
Getting Started – Run Locally
Node-RED running on Windows (Run at Startup)
Securing Node-RED
Node-RED Essentials Videos (Basics of the Editor)
Learn JavaScript Free
w3schools JavaScript Tutorial
learn-js.org
Node-Red JavaScript Primer
Modbus
Node-RED Modbus TCP and Serial
Dashboard – HMI
Node-RED Dashboard
Node-RED Dashboard extra nodes
SQL Database
Node-RED SQL Database
Node-RED SQL Plus – Execute queries and stored procedures
Modbus Learning Links:
Simply Modbus Frequently Asked Questions
Modbus TCP/IP Overview – Real-Time Automation
All You Need to Know About Modbus RTU – Video
Watch on YouTube: Do-More PLC Node-RED HTTP Request
If you have any questions or need further information please contact me.
Thank you,
Garry
If you’re like most of my readers, you’re committed to learning about technology. Numbering systems used in PLCs are not difficult to learn and understand. We will walk through the numbering systems used in PLCs. This includes Bits, Decimal, Hexadecimal, ASCII, and Floating Point. To get this free article, subscribe to my free email newsletter.
Use the information to inform other people how numbering systems work. Sign up now. The ‘Robust Data Logging for Free’ eBook is also available as a free download. The link is included when you subscribe to ACC Automation.