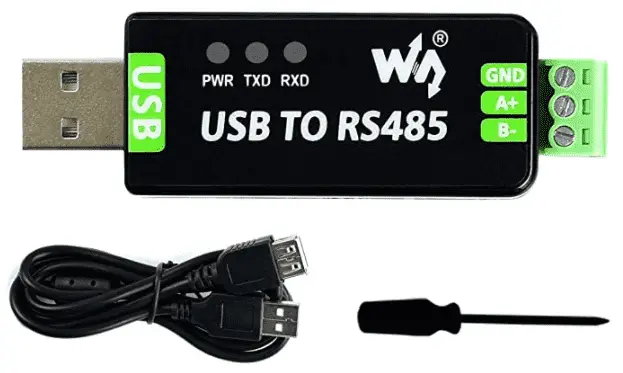
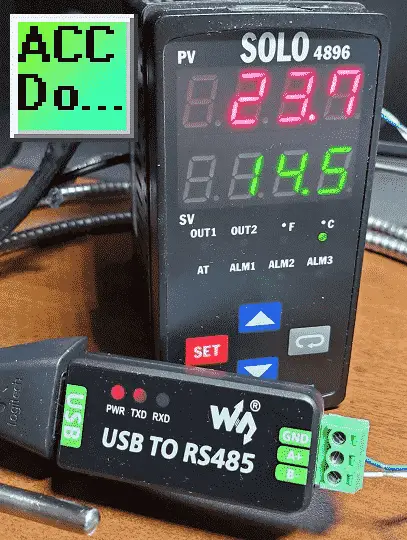
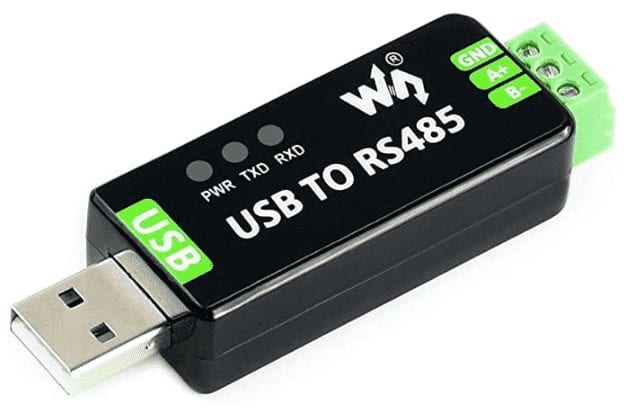
We will be installing an industrial USB to RS485 converter on our computer. The Waveshare USB to serial port is a 2-wire USB to RS-485 serial communication adapter for RS485 use. It does not require an external power supply or complicated configuration.
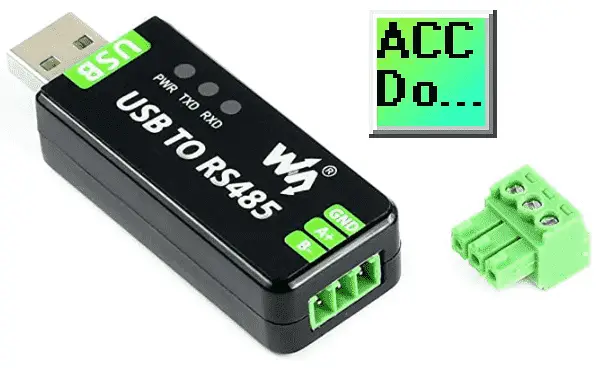
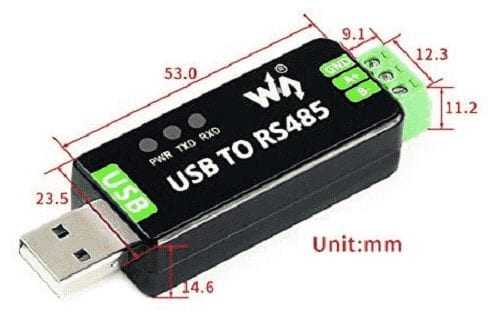
It has a Type A (plug) USB connector for the computer side and screw terminals for the RS485 connections. This is an industrial USB to RS485 converter that has an FT232RL chip inside. It features embedded protection circuits such as lightning-proof, resettable fuse, ESD (Electrostatic Discharge) protection, and TVS (Transient Voltage Suppression) diode, etc. All of these features are packed within a small form size.
Purchase at Amazon.com
We will be installing the driver for this USB to serial converter and connecting it to our computer. Node-RED will be used to communicate Modbus RS485 protocol to a Solo process temperature controller. Let’s get started.
The Waveshare industrial USB to RS485 adapter comes with an expansion USB cable so you can install the unit next to other USB ports on your device. A small screwdriver is also included for your convenience.
Physical Size (Dimensions) USB to RS485

Installing the Driver on PC (Installation)
Do NOT connect the USB to Serial unit to your PC before installing the driver file.
The first thing you must know is if your windows computer is 32 or 64-Bit. If you are unsure as to a 32 bit or 64-bit computer then go to the control panel and look under the system. Under System type, it will display either a 32-bit Operating or 64-bit Operating system.
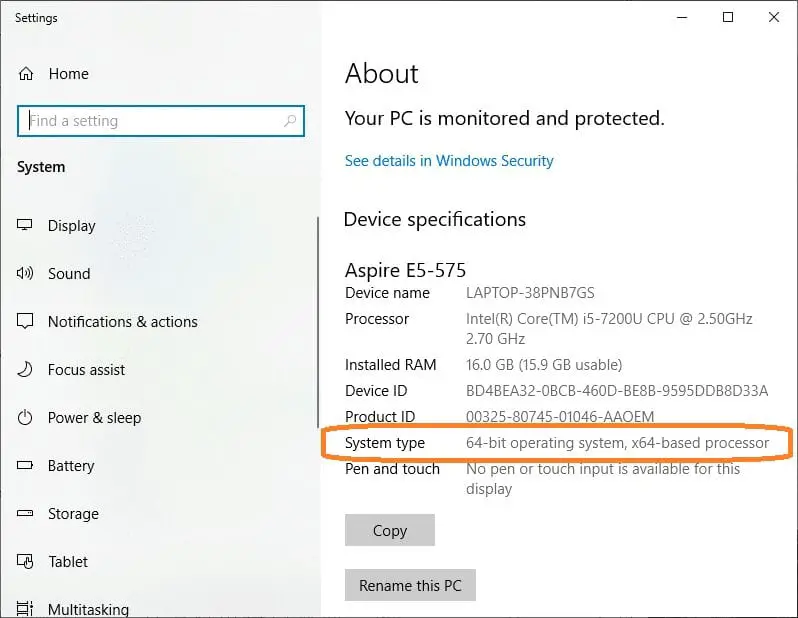
This system is a Windows 10 64-Bit.
Alternatively, on Windows 7 you can click Start and right-click on Computer. Selecting properties will call up the system information for you.
Go to the following website and download the latest drivers for this device.
https://www.waveshare.com/wiki/USB_TO_RS485#Resources
The driver file is called CDM_v2.12.06_WHQL_Certified.ZIP
Although we are installing this driver on a Windows 10 64-bit computer you can also use the following operating systems: Mac, Linux, Android, WinCE, Windows 10 / 8.1 / 8 / 7 / XP
Download and extract the zip file. (Right-click on the zip file and select Extract All…. )
Open the extracted files and double-click on the dpinst-amd64.exe file to install the driver.
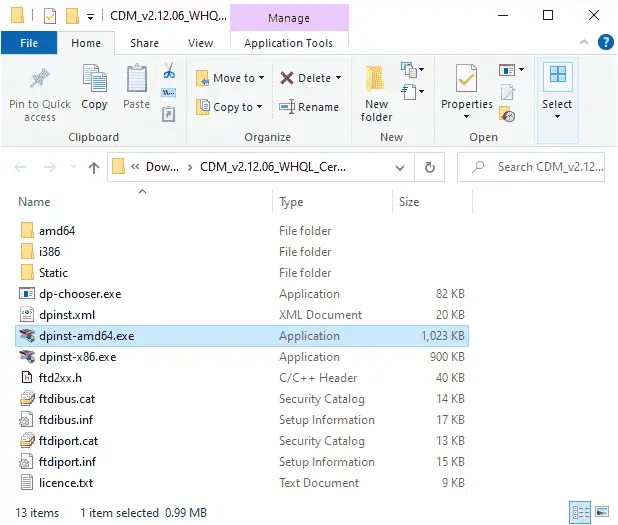
Double click on the dpinst-x86.exe file to install the driver on a 32-bit Windows computer.

This will now start the device driver installation wizard for our Waveshare USB to RS485 Driver. Select Next.
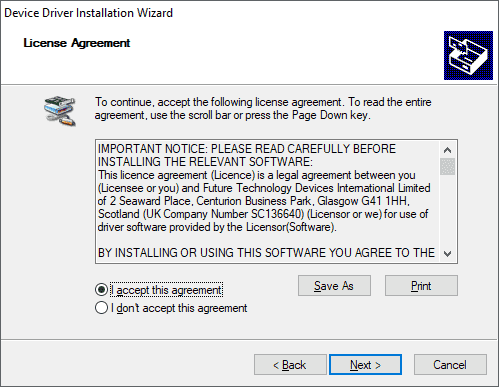
You must accept the license agreement before the software will install. Select ‘I accept this agreement and hit Next.
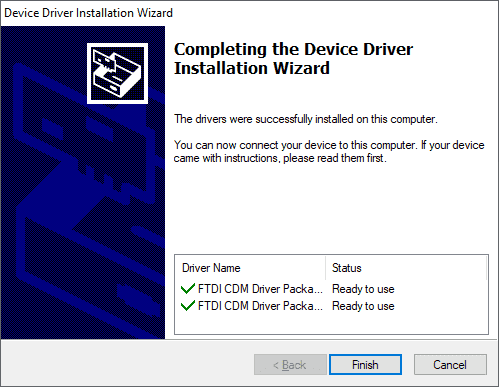
You will now get a message that the drivers were successfully installed on the computer. The Waveshare USB to Serial PC Driver is now installed. Click Finish.
We will now look at the configuration of the device driver.
Connect the WS USB to RS485 converter to your PC
Plugin the USB to RS485 adapter to your USB port on your computer. The driver software on our PC installation will begin by searching for and apply the USB to serial driver to our device.
You can now call up the device manager and view the ports on your computer.
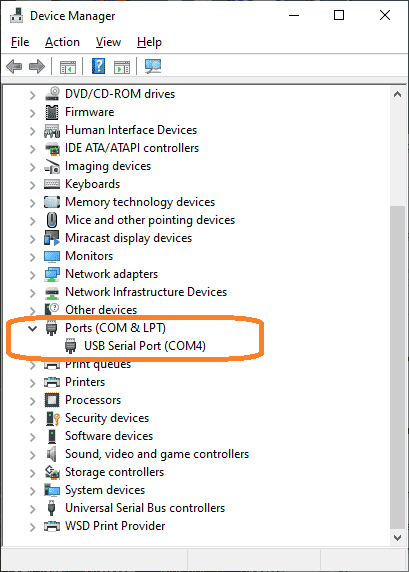
The USB Serial Port on communication port 4. COM4 will now point to the USB port where the information is converted to an RS485 signal. Depending on the computer, your communication port number may be different.
RS485 Network – Two Wire – Master (Client) / Slave (Server)
We are now ready to connect to our equipment with the USB to RS485 converter. Since this is a serial device and is a 1: N connection. This means that we will have a master and at least one slave unit. The master is usually the PC (personal computer) that will control all communication. It will request information and receive answers. All communication must have the same parameters when communicating. What separates the communication is that each slave is assigned a unique number.
Example:
| Device | Computer ‘Master’ | Solo Process Controller ‘Slave’ |
Do-More PLC ‘Slave’ |
Additional Devices ‘Slaves’ |
| Station Address / Unit number | N/A | 1 | 2 | … |
| Baud Rate | 9600 | 9600 | 9600 | 9600 |
| Data Bits | 8 | 8 | 8 | 8 |
| Parity | Even | Even | Even | Even |
| Stop Bits | 1 | 1 | 1 | 1 |
The protocol is the actual communication (Information format that is transferred) that takes place over the network. (Master to Slaves) The media is the RS485 serial cable itself.
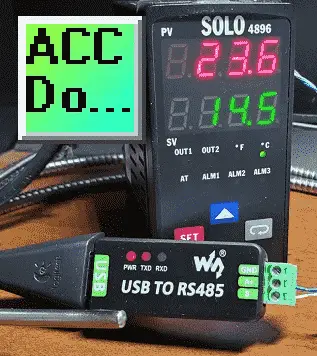
Node-RED Modbus RTU (RS485) to Solo Process Temperature Controller
Node-RED can be used to easily communicate as the Modbus Master (Client) on our serial network. We will demonstrate the communication to a Solo Temperature Controller (Mobus Slave (Server)).
The Solo is set up the same as the parameters mentioned above. To learn more about Node-RED and its integration into your IoT solution visit the Node-RED series page here.
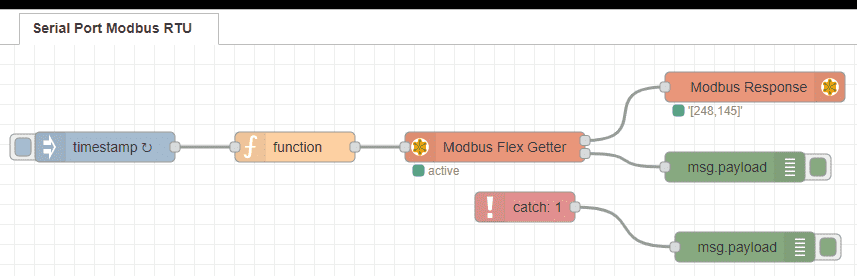
We will be using the Modbus Flex Getter to read the present (PV) and set (SV) values of the Solo temperature controller.
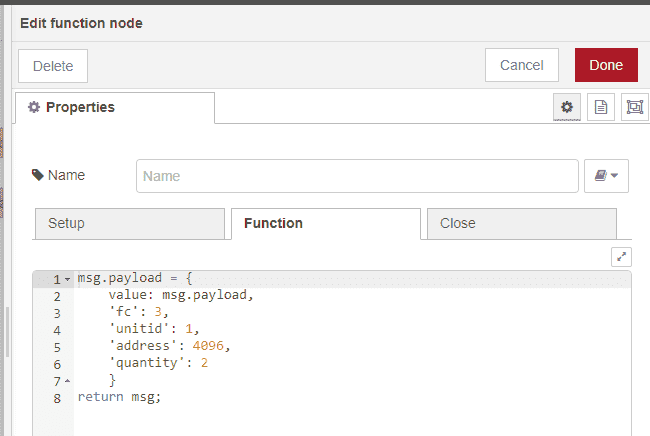
The function node will set up the Modbus communication parameters.
FC – Function Code 3 – Read multiple holding registers
Unit ID – unitid 1 – Modbus Server ID number – This is set in the Solo temperature controller.
Address – This is the starting address to start reading the registers.
Quantity 2 – The number of consecutive Modbus registers to read.
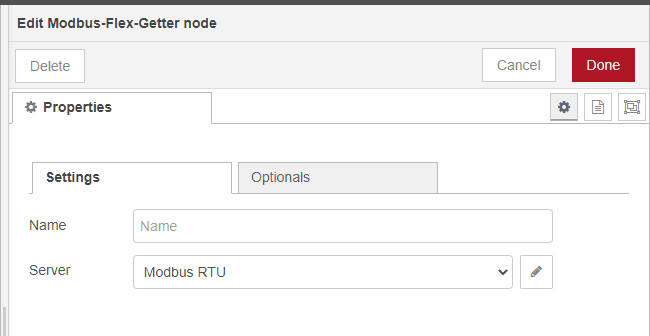
The Modbus Flex Getter Node will execute the commands from the previous function node. Modbus RTU is specified as the Modbus Server (Slave). Select the options tab.

We will select show activities and errors on the options tab. This will allow us to determine if errors occur and continue our flow. Select done to return to the previous screen.
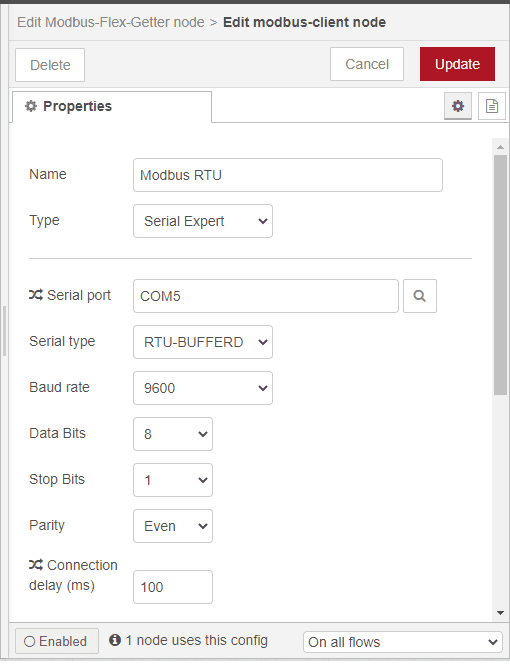
The Modbus RTU server (slave) information can be set for our program. The communication port for our USB to RS485 adapter can be seen with the device manager as outlined above.
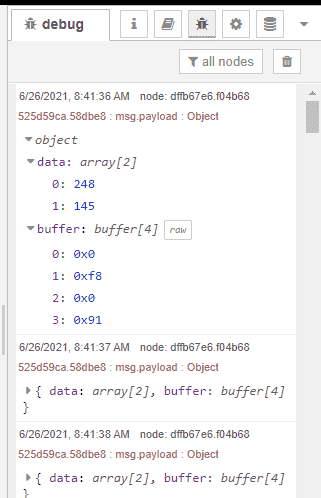
Running the program we can see the returned information from our Solo temperature controller. The inject node can be set to trigger this flow at set intervals. Watch the program below to see this flow trigger up to 100 times per second. (Every 0.01 seconds)
Features USB to RS485 communication
- Adopt original FT232RL, fast communicating, stable and reliable, better compatibility
- Onboard TVS (Transient Voltage Suppressor), effectively suppress surge voltage and transient spike voltage in the circuit, lightning-proof & anti-electrostatic
- Onboard self-recovery fuse and protection diodes, ensures the current/voltage stable outputs, provides over-current/over-voltage proof, improves shock resistance
- 3 LEDs for indicating the power and transceiver status
Specifications USB to RS485 communication
- Product type: industrial converter
- Baudrate: 300-921600bps
- Host port: USB
- Device port: RS485
- USB:
Operating voltage: 5V
Connector: USB-A - Protection: 200mA self-recovery fuse, ESD protection
- Transmission distance: about 5m
- RS485 Connector: screw terminal
Pins: A+, B-, GND
Direction control: hardware automatic control - Protection: 600W lightning-proof and surge-suppress, 15KV ESD protection (onboard 120R balancing resistor)
- Transmission distance: about 1200m (low rate)
- Transmission mode: point-to-multipoint (up to 32 nodes, it is recommended to use repeaters for 16 nodes or more)
- LED indicators:
PWR: red power indicator, light up when there is USB connection and voltage is detected
TXD: red TX indicator, light up when the USB port sends data
RXD: red RX indicator, light up when the device ports send data back - Operating environment:
Temperature: -15℃ ~ 70℃
Humidity: 5%RH ~ 95%RH
Operating system: Mac, Linux, Android, WinCE, Windows 10 / 8.1 / 8 / 7 / XP

Download the Node-RED flow program here.
Watch on YouTube: WS USB to Serial PC Installation
If you have any questions or need further information please contact me.
Thank you,
Garry
If you’re like most of my readers, you’re committed to learning about technology. Numbering systems used in PLCs are not difficult to learn and understand. We will walk through the numbering systems used in PLCs. This includes Bits, Decimal, Hexadecimal, ASCII, and Floating Point. To get this free article, subscribe to my free email newsletter.
Use the information to inform other people how numbering systems work. Sign up now. The ‘Robust Data Logging for Free’ eBook is also available as a free download. The link is included when you subscribe to ACC Automation.