Compare and move instructions in the Horner XL4 OCS all-in-one controller can be very powerful. We will be looking at how to use these compare and move instructions. Combining these two instructions to build a sequencer, we will apply this to an application example. Our application will be a simple traffic light. The HMI screen will show a picture of each of the lights.
Previously we discussed the following in our Horner XL4 Series:
System Hardware
Installing the Software Cscape
Cscape Software Setup
Establishing Communication
Numbering System and Addressing
User Interface
Timers and Counters
Compare Instructions – Horner XL4 Compare and Move Instructions
The compare instruction uses the following elements:
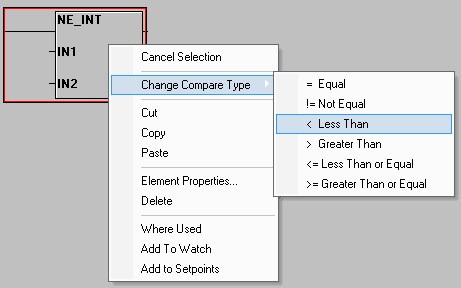
Equal A = B
Not Equal A!= B
Less Than A < B
Greater Than A > B
Less Than or Equal A <= B
Greater than or Equal A >= B
Limit Low >= Number <= High
The compare instruction will take two numbers and compare them. The numbers must be the same type. This is selected within the instruction.
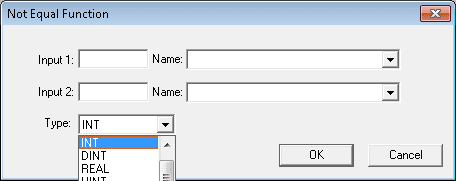
The following are the ‘Type:” that can be selected.
INT – Integer 16 bit
UINT – Unsigned Integer 16 bit
DINT – Double Integer 32 bit
REAL – Floating Point 32 bit
LREAL – Floating Point 64 bit
Right-clicking on the compare instruction will allow you to change to some of the other compare types.
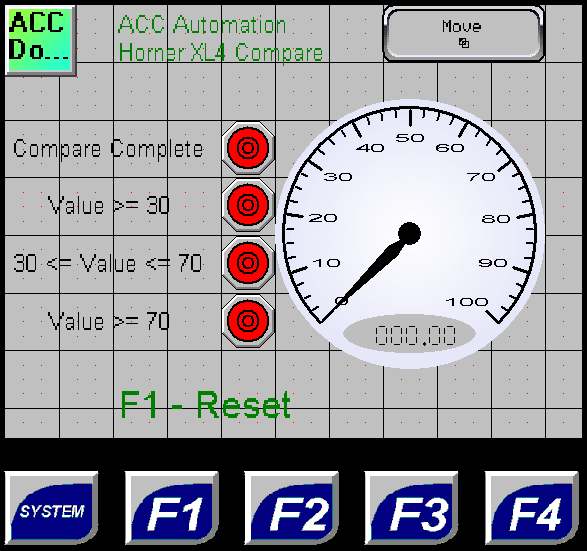
Let’s look at an example. Here is a counter that will go from 0 to 100. We want the following to happen:
Counter <= 30 then turn on %T00011
Counter >= 70 then turn on %T00012
Counter >= 30 and Counter <= 70 then turn on %T00013
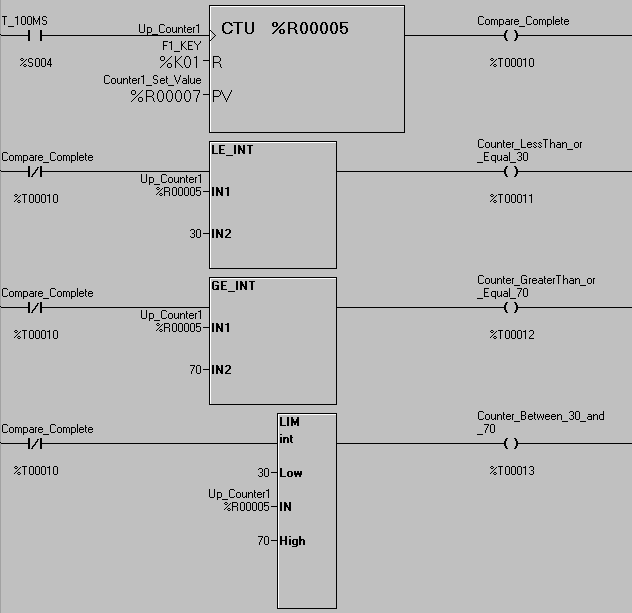
Here is the screen for the compare instruction. As the gauge increases the corresponding outputs lights will turn on. See this logic in action by watching the YouTube video below.
Move Instruction – Horner XL4 Compare and Move Instructions
We can use the following move instructions in the XL4:
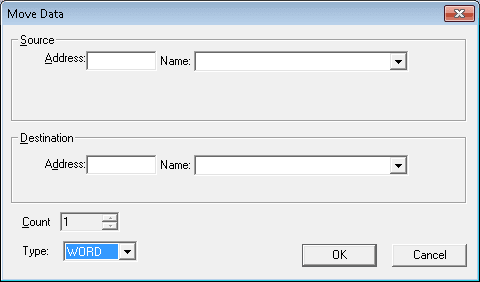
Single Register Move – This will move a 16, 32, or 64-bit data register into another.
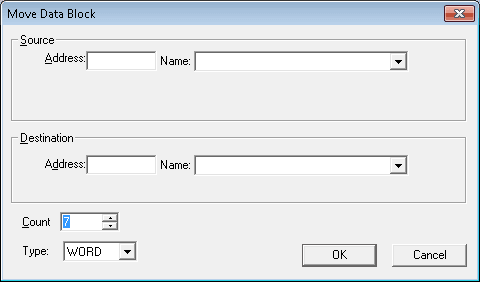
Block Register Move – This will move a block of registers from one location to another
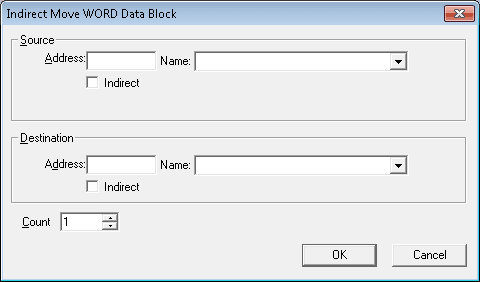
Indirect Move – This will operate on 16 bits only. The indirect offsets will work with %R registers only. You can specify the number of registers to move.
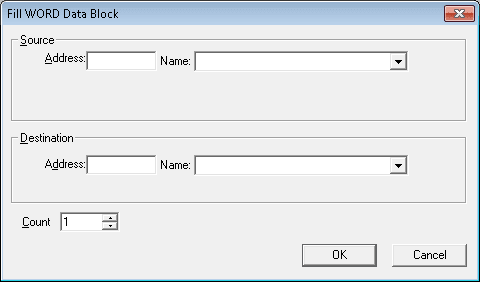
Fill Word Data Block – This will fill a block of data with the value stored in one register. This works on 16-bits only.
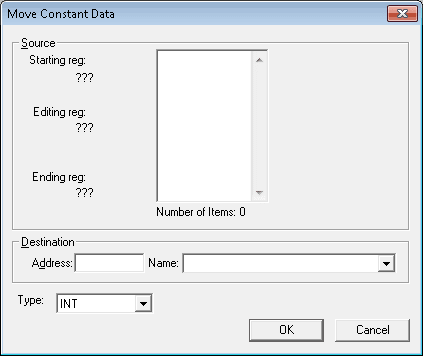
Move Constant Data – A table of constants can be moved into a group of consecutive controller registers. These values can be pasted into the instruction from excel, word, or a number of windows applications.
Let’s look at the following ladder logic. We will move indirectly what is in %R00001 to the destination %R00002. This means that if the value in %R00001 is ‘1000’, then it will move %R01000 to address %R00002.
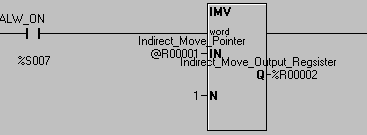
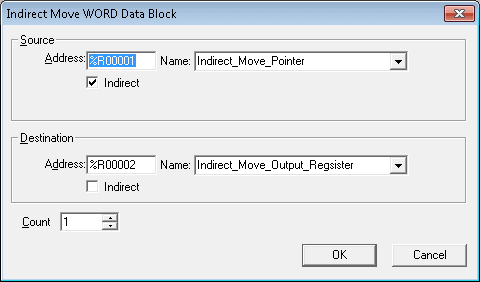
Here is the screen display of this instruction.
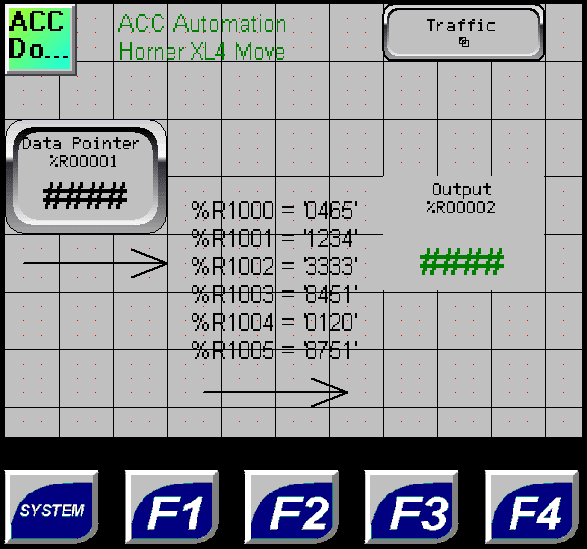
Note: The screen numeric input will limit the value in %R00001 to a number between 1000 and 1005. See this logic in action by watching the YouTube video below.
Traffic Light Program – Horner XL4 Compare and Move Instructions
We will now look at the traffic light program. A north/south and a west /east traffic light will be programmed. The sequence of operation will be a 3-second red overlap. Then 5 seconds for the green light and then 3 seconds for the yellow light. We will then have the 3-second overlap again with the same sequence on the other traffic light. Here is what our screen will look like.

On the screen, we have two animations. The number in these registers represents the image that will be displayed.
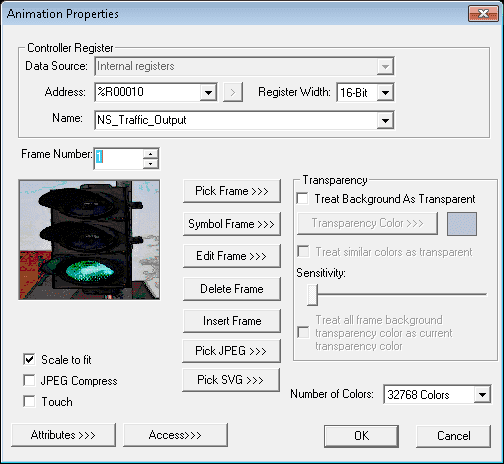
North / South Traffic Light – %R00010 – 0 Red, 1 Green, 2 Yellow
West / East Traffic Light – %R00011 – 0 Red, 1 Green, 2 Yellow
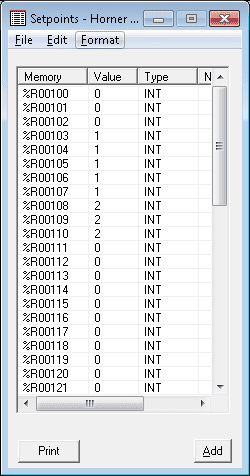
We will place the sequence of events for the N/S traffic light starting at location %R00100
The sequence of events for the W/E traffic light starts at location %R00150.
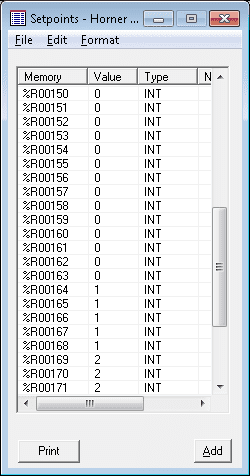
These values can be pre-programmed into the ‘Setpoints’ part of the program. To view this information, go to the main menu and select Program | Setpoints. You can also see the Setpoints under the Project Navigation tab.
We will be using %R00020 and %R00021 for the pointers to the sequence in the ‘Setpoints’ lists for the traffic light.
Here is the first rung of the ladder program.

The first scan flag will move 100 into %R00020 and 150 into %R00021. This will reset the program and ensure that we start with a red, red sequence.
We move indirectly %R00020 (@R00020) to the North / South traffic output %R00010. We also move indirectly %R00021 (@R00021) to the West / East traffic output %R00010. A compare is then done on our sequence pointer. If it is at the end of our sequence (121) then this allows the move 100 into %R00020 and 150 into %R00021. This acts as our reset for the sequence.
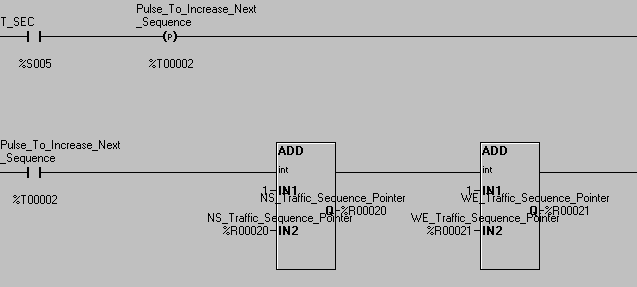
The next part of our logic uses the system 1-second clock pulse. This is used to increment our two-pointers in our program. Note: We will continually increment both at the same time. Our compare and move statements will take care of resetting the sequence.
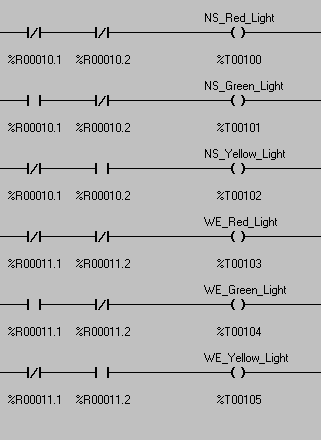
The final part of our ladder logic will demonstrate taking our output and turning on specific outputs to represent the different lights. If this was an actual application, we would tie our real-world outputs to these bits.
You can download this application here. It will contain all of the screens and logic programming.
See this logic in action by watching the YouTube video below.
All of the documentation for the XL4 can be downloaded at the following URL:
https://hornerautomation.eu/product/xl4-prime-ocs-3-5-colour-touchscreen/
Next time we will look at math instructions.
Watch on YouTube: Horner XL4 Compare and Move Instructions
If you have any questions or need further information please contact me.
Thank you,
Garry
If you’re like most of my readers, you’re committed to learning about technology. Numbering systems used in PLC’s are not difficult to learn and understand. We will walk through the numbering systems used in PLCs. This includes Bits, Decimal, Hexadecimal, ASCII and Floating Point.
To get this free article, subscribe to my free email newsletter.
Use the information to inform other people how numbering systems work. Sign up now.

The ‘Robust Data Logging for Free’ eBook is also available as a free download. The link is included when you subscribe to ACC Automation.