We will now be looking at how to use analog inputs to our Arduino UNO controller. An analog input converts a voltage level into a digital value. This can then be used in our Arduino program or sketch. The analog input signal can represent many different items. Speed, levels, distance, brightness, density, humidity, etc. are a few items that this external input can represent.
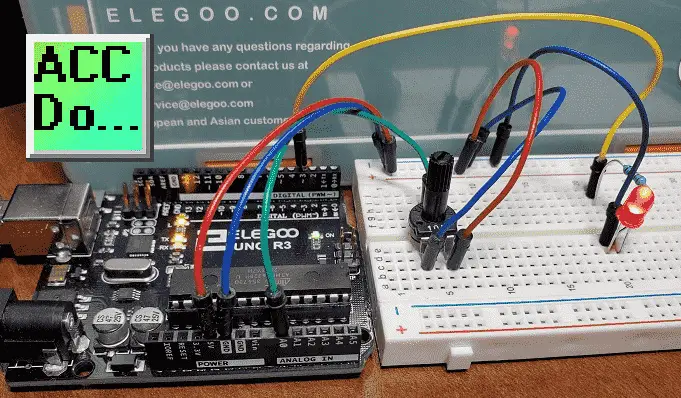
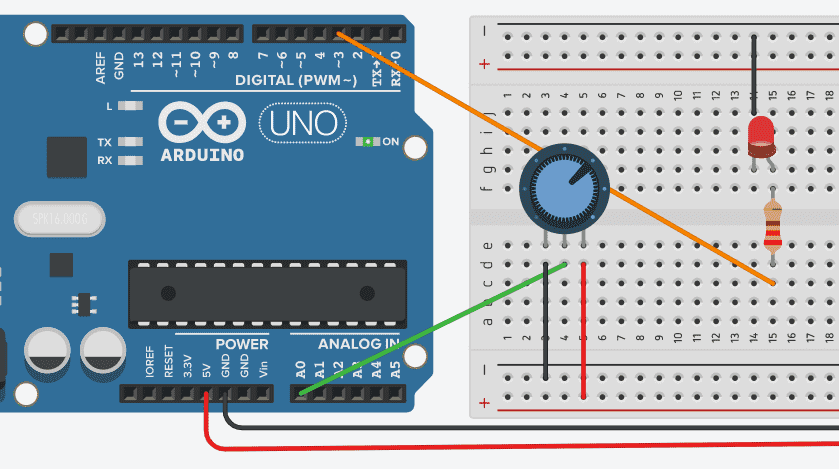
We will be wiring a 10K potentiometer to the first analog input of the controller. The Arduino Uno R3 from our Super Starter Kit will be used. As the analog values changes via our potentiometer, we will use PWM to change the brightness of an LED. We will look at how this conversion from analog voltage to digital is done. Values will be displayed on the built-in serial monitor of our Arduino IDE software. Let’s get started.
A full list of posts in this series can be obtained at the following location:
Arduino Uno Software Super Starter Kit
Previous posts in this Arduino Uno Super Starter Kit Series:
Hardware and Powering – Video
Software – Video
LEDs – Video
Digital Inputs – Video
Watch the video below of the operation of analog inputs with our Arduino Uno Kit. Elegoo Super Starter Kit UNO R3.
10K Potentiometer – Analog Input
A potentiometer is a resistor that can vary. In the picture, you can see the center area of the potentiometer. You will be able to physically turn this center location. This will change the resistance of the potentiometer (pot) from 0 to the maximum ohms specified. In our case, this is 10K ohms.
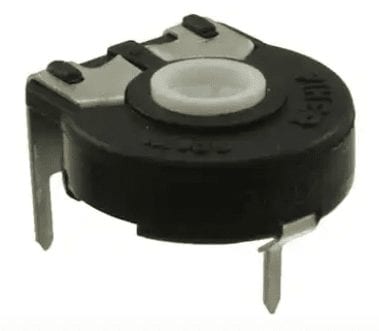
The potentiometer has three pins. (Analog input, GND, +VDC)
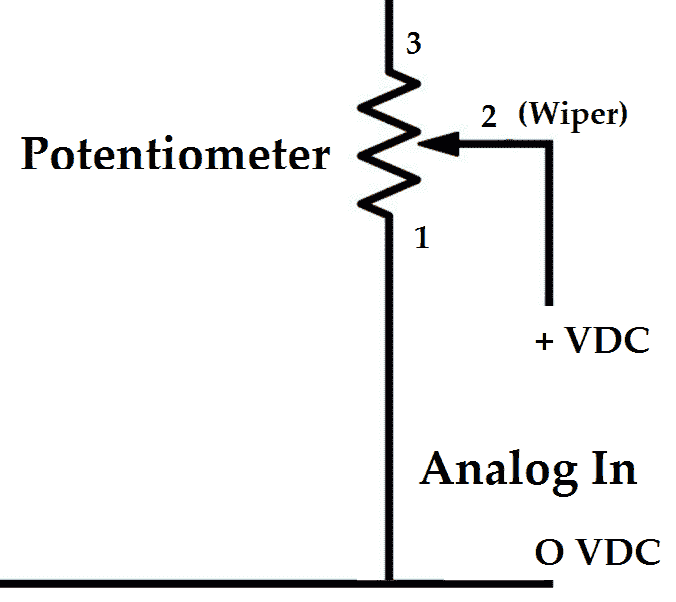
Usually, the middle pin is known as the wiper. The other pins are connected to the +V and GND of our system.
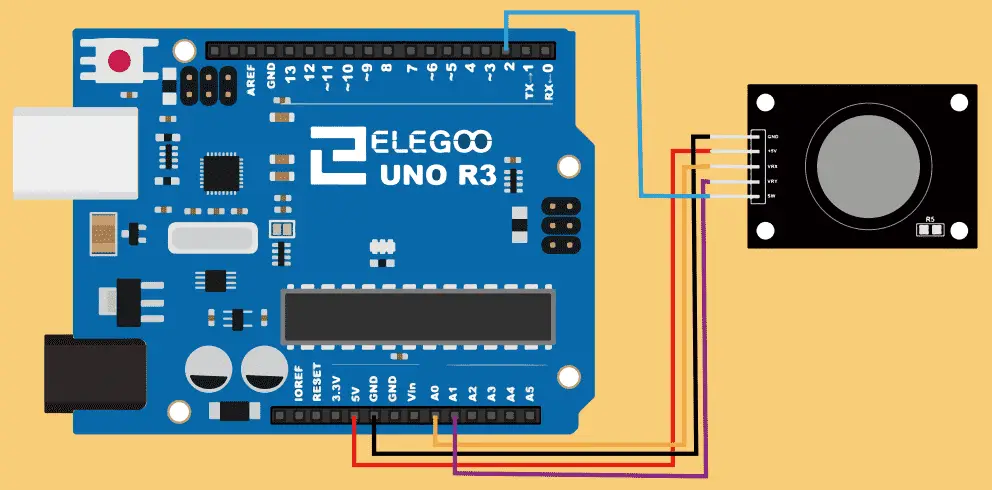
Wiring Analog Input to Arduino UNO
Our analog input will be wired to input pin A0 of our Arduino UNO controller. The LED light will be controlled by pin 3 which is the first PWM output.
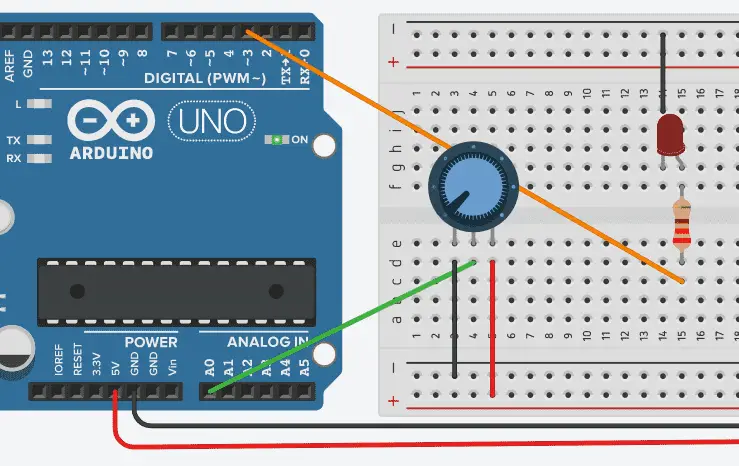
The wiper is connected to our first analog input A0. GND is connected to one side and +5VDC is connected to the other side of the potentiometer. Currently, the potentiometer is in a low state. Turning it up will increment the voltage signal into the A0 pin. This will increase up to +5VDC.
Arduino UNO Analog Resolution
The Arduino Uno has 6 analog inputs, labeled A0 through A5, each of which provides 10 bits of resolution (i.e. 1024 different values). They default to measure from GND to +5 volts. It is possible to change the upper end of their range using the AREF pin and the analogReference() function.
10-bits of resolution mean 10 on/off switches represent the analog input.
0000000000 = 0 volts
1111111111 = 5 volts
These bits can represent a number.

Call up the windows calculator. Programmer can be selected from the menu to display the programmer calculator.
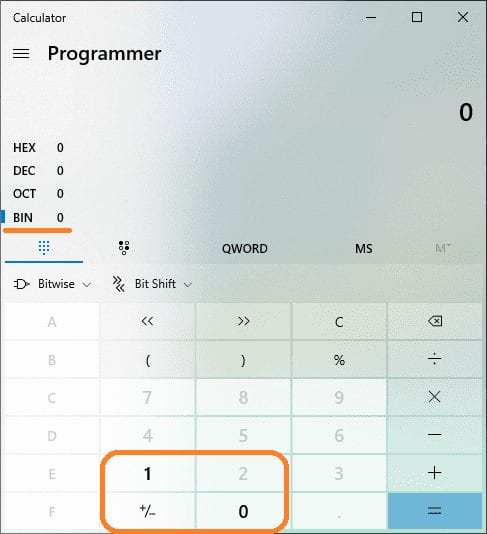
Select BIN (Binary) for the numbering system. You will notice that binary will only display a 1 or 0 so that is all that is shown on the keypad.
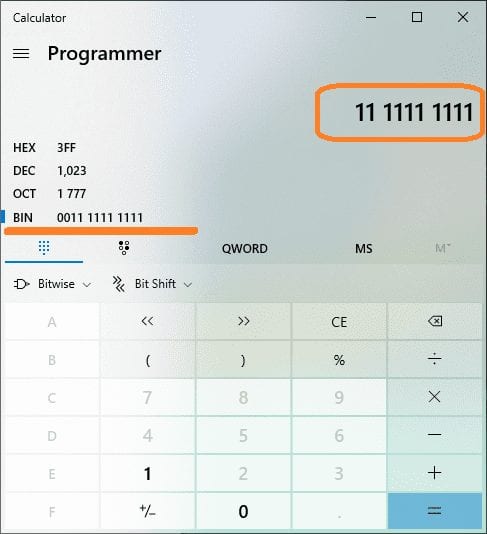
If we type in 11 1111 1111 as our binary number on our programmer calculator, it will display the equivalent value representation in HEX (hexadecimal), DEC (decimal), and OCT (octal) numbering systems.
In decimal, the values are from 0 to 1023. Since 0 is one value as well, we have 1024 different values that can be displayed for our 10-bit input of the analog.
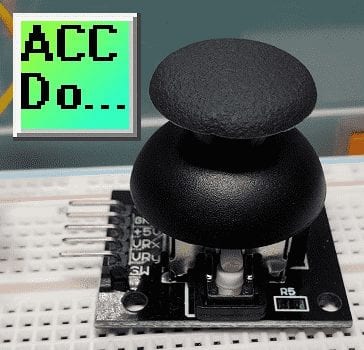
Analog Joystick in the Arduino UNO Elegoo Super Starter Kit
The starter kit includes an analog joystick. This joystick has two axes of movement. (X and Y) It also has a switch input that can be wired up using a pull-up or pull-down resistor.
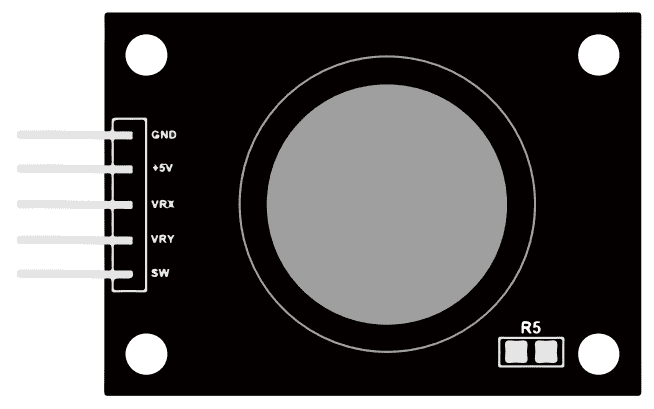
The joystick in the normal (home) position will return a value of 512 for each axis. This is half of the resolution of the analog input.
Here is a wiring diagram for the analog joystick. We will show this joystick in the video below and talk about the functions.
A sample program is included with the companion disk of the Elegoo starter kit. Try this out to see how you can incorporate this device in your next project.
Arduino UNO Analog Input PWM LED – Serial Monitor
This sketch (program) will introduce the serial monitor that is built into the Arduino IDE software program. We discussed the Arduino Serial Monitor in this post about the P1AM Industrial Arduino. Escape codes and external serial monitors like Putty are also discussed.
We will read the analog input point, convert it to a voltage, convert it to a PWM output, and then display it on the serial monitor. Here is the actual code for our program.
/* ACC AutomationArduino Uno Super Starter Kit Digital Inputshttps://accautomation.ca/ */ /*-----( Import needed libraries )-----*/ /*-----( Declare Constants and Pin Numbers )-----*/ int led3Pin = 3; /*-----( Declare objects )-----*/ /*-----( Declare Variables )-----*/ void setup() /****** SETUP: RUNS ONCE ******/ { /* Serial Port Setup https://www.arduino.cc/reference/en/language/functions/communication/serial/begin/ Serial.begin(speed) - Default: 8 data bits, no parity, one stop bit Serial.begin(speed, config) */ Serial.begin(115200); // Serial port setup. 115200 is the communication rate. pinMode(led3Pin, OUTPUT); }
void loop() /****** LOOP: RUNS CONSTANTLY ******/
{
// read the input on analog pin 0:
int sensorValue = analogRead(A0);
// Convert the analog reading (which goes from 0 - 1023 (10-Bit Resolution) to a voltage (0 - 5V)
float voltage = sensorValue * (5.0 / 1023.0);
// PWM LED is 0 - 255 resolution
int brightness = sensorValue * (255.0 / 1023.0);
// Set our PWM LED
analogWrite(led3Pin, brightness);
// Serial Print our parameters to monitor
Serial.print("Voltate = ");
Serial.print(voltage);
Serial.print(" Input Dec = ");
Serial.print(sensorValue);
Serial.print(" LED Brightness = ");
Serial.println(brightness);
}
Note: When calculating the brightness in the above program, you will notice that the numbers are written with one decimal place. This is because it will force the C++ compiler to calculate using float precision. The number will then be cast into an integer. (Int)
Use the upload button to transfer the Arduino program to the controller. Select the serial monitor button on the top right of the IDE screen to start the serial monitor.
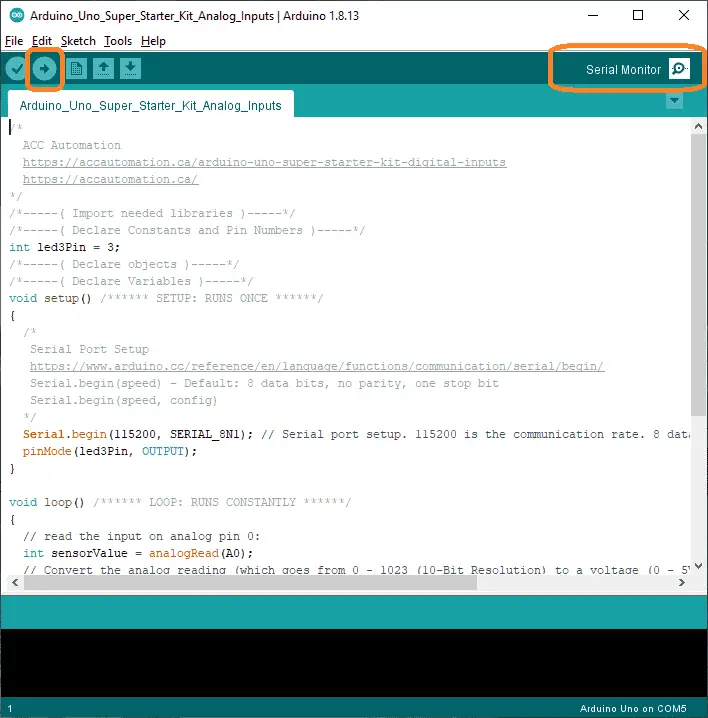
The serial monitor will now be displayed. Ensure that the baud rate is selected for the same speed that is specified in the program. In our case, this is 115200.

We can now test our program. Turn the potentiometer connected to our analog input point. This will increase or decrease the brightness of the LED. The serial monitor window will display these parameters.
The above Arduino program sketch can be downloaded here.
Watch the video below for the operation of the analog input and serial monitor on our Arduino Uno Super Starter Kit.
Elegoo Links:
Service
service@elegoo.com (USA and Canada)
EUservice@elegoo.com (Europe)
Arduino Compatible Links:
Product Hardware
Elegoo UNO Project Super Starter Kit
Elegoo Download Page
Amazon.com
Amazon.ca
Software
– Arduino IDE (Integrated Development Environment)
– Productivity Blocks (Development Timesaver)
– Productivity Blocks Documentation (Wiki)
Community
– Arduino Blog
– Arduino Forum
– Arduino UNO Facebook
Next time we will look at buzzers from our Arduino Elegoo super starter kit UNO R3.
Watch on YouTube: Arduino Uno Super Starter Kit Analog Inputs
If you have any questions or need further information please contact me.
Thank you,
Garry
If you’re like most of my readers, you’re committed to learning about technology. Numbering systems used in PLC’s are not difficult to learn and understand. We will walk through the numbering systems used in PLCs. This includes Bits, Decimal, Hexadecimal, ASCII, and Floating Point. To get this free article, subscribe to my free email newsletter.
Use the information to inform other people how numbering systems work. Sign up now. The ‘Robust Data Logging for Free’ eBook is also available as a free download. The link is included when you subscribe to ACC Automation.