We will now look at the Arduino serial monitor com. This serial communication is good for troubleshooting and displaying information to you or your operators. The Arduino integrated development environment (IDE) has a built-in pop-up serial monitor. The serial monitor can be used to receive and send serial data to our Arduino program. This can be a great feature to help us in debugging or controlling Arduino programs. (Sketches)
We will be modifying the blinking light program that we did previously and add a one to an integer every time the P1AM-100 arduino CPU switch is on. This will be then printed on the serial monitor.
Removing the blinking light, we will run our program again an see the difference in speed with the delay instructions removed. Productivity blocks will be used to program our industrial arduino controller.
We will then look at escape character codes that we can use with our industrial arduino. Since the built-in serial monitor will not interpret the escape codes, we will be using Putty as our serial monitor program. Let’s get started.
Previous posts in this Productivity Open Arduino Compatible Industrial Controller Series
A full list can be obtained at the following location:
Productivity Open (P1AM-100) Arduino Controller
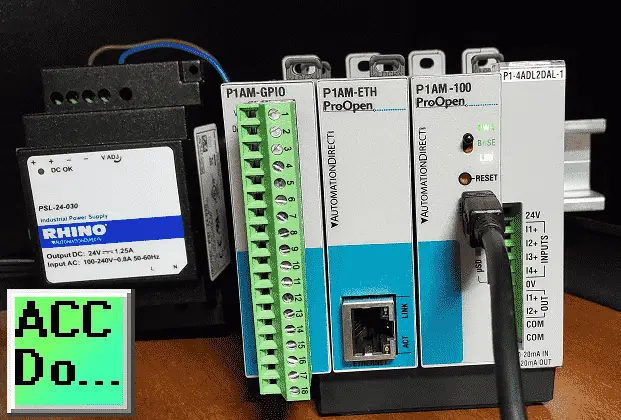
Productivity Open Arduino Controller Hardware
– Starter Kit Unboxing Video
– Powering Up Video
Installing the Software – Video
First Program – Video
Program Structure – Video
Variables Data Types – Video
Watch the video below to see the serial monitors work on our productivity open industrial Arduino controller.
Adding Serial COM Instructions
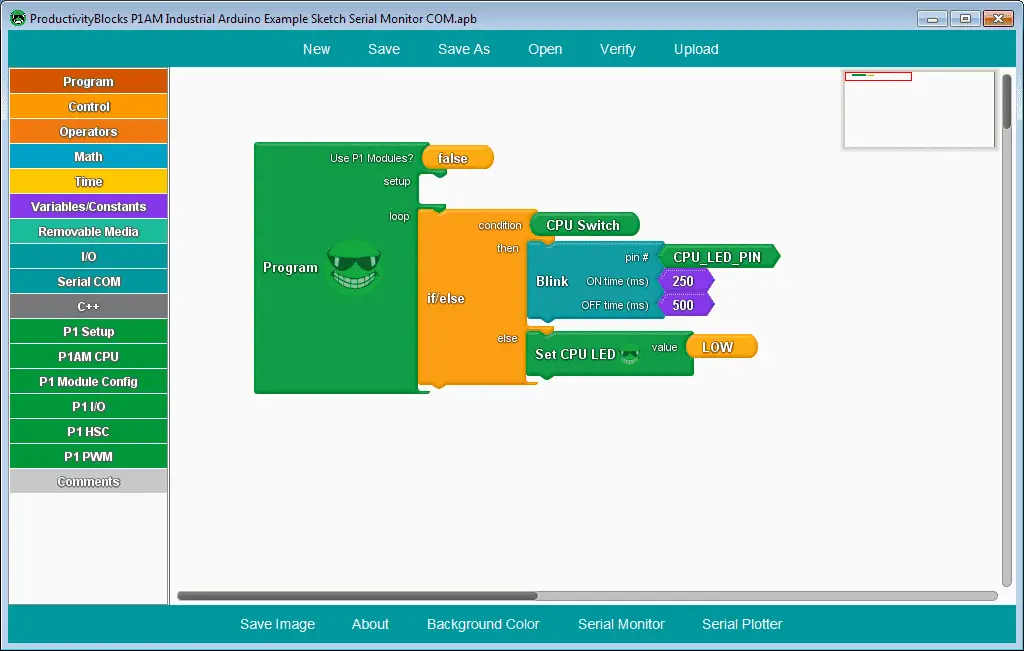
We will now add Serial COM instructions to the program we made in the Program Structure post.
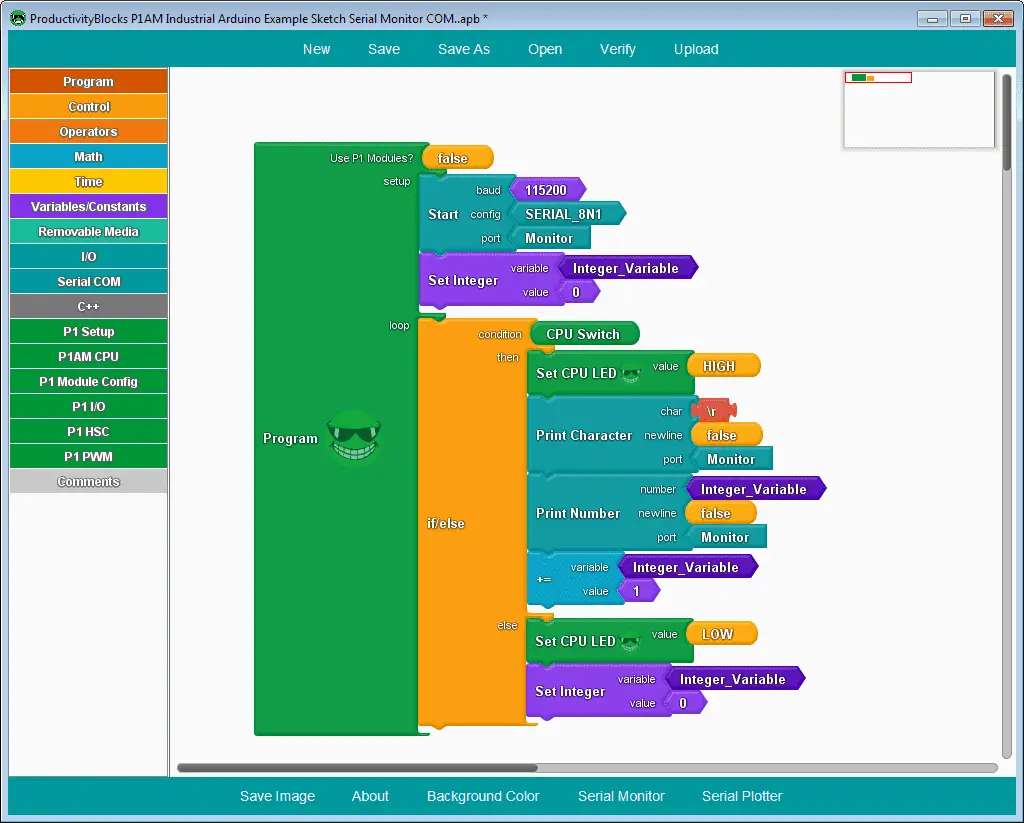
Select the Serial COM menu on the left side. Click and drag the Start instruction onto our workspace. Position it under the setup part of our program.
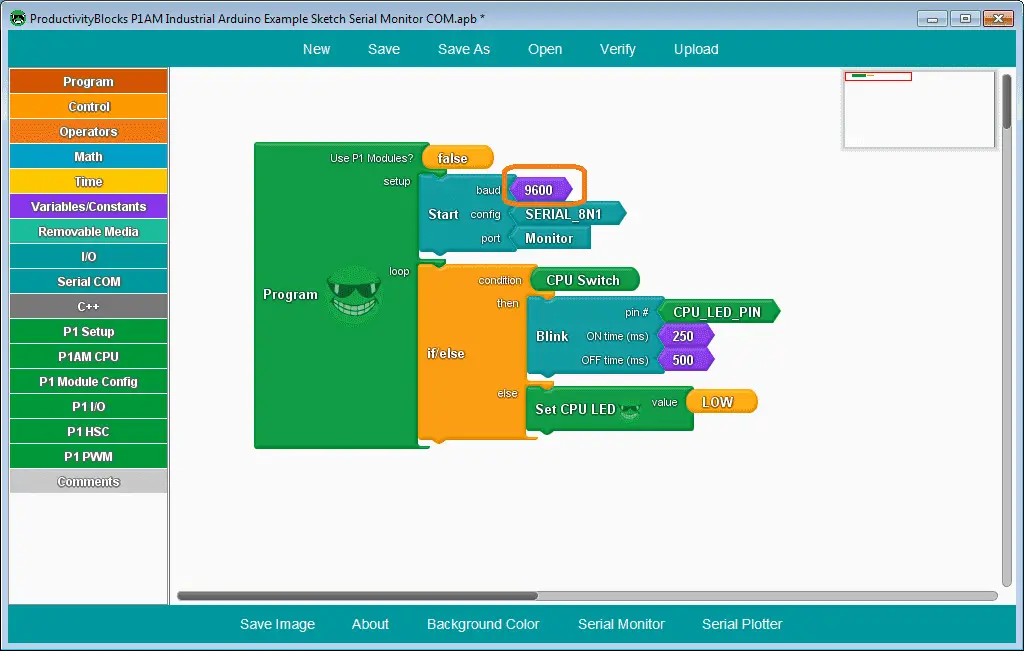
We will leave the default values the same except for the baud rate. Increase this to 115200. This will set our serial communication to 115200 baud, 8 data bits, No parity, and 1 stop bit.
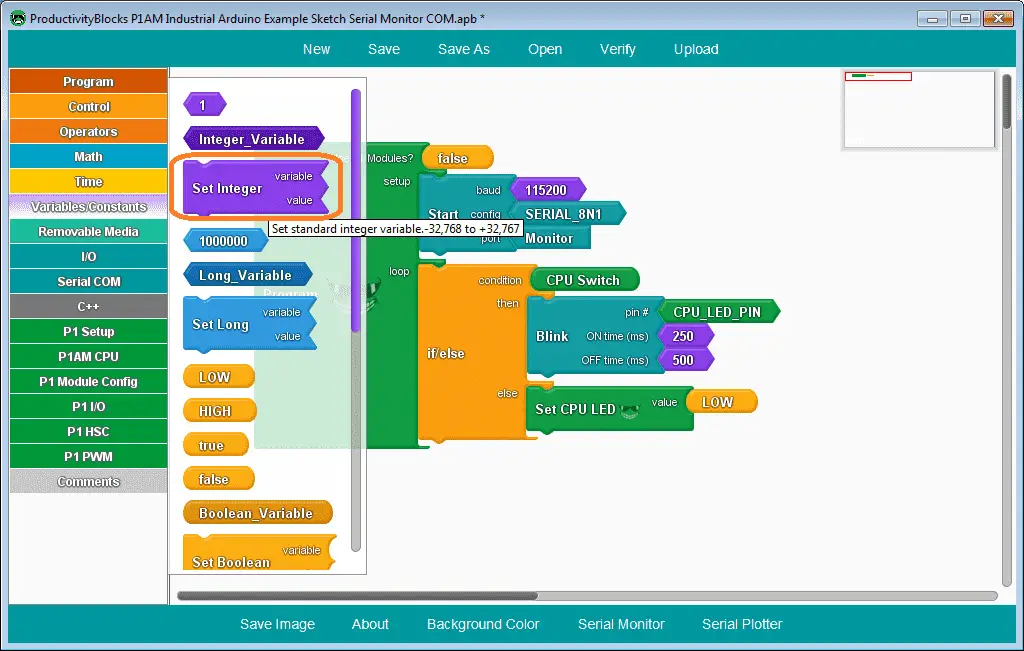
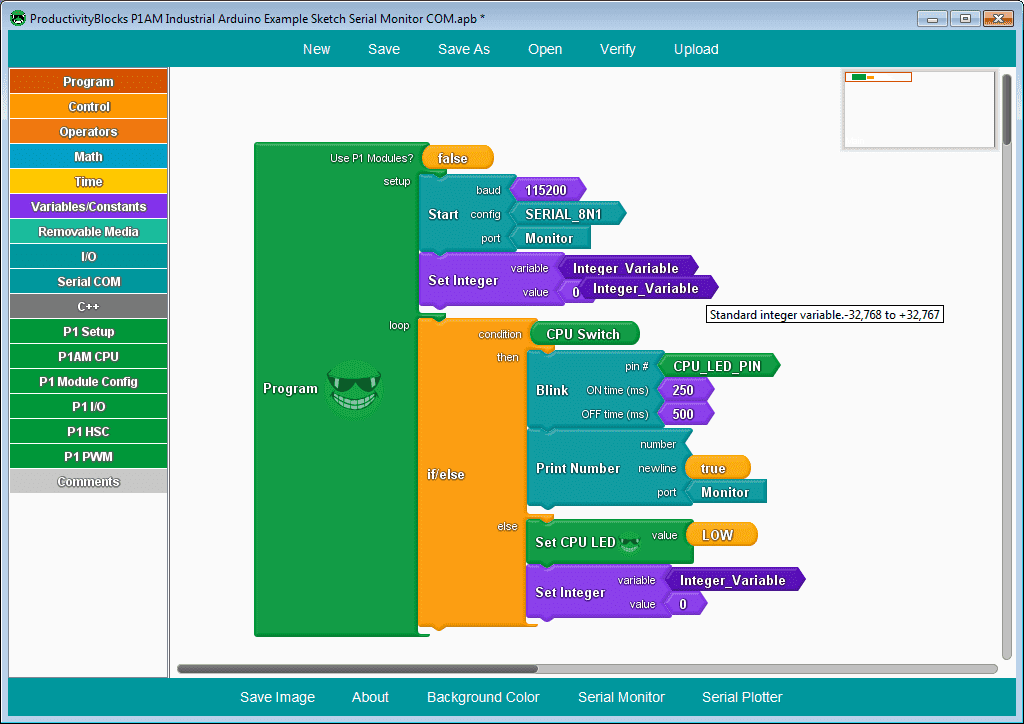
Select the Set Integer instruction under the Variables\Constants menu on the left side menu. Click and drag to the workspace and place it under the start (Serial COM) instruction.
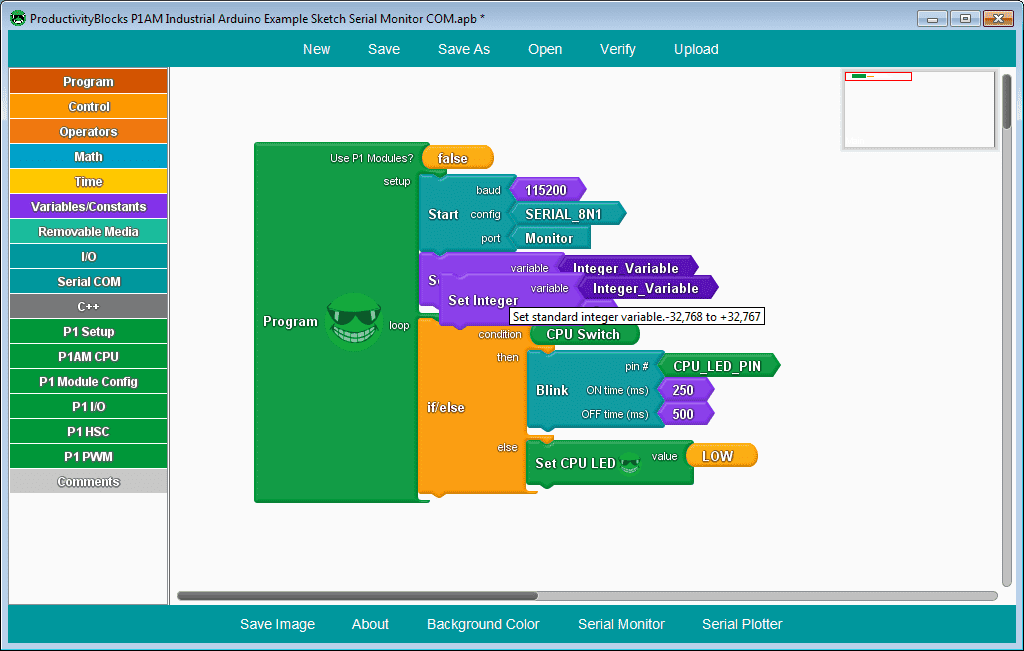
Right-click on the Set Integer instruction and select clone. This will make a copy of the instruction that will place under the else condition of our if/else instruction.
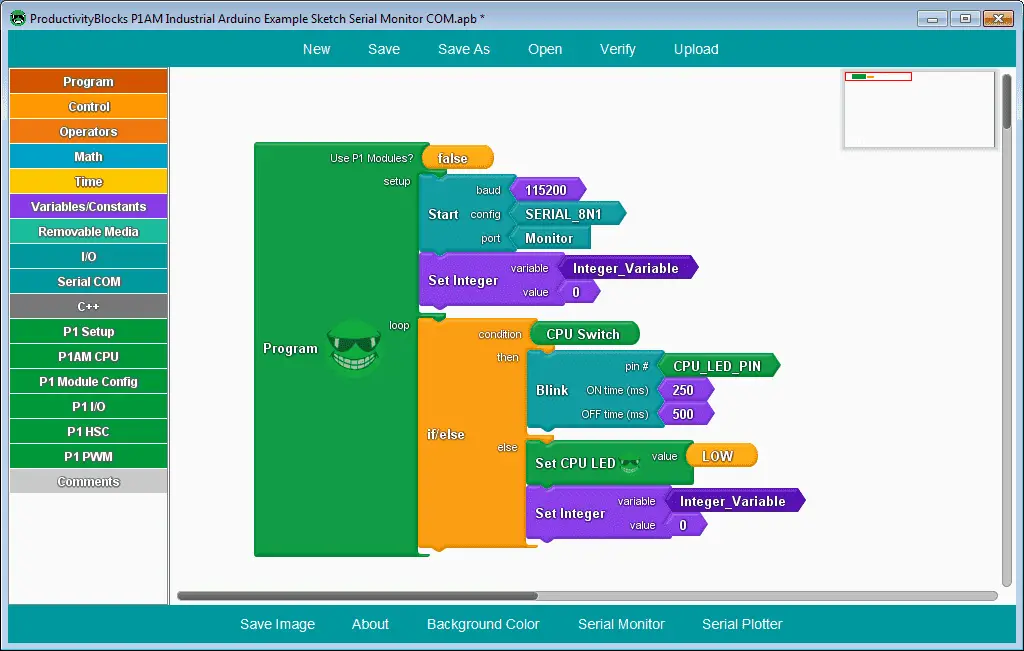
Here is our program so far.
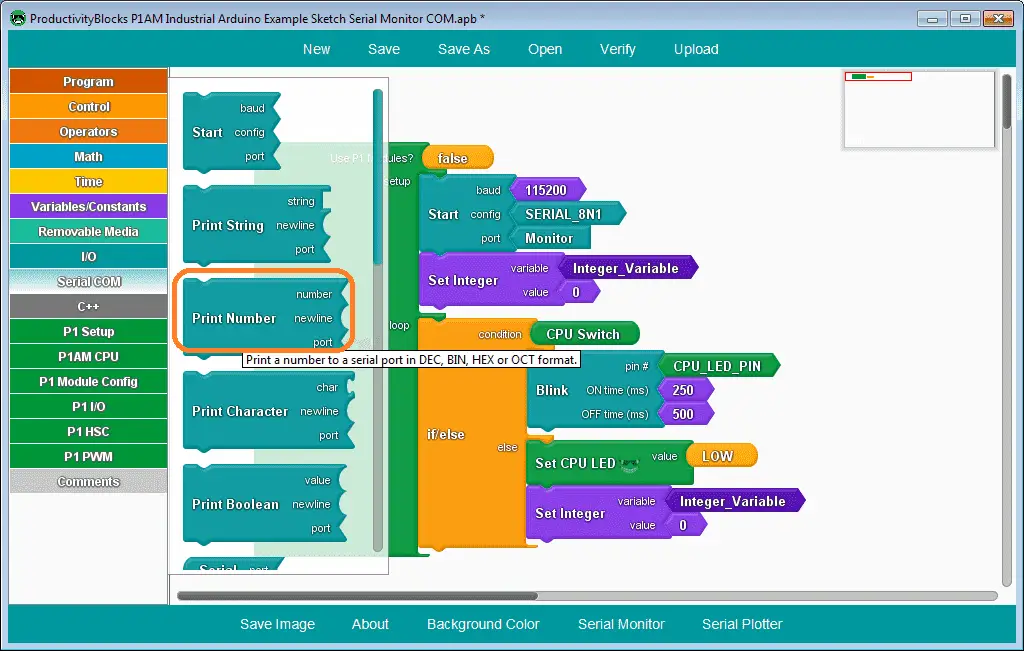
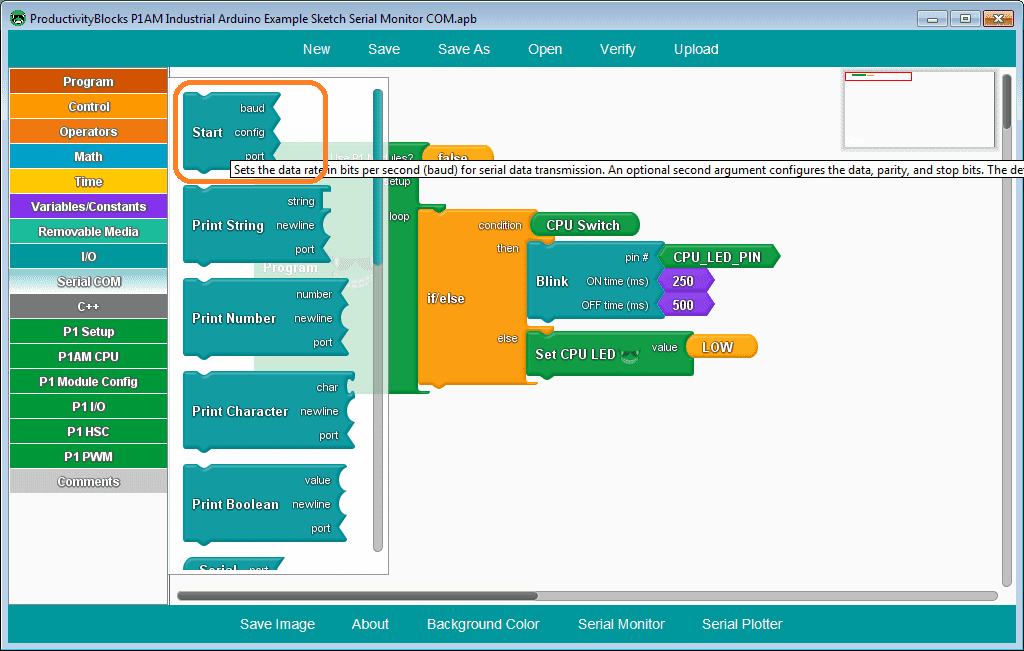
Select the Serial COM menu on the left side. Click and drag the Print Number instruction onto our workspace under the Blink instruction.

Remove the 1 in the print number instruction by clicking and dragging it to the left side menu.
Right-click on the Integer_Variable and select clone. Drag the Integer_Variable to the number on the print number instruction.
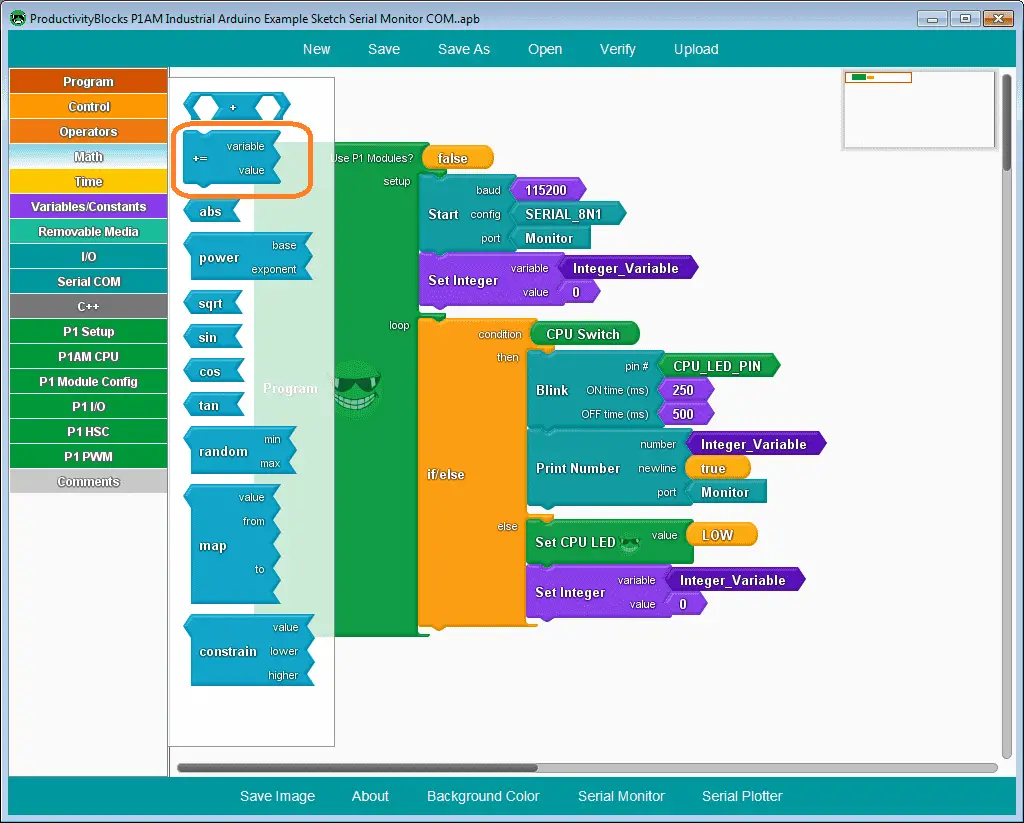
Under the Math menu on the left-hand side, select +- instruction. Click and drag this onto our workspace and place it under the print number instruction.
Change the value we are adding to our Interger_Variable to 1.
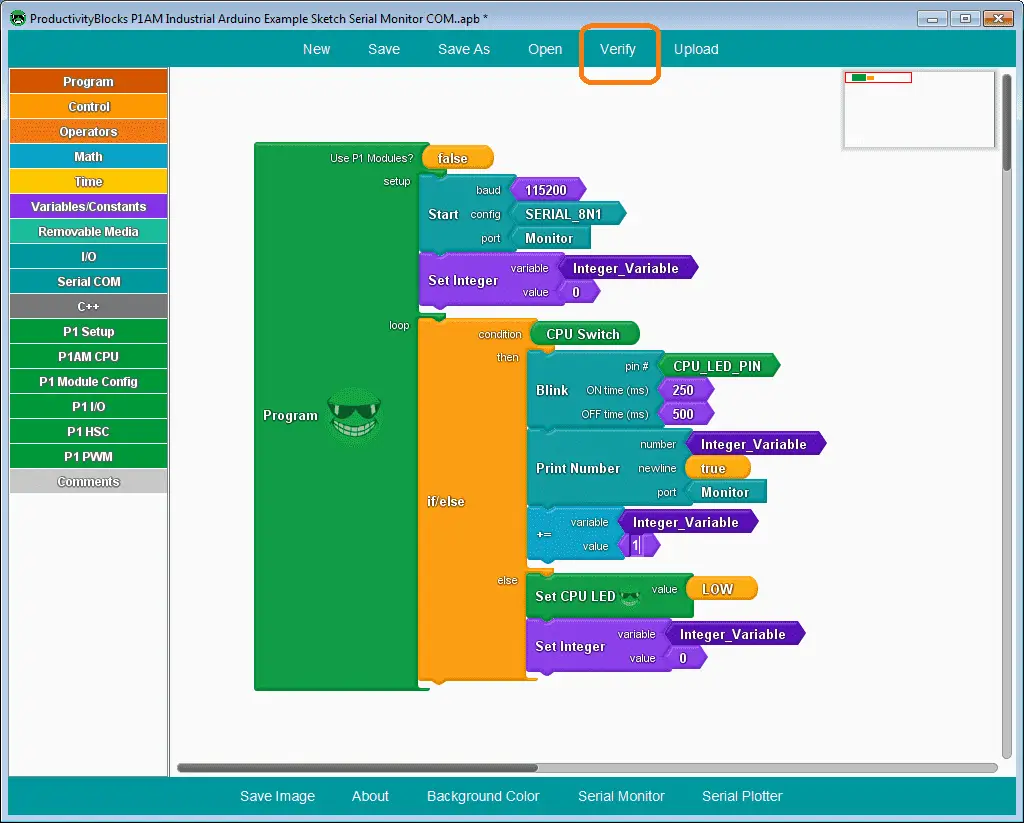
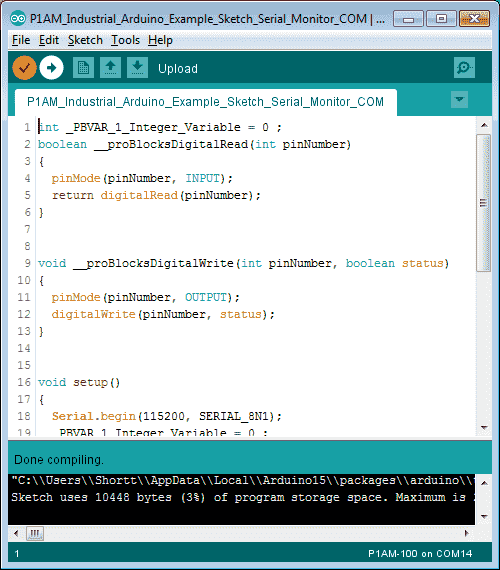
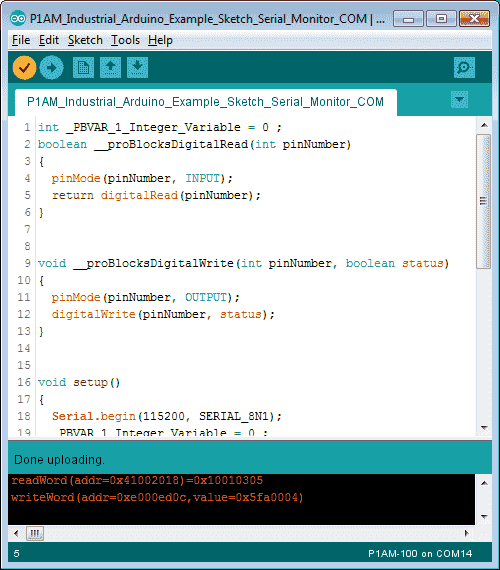
Select verify from the top menu.
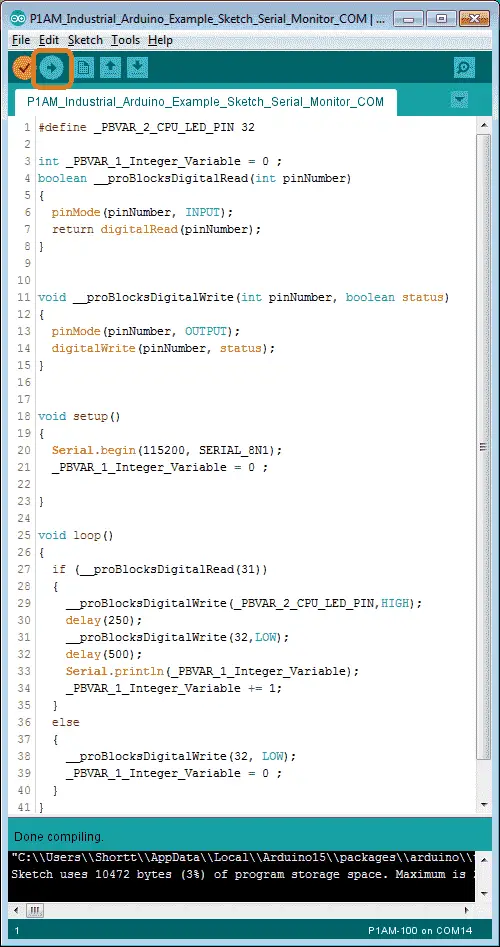
This will convert our program to C++ in the IDE. The syntax is something that we do not have to worry about because ProductivityBlocks makes it very easy to visually see our code.
Select the upload button to send this program to our industrial Arduino P1AM-100.
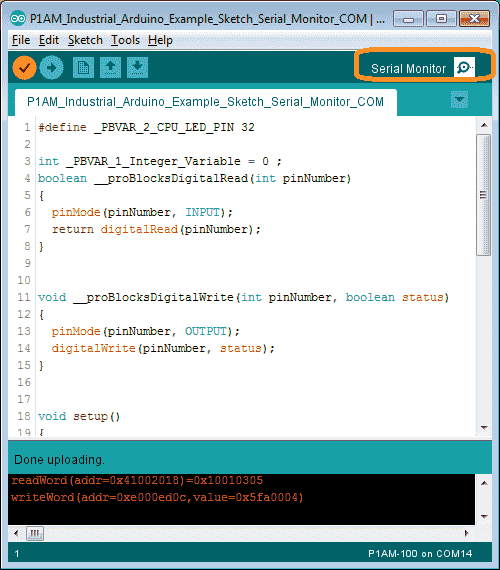
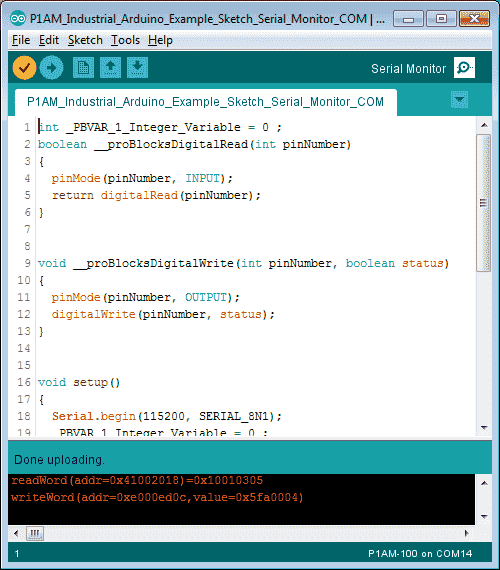
Once it is done uploading. Select the Serial Monitor icon on the top menu of the IDE.
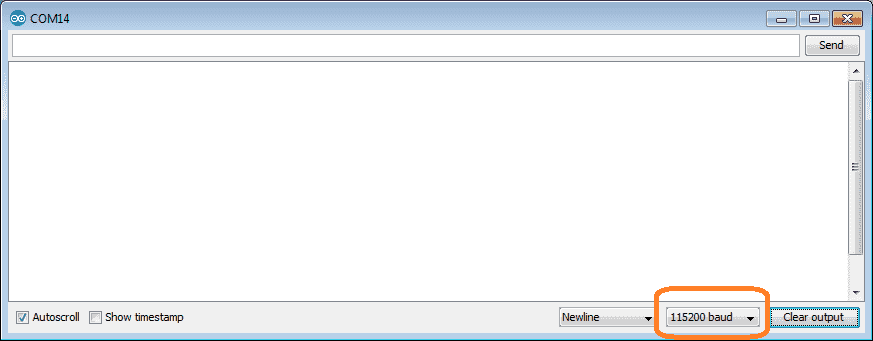
Ensure that the baud rate is set to 115200 that we set above.
We can now turn on the P1AM-100 CPU switch.
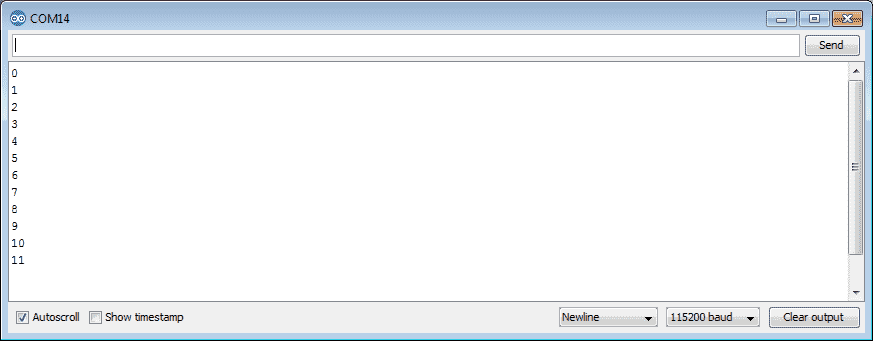
The integer value will be printed and incremented after each blink of the CPU led. Notice that it is 250 milliseconds on and 500 milliseconds off. This gives us a total of 750 milliseconds before our serial print will be done out to our monitor. If our program needed to monitor another switch, this program would be too slow to pick it up.
Speeding Up our Program (Sketch)

Modify our program by removing blink instruction. This utilized the delay instruction that is currently slowing down our program. Instead of the blink instruction, we will be setting the CPU led high if the switch is on.
Save and then verify the productivity blocks program.
Upload to our industrial Arduino P1AM controller.
Select the Serial Monitor icon on the top menu of the IDE after uploading our new program.
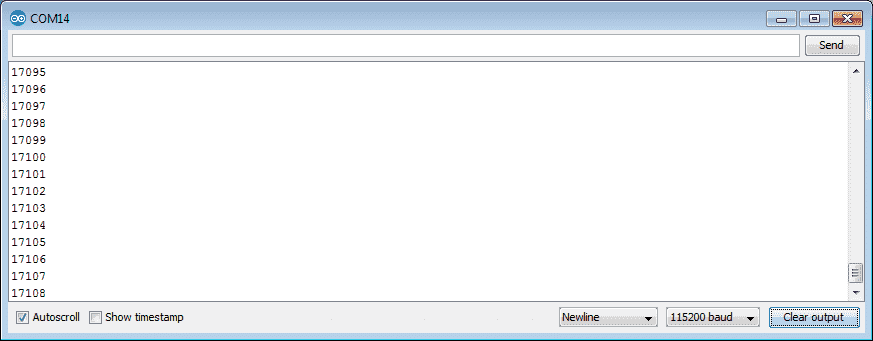
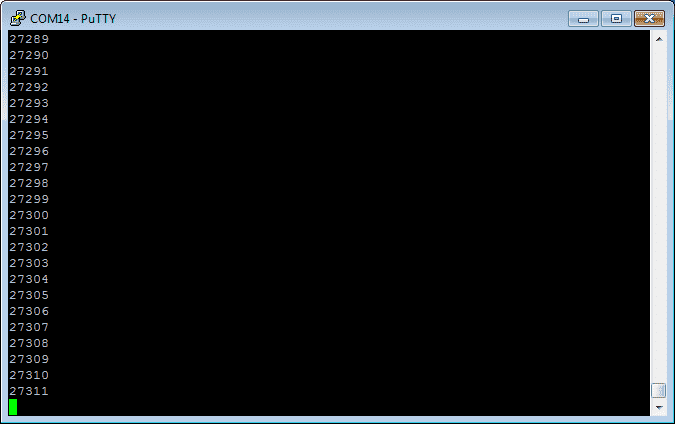
Running our program now you can see that our numbers are rapidly increasing. Our program is running in the microsecond range instead of the millisecond range.
Using Escape Character Codes in Arduino
The serial monitor window built into the IDE works well for quick troubleshooting of your program. It does not understand escape characters. Escape characters can interact with your monitor and do things like tab, form feed, backspace, newline, carriage return, etc. In order to accomplish some of the escape characters, an external terminal monitor program must be used.
Here is the ASCII chart that will show you the escape characters that are available. In the arduino the backslash indicates the start of an escape code.
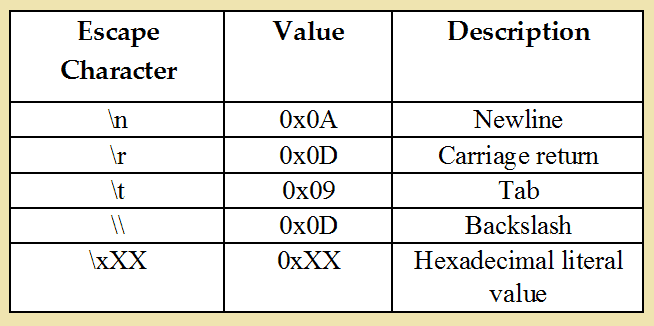
The above chart will indicate the way we print these escape character codes in the arduino.
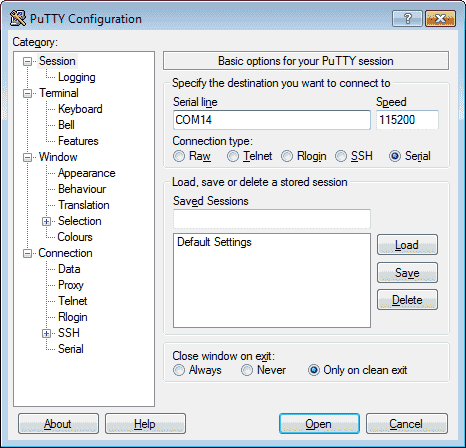
Putty Serial Monitor
Putty is a program that can use escape codes. PuTTY is an SSH and telnet client, developed originally by Simon Tatham for the Windows platform. PuTTY is an open-source software that is available with source code and is developed and supported by a group of volunteers.
Download PuTTY here.
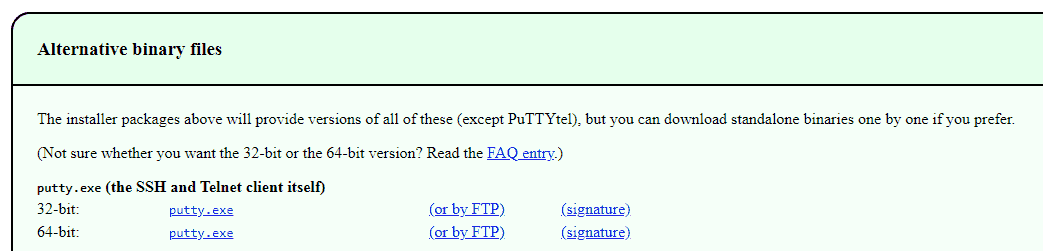
Since I am using a 64-bit Windows 7 machine the download for putty will be the 64-bit version of the standalone binaries.
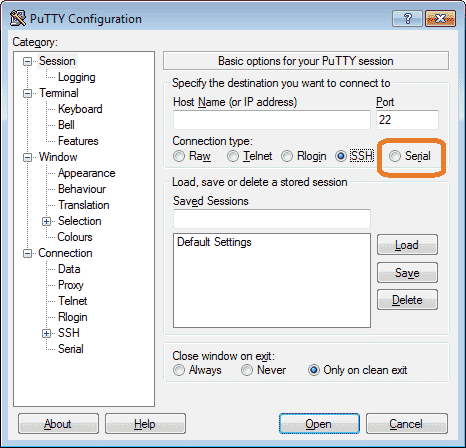
Double click on the putty.exe file that you downloaded.
Select the serial for the connection type.
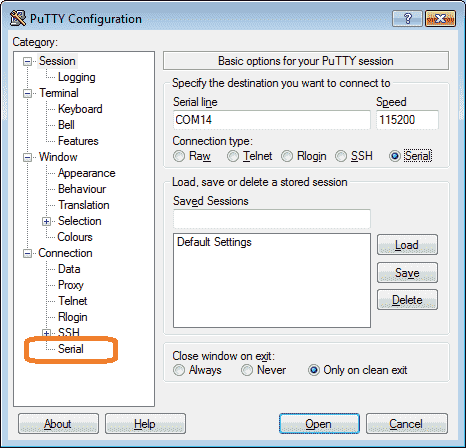
Select Serial from the left side menu under Category.
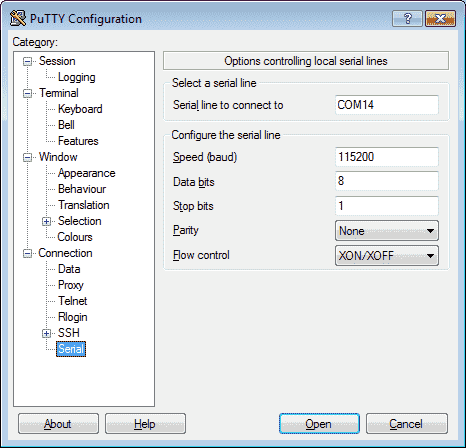
Ensure that the settings are the same as our arduino serial monitor port. 115200 baud, 8 data bits, 1 stop bit, and parity none.
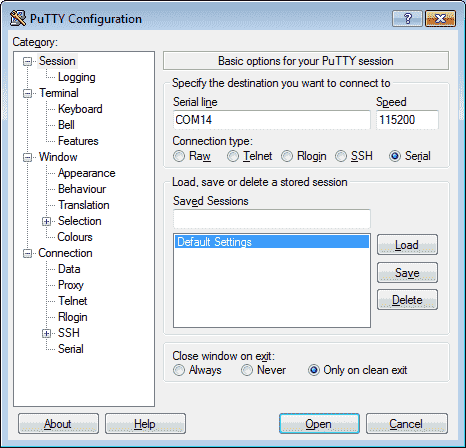
Select Session on the left side menu. Select Default Settings and then save. This will now be the settings each time we start putty.
Now select the Open button on the bottom of the putty configuration window.
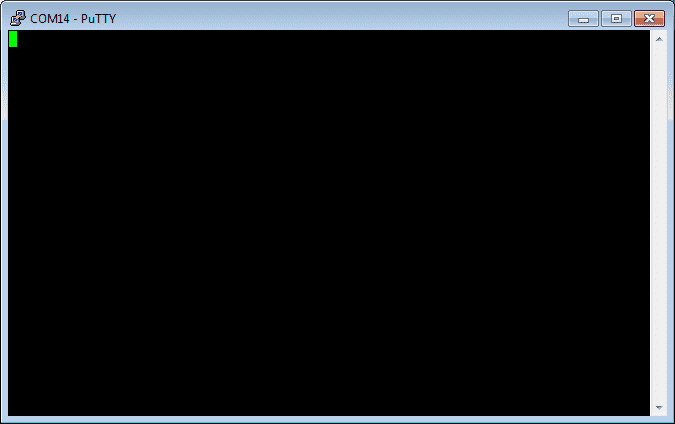
We will now run our program.
Our program looks similar to the built-in serial monitor of the IDE. Now let’s add some escape characters.
Adding Escape Codes to our Serial Monitor Program
Select the print character instruction under the Serial COM menu. Add this before our print number instruction. Change the character that we are going to print to the escape code for a carriage return. (/r)
Change the new line on our print instructions to false. The new line is actually the command for both a carriage return and new line. In our case, we only want a carriage return so the variable remains on the top line and gets updated. Select save and then verify on the top menu.
Upload the program to our P1AM industrial arduino.
Start our Putty program. Notice since we changed the default settings, our program starts in serial mode with the correct settings. Select Open.
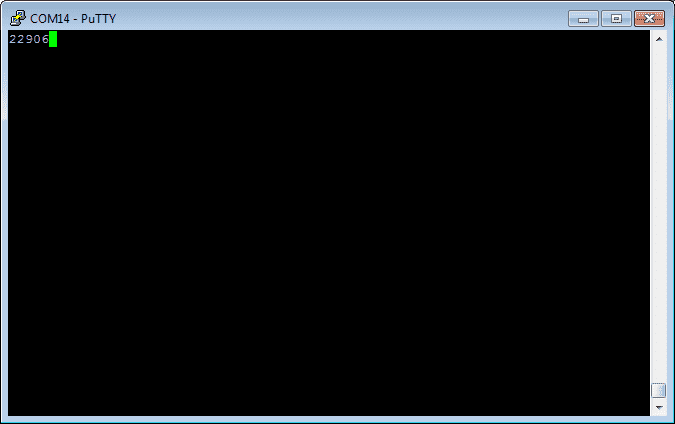
As our program runs, the variable is now just on the top line. Stop putty and try the built-in serial monitor of the IDE. Since it does not understand the escape code everything will be on one line scrolling across the screen.
Note: You must stop the serial monitor programs before downloading a new program to the Arduino controller. This is because it uses the same serial line for communication with the IDE.
Watch the video below to see Putty working with our productivity open industrial arduino controller.
Download the P1AM-100 sample sketch and Productivity Block program here.
Productivity Open Arduino Compatible Links:
Product Hardware
– Productivity Open (Automation Direct)
– P1AM-100 Specifications
– Productivity Open User Manual
– Configure a Productivity Open Arduino-based Controller
– Open Source Controllers (Arduino-Compatible)
– Productivity Open Documentation (Facts Engineering)
– P1AM Design Files
Software
– Arduino IDE (Integrated Development Environment)
– P1AM-100 library (Easy Interface for controlling P1000 Modules)
– Productivity Blocks (Development Timesaver)
– Productivity Blocks Documentation (Wiki)
Community
– Automation Direct Forum – Open Source Devices
Next time we will look at program control in the P1AM-100 Arduino Industrial Controller.
Watch on YouTube: Productivity Open P1AM Industrial Arduino Serial Monitor COM
If you have any questions or need further information please contact me. Thank you, Garry
If you’re like most of my readers, you’re committed to learning about technology. Numbering systems used in PLC’s are not difficult to learn and understand. We will walk through the numbering systems used in PLCs. This includes Bits, Decimal, Hexadecimal, ASCII and Floating Point. To get this free article, subscribe to my free email newsletter.
Use the information to inform other people how numbering systems work. Sign up now. The ‘Robust Data Logging for Free’ eBook is also available as a free download. The link is included when you subscribe to ACC Automation.