
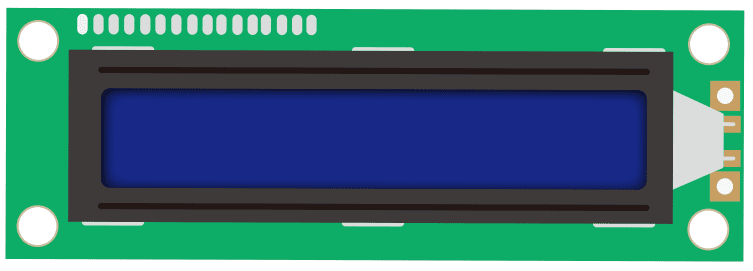
An LCD (Liquid Crystal Display) is a great way to display information in our Arduino Uno controller. We will be wiring and programming an alphanumeric, two rows with 16 characters on each row. The display has an LED (Light Emitting Diode) backlight with adjustable contrast.
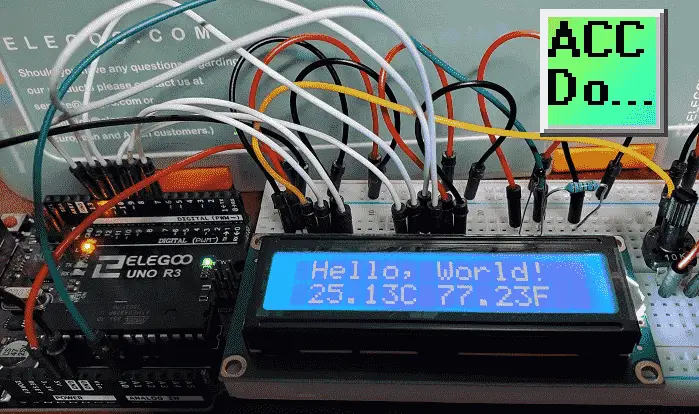
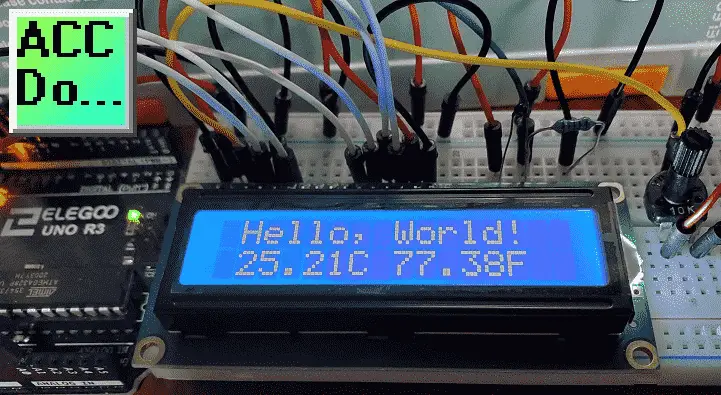
This white and blue LCD will display “Hello World!” on the top line and temperature on the bottom line. The thermistor temperature circuit created last time will be displayed in both Celsius and Fahrenheit degrees. Let’s get started.
A full list of posts in this series can be obtained at the following location:
Arduino Uno Software Super Starter Kit
Previous posts in this Arduino Uno Super Starter Kit Series:
Hardware and Powering – Video
Software – Video
LEDs – Video
Digital Inputs – Video
Analog Inputs – Video
Buzzers – Video
Tilt Ball Switch – Video
Servo – Video
Ultrasonic Sensor – Video
Temperature and Humidity – Video
IR Remote Control – Video
Watch the video below to see the LCD display in action on our Arduino Uno Kit. Elegoo Super Starter Kit UNO R3.
How do LCD displays work?
When you look at an LCD display, it is made up of a series of dots or pixels. Each of these pixels is a liquid crystal. If electricity flows through the liquid crystal it will change its structure and be more rigid. This rigidity will look darker than if no electricity is applied. If we use a light behind this LCD then the backlight will make the pixels more pronounced. So electricity on the pixel will block the light and no electricity will allow the light through. This contrast is what we see using an LCD display.
Additional information on LCDs (liquid crystal displays) can be obtained here.
Arduino LCD Displays
LCD1602 – Pin Assignments
VSS: A pin that connects to the ground.
VDD: A pin that connects to a +5V power supply.
VO: A pin that adjusts the contrast of LCD1602.
RS: A register select pin that controls wherein the LCD’s memory you are writing data to.
You can select either the data register, which holds what goes on the screen or an instruction
register, which is where the LCD’s controller looks for instructions on what to do next.
R/W: A Read/Write pin that selects reading mode or writing mode
E: An enabling pin that, when supplied with low-level energy, causes the LDC
module to execute relevant instructions.
D0-D7:Pins that read and write data.
A and K: Pins that control the LED backlight.
Wiring the LCD and Thermistor Temperature Bridge Circuit to our Arduino UNO
The LCD display needs six Arduino pins, all set to be digital outputs. It also needs 5V and GND connections.

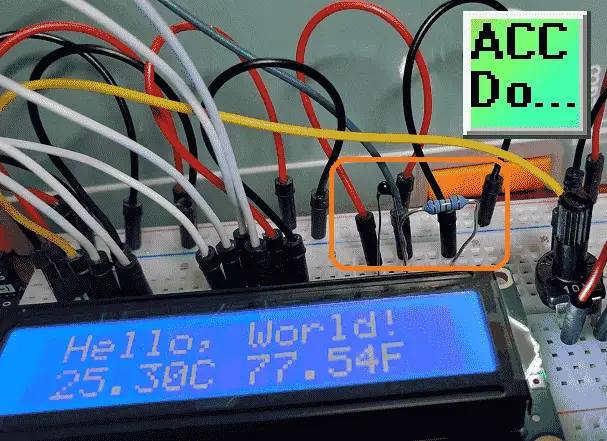
The ‘pot’ 10K ohm is used to control the contrast of the display.
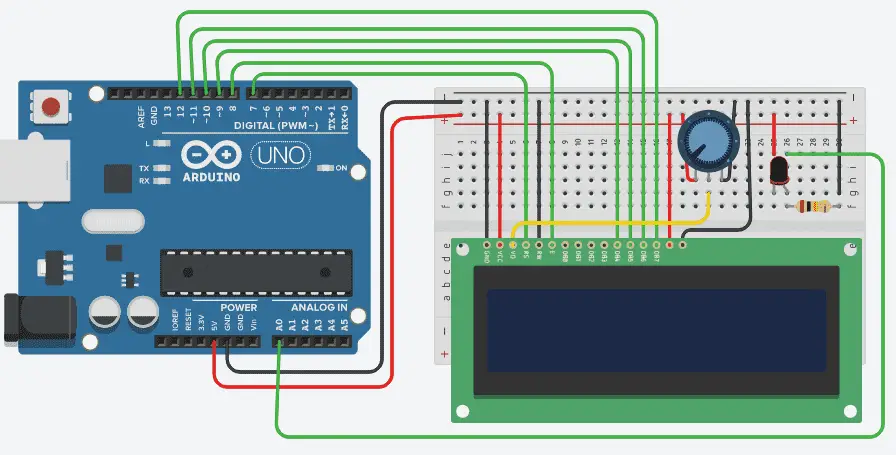
The thermistor temperature circuit bridge created last time can be wired to analog input 0.
Arduino UNO LCD Display Program
We will use a ZIP library for the liquid crystal display.
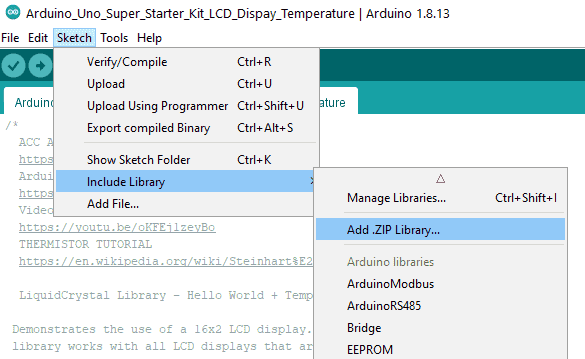
Select “Add ZIP Library…” from the main menu | Sketch | Include Library.

The LiquidCrystal.zip file came on the disk with the Arduino UNO R3 super starter kit. It can also be downloaded from the link below with the program. Select this library and then select open. This will add the library to the Arduino IDE (Integrated Development Environment).
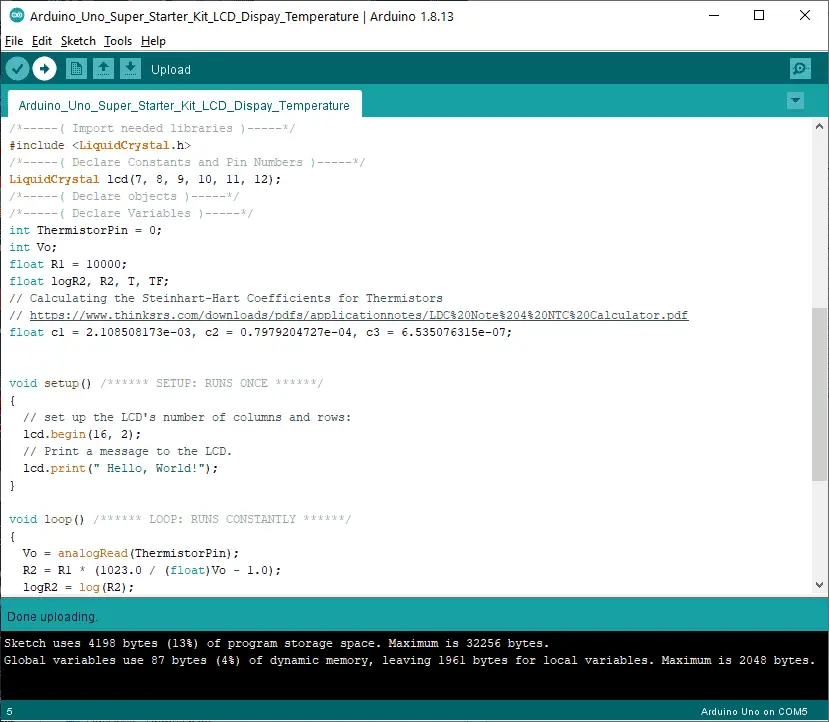
This first part will set up the library and declare the variables for the LCD display unit. Using the Steinhart-Hart Equation we declare our variables and set the coefficients for the equation.
/*-----( Import needed libraries )-----*/
#include
/*-----( Declare Constants and Pin Numbers )-----*/
LiquidCrystal lcd(7, 8, 9, 10, 11, 12);
/*-----( Declare objects )-----*/
/*-----( Declare Variables )-----*/
int ThermistorPin = 0;
int Vo;
float R1 = 10000;
float logR2, R2, T, TF;
// Calculating the Steinhart-Hart Coefficients for Thermistors
// https://www.thinksrs.com/downloads/pdfs/applicationnotes/LDC%20Note%204%20NTC%20Calculator.pdf
float c1 = 2.108508173e-03, c2 = 0.7979204727e-04, c3 = 6.535076315e-07;
The LCD is set up with 16 characters and 2 lines. The cursor for the LCD display is set for the first character on the first line by default. We then print the message “ Hello, World!”.
Note: Space is used in the message to center the message.
void setup() /****** SETUP: RUNS ONCE ******/
{
// set up the LCD's number of columns and rows:
lcd.begin(16, 2);
// Print a message to the LCD.
lcd.print(" Hello, World!");
}
The program will calculate the temperature in Celsius (T) and in Fahrenheit (TF). The LCD cursor is then set to the second row and column 0. We can then print our temperatures and units of measure.
void loop() /****** LOOP: RUNS CONSTANTLY ******/
{
Vo = analogRead(ThermistorPin);
R2 = R1 * (1023.0 / (float)Vo - 1.0);
logR2 = log(R2);
T = (1.0 / (c1 + c2*logR2 + c3*logR2*logR2*logR2));
T = T - 273.15;
// Calculation of F degrees
TF = (T * 9.0)/ 5.0 + 32.0;

// set the cursor to column 0, line 1
// (note: line 1 is the second row, since counting begins with 0):
lcd.setCursor(0, 1);
// print the number of seconds since reset:
lcd.print(" ");
lcd.print(T);
lcd.print("C ");
lcd.print(TF);
lcd.print("F ");
}
Upload the program sketch to the Arduino UNO R3 controller.
You will see the ‘Hello World!’ and the current temperature in two units of measure displayed on the LCD. Hold the thermistor between your fingers to see how rapidly the temperature can be read.
The above Arduino program sketch and library can be downloaded here.
Watch the video below to see the operation of our LCD display with the Arduino Uno Super Starter Kit.
Elegoo Links:
Service
service@elegoo.com (USA and Canada)
EUservice@elegoo.com (Europe)
Arduino Compatible Links:
Product Hardware
Elegoo UNO Project Super Starter Kit
Elegoo Download Page
Amazon.com
Amazon.ca
Software
– Arduino IDE (Integrated Development Environment)
– Productivity Blocks (Development Timesaver)
– Productivity Blocks Documentation (Wiki)
Community
– Arduino Blog
– Arduino Forum
– Arduino UNO Facebook
Next time we will look at the DC motors on our Arduino Elegoo super starter kit UNO R3.
Watch on YouTube: Arduino Uno LCD Display
If you have any questions or need further information please contact me.
Thank you,
Garry
If you’re like most of my readers, you’re committed to learning about technology. Numbering systems used in PLCs are not difficult to learn and understand. We will walk through the numbering systems used in PLCs. This includes Bits, Decimal, Hexadecimal, ASCII, and Floating Point. To get this free article, subscribe to my free email newsletter.
Use the information to inform other people how numbering systems work. Sign up now. The ‘Robust Data Logging for Free’ eBook is also available as a free download. The link is included when you subscribe to ACC Automation.