We will now look at the tilt ball switch on our Arduino Uno super starter kit. Tilt sensors (tilt ball switch) allow you to detect orientation or inclination. They are small, inexpensive, low-power, and easy to use. Their simplicity makes them popular for toys, gadgets, and appliances. Tilt ball switches are sometimes referred to as “mercury switches”, “tilt switches”, or “rolling ball sensors”.
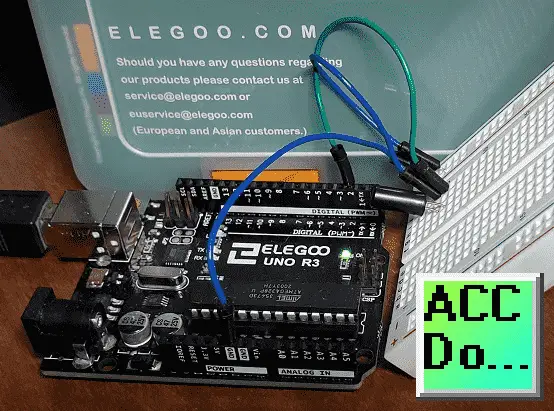
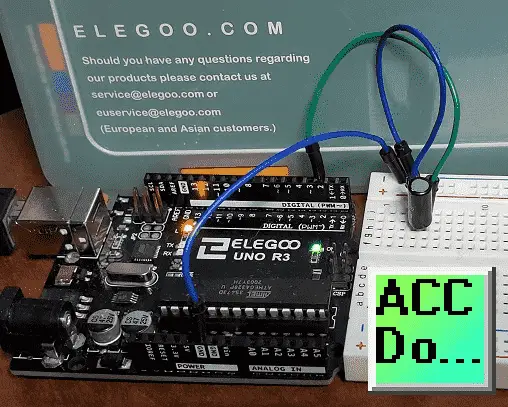
We will be wiring a tilt ball switch to our Arduino UNO R3 controller on our super starter kit. Let’s get started.
A full list of posts in this series can be obtained at the following location:
Arduino Uno Software Super Starter Kit
Previous posts in this Arduino Uno Super Starter Kit Series:
Hardware and Powering – Video
Software – Video
LEDs – Video
Digital Inputs – Video
Analog Inputs – Video
Buzzers – Video
Watch the video below of the operation of the tilt ball switch with our Arduino Uno Kit. Elegoo Super Starter Kit UNO R3.
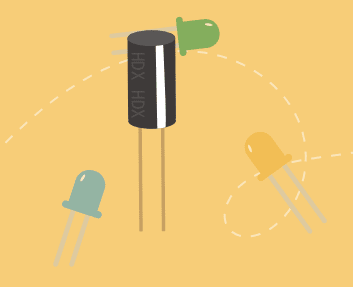
Tilt Ball Switches – How they work.
They are usually made up of a cavity (cylindrical is popular, although not always) with a conductive free mass inside, such as a blob of mercury or a rolling ball. One end of the cavity has two conductive elements (poles). When the sensor is oriented so that that end is downwards, the mass rolls onto the poles and shorts them, acting as a switch throw.
While not as precise or flexible as a full accelerometer, tilt switches can detect motion or orientation. Another benefit is that the big ones can switch power on their own.
Accelerometers, on the other hand, output digital or analog voltage that must then be analyzed using extra circuitry.
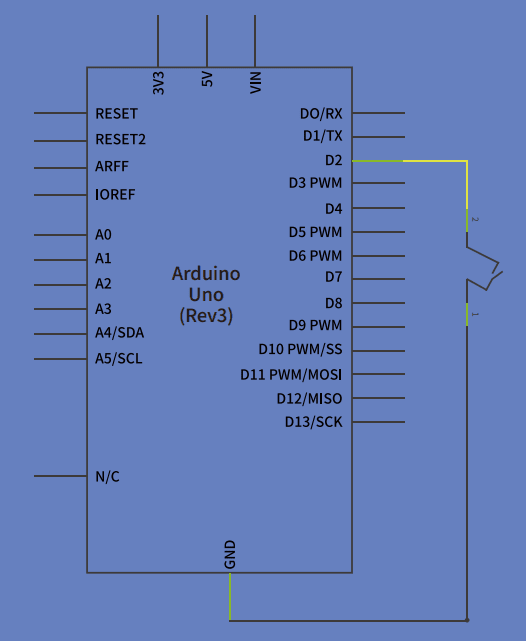
Wiring the Tilt Ball Switch to our Arduino UNO
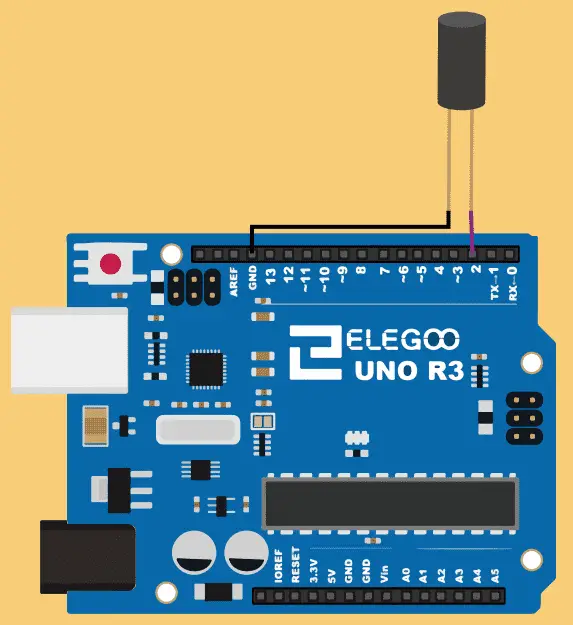
Arduino UNO Pull-up Resistor Programming
There are pull-up resistors built into the Atmega chip that can be accessed from software. These built-in pullup resistors are accessed by setting the pinMode() as INPUT_PULLUP. This inverts the behavior of the INPUT mode, where HIGH means the sensor is off, and LOW means the sensor is on. The value of this pull-up depends on the Arduino controller used. Consult the datasheet of the microcontroller on your board for the values.
Arduino UNO Tilt Ball Switch Program
This sketch (program) will turn on and off the built-in LED on the Arduino UNO board based on the condition of the tilt ball switch.
/*
ACC Automation
https://accautomation.ca/
*/
/*-----( Import needed libraries )-----*/
/*-----( Declare Constants and Pin Numbers )-----*/
const int ledPin = 13; //LED on the Arduino UNO controller
/*-----( Declare objects )-----*/
/*-----( Declare Variables )-----*/
void setup() /****** SETUP: RUNS ONCE ******/
{
pinMode(ledPin,OUTPUT);//initialize the ledPin as an output
pinMode(2,INPUT_PULLUP);
//An older way of setting the input with a pullup resistor
//pinMode(2,INPUT);
//digitalWrite(2, HIGH);
}

void loop() /****** LOOP: RUNS CONSTANTLY ******/
{
int digitalVal = digitalRead(2); //read pin 2
if(HIGH == digitalVal)
{
digitalWrite(ledPin,LOW);//turn the led off
}
else
{
digitalWrite(ledPin,HIGH);//turn the led on
}
}
The above Arduino program sketches can be downloaded here.
Watch the video below for the operation of the tilt ball switch on our Arduino Uno Super Starter Kit.
Elegoo Links:
Service
service@elegoo.com (USA and Canada)
EUservice@elegoo.com (Europe)
Arduino Compatible Links:
Product Hardware
Elegoo UNO Project Super Starter Kit
Elegoo Download Page
Amazon.com
Amazon.ca
Software
– Arduino IDE (Integrated Development Environment)
– Productivity Blocks (Development Timesaver)
– Productivity Blocks Documentation (Wiki)
Community
– Arduino Blog
– Arduino Forum
– Arduino UNO Facebook
Next time we will look at the servo from our Arduino Elegoo super starter kit UNO R3.
Watch on YouTube: Arduino Uno Super Starter Kit Tilt Ball Switch
If you have any questions or need further information please contact me.
Thank you,
Garry
If you’re like most of my readers, you’re committed to learning about technology. Numbering systems used in PLCs are not difficult to learn and understand. We will walk through the numbering systems used in PLCs. This includes Bits, Decimal, Hexadecimal, ASCII, and Floating Point. To get this free article, subscribe to my free email newsletter.
Use the information to inform other people how numbering systems work. Sign up now. The ‘Robust Data Logging for Free’ eBook is also available as a free download. The link is included when you subscribe to ACC Automation.