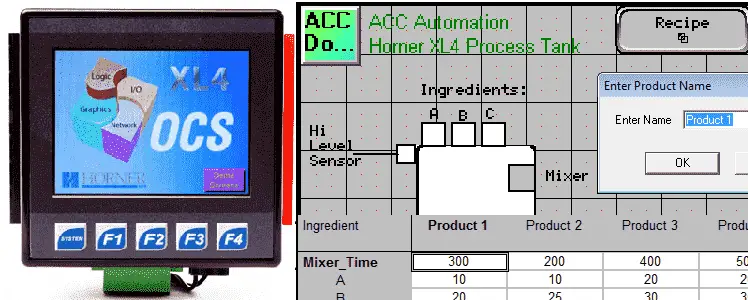
The Horner APG XL4 all in one controller has recipe instructions. Recipes allow you to send or update multiple registers in your program from the removable micro SD memory card. Each recipe can have 250 ingredients and 1024 products. The number of recipes will be limited to the size of the removable memory card. We will be looking at applying recipes to our process mixer application. Editing, Save, Load and View instructions for the recipe will be discussed.
Previously we discussed the following in our Horner XL4 Series:
System Hardware
Installing the Software Cscape
Cscape Software Setup
Establishing Communication
Numbering System and Addressing
User Interface
Timers and Counters
Compare and Move Instructions
Math Instructions
Program Control Instructions
Rotate and Shift Register
Overview of Recipes – Horner XL4
Cscape will be used to configure and download the recipe to the Horner APG XL4 controller. This will happen automatically when the program gets downloaded to the controller.
The ladder diagram will be able to load and save the recipes when in run mode.
Using the HMI on the unit we are able to edit, save, load or view a recipe.
The recipes are stored on a removable micro SD memory card in ‘CSV’ format. This comma-separated value format can be edited with many computer applications.
Naming files are restricted to the 8.3 conventions. Example: RecipesX.csv
Horner Recipe Sample Program
Let’s take a look at a sample program. We will use the process mixer program from the previous post: PLC Programming Example Process Mixer. This post walked through the development of the application.
https://accautomation.ca/plc-programming-example-process-mixer/
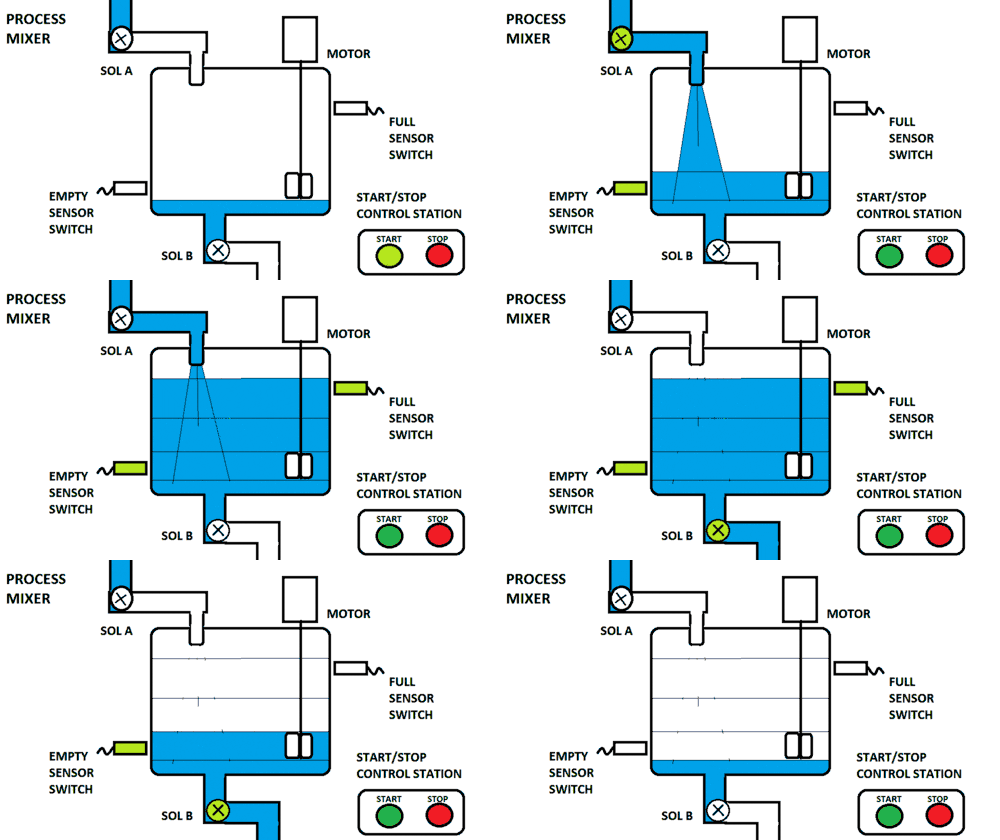
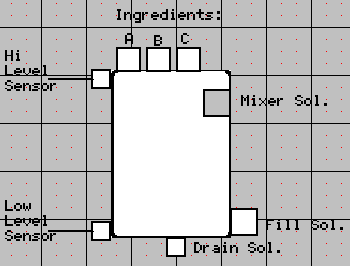
We will modify this program to add three ingredients A, B and C. They will be added with a timed output when the tank is filled. The mixer will also be on a variable timer selected by the recipe.
The first thing that we will do is create a new recipe database. Go to the main menu and select Program | Recipes Editor. Alternatively you can go to Project Navigator and under Control of your project you will see a Recipes selection.
This will call up the Create New Recipe Database window.
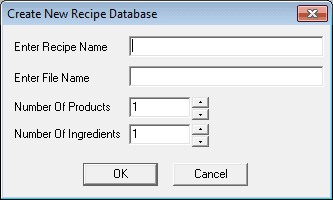
Enter Mixer_Recipes for the recipe name and Mixer.csv for the file name. We will also select 4 for the number of products and 4 for the number of ingredients.
Hit OK. You will now see the Recipe Editor. From now on when you do the same things above to create a new recipe database, the recipe editor will appear.
The Recipe editor will allow us to modify and set our recipes.
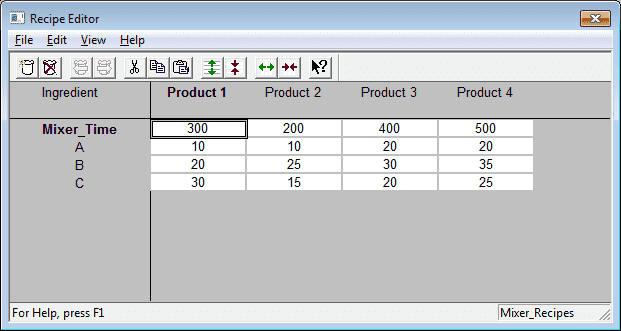
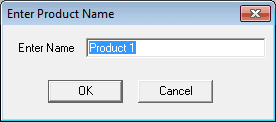
As you can see our Recipes have already been set. This can be done by right-clicking on the product and entering the new name.
To change the ingredient name and address, right-click on it and enter the new values.
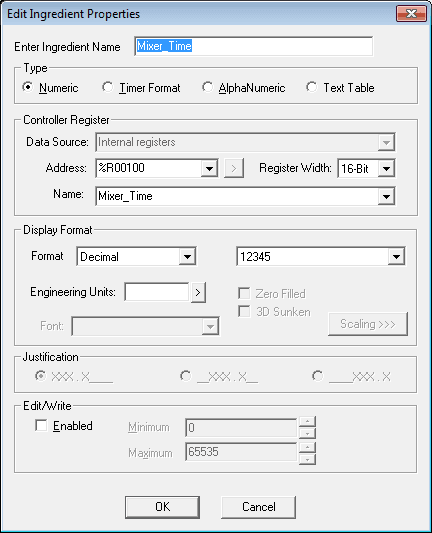
Note: This is how we assign registers to the ingredients in each of the products. The registers do not have to be in consecutive order.
Here is the main program in a PLC ladder diagram example.
Process Mixer
This is the start of the sequence. The bit is memory retentive so we can use this to turn on and off all of the other outputs.

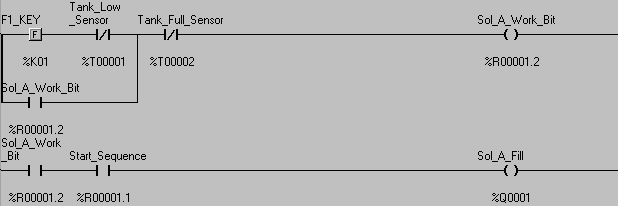
This section controls Sol_A so we can fill the tank.
Mixing Motor and Timer
The timer is memory retentive.
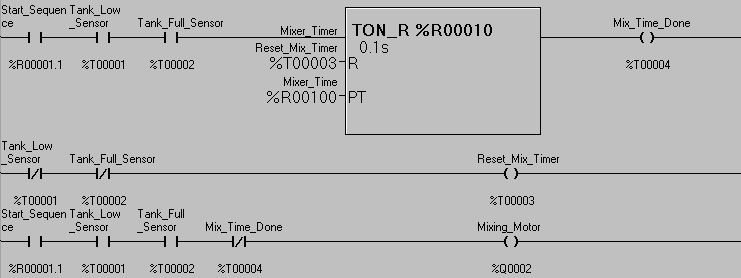
Ingredient A Timer and Output

Ingredient B Timer and Output

Ingredient C Timer and Output

This section controls Sol_B so we can empty the tank.

The first scan of the controller will load Product 1.

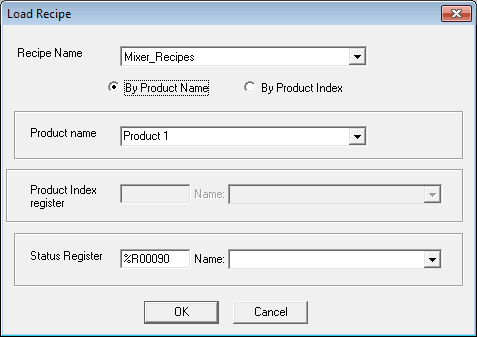
The load recipe instruction in the controller has several inputs.
Recipe Name – This is the name that we called the recipe when we created it above.
Product Name – This is the product in which we would like to load into the controller.
Status Register – This is the status of the instruction. See the help section in the CScape software package for the status register codes.
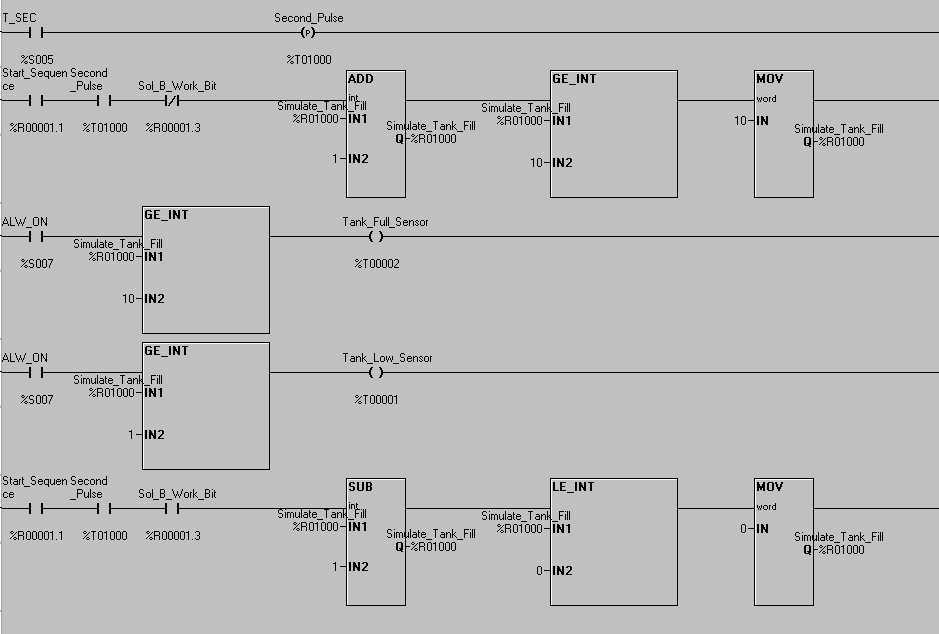
This section will allow us to simulate the tank level filling and draining.
It will control the automation on the screen.
The sample HMI screen will look like this.

F1 will start the cycle. F2 will stop the cycle. When the tank is completely filled the ingredients will be added and the mixer will mix for the time in the recipe.
Changing the Product – Horner XL4 Recipe
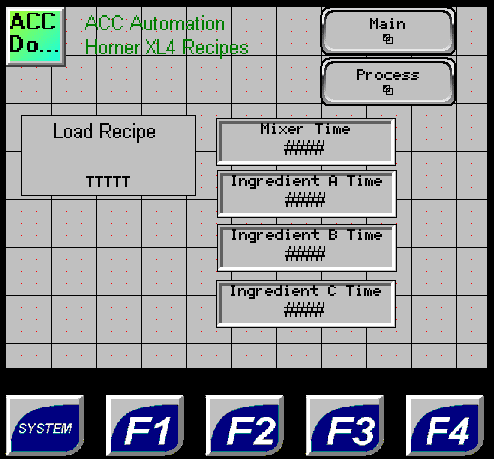
Using the load recipe on the HMI will allow us to select the product that we would like to run. This will then be transferred from the memory card to the registers in the controller.
As you can see the use of recipes is very easy. Having the external micro SD card makes modification and implementation of the recipes easy.
See this logic in action by watching the YouTube video below.
You can download this application here. It will contain all of the screens and logic programming.
All of the documentation for the XL4 can be downloaded at the following URL:
https://hornerautomation.eu/product/xl4-prime-ocs-3-5-colour-touchscreen/
Next time we will look at the report generator.
Watch on YouTube : Horner XL4 Recipe Instruction
If you have any questions or need further information please contact me.
Thank you,
Garry
If you’re like most of my readers, you’re committed to learning about technology. Numbering systems used in PLCs are not difficult to learn and understand. We will walk through the numbering systems used in PLCs. This includes Bits, Decimal, Hexadecimal, ASCII and Floating Point.
To get this free article, subscribe to my free email newsletter.
Use the information to inform other people how numbering systems work. Sign up now.
The ‘Robust Data Logging for Free’ eBook is also available as a free download. The link is included when you subscribe to ACC Automation.

