We will be connecting the Productivity 2000 Series PLC with our computer running the Productivity Suite Software. A micro USB and an Ethernet (RJ45) communication link will be made to our programmable logic controller.
The latest Productivity Suite software version is 3.10.2.1. This is the programming software that we installed last time and will be used to communicate and create our logic for control.
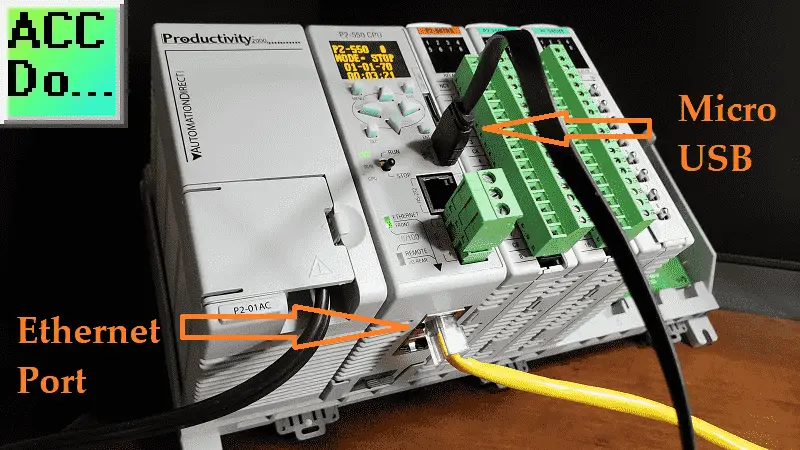 We will be connecting the P2000 PLC to the Productivity Suite programming software with both the micro USB and an Ethernet (RJ45). Once connected we will be automatically setting the PLC configuration and writing this into the controller. Let’s get started.
Previously in this Productivity 2000 series PLC, we have discussed:
P2000 Hardware Features – Video
Productivity Suite Software Install – Video
Power Up the Productivity 2000 Series PLC
Previously we assembled our base (rack) with a power supply, CPU, Outputs, and Inputs.
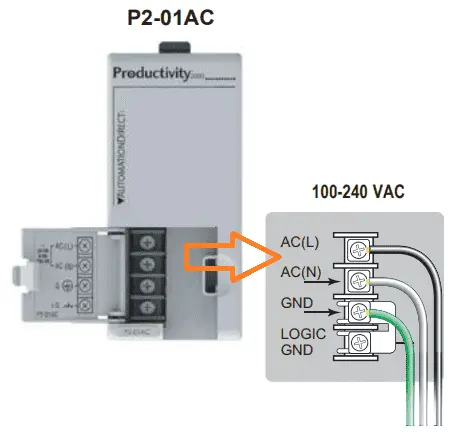 We are powering our P2000 with 120VAC. The part number for the power supply is P2-01AC.
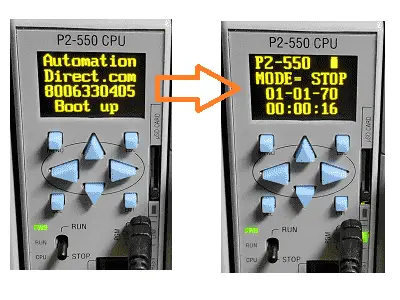 When we apply power to the P2000 a splash screen on the OLED will be displayed as it boots up. Once it has finished booting the CPU unit number, battery level, PLC mode, Time, and Date will be displayed.
Note: This 4 line by 10 character OLED for system alarms, information, and for displaying user-defined messages. (Display Page Instruction) OLED characters are 7×12 (1.72 mm x 2.94 mm) with a dot pitch of 0.245 mm.
Productivity 2000 Communication Connections
Connect a micro USB cable to the P2000 CPU. Also, connect an Ethernet cable (RJ45) to the front Ethernet port on the bottom. See the above picture.
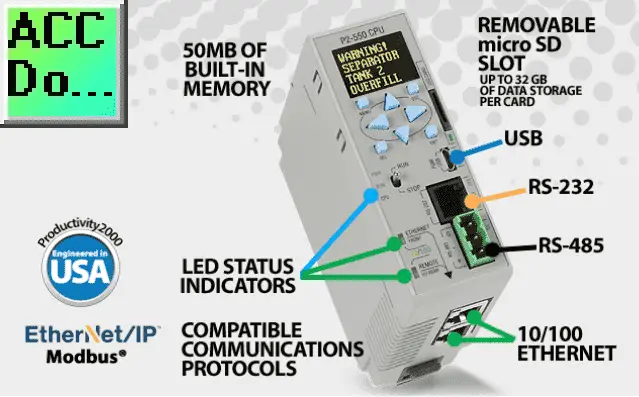 These are the two ports available for programming using the productivity suite software. The USB is ideal for quick changes or monitoring in the field at the control panel. Ethernet port is quicker than the serial USB programming port. We will look at both methods of communication.
Establish PC to Productivity 2000 CPU Communications
Start the Productivity Suite software package. Double click on the shortcut icon on your screen or from the windows start button and look for Productivity Suite.
 The start productivity window will be displayed.
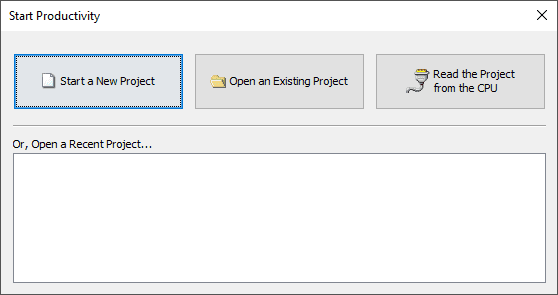 This will show recent projects and will allow you to quickly start a new project, open an existing project, or read a project from the CPU. (Central Processing Unit) Clicking on the “Read the Project from the CPU” will call up the CPU connections window. We will show another way. Click on the X on the upper right-hand side to close the window.
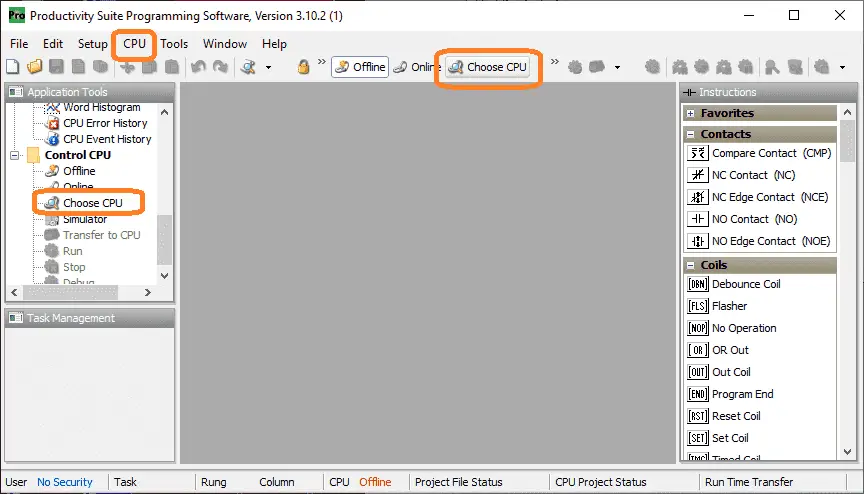 Select “Choose CPU” in one of the following ways. Select Choose CPU on the icons across the top of the productivity suite software, under the Control CPU heading in the application tools, or from the main menu | CPU | Choose CPU.
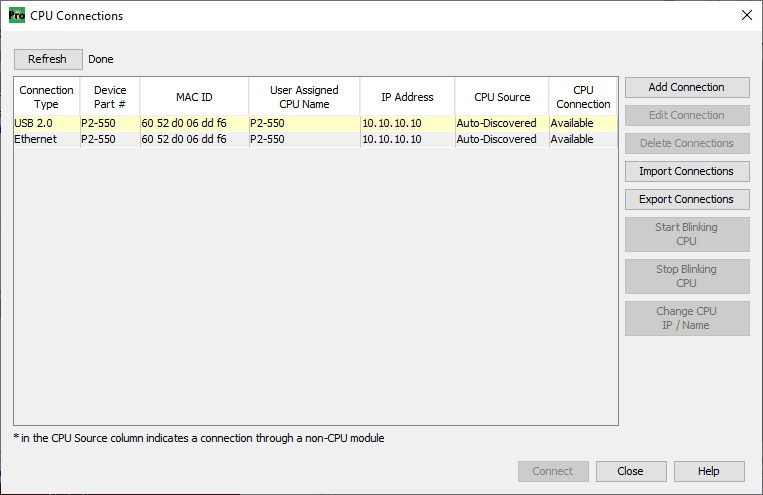 The CPU connections window will now be displayed. Items listed come from looking at the computer ports and determining if anything is connected. Since we have the USB and Ethernet connections, both of these items are listed. A MAC ID is a unique value for every communication device. You will see that both of the connections have the same MAC ID. This is because we are connected to the same PLC unit. Click on the USB 2.0 connection.
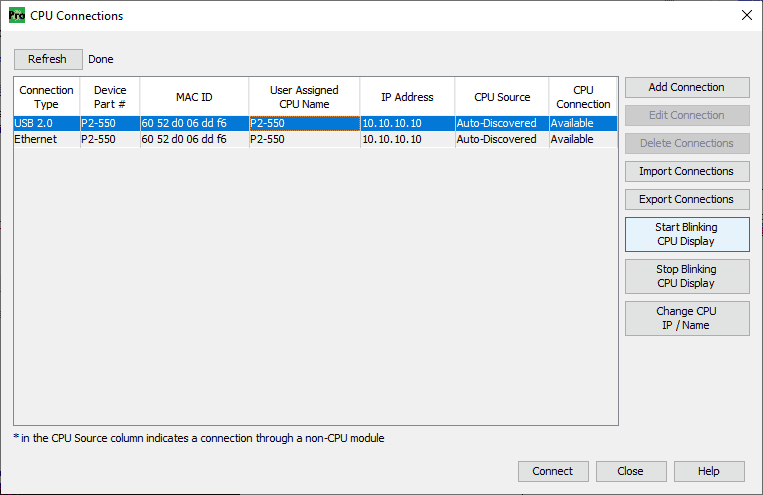 You will see that the menu to the right-hand side has now changed. Through the selected communication selection we can now start or stop blinking CPU display. This will allow you to verify that you are connected to the correct PLC.
Select the Ethernet connection.
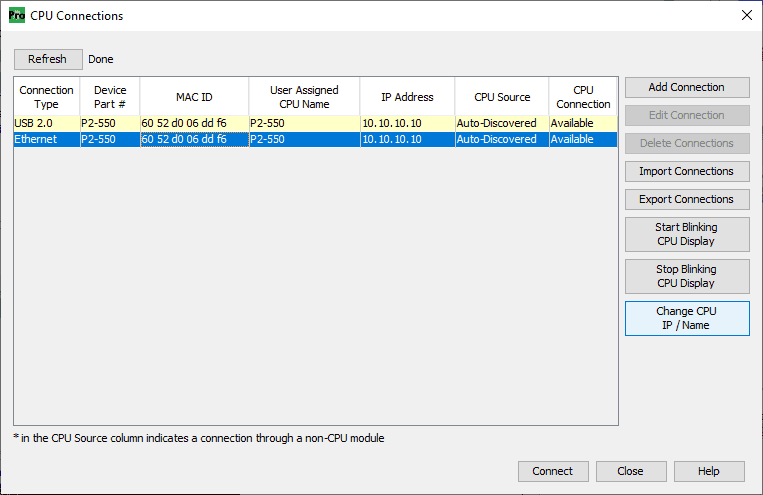 The default PLC name is P2-550 and the IP address is 10.10.10.10. We can change this to an IP address on our network by selecting “Change CPU IP/Name”.
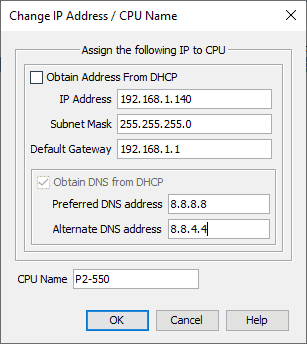 We can now enter the IP address for this PLC on our network. The default gateway is the address (Usually the Routers) that will connect to the internet. The following post will explain IP addressing and numbers that are used.
What Everyone Ought to Know About IP Addressing
We will leave the PLC name as the default. Select OK.
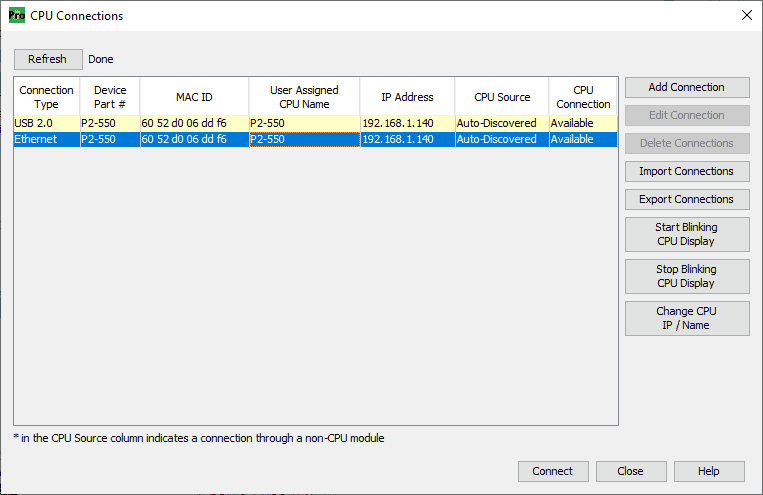 Double click on the Ethernet connection. This will select Ethernet as our communication method to the PLC.
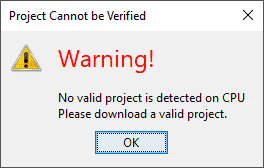 A warning message is displayed. This is because we do not have a valid project in our productivity 2000 PLC CPU. Select OK.
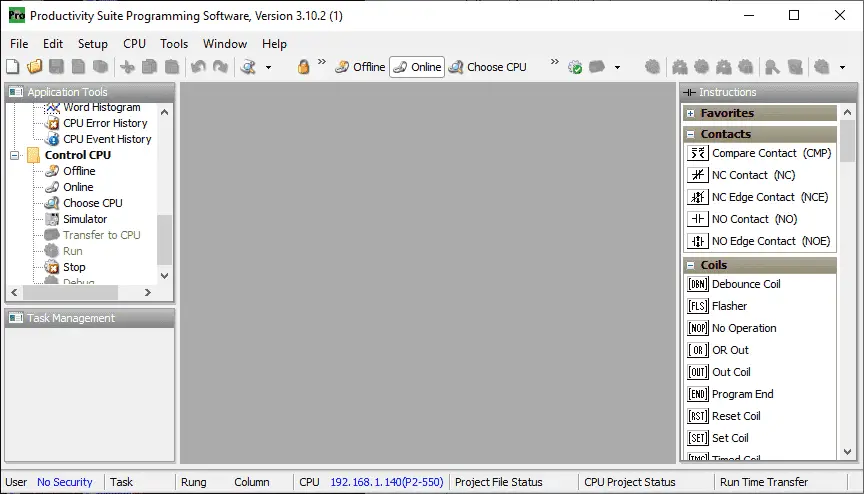 We are now communicating with the PLC. The Online icon is now highlighted showing this connection. Along the bottom of the productivity suite software, you will see the IP address next to the CPU. If this was through the USB connection it would be indicated here.
Downloading CPU Configuration to the Productivity 2000 PLC
Start a new project.
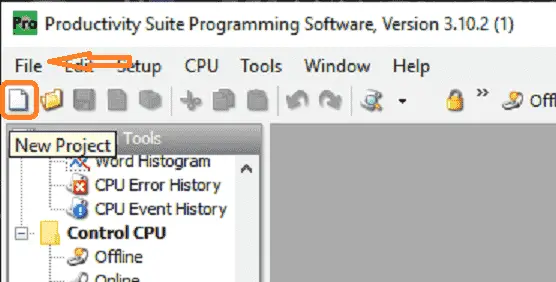 Select the new project icon or use the main menu | File | New Project.
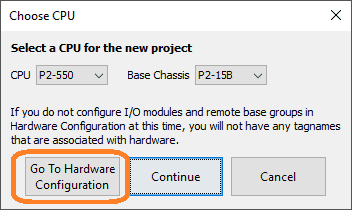 The Choose CPU window will now be displayed. Our hardware has to be determined in the PLC. This tells the controller the connected input and output on the PLC. This can be done before or after programming the ladder logic. I prefer to establish the addresses and placement of the hardware before starting to program.
Select go to hardware configuration.
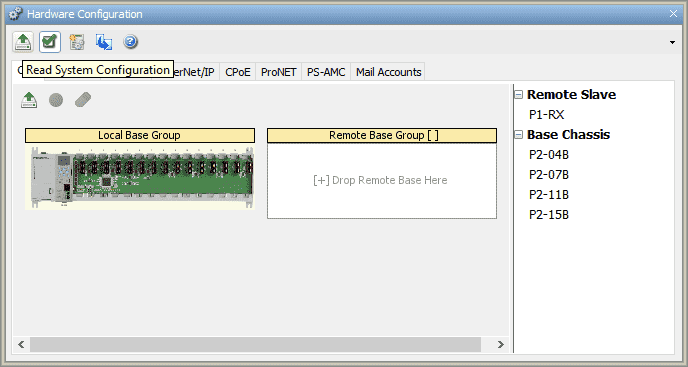 The hardware configuration window will now be displayed. Since we are online to the productivity 2000 PLC we can automatically read the system configuration. Select the top-left icon on the hardware configuration window.
 Additional information about the automatic discovery of hardware will not take place unless we have an updated project on the CPU. This is for the additional remote IO for the system that we currently do not have connected. Select OK.
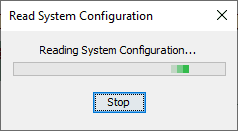 The software will now read the current system configuration in the connected PLC.
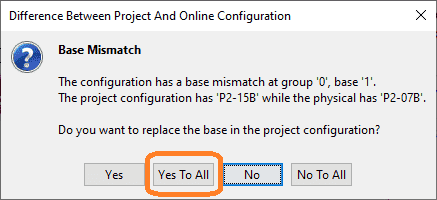 Any differences in the connected PLC vs the current software project will be displayed. We are only interested in the online configuration. Select yes to all.
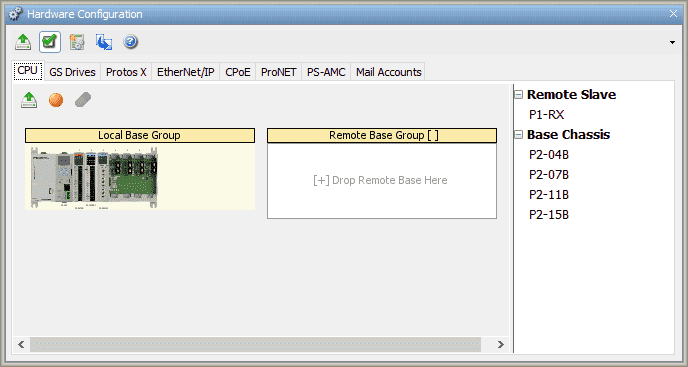 Our configuration will now be shown. It has only the local base group unit with some inputs and outputs. Double click on the local base group to expand the display.
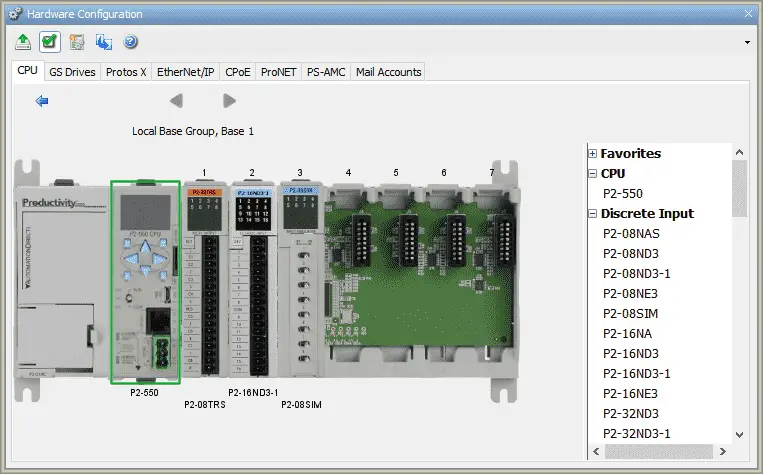 Our configuration is shown with the cards on our PLC. Using your mouse you can click on each of the units on the base unit. Double click on the CPU unit P2-550.
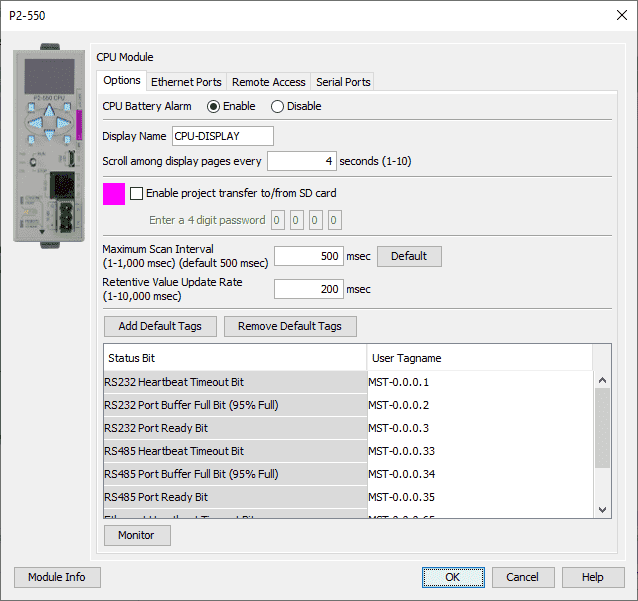 Additional information and default tags can be seen on the P2-550 window. We will discuss some of these options at a later time in this series. Select OK.
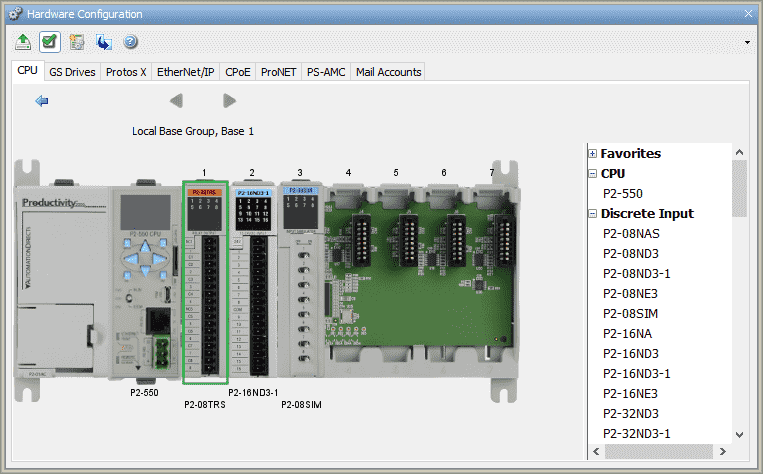 Double click on our output P2-08TRS module.
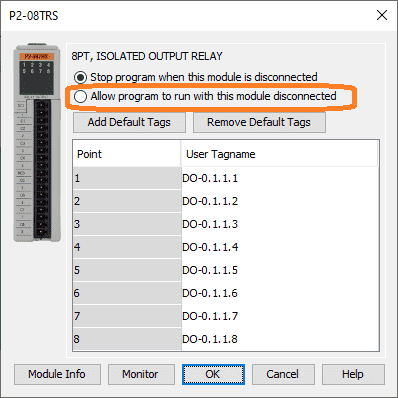 The default parameters for the output are displayed. Stop PLC program when this module is disconnected is the default value. Select allow the program to run with this module disconnected.
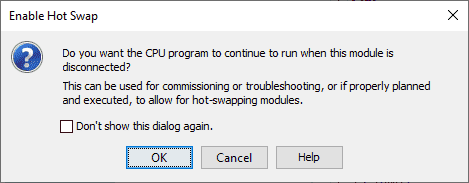 The enable hot-swap window will be displayed. This will ensure that you want the hot-swap enabled. This means that modules can be removed and installed as the program is running. Select OK.
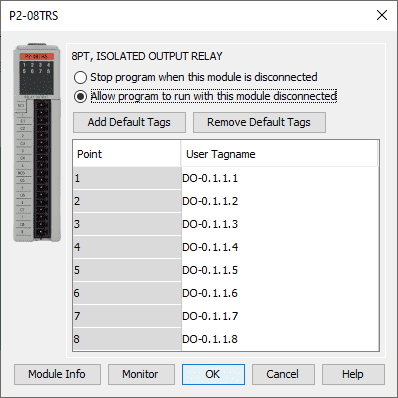 Our output module card is enabled for hot-swapping. Select OK.
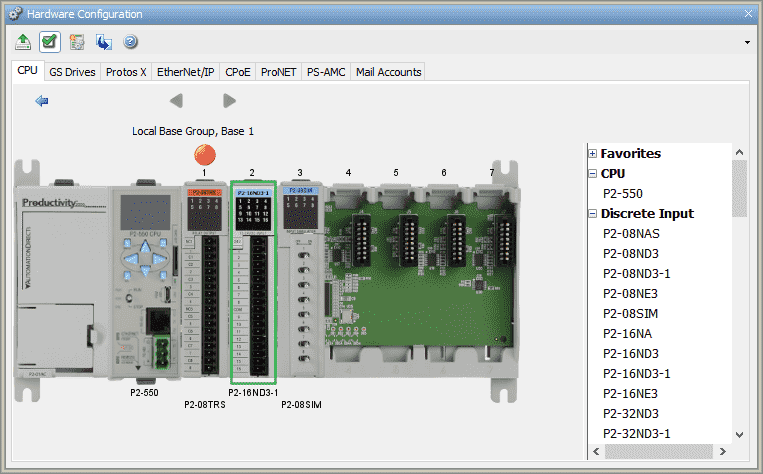 The red dot above the card on the hardware configuration window indicates that hot-swap is enabled.
Enable hot-swap for the remaining two input modules.
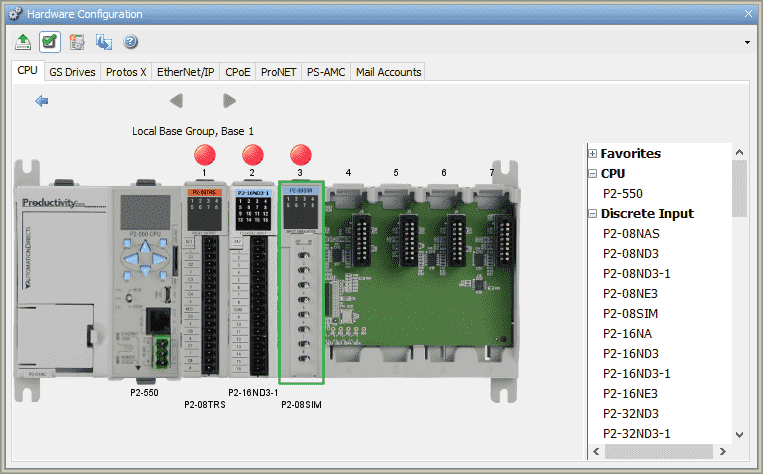 Here is what our hardware configuration now looks like.
See the video below to watch this being performed. Close the hardware configuration window by using the X on the upper right-hand side.
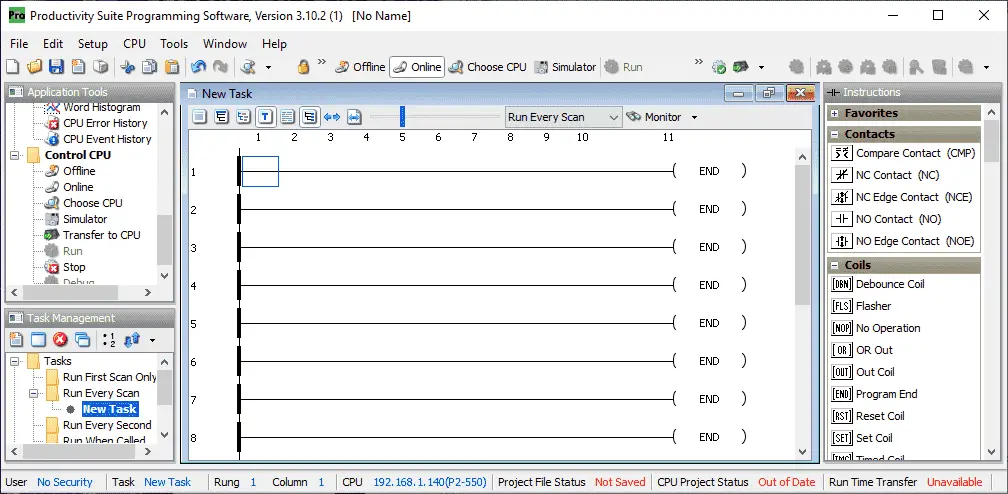 Our productivity 2000 PLC configuration is now complete. If you look at the bottom of the programming software window we will need to save the project.
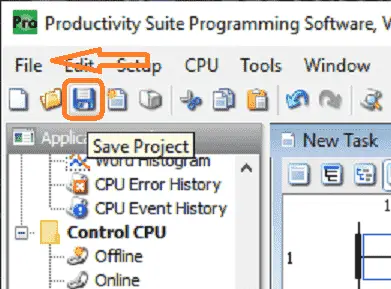 Select the save icon or use the main menu | File | Save.
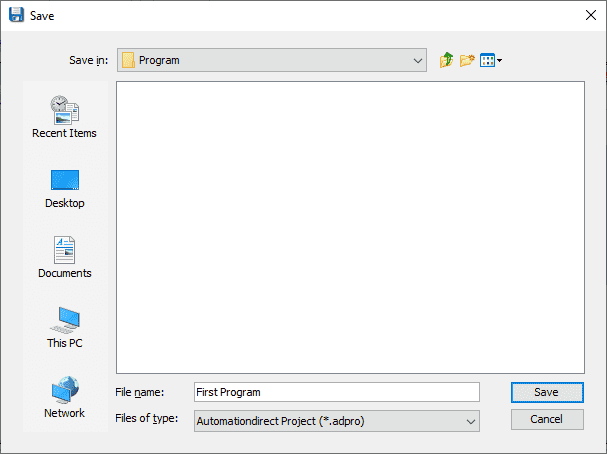 We will call this the first program. The file will be saved with a .adpro extension. Select save.
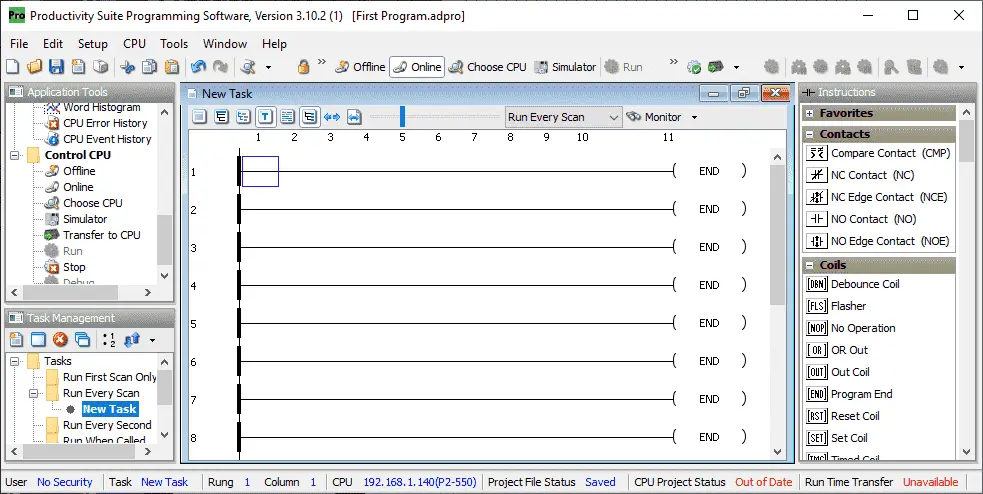 At the bottom of the programming window, you will see that the CPU project status is out of date. This means that the computer version of the software is different than the PLC version. The enabling of the hot-swap feature is why this is shown. We will need to transfer the project program to the PLC.
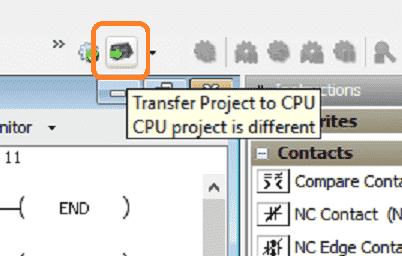 Select the transfer project to the CPU icon.
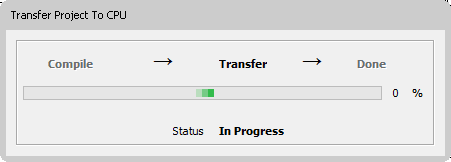 This will now transfer our program to the connect Productivity 2000 PLC.
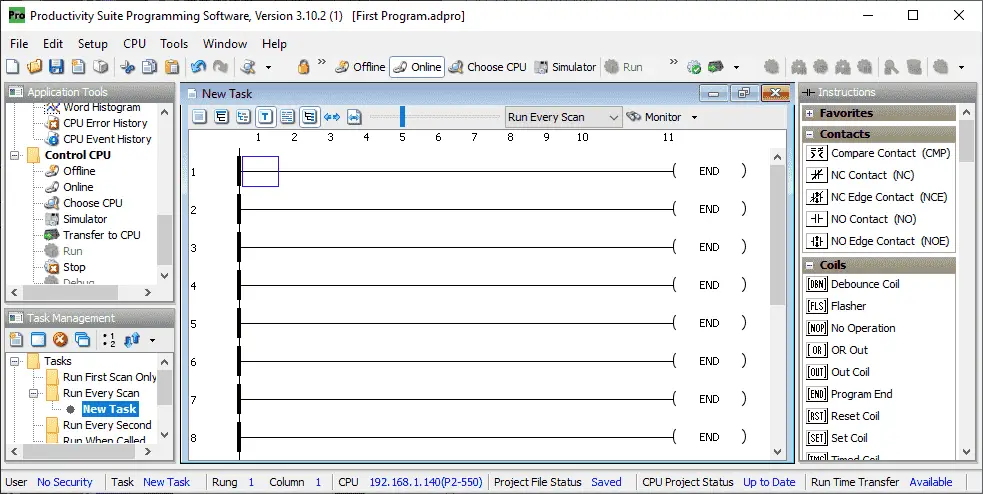 Our hardware configuration is now set for hot-swapping. The program is saved and now we can start programming our ladder logic in the P2000 PLC. Watch the video below to watch the communication and configuration of the PLC.
Productivity 2000 Features (P2000)
- CPU with 5 communication ports
- OLED message display on the CPU module
- Plenty of discrete and analog I/O modules
- Status displays on all discrete I/O modules
- OLED data display on analog modules
- P2-RS remote I/O expansion module, or use the Productivity1000 P1-RX remote expansion module to add even lower-cost remote I/O to your system
- FREE full-featured Productivity Suite software
- Programming with several ports – USB, Ethernet, Serial
- Hardware auto-discovery
- Hot-swappable I/O
- Choose from three wiring options
- Slim DIN rail density form factor:
- hardware – power supply, CPU, and seven modules in only 10-1/2 inches
- All project files (program, tag name database, and all the program documentation) in the CPU
- Run-time editing and debug mode on CPU
- Easy data logging with micro SD on CPU
- Secure Web server to access data files and system tags
- Easy drive and motion controller integration
- Coordinate motion control with PS-AMC allows control of up to 16 axes and synchronization of up to 4 axes
- Two-Year Warranty
Productivity 2000 Series PLC from Automation Direct
Overview Link (Additional Information on the Unit)
Configuration (Configure and purchase a system – BOM)
User Manual and Inserts (Installation and Setup Guides)
Productivity Suite Overview (Features of the fully functional free software package for the Productivity Family of PLC (PAC) controllers)
Productivity Suite Programming Software (Free Download Link)
This software contains all of the instructions and helps files for the Productivity Series.
Watch on YouTube: Productivity 2000 Series PLC Communication
If you have any questions or need further information please contact me.
Thank you,
Garry
If you’re like most of my readers, you’re committed to learning about technology. Numbering systems used in PLCs are not difficult to learn and understand. We will walk through the numbering systems used in PLCs. This includes Bits, Decimal, Hexadecimal, ASCII, and Floating Point.
To get this free article, subscribe to my free email newsletter.
Use the information to inform other people how numbering systems work. Sign up now.
The ‘Robust Data Logging for Free’ eBook is also available as a free download. The link is included when you subscribe to ACC Automation.

