We will now be looking at simple data logging using a Click PLC with an Ethernet port. Node-RED will be used to communicate to the controller via Modbus TCP protocol. Information collected will be then stored in an SQLite SQL database. A Raspberry Pi 4 single-board computer will be used for the Node-RED collecting and storing. The update time will be two times a second (500 mSec). This method is ideal for quickly determining how things are operating.
Analysis or display of the information will be done with a spreadsheet. The spreadsheet will be run on a windows computer. Let’s get started.
In this series we used Node-RED in some of the following ways:
Installing the Windows Software – Video
Modbus Communication – Video
User Interface – Dashboards – Video
SQL Database Log – Video
SQL Database Spreadsheet Connection – Video
Install Node-RED on Raspberry Pi – Video
Do-More PLC Node-RED HTTP Request – Video
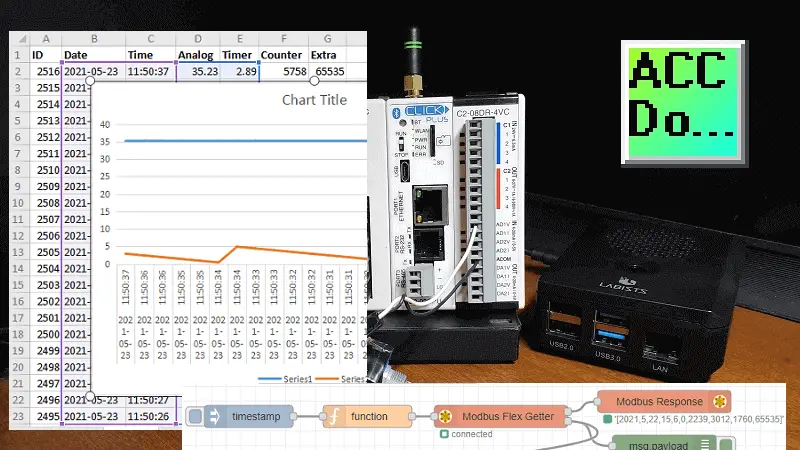
We will now look at a simple Click data logging example. Node-RED will be run on a Raspberry Pi. Modbus TCP will be used to retrieve 10 registers in the Click and log this to an SQLite SQL database. This is a common application request that I receive. We will then display the information on a spreadsheet.
Watch the video below to see the simple Click data logging on the Raspberry Pi.
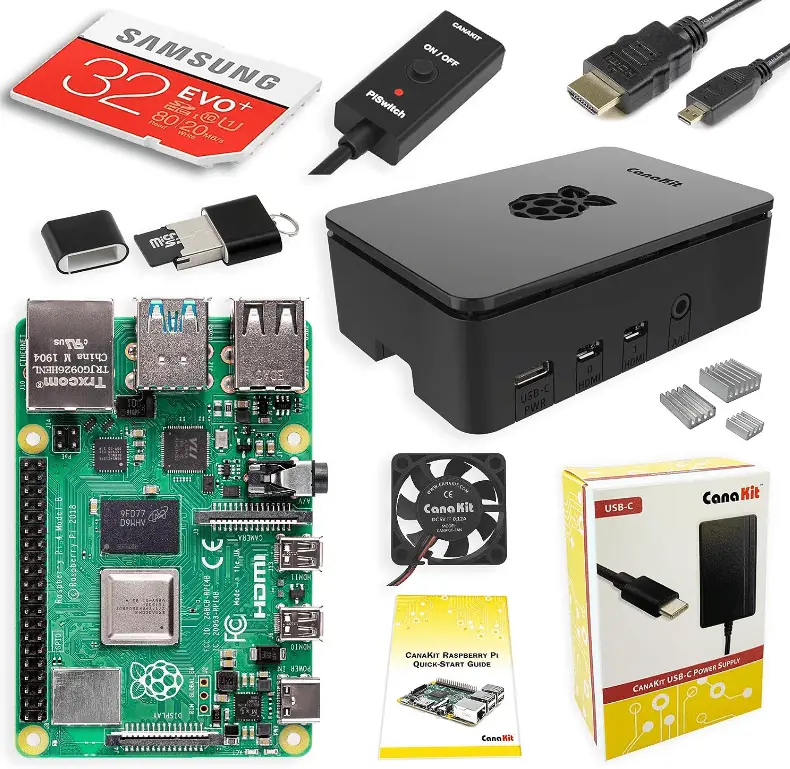
Purchase Raspberry Pi 4 Starter Kit
Amazon USA
https://amzn.to/3I5jIpz
Amazon Canada
https://amzn.to/42MyPxR
The following are short videos on how to get your Raspberry Pi kit assembled and running.
Raspberry Pi4 Unboxing Starter Kit
Raspberry Pi 4 Kit Assembly
Raspberry Pi 4 First Power Up
Raspberry Pi 4 Remote Access
Click PLC Logging Program
This is called a simple logging sample program because all of the data that will be logged as coming from the Click PLC only. The information is stored in the following memory locations.
DS1 – Year – YYYY
DS2 – Month – MM
DS3 – Day -DD
DS4 – Hour – HH
DS5 – Minute – MM
DS6 – Second – SS
DS7 – Analog Value – 0 to 5000
DS8 – Timer – 5 seconds timed in milliseconds
DS9 – Counter – Number of timer cycles.
DS10 – Extra – Extra register to log
The first three rungs will set up our real-time clock (RTC) in the first 6 DS registers.
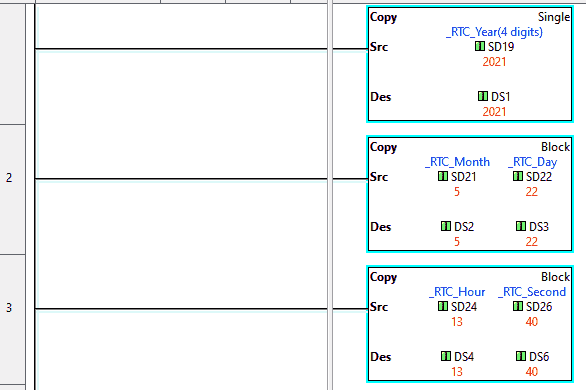
Our analog value (0-5V) is scaled from 0.0 to 50.0 in DF1. We multiply this value by 100 to get two decimal places and then move the result to DS7.

Here is the setup of the analog input on the Click PLC.
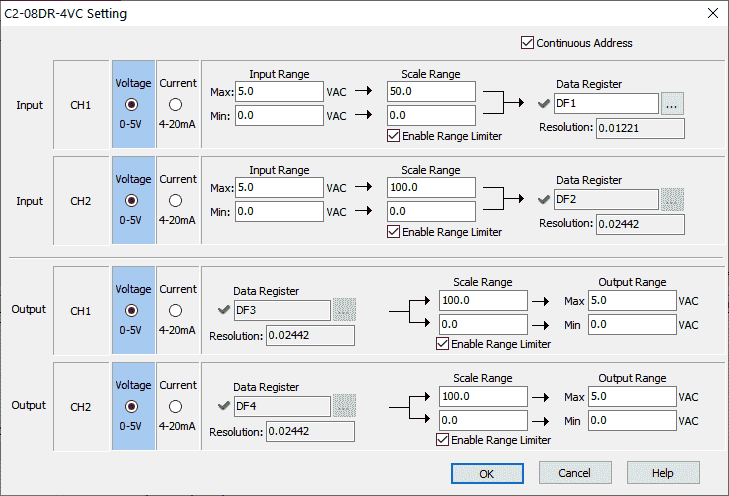
This can be accessed under the system configuration menu. Main menu | Setup | System Configuration…
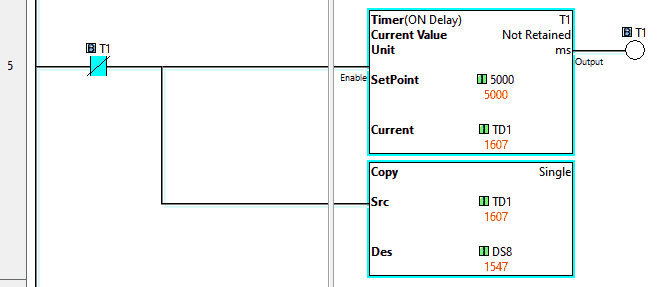
A self-resetting timer is used with a millisecond update. The present value is copied to DS8.
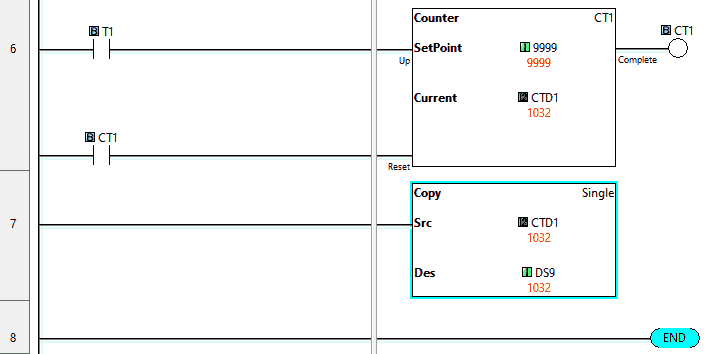
A self-resetting counter is also used with a set value of 9999. The present value of the counter is then copied to DS9.
DS10 will be monitored and changed so you can see the values updating in our database. It is important to account for the future expansion of your system.
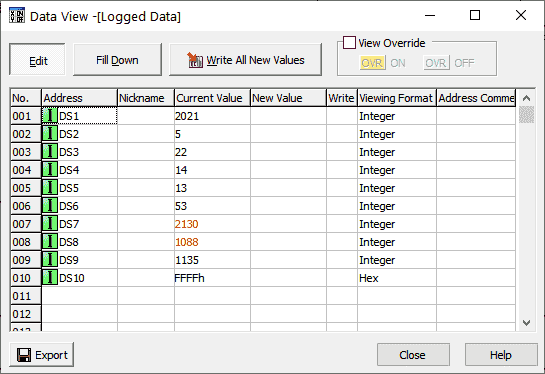
We can use the Data View to monitor our logged parameters in the Click Programming Software package.
The Click Programming Series can be found here. See the video below to see this program in action on our simple click data logging example.
SQLite SQL Database Setup
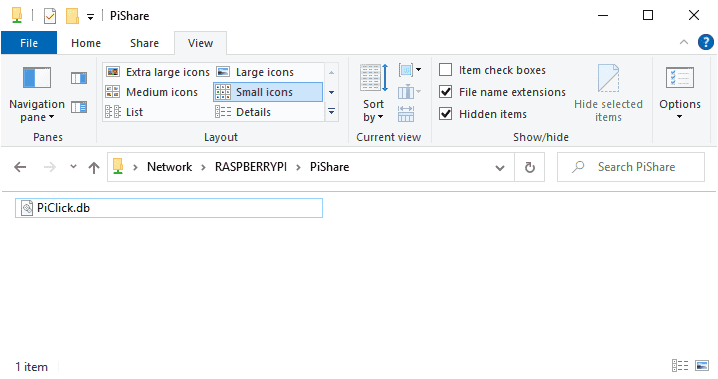
We will be using SQLite Studio on our windows 10 computer to create a SQL Database called PiClick.db. This will store our data collected from the Click PLC. The logged data will be stored on the Raspberry Pi in the PiShare directory.
This database will have one table called data. The data table will have 7 columns.
ID – Integer – Auto Incrementing – This is good for sorting the table.
Date – Text – This will be in the format YYYY-MM-DD
Time – Text – This will be in the format HH:MM:SS
Analog – Integer – 0 to 5000
Timer – Integer – 0 to 5000
Counter- Integer – 0 to 9999
Extra – Integer – The largest number will be FFFF hex = 65535

This post will go into more detail on how to use SQLite Studio.
Node-RED Click Logging Program
Previously we installed node-red on the Raspberry Pi single-board computer. We will now utilize this program to log the Click values to the SQL Database created above. This simple click data logging will be done with one Modbus TCP read and one SQL insert command to the SQLite SQL database.
Use the manage palette to install node-red-contrib-modbus and node-red-node-sqlite. This will add the required nodes to Node-RED. You can review this procedure in the video below or on this Series page.

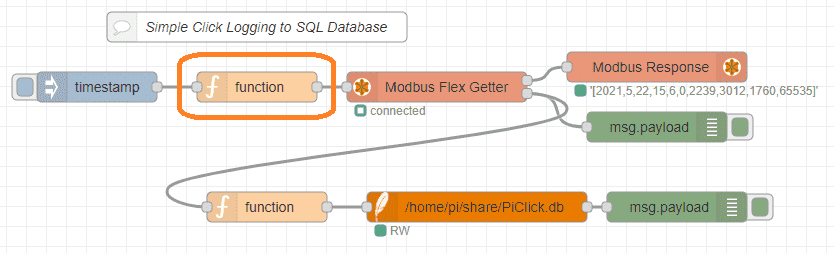
Node-RED is a visual programming environment. You can see that we have one flow the will get our Modbus values and then insert the values into a SQL database.
We will start with the function node before the Modbus Flex Getter node.
This node will set up the information to read the Modbus information. Here is the code within this function.
msg.payload = { value:
msg.payload,
'fc': 3,
'unitid': 1,
'address': 0 ,
'quantity': 10 }
return msg
This is using the function code (fc) 3 to read multiple registers. The unit ID to read is 1 starting at address 0 and reading 10 registers. This will then return the message to the next node.
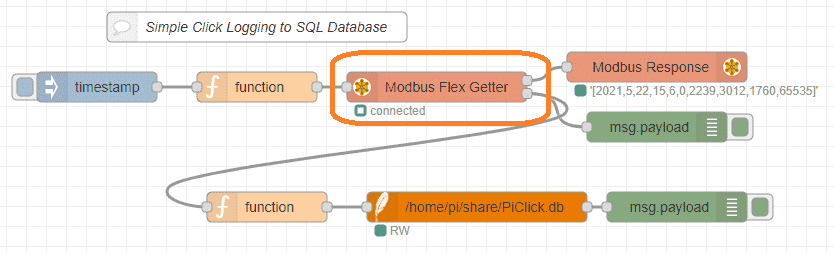
The Modbus Flex Getter node will do the communication to our Click PLC. Inside this node, we set up the Modbus Server information.
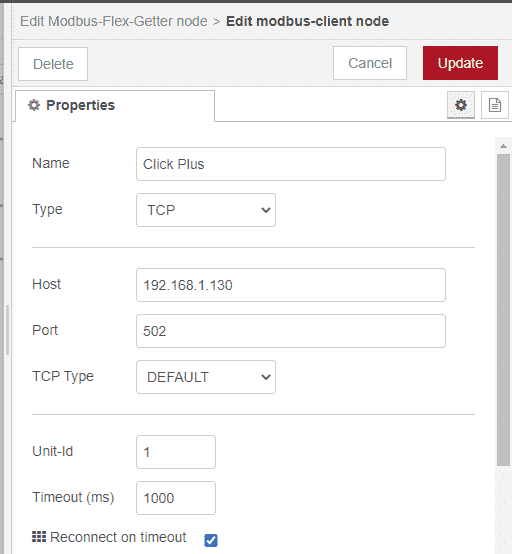
We have called the server Click Plus and used the default port of 502 at the IP address of the WiFi on our controller.
The Modbus Response node is great for troubleshooting the system. It will display the values received from the Click PLC. The debug node is used to display any errors and the path values of the information from the Click. See the video below for a demonstration of using these two troubleshooting items.
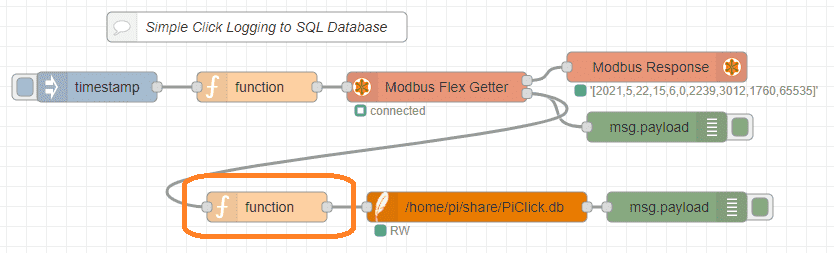
SQL commands are used in the function node before the SQLite node.
msg = {
"topic":"INSERT INTO Data(Date,Time,Analog,Timer,Counter,Extra) values("+"\'"+msg.payload.data[0]+ "-" +("0" +msg.payload.data[1]).slice(-2) + "-" +("0"+ msg.payload.data[2]).slice(-2) + "\'"+", "+"\'"+("0"+ msg.payload.data[3]).slice(-2) + ":" +("0"+ msg.payload.data[4]).slice(-2) + ":" +("0"+ msg.payload.data[5]).slice(-2) + "\', " + parseFloat(msg.payload.data[6])/100 + ", "+ parseFloat(msg.payload.data[7])/1000 + ", "+ msg.payload.data[8]+ ", "+ msg.payload.data[9]+ ")"
}
return msg;
This is inserting data into our table called data.
(“0” +msg.payload.data[1]).slice(-2) – Adding a 0 before the month data and then retrieving the last two values will ensure that we are always reading two digits for the month.
parseFloat(msg.payload.data[7])/1000 – Parse float is used to set the number of decimal places in the data coming from the PLC. In our case, the timer is set to three decimal places and the analog signal is set to two decimal places.
Once the data is set up in the message, we now specify the database in the SQLite node.
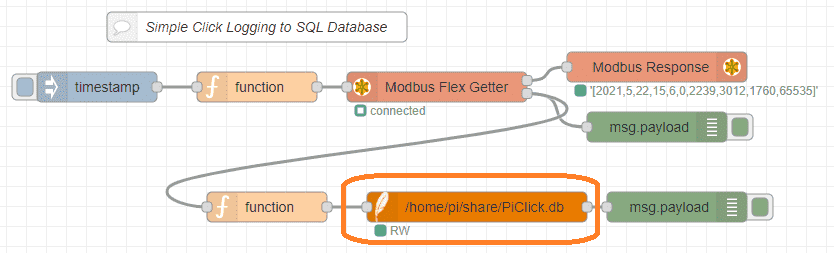
Using the SQLite node we can specify the path for the PiClick SQL database.
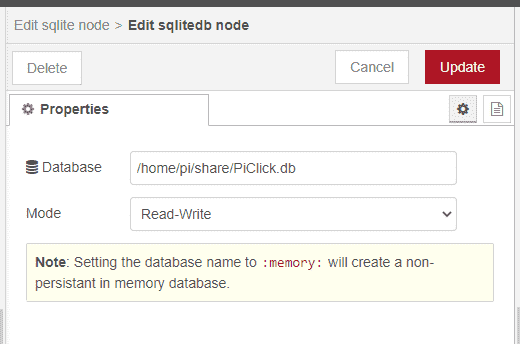
The mode for the database will be read and write. This will allow us to insert it into the SQL database.
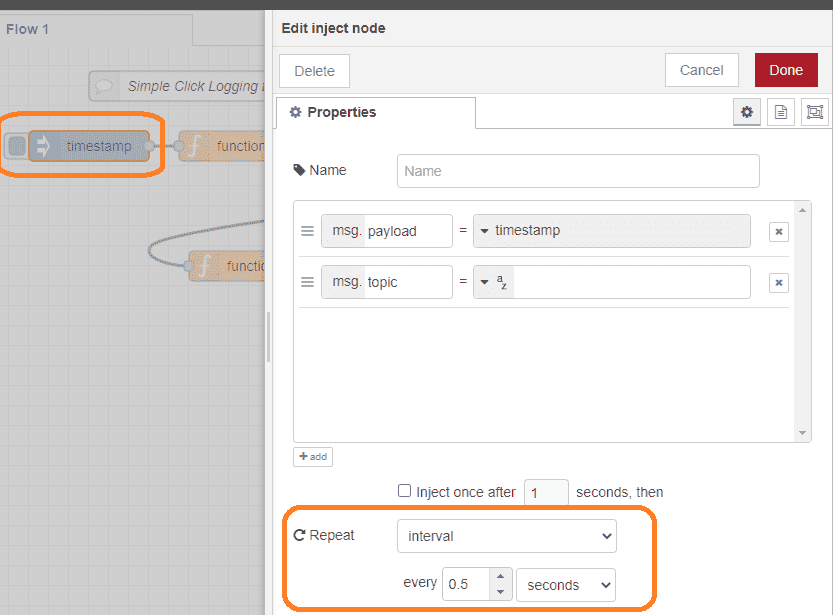
The last thing that we will do after testing our flow is to set the inject node to repeat every 0.5 seconds. (500 milliseconds)
We can now save our flow by deploying. Our Node-RED program is now operating. Using a spreadsheet, we can now view the collected data.
Viewing the SQL Database Information on a Spreadsheet
In order to connect to an SQLite database from a spreadsheet like Excel or WPS Spreadsheet, we will need to install the ODBC driver. The SQLite Drive can be downloaded here.
We will be using the 32-bit version of this driver, so download and install the sqliteodbc.exe file.
We will be using the spreadsheet in WPS Office. This will connect to our simple click data that has been logged to SQL database.
On the main menu, select Data.
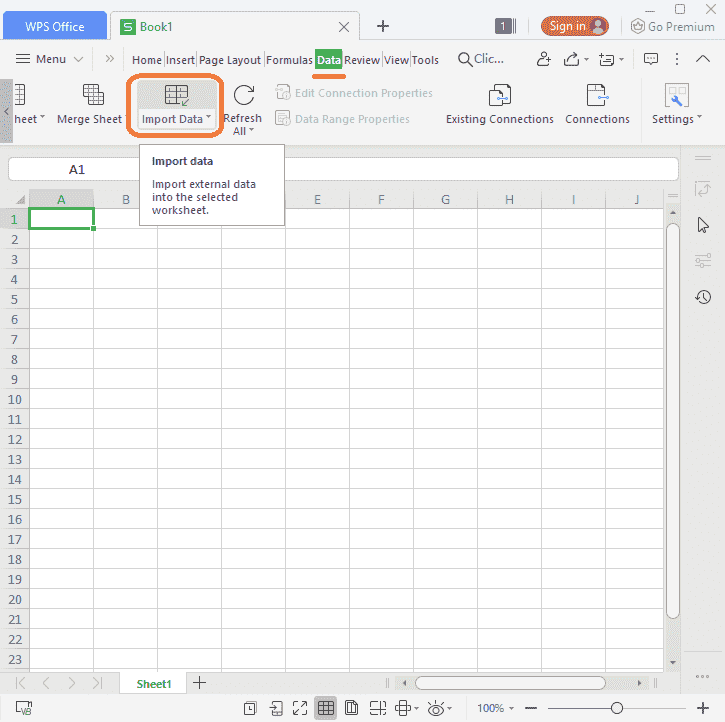
Select Import data on the ribbon for the data menu. This will start the import process.
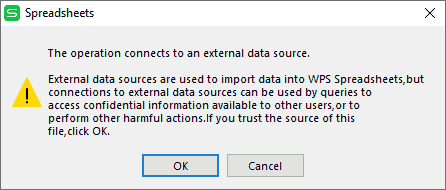
A warning is displayed about trusting the sources of the file and the use of the information. Select OK.
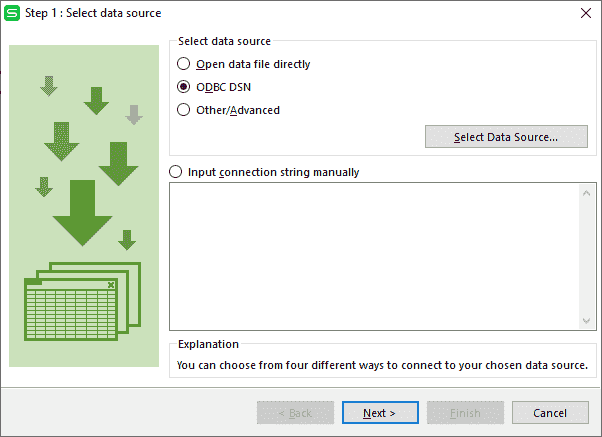
Select the ODBC DSN option under the select data source.
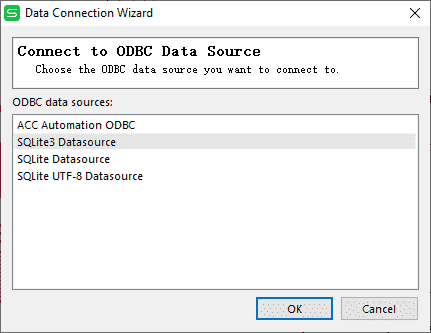
The data connection wizard will be displayed. Select the SQLite3 Datasource and then select OK.
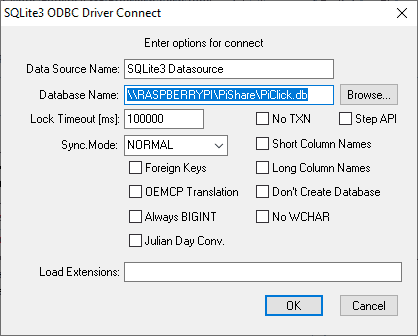
Enter the path to the database (PiClick) that we created above. If you are unsure of the path, select the browse button to specify. Select OK.
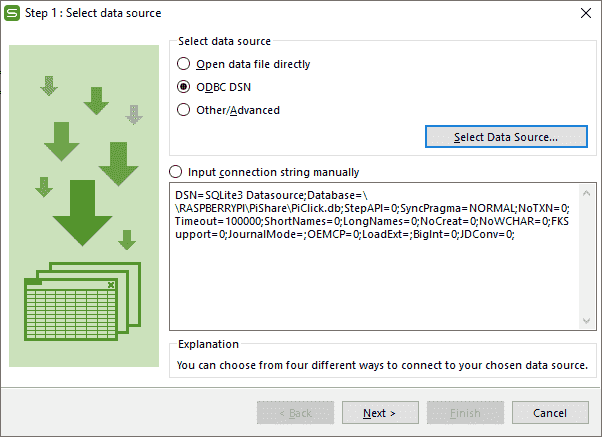
You will now see our ODBC connection string to the SQL database. Select next.
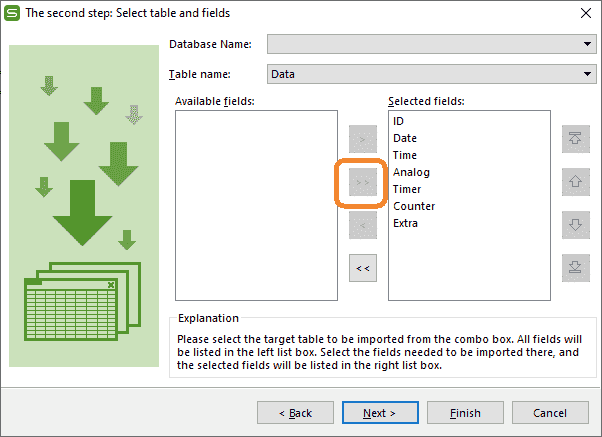
Select all of the available fields to return to our spreadsheet. Select next.
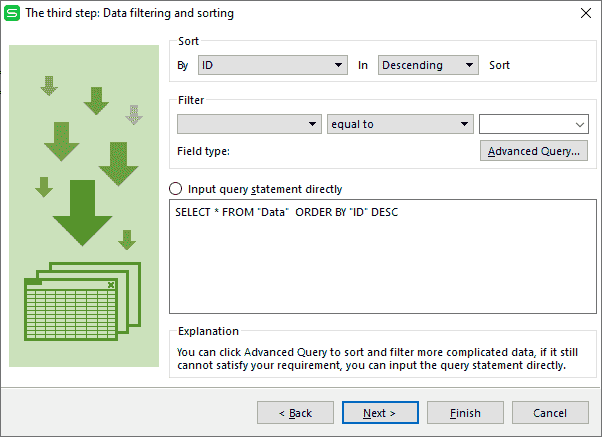
We will add to the query of the SQL database by using the sort. The ID field will be sorted in descending order. It will show the latest data first. Select next. We could also add SQL commands directly to limit the number of records to return.
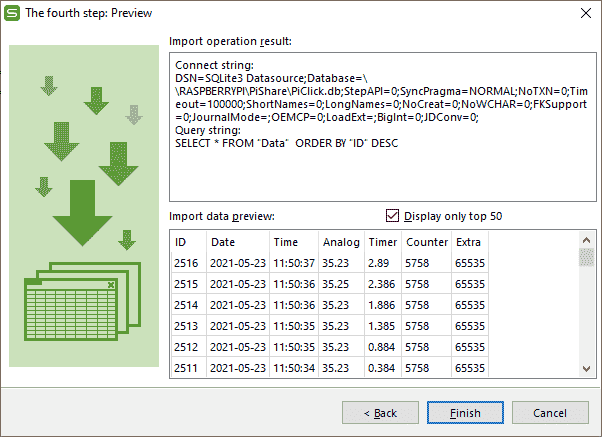
A preview of the data will be shown. If you are using Microsoft Excel the procedures are similar. Select finish.
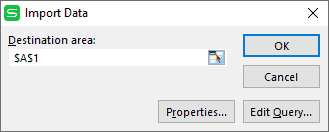
Specify the location on the spreadsheet where the imported data will start. Select OK.
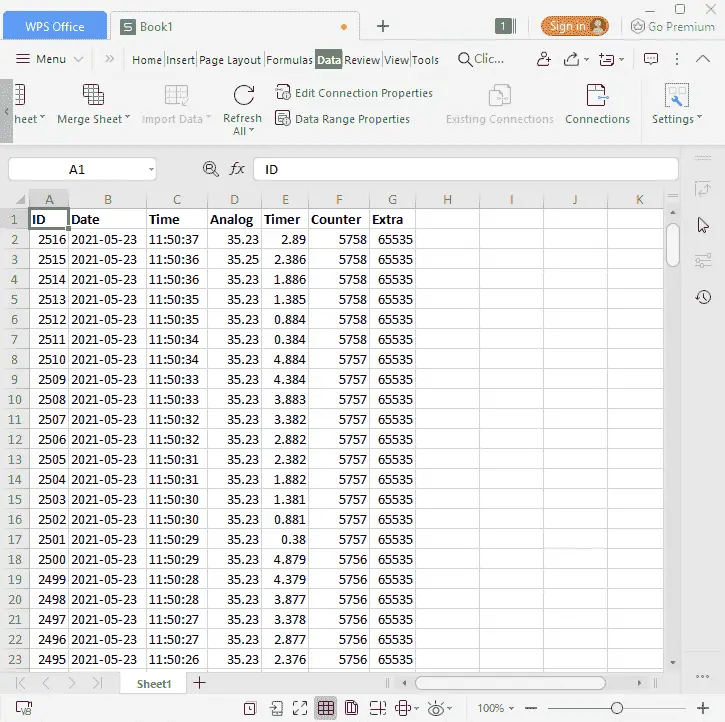
Data is now returned to our spreadsheet. The above steps only have to take place once. Save the spreadsheet. When you open it again you may use the refresh data icon on the data menu to get the latest data in the database. Right-clicking on the data and selecting refresh will also update the information in the database.
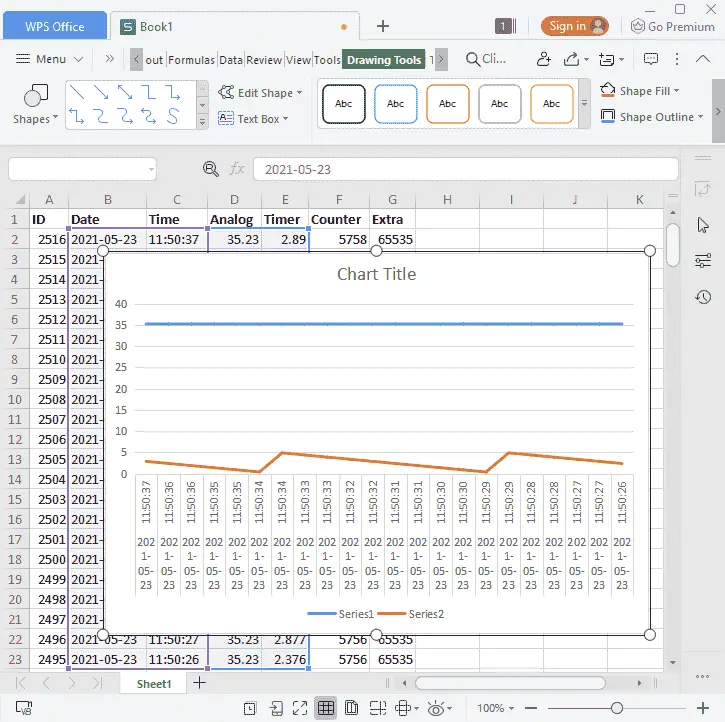
In general, a database is used to store information in an efficient way. Spreadsheets like Excel can be used to review the data for analysis.
Watch the video below to see our simple click data logging using Node-RED on our Raspberry Pi 4 Model B.
Download the Simple Click Data Logging Node-RED, SQL Database, and PLC programs here.
Node-RED Links
Node-RED Organization Home Page
Getting Started – Run Locally
Node-RED running on Windows (Run at Startup)
Securing Node-RED
Node-RED Essentials Videos (Basics of the Editor)
Learn JavaScript Free
w3schools JavaScript Tutorial
learn-js.org
Node-Red JavaScript Primer
Modbus
Node-RED Modbus TCP and Serial
Dashboard – HMI
Node-RED Dashboard
Node-RED Dashboard extra nodes
SQL Database
Node-RED SQL Database
Node-RED SQL Plus – Execute queries and stored procedures
Modbus Learning Links:
Simply Modbus Frequently Asked Questions
Modbus TCP/IP Overview – Real-Time Automation
All You Need to Know About Modbus RTU – Video
Watch on YouTube: Simple Click Data Logging
If you have any questions or need further information please contact me.
Thank you,
Garry
If you’re like most of my readers, you’re committed to learning about technology. Numbering systems used in PLCs are not difficult to learn and understand. We will walk through the numbering systems used in PLCs. This includes Bits, Decimal, Hexadecimal, ASCII, and Floating Point. To get this free article, subscribe to my free email newsletter.
Use the information to inform other people how numbering systems work. Sign up now. The ‘Robust Data Logging for Free’ eBook is also available as a free download. The link is included when you subscribe to ACC Automation.