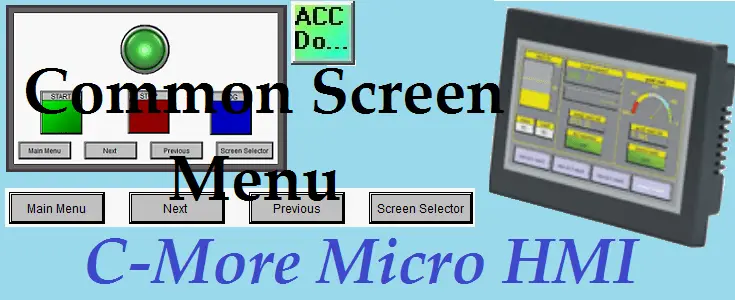
We will now look at creating common screen menus on our C-More Micro HMI. The menu can appear on multiple screens which provides intuitive operation for your operators. Allowing operators of your HMI (Human Machine Interface) panel to easily navigate all of the information available is a vital part of programming. We want to present the information to the operator so they will clearly understand the programmed operation of the unit. Common menus on the HMI panel pages will allow the quick navigation, understanding, and control that your operators want. When programming operator interfaces I have always heard to use the KISS method. (Keep it stupidly simple.) Your HMI program interface could contain hundreds of pages containing vital information for operator understanding and control, but you must make it easily accessible and intuitive. This is how you design and program a good HMI panel display.
We will be creating a common screen menu for our C-More Micro HMI Panel using the C-More Micro programming software. Using our previous program created we will be making a background screen to act as our menu system. Let’s get started.
Previously in this C-More Micro HMI Panel series we have done the following:
System Hardware – Video
Installing the Software – Video
– Update Automation Direct Software C-More Micro HMI Video
System Setup Screens – Video
First Program – Video
First Program Part 2 (PLC < – > Panel) – Video
Creating the Background Menu – C-More Micro
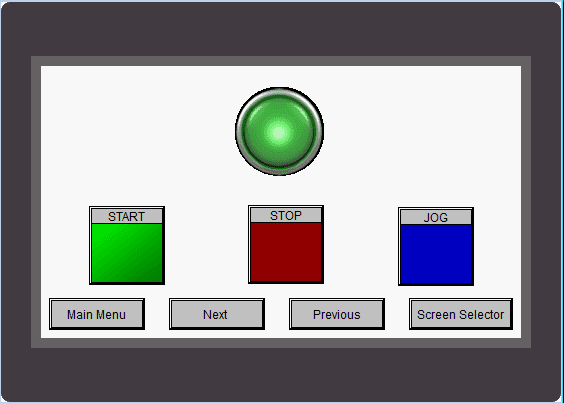
We will modify our program from First Program Part 2 (PLC < – > Panel). Our existing program has two pages: 1 – Screen 1 (Motor Start, Stop, Jog) and 2 – Screen 2 Blank.
Create a new page.
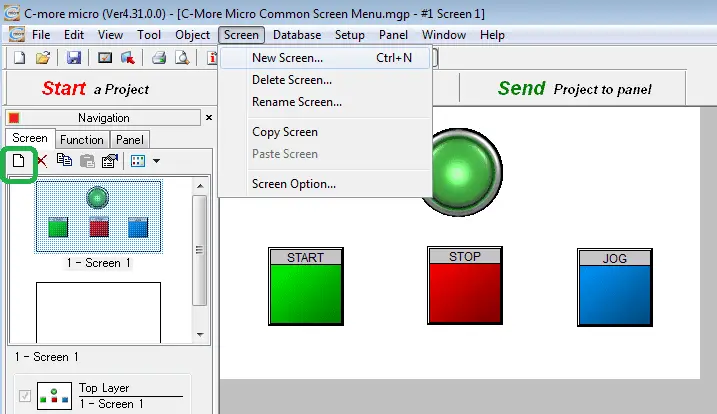
You can select the icon under the navigation area or from the main menu Screen | New Screen… The shortcut keyboard combination is Ctrl + N.

The next screen is automatically called up. 3 – Screen 3. We will make this screen number 100 and call it Background Menu.

Adding screen comments will help others and yourself when trying to read the program.
Hit OK.
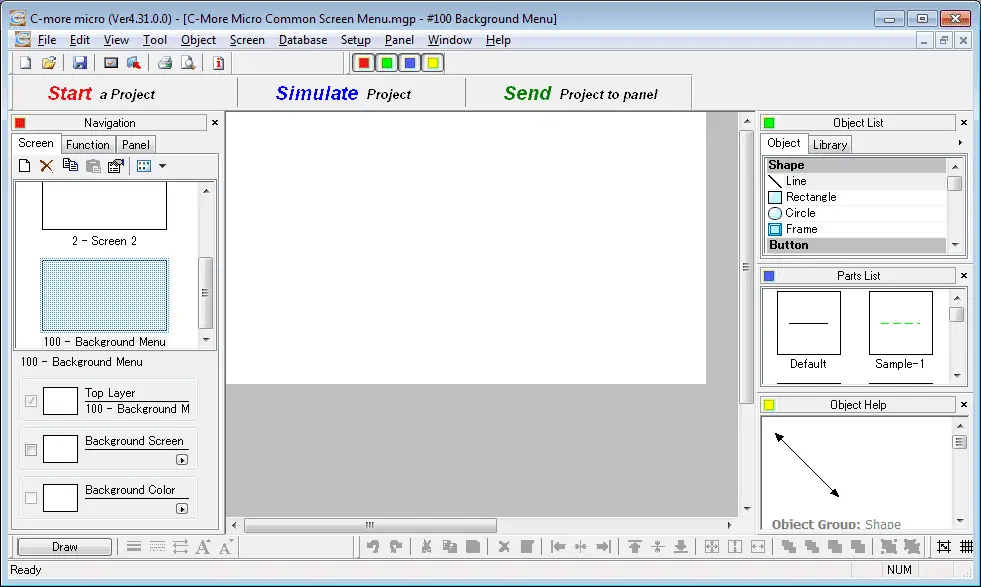
Displaying a grid on our page will help us to position the objects for alignment.
Main menu View | Display Grid.
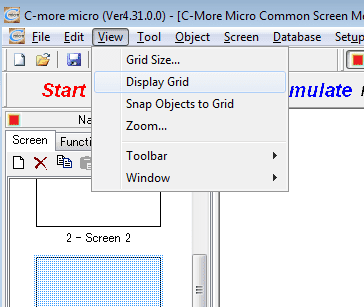
Note: You can also change the Grid Size and use the Snap Objects to Grid. These options are on the main menu under the View. I am using an 8 x 8 pixel grid and have the Snap Objects to Grid selected.
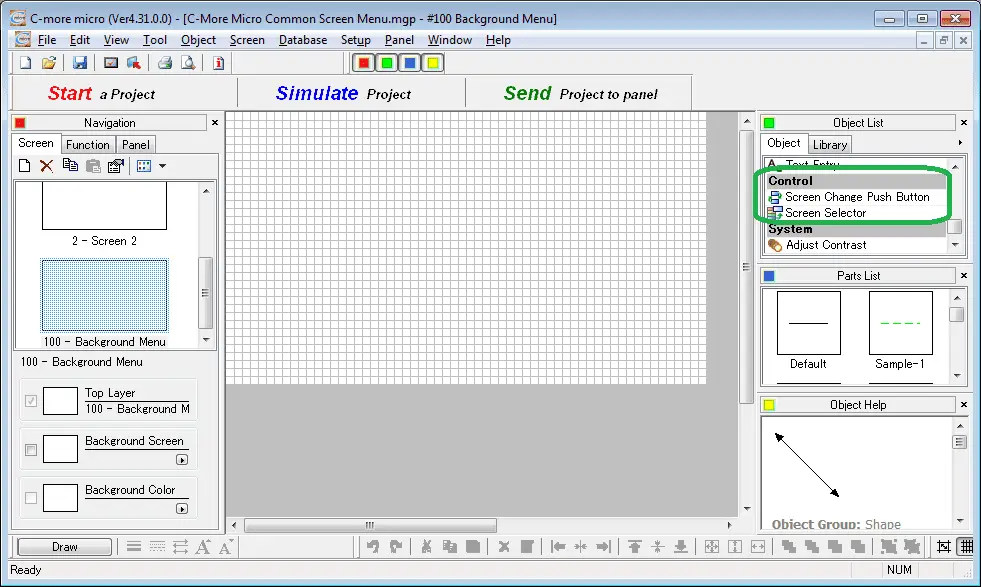
Under the Object List, select the Screen Change Push Button. Drag it onto the work area of the program.
This object will change the screen for us in the C-More Micro HMI Panel. We do not need to use the PLC program to do this task.
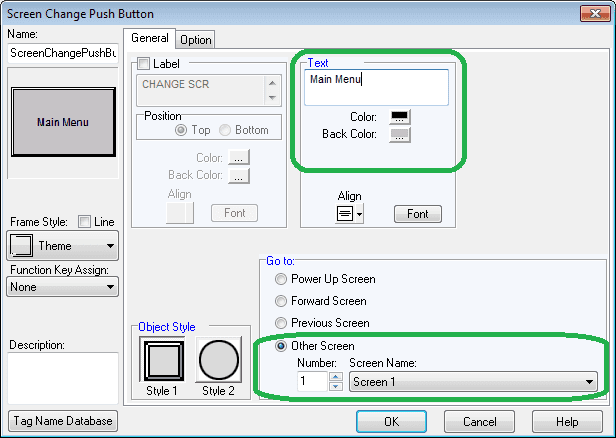
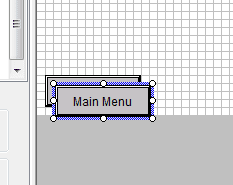
Change the text to Main Menu. The Go-To area will be screen number 1. This is our main screen (Motor Start, Stop, Jog) We will leave all the other selections in their default state, but you can change the appearance of the button.
Select OK.

Position the button on the work area of the screen. You can adjust the height, width and position using your mouse.
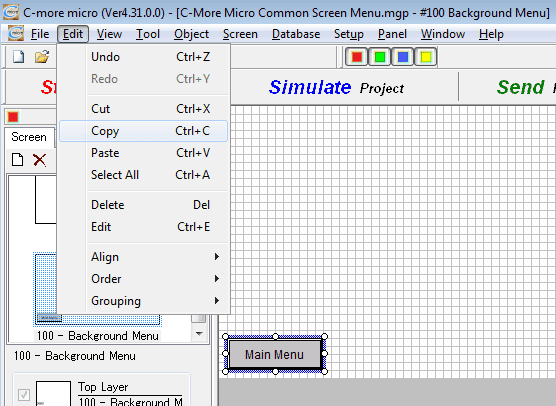
With the Change Page Button selected, copy the button by using the main menu | Edit | Copy. You can also use the keyboard shortcut of Ctrl + C or right-click on the button and select copy.
Paste the copied content onto the page. This is done by the main menu | Edit | Paste, Ctrl + V, or right-click the page and select paste.
Position the button next to our previous one. Double click on the new button to bring up the properties or right-click and select object properties.
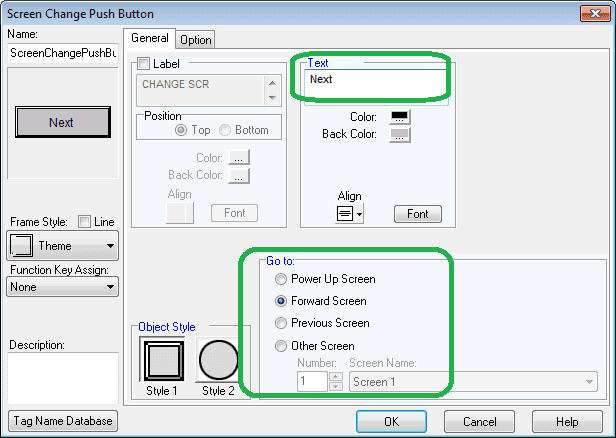
Change the text to Next and the go-to selection to Forward Screen.
Select OK.
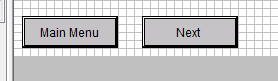
Copy the Next page change button and modify it as follows:
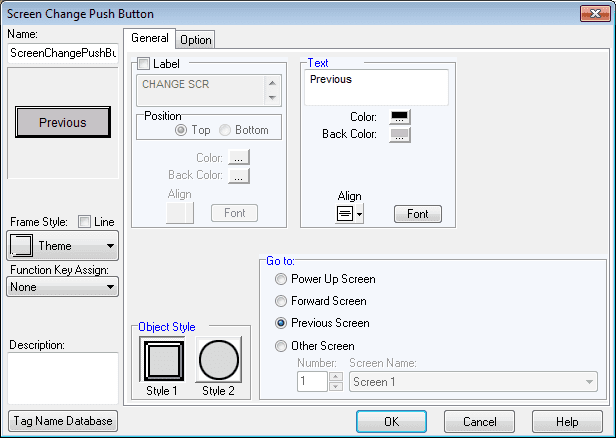
Text – Previous
Go to – Previous Screen
Our background screen menu is coming together well.
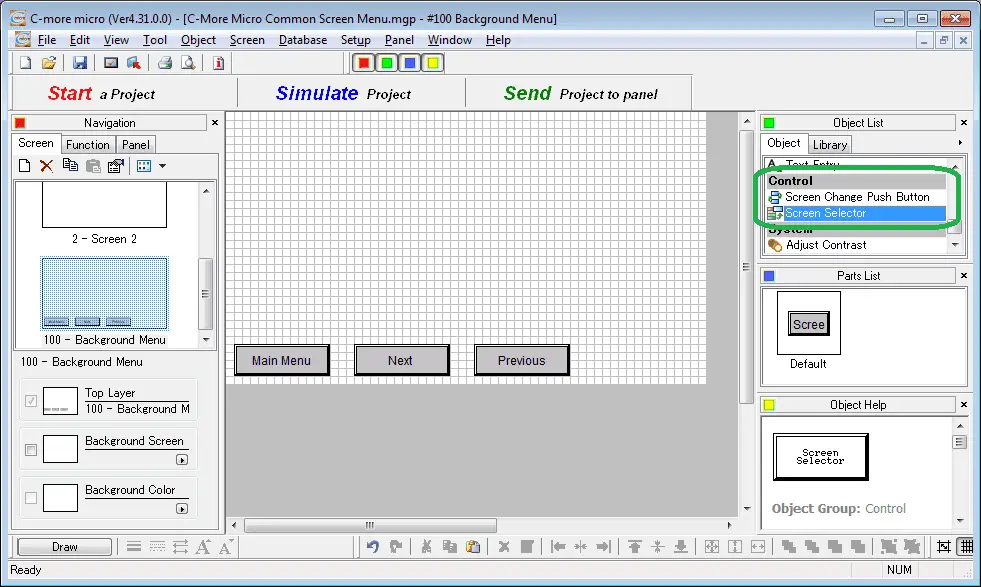
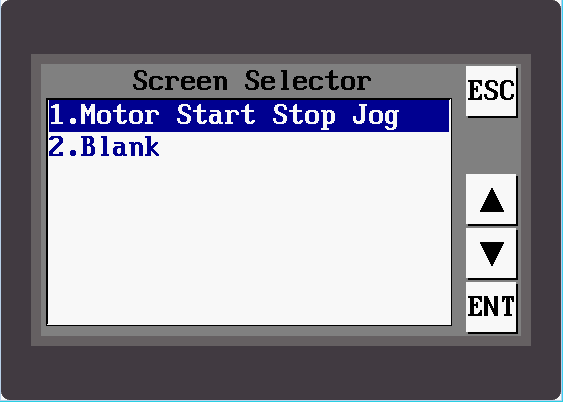
We will now add a Screen Selector as our final button on our menu. This button will allow the operator to choose what screen they will display. Drag the screen selector control onto our work area.
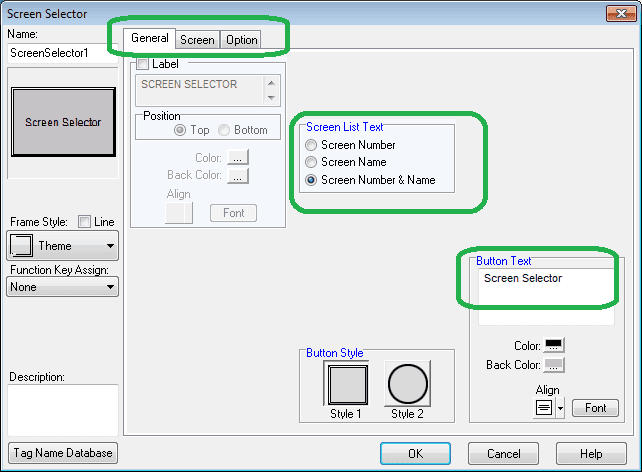
We will leave the Button Text as Screen Selector. Note that we can display the Screen Number, Screen Name or Both (default) from the Screen List Text.
Select the Screen Tab.
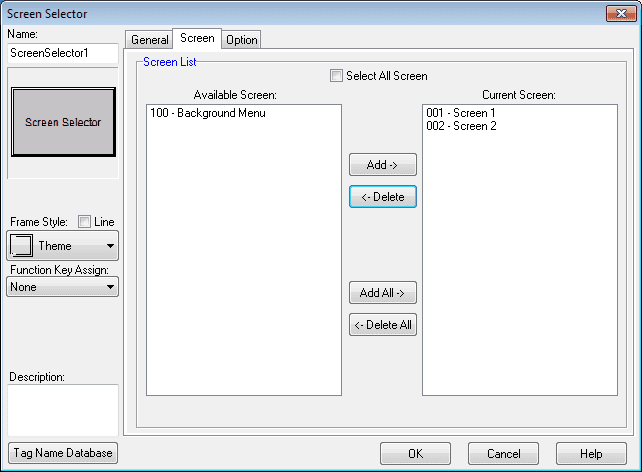
Uncheck the Select All Screen (default). This will now allow you to customize what screens the operator can select. Select 100 – Background Menu and hit < – Delete. This will prevent the Background menu screen from being selected. Hit OK.
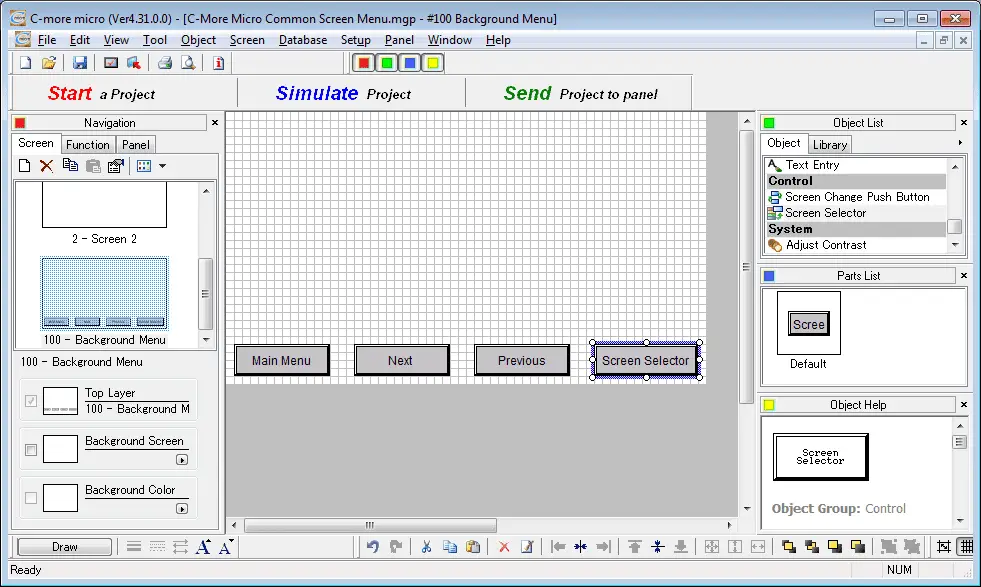
Resize and position the screen select button on our screen.
We have now finished the Background Page.
Putting a Background Menu on Existing Screens – C-More Micro
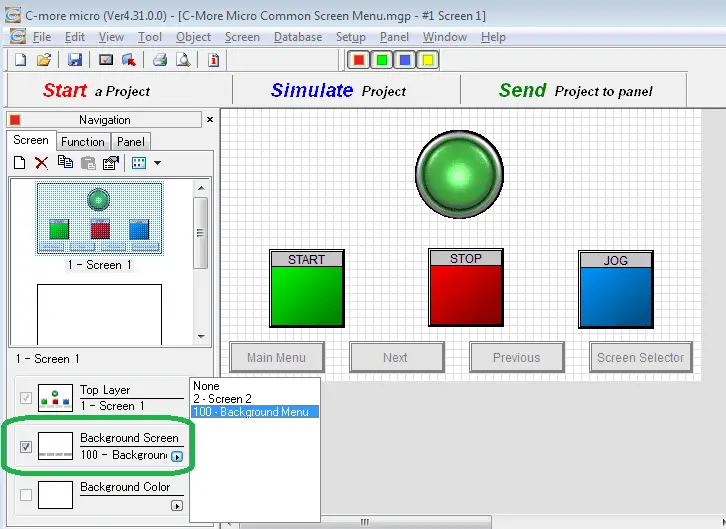
Select the screen that we want the background menu to appear. (1 – Screen 1) Select the Background Screen Option and select page 100 – Background Menu.
Note: The background menu will appear faded on the screen when you are programming the page. This just indicates your location and the content of the background screen information.
Repeat the above procedure for 2 – Screen 2.
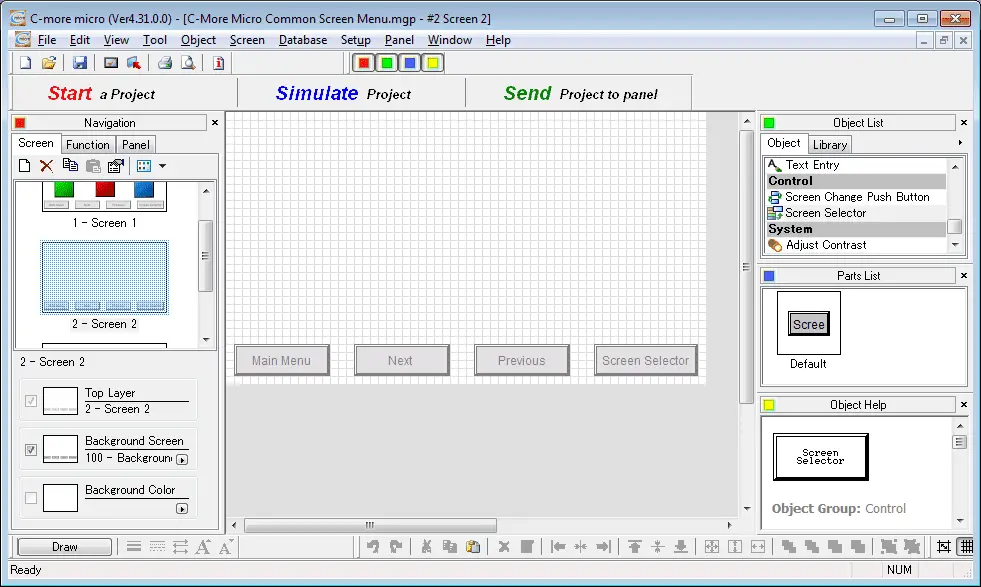
Our background menu will now appear on each screen.
Changing the Screen Names – C-More Micro
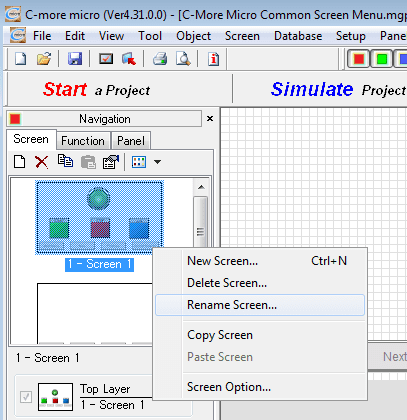
1 – Screen 1 is not a good name so we will change this to Motor Start Stop Jog. Our screen number will remain the same. Right-click the screen under the navigation menu and select Rename Screen…
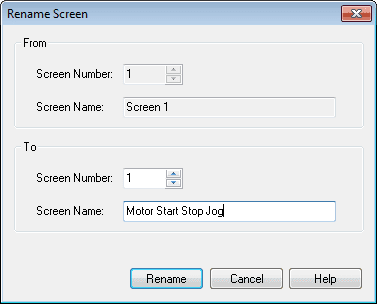
Change the screen name to Motor Start Stop Jog. Select Rename.

Our screen is now renamed. Now change screen number 2 – Screen 2 to the name Blank.
C-More Micro – PLC Program Modification – Keeping track of the screen changes.
The operator can change the screen number anytime using our menu system created above. To keep track of the changes in the PLC we need to add to our existing program.
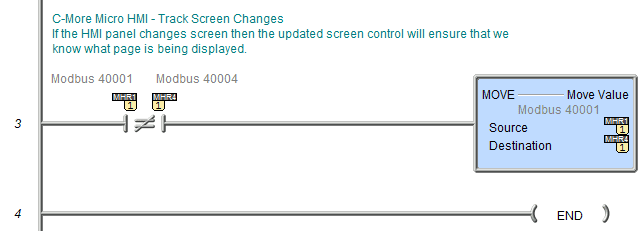
When the operator changes the page, notification will be given to us in address MHR1. We compare this to our location to change the page. (MHR4) If the values are not equal then the value of MHR1 is placed in MHR4. This will ensure that we are always on the same screen (page) number. The following code will now allow us to change pages by writing the page number that we require in MHR1 from the PLC.
The following is a table of the Modbus communication that we have discussed previously.
PLC Communication – Modbus TCP
Do More Designer Simulator PLC – Modbus Address Map
The following table shows the Coil/Register numbers and the associated Do-More Simulated PLC address for Modbus.
| Coil/Register Numbers | Data Addresses | Type | Do-More PLC (BRX) | Table Name |
| 00001-09999 | 0000 to 270E | Read-Write | MC1 to MC1023 | Discrete Output Coils |
| 10001-19999 | 0000 to 270E | Read-Only | MI1 to MI1023 | Discrete Input Contacts |
| 30001-39999 | 0000 to 270E | Read-Only | MIR1 to MIR2047 | Analog Input Registers |
| 40001-49999 | 0000 to 270E | Read-Write | MHR1 to MHR2047 | Analog Output Holding Registers |
Note: The Do-More Series PLC uses the Modbus area to communicate. This is because having direct access to the digital I/O can be dangerous when connected via Ethernet to the internet. Data must move in and out of this area via the PLC program.
Running the Program – C-More Micro
Our common screen menu is now available for the operator.
Selecting screen selector will allow the operator to quickly go to the screen desired.
Download the PLC and C-More Micro program here.
Watch the video below to see the above common screen menu in action on our C-More Micro HMI Panel.
C-More Micro Panels from Automation Direct
https://www.automationdirect.com/adc/Shopping/Catalog/HMI_(Human_Machine_Interface)/C-more_Micro_Panels
C-More Micro – Graphic Panel (EA3 Series) User Manual and Quick Start Guides
https://cdn.automationdirect.com/static/manuals/ea3mguserm/ea3mguserm.html
EA3-T4CL C-More Micro Specifications
https://cdn.automationdirect.com/static/specs/ea3t4cl.pdf
C-More Micro Programming Software V4.30
http://support.automationdirect.com/products/cmoremicro.html
This free software will enable you to program all of the C-More Micro HMI units. It includes a simulator for your application.
Next time we will look at the simulator in the C-More Micro HMI Panel.
Watch on YouTube : C-More Micro HMI Common Screen Menu
If you have any questions or need further information please contact me.
Thank you,
Garry
If you’re like most of my readers, you’re committed to learning about technology. Numbering systems used in PLC’s are not difficult to learn and understand. We will walk through the numbering systems used in PLCs. This includes Bits, Decimal, Hexadecimal, ASCII and Floating Point.
To get this free article, subscribe to my free email newsletter.
Use the information to inform other people how numbering systems work. Sign up now.

The ‘Robust Data Logging for Free’ eBook is also available as a free download. The link is included when you subscribe to ACC Automation.