Continuing our series, we will now look at the numbering systems and addressing used in the Click PLC. Previously we have discussed:
System Hardware – Video
Installing the Software – Video
Establish Communication – Video
The programming software and manuals can be downloaded from the Automation Direct website free of charge. These are being used exclusively in our Click PLC series.
Data Types – Click Addressing
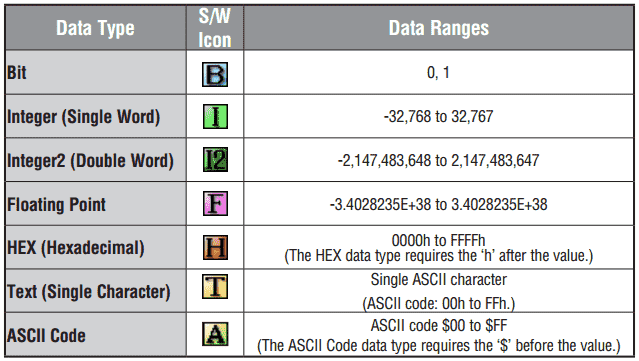
Click PLC data types can be found in the following table. The different types supported are Bit, Integer (Single Word – 16 bits), Integer2 (Double Word – 32 bits), Floating Point (Single – 32 bits), Hexadecimal (16 bits), Text (Single ASCII Character – 8 bits), and ASCII Code (8 bits).
To better understand data types in the PLC you can get the free information guide by subscribing to this site at the end of this post.
(Picture – understanding- Link to bottom)
What Everybody Ought to Know about PLC Numbering Systems
Memory Types – Click Addressing
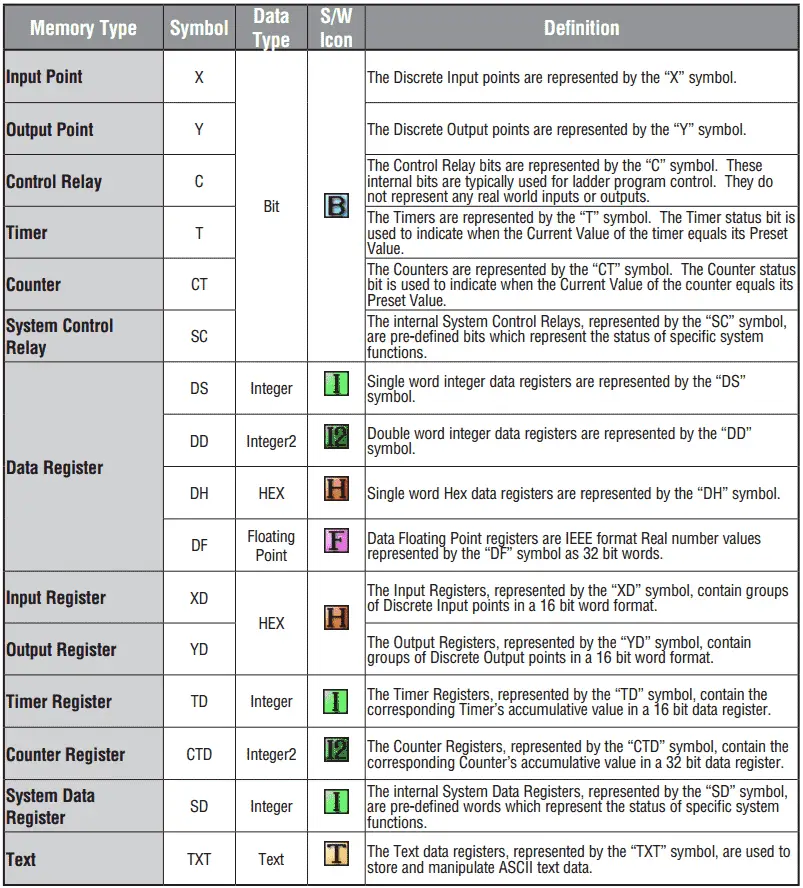
Once we know the Data Types that are in the PLC, we can look at the Memory Types. This is the Memory that the PLC utilizes within the program. This includes where to look for the actual input and output points, timers, counters, data registers, etc.
Indirect Addressing – Click Addressing
Indirect addressing is supported in the Click PLC. The manuals refer to this as ‘Pointer Addressing’. It will utilize the DS registers as the offset value and can be used with the DS, DD, DF, DH, XD, YD, TD, CTD, and TXT data register memory types.
Example:
DD[DS3] – This will point to the address in DD that DS3 value contains. If DS3 has a value of ‘145’ then the address will use DD145. As we change DS3 the corresponding address of DD will change as well.
Here are some additional links to show how indirect addressing works:
– Here is a Method that is Helping PLC Programmers to Program Faster
– Building a PLC Program that you can be Proud of – Part 1
Memory Map – Click Addressing
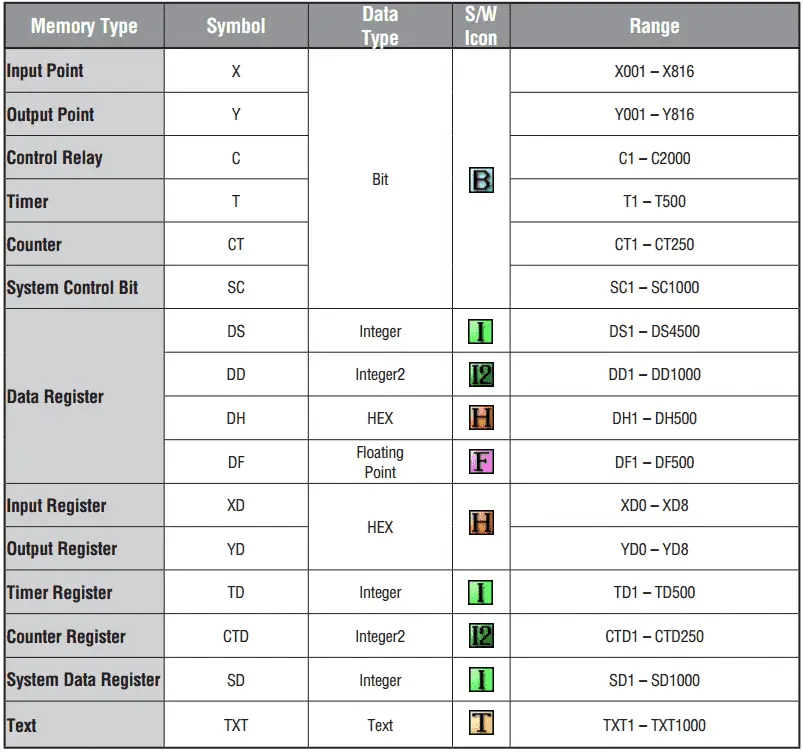
Now that we know the data types and memory types we can now look at the memory map. This will show us the amount of memory that we have in the PLC for addressing. The following table shows the memory type and addresses range for each.
We will now connect to the PLC with the software and view how we address using the memory map above.
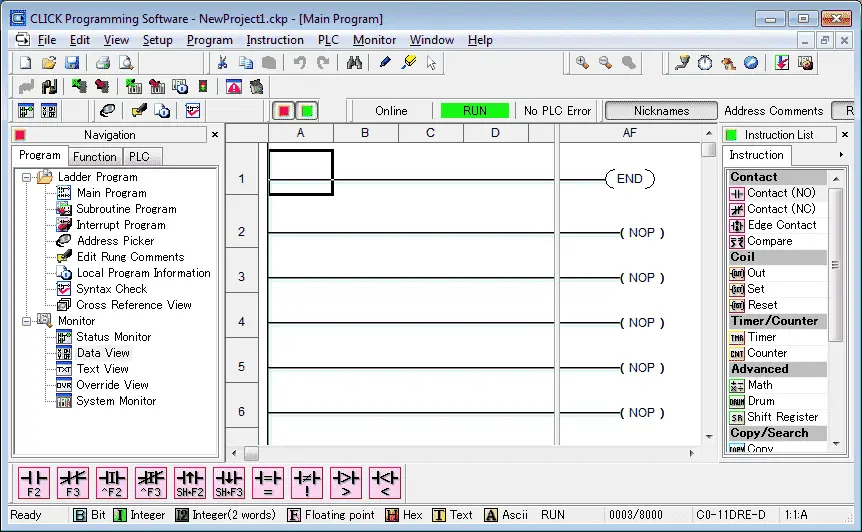
You will note at the bottom of the programming software you get a reference to the different types of memory.
Once we are online we can call up the system configuration window. This is located under Setup | System Configuration…
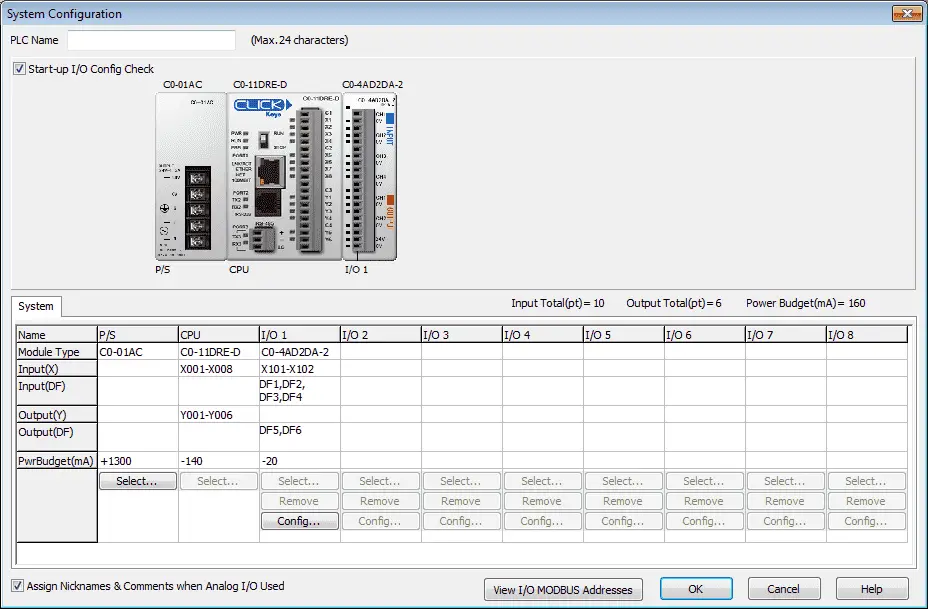
This windows a great deal of information. We can call this window up offline to configure the PLC manually. This is ideal if we need to know the total current we need before purchasing a system. When online it will automatically read the configuration of our system.
If you look under the CPU you will notice that our Input (X) are referenced X001 to X008 and our Outputs (Y) are referenced Y001 to Y006. The addresses for our analog card are also displayed. We have 4 inputs – DF1, DF2, DF3 and DF4. DF5 and DF6 are for our analog outputs. Bits X101 and X102 are used for the state of the analog card on our system.
Note: I can scale the analog inputs and outputs by selecting the Config.. button in this window.
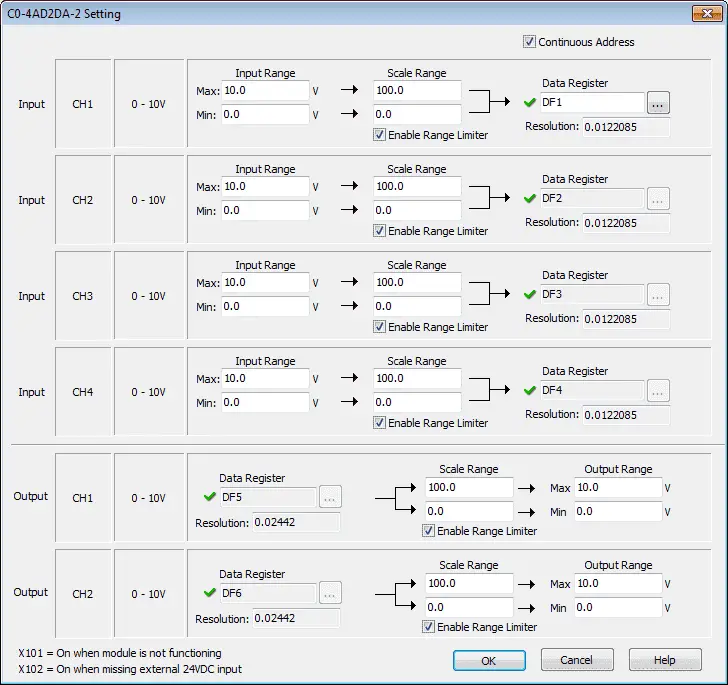
No programming is necessary for scaling of analog. We select the analog range and set the corresponding scale range for both the inputs and outputs.
Data View – Monitoring Click Addressing
We will now monitor the address in the PLC. Select Monitor | Data View | Add New Data View…
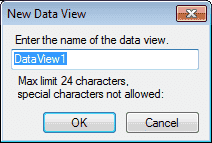
You can name this Data View anything that you like. We will leave the default name of DataView1 and select OK.
The Data View window will now appear on your screen.
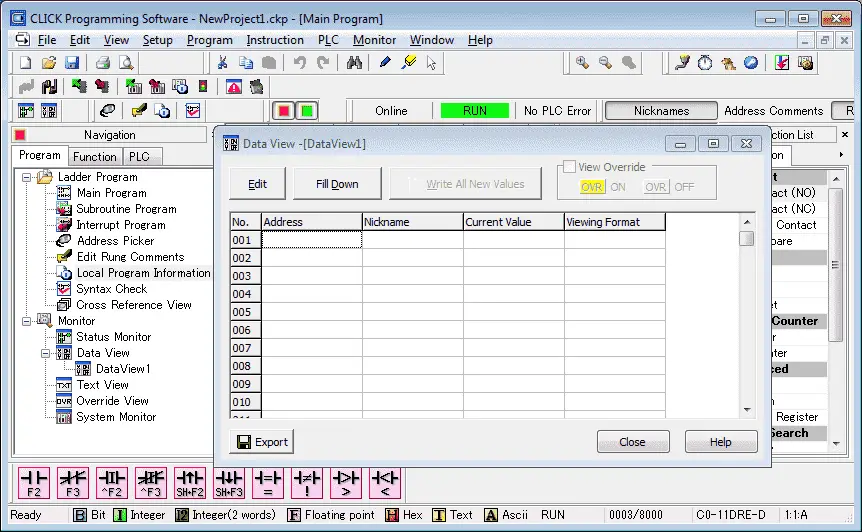
Select the Edit button so we can add an address.
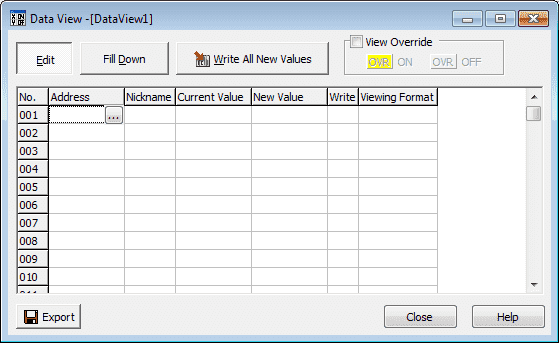
When the address is selected on the Data View window you will notice a box with […]. If we select this button the address picker is displayed.
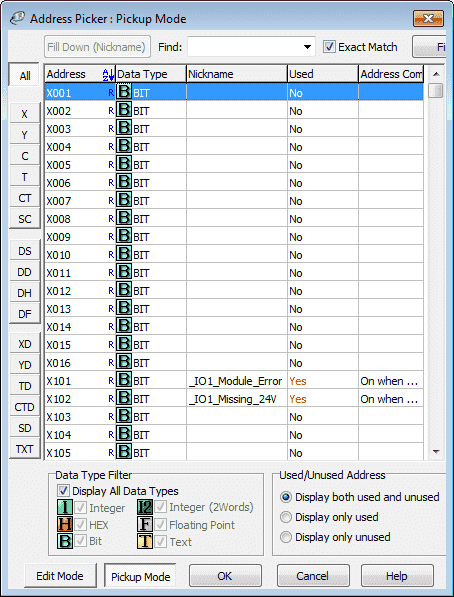
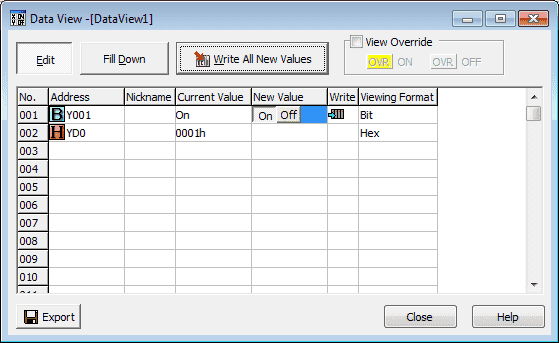
Select the first output address of our PLC. This would be Y001. We can select the ‘Y’ on the left side and then the first of the list. Now hit OK to bring it back to our Data View window.
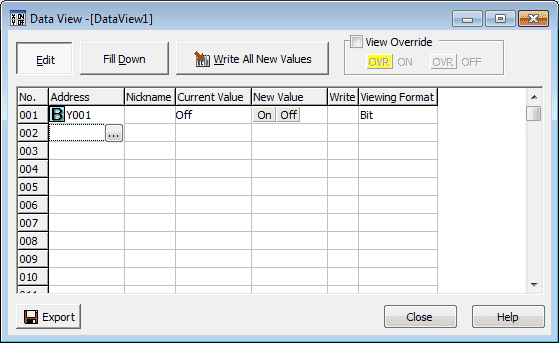
Now let’s add the output register that holds all of our outputs on the PLC. (YD0)
Under the New Value heading, select On for our address Y001.
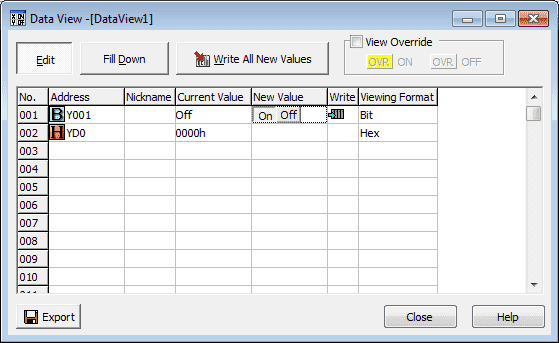
Select ‘Write All New Values’. You will get a message asking if you want to write all edits. Select Yes.
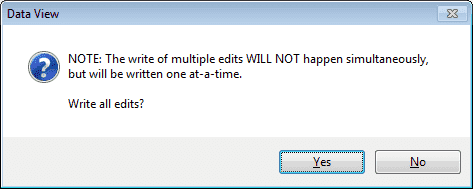
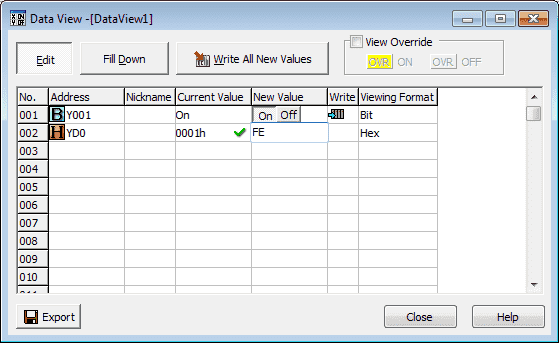
The output bit on the CPU will not turn on. You will also notice that the bit 00 in the output word (YD0) also turns on because this is the same location.
Lets write a new value of ‘FE’ into the register YDO.
Select ‘Write All New Values’. Then when the warning message pops up select OK.
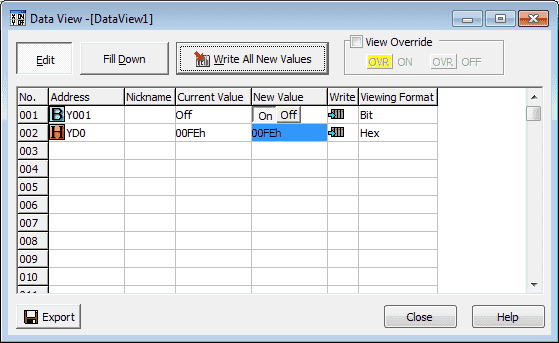
The first bit now is currently off and the remaining bits in the PLC output channel are on.
The Click PLC has all of the memory types available that are sometimes only obtained in larger systems. Addressing is very straight forward thanks to the system configuration window.
Next time we will look at the Click PLC Timers and Counters.
Watch on YouTube: Click PLC Numbering System and Addressing
Watch on YouTube : Wiring (Testing) Analog PLC Input Click
If you have any questions or need further information please contact me.
Thank you,
Garry
If you’re like most of my readers, you’re committed to learning about technology. Numbering systems used in PLC’s are not difficult to learn and understand. We will walk through the numbering systems used in PLCs. This includes Bits, Decimal, Hexadecimal, ASCII and Floating Point.
To get this free article, subscribe to my free email newsletter.
Use the information to inform other people how numbering systems work. Sign up now.

The ‘Robust Data Logging for Free’ eBook is also available as a free download. The link is included when you subscribe to ACC Automation.