We will now look at the MQTT communication capability using our Click plus PLC.
MQTT stands for Message Queuing Telemetry Transport. This simple ‘publish and subscribe’ communication protocol, does not take too many resources.
Constrained devices with low bandwidth are ideal for MQTT. This protocol provides machine-to-machine (M2M) connectivity which is ideal for the Internet of Things. (IoT) This protocol is not for remote IO or real-time (deterministic) applications. MQTT is a good solution for applications that move data from hundreds or thousands of machines (sensors) to clients in many networks.
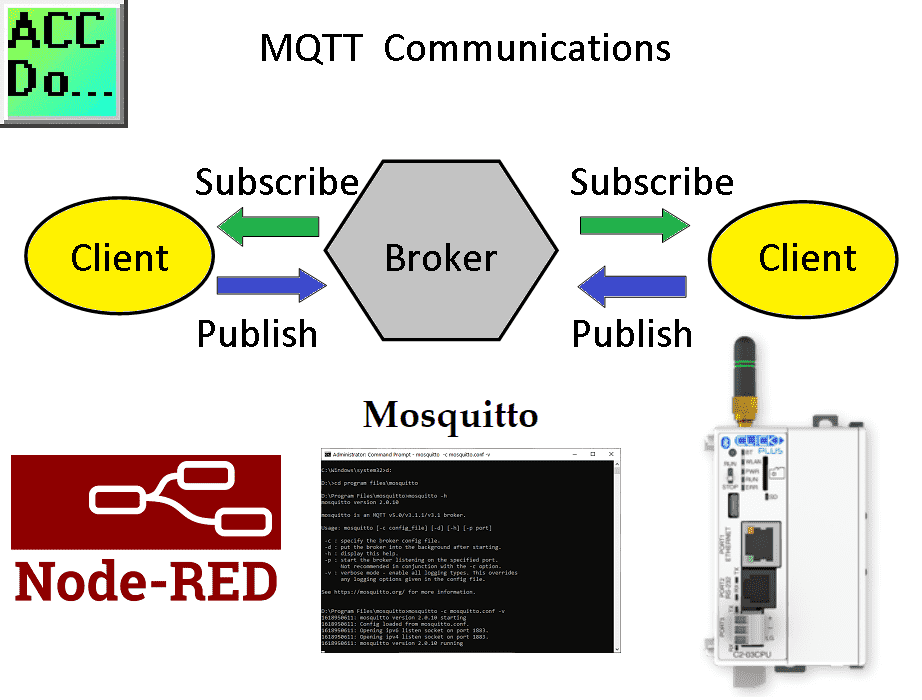
We will be installing a windows based broker called Mosquitto. The Click Plus PLC will be one of the clients publishing and subscribing to the MQTT broker. Node-RED will be the other client publishing and subscribing to the MQTT broker. Each client will share information. Let’s get started.
Our entire Click series can be found here. All of the previous information for the Click PLC can be applied to the Click PLUS.
Previously we looked at the following:
Software Installation – Video
Click Software Establish Communication – Video
The programming software and manuals can be downloaded from the Automation Direct website free of charge.
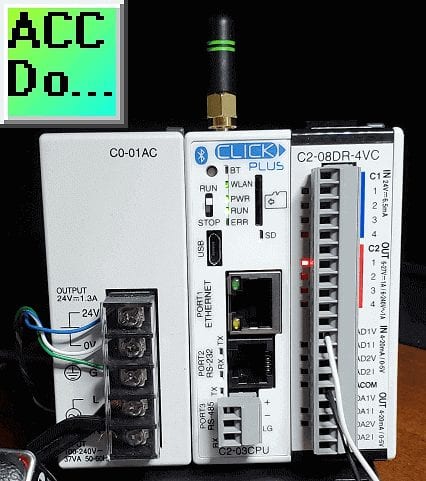
Watch the video below to see Click Plus MQTT communication to a broker. (C2-03CPU)
Eclipse Mosquitto – Open Source MQTT Broker
Installing Mosquitto Broker Windows
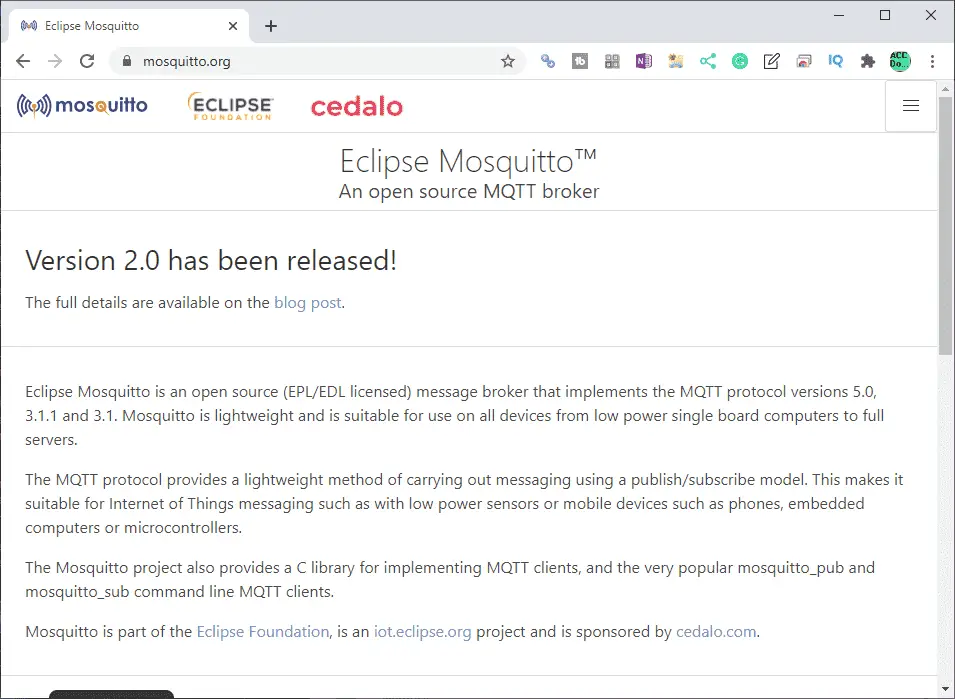
The Eclipse Mosquitto broker is an open-source message broker that implements MQTT protocol versions 5.0, 3.1.1, and 3.1. Mosquitto has the ability to run on Windows, Mac, Debian (Raspberry Pi), and Ubuntu.
On the Mosquitto website, select downloads.
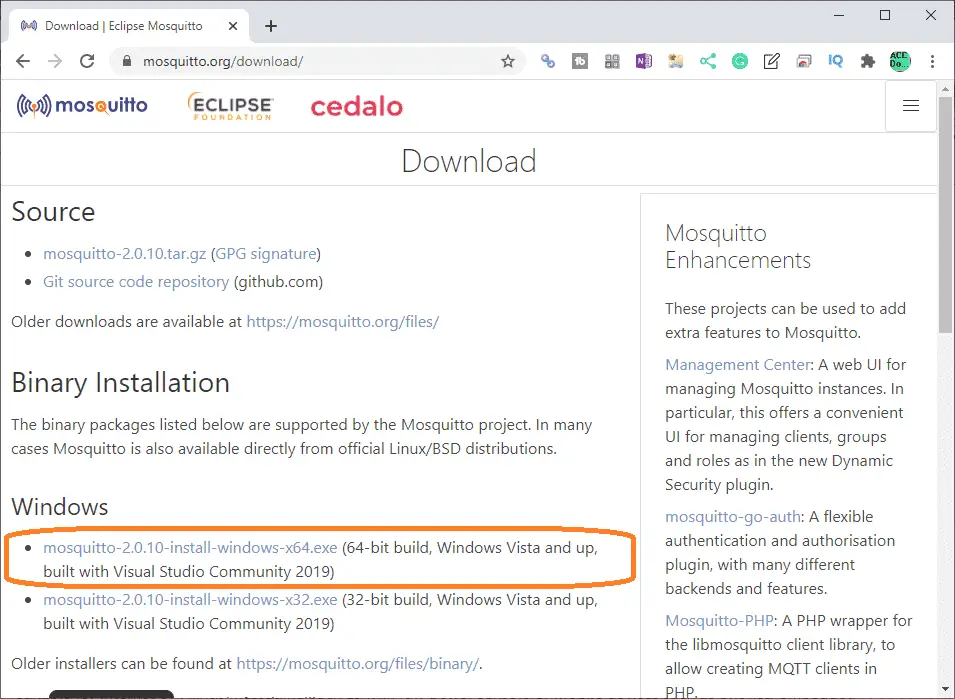
Our windows 10 machine is 64-bits. Select the mosquitto-2.0.10-install-windows-x64.exe file.
Run the file downloaded.

The welcome screen will now appear. Click the Next button.
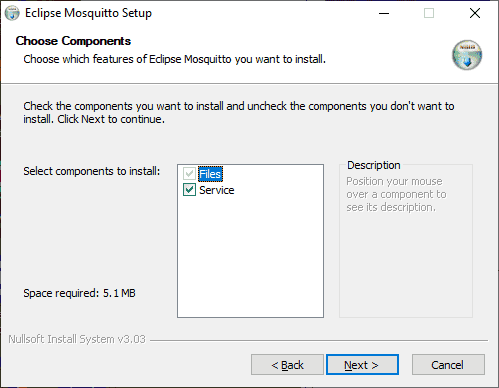
Use the default selection as displayed above. This will install the Eclipse Mosquitto service. Services such as this can be controlled when to start under the administration tools. Click the Next button.

We will change the destination folder to our D drive instead of the default C drive. Take note of the location of the Mosquitto files. Click the Install button.
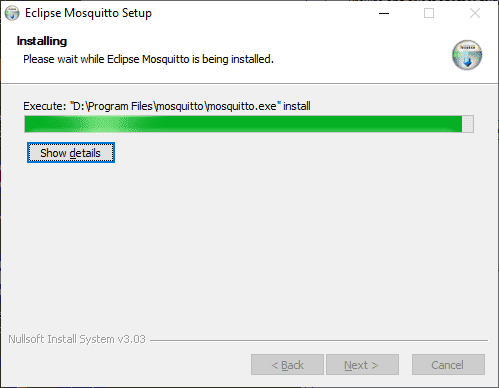
The files will now be installed on our computer.
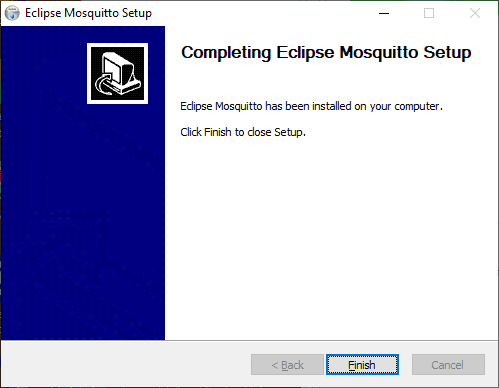
Once the installation is complete the above message will appear. Click the Finish button.
Mosquitto Broker Windows Service
Start windows service.
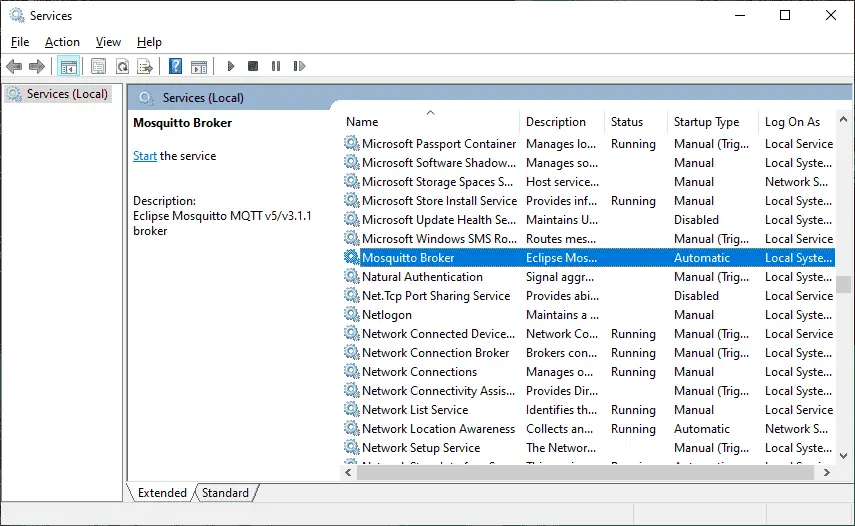
The Mosquitto Broker is set to start automatically. We will change to manual for our post. Double click on the mosquitto broker service.
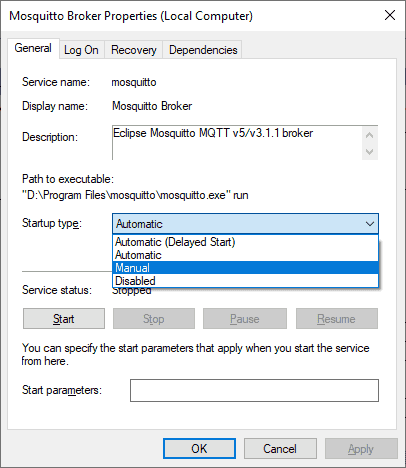
Under the startup type select Manual. Select OK.
Mosquitto Broker Windows Configuration
The broker will run without a configuration, but you will be limited to clients running on this computer only. (Local) A sample configuration file called mosquitto.conf is in the same installation directory as the program. Open this file with Notepad. All of the configurations in the file have been commented out. This shows you all of the options available for the broker configuration.
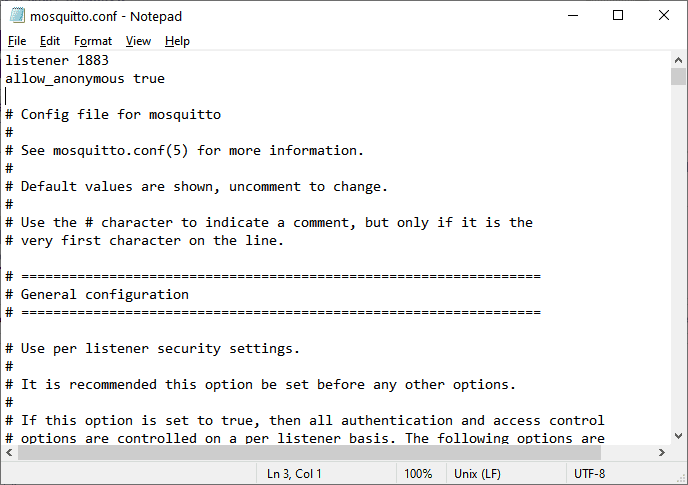
Add the following two lines to this file.
Listener 1883
Allow_anonymous true
We are configuring the broker to listen on port 1883 (default) and allow all users to connect. This is fine in our setting because we are behind a firewall.
Manually Run Mosquitto Broker Windows
Open up a command prompt as administrator in Windows 10.
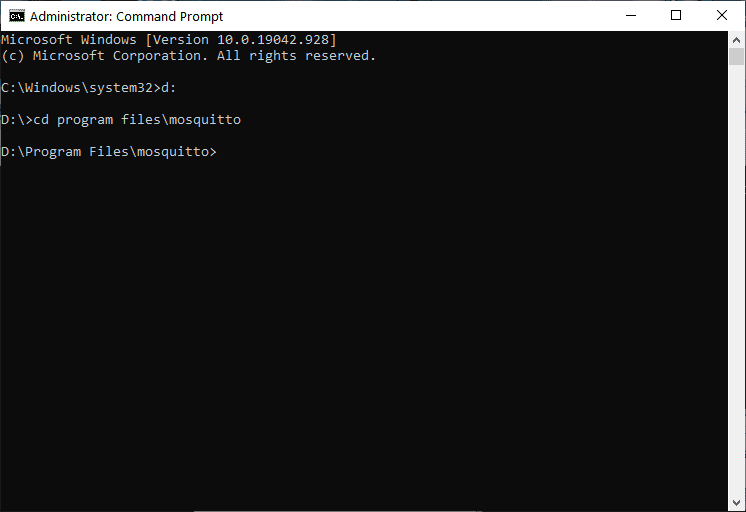
Type ‘d:’ and then enter the command prompt. This will change the drive to our installation location. Then type “cd program files\mosquitto” at the command prompt. This means to change the directory (cd) to the same file location that we installed Mosquitto as noted above.
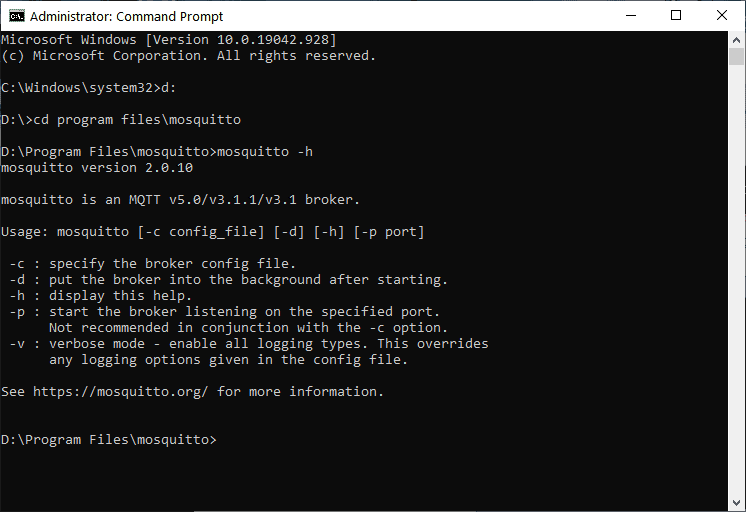
Mosquitto –h command will be used for listing the help information.
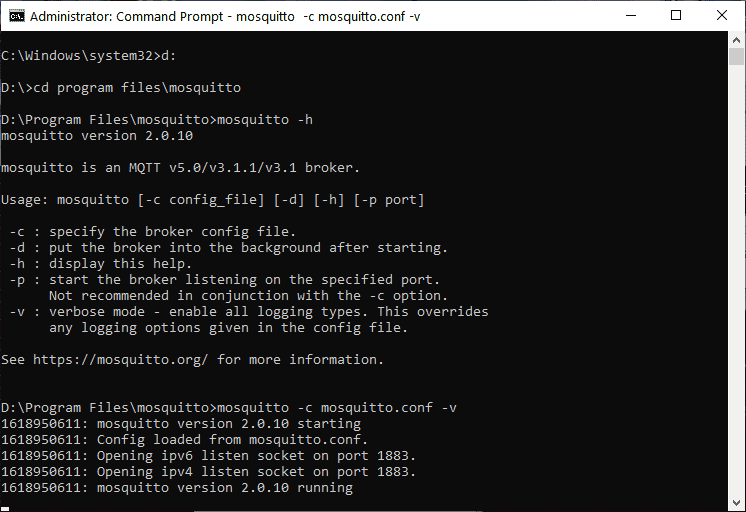
Mosquitto -c mosquitto.conf –v command will be used to start the MQTT broker.
The configuration file we modified and verbose (-v) mode will be used to start the mosquitto broker. Verbose is used so we see console messages.
Our broker is now running on our computer.
Note: If you are currently running a firewall on your computer, you must specify exceptions (IP addresses) for the equipment that will be communicating to this broker.
MQTT Broker Address
The clients connecting to our broker will need to know the IP address to communicate. We can determine the IP address of the MQTT Broker in a few different ways.
Start another command prompt and type the command “ipconfig”.
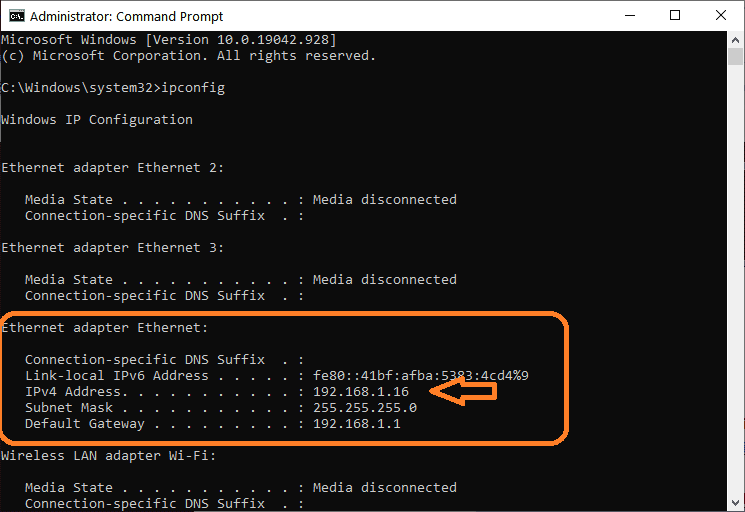
Since we are behind a router we are looking for the local IP address. We are currently using 192.168.1.16. We are now ready to add our clients to the broker.
Node-RED MQTT Client
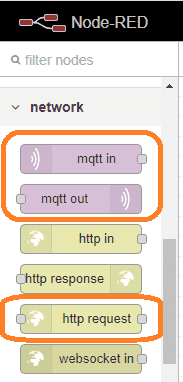
Node-RED supports the MQTT client without installing any nodes. You will find MQTT IN and MQTT OUT under the network heading in the nodes. (Left-hand side)
Our MQTT client will also get the weather information from a website using the HTTP REQUEST node.
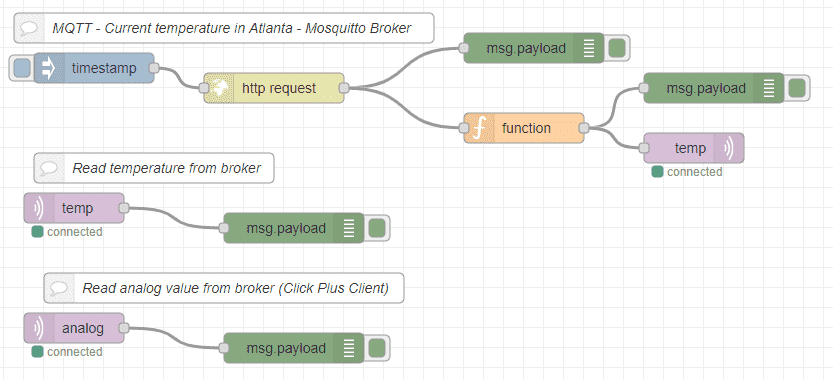
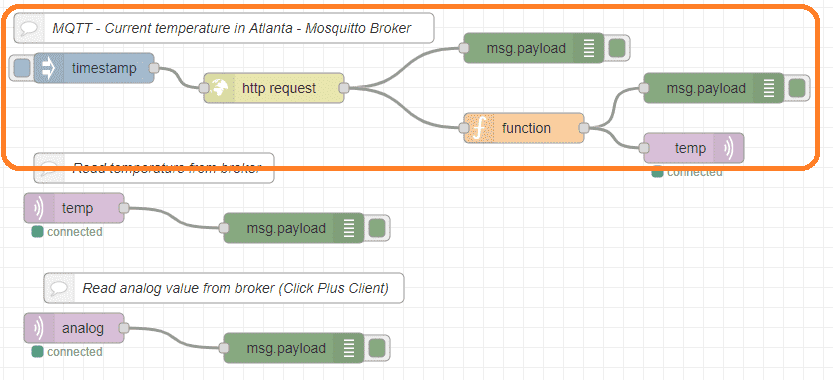
Here is our overall flow. We have basically three sections to our Node-RED flow.
The first will use an inject node at a fixed time to get the weather in Atlanta, US. An API is used on the website openweathermap.org. You can sign up for free at the sight, but you are limited to the number of requests made per day.
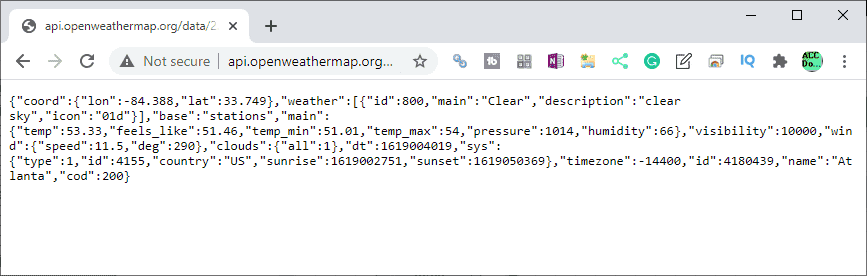
If you place the URL address in a browser, you will see the JSON data returned from the website.
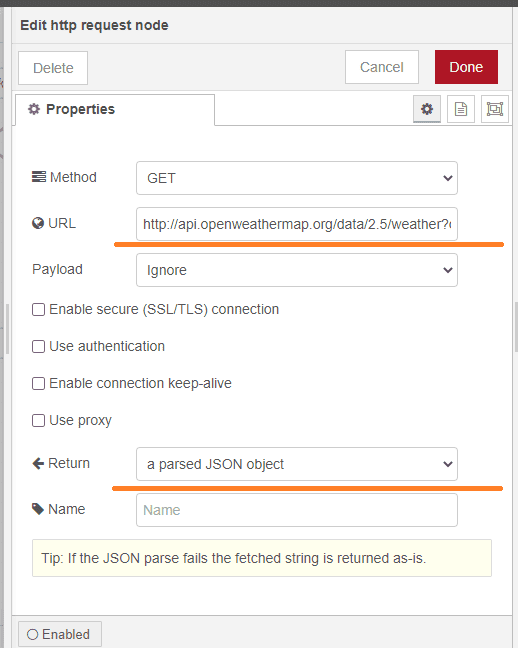
The HTTP request node will contain this URL address. It will also be selected for the return of a parsed JSON object.
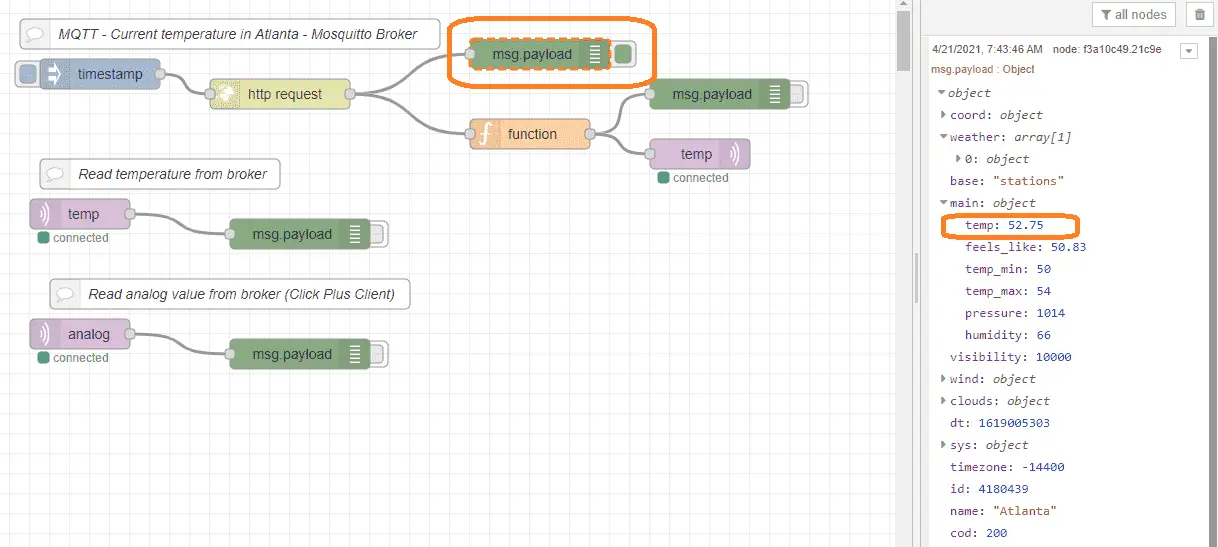
Using the message payload we can view the debug on the right of the screen to see the returned JSON data. Our current temperature in Atlanta is one of many variables that we can use.
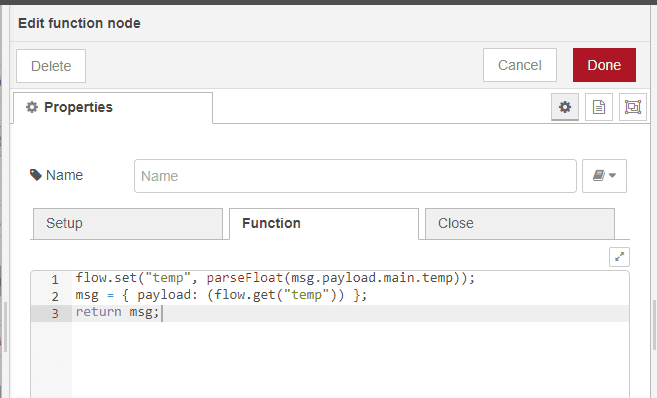
The function node will then take the temperature and place this in a variable so we can use this value to send to the MQTT broker.
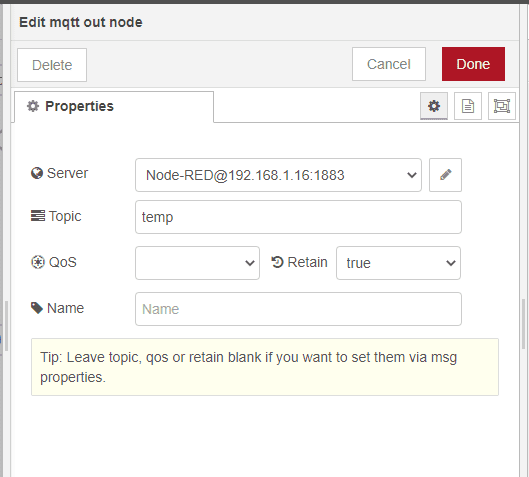
The MQTT out node will be set for the topic of ‘temp’ and the retained value will be set for true.
The server is set up based on the IP address set in our broker. Select the edit to the right-hand side of the node properties.
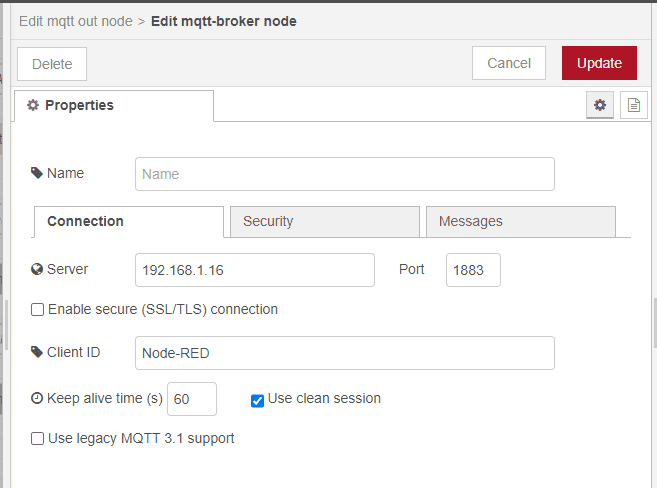
Client ID is set for Node-RED this can be left blank, but we will use this to actually see the information being published and subscribed by this program.
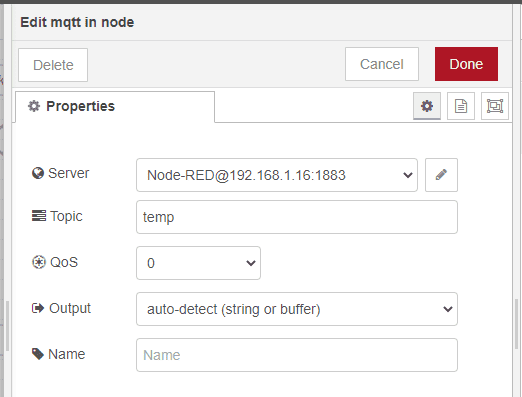
The MQTT IN NODE will be used to read the information that our program just sent above.
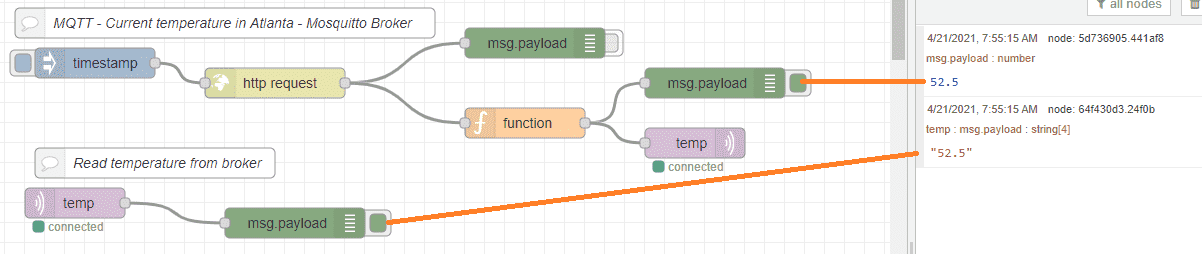
Here is how it will look using the message payloads and debug mode. The temperature is written to the broker and then the broker will write back the temperature to the client.
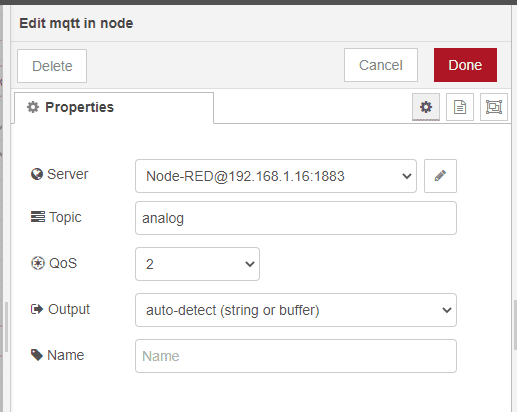
We will also set up a topic called ‘analog’ that will contain an analog value from the Click Plus PLC.
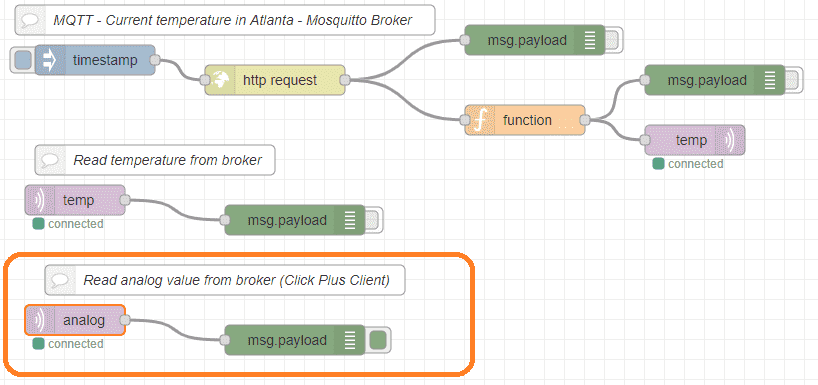
The message payload will allow us to monitor the values coming into Node-RED from the Click Plus through the MQTT broker. We can now set up the Click plc for MQTT.
Click Plus MQTT Client
The Click Plus requires no ladder logic to make it function.
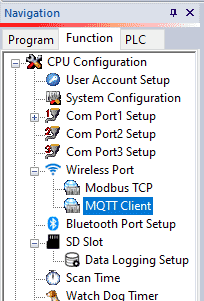
We will be using the Wireless Port for our MQTT Client. If you have a wired Ethernet connection then look for the MQTT client under Com Port1 Setting. Click on the MQTT Client under the Wireless Port.
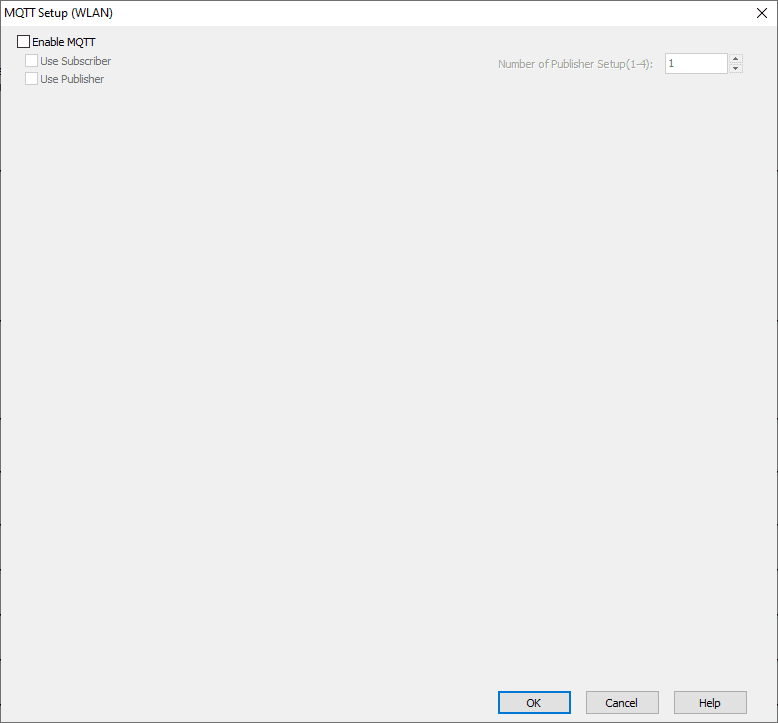
Our MQTT Setup (WLAN) window will now be displayed. Select enable MQTT.
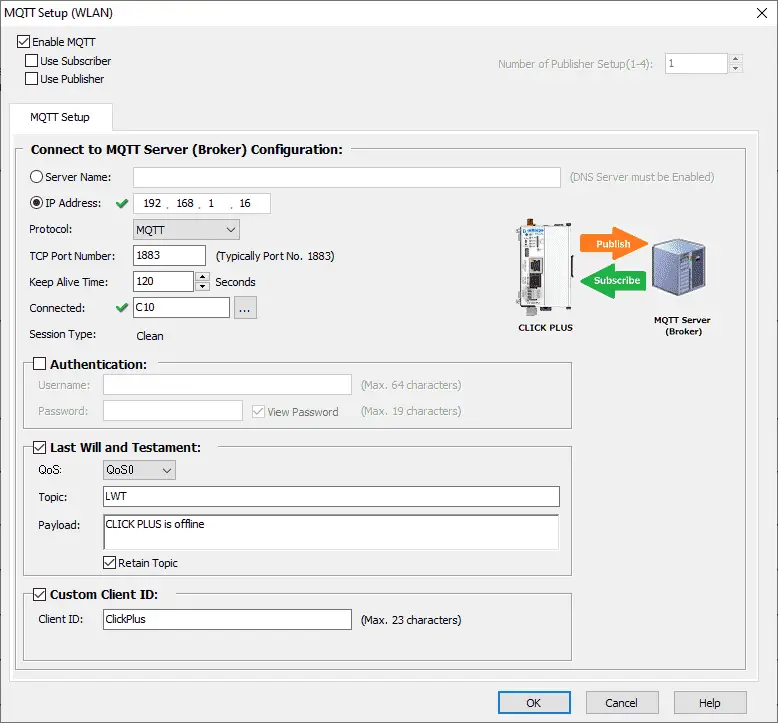
Our MQTT Server (Broker) configuration information can now be entered. The IP address will be what we set above. We will leave the default port 1883 as the TCP port number. The temperature in Atlanta will be read every minute so we will set the keep-alive time to 120 seconds. C10 will be used to indicate that we have made a connection to the broker. Authentication will be left blank because we did not configure this in the broker. We will select the last will and testament. This will write to the topic when the Click Plus disconnects from the broker. Our custom client ID will be set to ‘ClickPlus’. This will help in troubleshooting any issues with our MQTT network. Select the use subscriber box.
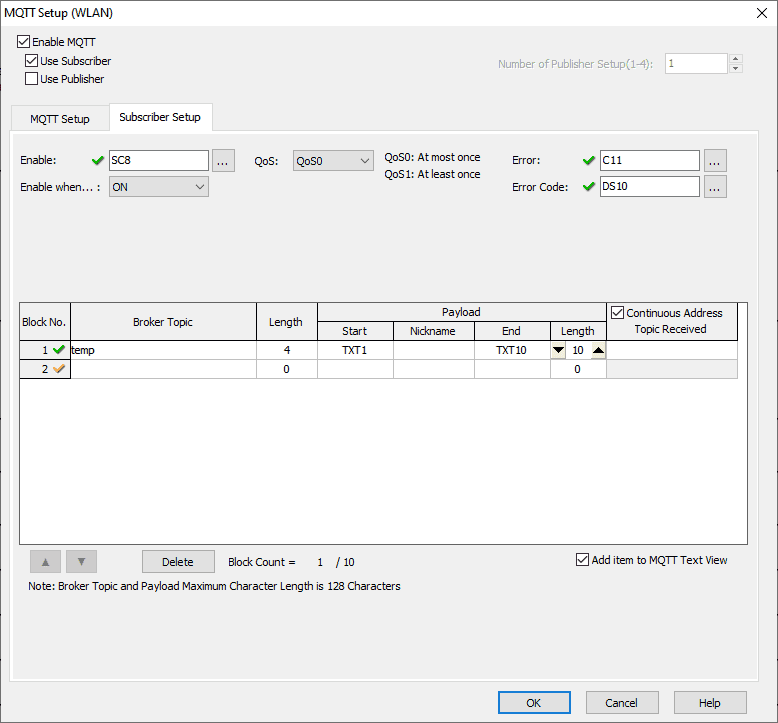
The subscriber setup tab will be displayed. We can setup up 10 different blocks of information to read from the MQTT broker into the Click PLC. In our case, we will just subscribe to the broker topic temp. This will bring back the current temperature in Atlanta in TXT1 to TXT10 memory.
The enable bit SC8 (1-minute pulse bit) will request this information each time the bit is on. C11 will be on if an error occurs and DS10 will hold the error code.
Select the add item to MQTT Text View. This will show our MQTT information when we are online with the controller.
Select use publisher.

The publisher setup01 will be displayed. You will notice that we can set up four different publisher tabs. Each of the tabs can have 3 blocks. To add additional publisher setups, increase the number on the top right of the page.
We are going to just have the one publisher tab. The analog value will be sent to the broker from memory location DF1. The retained value is checked to indicate that the broker will remember the current value. Select OK.
Our MQTT setup is now complete.
Click Plus MQTT Program
As mentioned before, we do not need to have any ladder logic for MQTT to work, however, if we wish to use the information collected in our program then we must put some code into the controller.

The temperature in Atlanta will be compared to our current analog value. If it is less than the value an output (Y001) will turn on.
Note: The text value is turned into a real number so we can then do the comparison. Copy instruction is used to do this conversion.
Click Plus MQTT Monitoring
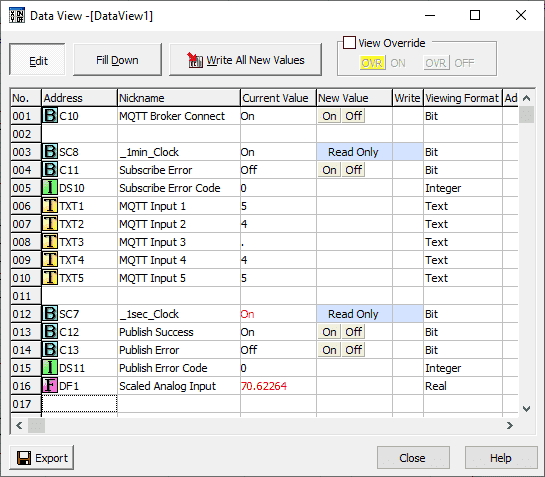
The data view can be used to monitor our MQTT values. As the program is run you will be able to see the values changing. See the video below.
We can also use the MQTT text view that we checked when we set the subscriber tab.
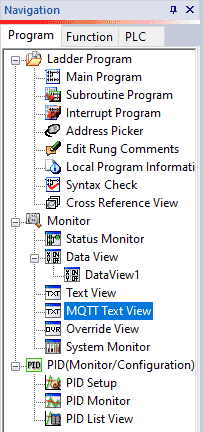
Under the navigation window, select MQTT Text View under Monitor.
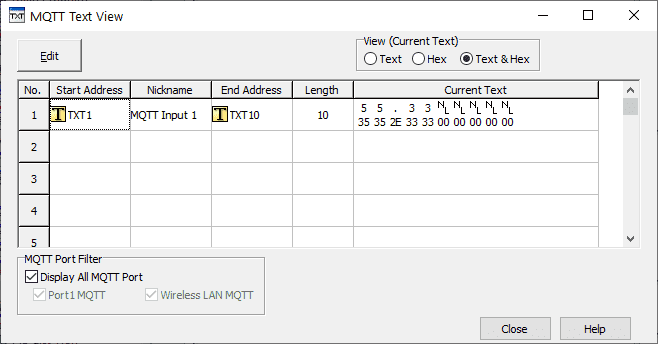
This will now show the MQTT Text View. You can display the information in TEXT, HEX, or both. (Default)
Download the Click Program, Mosquitto Configuration File, and Node-RED Flow here.
Note: Click password is acca1234. This is also in the title of the file. An application ID will have to be obtained from the Open Weather Map before information can be retrieved from the site.
Watch the video below to see MQTT communications using the Click Plus PLC.
Click PLC Support Links
The Click PLC can be programmed using free Click programming software from Automation Direct. Here is a link to the software.
Version 3.00
Version 2.60
The entire Click PLC series prior to the Click PLUS release can be found here.
All previous posts and information are still valid with the Click PLC line-up.
YouTube Click Playlist
YouTube Click PLUS Playlist
Click and Click PLUS PLC Overview
Click and Click PLUS PLC Videos from Automation Direct
Watch on YouTube: Click Plus PLC MQTT Communication
If you have any questions or need further information please contact me.
Thank you,
Garry
If you’re like most of my readers, you’re committed to learning about technology. Numbering systems used in PLCs are not difficult to learn and understand. We will walk through the numbering systems used in PLCs. This includes Bits, Decimal, Hexadecimal, ASCII, and Floating Point.
To get this free article, subscribe to my free email newsletter.
Use the information to inform other people how numbering systems work. Sign up now.

The ‘Robust Data Logging for Free’ eBook is also available as a free download. The link is included when you subscribe to ACC Automation.