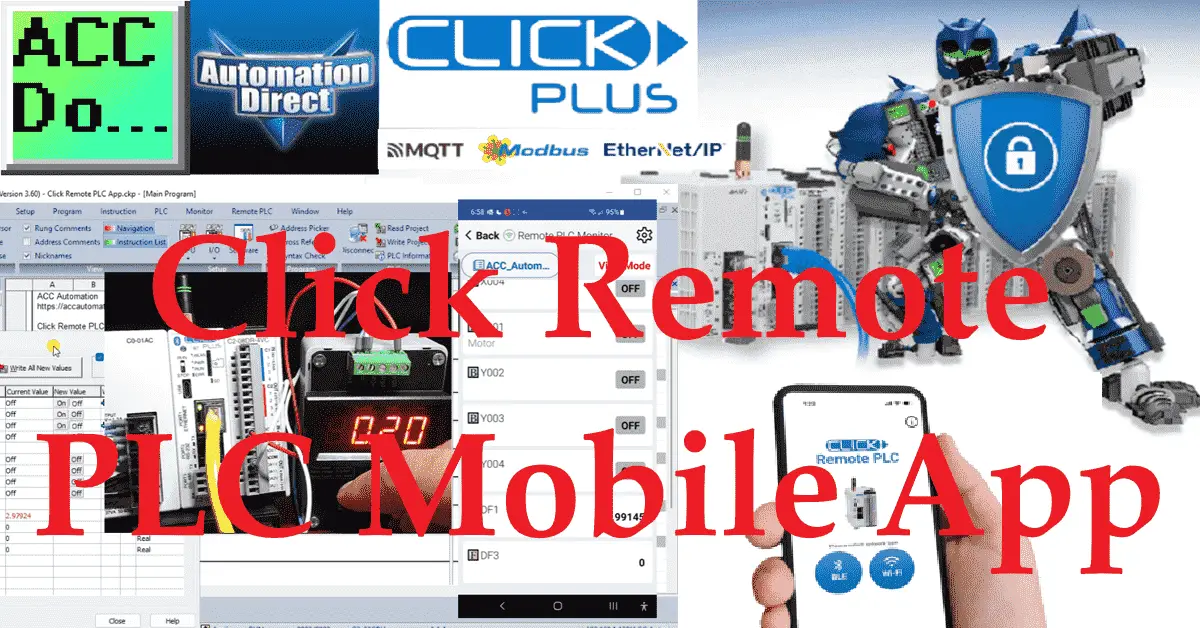
The Click PLC Programming Software Version 3.60 has added support for a new Remote PLC Mobile App, which allows users to view and edit PLC Registers and view PLC Status from an iOS or Android mobile device. Any CPU with Ethernet or Bluetooth communication supports this feature.
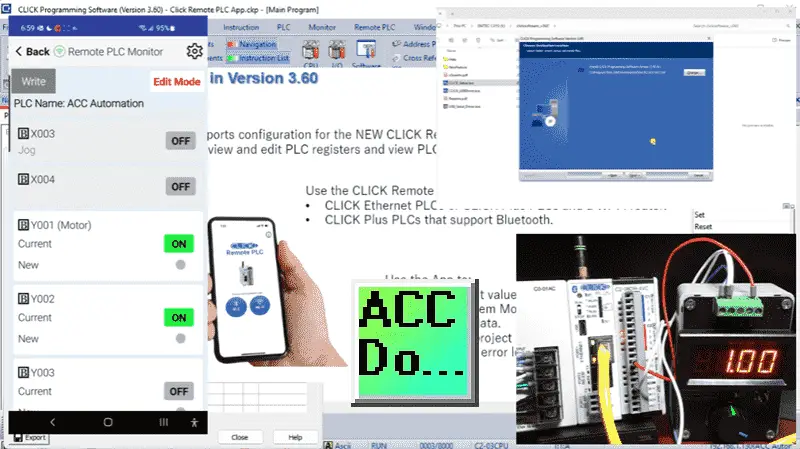
We will install the latest Click PLC Programming Software Version 3.60, introducing an exciting new feature – the Remote PLC Mobile App. This app empowers users to effortlessly access and modify PLC Registers and monitor PLC Status directly from their iOS or Android mobile devices. This powerful functionality is compatible with any CPU equipped with Ethernet or Bluetooth communication. Our next steps will involve:
- Installing the new Click PLC software.
- Updating the firmware.
- Putting the new Remote PLC Mobile Application to the test on our Click PLC.
Let’s get started.
Our entire Click series can be found here. All of the previous information for the Click PLC can be applied to the Click PLUS.
Previously, here are some of the things we covered:
Software Installation – Video
Click Software Establish Communication – Video
MQTT Communication – Video
Data Logging – Video
Real-Time Clock with Network Time Service – Video
The programming software and manuals can be downloaded from the Automation Direct website free of charge.
Watch the video below for the communication between the Click PLC and the Android Remote PLC App.
Install the new Click 3.6 version Software.
Download the latest Click programming software here. Once downloaded, expand the zip file and select the CLICK_Setup.exe to install the software onto your Windows 10 or 11 machine.
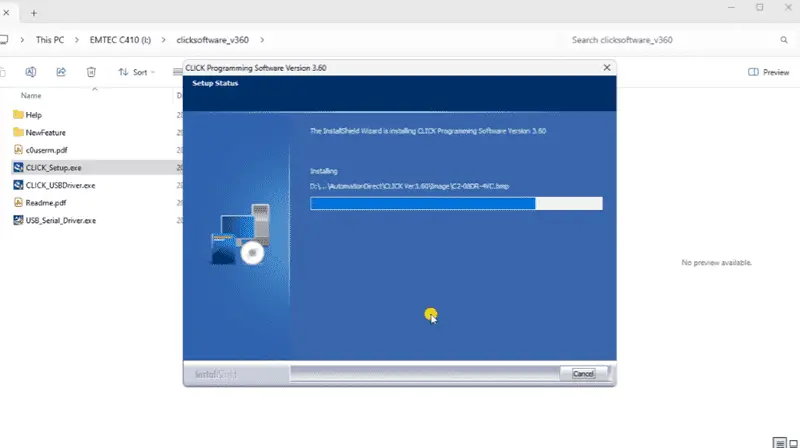
You must have an Intel or AMD x86, 32- or 64-bit processor with 1 GHz or higher clock speed. With 2 GB free RAM and 300MB free storage, this program does not require much computing power. Your display must be SXGA, with a minimum resolution of 1280 x 1024.
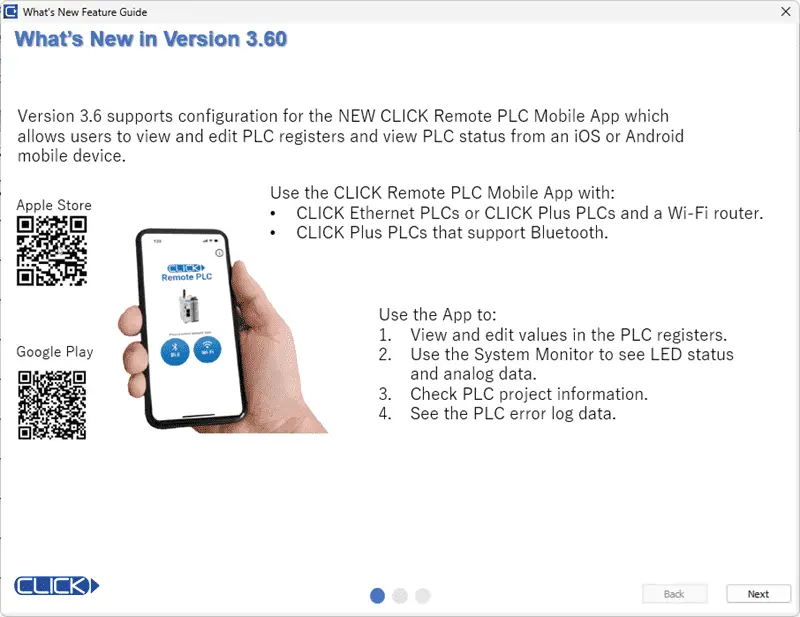
While the Click programming software is installed, you can also install the Free Click Remote PLC Mobile App from Google Play or the App Store.
Click Program and Update Firmware
Start the new Click PLC programming software version 3.60. The What’s New Feature Guide window will be displayed. This will show you the latest features, improvements, and bug fixes.
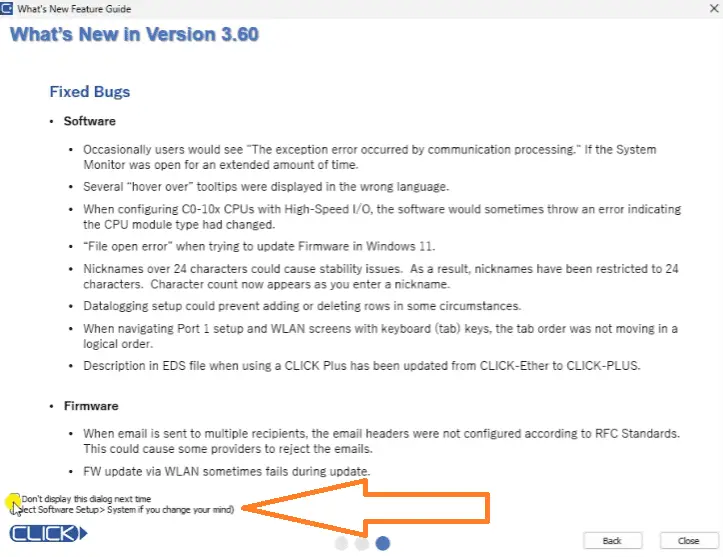
On the last screen of this window, we can select “Don’t display this dialog next time.” If we need to review the information again, it can be found under the main menu | Help | New Feature…
When the startup window displays, we select “Open an existing project.” Select the Click Remote PLC App and choose Open. This program consists of just an END statement for the program and is configured for our hardware.
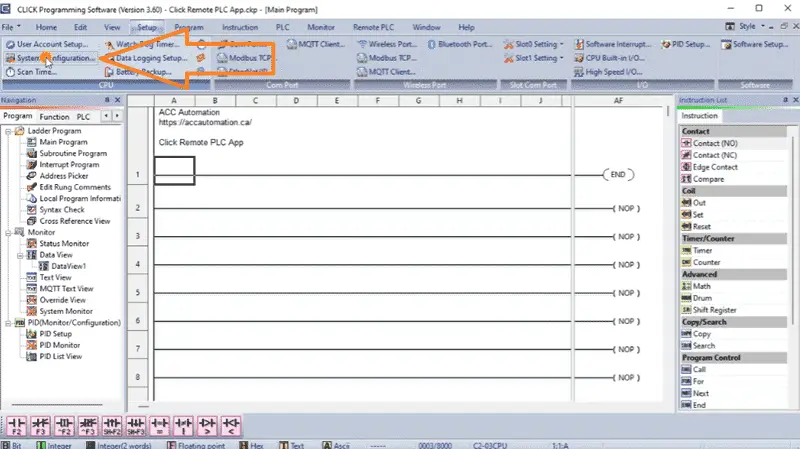
Select “System Configuration” from the main menu | Setup.
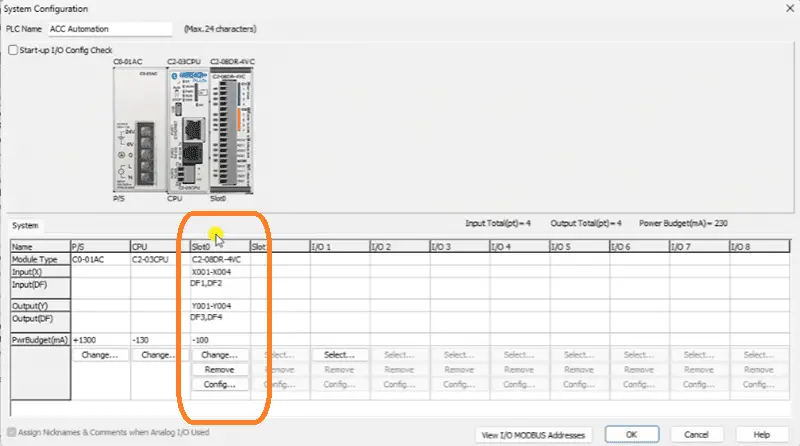
This will show a C2-03CPU with a power supply and a C2-08DR-4VC slot card. Our discrete inputs are X1 to X4, and analog are DF1 and DF2. The discrete outputs are Y1 to Y4, and the analog outputs are DF3 and DF4.
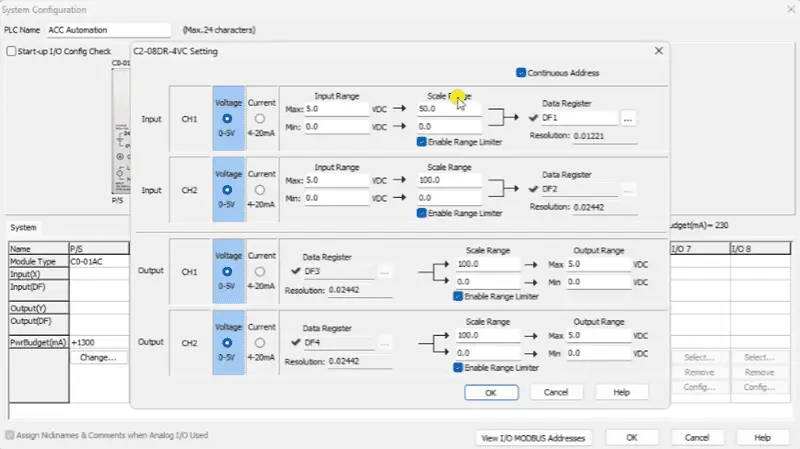
If we look at the configuration of Slot 0, we will see that the first analog input is set for 0-5V, and the scale range is 0.0 to 50.0 in DF1. Select cancel.
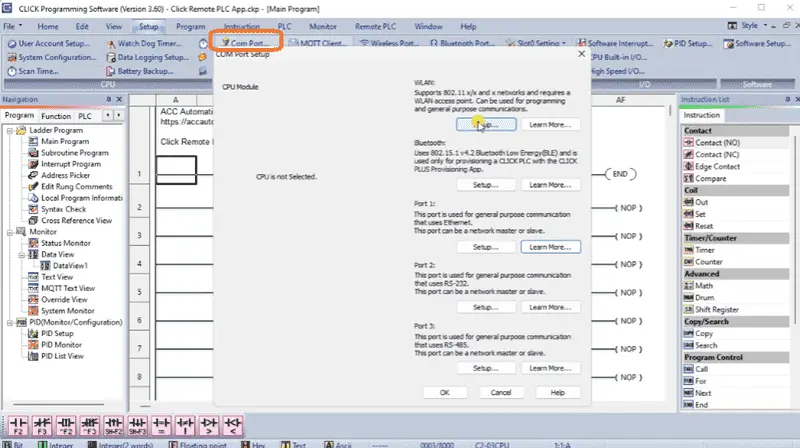
Staying on the Setup tab of the main menu, we can select COM Port…
This will open up the COM Port Setup window. We can review the Setup of the WLAN, Port 1 (Ethernet), and Bluetooth Port setup.
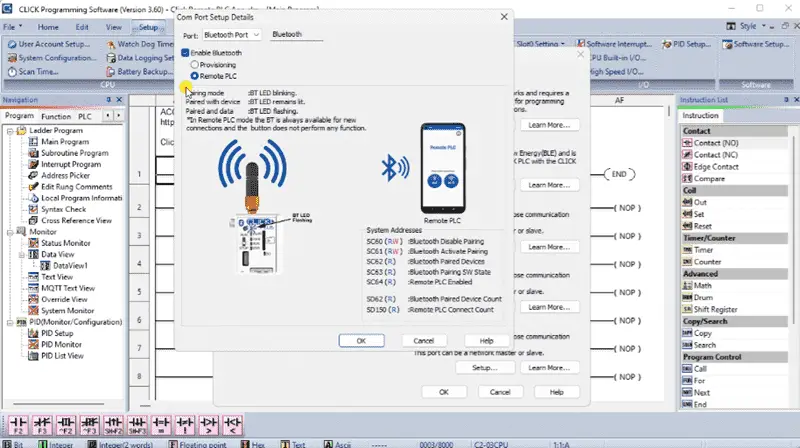
You will see that we have enabled Bluetooth and selected remote PLC.
Select “Write Project” from the main menu | Home. The connect to Click PLC window will be displayed.
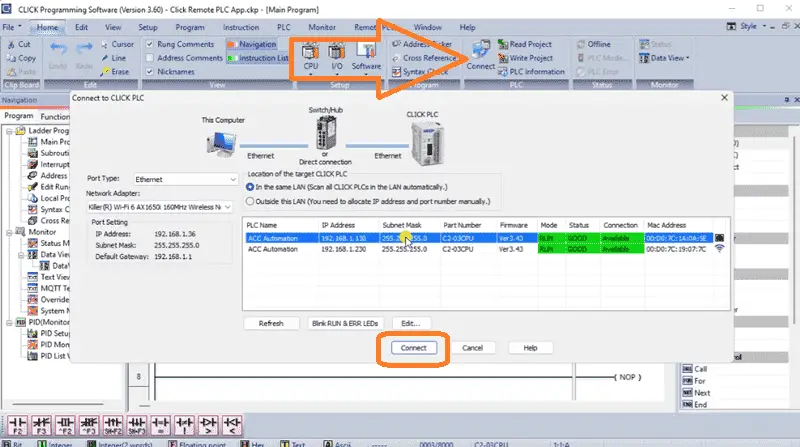
Select the PLC or method to download the program and select Connect.
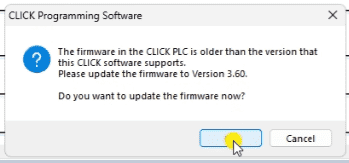
Once the connection is established, a message will be displayed indicating that the firmware needs to be updated in the Click PLC. Select OK to update the firmware now.
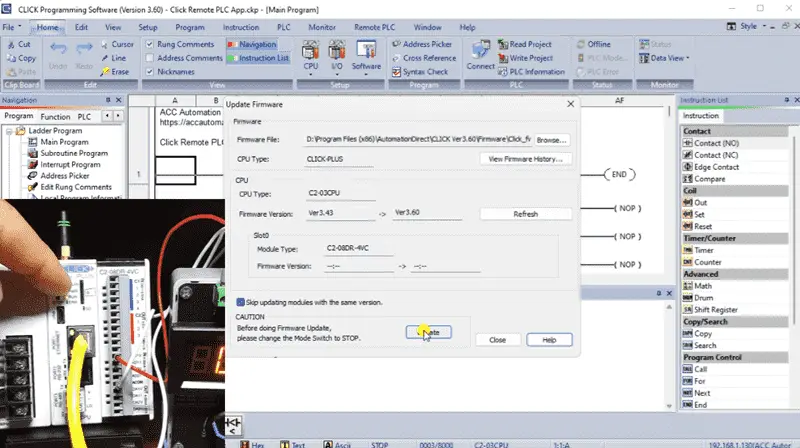
The Update Firmware window will now display. Ensure the Click PLC mode switch is set to STOP. Select Update. Prompts will ask you about the backup of the existing program and if you want to update the firmware. Confirm these settings to continue.
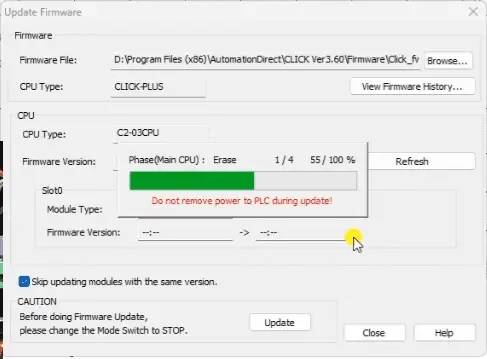
A popup window will display the status of the firmware update.
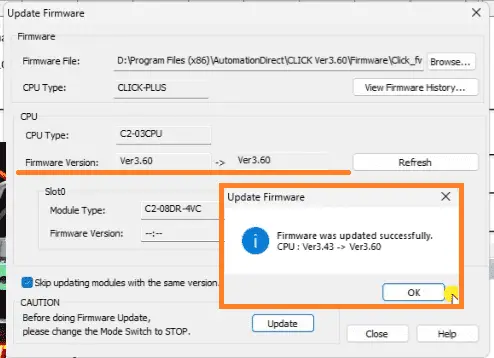
When the firmware has been updated, a confirmation window will appear. Select OK. You will see that our CPU firmware is now set for Ver 3.60.
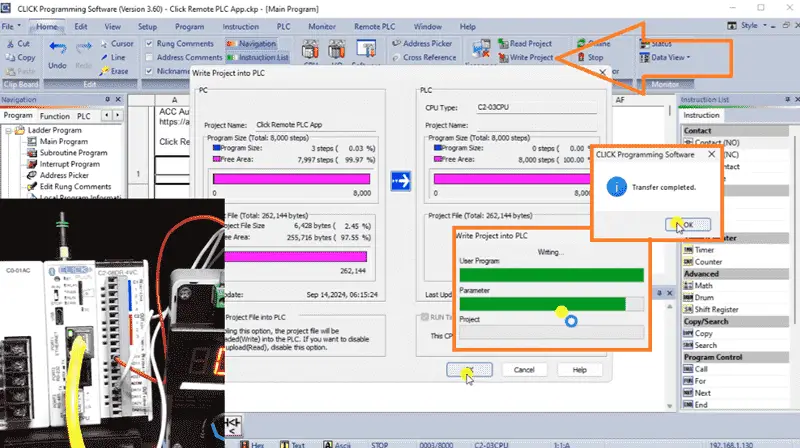
Select the Write Project from the main menu | Home again. Write our project into the Click PLC. Once our program has been written, select OK.
Setup Remote Application (App)
We can now set up the Remote PLC software for our application using the Click programming software. Select Remote PLC Setup from the main menu | Remote PLC.
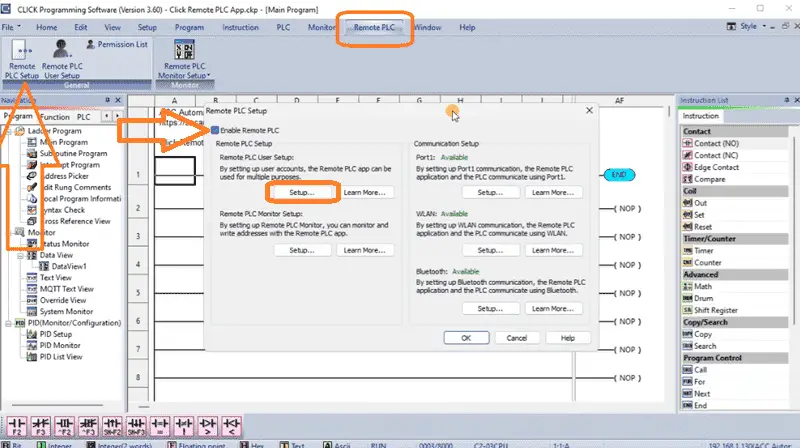
The Remote PLC Setup window will be displayed. This window can set up everything we need for the remote application on our Android or iOS devices.
Ensure that the “Enable Remote PLC” is selected. Ours was chosen automatically because we selected remote plc for our Bluetooth connection.
The communication setup will show you what is available for the remote click application. We saw this Setup previously. This is just a shortcut to setting up the communication ports on the Click PLC.
Select Setup… under the remote user.
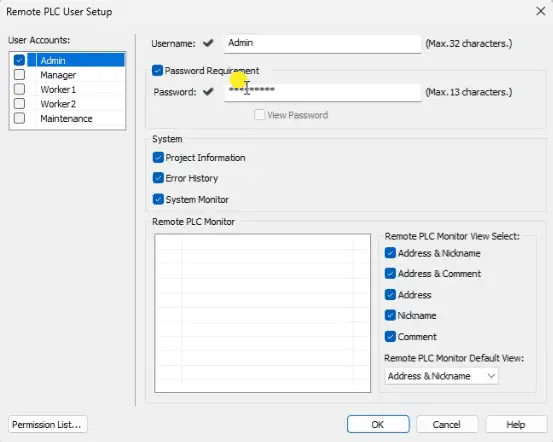
The Remote PLC User Setup window will be displayed. This screen will allow us to put in 5 different profiles of users of the remote application and select access to certain information. System project information, error history, and system monitor can be selected for each profile. A password must be assigned to each profile to set it up. Our demonstration will turn on everything for the Admin profile, and we will use a password of “1234”. Select OK.
Under the Remote PLC Monitor Setup, select Setup in the remote PLC setup window.
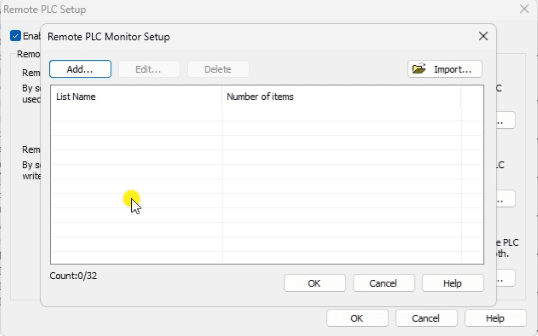
The remote plc monitor setup window will be displayed. This is the screen we will program to indicate what can be controlled or viewed in the PLC.
Select the ADD button.
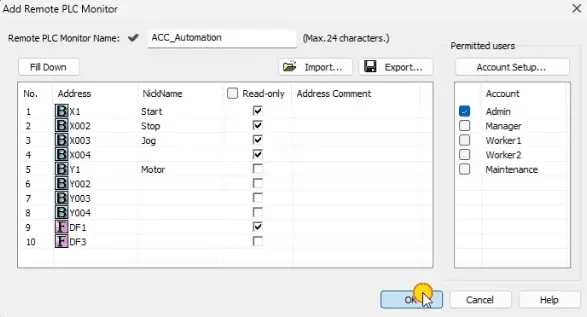
This will now display the add remote plc monitor window.
Set a remote monitor name. We can now add the addresses we want to monitor or control in the PLC. Use the Fill Down button to list consecutive addresses in the list. We will enter all of the discrete inputs and outputs of the PLC and the first analog input and output. Set the read-only for the addresses we do not want to be changed. In our case, these are the discrete inputs and analog inputs. We can set the permitted users of these addresses. Select OK.
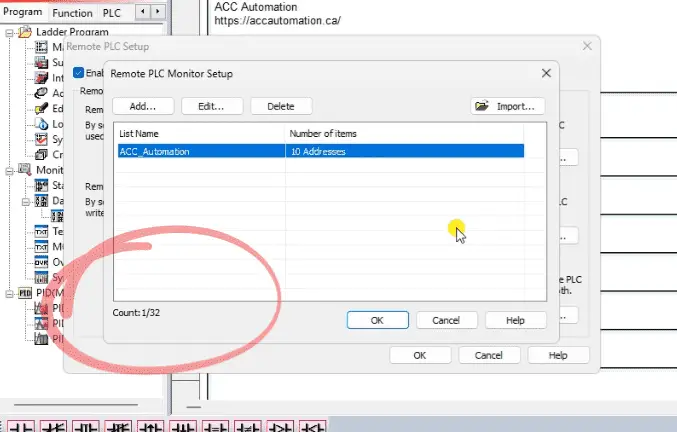
We can set up 32 monitor items, with ten addresses each, for the connected Click PLC. Select OK.
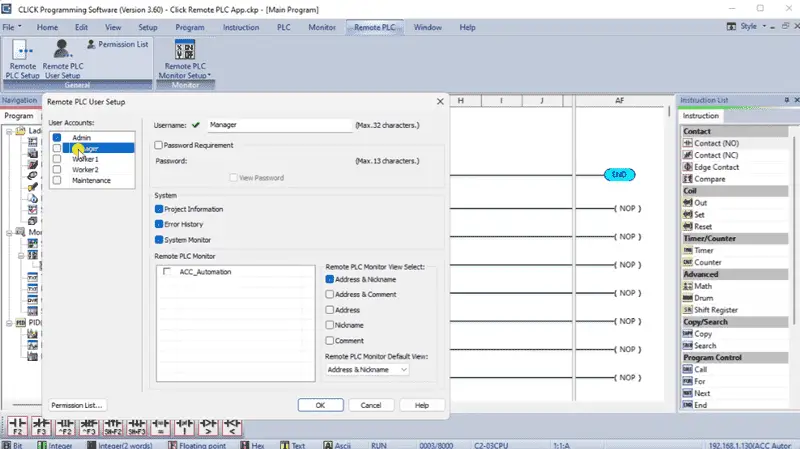
Returning to our user profiles, you will see whether the corresponding monitor list is selected as we choose the user.
Transfer the program to the connected Click PLC.
Test and Demonstrate Click Remote PLC App
Call up the data view window in the Click programming software. This will allow us to monitor and change the IO we are monitoring.
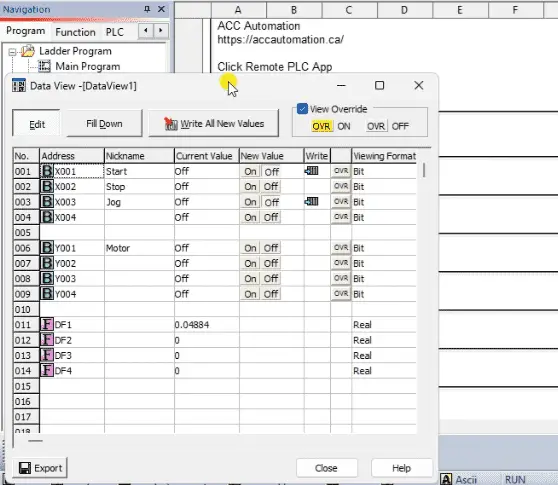
Note that since we do not have a program in the PLC to change the physical outputs, we can control these with the remote app or through the data view window. In an actual application, internal bits can be programmed in parallel in the ladder logic and controlled through the app.
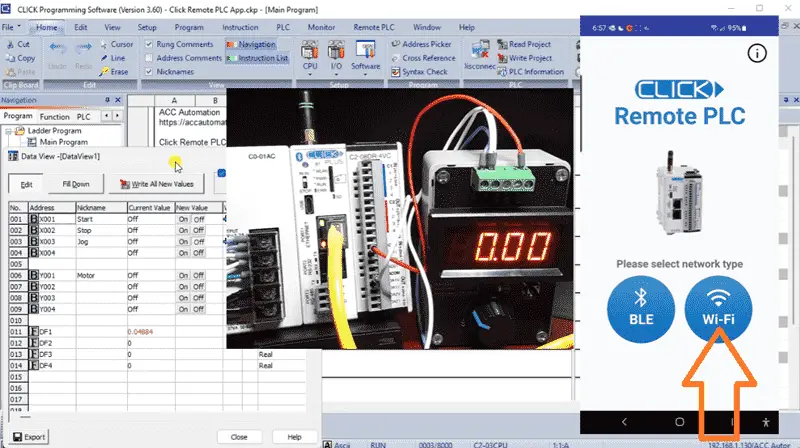
On our Android device, call up the installed Remote PLC application. Select the WiFi connection.
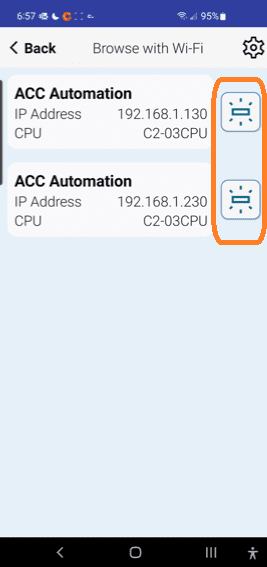
You will see two options, one for our WiFi connection and one through our Ethernet (Port 1) connection. The symbol next to the connection will blink the lights so that we know which PLC we are monitoring or controlling. Select the connection you want to use on the Android device.
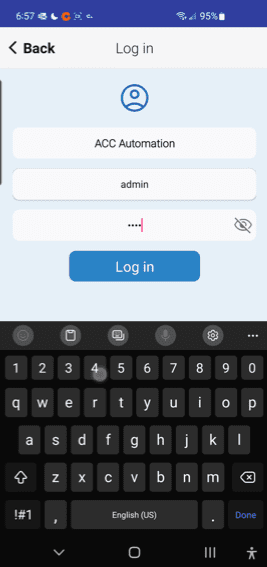
You will now be prompted for your username and password. In our case, this is Admin and 1234. Select Log In.
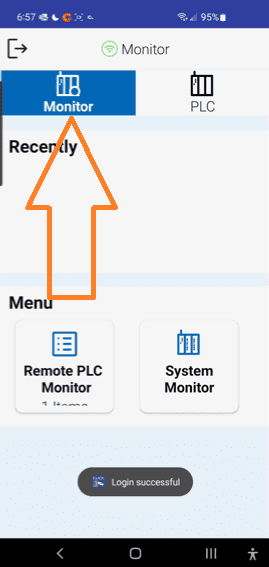
We can now select monitor or PLC to view the information in the connected Click PLC controller. Select the monitor mode for the addresses we set up in the programming software.
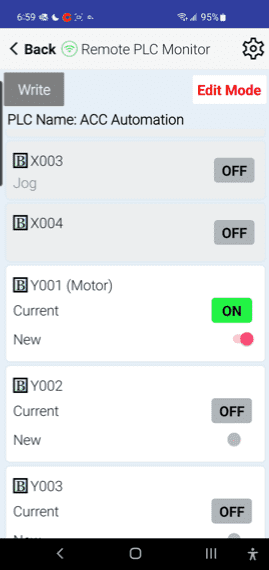
The view and edit modes can be selected to monitor or change the values in the controller.
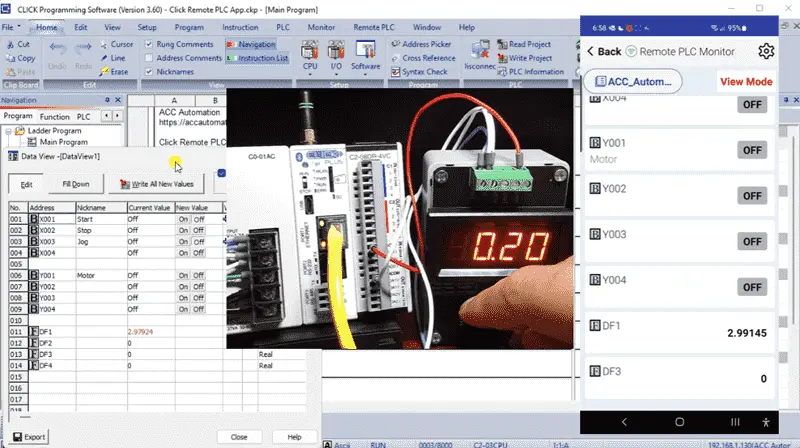
A simple program like this will help you understand the power of this remote machine interface. I recommend you use a sample program and experiment before deploying this application in the field, as we do here. Download this sample program from the link below. Let me know how you make out in the comments below.
The CLICK Remote PLC mobile app offers a convenient way to view and edit values in select CLICK Ethernet or CLICK PLUS PLC registers. The mobile app can also check PLC project/status information, including data stored in error logs.
To learn more about this cost-effective Click PLC and its many features, click here.
Download the sample Click Plus program here.
Watch the video below for the communication between the Click PLC and the Android Remote PLC App.
Click PLC Support Links
The Click PLC can be programmed using free Click programming software from Automation Direct. Here is a link to the software.
Version 3.60
The entire Click PLC series before the Click PLUS release can be found here.
All previous posts and information are still valid with the Click PLC line-up.
YouTube Click Playlist
YouTube Click PLUS Playlist
Click and Click PLUS PLC Overview
Click and Click PLUS PLC Videos from Automation Direct
Watch on YouTube: Click Remote PLC Mobile App
If you have any questions or need further information, please contact me.
Thank you,
Garry
If you’re like most of my readers, you’re committed to learning about technology. Numbering systems used in PLCs are not difficult to learn and understand. We will walk through the numbering systems used in PLCs. This includes Bits, Decimal, Hexadecimal, ASCII, and Floating Point.
To get this free article, subscribe to my free email newsletter.
Use the information to inform other people how numbering systems work. Sign up now.
The ‘Robust Data Logging for Free’ eBook is also available as a free download. The link is included when you subscribe to ACC Automation.

