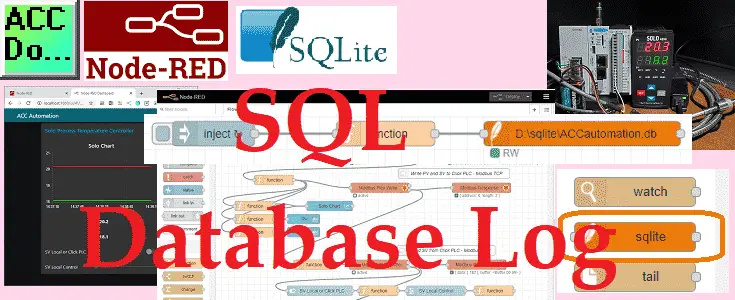
Node-RED can easily log data to a database. SQL (Structured Query Language) can be used to communicate to a SQL database. Databases separate analysis from the data unlike spreadsheets like Excel. The database is designed to hold more information than spreadsheets and allow multiple users to access the information.
We will be creating an SQLite SQL database. SQLite Studio will be used to design the structure of the database. (Tables) Installing the node-red-sqlite-node palette will allow us to log the information from our Solo process temperature controller, Click PLC, and dashboard variables. Let’s get started.
In this series we started using Node-RED in some of the following ways:
Installing the Windows Software – Video
Modbus Communication – Video
User Interface – Dashboards – Video
We will continue with the following:
Log information into a database
View information in the database through spreadsheets such as Excel.
Previously we installed Node-RED Modbus Palette on our windows 10 computer and communicated Modbus RTU (serial) and Modbus TCP (Ethernet) to a Solo Process Temperature Controller and a Click PLC. We then implemented the dashboard user interface on any web browser. (Windows / Android Phone) I would recommend that you review the following Node-RED Essentials Videos (Basics of the Editor) before continuing. This will allow you to become familiar with the editor.
Watch the video below to see the logging of data into a SQL database using Node-RED.
Download/Install SQLite
The first thing that we need to do is download and install SQLite on our Windows 10 computer. The files can be obtained on the SQLite website.
Select the download page on SQLite.
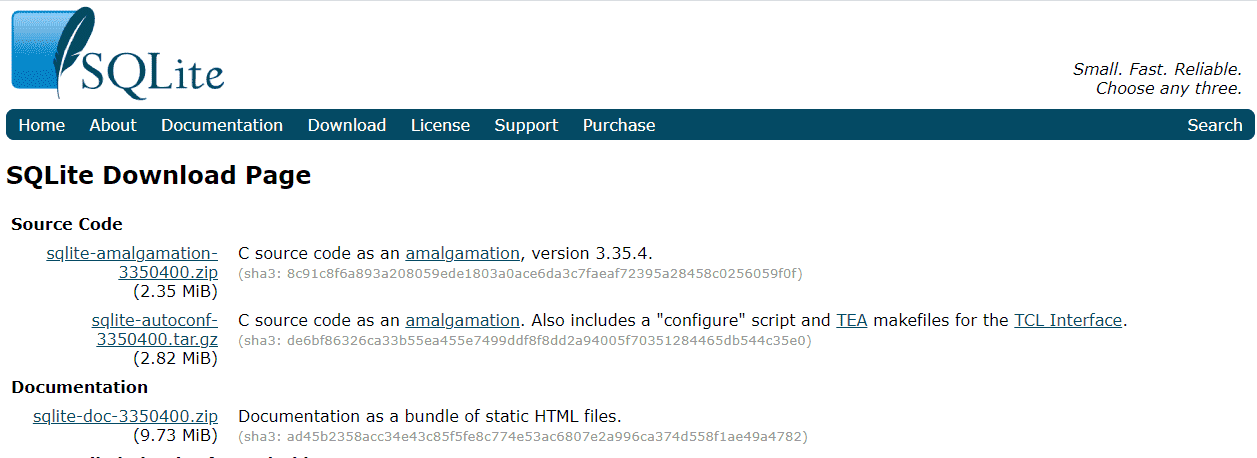
Scroll down until you see the files for windows.

Select to download the SQLite tools windows 32. This downloaded file is a zip file containing the program. It does not need to be installed.
Just create a folder like D:\sqlite and place the unzipped files into the directory.
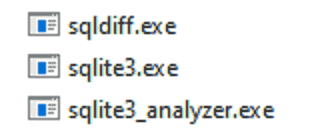
Here are the three files that you will see in the directory. Your installation of the SQLite is complete.
The following is a tutorial on SQLite that will get you started using the command prompt to set your database. We will be using SQLite Studio to get us going faster in creating our database. This is especially true if you are not familiar with using the command prompt.
Download/Install SQLite Studio
SQLite Studio can be used instead of SQLite directly. I prefer to use a GUI (graphic user interface) instead of the command prompts. SQLite Studio can be downloaded from the sqlitestudio.pl website. This will download the sqlitestudio-3.3.2.zip file to your computer. Just like SQLite, this program does not have to be installed. You just unzip the file and run the program.
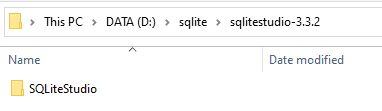
I have placed my unzipped file under D:\sqlite\.
Open the SQLiteStudio folder.
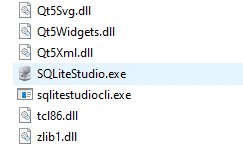
Start the studio by double-clicking on the SQLiteStudio.exe file.
W3Schools.com has a good tutorial on SQL.
SQLite Studio Create Database
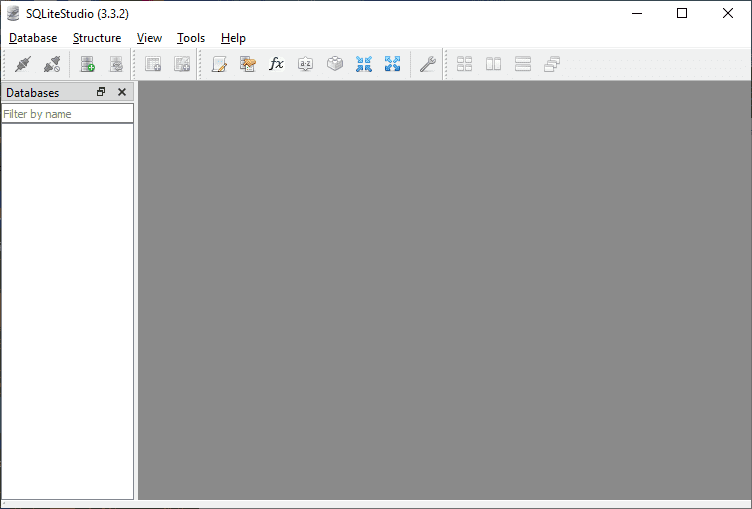
When SQLite Studio starts for the first time you will have a blank SQLiteStudio (3.3.2) window. The first thing we need to do is create a database.
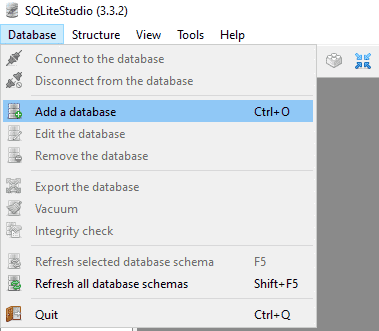
Select Database | Add a database from the main menu. You can also use Ctrl+O or right-click under database and select Database |Add a database.
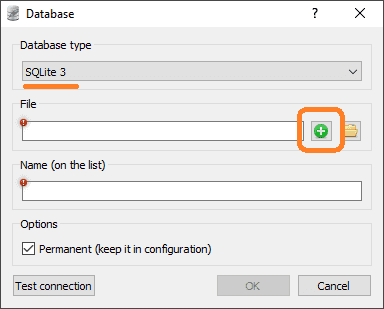
The database type defaults to SQLite 3 in the database window. Select the plus icon in the file to create a new SQL database.
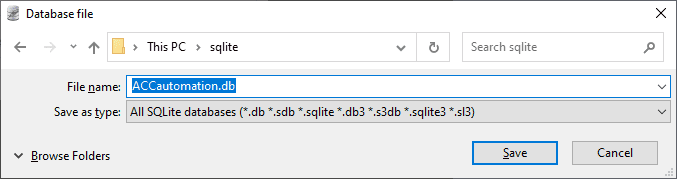
We will call our database ACCautomation. The extension can be any of the ones listed under the “Save as type”. We will use the “db” extension for our database. This name will contain all of the tables and information that we will collect and share. SQLite utilizes this single file name and can have a size greater than 140 terabytes. In other words, we can store a lot of information. Select save.
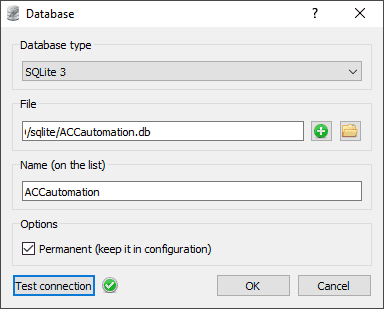
The database window will now show our newly created file. Select the test connection button and you should see the checkmark appear. This indicates that the database has been saved correctly. Select OK.
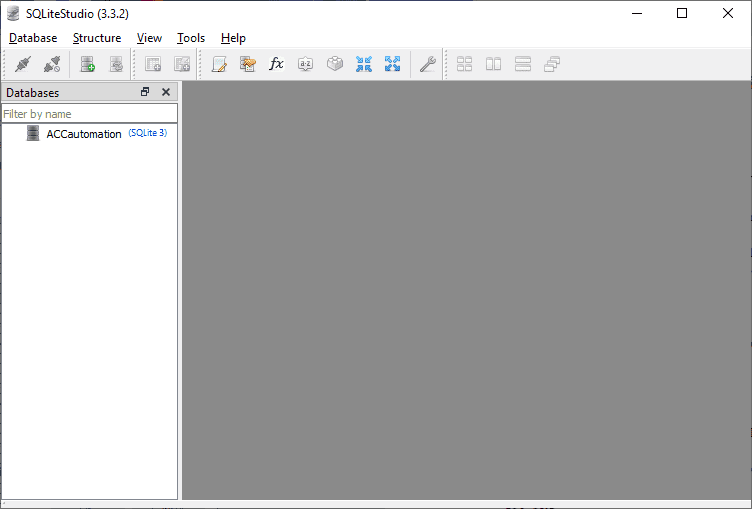
We now have our ACCautomation database appearing under our Databases title. Double click on this database.
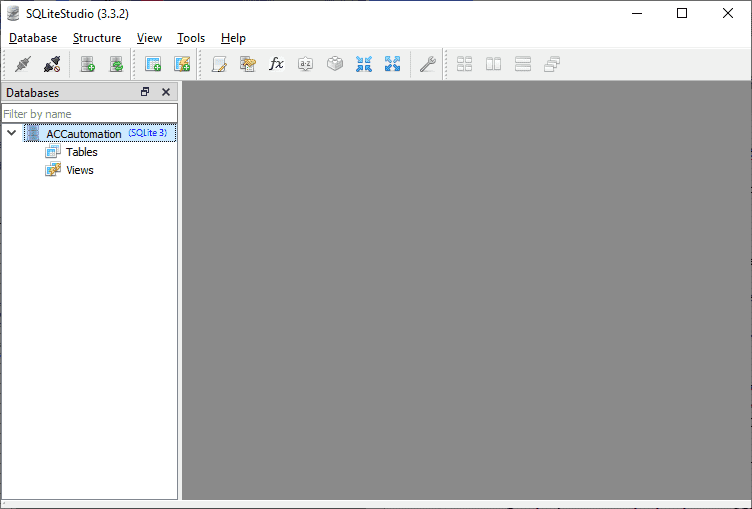
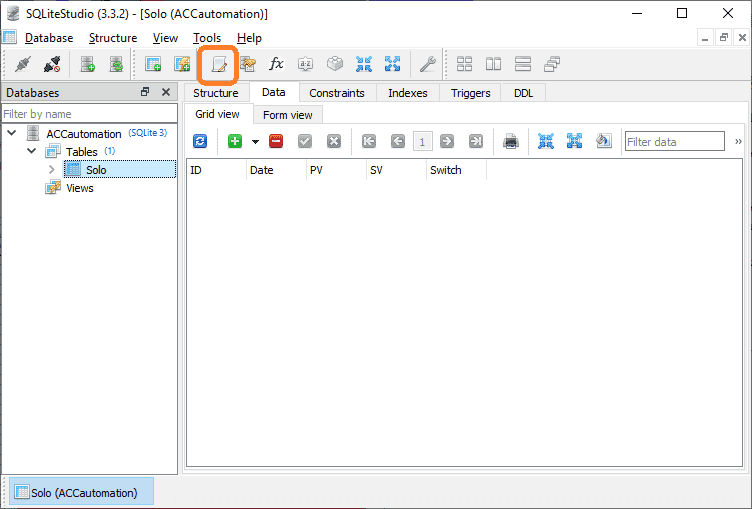
You will now notice that we have connected to the database and it is showing tables and views under the name. We will now create a table in our database to save our Solo values.
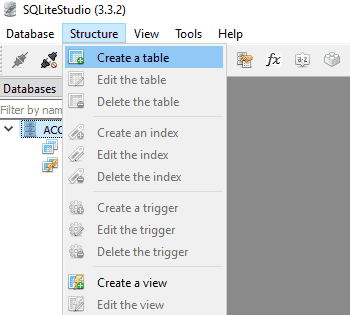
Select structure | create a table from the main menu. You can also right-click on the database and select create a table.
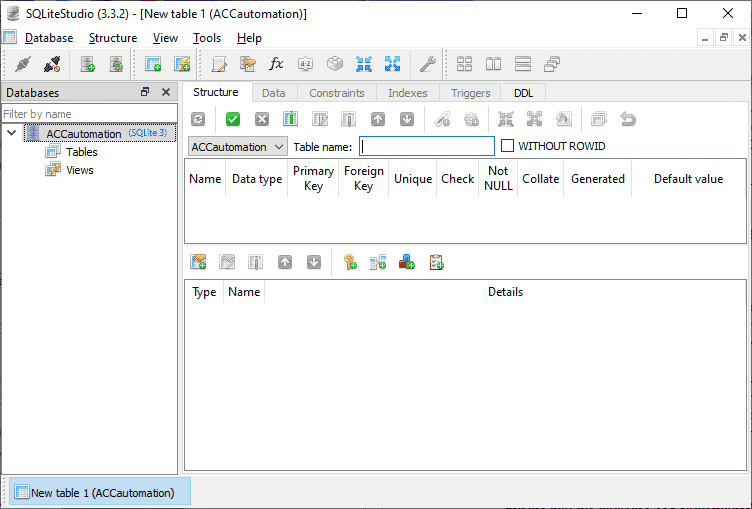
The table structure will now appear on the right-hand side of the screen. We will use Solo for the table name.
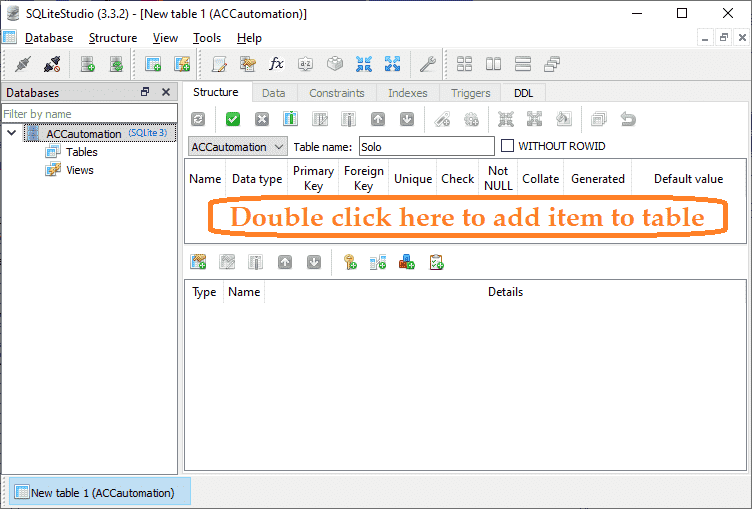
Double click on the table to add columns to the table.
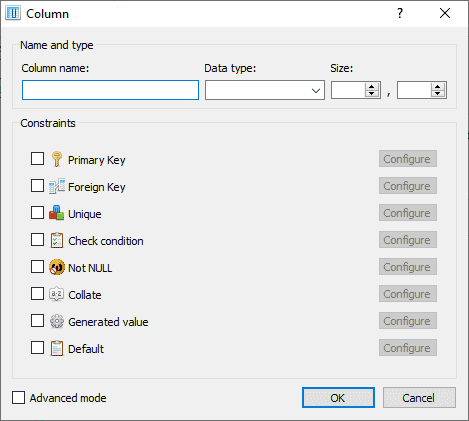
Our first column name will be ‘ID’. The data type will be set for Integer. This will be a primary key for the table.
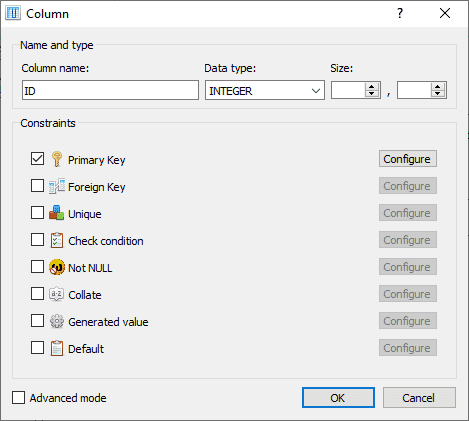
Select Configure to the right-hand side of the primary key.
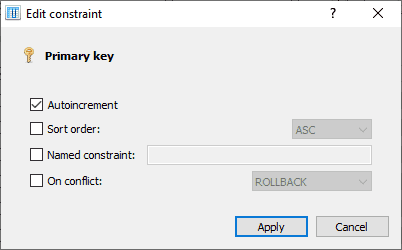
Select Auto increment for the primary key. This will assign an integer value to every row in our database table. This is one way to ensure the integrity of your data table. Select Apply and then OK on the column window.
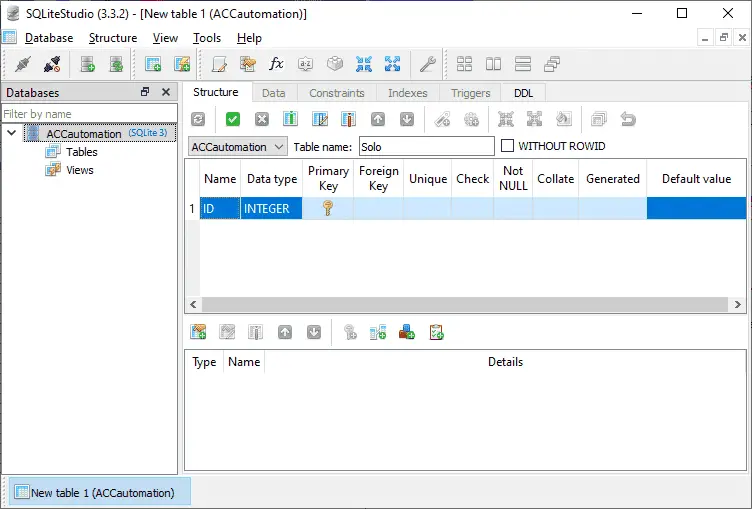
Add a date column with the data type of DATETIME. PV and SV columns which will be data type double. This allows decimal numbers. A switch column will also be added with the data type Boolean.
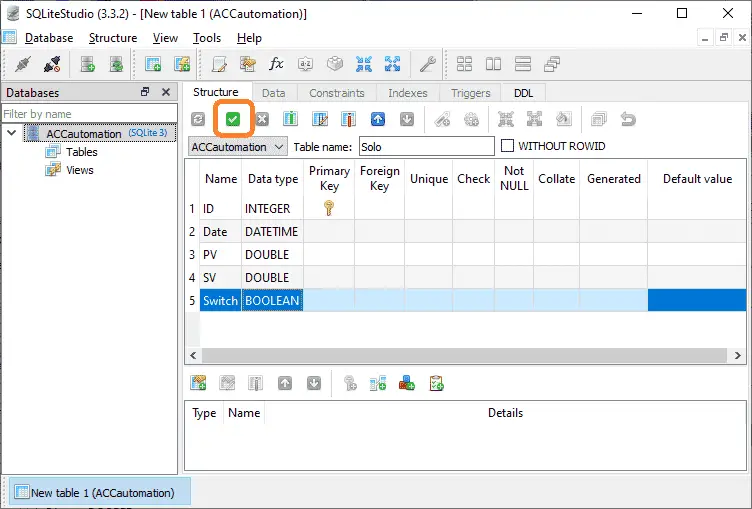
Here are the completed columns. Select the green checkmark (Commit Structure Changes) to execute our SQL commands to add this table.
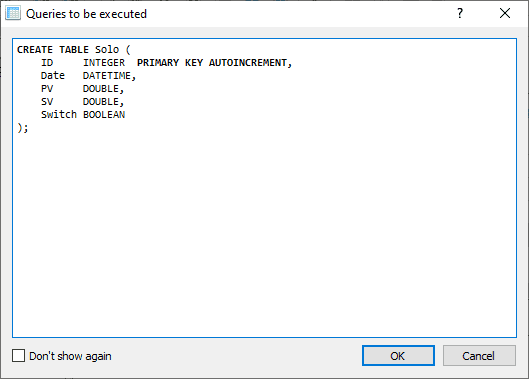
The SQL query will now be displayed showing the creation of the table. Select OK.

We can now see the Solo table under the tables heading for our SQL database. The status window will appear indicating that the changes were successful. Our database is now ready to accept data from Node-RED.
Node-RED SQLite Install
Installing node-red-node-sqlite Palette
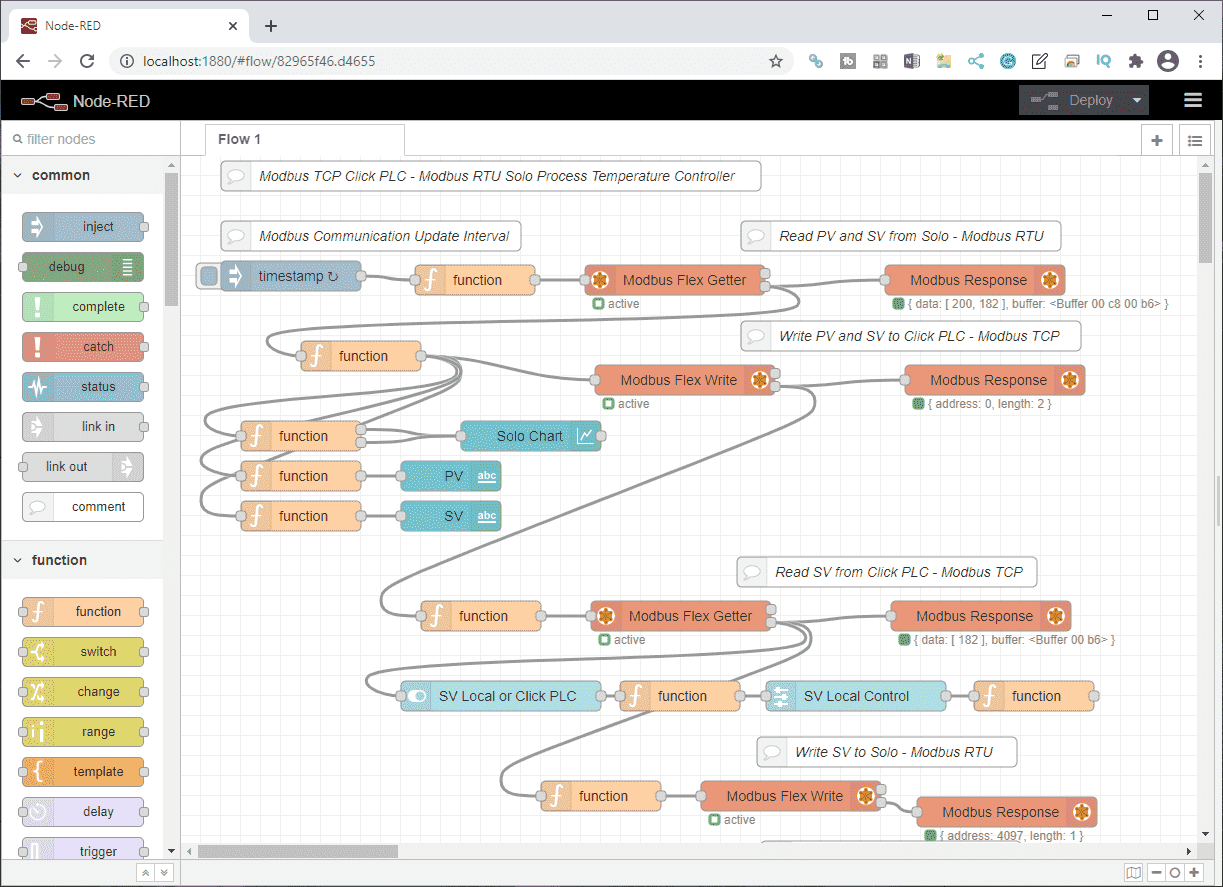
We will be using our Flow that we created last time. This will retrieve data from the Solo and Click controllers and display it on the dashboard. The SV (set value) can either come from the dashboards or Click controller.
On the main menu beside the deploy button, select the three lines (pancake icon). Select the Manage palette option.
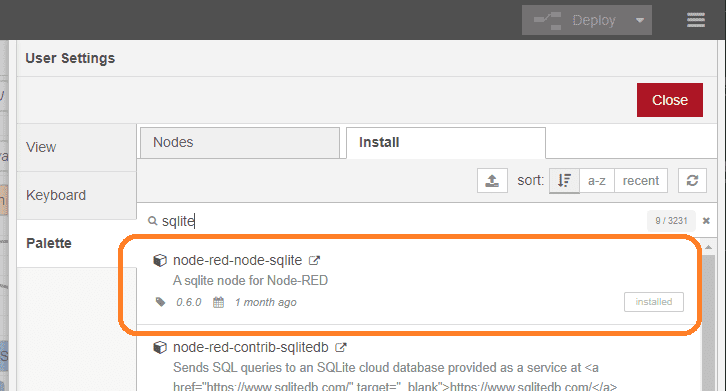
Select the install tab and search for ‘sqlite’. The palette node-red-node-sqlite will be displayed. Select the install if it is not already installed. Select close.
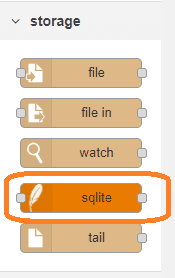
The SQLite node will now appear in the group of storage nodes.
Node-RED SQL Database Log Program
We will be adding the following under our existing Node-RED program.

The inject will allow us to specify a time frequency for your values to be stored. The function node will be used to set up the SQL statement to insert data into our table within the SQL database. SQLite node will then execute the SQL commands.
Inject Node
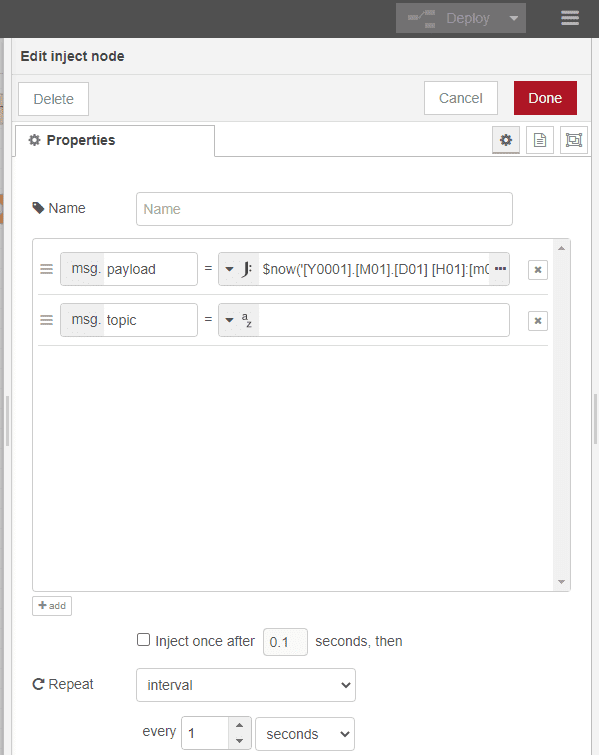
This will contain a message payload with a JSON expression.
$now(‘[Y0001].[M01].[D01] [H01]:[m01]:[s01]’,’-0400′)
This expression will format the date and time to YYYY.MM.DD HH:MM:SS in the correct time zone. The inject node will have a repeat interval every 1 second.
Function Node
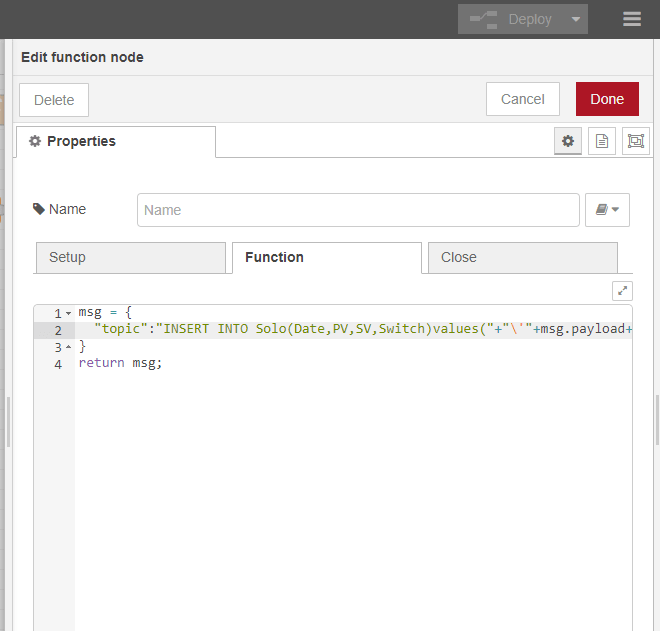
The function node will set up the following SQL command.
“topic”:”INSERT INTO Solo(Date,PV,SV,Switch)values(“+”\'”+msg.payload+”\'”+”, “+ parseFloat(flow.get(“PV”)/10) +”, “+ parseFloat(flow.get(“SV”)/10) +”,\'”+ flow.get(“Switch”) +”\’)”
The message topic is used to hold the SQL command.
SQLite Node
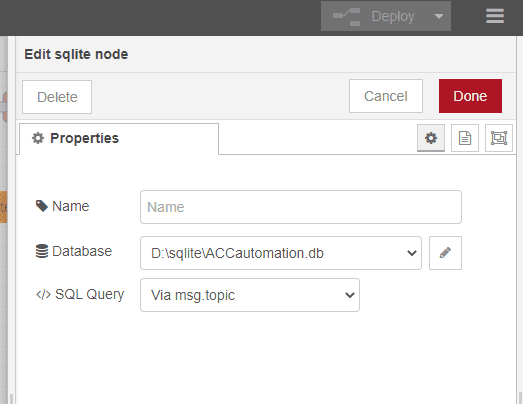
This node will execute our SQL command. The database path must point to the SQL database ACCautomation.db that we created above. The SQL Query will come in with the message topic.
Node-RED Database Program Run
We can now deploy the new program.
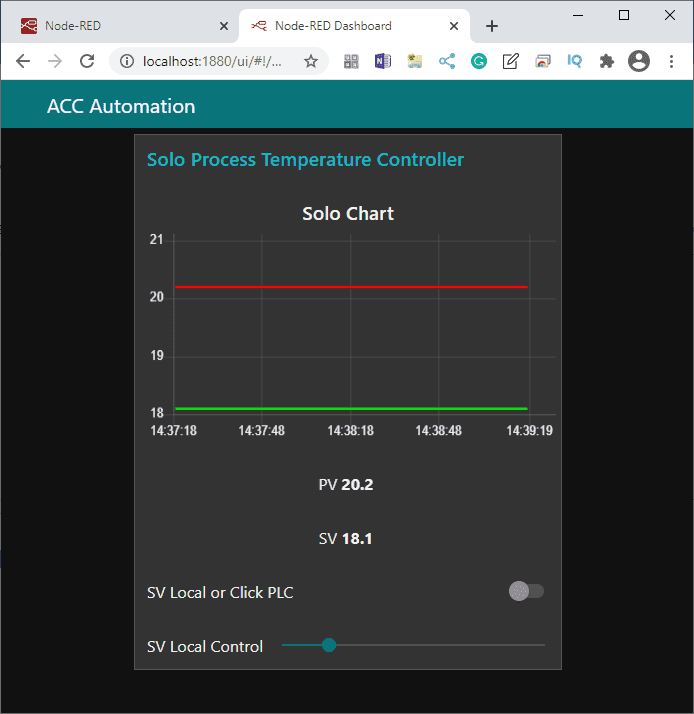
Calling up the dashboard we can see the variables being retrieved.
Call up our SQLite Studio once again.
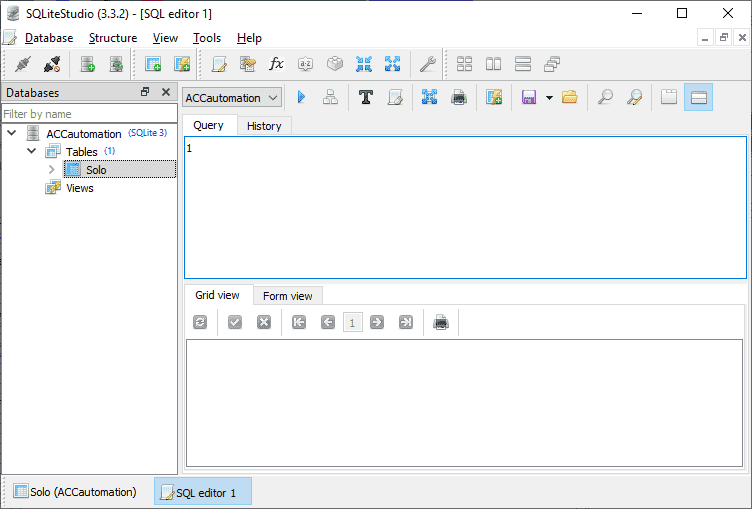
Select the open SQL editor using the icon or Alt + E.
We can now write SQL query commands to display the data that we are collecting.
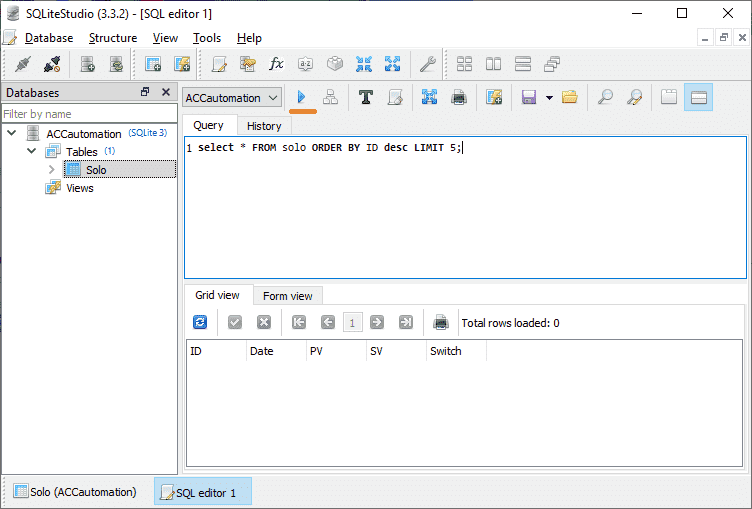
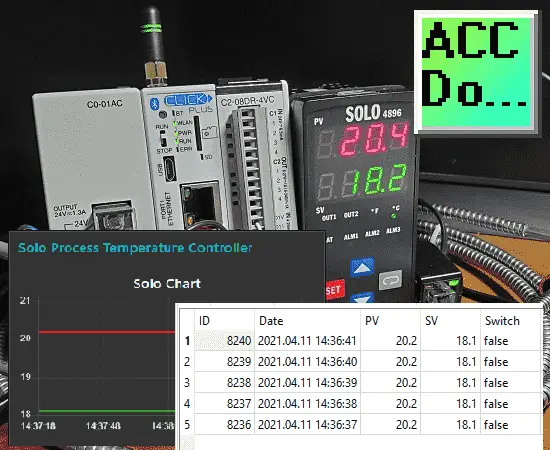
Type in the following query “Select * FROM Solo ORDER BY ID desc Limit 5;”
Select the play icon. (Arrowhead to the right)
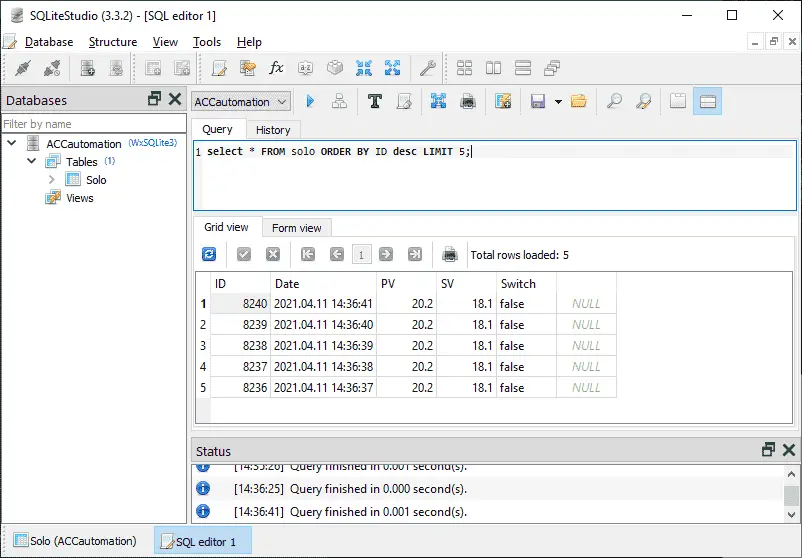
This SQL query will select all of the columns from the table Solo and order them by ID. This will be sorted in descending order and only 5 records will be returned.
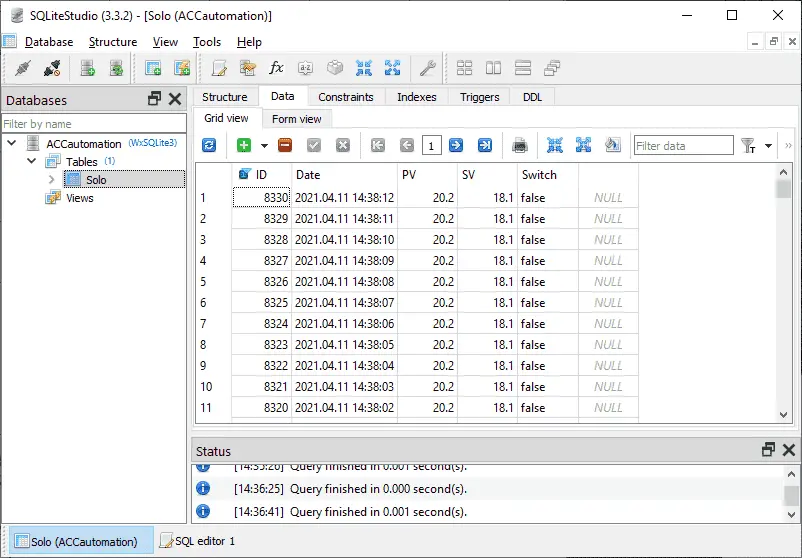
If we go back to the solo table itself we can quickly view all of the data in the table. Select the data tab and click on the refresh structure to display all of the records. F5 can also be used to refresh the structure. Clicking on the column heading will allow you to display the records ascending or descending in the table.
Watch the video below to see the Node-RED SQLite SQL database log the Solo and Click controller data.
Download the Click Program, Flow, and database here.
Node-RED Links
Node-RED Organization Home Page
Getting Started – Run Locally
Node-RED running on Windows (Run at Startup)
Securing Node-RED
Node-RED Essentials Videos (Basics of the Editor)
Learn JavaScript Free
w3schools JavaScript Tutorial
learn-js.org
Node-Red JavaScript Primer
Modbus
Node-RED Modbus TCP and Serial
Dashboard – HMI
Node-RED Dashboard
Node-RED Dashboard extra nodes
SQL Database
Node-RED SQL Database
Node-RED SQL Plus – Execute queries and stored procedures
Modbus Learning Links:
Simply Modbus Frequently Asked Questions
Modbus TCP/IP Overview – Real-Time Automation
All You Need to Know About Modbus RTU – Video
Next time we will view the information in the SQL database through spreadsheets such as Excel.
Watch on YouTube: Node-RED SQL Database Log
If you have any questions or need further information please contact me.
Thank you,
Garry
If you’re like most of my readers, you’re committed to learning about technology. Numbering systems used in PLCs are not difficult to learn and understand. We will walk through the numbering systems used in PLCs. This includes Bits, Decimal, Hexadecimal, ASCII, and Floating Point. To get this free article, subscribe to my free email newsletter.
Use the information to inform other people how numbering systems work. Sign up now. The ‘Robust Data Logging for Free’ eBook is also available as a free download. The link is included when you subscribe to ACC Automation.