Last time we created our first program and transferred this to our connected Productivity 1000 Series PLC. This was programmed with our computer running the Productivity Suite Software. One of the most important aspects of programming the PLC is to document. This will aid you and your team in programming, troubleshooting, and modifying the automation control system. Your documentation should read like a book so information can be quickly obtained when required. Time spent on the documentation will be priceless when you go to read your program in 1, 3 or 10 years from now. The Productivity Suite software provides several different methods for documenting your program.
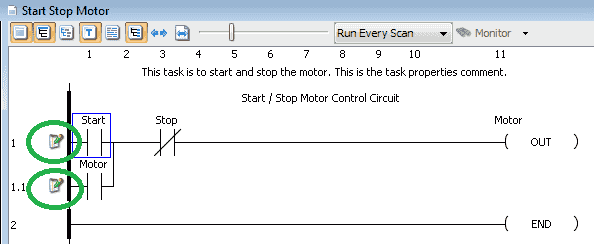
Tag Names and Details, Task Names and Descriptions, Rung Comments and Instruction comments are the ways that we will be looking at documenting our program.
Let’s get started.
Previously in this Productivity 1000 series PLC we have discussed:
System Hardware – Video
Installing the Software – Video
Establishing Communication – Video
First Program – Video
Productivity Documentation
The productivity suite software has several different ways to document your program. We will start with the start-stop circuit that we made last time.
https://accautomation.ca/how-to-make-a-start-stop-jog-circuit-in-a-plc/

Tag Database – Productivity Documenting Program
Open the tag database by clicking on the Tag Database under the Write Program heading in the Application Tools.
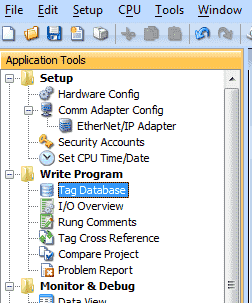
You can also use the main menu | Edit | Tag Database to access the tag database.
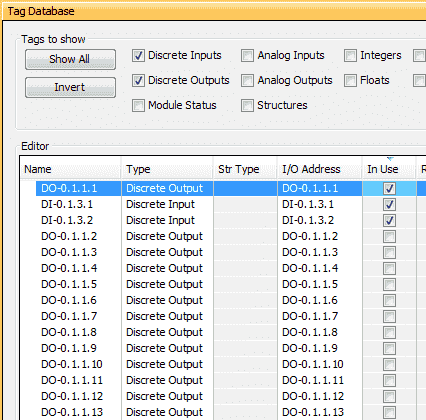
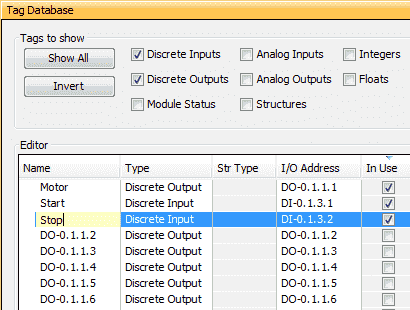
Select the Discrete Inputs and Discrete Outputs only. You can quickly use these selections to view the parts of the tag database that you want to modify or view.
Under the Editor there are several columns of information that we will explain later. On the far right side, you will see the column named “In Use”. This will be checked if your program is using the tag. I have moved this column next to the “I/O Address” by clicking it and dragging it over. Clicking the top of the column will sort the tags so all of the tags in use will be at the top of the list.
These are the default names for the discrete (on/off) inputs and outputs. We can change the name of the tag by double-clicking the tag name and entering a new one.
Once we have the names for our inputs and outputs in the tag database, move the column over that says “Forceable”. This means that when we are monitoring our program we can overwrite the input or output and turn this on or off. Place a check to make the Motor and the Start tags forceable. Leave the Stop tag unchecked.
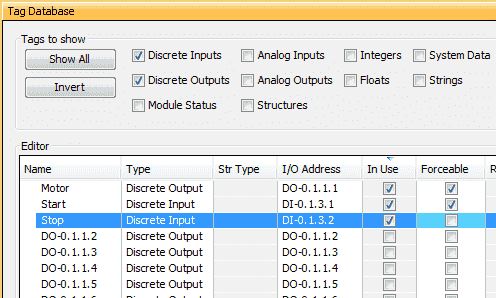
We will see this in action during the monitoring of our program.
Close the tag database by clicking the X in the top right corner.
You will notice now that our program has now changed the default names with the names that we have selected for the tags.

Tasks – Productivity Documenting Program
Tasks are located under Task Management. If the panel is not displaying on your window then go to the main menu | Tools | Task Management Panel.
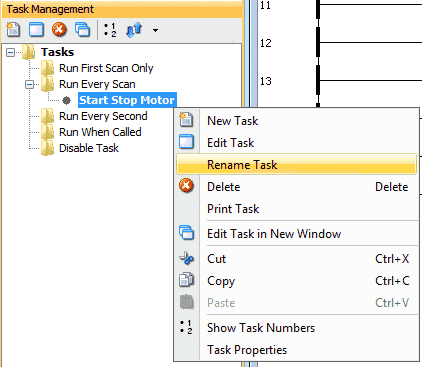
You can rename the task by right-clicking the task and clicking Rename Task. We have changed our task name to Start Stop Motor.
Right-click the Start Stop Motor task again and select Task Properties.
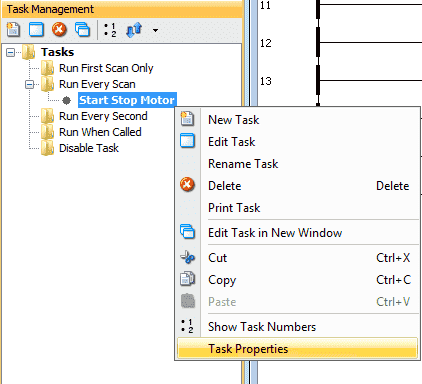
The task properties window will now appear.
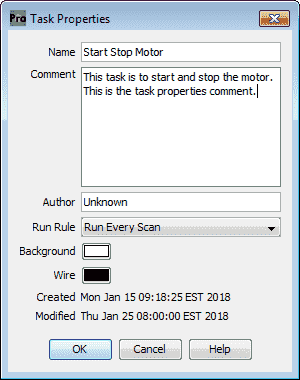
There are several items you can change in this window.
Name: – We can change the name of the task here as well
Comment: – Write a comment on what the task is doing in our program.
Author – This may be helpful to speak to the individual about a section of the program they programmed.
Background – You may change the background colour of the Ladder Editor Window of this task.
Wire – You may change the colour of the wire symbols of the Ladder Editor Window of this task
Run Rule: The task can be run in a few different ways. Currently, we will Run Every Scan. Another way to change this is to click and drag the task under the appropriate heading in the Task Management Panel.
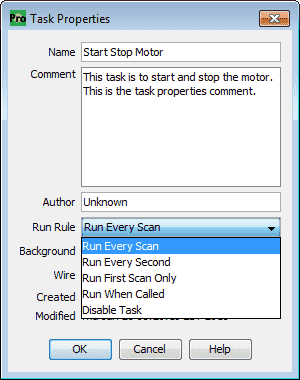
Click OK to close the window.
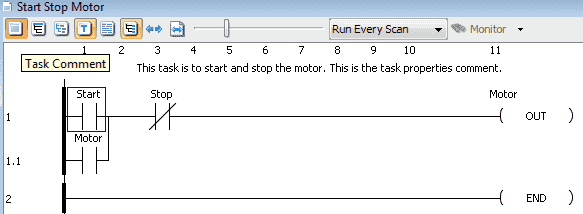
On our Ladder Editor Window, our name of the task now appears at the top of the window. Selecting the first icon (Task Comment) will display our comment for our Start Stop Motor task.
Rung Comments – Productivity Documenting Program
Rung comments will allow us to document each rung within the task.
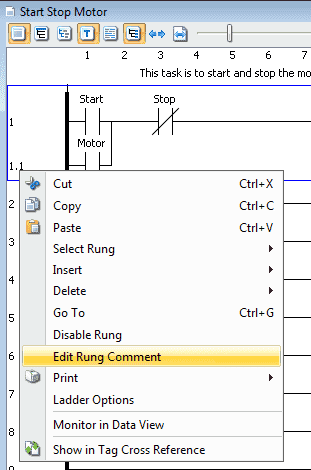
Right-click on the rung in the Ladder Editor Window and select Edit Rung Comment.

We can now enter the rung comment for the circuit. Type “Start / Stop Motor Control Circuit” Then hit OK.
Select the Rung Comment icon in the Ladder Editor Window.
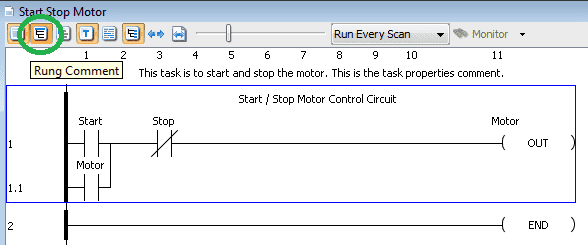
The rung comments will now show up in the rung. As we progress through the documentation methods, our program is getting easier to understand.
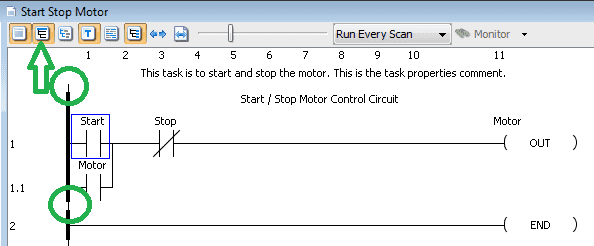
To quickly get to the rung comments in the ladder editor window, ensure that the rung comment icon is on. Double click on the top of the starting rung to call up the current rung comment window. The top circle will be for rung 1 comment and the bottom circle will be for rung 2 comment in the above picture.
We can also access all of the rung comments in our task by using the main menu | Edit | Rung Comments.
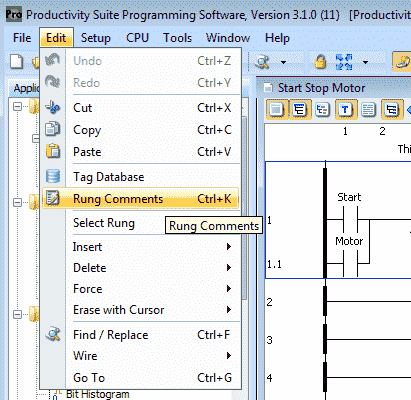
The keyboard shortcut of Ctrl + K will also call the rung comments.
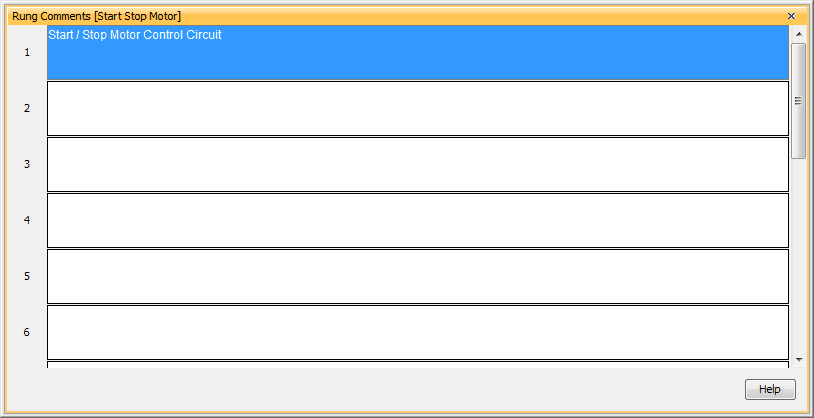
This will show you all of the comments in the task. Clicking each of the rungs will allow you to enter or modify the rung comment.
Click the X in the top right corner of the window to close the rung comments.
Instruction Comments – Productivity Documenting Program
Instruction comments are associated with the instruction (location) within the rung of your task. This allows you to comment on the purpose of using the instruction in that position.
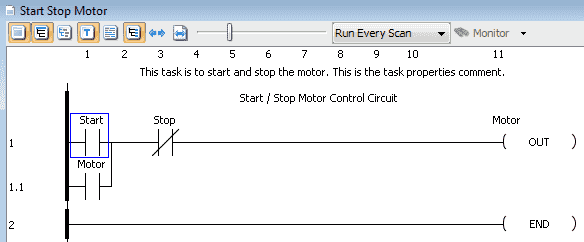
Each of your instructions can have a comment. As you make the program or after the program is complete, double-click the instruction.
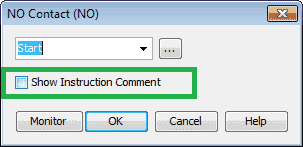
Select the Show Instruction Comment.
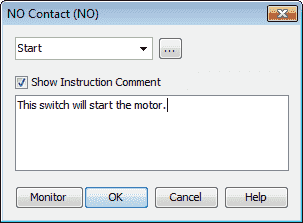
Enter the instruction comment and hit OK. Enter comments for all of the other instructions in the rung.

The symbol to the left of the rung mean that we need to save our program. We can do this by the save icon on the main menu or select File | Save Project from the main menu.
To display our instruction comments on the ladder editor window, click the Instruction Comment icon on the menu.

You may have to now resize the screen in order to read all of the information now that is presented.
Tag Details – Productivity Documenting Program
Tag details will show the address/information of the contacts from our tag database. Click the tag details icon in the ladder editor window to display.

Our program has been transformed with the documentation that is provided with the Productivity Suite Software. This will make programs easier to read, troubleshoot, modify and create.
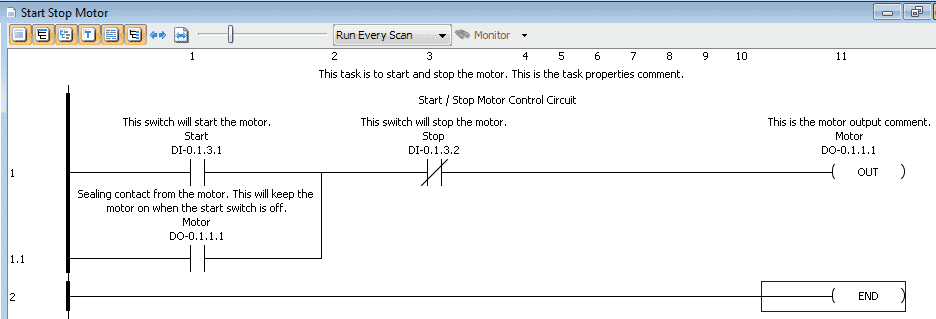
Watch the video below to see all of the ways to document our program in our Productivity 1000 Series PLC.
Download the fully documented program here.
Productivity 1000 Series PLC from Automation Direct
Overview Link (Additional Information on the Unit)
Configuration (Configure and purchase a system – BOM)
User Manual and Inserts (Installation and Setup Guides)
Productivity Suite Programming Software (Free Download Link)
This software contains all of the instruction sets and help files for the Productivity Series.
Next time we will look more at monitoring and testing our program in the Productivity 1000 Series PLC.
Watch on YouTube : Productivity 1000 Series PLC – Documenting the Program
If you have any questions or need further information please contact me.
Thank you,
Garry
If you’re like most of my readers, you’re committed to learning about technology. Numbering systems used in PLC’s are not difficult to learn and understand. We will walk through the numbering systems used in PLCs. This includes Bits, Decimal, Hexadecimal, ASCII, and Floating Point.
To get this free article, subscribe to my free email newsletter.
Use the information to inform other people how numbering systems work. Sign up now.
The ‘Robust Data Logging for Free’ eBook is also available as a free download. The link is included when you subscribe to ACC Automation.

