We will look at Arduino variables data types that can be used with our P1AM unit. Data types in the C++ language are used to determine the variable or function applied for the given type. The type will determine the size of the storage (bits), and the method to interpret the information.
Microprocessors can only understand binary (on / off) numbering systems. The interpretation of these binary numbers will allow us to have several different data types. We will be reviewing the different data types that we can use in our sketches (programs) for our P1AM-100 Arduino industrial controller. Only the variables data types available in ProductivityBlocks will be discussed, but references will be made for all data types that can be used. We will then look at a program that will list some integer and string variables. This will then be displayed on the serial monitor of the Arduino IDE. Let’s get started.
Previous posts in this Productivity Open Arduino Compatible Industrial Controller Series
A full list can be obtained at the following location:
Productivity Open (P1AM-100) Arduino Controller
Productivity Open Arduino Controller Hardware
– Starter Kit Unboxing Video
– Powering Up Video
Installing the Software – Video
First Program – Video
Program Structure – Video
PLC programming also deals with numbering systems (data types). The following post will go over an explanation of the basic numbering systems used in the PLC.
What Everyone Ought to Know about PLC Numbering Systems
We can apply some of this information to our data types in our P1AM Arduino industrial controller. The Arduino and PLC are both microprocessor-based controllers and as such, each just manipulates bit (on / off, 1 /0, high/low) information in memory. The interpretations of these bits depend on the data type specified. Let’s review numbering systems in general, so you can determine how these bits are manipulated in the controller.
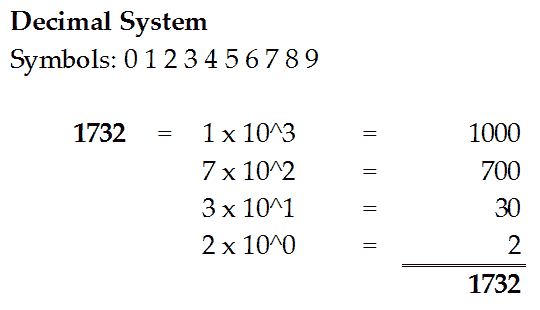
We currently use the decimal numbering system. It has 10 symbols. This means that we have a base 10. The position location is important in determining the value of multiple numbers. In the example above 1 is in the 3rd position, 7 is in the 2nd position, 3 is in the 1st position and 2 is in the 0 position. Let’s now take a look at the binary numbering system.
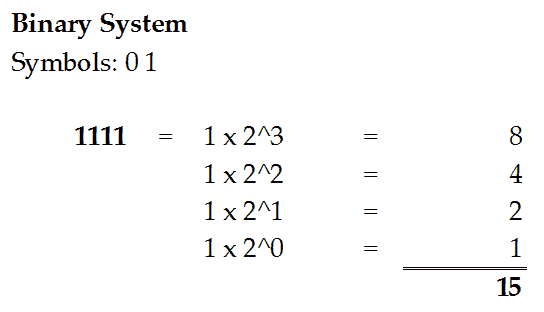
In binary, we have only two symbols. (1 or 0) Breaking the binary number of 1111 into decimal we find it is equivalent to 15 decimal. The place holder of the number will determine the value.
4 bits are called a nibble. 2 nibbles (8 bits) are called a byte. 2 bytes (16 bits) are a word.
All microprocessor memory contains bits. The interpretations of these bits that we see allow us to understand the status of the bits. Nibbles can be represented by the hexadecimal numbering system.

In hexadecimal, you can see that we have 16 symbols. (0 to F) FFFF in our example will be for 16 bits in binary. (1111 1111 1111 1111) All hexadecimal will do is represent the bits in the memory location.
Watch the video below to see how numbering systems work on our productivity open industrial arduino controller.
A complete list of data types can be found under Language Reference | Variables | Data Types in the following URL: Arduino Language Reference
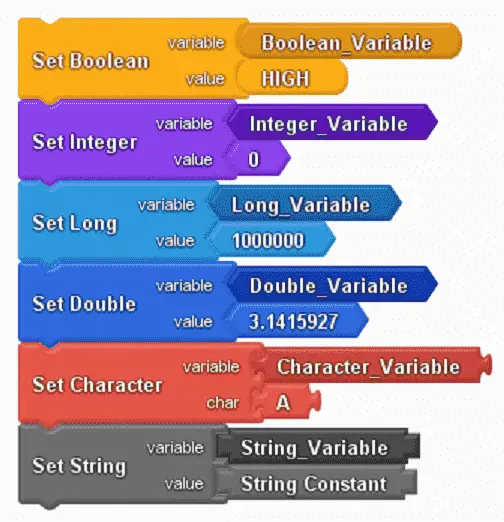
We will be looking at the variables available through ProductivityBlocks. These are the most common to use in your sketches. Other types can be used within productivity blocks using the C++ code.
Boolean Data Type Variable
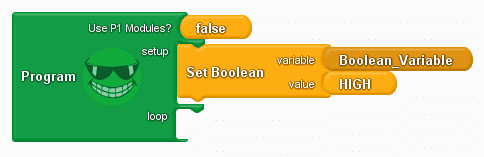
A Boolean value data type can be true or false. This is just like a bit. It can only hold a 1 or 0, Yes or No, High or Low. Boolean values use one byte (8 bits) of memory. This is the minimum size of memory allocation.

Here is the C++ code for the Boolean variable.
Int Data Type Variable
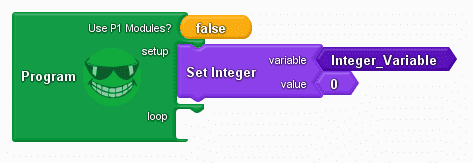
An integer data type stores a 16-bit 2-byte value. This is a signed value which means that the most significant bit will indicate the negative number.
Example:
8000 hexadecimal = -32786 decimal
7FFF hexadecimal = 32767 decimal
Integers store negative numbers using the two complement math. The arduino will automatically take care of the math for you.
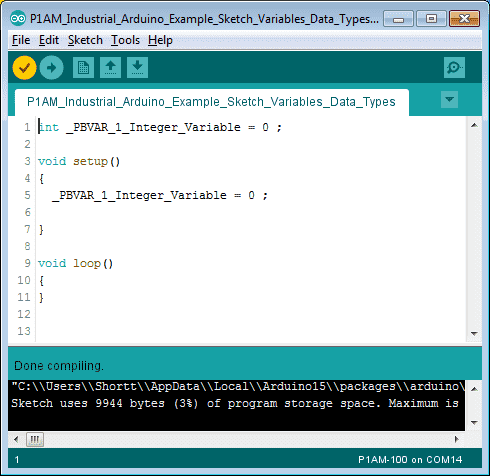
Here is the C++ code for the Integer variable. When using an integer, make sure that the number in your sketch does not exceed the limits mentioned above. If it does then we will use a long.
Long Data Type Variable
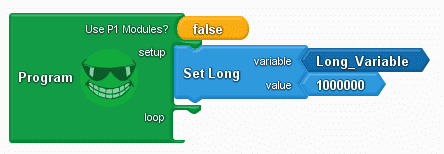
A long variable data type stores a 32-bit 4-byte value. This is also a signed value which means that the most significant bit will indicate the negative number. Numbers can be used from
-2,147,483,648 to 2,147,483,647.
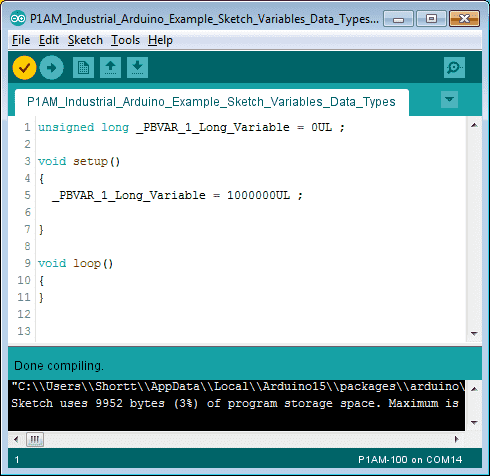
Here is the C++ code for the long variable. Note: In our example, we are using the unsigned long variable designated by the UL behind the number.
Double Data Type Variable
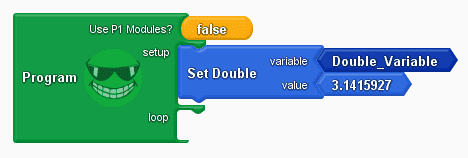
Double precision floating point Arduino data type will use 8 bytes to store the value. This decimal point number is used for very large number approximations.

The C++ code is indicating the value of pie to 7 decimal places.
Char Data Type Variable
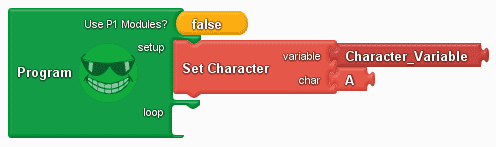
The char variable data type takes one byte of memory to store a character value. An ASCII (American Standard Code Information Interchange) chart will display the byte (8 bits) of memory for the actual characters that can be represented. Your keyboard is an example of using ASCII. As you type a letter or number 8 bits of data representing that letter or number are sent to your computer. ASCII charts usually show the hexadecimal value and equivalent decimal number for the character to represent.
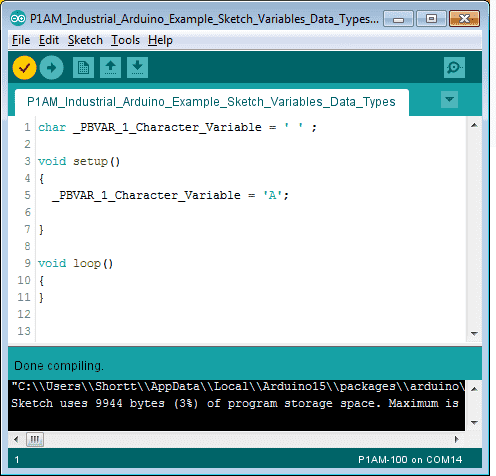
Here is the C++ code for the character variable. Note: Adding 1 to our character will produce the next letter or number. In our case, the symbol B will be shown if you add 1.
String Data Type Variable
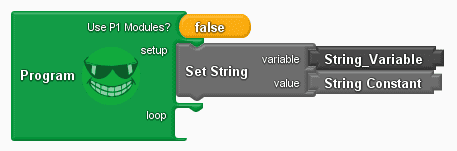
The string variable data type is a representation of a number of characters. This can be set or manipulated in your sketch.
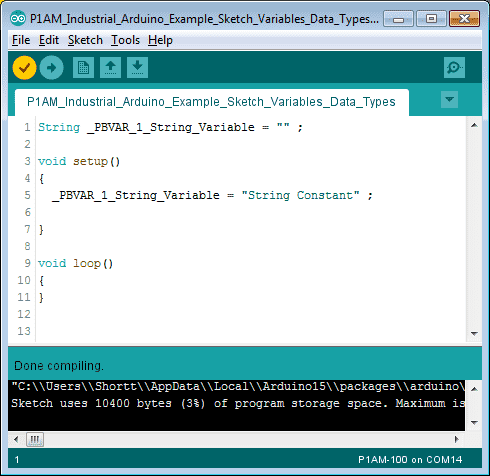
The C++ code for setting the string variable is done in quotation marks. In our example, the string variable is ‘String Constant’.
Sample Program – Arduino Variables Data Types
Our sample program will list an integer variable from -10 to 9 and place this on a line of our serial monitor.
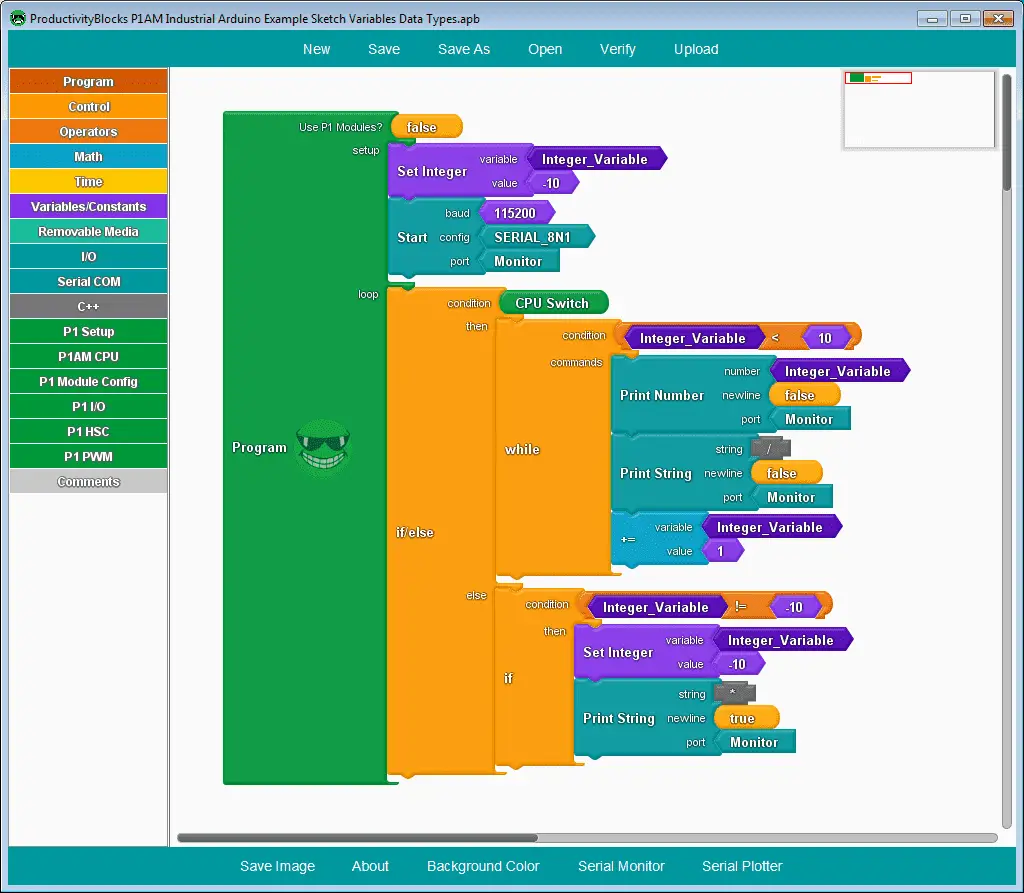
We first set the integer variable to -10. The Start instruction for the serial monitor can be found under the Serial COM menu on the left-hand side. Baud is the rate for the bits per second for our communication. We will set this for 115200. Configuration for the monitor will be SERIAL, 8 data bits, No parity and 1 Stop Bit.
Our loop consists of an if/else instruction. The condition is set for the CPU Switch. If the switch is on, then do a while loop. While the integer value is less than 10, print the integer value out the monitor port. We will then print the string ‘/’ out the monitor port. The new line on each of these instructions is set to false. We will then increment the integer variable by 1. The result of our while loop will be:
-10/-9/-8/-7/-6/-5/-4/-3/-2/-1/0/1/2/3/4/5/6/7/8/9/
When the CPU switch is off, we will use an if condition. The condition will be if the integer value is not equal to -10 then we will set the integer value to -10. We will then print a string (*) out the monitor port. This print string instruction will then start a new line on our monitor. Our output on the monitor will now look like this.
-10/-9/-8/-7/-6/-5/-4/-3/-2/-1/0/1/2/3/4/5/6/7/8/9/*
Our program will continue to loop until the CPU switch is turned on again.

Here is our C++ code for our sample program. Upload the program to our P1AM-100 arduino industrial controller. The upper right corner of the C++ sketch will show the serial monitor. Alternatively, you can also use the main menu | Tools | Serial Monitor or the Ctrl + Shift + M keys. Click the serial monitor icon.
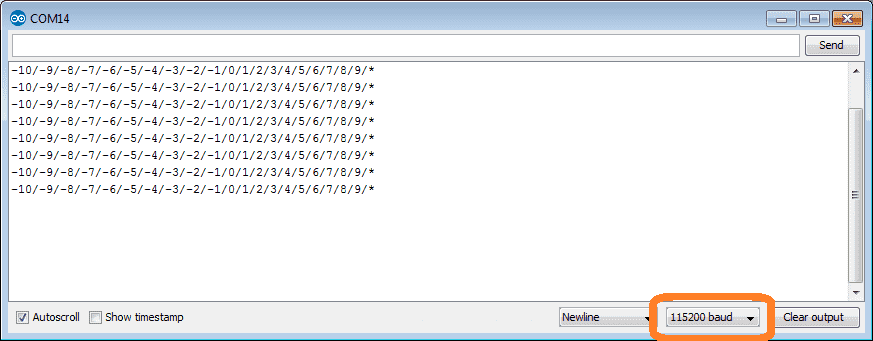
Our serial monitor window will now be displayed. The communication port number that you are using with your P1AM-100 will be the title of the window. Ensure that the communication baud rate matches what we programmed for our sketch. (115200)
We can now test our program by turning the CPU switch on and off.
Watch the video below to see the variable data types on our productivity open industrial arduino controller.
Download the P1AM-100 sample sketch and Productivity Block program here.
Productivity Open Arduino Compatible Links:
Product Hardware
– Productivity Open (Automation Direct)
– P1AM-100 Specifications
– Productivity Open User Manual
– Configure a Productivity Open Arduino-based Controller
– Open Source Controllers (Arduino-Compatible)
– Productivity Open Documentation (Facts Engineering)
– P1AM Design Files
Software
– Arduino IDE (Integrated Development Environment)
– P1AM-100 library (Easy Interface for controlling P1000 Modules)
– Productivity Blocks (Development Timesaver)
– Productivity Blocks Documentation (Wiki)
Community
– Automation Direct Forum – Open Source Devices
Next time we will look at the Serial Monitor COM in the P1AM-100 Arduino Industrial Controller.
Watch on YouTube: Productivity Open P1AM Industrial Arduino Variables Data Types
If you have any questions or need further information please contact me.
Thank you,
Garry
If you’re like most of my readers, you’re committed to learning about technology. Numbering systems used in PLC’s are not difficult to learn and understand. We will walk through the numbering systems used in PLCs. This includes Bits, Decimal, Hexadecimal, ASCII and Floating Point.
To get this free article, subscribe to my free email newsletter.
Use the information to inform other people how numbering systems work. Sign up now.

The ‘Robust Data Logging for Free’ eBook is also available as a free download. The link is included when you subscribe to ACC Automation.