We will now use the Do-More Designer software to establish communication with the BRX Do-More PLC. This is the same software that we used in the Learn PLC Programming Fee Video Series. Using the Do-More Designer software, we will communicate via USB, RS485, and Ethernet. These three methods will allow us to communicate to our BRX Do-More PLC in order to program or troubleshoot this controller. Once we have established communication we will then look at updating the firmware in our controller. Let’s get started.
Previously in this BRX Do-More series PLC, we have discussed:
System Hardware – Video
Unboxing – Video
Installing the Software – Video
USB Pluggable Option Module (POM) – BRX Do-More Establishing Communication
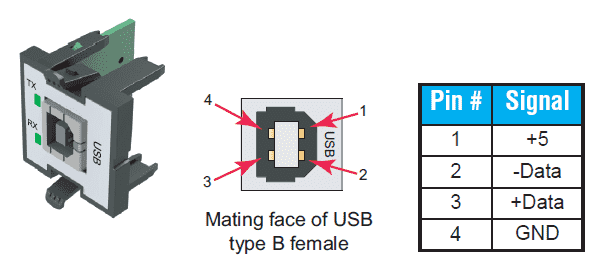
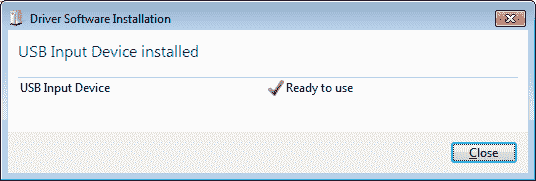
The USB POM for the BRX Do-More PLC is a hot-swappable item. This means that you can install the unit when the power is on the PLC and the program is running in the PLC. This USB POM uses a standard USB printer cable (USB Type-A to USB Type B) for communication. When you plug in this module and connect this to your USB port on a windows machine it will automatically load the windows drivers. The drivers are included with Windows so this is a plug and play operation.
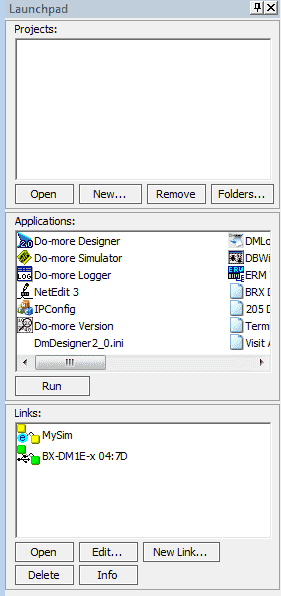
Start the Do-More Designer software and you will automatically notice that the USB link is under the Links setting on the Launch pad.
The USB POM can only be used for programming of the BRX Do-More Series PLCs. You cannot use it to communicate with other devices like a printer.
We can now double click on the link for the BX-DM1E-x 04:7D. This will now take us online with the PLC.
We know that we are on-line by the status bar and the on-line toolbar.
Status Bar
![]()
This is the bar across the bottom of the main window. It contains 10 separate sections that may or may not be visible depending on your current situation. Some of the main information includes online/offline, CPU errors, CPU mode (Run or Program), Current mode switch, etc. For a full listing of all of the information on the status bar use the help menu and search for “Programming Window”.
Online Toolbar

The Online Bar is used when you are online to the PLC or simulator. You can read/write, force I/O, etc.
System Configuration – BRX Do-More Establishing Communication
Since we are currently online with the BRX Do-More PLC we will configure the RS232 / RS485 port on the controller. The default for the port is RS232. We will be using RS485, so we will need to change the parameters before attempting to communicate.
Hit the ‘Configure’ button on the online bar. Alternatively, you can select System Configuration from the Project Browser or from the main menu select PLC | System Configuration.
This System Configuration window will show all of the parameters that you can change in the system.
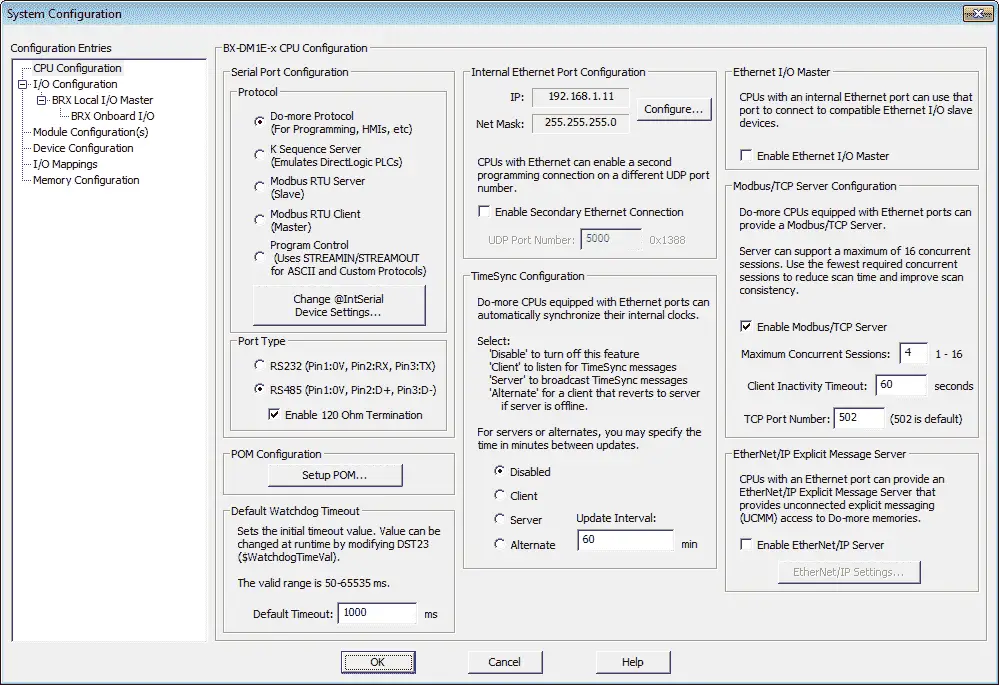
The order in which these parameters are changed should be from top to bottom on the Configuration Entries. This is because the high-level settings will affect the lower ones that are specified later.
Find the Port Type settings in the CPU Configuration.
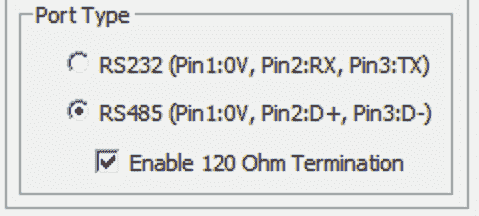
We will change this to RS485 and enable the 120 Ohm Termination.
Since we are online to the BRX Do-More PLC the configuration information is automatically written into the controller.
There are a couple of ways that we can set up the Ethernet port as well. Select the Internal Ethernet Port Configuration on the same CPU Configuration window.
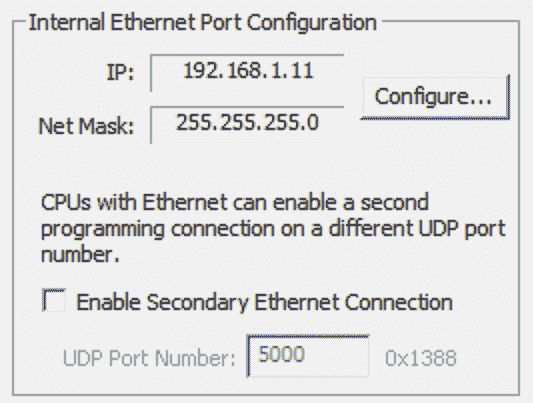
Select the Configure… button.
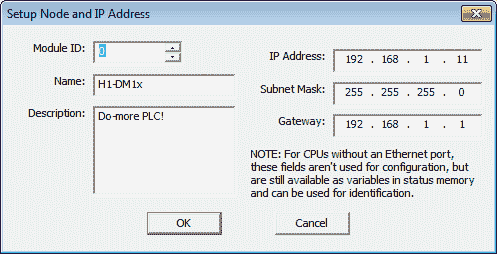
We can now change the IP Address, Subnet Mast and the Gateway for the Ethernet port.
Hit OK to save the settings.
Hit OK on the System Configuration page to exit this window. The configuration setting will be saved to the controller.
RS232 / RS485 – BRX Do-More Establishing Communication
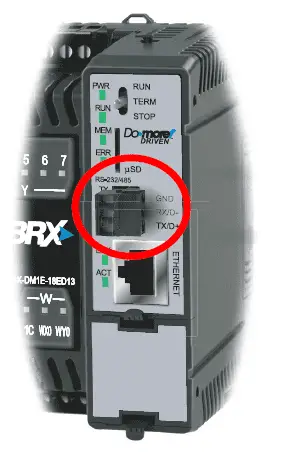
We will now look at communicating using RS485 to the controller.
See the following post on how to install the USB to RS485 adapter.
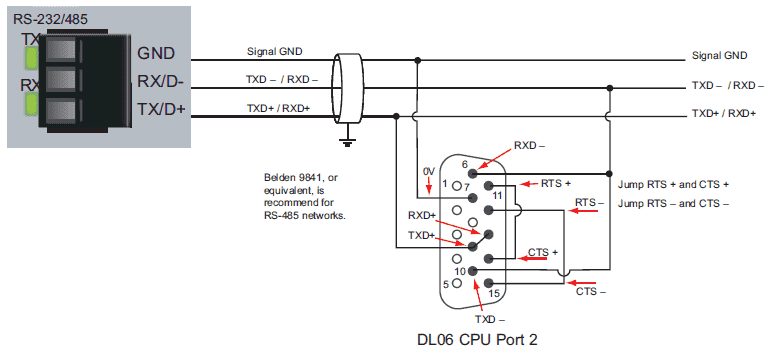
Here are the wiring diagrams for this port.
RS232

RS485
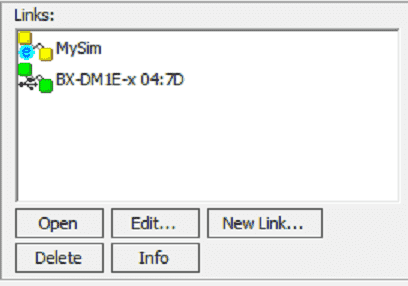
In the Do-More Designer software look at the Links setting on the Launchpad. Select New Link…
We now select the communication port that we want to use on the computer. You can view your ports using the Windows device manager. We will select COM5 and hit Next.
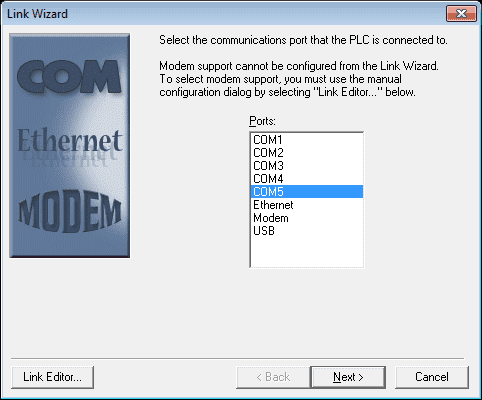
The software will automatically try to communicate to the PLC to set the communication parameters. If it can establish a link then it will move onto the last step, which is to enter a name and link description for our serial link.
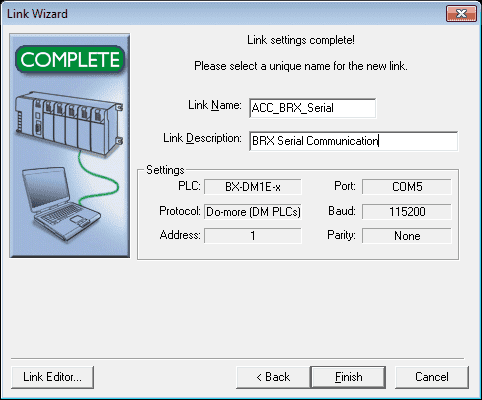
Click Finish to save and close the window.
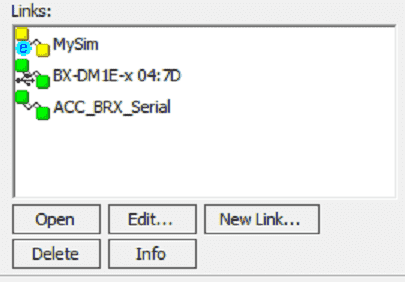
You can now see our new link in the Links window on our Launchpad.
Ethernet – BRX Do-More Establishing Communication
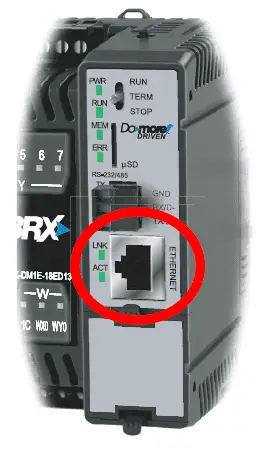
The Ethernet port on the BRX Do-More CPU uses standard networking cables and devices. Category 5e cabling is preferred. Auto MDI detection on the port will allow either a straight-through or crossover cable pinout.
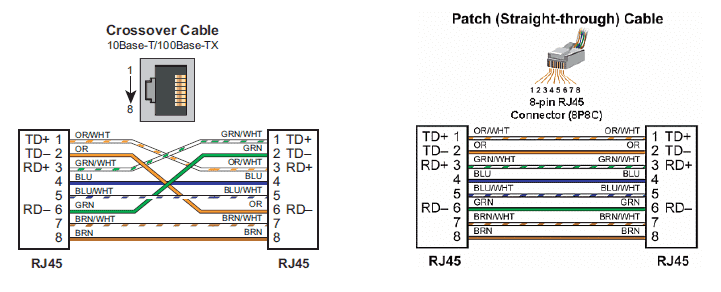
You must decide on an IP address for the BRX Do-More Series PLC. This should follow the standard IP addressing and subnets.

More information can be obtained from our post What Everybody Ought to Know About IP Addressing.
Let’s now create a new link in our Links window on our Launchpad. Select New Link…
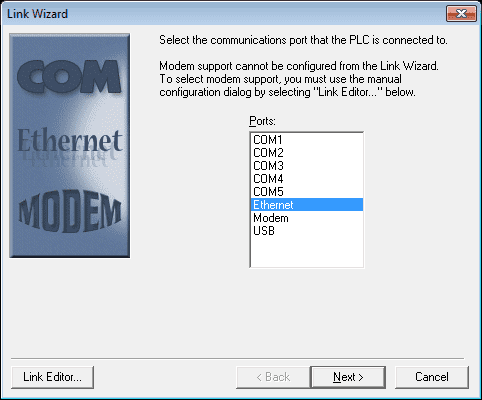
We will select Ethernet and hit Next.
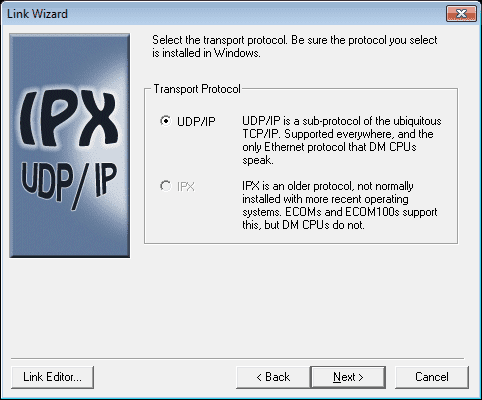
Select UDP/IP and select Next.
The software will look on the network for any nodes that are active, and display them for you.
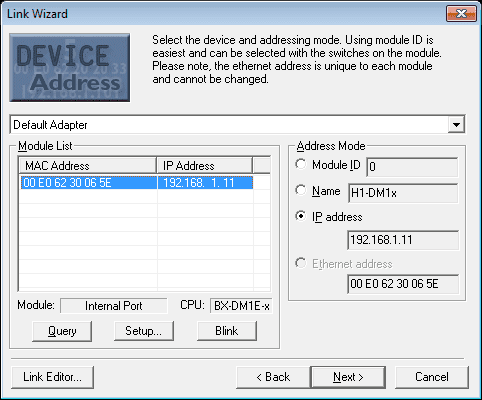
If you cannot see any controllers on the network, hit the Setup…
This will list all of the devices on the network, using a program that comes with the Do-More called NetEdit 3.
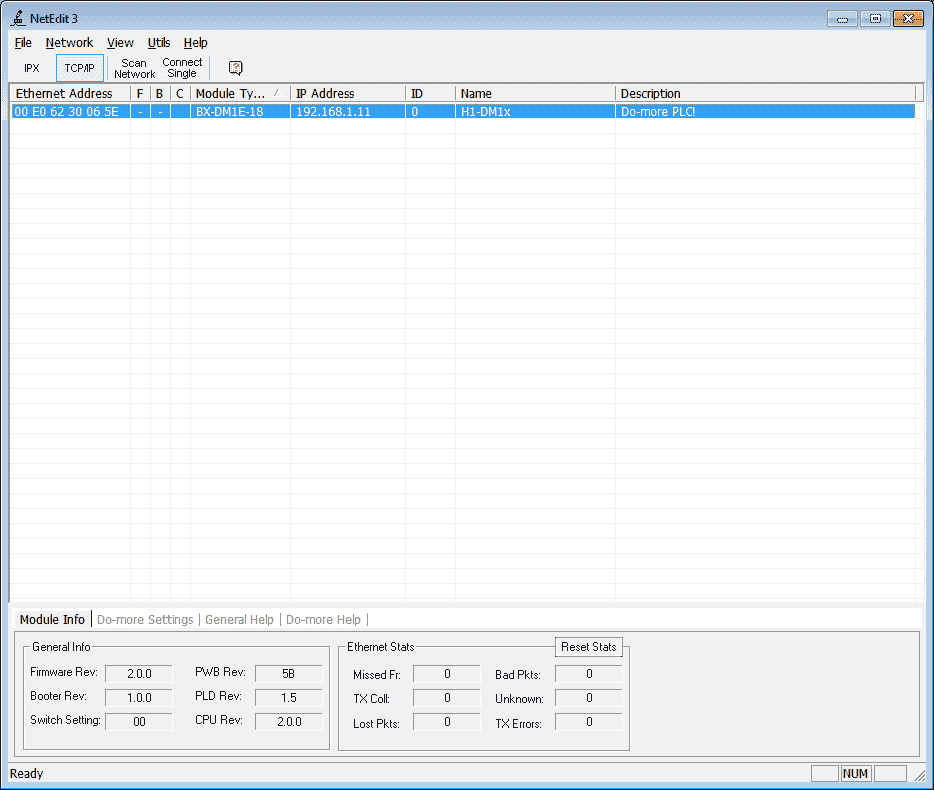
Double-clicking on the controller that it has found, you can then edit the IP address.
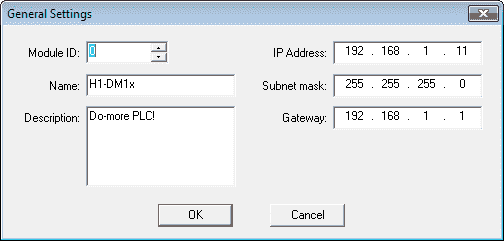
In our case we will use the following parameters:
IP Address: 192.168.1.11
Subnet mask: 255.255.255.0
Gateway: 192.168.1.1
Hit OK once this is set.
You can now close the NetEdit 3 window by hitting the X at the top right window.
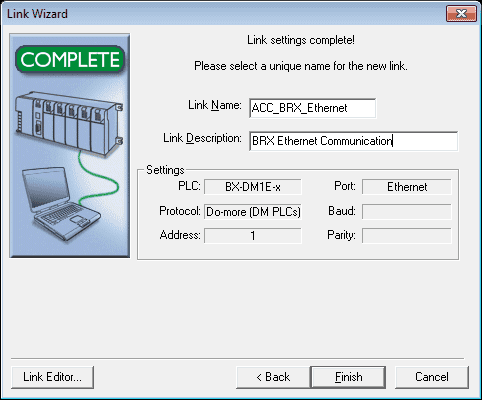
The last set is to name and describe the link. Hit Finish.
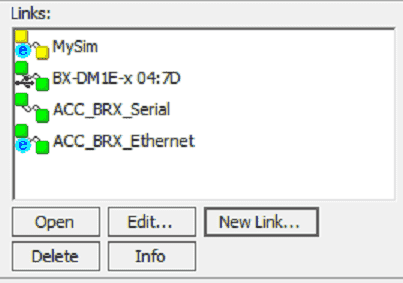
All of the different links are now complete in the LaunchPad.
Establishing communication is very easy using this intuitive software.
Updating the Firmware
Manufacturers will from time to time update the software of the controller. This is the software that will run the code that we develop. It is called the firmware.
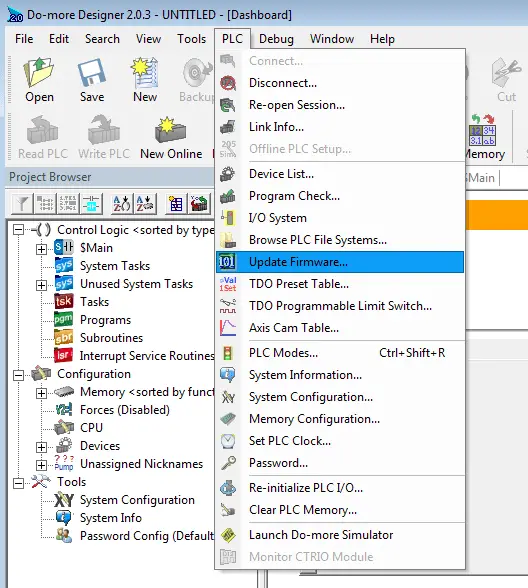
To update the firmware on the BRX Do-More PLC we need to start the update firmware window. We can do this by using the main menu and selecting PLC | Update Firmware…
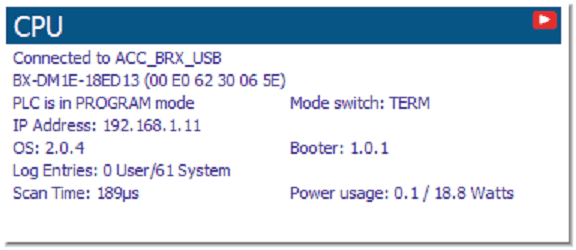
The dashboard view under CPU will display the current OS and Booter. Clicking on the OS version will also call up the update firmware window.
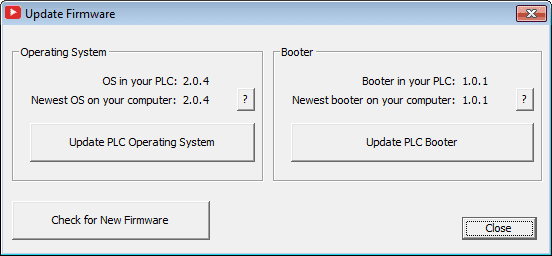
We can now use the buttons to check for new firmware. To update the OS (Operating System) click on the update PLC Operating System. Clicking on the Update PLC Booter will update that software. To see this in action, please watch the video below.
You can watch the videos below to see the different ways to establish communication and update the firmware on the BRX Do-More Series PLC.
BRX Do-More Series PLC from Automation Direct – Power to deliver
Overview Link (Configure and purchase a system)
Manuals and Product Inserts (Installation and Setup Instruction)
Do-More Designer Software v2.0.3 (Free Download Link) – The software will contain all of the instruction sets and help files for the BRX Do-More Series PLC.
Next time we will look at numbering systems and addressing in the BRX Do-More PLC.
Watch on YouTube: BRX Do-More PLC Establishing Communication
Watch on YouTube: BRX PLC Updating Firmware
If you have any questions or need further information please contact me.
Thank you,
Garry
If you’re like most of my readers, you’re committed to learning about technology. Numbering systems used in PLC’s are not difficult to learn and understand. We will walk through the numbering systems used in PLCs. This includes Bits, Decimal, Hexadecimal, ASCII and Floating Point.
To get this free article, subscribe to my free email newsletter.
Use the information to inform other people how numbering systems work. Sign up now.
The ‘Robust Data Logging for Free’ eBook is also available as a free download. The link is included when you subscribe to ACC Automation.

