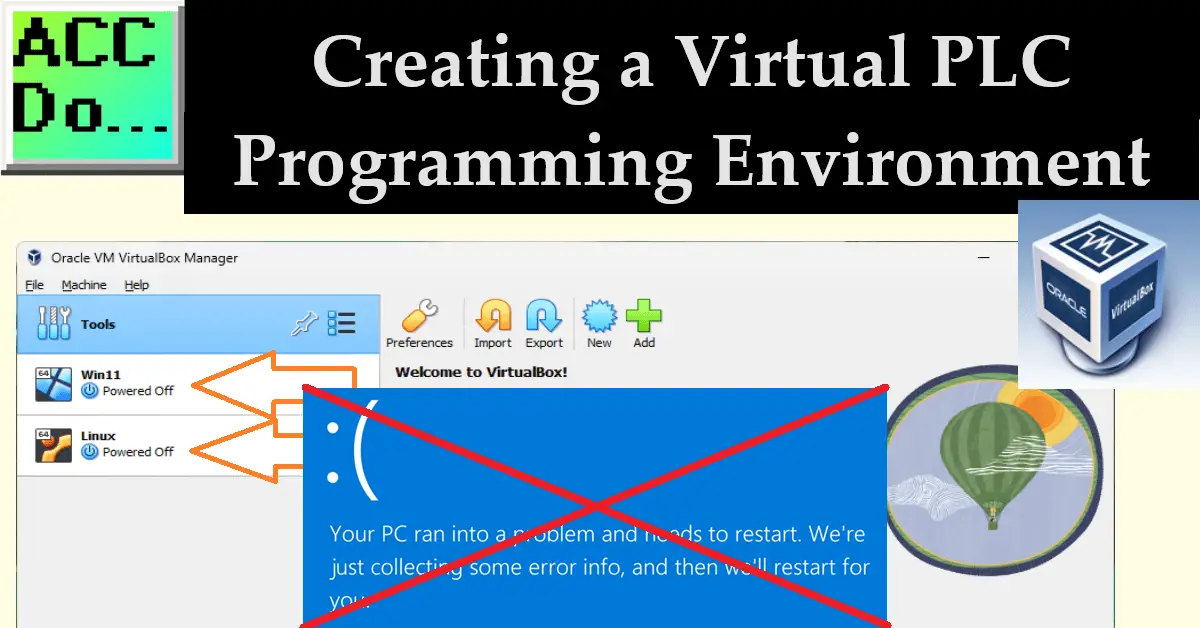
Have you ever been in a situation where you were programming a PLC, and your computer suddenly displayed a blue screen of death? Virtual environments can help you. This issue is becoming more relevant as PCs are now part of industrial control. This means that when your computer crashes, it can cause a machine to go down, resulting in downtime and loss of productivity.
We will set up a virtual PLC programming environment on our computer using Oracle VirtualBox. This will enable us to run our applications on a virtual computer. In case of a critical error, we can close and restart the virtual computer again. VirtualBox also allows us to use different operating systems. We will install Windows 11 and Linux operating systems on our Windows 11 computer. This gives us the freedom to choose the programming environment we prefer.
To begin, we need to install Oracle VirtualBox.
Installing Oracle VirtualBox
Oracle VirtualBox is a powerful virtualization software that allows you to run multiple operating systems on a single computer. Its primary purpose is to create a virtual environment isolated from the host operating system, enabling you to run different operating systems and applications without affecting the underlying system. VirtualBox is an open-source software that is available for free and can be installed on Windows, macOS, Linux, and Solaris. It is widely used by developers, IT professionals, and enthusiasts to test applications, run legacy software, and experiment with different operating systems. Functionality includes creating and managing multiple virtual machines, allocating system resources such as CPU, memory, and storage to each virtual machine, and configuring virtual networks. VirtualBox also supports a range of features, such as snapshots, which allow users to save the current state of a virtual machine and revert back to it later, and virtual machine cloning, which enables users to create a duplicate copy of a virtual machine.
Download Oracle VirtualBox here.
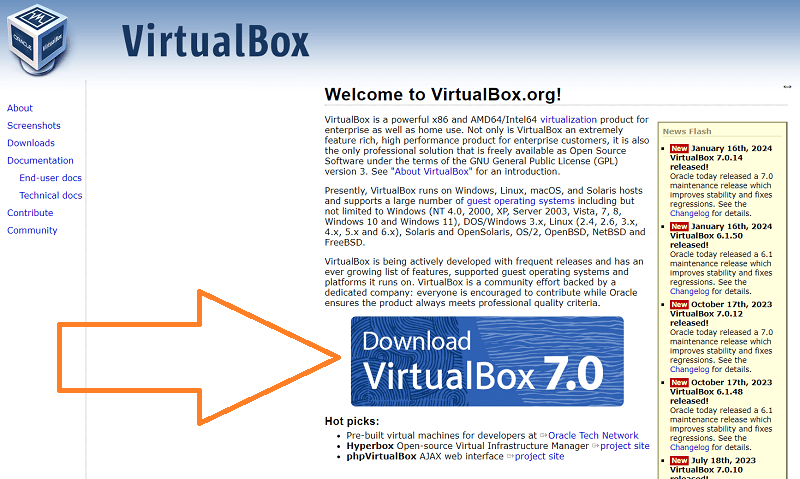
Select the Download VirtualBox 7.0 button.

Select Windows Hosts to start the download for our Windows 11 machine.
While this is downloading, check to ensure that the virtualization is enabled in your basic input and output system (BIOS).
Press the Ctrl, Shift, and ESC keys to call up your task manager in Windows.
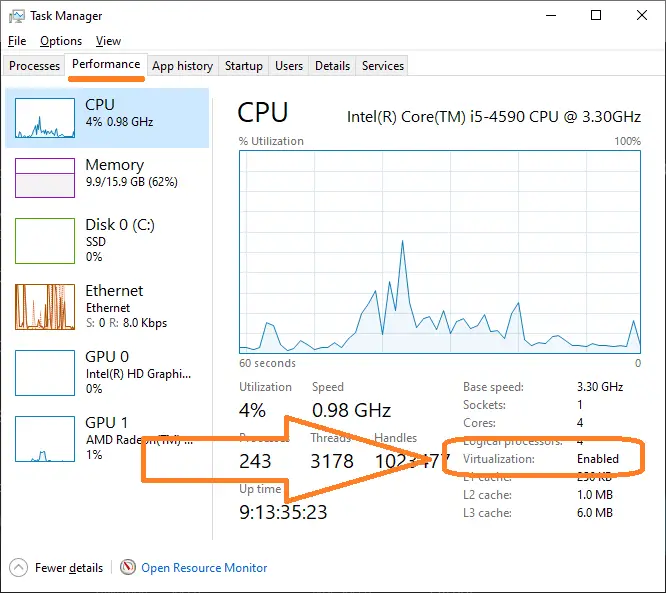
Under the performance tab, find the CPU. In the CPU settings, ensure that virtualization is enabled.
If this setting is not enabled, then you will have to enable this in your BIOS. Each computer is slightly different, but it should be an item usually under the advanced settings.
Double-click on the installation file that you downloaded. This will start the installation of the software.
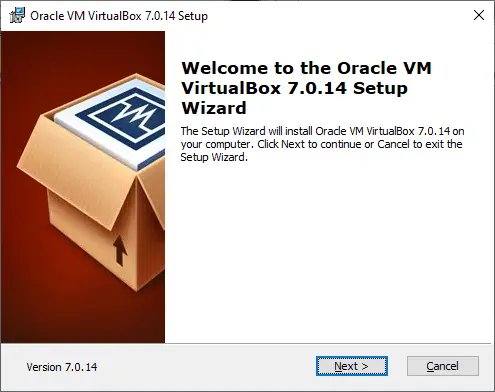
The introduction splash screen will appear. Select next.
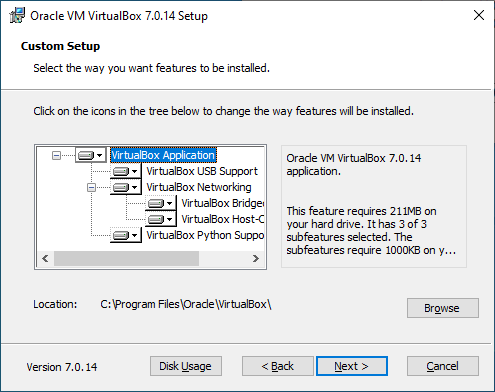
VirtualBox will now display where the files will be kept. We will leave everything as their default and select next.
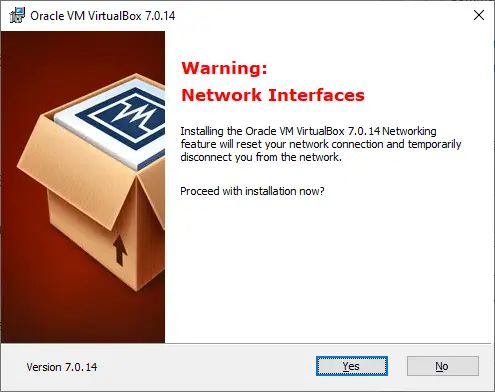
A warning screen will now indicate that the network connection will temporarily be disconnected. We will proceed with the installation and select Yes.
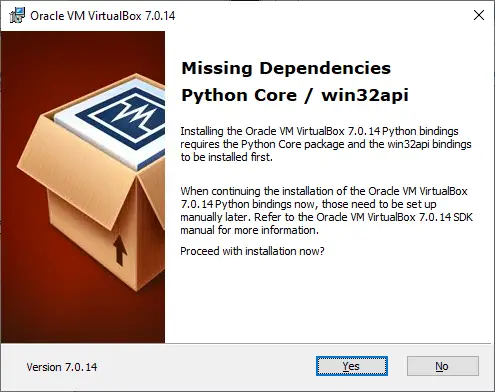
Missing Dependencies will now be displayed. We can install these later if required. Select Yes to continue.
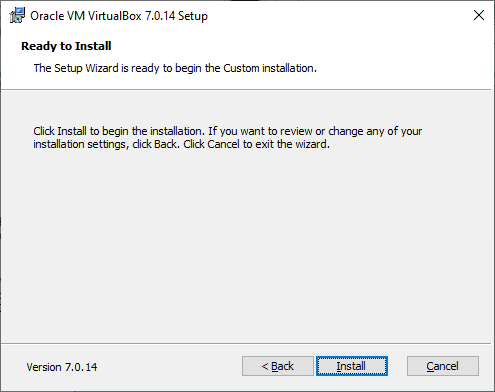
We are now ready to install the Oracle VirtualBox. Select install.
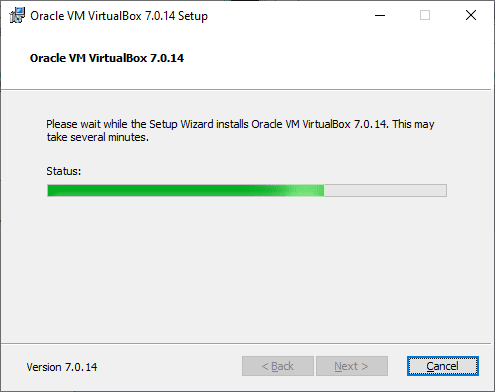
Our software will now be installed on our computer.

When the installation is finished, we will receive this screen. After installation, the Start Oracle VM VirtualBox 7.0.14 will be selected as a default. Select Finish.
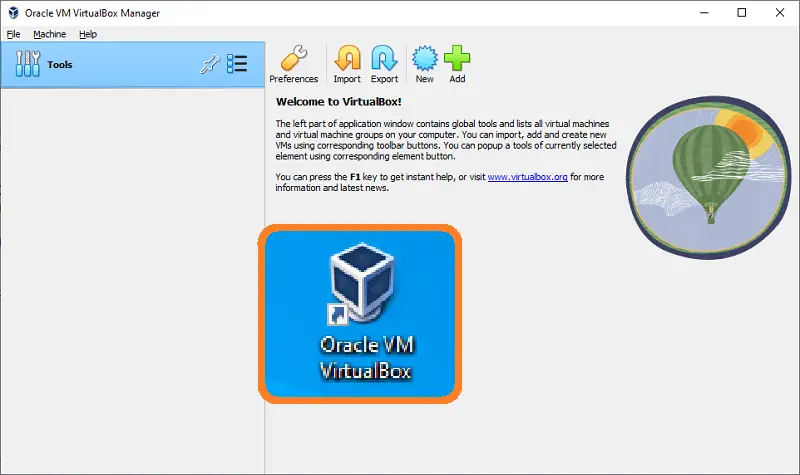
Our VirtualBox will now be running in our window. A desktop icon can be used to start the program at any time.
Obtaining Windows ISO
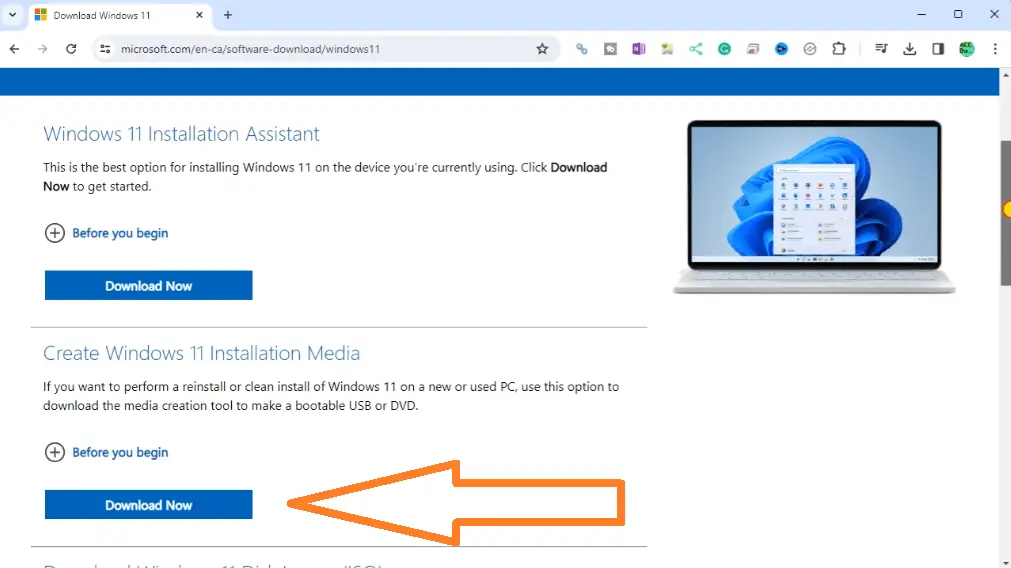
We will obtain our Windows ISO file from our computer using the Create Windows 11 Installation Media program.
Select Download Now
When the file has finished downloading, double-click on the file to start the application.
You must agree to the license terms. Select Accept.
We will use the recommended options for this PC. Select Next.
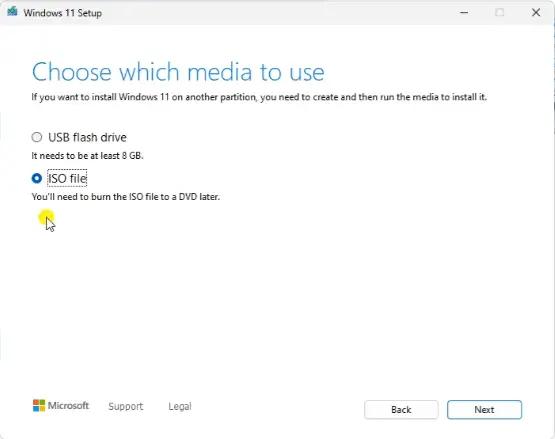
When asked to choose the media, select the ISO file. Select Next.
We will use the default path to store the windows.iso file. Select Save.
See the video below for all the selections for downloading the Windows ISO file.
An ISO file for an operating system is a disk image file containing all the files and folders required to install and run the system. It is a digital copy of the installation media, such as a CD or DVD, and can be used to create a bootable USB drive or DVD. When you download an operating system ISO file, you can use it to install the operating system on your computer or to create a virtual machine. Many operating systems, including Windows and Linux, are available for download as ISO files from the respective vendor’s website.

Select Finish after the Windows ISO file has been downloaded.
Retrieving Your Windows Product Key
We can use the Windows Registry Editor to get our Windows Product Key.
A Windows Product Key is a unique code made up of 25 characters that is used to activate a copy of the Windows operating system. It is usually required during the Windows installation process and is also needed when upgrading to a new operating system. The product key is designed to prevent piracy and ensure that each copy of Windows is properly licensed. It is important to keep your product key in a safe place, as you will need it if you ever need to reinstall or reactivate your copy of Windows.
Navigate to the following location.
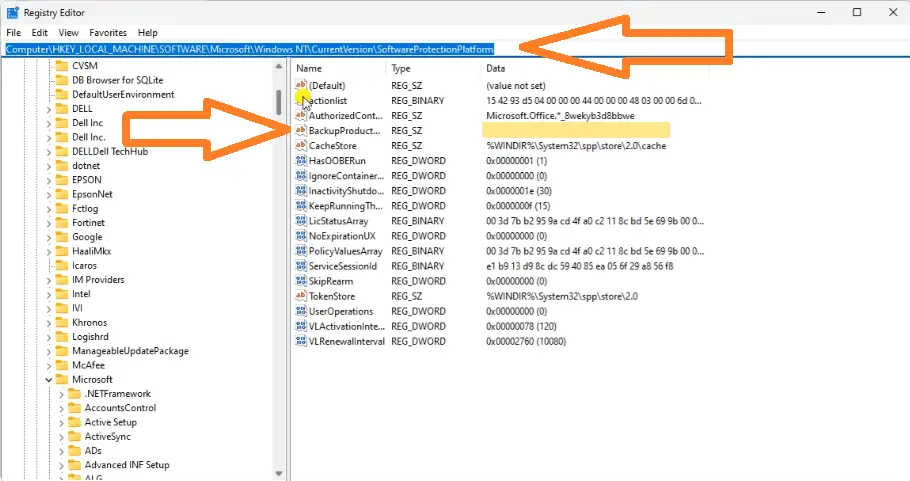
Computer\HKEY_LOCAL_MACHINE\SOFTWARE\Microsoft\Windows NT\CurrentVersion\SoftwareProtectionPlatform
Your Windows product key can be found under the string name BackupProductKeyDefault. Copy this and store it in a safe location. We will need this for our next step of installing the virtual Windows computer.
Installing a Virtual Windows Computer
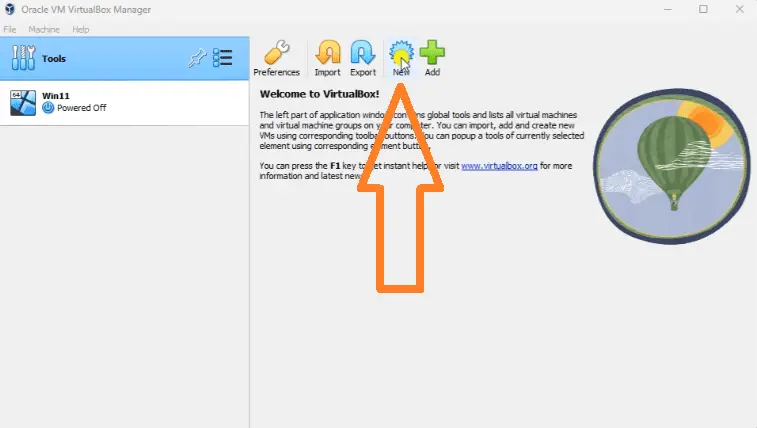
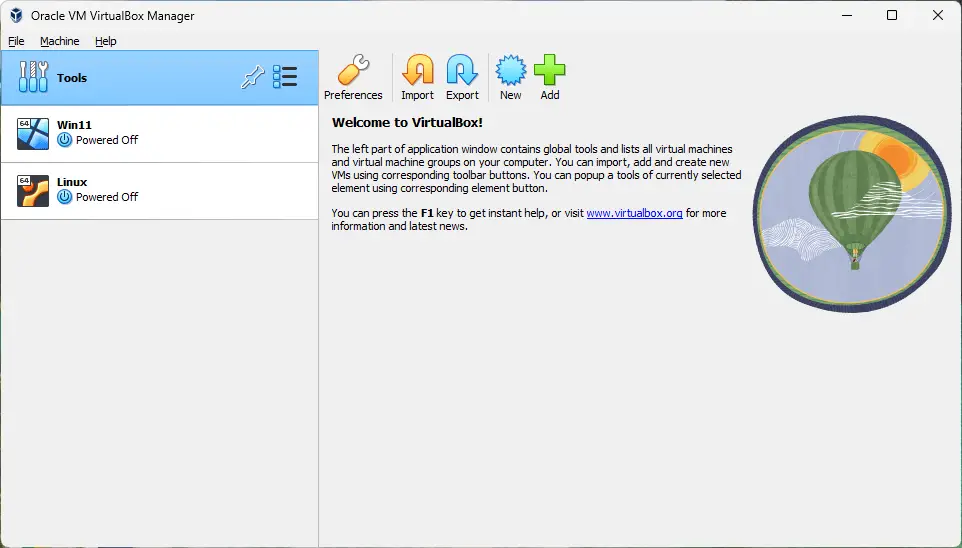
Call up the Oracle VM VirtualBox Manager. We currently do not have any virtual machines installed.
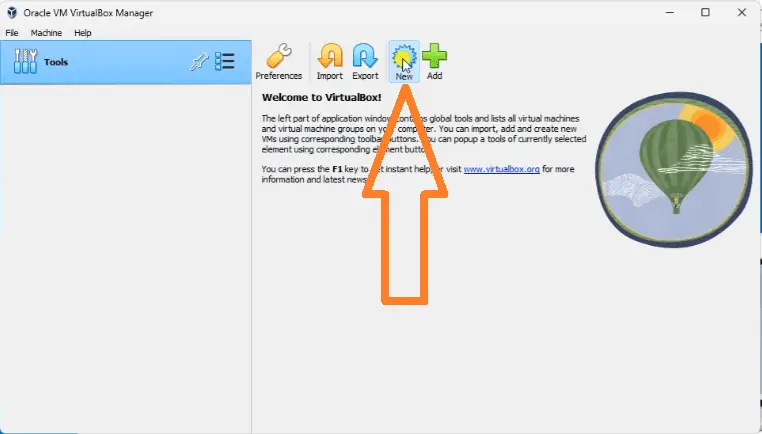
Select the New Icon in the tools menu.
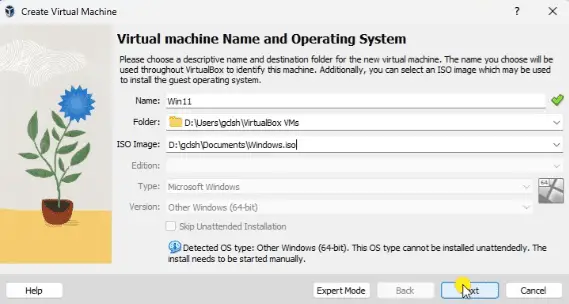
The Create Virtual Machine window will be displayed. We will name our machine Win11. We will leave the folder as the default location but under the D drive.
Select the windows.iso file that we previously downloaded. Select Next.
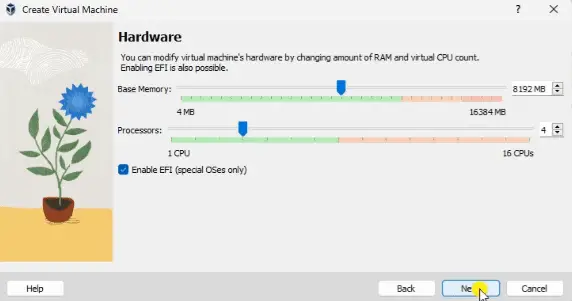
We can now select the hardware specifications for our Windows 11 virtual machine. A Windows 11 minimum specification is 4096 RAM and 2 CPUs. Our machine will have 8192 RAM and 4 CPUs. Select the Enable EFI option for this installation. Select Next.
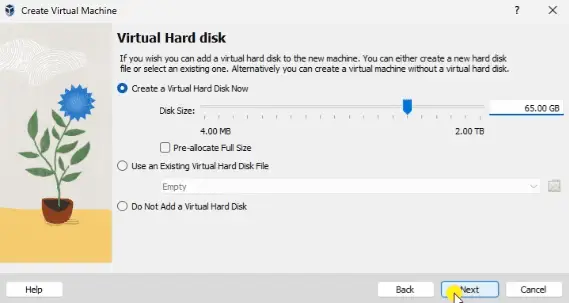
We will set the virtual hard disk to the minimum specified for Windows 11, which is 64 GB. Our machine will not automatically use all this memory at once unless you select the Pre-allocate Full Size. Space will be used as required up to the limit set. Select Next.
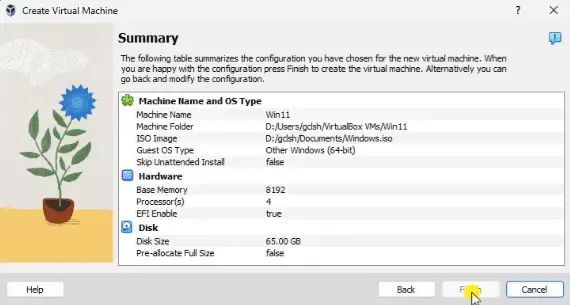
The summary will be displayed for review. Select Finish.
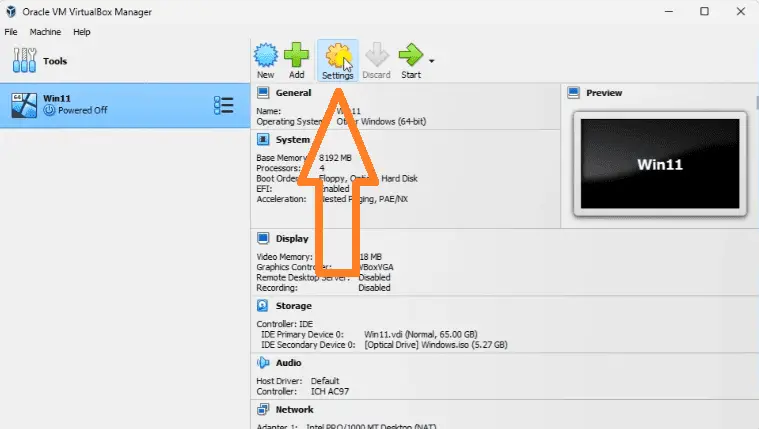
Our Win11 virtual machine is now displayed on our Oracle VM VirtualBox Manager. Select Settings for Win11.
All of our settings that will be used for our virtual Windows 11 machine are now displayed. We can go back anytime and easily modify our values for this machine.
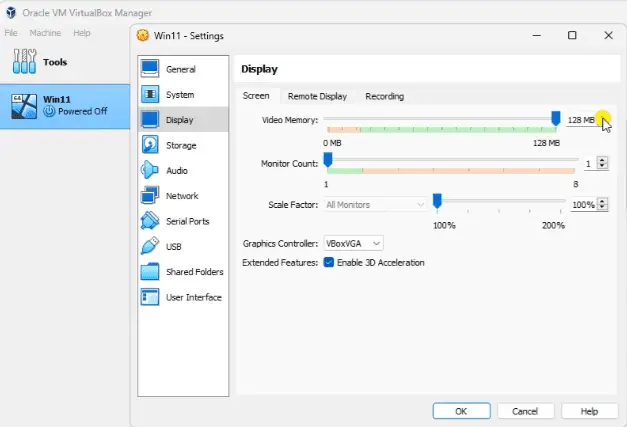
Select Display, change the video memory to 128 MB in the display settings, and enable the 3D acceleration. Select OK.
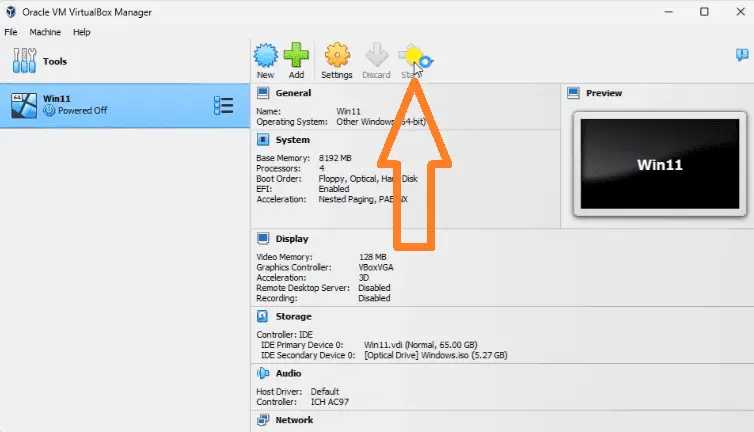
Select the Start icon for the Win11 machine. This will start our new virtual computer.
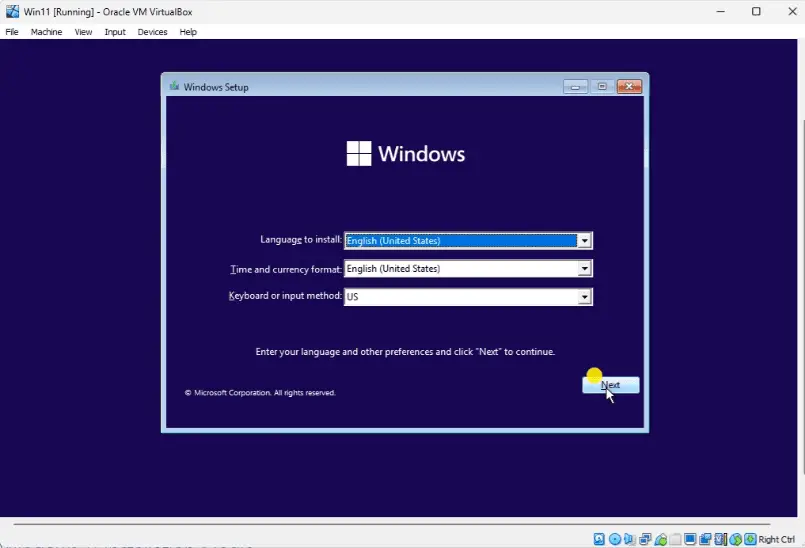
Our Windows Setup screen will be displayed. We will leave everything as their default and select Next.
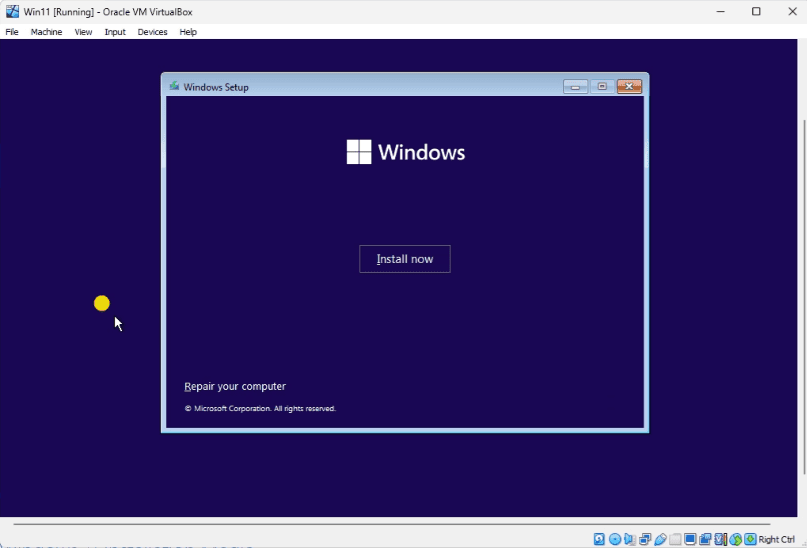
Before we select the Install Now button, we will modify the system registry so that our virtual machine will run without errors.
Press Shift + F10. This will call up a command prompt.
Type Regedit at the command prompt to start the registry editor.
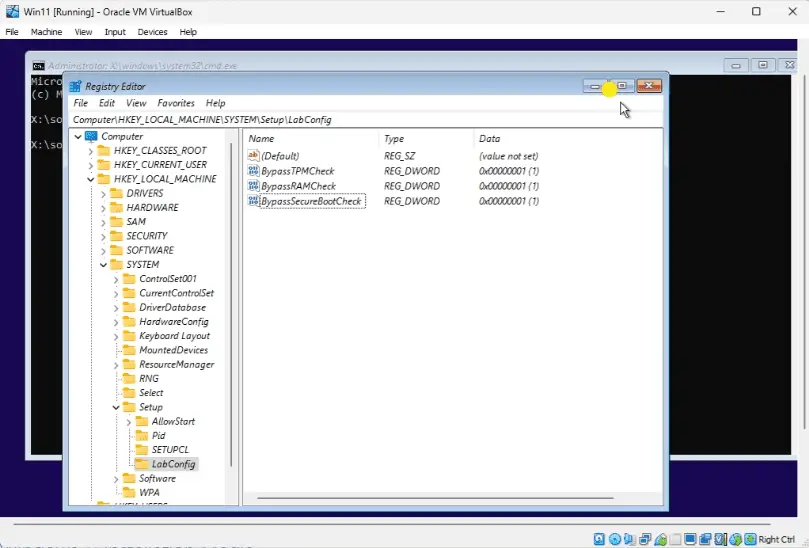
When the Registry Editor opens, navigate to “HKEY_LOCAL_MACHINE\SYSTEM\Setup,” right-click on the “Setup” key, and select “New => Key.”
Name the key “LabConfig” and press enter.
Now right-click on the “LabConfig” key, select “New => DWORD (32-bit)” value, create a value named “BypassTPMCheck,” and set its data to “1“. With the same steps, create the “BypassRAMCheck” and “BypassSecureBootCheck” values and also set their data to “1”.
Close the “Registry Editor,” and then type exit in the “Command Prompt” followed by enter to close the window. You can now click on the “Install now” button to proceed to get “Microsoft Windows 11” installed as a virtual machine on top of VirtualBox.
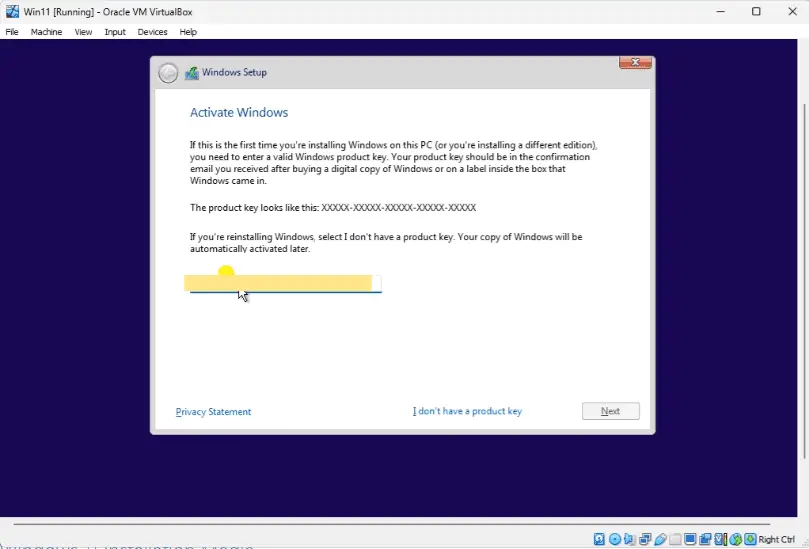
When the Activate Windows is displayed, you must enter the Windows product key that we retrieved previously. Select Next.
The software license terms are next. You must accept and then press Next.
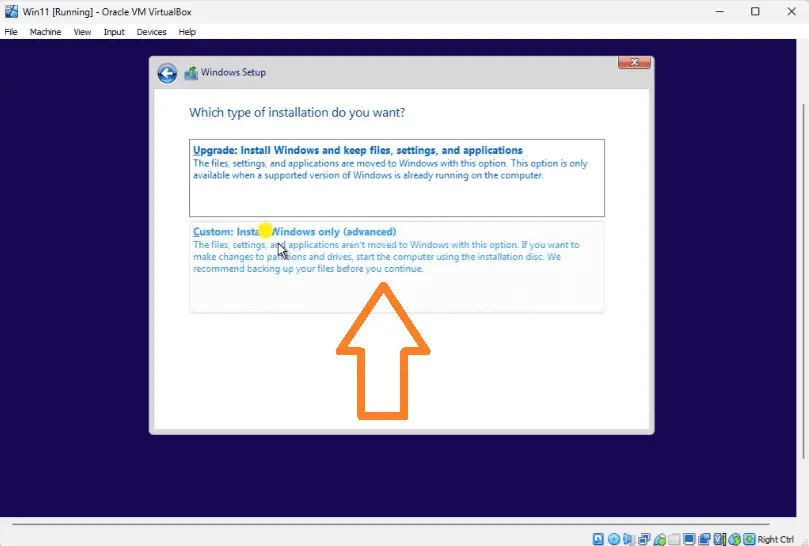
When asked about the type of installation, select Custom: Install Windows only (advanced). Since we have only one disk drive for our virtual machine, select Next.
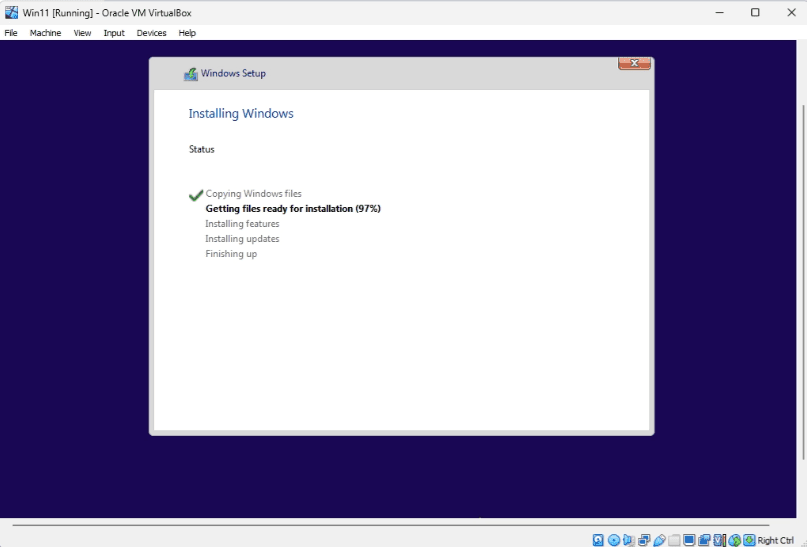
Windows will now start installing. Watch the video below to see all of the different steps of the installation.
You will be asked for our Microsoft sign-in account. Enter your credentials so that you can retrieve your customized settings.
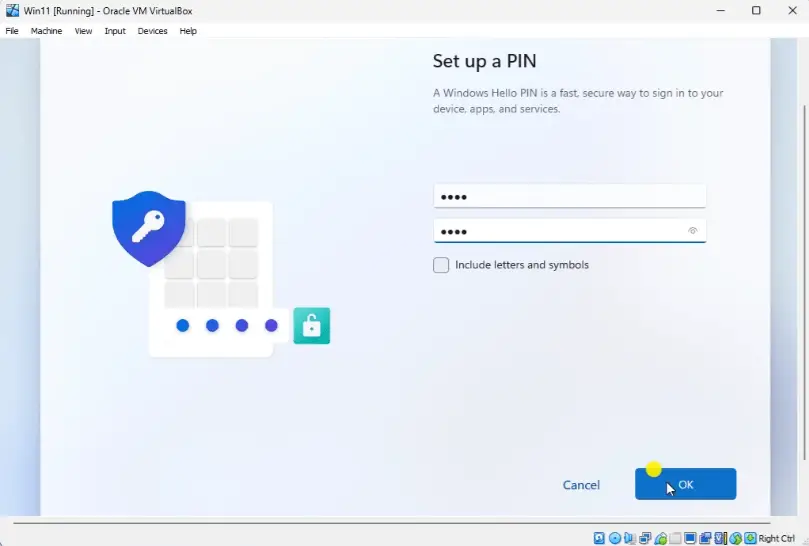
Create a PIN to log onto this virtual machine easily.
All of the privacy settings for this machine will be turned off. Select Next.
We will then be asked a number of questions on our Windows 11 installation for our virtual environment. Once this is complete, our Win11 machine will run inside a window.

Remember that while running, this resource takes resources from the main machine. A pause can be used to pause the application from the main menu under settings. The screen will turn black and white, indicating that it is paused. Select pause again to unpause the virtual environment.
We can shut down this Windows 11 virtual environment in two different ways. The Windows way by selecting Start, and then Power, Shut Down.
You can also use the main menu | Machine | ACPI Shutdown.
To start Win11 in our virtual environment again, you can double-click it in the Oracle VM VirtualBox Manager, or you can select it and then select the Start Icon. Enter your PIN to start the Windows application again. Watch this in the video below.
Obtaining Linux ISO
We will now get a Linux ISO file to install a Linux virtual computer environment on our Windows 11 main machine. The Ubuntu Linux desktop environment can be downloaded at ubunto.com.
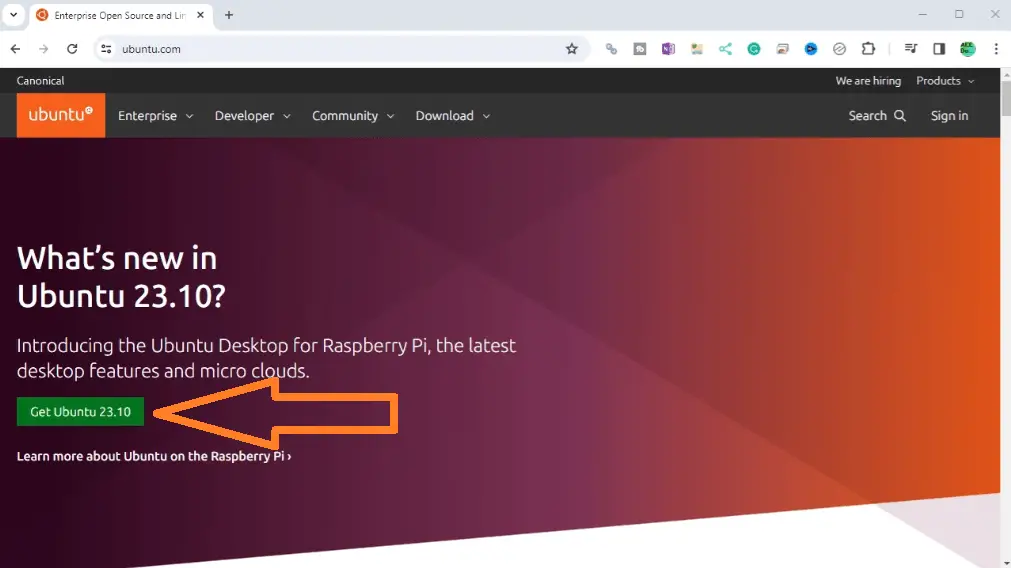
On the main webpage, select Get Ubuntu 23.10.
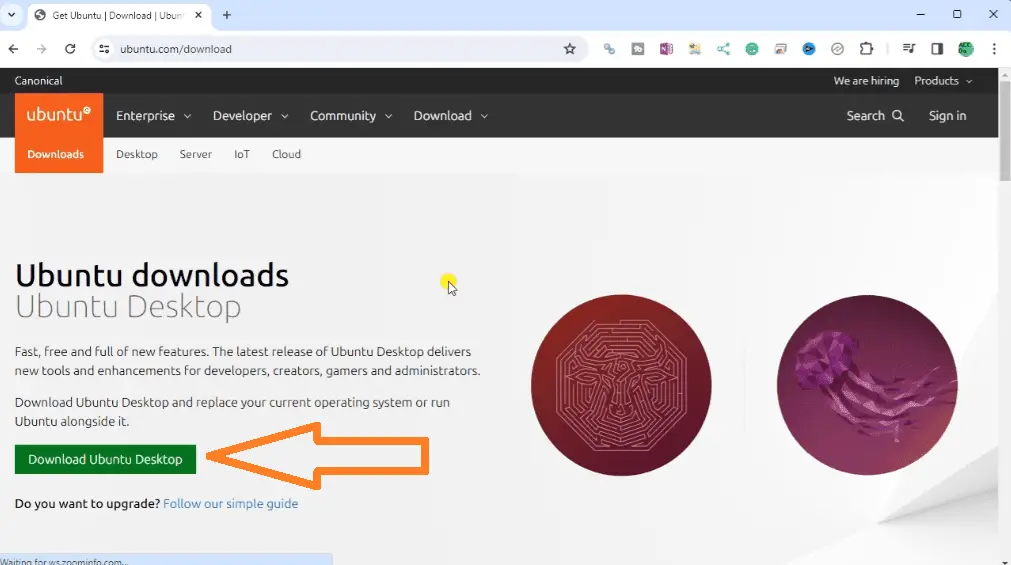
Under the Ubuntu downloads desktop, select Download Ubuntu Desktop. We will select the latest version of Ubuntu.
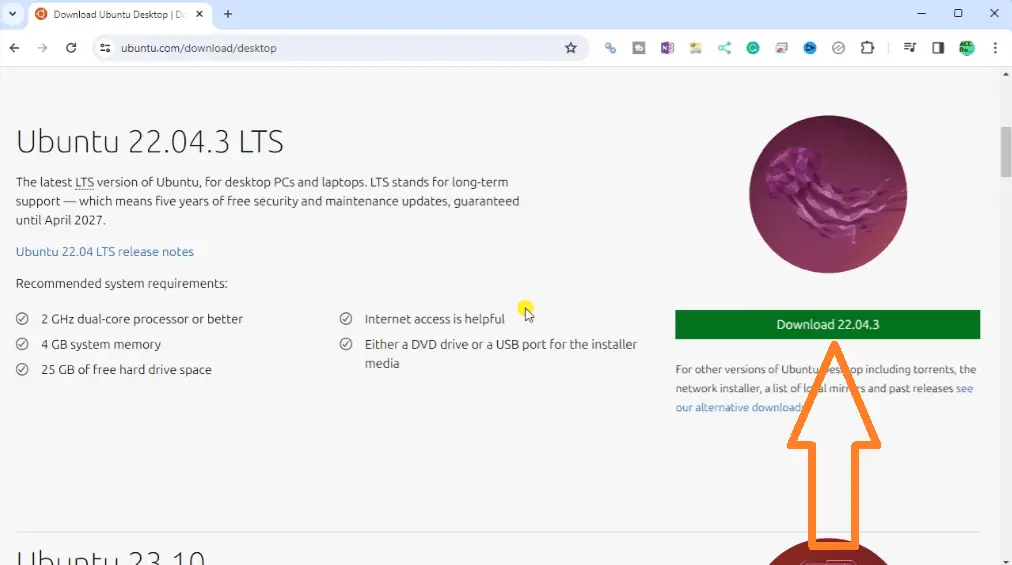
Select Download 22.04.3 to start the download.
Ubuntu is a popular Linux-based operating system that is designed for use on a wide range of computing platforms, from enterprise servers to personal desktops, as well as cloud and IoT (Internet of Things) devices. It is known for being a reliable, secure, and user-friendly operating system suitable for various applications and use cases. As an open-source operating system, Ubuntu is freely available to download, use, and modify, making it a popular choice among developers, IT professionals, and enthusiasts worldwide.
Installing a Virtual Linux Computer
Call up the Oracle VM VirtualBox Manager. We currently have one virtual machine installed: the Windows 11 virtual environment.
Select the New Icon in the tools menu.
The Create Virtual Machine window will be displayed.
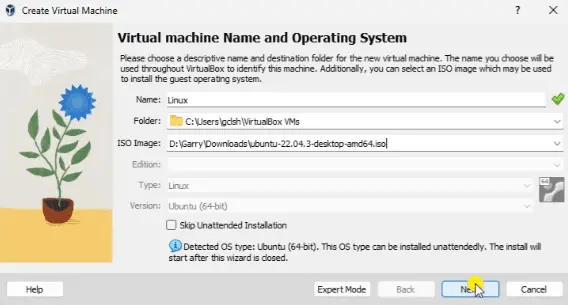
We will name our machine Linux.
Select the ubuntu-22.04.3-desktop-amd64.iso file that we previously downloaded. You will see that the VirtualBox software detects that we are installing a Linux system, and the version is a Ubuntu 64-bit. Select Next.
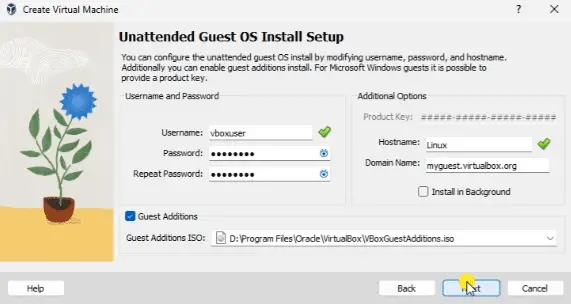
We will keep the Username as the default but change the password to something we can remember. Select Guest Additions. This will enable our Linux virtual machine to run quickly in the environment. Select Next.
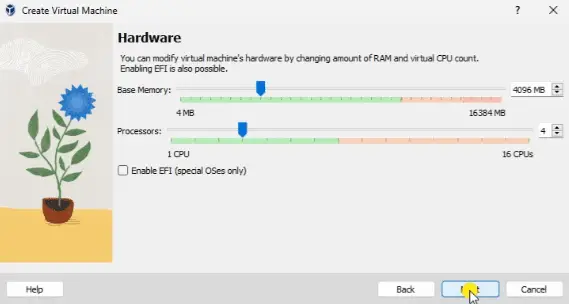
We can now select the hardware specifications for our Linux virtual machine. Select 4096 MB for the base memory and 4 CPUs. Remember that while running, this resource takes resources from the main machine. If we were to run this and the Windows 11 virtual environment simultaneously, we would be close to our host machine limits. This will affect the performance that we will observe. Select Next.

We will leave the virtual hard disk as the default 25 GB. Select Next.
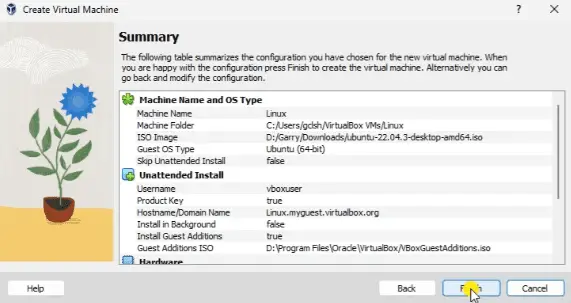
A summary of our Linux virtual environment will be displayed. Select Finish.
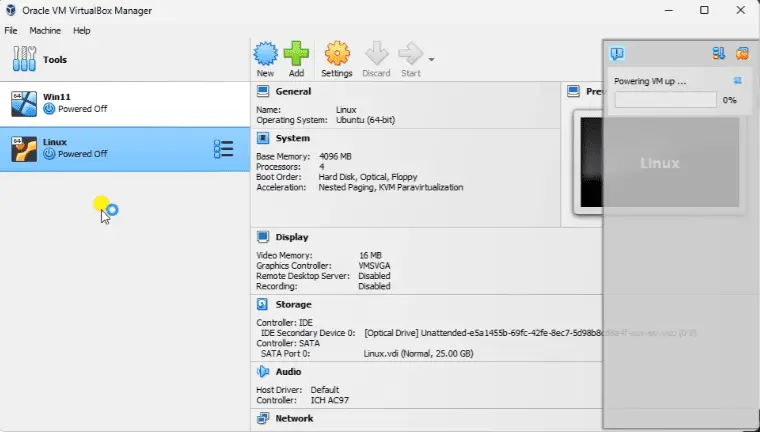
Our Linux machine will now power up.

As our software is being installed, we can see some of the features of this operating system.
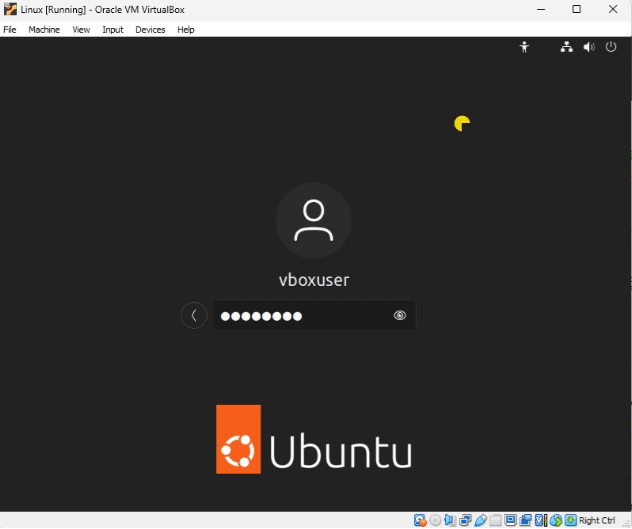
When the installation has finished, enter your password to log into the system. We can always change the environment settings to improve the virtual machine response.
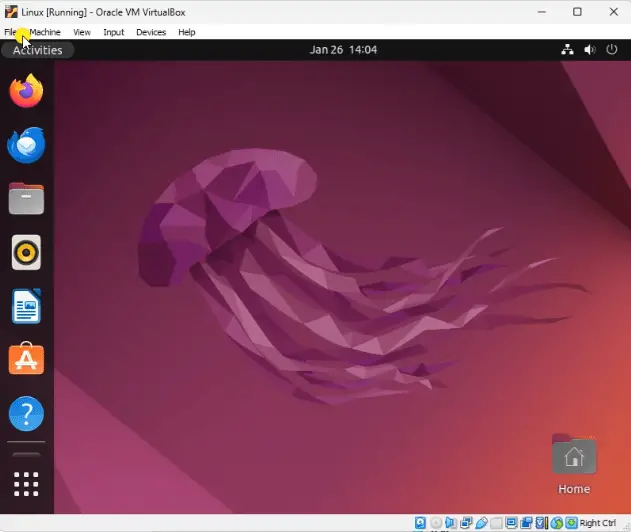
We can start, pause, and stop this Linux virtual machine environment anytime. Watch the video below to see this in operation.
The Oracle VM VirtualBox Manager now has two different operating systems that we can use anytime for our PLC programming. VirtualBox allows us to experiment with different operating systems without interfering with our main machine. This gives us the freedom and confidence to choose our preferred programming environment.
Watch on YouTube: Creating Virtual PLC Programming Environment
PLC Beginner’s Guide to PLC Programming
There are many different PLC manufacturers with other hardware and software. All of the programmable logic controllers have similar basic features. Here is how I would approach learning about basic PLCs.
Once you are familiar with the basics of the PLC, you will then learn specifics for the controller you will be programming.
This is the easiest way to learn about PLC programming.
Here are the controllers that we have covered or are covering at ACC Automation:
Arduino Opta PLC
BRX Do-More Series (Do-More Designer Software + Simulator)
Productivity Series P1000 / P2000
Click PLC Series
Omron CP1H Series
Horner XL4 PLC Series
EasyPLC Software Suite is a complete PLC, HMI, and Machine Simulator Software package. See below to receive 10% off this software. This PLC learning package includes the following:
Easy PLC – PLC Simulation will allow programming in Ladder, Grafcet, Logic Blocks, or Script.
HMI System – Easily create a visual human-machine interface (HMI)
Machine Simulator – A virtual 3D world with real-time graphics and physical properties. PLC programs can be tested using the EasyPLC or through other interfaces. (Modbus RTU, TCP, etc.)
Machine Simulator Lite – Designed to run on Android Devices.
Machine Simulator VR – Virtual Reality comes to life so you can test, train, or practice your PLC programming.
Purchase your copy of this learning package for less than $95 USD for a single computer install or less than $110 USD to allow different computers.
Receive 10% off the investment by typing in ACC in the comment section when you order.
Learn PLC programming the easy way. Invest in yourself today.
Additional examples of PLC program development using the five steps.
Click PLC – Easy Transfer Line Programming – Video
Productivity PLC Simulator – Chain Conveyor MS – Video
Five Steps to PLC Program Development – Die Stamping
PLC Programming Example – Process Mixer
PLC Programming Example – Shift Register (Conveyor Reject)
PLC Programming Example – Paint Spraying
PLC Programming Example – Delay Starting of 7 Motors
PLC Programming Example – Pick and Place
PLC Programming Example – Sorting Station (Shift Register)
PLC Programming Example – Palletizer
If you have any questions or need further information, please contact me.
Thank you,
Garry
If you’re like most of my readers, you’re committed to learning about technology. Numbering systems used in PLCs are not challenging to learn and understand. We will walk through the numbering systems used in PLCs. This includes Bits, Decimals, Hexadecimal, ASCII, and Floating Points.
To get this free article, subscribe to my free email newsletter.
Use the information to inform other people how numbering systems work. Sign up now.

The ‘Robust Data Logging for Free’ eBook is also available as a free download. The link is included when you subscribe to ACC Automation.