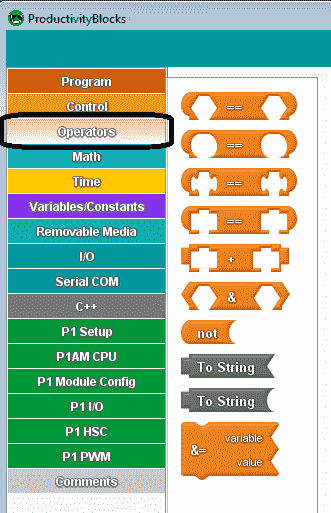
Operators in your Arduino sketches (programs) consist of comparison blocks, concatenate strings, bitwise operators, string conversion, ‘not’ operator, and compound operators. These operations generally will be used with other instructions in your sketch. It is important to understand what instructions are available and what they are designed to accomplish.
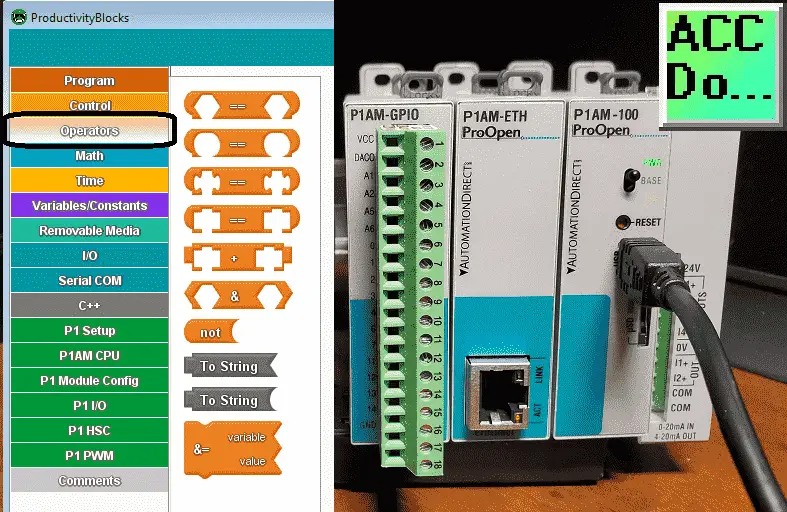
We will be looking at each of these instructions that are available using productivity blocks. A sample sketch will be shown that will use some of these operators. The sketch will get a number between 1 and 100 from the built-in Arduino IDE (integrated development environment) serial monitor. It will print the number on the monitor if it is between 1 and 100, else it will print try again. Let’s get started!
Previous posts in this Productivity Open Arduino Compatible Industrial Controller Series
A full list can be obtained at the following location:
Productivity Open (P1AM-100) Arduino Controller
Productivity Open Arduino Controller Hardware
– Starter Kit Unboxing Video
– Powering Up Video
Installing the Software – Video
First Program – Video
Program Structure – Video
Variables Data Types – Video
Serial Monitor COM – Video
Program Control – Video
Watch the video below to learn about operators on our productivity open industrial Arduino controller.
P1AM Arduino Comparison Blocks
Comparison Blocks return a Boolean value. (True / False)
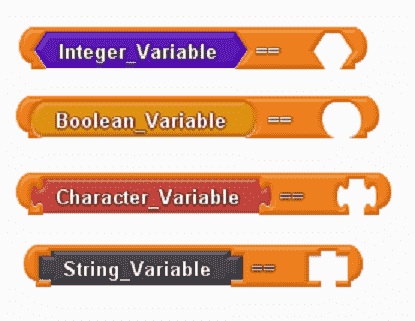
Every comparison block makes a comparison between two values of similar data types. You can tell the comparison type by the shape of the ends of each of the variables. See the picture above. All comparison blocks return a boolean (‘true/false’) value representing the result of the comparison.
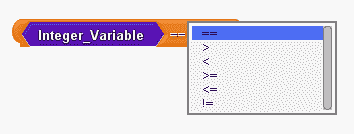
The available comparison operators for a number are the following in the order they appear in the dropdown. (Equal To, Greater Than, Less Than, Greater Than or Equal To, Less Than or Equal To, Not Equal To )

The available comparison operator for a Boolean variable is the following in the order they appear in the dropdown. (Equal To, Not Equal To, Logical And, Logical Or)


The character and string variables can be compared to see if they are equal or not equal to each other.
Each comparison block has a drop-down menu to select what kind of comparison to make (see ‘Comparison Operators’ in the Arduino Reference).
Arduino Concatenate Strings
Concatenate strings means to put two string constants or variable together to form a new string. The result is a new string that contains both input strings ‘glued’ together.

Example:
String Variable 1 = Hello
String Variable 2 = World
String Variable 1 + String Variable 2 = Hello World
Arduino Bitwise Operators
This will perform selected bitwise operations on two numeric values.
Shift the bits of a number left/right or return the bitwise ‘and/or’ between two numeric values.

Bitwise AND
0011 binary = 3 decimal – operand 1
0101 binary = 5 decimal – operand 2
0001 binary = 1 decimal = operand 1 AND operand 2
Bitwise OR
0011 binary = 3 decimal – operand 1
0101 binary = 5 decimal – operand 2
0111 binary = 7 decimal = operand 1 OR operand 2
Shift Left Operation <<
0011 binary = 3 decimal – operand 1
0001 binary = 1 decimal – operand 2
0110 binary = 6 decimal = operand 1 << operand 2
Shift Right Operation >>
0011 binary = 3 decimal – operand 1
0001 binary = 1 decimal – operand 2
0001 binary = 1 decimal = operand 1 >> operand 2
Arduino Not Operator
The not operator will take the opposite of the Boolean value. (True/False High/Low)
‘Not’ returns the opposite Boolean value.

String Conversion Arduino
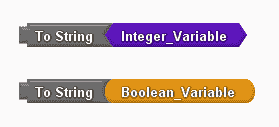
This will create a string from a numeric or a Boolean value.
A string is returned representing the input number or Boolean.
The formatting of the converted string is the default ‘base ten’.
Compound Arduino Operators
Set a variable equal to the result of an operation involving itself and another number.
Place a numeric variable inside the ‘variable’ socket, and another numeric value in the ‘value’ socket. Use the dropdown to select the desired operation.
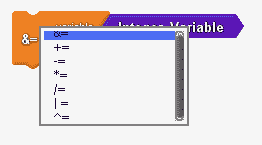
The following are the dropdown selection in the order they appear.
&= Compound Bitwise AND
+= Compound Addition
-= Compound Subtraction
*= Compound Multiplication
/= Compound Divide
|= Compound Bitwise OR
^= Compound Bitwise XOR (one or the other but not both)
0011 binary = 3 decimal – operand 1
0101 binary = 5 decimal – operand 2
0110 binary = 6 decimal = operand 1 XOR operand 2
Watch the video below to see the operators with our productivity open industrial Arduino controller.
Sample P1AM Arduino Program with Operators
This sample sketch will get a number from the Arduino IDE monitor and determine if it is between 1 and 100. If it is then the number will be printed on the monitor. If the number is outside this range then the message ‘Try Again’ will be printed on the monitor.
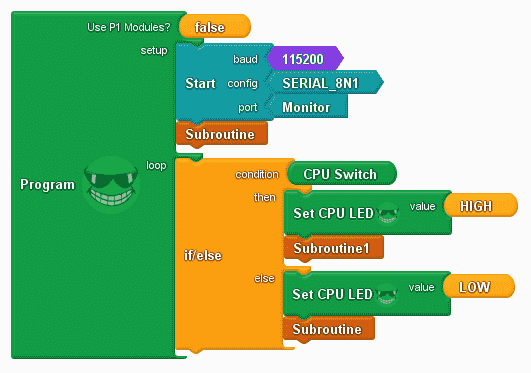
Under the setup section of our program, we will set our serial monitor specifications. We will then call Subroutine to initialize some variables.
Under the loop section of our program, we will check to see if the CPU Switch is on. If it is then we will turn the CPU LED light on. (This is to indicate that our program is running. ) We then call up Subroutine1 which will get and compare the serial input.
If the CPU Switch is off then we will turn off the CPU LED light on our P1AM-100 and then initialize some variables using Subroutine.

The initialize subroutine will set the boolean variable low and the integer variable to 0.
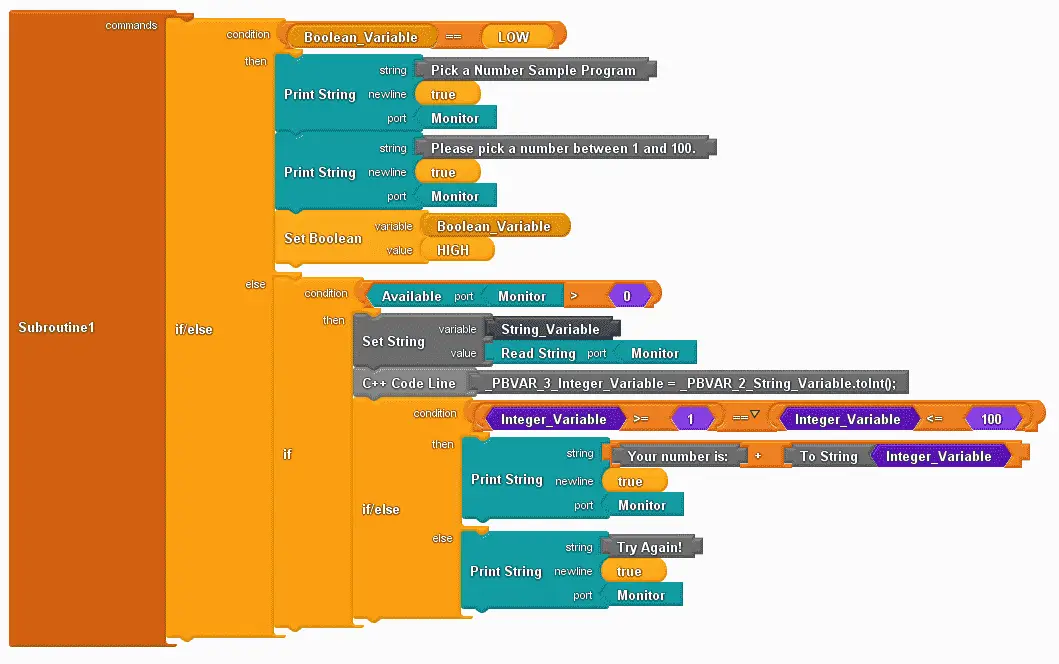
Here is subroutine 1.
If the boolean variable is low then it will print to the serial monitor the following:
Pick a Number Sample Program
Please pick a number between 1 and 100.
The program will then set the boolean variable to high so that the above print to the serial monitor will only happen once.
If the boolean value is high, then compare if the number of bytes on the monitor port is greater than 0.
If they are then we will read the bytes from the monitor port into a string variable. We will then use a C++ code line in productivity blocks to convert the string variable into an integer variable using the toint() instruction.
Note: Code block and lines are available in productivity blocks to use instructions that may not be present in the graphical programming method.
Using a nested operator instruction we compare the integer variable greater than or equal to 1 and less than or equal to 100. If it is then it will print the number. This is done using the operator ‘To String’. If the integer is outside this range then try again is printed.
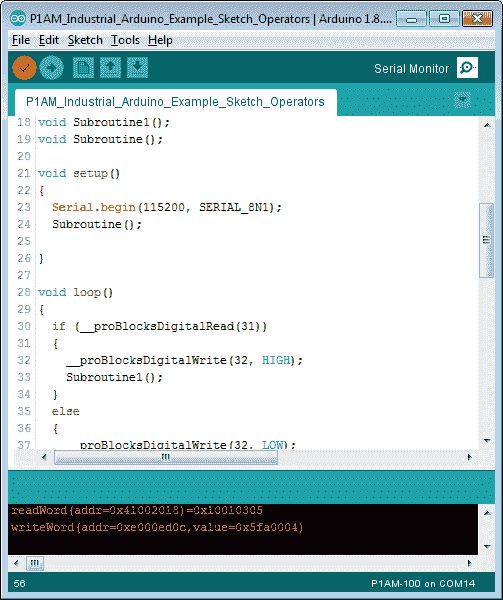
Compile and upload the program (Sketch) to our Industrial Arduino P1AM unit. Select the serial monitor, so we can test our program.
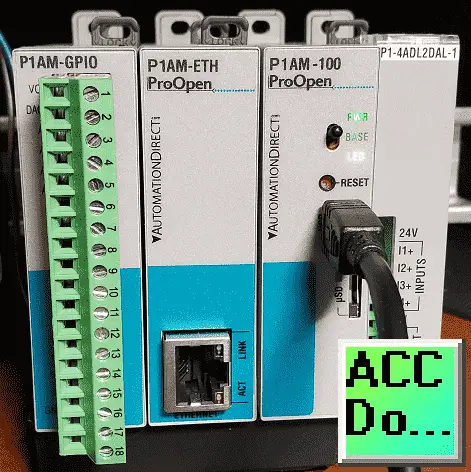
Turn the CPU switch on.

Our message to enter a number will be displayed.
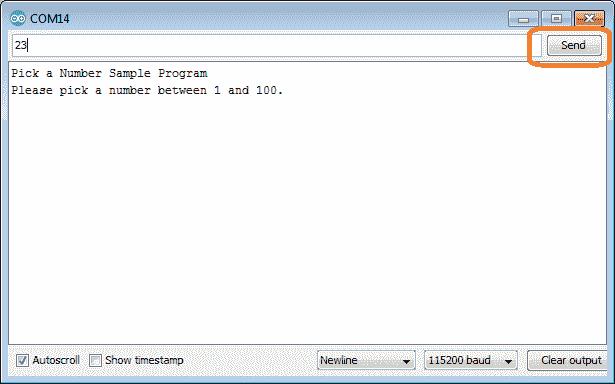
Enter a number (23) and select the send button on the serial monitor.
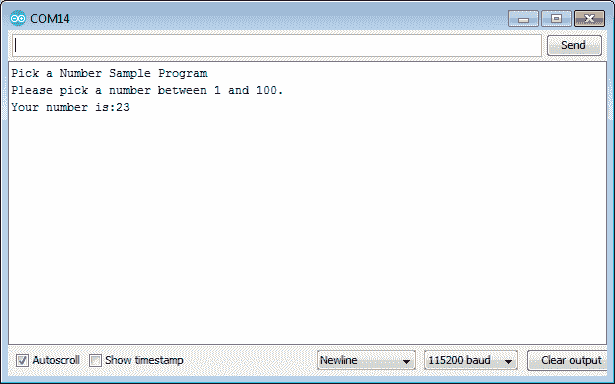
Since our input is a number then the program will display the number.
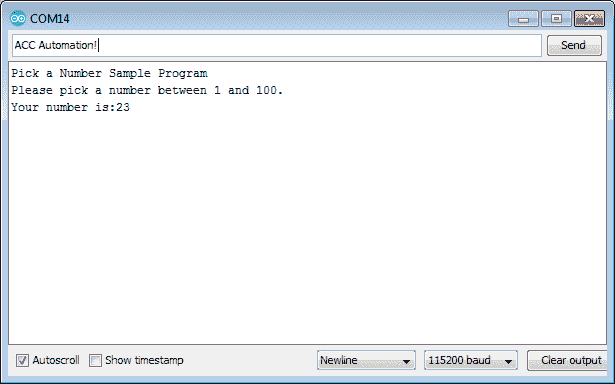
Enter something other than a number, or a number outside of the range 1 to 100. Press send.
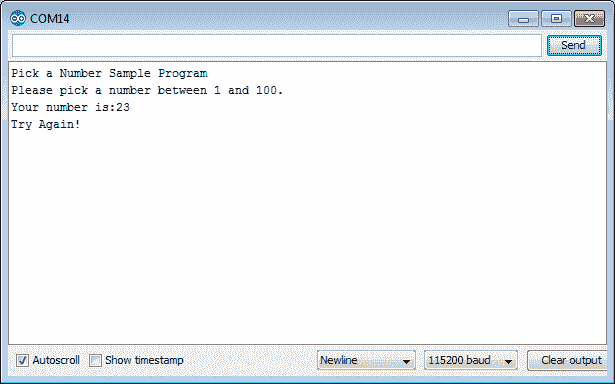
The ‘try again’ message is displayed just as we programmed. Our program is working great.
Download the P1AM-100 sample sketch and Productivity Block program here.
Productivity Open Arduino Compatible Links:
Product Hardware
– Productivity Open (Automation Direct)
– P1AM-100 Specifications
– Productivity Open User Manual
– Configure a Productivity Open Arduino-based Controller
– Open Source Controllers (Arduino-Compatible)
– Productivity Open Documentation (Facts Engineering)
– P1AM Design Files
Software
– Arduino IDE (Integrated Development Environment)
– P1AM-100 library (Easy Interface for controlling P1000 Modules)
– Productivity Blocks (Development Timesaver)
– Productivity Blocks Documentation (Wiki)
Community
– Automation Direct Forum – Open Source Devices
Next time we will look at the input and outputs on the P1AM-100 Arduino Industrial Controller.
Watch on YouTube: Productivity Open P1AM Industrial Arduino Operators
If you have any questions or need further information please contact me. Thank you, Garry
If you’re like most of my readers, you’re committed to learning about technology. Numbering systems used in PLC’s are not difficult to learn and understand. We will walk through the numbering systems used in PLCs. This includes Bits, Decimal, Hexadecimal, ASCII and Floating Point. To get this free article, subscribe to my free email newsletter.

The ‘Robust Data Logging for Free’ eBook is also available as a free download. The link is included when you subscribe to ACC Automation.

