The servomotor, RC (Hobby) Servo is a type of gear motor that can only rotate 180 degrees. It is controlled by sending electrical pulses from our UNO R3 board. These pulses tell the servo what position it should move to.
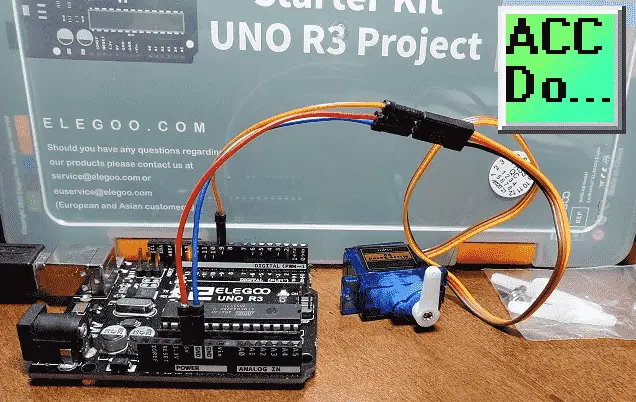
We will be wiring the servo to our Arduino UNO R3 controller on our super starter kit. Let’s get started.
A full list of posts in this series can be obtained at the following location:
Arduino Uno Software Super Starter Kit
Previous posts in this Arduino Uno Super Starter Kit Series:
Hardware and Powering – Video
Software – Video
LEDs – Video
Digital Inputs – Video
Analog Inputs – Video
Buzzers – Video
Tilt Ball Switch – Video
Watch the video below of the operation of the servo with our Arduino Uno Kit. Elegoo Super Starter Kit UNO R3.
RC (hobby) Servo Motors – How they work
Servos have integrated gears and a shaft that can be precisely controlled.

Standard servos allow the shaft to be positioned at various angles, usually between 0 and 180 degrees. Continuous rotation servos allow the rotation of the shaft to be set to various speeds.
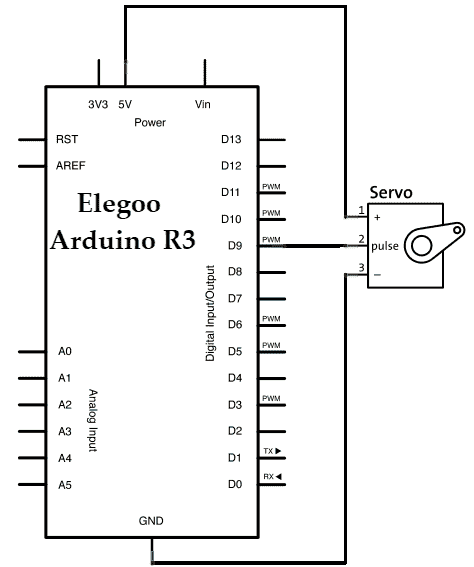
Wiring the Servo to our Arduino UNO
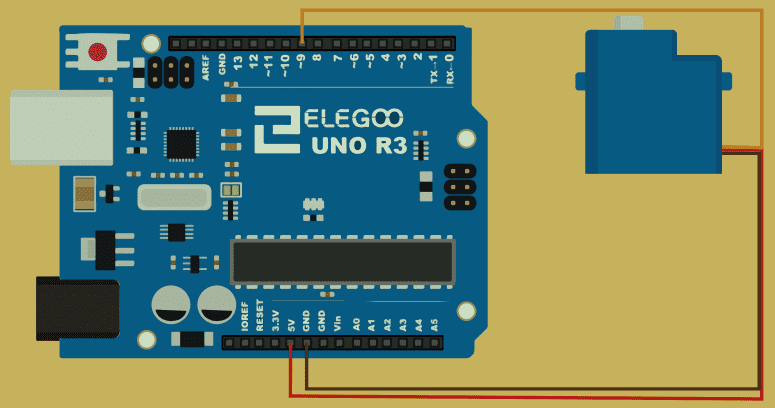
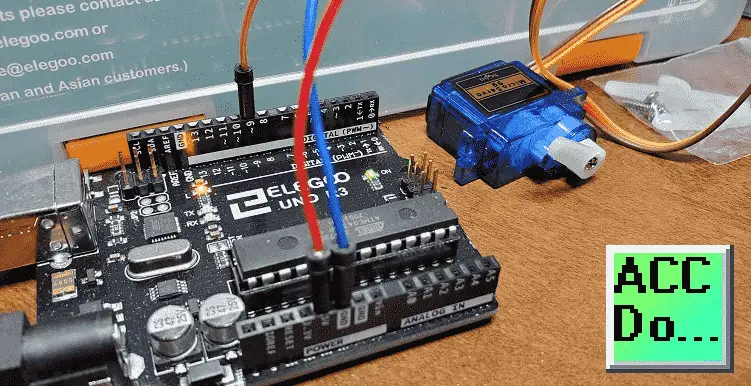
The Servo has three wires, of which the brown one is the ground wire and should be connected to the GND port of UNO, the red one is the power wire and should be connected to the 5v port, and the orange one is the signal wire and should be connected to the digital #9 port.
Arduino UNO Servo Motor Program
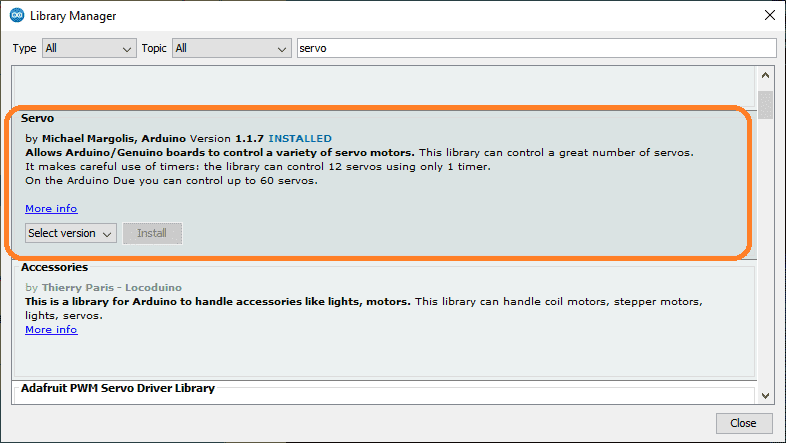
This program will use the Servo library. Please insure that this installed in order for your sketch to work.
This sketch (program) will start the servo at 90 degrees. It will then rotate to 60 and then back to 90 degrees. It will then rotate to 120 degrees and then back to 90 degrees. Each movement will be delayed by 1000 milliseconds (1 second). This movement will happen endlessly.
/*
ACC Automation
https://accautomation.ca/
*/
/*-----( Import needed libraries )-----*/
#include
/* After including the corresponding libraries,
we can use the "class" like "Servo" created by the developer for us.
We can use the functions and variables created in the libraries by creating
objects like the following "myservo" to refer to the members in ".".*/
/*-----( Declare Constants and Pin Numbers )-----*/
/*-----( Declare objects )-----*/
Servo myservo;
//it created an object called myservo.
/* you can see Servo as a complex date type(Including functions and various data types)
and see myservo as variables. */
/*-----( Declare Variables )-----*/
void setup() /****** SETUP: RUNS ONCE ******/
{
/*"attach" and "write" are both functions,
and they are members contained in the complex structure of "Servo".
We can only use them if we create the object "myservo" for the complex structure of "Servo".
*/
myservo.attach(9);//connect pin 9 with the control line(the middle line of Servo)
myservo.write(90);// move servos to center position -> 90°
}
void loop() /****** LOOP: RUNS CONSTANTLY ******/
{
myservo.write(90);// move servos to center position -> 90°
delay(1000);
myservo.write(60);// move servos to center position -> 60°
delay(1000);
myservo.write(90);// move servos to center position -> 90°
delay(1000);
myservo.write(150);// move servos to center position -> 120°
delay(1000);
}
The above Arduino program sketches can be downloaded here.
Watch the video below for the operation of the servo motor on our Arduino Uno Super Starter Kit.
Elegoo Links:
Service
service@elegoo.com (USA and Canada)
EUservice@elegoo.com (Europe)
Arduino Compatible Links:
Product Hardware
Elegoo UNO Project Super Starter Kit
Elegoo Download Page
Amazon.com
Amazon.ca
Software
– Arduino IDE (Integrated Development Environment)
– Productivity Blocks (Development Timesaver)
– Productivity Blocks Documentation (Wiki)
Community
– Arduino Blog
– Arduino Forum
– Arduino UNO Facebook
Next time we will look at the ultrasonic sensor from our Arduino Elegoo super starter kit UNO R3.
Watch on YouTube: Arduino Uno Super Starter Kit Servo
If you have any questions or need further information please contact me.
Thank you,
Garry
If you’re like most of my readers, you’re committed to learning about technology. Numbering systems used in PLCs are not difficult to learn and understand. We will walk through the numbering systems used in PLCs. This includes Bits, Decimal, Hexadecimal, ASCII, and Floating Point. To get this free article, subscribe to my free email newsletter.
Use the information to inform other people how numbering systems work. Sign up now. The ‘Robust Data Logging for Free’ eBook is also available as a free download. The link is included when you subscribe to ACC Automation.

