Programming a PLC (Programmable Logic Controller) can be daunting, especially if you need to become more familiar with the software and hardware. We’ll guide you through installing the XG5000 programming software to program the LS Electric XGB PLC. A mini USB cable will establish communication and set up the Ethernet port on the CPU unit. We will then communicate to the PLC via an Ethernet cable.
Before we begin, let’s take a quick look at what a PLC is and why it’s essential. A PLC is a digital computer used to automate electromechanical processes, such as controlling machinery on factory assembly lines, amusement rides, or light fixtures. It is designed to withstand harsh industrial environments and provide reliable equipment control. In short, it’s the brain of your industrial automation system.
Installing the XG5000 programming software is the first step toward programming your LS Electric XGB PLC. Here’s how you can do it.
Previously in this LS Electric XGB series, we have done the following:
Transform Automation with LS XGB PLC: The Solution
– Unboxing and Powering Video
See the list of references for the XGB PLC, including the frequently asked questions (FAQ) at the end of this post.
Step 1: Check System Requirements
Before you start the installation process, ensure your computer meets the system requirements for the XG5000 programming software. The software is compatible with the following versions of Windows operating systems.
XG5000 Programming Software Supported Operating Systems:
Windows 11
Windows 10
Windows 8.1 – 32 and 64-bit systems
Windows 8 – 32 and 64-bit systems
Windows 7 – 32 and 64-bit systems
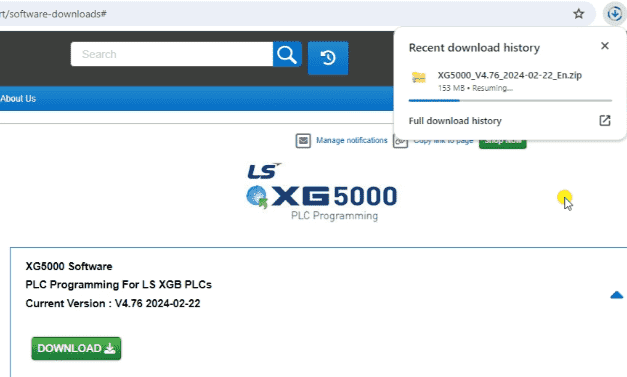
Step 2: Download the Software
You can download the XG5000 programming software from the manufacturer’s website or a trusted software download site like Automation Direct. The XG5000 version 4.76 is the latest IEC (International Electrotechnical Commission) programming software. This will download a zip file to your computer.
This free programming software is an advanced tool for configuring and programming LS PLCs. This highly developed software has been fine-tuned over the years to provide a wealth of features and capabilities, including:
- Program segmentation with different Scan programs and various Task programs
- Numerous data types, including IEC standard data types (64-bit available) and 3-dimensional arrays
- Handy two-dimensional trend graph (X-Y plotter)
- Easy edits of global and local variables using MS Excel or View Variable, View Device, View Flag, and Auto-fill options in software
- Convenient program edits with unlimited Undo/Redo functions, block edits in cell units, an enhanced Find/Replace function, program execution controls, and more
- Various monitoring functions are available, such as variable, device, system, trend, and special module monitoring.
- Various message windows to edit and inspect the program easily
- Custom events that allow actions to take place once user-defined conditions are met for a specific device
- Editing, monitoring, or managing multiple interlocked PLCs included in the same project at the same time
- Online editing capabilities
- Plus, there are many more features
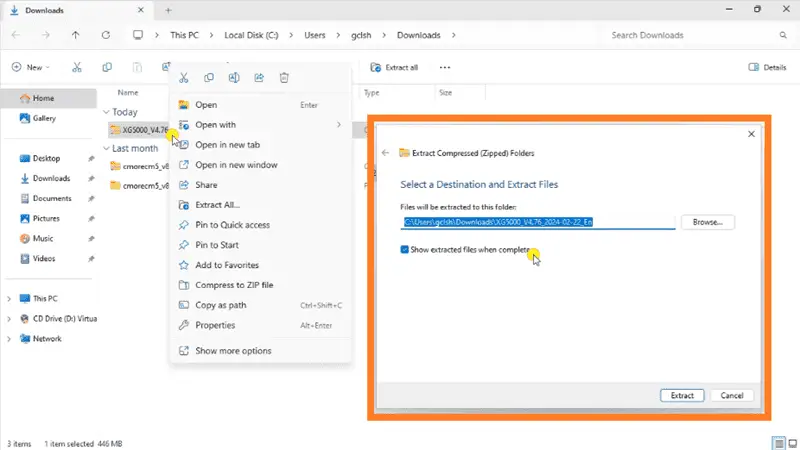
Once this 447MB zip file has been downloaded, right-click on the zipped file “XG5000_V4.76_2024_02_22_En” and select “Extract All…”.
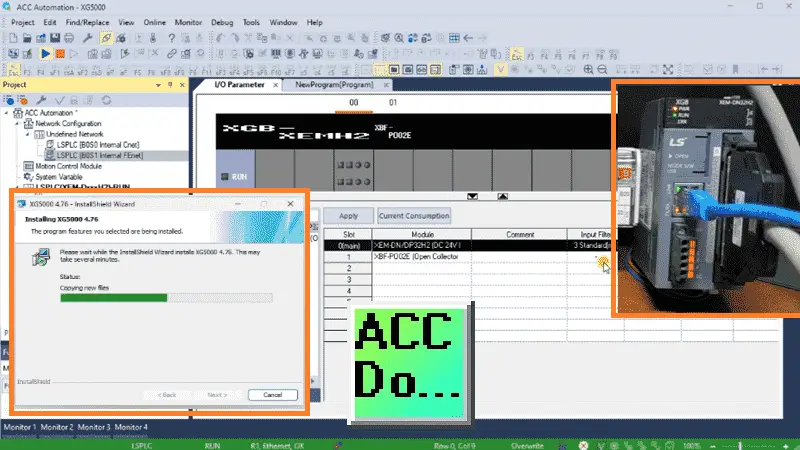
Step 3: Installing the XG5000 Software
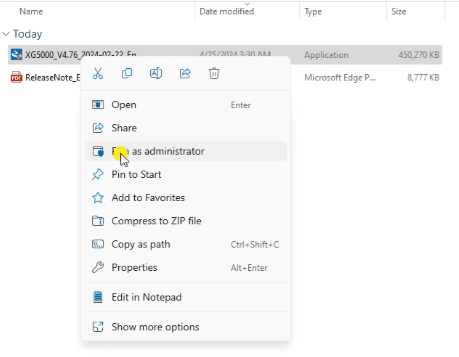
Once you have downloaded the software and extracted the files, right-click on the “XG5000_V4.76_2024_02_22_En.exe” executable file and click “Run as Administrator.”
You must allow the software to change your computer to continue the installation. Follow the on-screen instructions to install it. You will be prompted to select other necessary software, installation directory, and other options during installation. This is customized to your computer. Make sure you read and understand each step before proceeding. An icon will be placed on your computer desktop for easy access to start the XG5000 programming software.
Watch the video below to see the installation of the software.
Step 4: Launch the Programming Software
Once the XG5000 programming software has been installed on your computer, you can launch it by double-clicking the icon on the desktop or searching for the XG5000 application from your start menu.

Step 5: Connect Your PLC to Your Computer
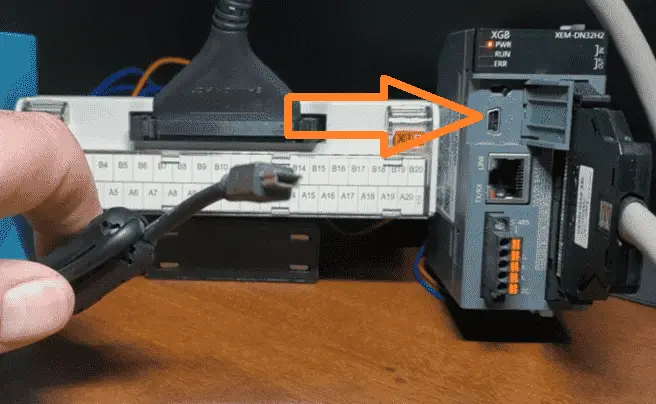
To program your LS Electric XGB PLC, connect it to your computer using a mini USB serial communication cable, which you must purchase separately.
Once connected, open the computer’s device manager. A quick way to do this is to press the Windows key + X and select Device Manager from the menu.
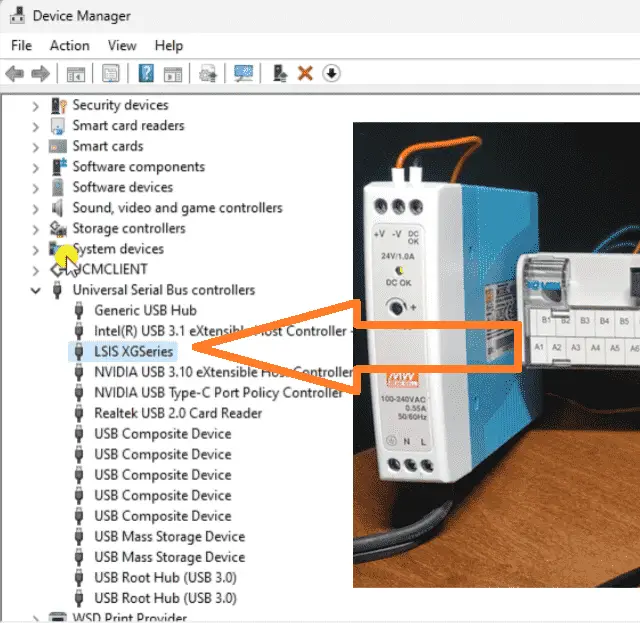
The LSIS XGSeries driver is under the universal serial bus controller selection. This ensures that the communication drivers have been installed correctly.
Start a new project by selecting the icon on the XG5000 programming software’s main menu. You can also call up this option by selecting “New Project” under the project selection on the main menu or using the shortcut CTRL + N.
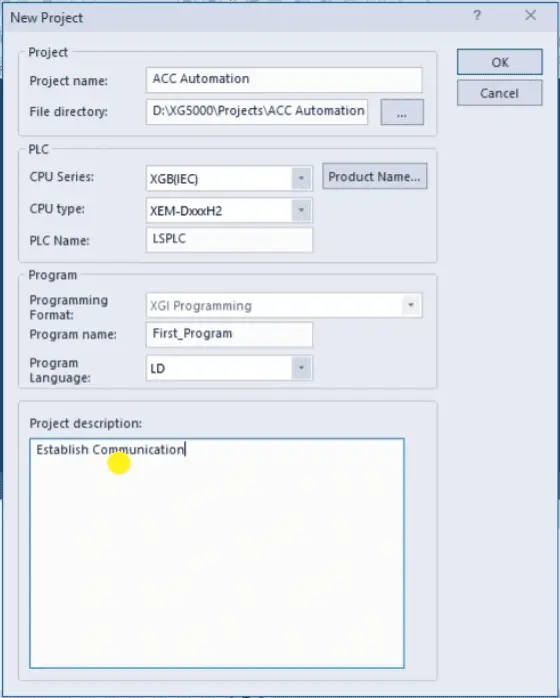
The new project window will now be displayed. We will leave the default directory and call the project “ACC Automation”. Under the PLC heading, we will select the XGB (IEC) for the CPU series, XEM-DxxxH2 for the CPU type, and leave the PLC name as the default. We will change the program name to “First_Program”. You will see that we cannot use spaces or special characters for the program name. Leave the language as the default “LD” ladder, and we can add a comment for this project. Select OK.
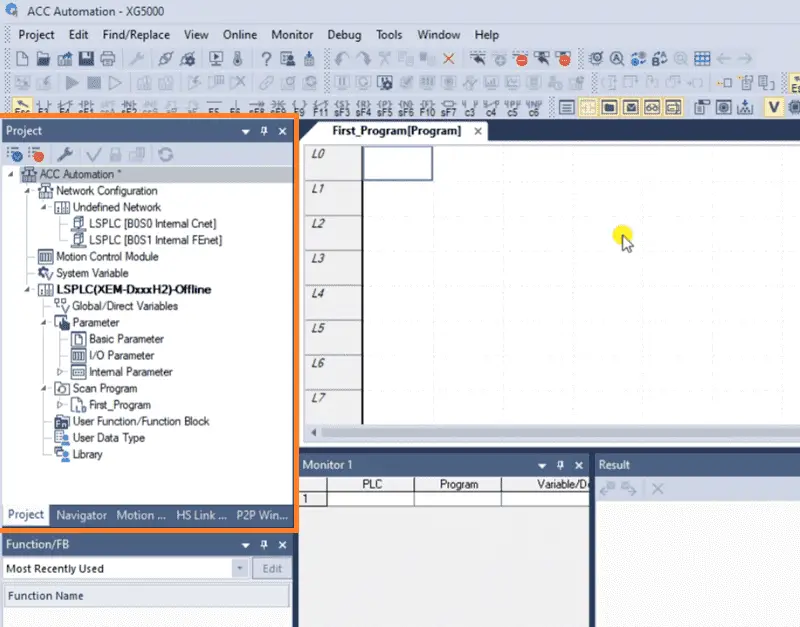
The project navigation window in the software will show you all of the different parameters of the project.
Select connection settings under the online option on the main menu. Change the connection type to USB.
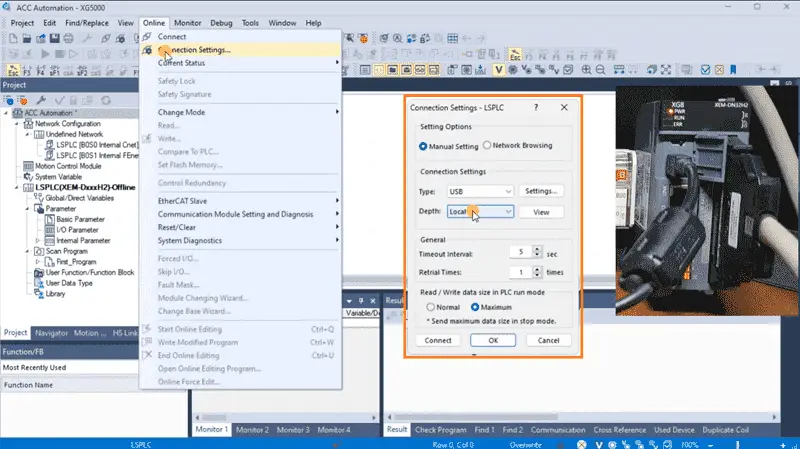
If you are unsure about the connection to the PLC, you can use network browsing. Once we select the connect option, the bottom of the XG5000 programming software will turn different colors.
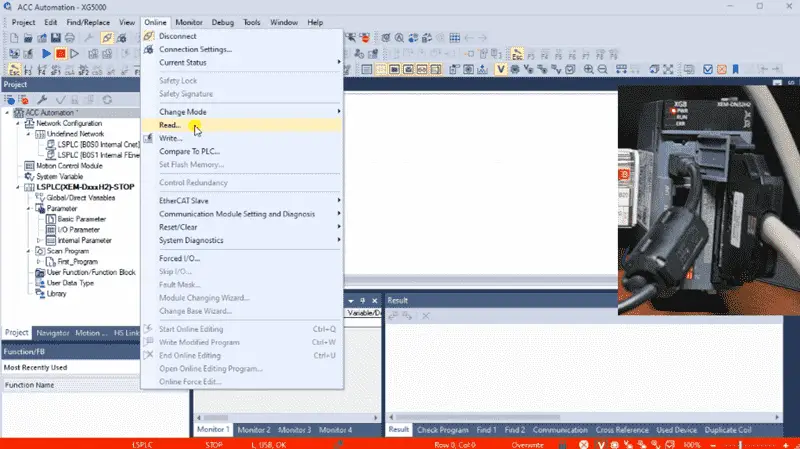
The red means that we are connected, and the PLC is stopped. Once connected, select Online| Read from the main menu. This will run the IO synchronization so that the XG5000 and XGB PLC are the same.
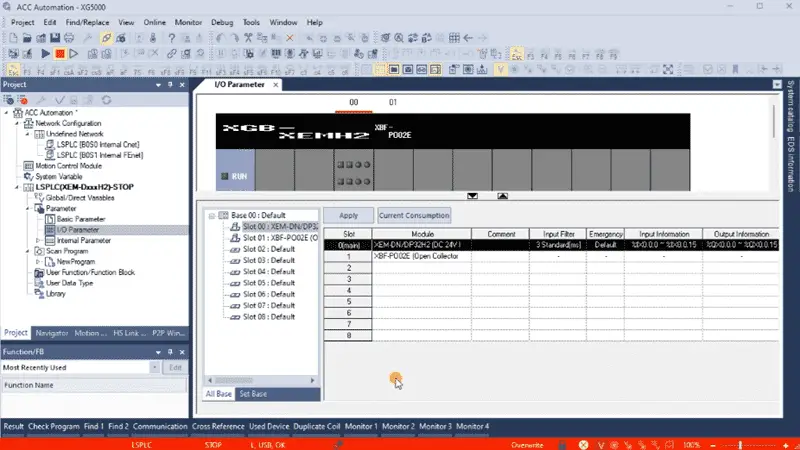
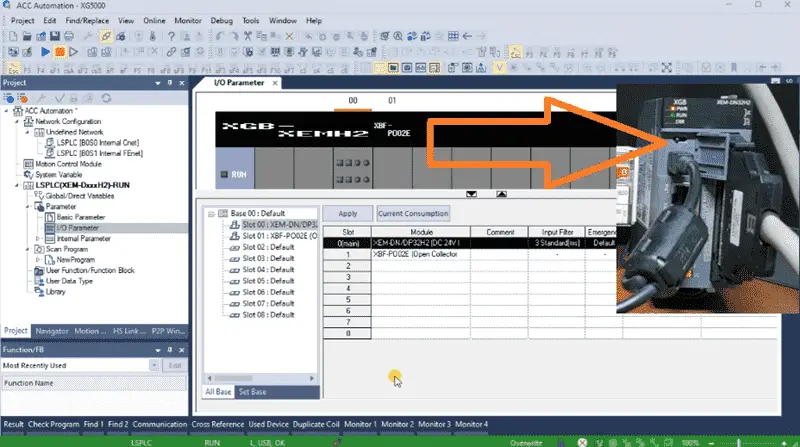
We can now select the IO Parameters in the project window. This will show us the physical inputs and outputs on the XGB PLC CPU and their addresses. Inputs are %IX0.0.0 to %IX0.0.15, and outputs are %QX0.0.0 to %QX0.0.15. This makes up our 32 IO on the XGB CPU.
Turning on the XGB PLC switch will cause the mode to run. The green at the bottom of the screen on the XG5000 software indicates that the PLC is running (Executing its program). Our existing program has just an END statement. This is the default program in the XGB PLC.
Select FEnet settings in the project window under network configuration. This will display the Standard Settings – FEnet window, the built-in Ethernet port on our XGB PLC CPU.
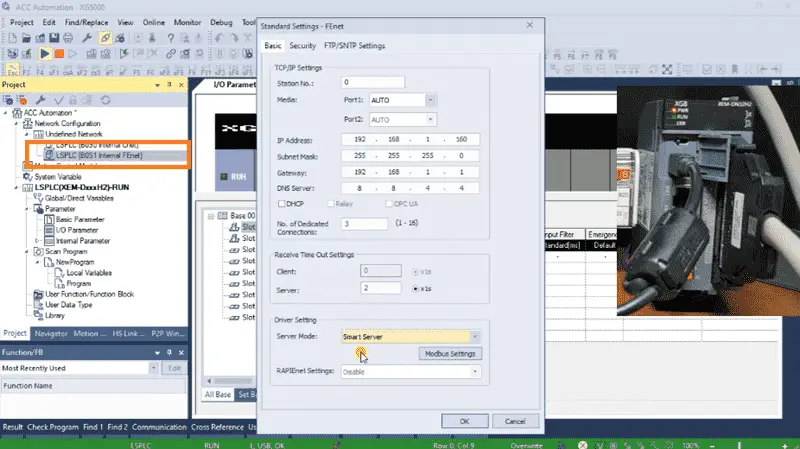
Set the IP addresses for the network that we will connect to. We will include the DNS server settings. We will set the server mode to “Smart Server.” This will do both the programming software and Modbus TCP. Select OK.
Save the project.
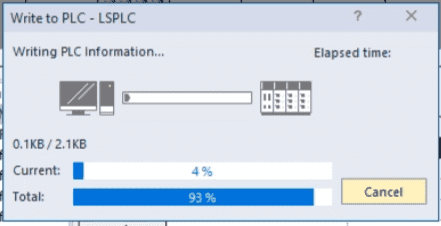
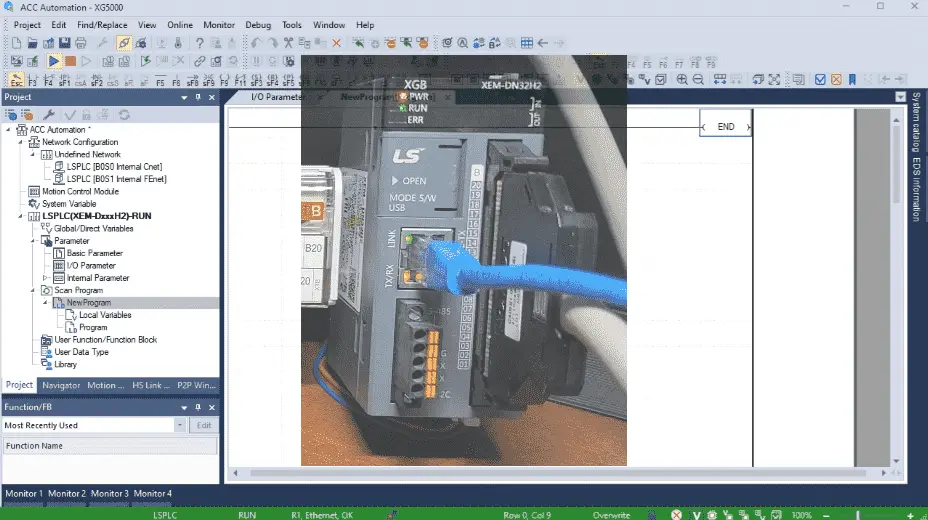
Select online write to set the parameters for our Ethernet port. The CPU switch must be in program mode for these new settings to be written (downloaded) to the PLC. Plug the Ethernet cable into the CPU unit. Select Ethernet as the new connection settings. Enter the IP settings that we set for the PLC. If this does not work, use the network browsing and find the IP setting for the PLC.
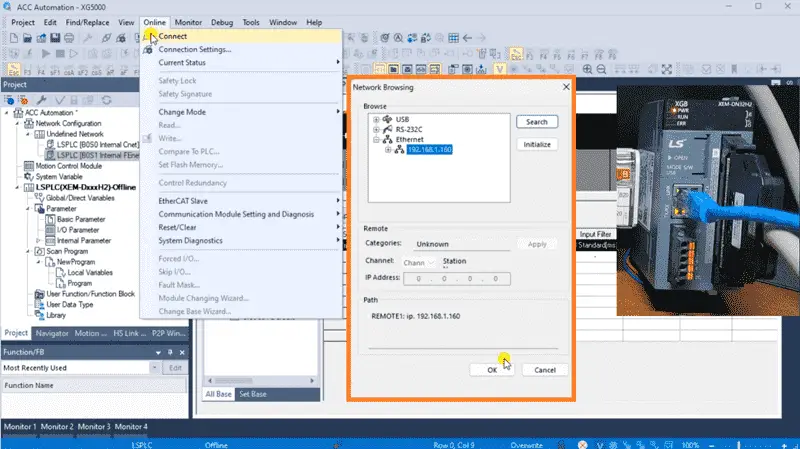
Select connect. Change the CPU selector to run.
Step 6: Start Programming
You can start programming your industrial automation system with the software installed and the PLC connected. The programming software includes a user-friendly interface with drag-and-drop tools for creating ladder logic diagrams and other IEC program languages. There are also other software packages installed with the XG5000 program. We will be exploring these at a later time.
Programming an LS Electric XGB PLC requires installing the programming software. Following the steps outlined in this blog post, you can successfully install the XG5000 programming software and start programming your XGB PLC. Always read the documentation and follow the manufacturer’s instructions to safely and efficiently use your industrial automation system.
Watch on YouTube: Install & Com w/ XG5000 PLC: Guide for Beginners
LS XGB PLC Additional Information:
LS XGB PLC – Series
– FAQ – Frequently Asked Questions
Product Cut Sheet (XEM-DN32H2 Unit Specifications)
LS PLC Technical Specifications
Manuals:
Interactive Guide
LS PLC User Manual
Other Documents:
PLC Installation Guide
Product Brochure
PLC Statement of Direction
Software and Support:
XG5000 / XG-PM PLC Programming Software
XEM PLC Firmware
Quick Start Procedures
XEM Pulse Servo Wiring Diagrams
Example Applications Directory
If you have any questions or need further information, please get in touch with me.
Thank you,
Garry
If you’re like most of my readers, you’re committed to learning about technology. Numbering systems used in PLCs are not challenging to know and understand. We will walk through the numbering systems used in PLCs. This includes Bits, Decimals, Hexadecimal, ASCII, and Floating Points.
To get this free article, subscribe to my free email newsletter.
Use the information to inform other people how numbering systems work. Sign up now.

The ‘Robust Data Logging for Free’ eBook is also available for free download. The link is included when you subscribe to ACC Automation.