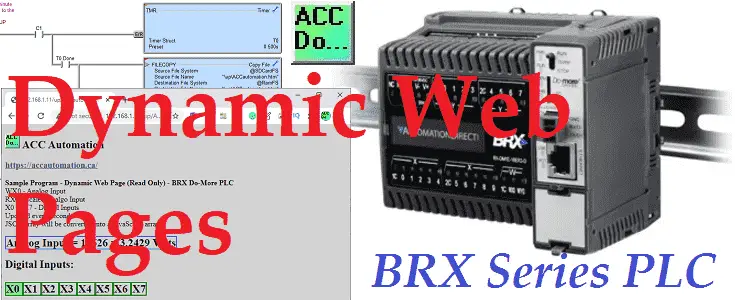
We will now look at creating BRX Do-More dynamic web pages on our PLC web server. These pages are great for operator information display. A dynamic web page is a web page that displays different content each time it’s viewed. For example, the page may change with the time of day, the user that accesses the web-page, or the type of user interaction. There are two types of dynamic web pages.
Client-Side Scripting – Web pages that change in response to an action within that web page, such as a mouse, keyboard action, or timer, use client-side scripting. Scripting languages such as JavaScript will allow this updated content to your users.
Server Side Scripting – Web pages that change when a web page is loaded or visited use server-side scripting. Login pages, forums, and shopping carts are examples of server-side scripting. PHP, ASP, Perl, and ASP.Net, are some of the languages that can be used.
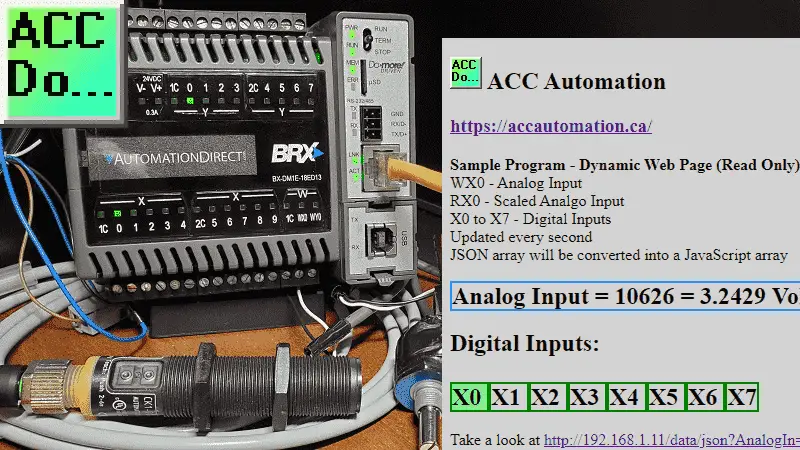
Previously we enabling the HTTP web server, set the whitelist, and reviewed the website on our BRX Do-More PLC. We will be using JavaScript in our HTML web page to create dynamic content for our BRX Do-More PLC. These pages will be stored on the SD memory card and transferred to the RAM memory upon powering up our BRX Do-More PLC. Let’s get started.
Previously in this BRX series PLC, we have discussed:
System Hardware – Video
Unboxing – Video
Installing the Software – Video
Establishing Communication – Video
Firmware Update – Video
Numbering Systems and Addressing – Video
First Program – Video
Monitoring and Testing the Program – Video
Online Editing and Debug Mode – Video
Timers – Video
Counters – Video
High-Speed IO – Video
Compare Instructions – Video
Math Instructions – Video
Program Control – Video
Shifting Instructions – Video
Drum Instruction – Video
Serial Communication – Modbus RTU to Solo Process Temperature Controller – Video
Data Logging – Video
Email – Text SMS Messaging Gmail – Video
Secure Email Communication Video
AdvancedHMI Communication – Modbus TCP – Video
Analog IO – System Configuration – Video
HTTP JSON Instructions – Video
Analog Dusk to Dawn Program – Video
INC DEC 512 Registers for DMX512 – Video
PID with PWM Output – Video
PID Ramp Soak Profile – Video
Do-More Simulator MQTT Publish / Subscribe – Video
BRX Do-More PLC MQTT Communications – Video
Stride Field Remote IO Modules Modbus TCP Ethernet
– Unboxing SIO MB12CDR and SIO MB04ADS Video
– Powering and Configuring Video
BRX Do-More PLC to Stride Field IO Modbus TCP – Video
BRX Do-More PLC Ethernet Remote IO Controller BX-DMIO
– Unboxing BX-DMIO Video
– Configuration and Programming Video
Modbus RTU TCP Remote IO Controller BX-MBIO
– Hardware Video
– Powering and Configuring Video
BRX Do-More PLC to Modbus Remote IO Controller BX-MBIO – Video
Modbus ASCII Protocol – Video
Peerlink Ethernet Communication – Video
HTTP Web Server – Video
Our entire BRX D0-More series can be found here.
The programming software and manuals can be downloaded from the Automation Direct website free of charge.
Watch the video below to see how to create, transfer, and view dynamic web pages on our BRX Do-More PLC.
BRX Do-More PLC HTTP Web Server
Our previous post enabled our HTTP web server, Whitelist, and static IP for our website. This must be done prior to creating our dynamic web page on our BRX Do-More PLC.
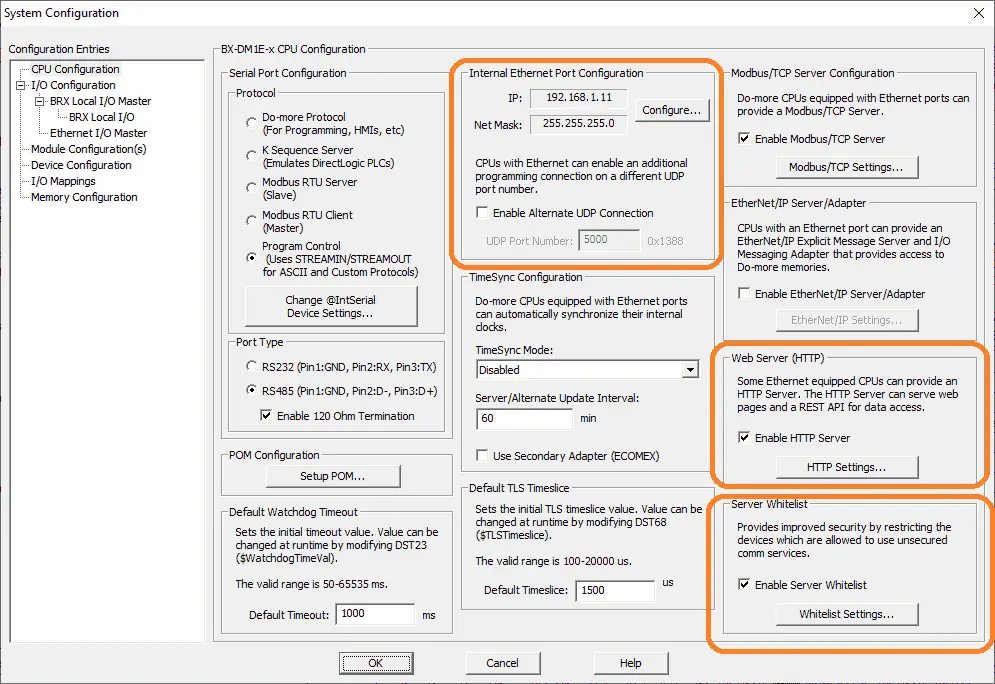
In order to run our dynamic web page on our BRX Do-More PLC, we will need to download and install version 2.8 or newer of the Do-More Designer Software.
You can download the latest version of Do-More Designer here.
Do-More Rest API
Ethernet-equipped BRX CPUs contain an HTTP-based RESTful API (REpresentational State Transfer, Application Programming Interface) that will return the contents of PLC memory locations in JSON formatted records. The REST API is accessed by a web browser using a URL with the appropriate parameters.
Additional information on the BRX Do-More Rest API can be found in the following video. The help menu on the Do-More Designer software will also explain the Rest API in the PLC.
In our example we will be using the following URL parameters:
http:///data/json?AnalogIn=WX0,8 &ScaleAnalogIn=RX0,8 &DigitalIn=X0,8
AnalogIn=WX0,8 – This will return eight addresses starting at the BRX Do-More PLC WX0. AnalogIn will be the variable to store the information.
ScaleAnalogIn=RX0,8 – ScaleAnalogIn will be the variable to store eight registers starting at the BRX Do-More PLC RX0. This was the scaling area we used in the previous post for our analog signal.
DigitalIn=X0,8 – The variable DigitalIn will contain the status of the eight discrete inputs on our Do-More PLC starting at X0.
Here is an example of the Rest API information received from the above URL.
{
"AnalogIn":[34,0,0,0,0,0,0,0],
"ScaleAnalogIn":[0.0109867,0,0,0,0,0,0,0],
"DigitalIn":[1,0,0,0,0,0,0,0]
}
The data returned is in a JSON array. You can see the three variable names and then the corresponding data called. This will be converted into a JavaScript array for our dynamic web page.
Creating the BRX Do-more Web Page
Website pages can be created using any text editor. In our example, we will be using a windows notepad. Use the extension .htm to save your file. This specifies that we have an HTTP file.
W3School is a great resource to help you develop your web page.
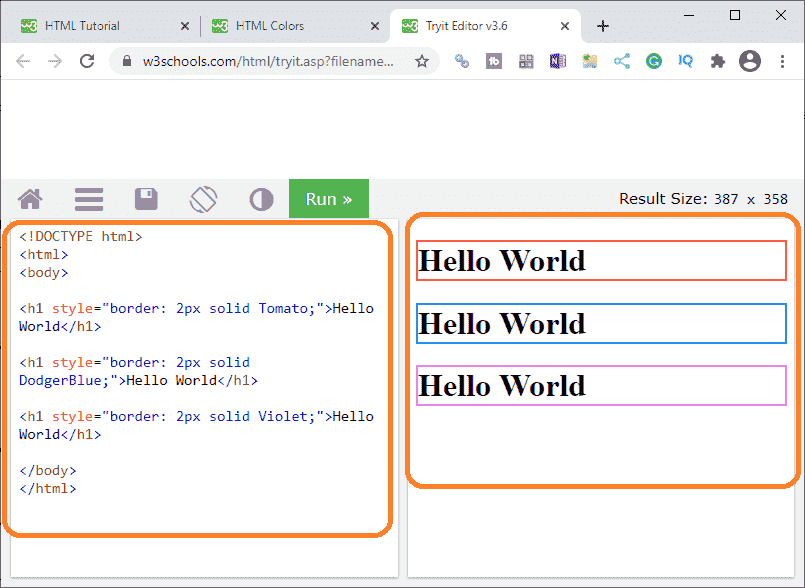
There is an online editor that you can develop your code. Then use windows, copy and paste to create your web page in notepad.
Creating the Dynamic Web Page
Let’s break down the HTML and JavaScript code for our BRX Do-More dynamic web page.
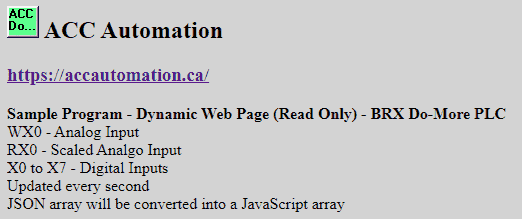
An image with a hyperlink will be displayed on our dynamic web page.
<!DOCTYPE html>
<html>
<body style="background-color:lightgray;">
<h2>
<img src="ACC_Do_1.jpg" alt="ACC_Automation" width="32" height="32">
ACC Automation</h2>
<h3><a href="https://accautomation.ca/" target="_blank">https://accautomation.ca/</a></h3>
<p><b>Sample Program - Dynamic Web Page (Read Only) - BRX Do-More PLC </b><br>
   WX0 - Analog Input <br>
   RX0 - Scaled Analgo Input <br>
   X0 to X7 - Digital Inputs <br>
   Updated every 0.2 seconds (200 milliseconds) <br>
   JSON array will be converted into a JavaScript array</p>
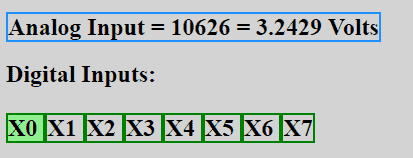
A paragraph is made with the ID of “AccA”. This is where we will be placing the information from the Rest API using JavaScript.
A variable called myArr is created for the JSON parse information from the Rest API information.
We loop through the digital inputs of our JSON array (myArr) and create the information that will be displayed. Each input will have a box around it and highlight when the input is on, and turn off the highlight when the input is off.
Writing to the document (AccA) we write the analog input and scaled analog input. We then write digital information.
<p id="AccA"></p>
<script>
var xmlhttp = new XMLHttpRequest();
xmlhttp.overrideMimeType("application/json");
xmlhttp.onreadystatechange = function() {
  if (this.readyState == 4 && this.status == 200) {
    var myArr = JSON.parse(this.responseText);
    var StatusDigital = "";
    var i;
    for (i = 0; i < myArr.DigitalIn.length; i++) {
if (myArr.DigitalIn[i] == 1) {
StatusDigital += "<span style='background-color:lightgreen; border:2px solid green;'>  X" + i + " </span>";
} else {
StatusDigital += "<span style='border:2px solid green;'>  X" + i + " </span>";
}
//StatusDigital += myArr.DigitalIn[i] + " ";
    }
    document.getElementById("AccA").innerHTML = "<h2> <span style='border: 2px solid DodgerBlue;'> Analog Input = "
+ myArr.AnalogIn[0] + " = " + myArr.ScaleAnalogIn[0] + " Volts </span></h2>"
     + "<h2> Digital Inputs: <br><br>"
+ StatusDigital + "</h2>";
  }
};
To automatically update information (Dynamic Web Page) we create a function called update data. The timeout of the function will be 200 milliseconds. We then call this function in order to start our timeout.
function updatedata(){
     xmlhttp.open("GET", "http://192.168.1.11/data/json?AnalogIn=WX0,8 &ScaleAnalogIn=RX0,8 &DigitalIn=X0,8", true);
     xmlhttp.send();
     setTimeout(updatedata, 200);
}
updatedata();
</script>

At the bottom of our dynamic web page we will include a link to the Rest API (JSON Array) information.
<p>Take a look at <a href="http://192.168.1.11/data/json?AnalogIn=WX0,8 &ScaleAnalogIn=RX0,8 &DigitalIn=X0,8" target="_blank">http://192.168.1.11/data/json?AnalogIn=WX0,8 &ScaleAnalogIn=RX0,8 &DigitalIn=X0,8</a></p>
</body>
</html>
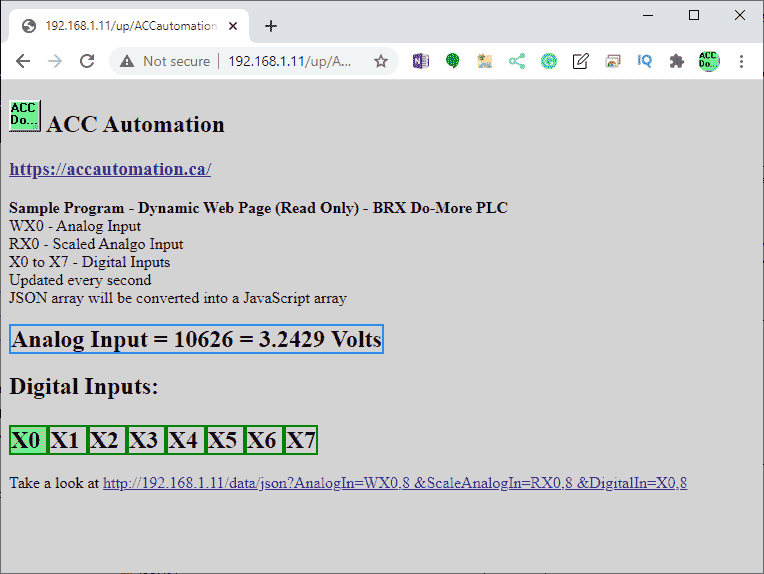
This is our completed dynamic web page.
BRX Do-More Storage Area for Web Pages
Using the Do-More Designer Software call up the Browse PLC File Systems…
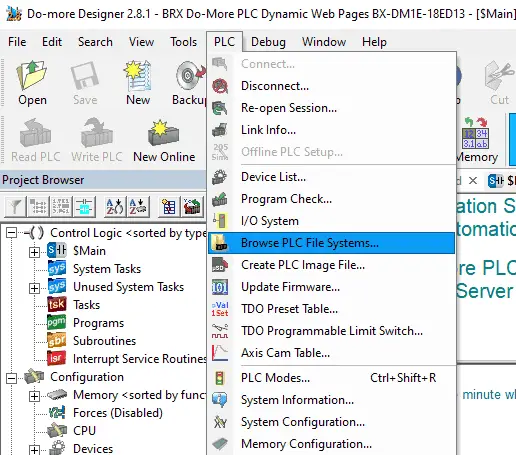
This can be found using the main menu | PLC | Browse PLC File Systems…
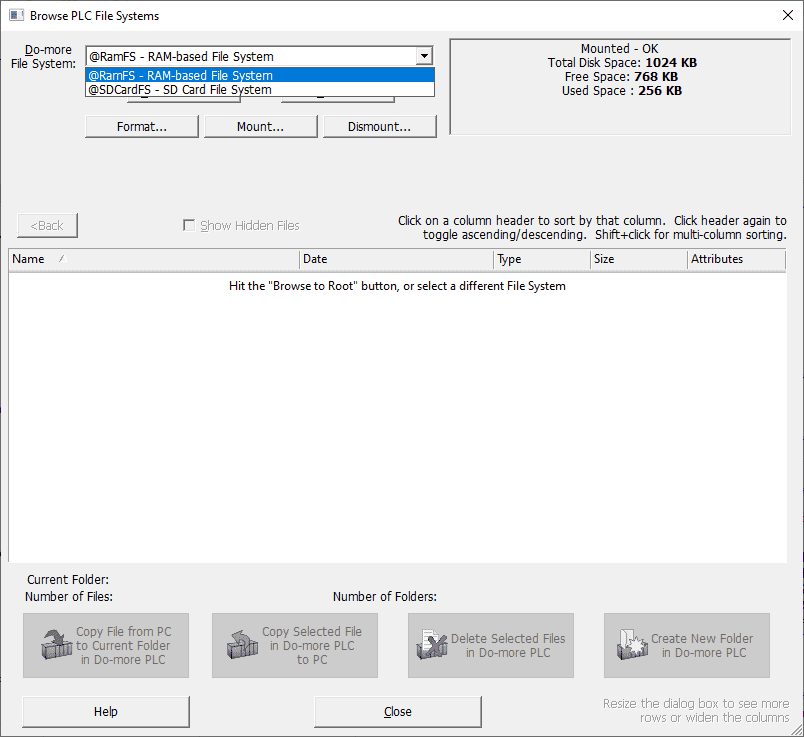
Web pages are served from the RAM (random access memory) of our BRX Do-More PLC. (@RamFS)
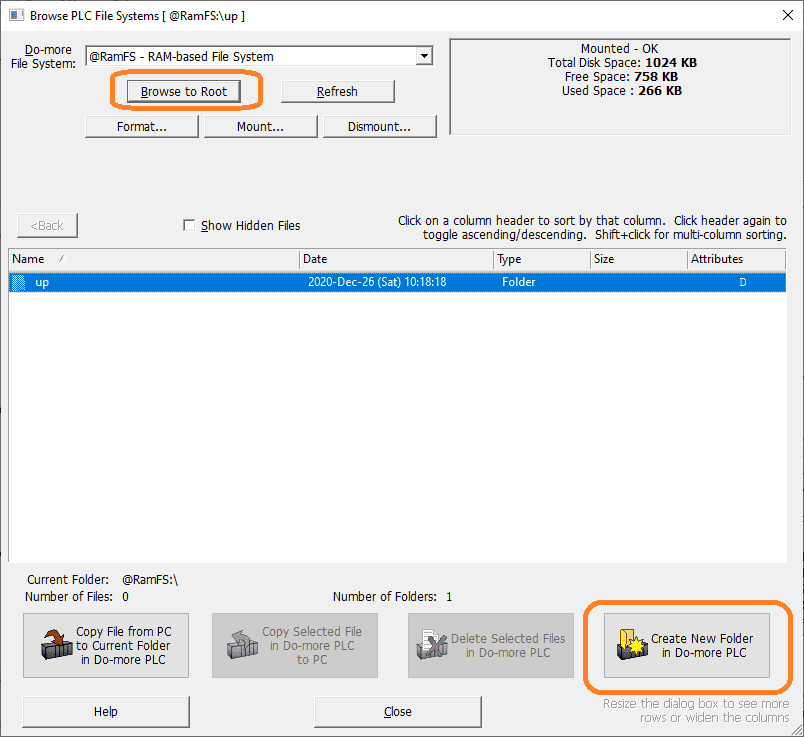
Browse to the root of this memory area and create a new folder called UP. (User Pages)
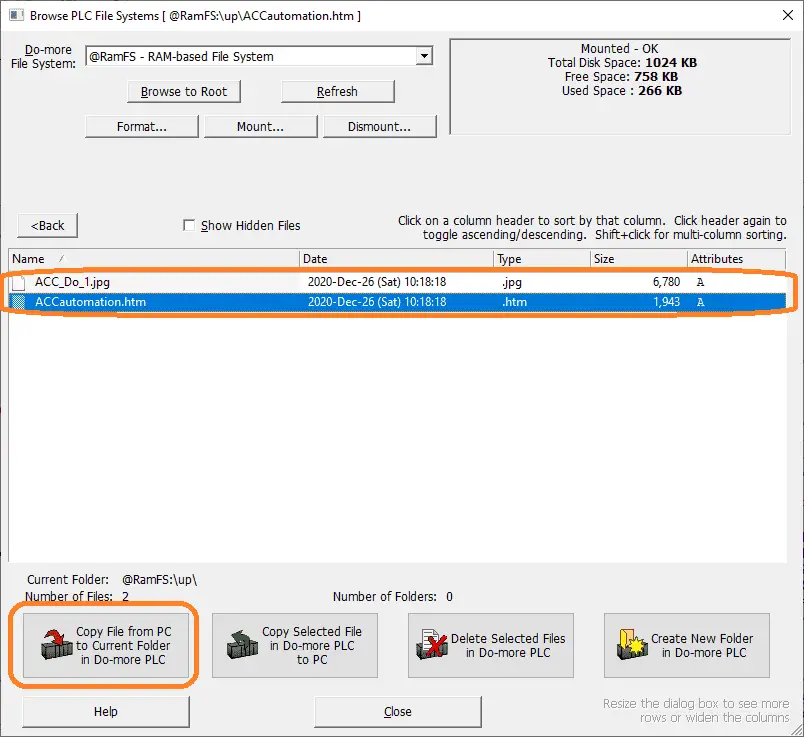
In the ‘up’ directory, copy the htm and picture to this directory.
We can now specify the IP address and call up the web page from the User Pages tab on the website. See the video below to watch the dynamic web page in action.
BRX Do-More Sample Program for Dynamic Web Page
Last time we wired our analog input tester to the analog input WX0 on the BRX CPU. A capacitive CK1 proximity sensor was wired to X0 on the BRX CPU.

Our input from our capacitive proximity sensor will directly trigger the first output Y0 on our BRX Do-More PLC.
Analog Input Scaling
Call up the system configuration window. Select BRX Local IO on the left side of the window. Select the analog button.

We will select 0-10VDC for our analog input signal. The scaling will be enabled from WX0 to RX0. 0 to 32767 will be scaled to 0 to 10. This will represent our voltage on our tester. Select OK.
BRX Do-More Create Folder and Copy Files for Dynamic Web Page
When power is removed from the PLC the RAM memory (@RamFS) is lost. In order for our web pages to be seen, we must transfer the information into the RAM memory upon a power-up of the BRX Do-More PLC.
Detect Power Applied to BRX Do-More PLC

Using the math instruction we compare the year, month, day, hour, and minute with the current ($Now) and start-up real-time clock. This will turn on a bit (C0) for one minute indicating that the PLC has just been powered up.

Once we detect that the PLC has been powered, we will make a new folder in @RamFS. This will be our ‘UP’ folder (User Pages) for the web pages.
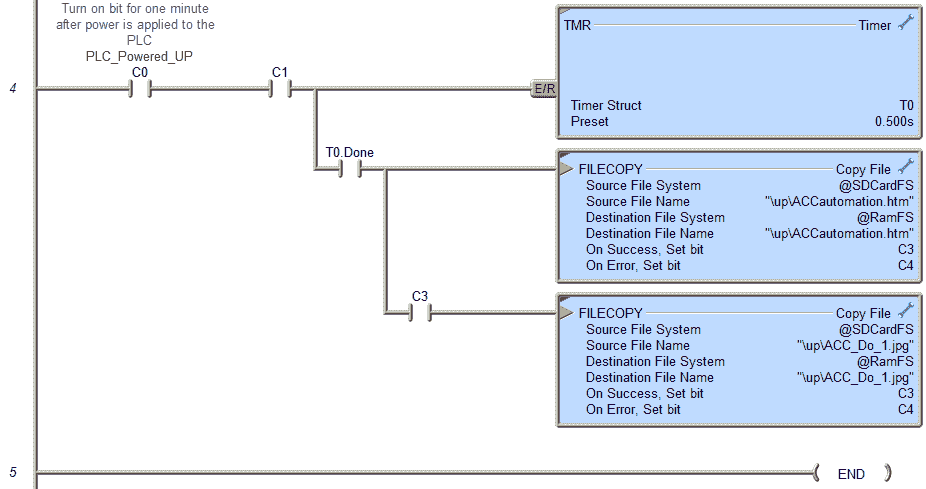
Once we power-up, a delay of 500 milliseconds is used before we transfer our files from the @SDCard to the @RamFS memory.
That is our completed ladder logic program. Download this to the BRX Do-More PLC and place the PLC in run mode.
Watch the video below to see the dynamic web pages running on our BRX Do-More PLC web server.
Download the BRX Do-More program and web pages with images here.
BRX Series PLC from Automation Direct – Power to deliver
Overview Link (Configure and purchase a system)
Manuals and Product Inserts (Installation and Setup Instruction)
Do-More Designer Software (Free Download Link) – The software will contain all of the instruction sets and help files for the BRX Series PLC.
Watch on YouTube: BRX Do-More PLC Dynamic Web Pages
If you have any questions or need further information please contact me.
Thank you,
Garry
If you’re like most of my readers, you’re committed to learning about technology. Numbering systems used in PLC’s are not difficult to learn and understand. We will walk through the numbering systems used in PLCs. This includes Bits, Decimal, Hexadecimal, ASCII, and Floating Point. To get this free article, subscribe to my free email newsletter.
Use the information to inform other people how numbering systems work. Sign up now. The ‘Robust Data Logging for Free’ eBook is also available as a free download. The link is included when you subscribe to ACC Automation.

