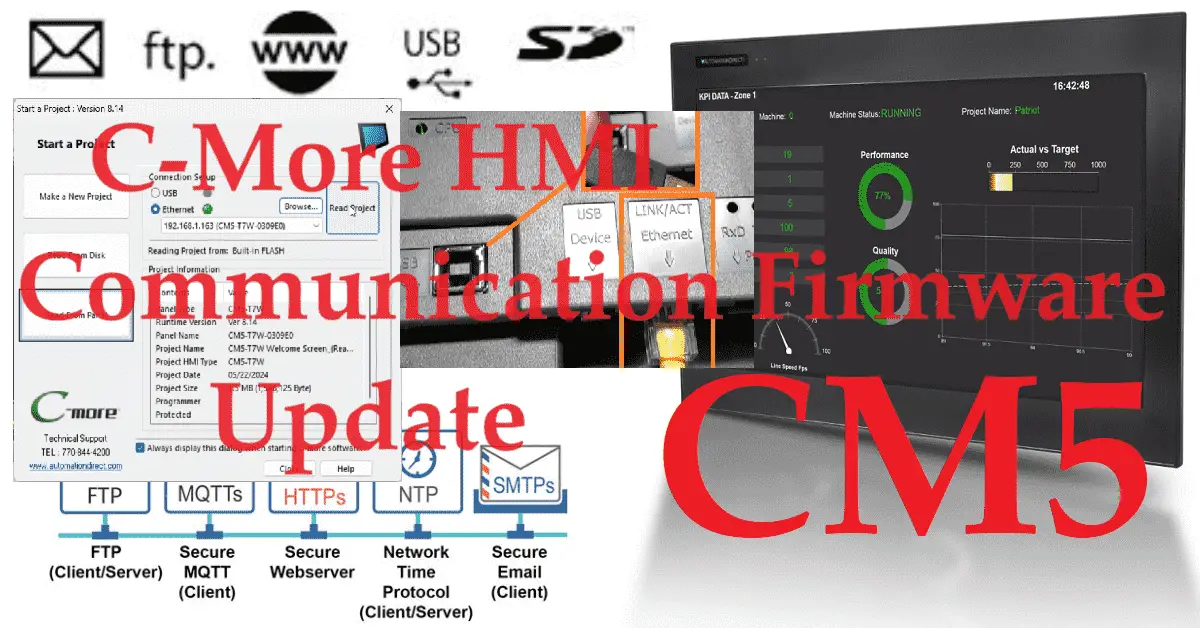
We will establish communication and check the firmware on our C-More CM5 HMI touch panel. Communication with our CM5 HMI can be done via USB or Ethernet.
The C-More CM5 has a USB port just used for programming, which is especially helpful if you are physically connecting to the HMI unit. Firmware is a type of software that is embedded in a hardware device. It provides low-level control for the device’s specific hardware. Firmware is often stored in non-volatile memory and controls the device’s essential functions. The C-More CM5 HMI panel firmware is updated with the programming software. Currently, this is on version 8.14. CM5 firmware consists of the operating system and run time files. Let’s get started communicating and checking our firmware.
Previously in this C-More CM5 HMI Panel series, we have done the following:
Latest C-More CM5 HMI Game Changer Post
– C-More CM5 Unboxing and Power Video
Installing C-more CM5 HMI Software Step by Step – Video
C-More CM5 HMI Series Panel System Setup Screens – Video
See the list of references for the CM5 HMI, including the frequently asked questions (FAQ) at the end of this post.
Establishing C-More CM5 Communication
Start the C-More Programming Software we installed in our previous post. When the software starts, the “What’s New Feature Guide” will be displayed for your installed version.
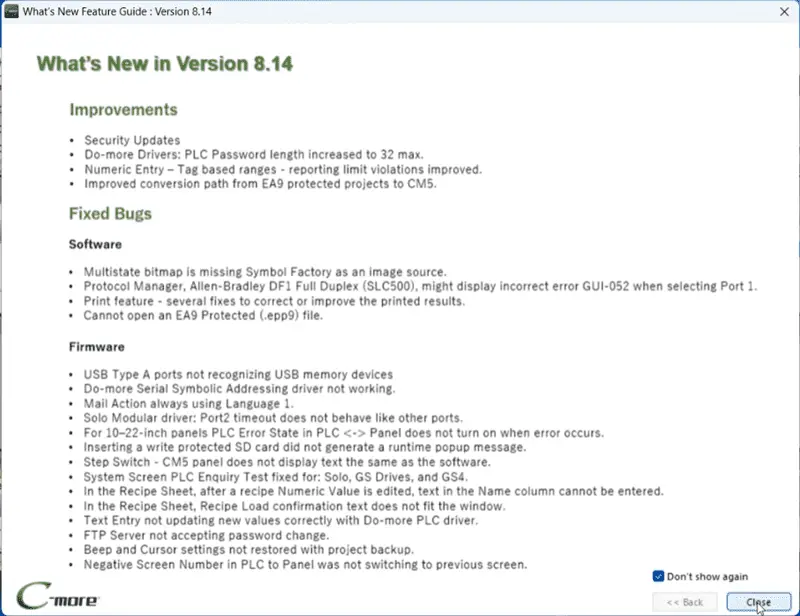
Once we have read the improvements and the fixes for the software, select the “Don’t show again” button. Select close.
There are a few ways to program the C-More CM5 HMI from our computer with the C-More Programming Software Version 8.00 or higher.
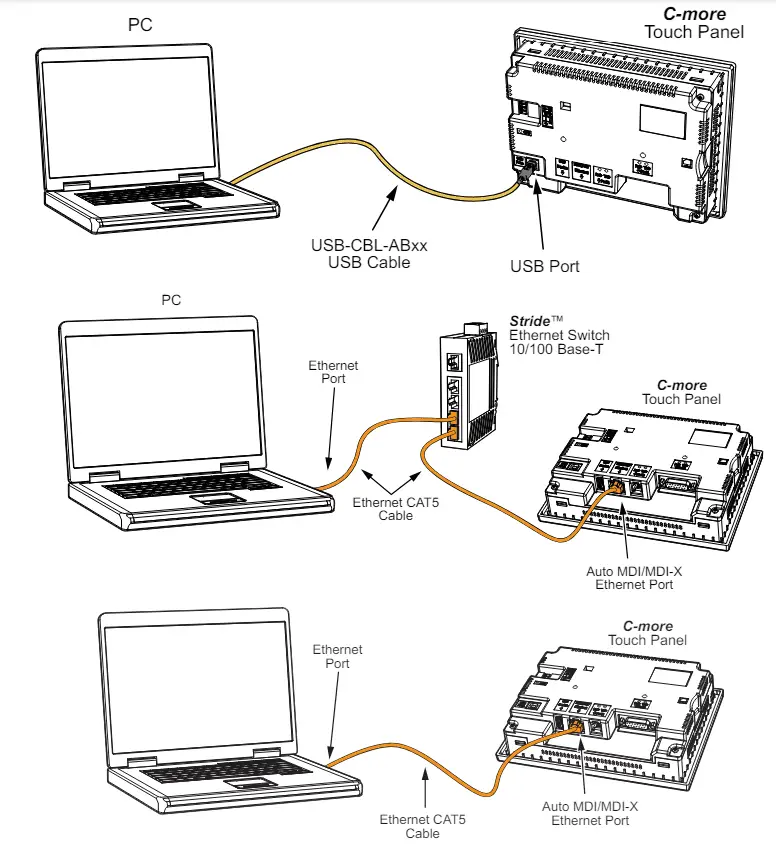
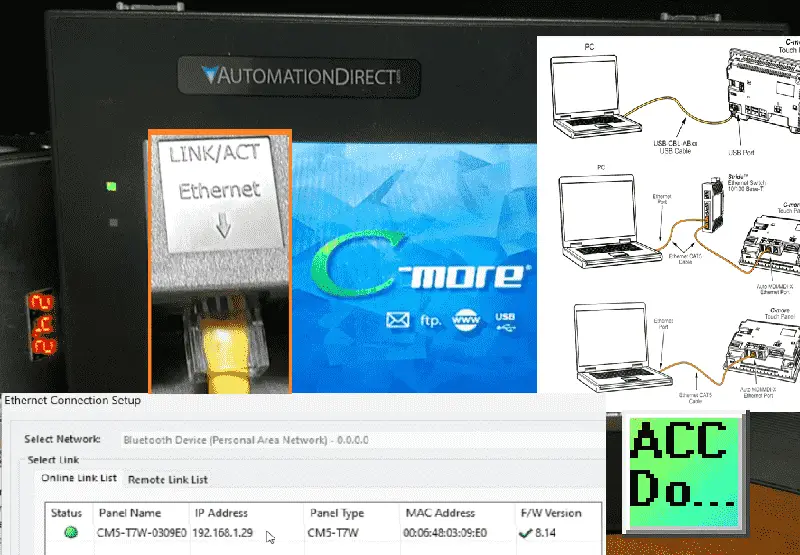
We will be using the Ethernet port plugged into our network router.
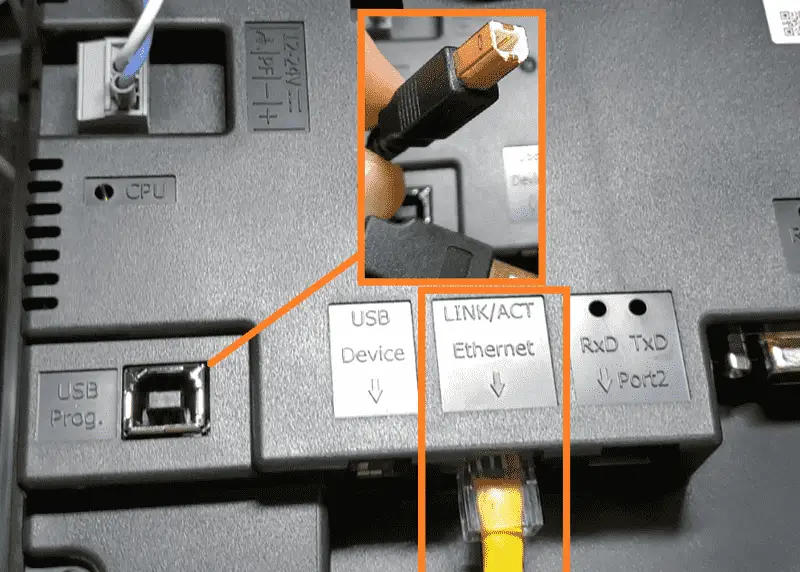
The Ethernet cable could also be connected directly to the computer. A USB cable can also be plugged into the back of the C-More HMI and the computer on which you have installed the C-More programming software. (The USB port is only used for programming.) Our Ethernet port can be used for programming or communication with devices like a PLC.
The “Start a Project” window appears when the C-More Programming Software starts. You can change this option by selecting the option at the bottom of the window. You can also call this up by the main menu | Panel | Read from Panel. Select the “Read From Panel” button.
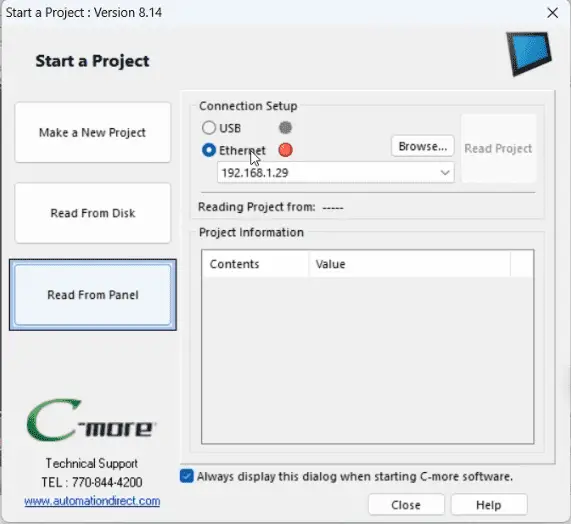
Under the connection setup, you will see USB or Ethernet. As you select these options, the software will try communicating with the CM5 HMI unit. The red/green light indicates the communication status. Select the “Browse” button next to the Ethernet connection.
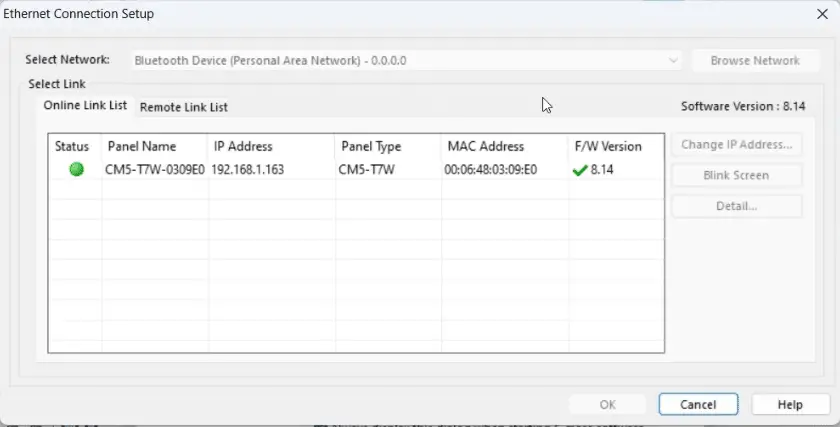
This instructs the software to search the network and report any connected panels. Select the panel name and then select OK.
We will now see that the Ethernet connection has been selected, and we have an excellent connection to the C-More CM5 HMI.
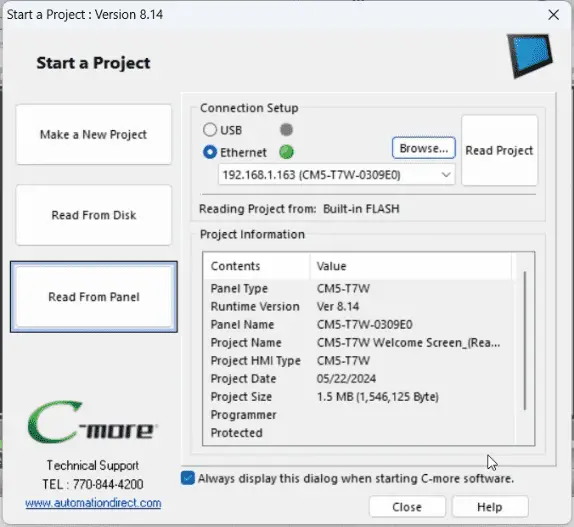
Our communication specifications will now be shown. Its IP address is 192.168.1.163. The page will also show information like runtime version, project date, project size, project name, etc.
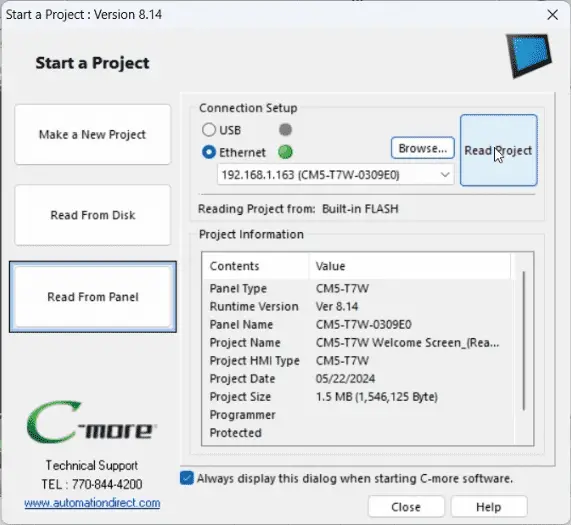
Select the “Read Project” button.
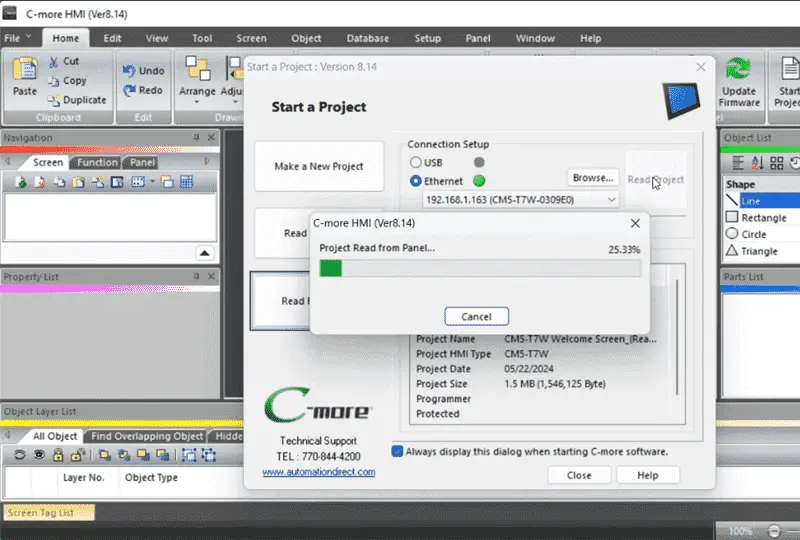
This will read the project from the C-More CM5 panel, where we have established communication.
We now have this program on our computer so we do not lose any information.
C-More CM5 Reset to Factory Default
Resetting the CM5 back to the factory default is helpful if you want to start all over again for your program.
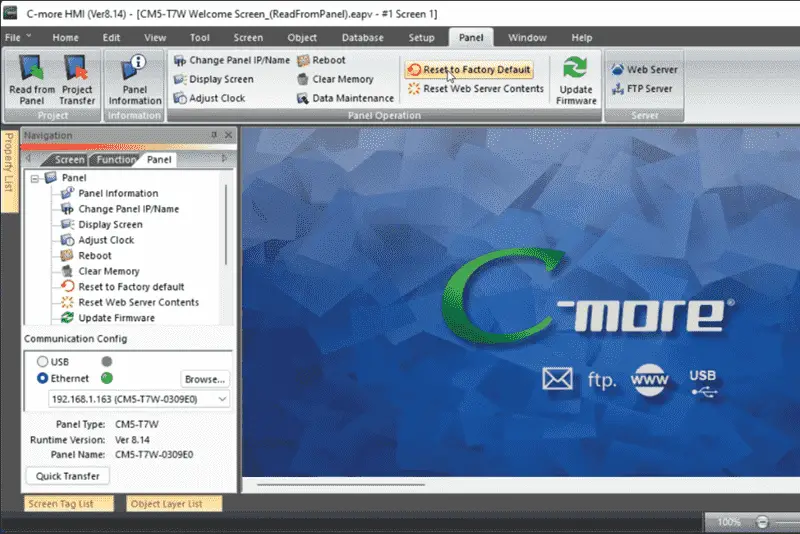
Select “Reset to Factory Default” from the main menu | Panel.

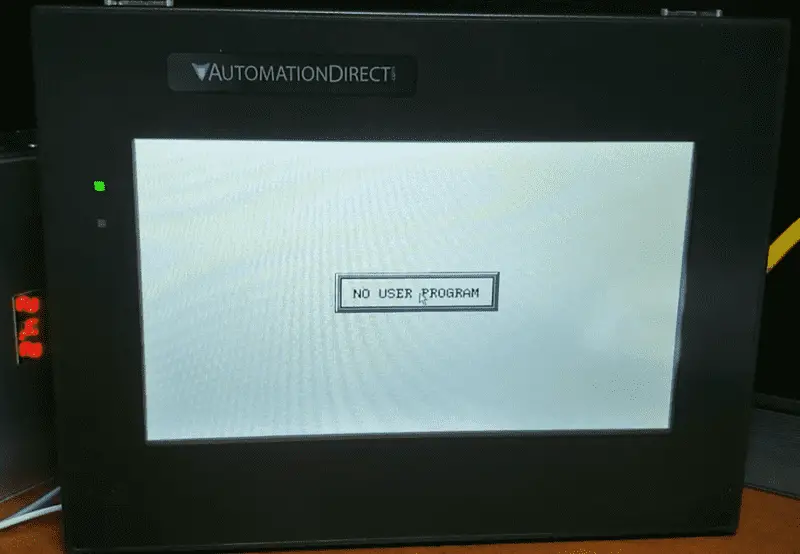
A warning message about the factory reset will appear. Select Yes to continue. Our C-More CM5 HMI panel will now restart.
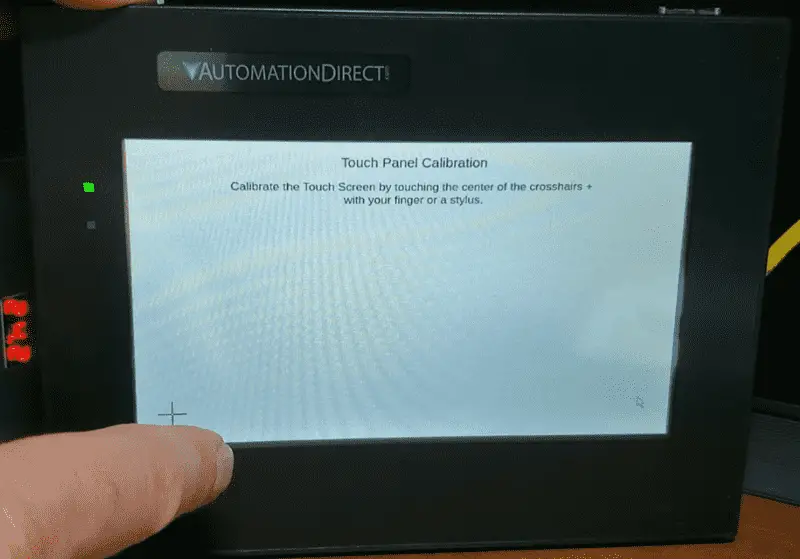
As mentioned in our warning, we will calibrate the touch screen now. Since our screen will no longer have a program, we must establish communication again with the Panel.
C-More CM5 Download Program Firmware
Select “Project Transfer” from the main menu | Panel.
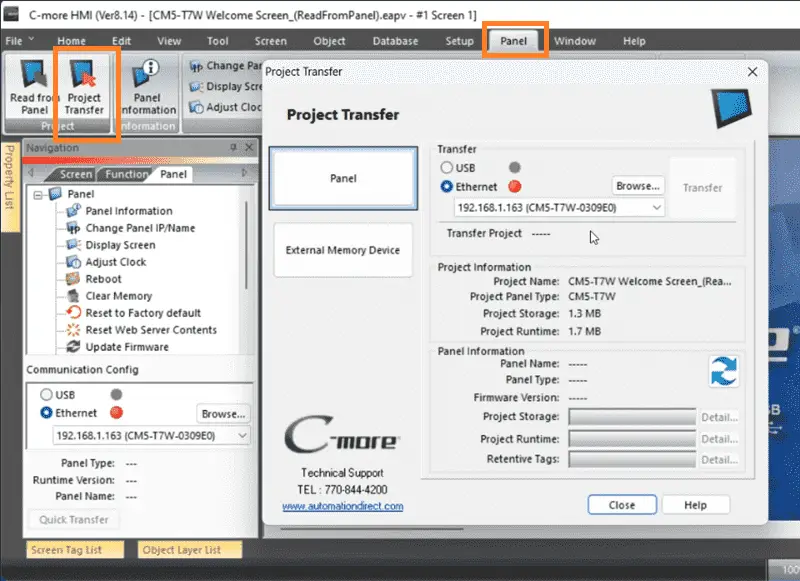
When the project transfer window opens, select browse to find the new IP address set after the factory reset.
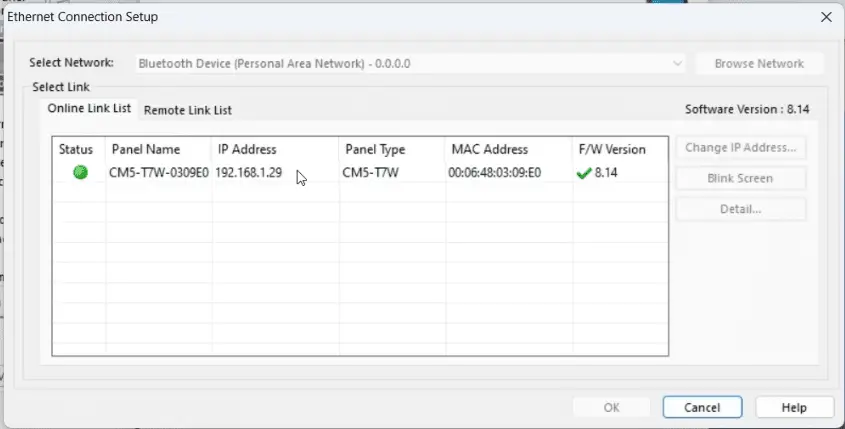
This will search the network for any C-More CM5 panels. You will see our HMI’s physical MAC address, IP address, and name. Our existing firmware (F/W) version is displayed. A check mark beside the number indicates that this is the same as the CM5 programming software. Select the HMI and then select OK.
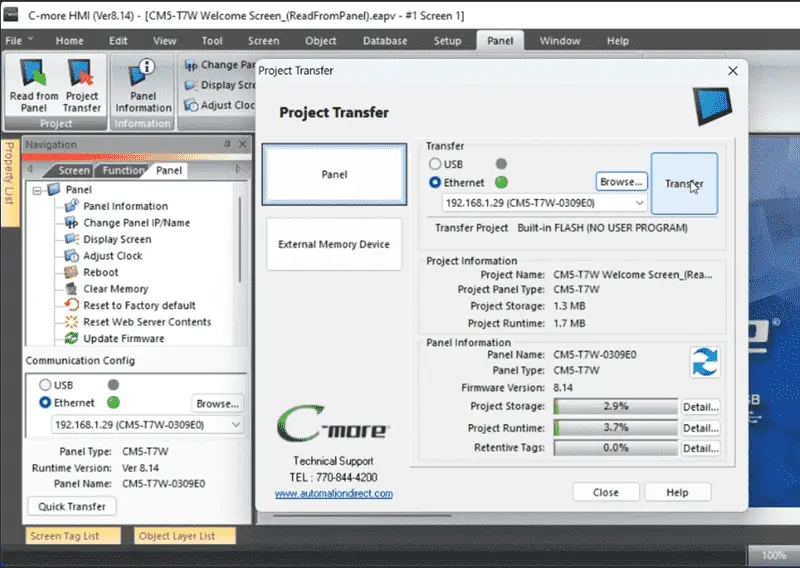
The information on our CM5 panel is returned. Select “Transfer” to write the program back into the CM5 HMI.
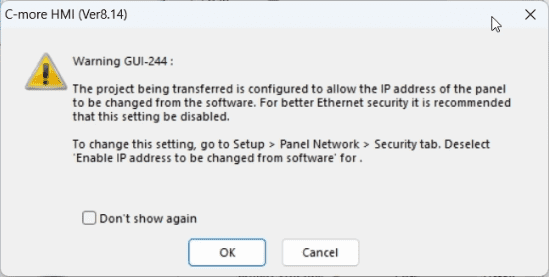
A warning message will be displayed indicating that the project will allow the configuration of the IP address from the programming software. This can be changed by going to the main menu | Setup | Panel Network | Security and deselecting “Enable IP address to be changed from software.”
Select OK.
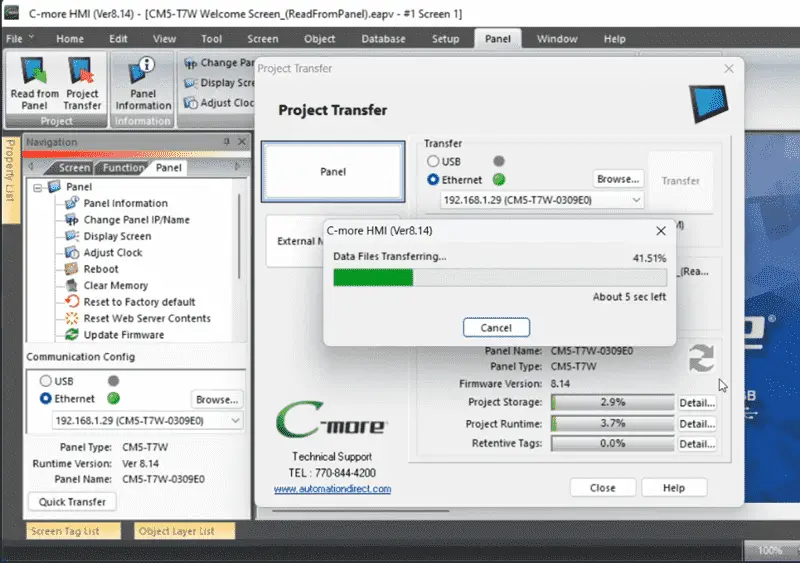
Our program will now be transferred to our CM5 HMI. If the firmware needs to be updated, it will also be transferred.

Watch the video below to see the communication, factory reset, and firmware version of the C-more CM5-T7W panel.
C-More CM5 Features:
- “4”, “7”, “10”, “12”, “15”, and “22” widescreen options
- 16.7M colors and LED backlights
- 800MHz (4″, 7″) or 1.6GHz Quad Core CPU (10″ or higher)
- 43MB project memory
- 12 to 24 VDC powered
- Built-in real-time clock with 30-day backup (no battery required)
- NEMA 4/4X (indoor use only), IP65
- FREE HMI programming software with powerful design tools and a project simulator
- CM5 series HMIs support any EA9 series project (created with V6.73 or later) for an easy panel upgrade
Frequently Asked Questions (FAQ)
Product Brochure
C-more CM5 Overview
CM5-T7W Cut Sheet – Tech Specifications / Protocols
CM5 User Manual – Hardware
CM5 Quick Start Guide
C-More Programming Software (CM5 Series)
CM5 User Manual – Software On-Line
AD C-More CM5 Sample Projects (CM5-T7W)
Watch on YouTube: C-More CM5 HMI Communication Firmware Update
If you have any questions or need further information, please get in touch with me.
Thank you,
Garry
If you’re like most of my readers, you’re committed to learning about technology. The numbering systems used in PLCs are not challenging to know and understand. We will walk through the numbering systems used in PLCs, including Bits, Decimal, Hexadecimal, ASCII, and Floating Points.
To get this free article, subscribe to my free email newsletter.
Use the information to inform other people how numbering systems work. Sign up now.

The ‘Robust Data Logging Easily’ eBook is also available for free download. The link is included when you subscribe to ACC Automation.