Time instructions in our productivity blocks programming (Arduino sketches) consist of runtime (ms), runtime (us), delay ms, and delay microseconds us.
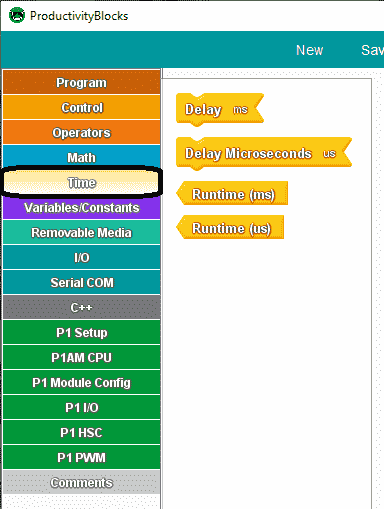
We will be looking at each of these instructions that are available for our program using productivity blocks. Delay instructions in our sketches should be used with caution. They will pause our program for the delayed time, not allowing other parts of the program to function. We will be looking at this and the method to do the exact same delay functions without pausing your program.
A sample program will be discussed to demonstrate the time functions in our program. Let’s get started.
Previous posts in this Productivity Open Arduino Compatible Industrial Controller Series
A full list can be obtained at the following location:
Productivity Open (P1AM-100) Arduino Controller
Productivity Open Arduino Controller Hardware
– Starter Kit Unboxing Video
– Powering Up Video
Installing the Software – Video
First Program – Video
Program Structure – Video
Variables Data Types – Video
Serial Monitor COM – Video
Program Control – Video
Operators – Video
GPIO Inputs and Outputs – Video
Math Instructions – Video
Watch the video below to learn about the time instructions of our productivity open industrial arduino controller.
Arduino Delay Instructions – Time
Pauses the program for the amount of time specified as a parameter.
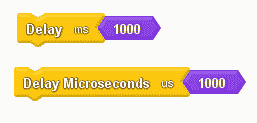
The data type used in the time functions is unsigned long. The program will wait (pause) until the time duration has expired. During this wait time, no other part of your program is being executed. This should be used with caution in your programs especially if you are looking for switches or other inputs to operate. See the example program below.
Note:
1000 milliseconds = 1 second
1000 microseconds = 1 milliseconds = 0.001 second
Millis (Milliseconds) and Micros (Microseconds) Time
Returns the number of milliseconds or microseconds since the program began running.
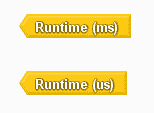
The runtime instruction will return the time (ms or us) since the program began running.
The output of the runtime ms block is an unsigned long variable. It will overflow (go back to zero), after approximately 50 days.
The output of the runtime us block is an unsigned long variable as well. It will overflow (go back to zero), after approximately 70 minutes.
Sample Arduino Time Program
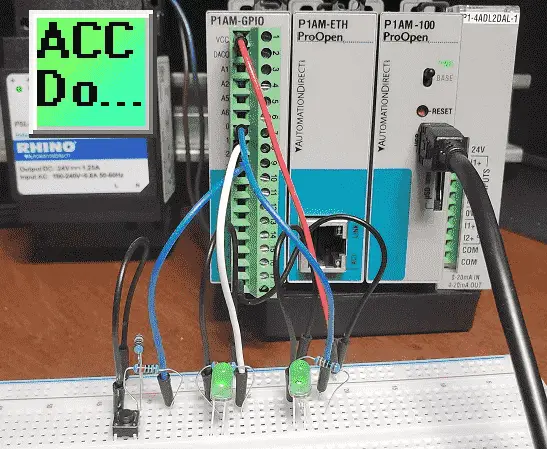
Our sample program will take the switch input (D2) and control the output LED (D1) directly. This will happen independently of the delay programming routines.
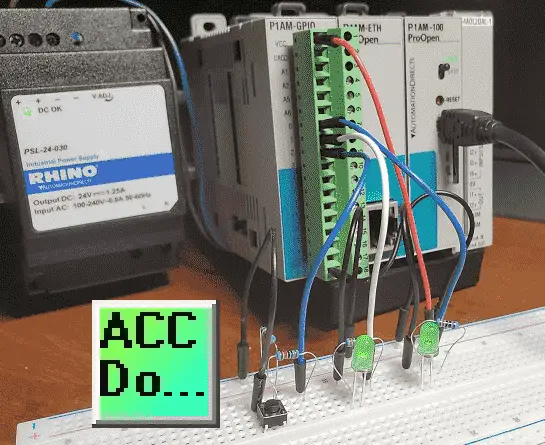
If the CPU switch is on then use the delay ms block to turn on the LED (D0) for 1 second and then turn off the LED (D0) for 1 second. During this time the delay will pause our program so our switch will not function correctly as outlined above.
If the CPU switch is off then we will use the runtime ms block to turn on and off the LED (D0) for 1 second without pausing the program. This will allow our switch to operate the LED (D1) at the same time as LED (D0) is pulsing.
We will use the serial monitor to display some variables and demonstrate the program execution above.
Arduino Wiring
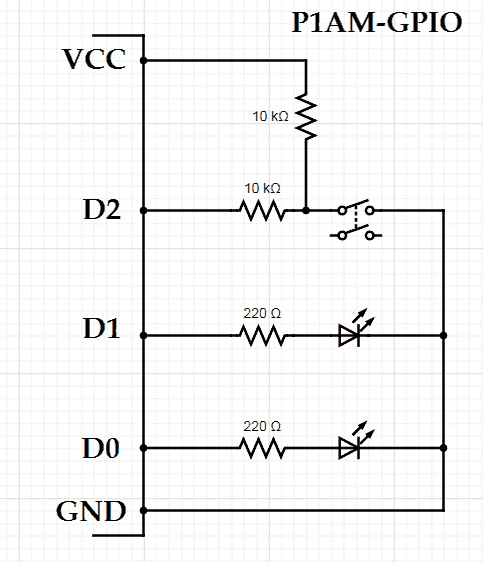
Note: This is going to the GPIO industrial shield for the P1AM. Most inputs are protected, but we have included 220-ohm resistors for the LED outputs and 10000-ohm resistors for the input switch.
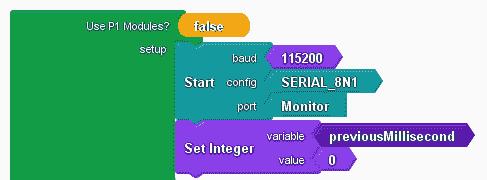
The setup part of our sketch will initialize the monitor port and set our previous millisecond variable to 0.
int _PBVAR_1_previousMillisecond = 0 ;
boolean __proBlocksDigitalRead(int pinNumber)
{
pinMode(pinNumber, INPUT);
return digitalRead(pinNumber);
}
void __ProBlocksDigitalWrite(int pinNumber, boolean status)
{
pinMode(pinNumber, OUTPUT);
digitalWrite(pinNumber, status);
}
boolean __ProBlocksDigitalRead(int pinNumber)
{
pinMode(pinNumber, INPUT);
return digitalRead(pinNumber);
}
void setup()
{
Serial.begin(115200, SERIAL_8N1);
_PBVAR_1_previousMillisecond = 0 ;
}
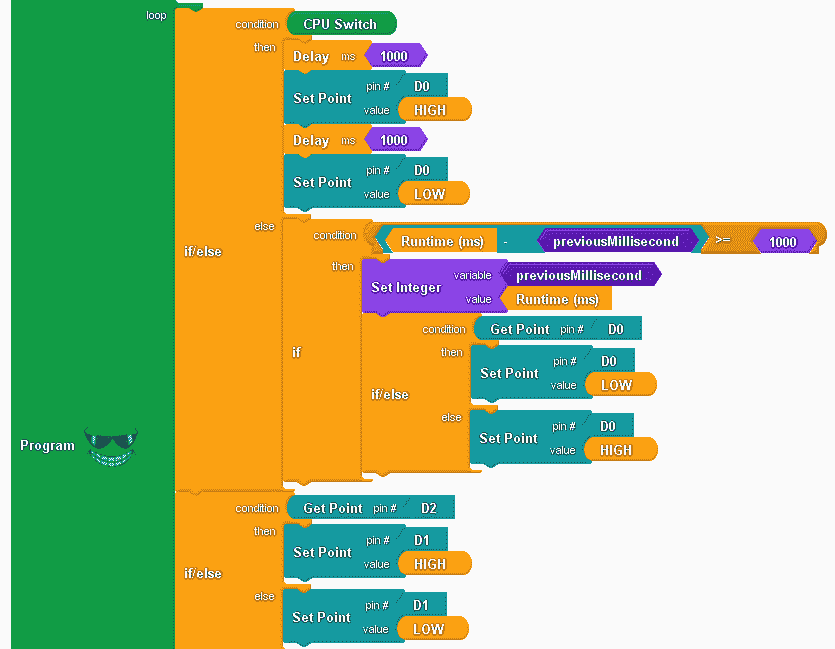
If the CPU switch is on then use the delay ms for 1 second and then set D0 high (on). Delay another 1 second and then set D0 low (off).
If the CPU switch is off then compare if the current runtime ms minus the previous millisecond variable is greater than or equal to 1000. (1 second) If it is, then set the previous millisecond variable to the current runtime ms and toggle the output LED (D0).
The above code will demonstrate the use of the runtime block and the delay.
Independent of the CPU switch, if D2 switch is on then set LED (D1) on. If D2 switch is off then set LED (D1) off.
void loop()
{
if (__proBlocksDigitalRead(31))
{
delay( 1000 );
__ProBlocksDigitalWrite(0, HIGH);
delay( 1000 );
__ProBlocksDigitalWrite(0, LOW);
}
else
{
if (( ( ( millis() - _PBVAR_1_previousMillisecond ) ) >= ( 1000 ) ))
{
_PBVAR_1_previousMillisecond = millis() ;
if (__ProBlocksDigitalRead(0))
{
__ProBlocksDigitalWrite(0, LOW);
}
else
{
__ProBlocksDigitalWrite(0, HIGH);
}
}
}
if (__ProBlocksDigitalRead(2))
{
__ProBlocksDigitalWrite(1, HIGH);
}
else
{
__ProBlocksDigitalWrite(1, LOW);
}
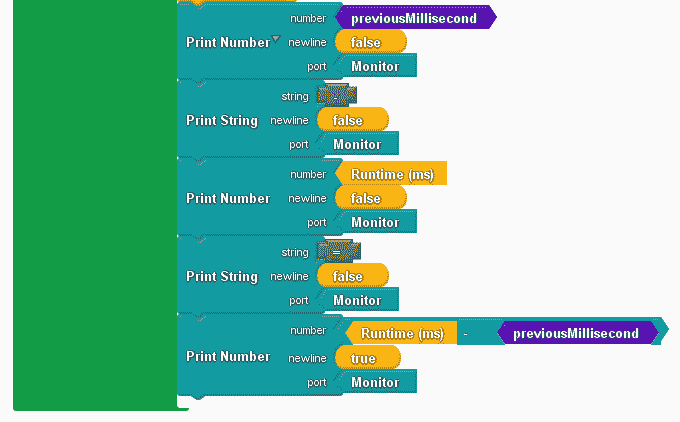
Print out the variables on our serial monitor.
Previous Millisecond Variable – Millisecond = Result.
We are printing this out so we can see the unsigned long variable in action. This will show you that the overflow of our millisecond block will not affect our program.
Serial.print(_PBVAR_1_previousMillisecond);
Serial.print("-");
Serial.print(millis());
Serial.print("=");
Serial.println(( millis() - _PBVAR_1_previousMillisecond ));
}
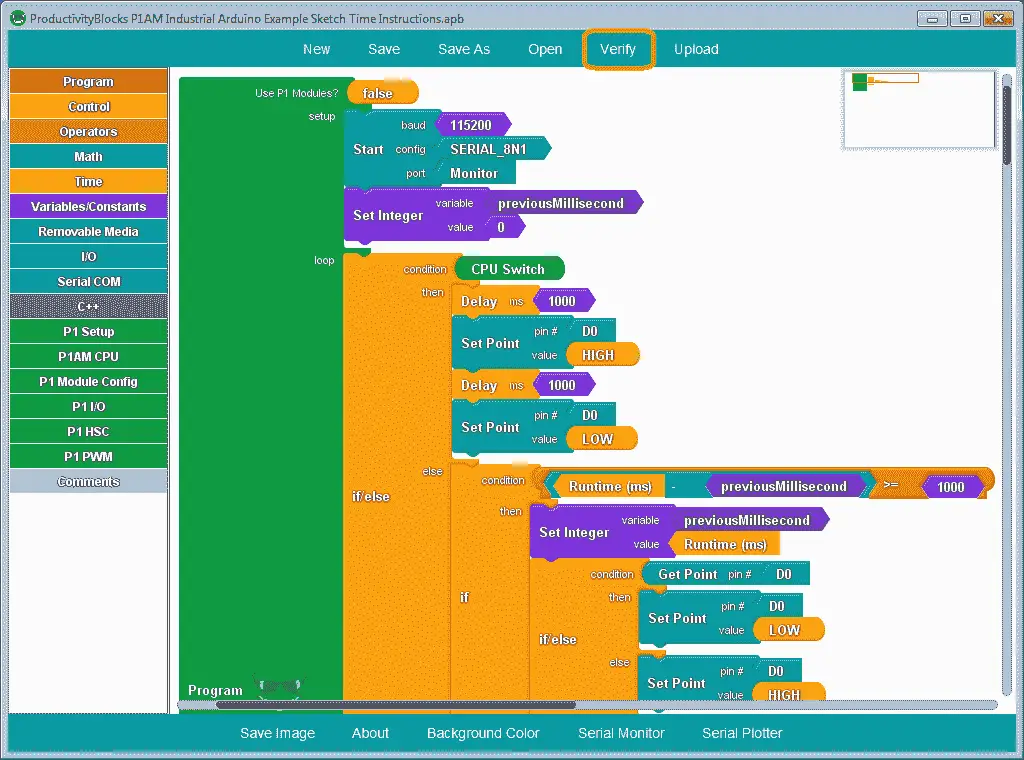
Here is the complete program. Click the verify button to compile and translate our program to the C++ code for our P1AM-100 CPU.
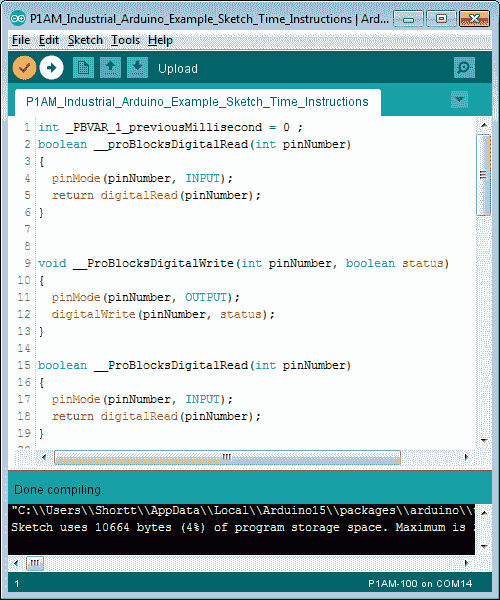
Once the arduino software (IDE – integrated development environment) is finished compiling, select the upload button to send the program to our P1AM CPU.
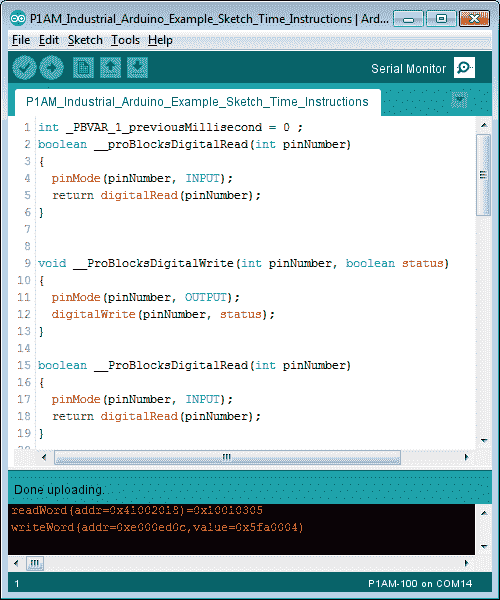
Once the upload to the P1AM CPU is complete, we can select a serial monitor.
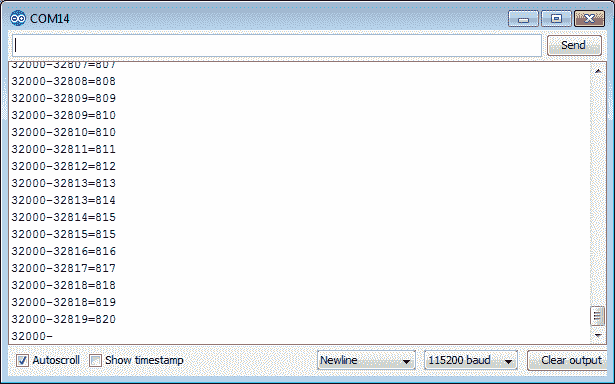
When the CPU switch is off then we will see our screen updating very quickly indicating that our program is being scanned. The switch will operate LED D1 each time the button is pressed with no delay.
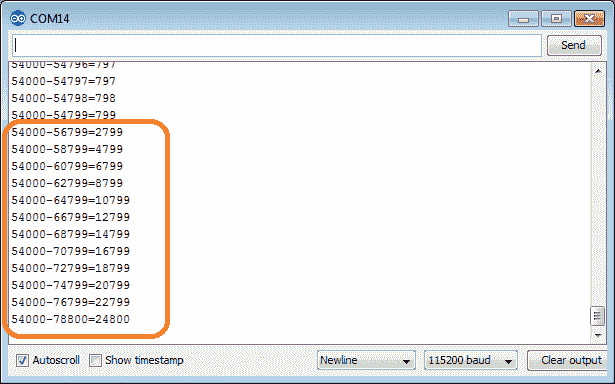
When the CPU switch is on then we will see our screen updating every 2 seconds. Our program is being paused because of the delayed block time instructions. 1 second for the on-time and 1 second for the off-time. The switch has to be held for more than 2 seconds in order for the program to read the status and set the LED D1. You can now see how the delay block can pause the execution of your program.
Note: The math operation of the unsigned long variables will only produce a positive number. Therefore when the values overflow to zero our timing will not change.
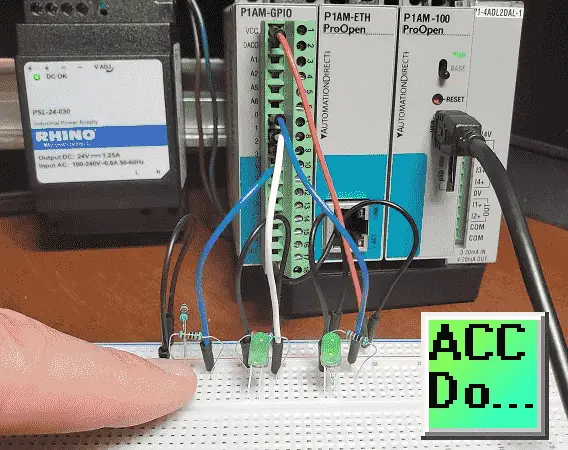
Watch the video below to see the operation of our sample time program with the productivity open industrial arduino controller.
Download the P1AM-100 sample sketch and Productivity Block program here.
Productivity Open Arduino Compatible Links:
Product Hardware
– Productivity Open (Automation Direct)
– P1AM-100 Specifications
– Productivity Open User Manual
– Configure a Productivity Open Arduino-based Controller
– Open Source Controllers (Arduino-Compatible)
– Productivity Open Documentation (Facts Engineering)
– P1AM Design Files
Software
– Arduino IDE (Integrated Development Environment)
– P1AM-100 library (Easy Interface for controlling P1000 Modules)
– Productivity Blocks (Development Timesaver)
– Productivity Blocks Documentation (Wiki)
Community
– Automation Direct Forum – Open Source Devices
Next time we will look at adding a Productivity 1000 (P1000) expansion analog combination module on our P1AM-100 Arduino Industrial Controller.
Watch on YouTube: Productivity Open P1AM Industrial Arduino Time Instructions
If you have any questions or need further information please contact me. Thank you, Garry
If you’re like most of my readers, you’re committed to learning about technology. Numbering systems used in PLC’s are not difficult to learn and understand. We will walk through the numbering systems used in PLCs. This includes Bits, Decimal, Hexadecimal, ASCII and Floating Point. To get this free article, subscribe to my free email newsletter.

The ‘Robust Data Logging for Free’ eBook is also available as a free download. The link is included when you subscribe to ACC Automation.

