
To get started with the XY-MD02 temperature and humidity sensor, we will be using the program PuTTY for serial communication. We will use RS485 serial communication to establish a connection and show how to read the values and parameters of the XY-MD02 sensor effectively. Additionally, we will explore the automatic polling feature, which allows for continuous monitoring of the sensor’s data.
PuTTY is a versatile tool for connecting the computer and the XY-MD02 sensor. By utilizing RS485 communication, we can effectively retrieve temperature and humidity readings from the sensor. Setting up PuTTY on a Windows 11 64-bit computer, ensuring a seamless connection to the XY-MD02 sensor, will be demonstrated. These step-by-step instructions on how to read the temperature and humidity values from the XY-MD02 sensor are critical in understanding serial UART communication. This 1:1 communication will enable you to accurately monitor the environmental conditions in your desired setting. Let’s get started.
Hardware
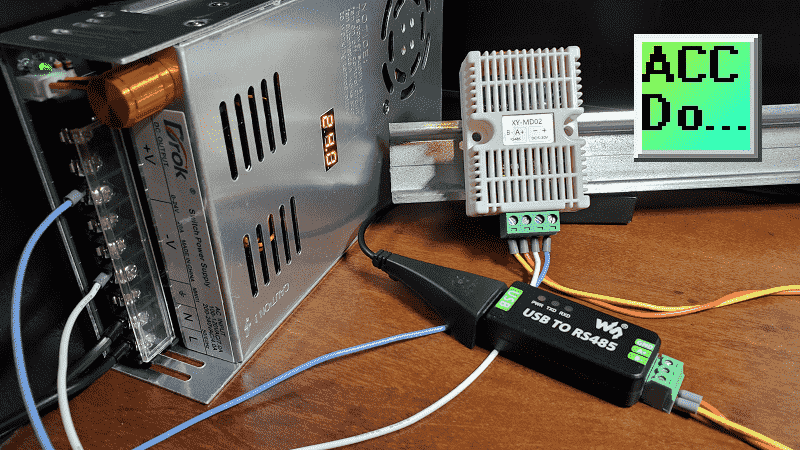
Setting up the necessary hardware components is essential to ensure the proper functionality of the XY-MD02 temperature and humidity sensor.
The sensor will require a 24VDC power supply to operate effectively. A USB to RS485 converter will also establish a connection between the computer and the sensor.
The 24VDC power supply is crucial for providing the necessary power to the XY-MD02 sensor. This ensures the sensor can accurately measure temperature and humidity levels in the desired environment. It is essential to ensure the power supply is compatible with the sensor’s requirements to avoid potential issues.
To establish a connection between the computer and the XY-MD02 sensor, a USB to RS485 converter is utilized. This converter allows for seamless serial communication between the two devices. Data can be transmitted and received effectively by connecting the converter to the computer’s USB port and the sensor’s RS485 port.
The USB to RS485 converter acts as a bridge, enabling the computer to communicate with the XY-MD02 sensor. This hardware component is essential for reading the temperature and humidity values and accessing the sensor’s parameters.
By ensuring the proper setup of the hardware components, you can install PuTTY and the subsequent steps required for reading the temperature and humidity values of the XY-MD02 sensor.
The Waveshare USB to RS485 installation instructions are covered in the following post. This driver will assign the device a communication port (COM Port). Using the device manager in Windows, you can see the serial communication port assigned to the USB to RS485 converter.
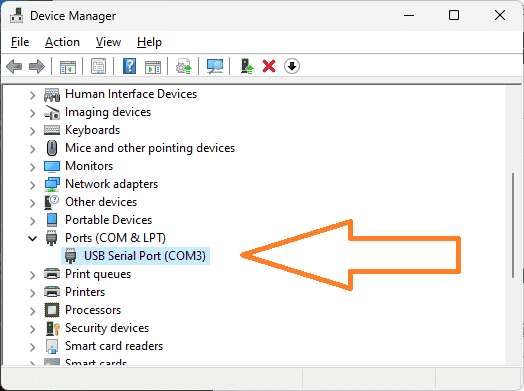
There are a few different ways to get to device manager in Windows 11. Right-click the Start button or press the Windows Logo + X key combination on the keyboard and, from the list, click Device Manager. You can also search for device manager on the search bar.
Installing PuTTY on a Windows 11 64-bit computer
The following steps will install PuTTY on a Windows 11 64-bit computer. First, visit the official PuTTY website.
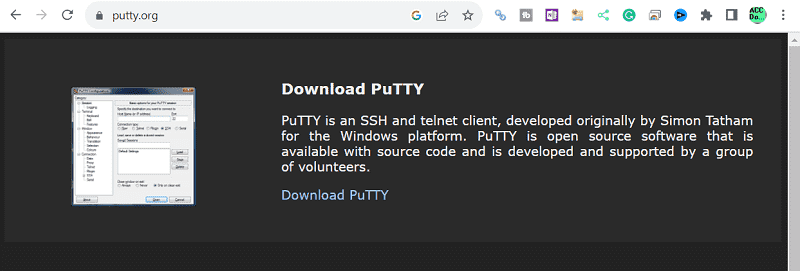
Select ‘Download PuTTY’.
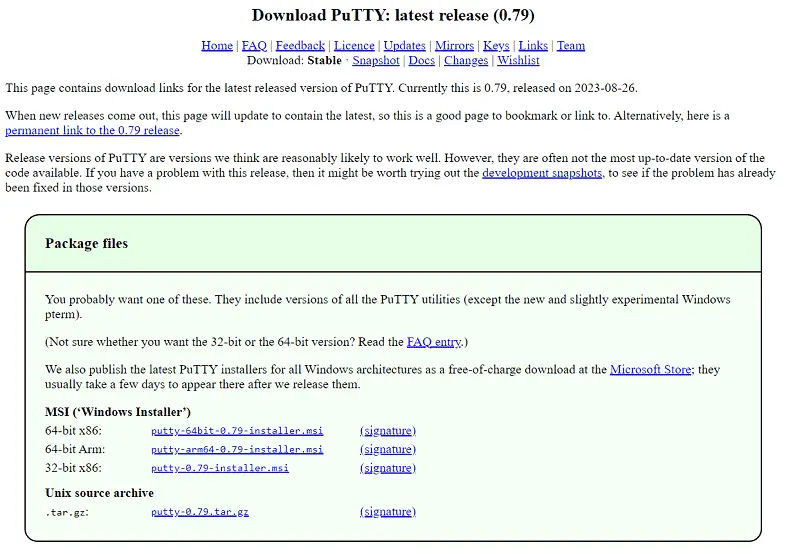
The Windows installer packages will be displayed first. We will download the executable file only, so software installation will not be required. Scroll down and look at the ‘Alternative binary files.’
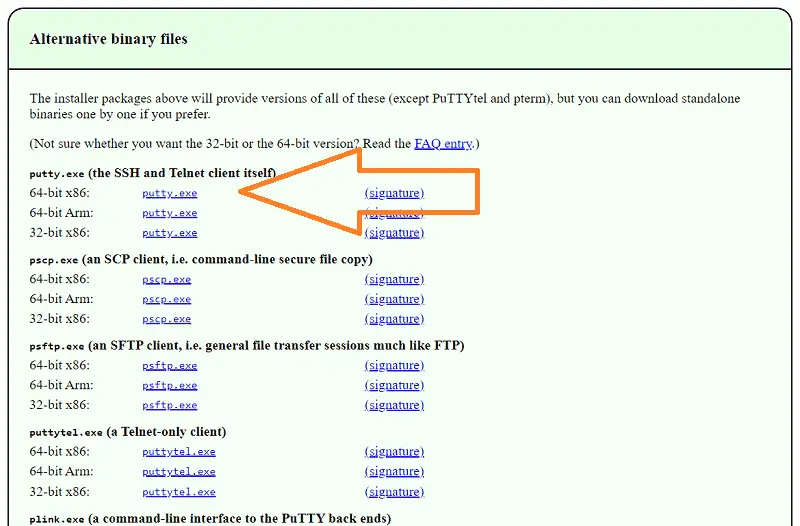
We will select the executable file that matches our hardware under the SSH (Secure Shell) and Telnet Client.
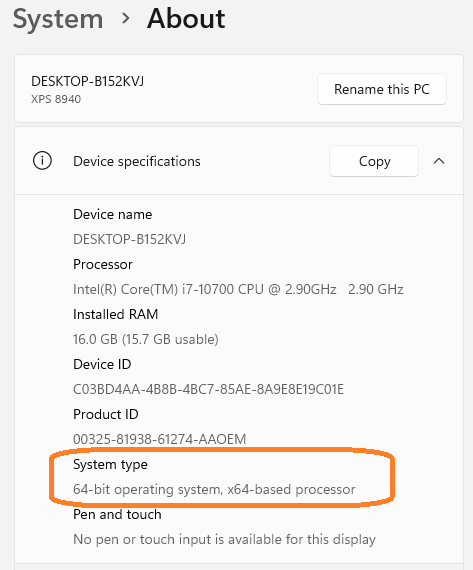
To check your system hardware using Windows 11, do the following:
- Open Settings on Windows 11.
- Click on System.
- Click the About tab.
- Check the hardware specs under the “Device specifications” section.
Select the ‘putty.exe’ next to the 64-bit x86. This will download the program file for our hardware.

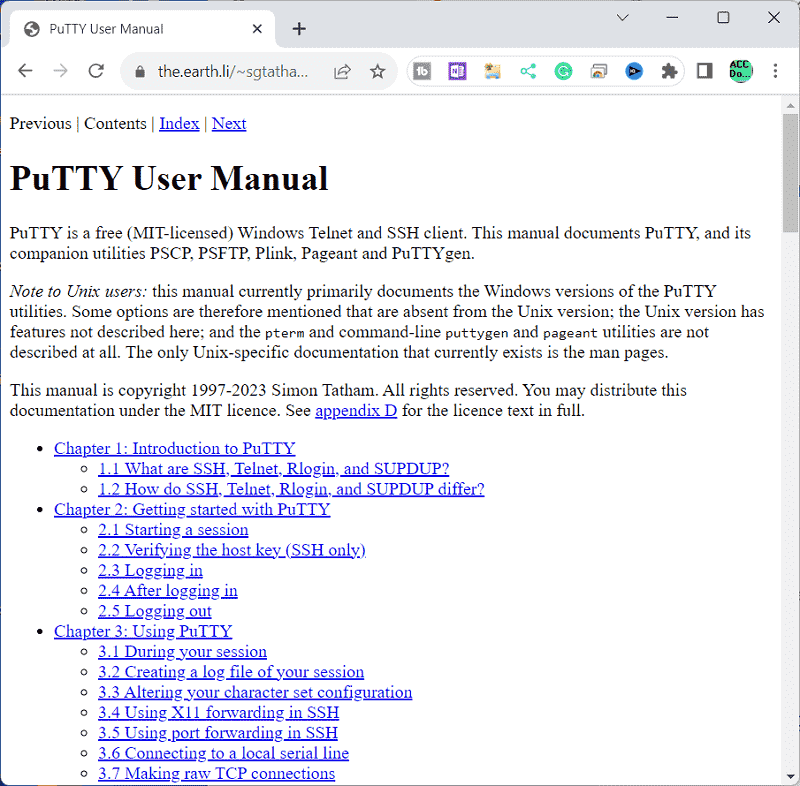
Further down the PuTTY website page, you will see the documentation. You can download the actual file or read this online using the HTML contents page.
Open a window showing you the PuTTY executable file you downloaded.

Double-click on the file to start the PuTTY program.
Once PuTTY is open, we can configure the necessary settings to establish a connection with the XY-MD02 temperature and humidity sensor.
By installing PuTTY on your Windows 11 64-bit computer, you will have the necessary software to communicate with the XY-MD02 sensor and retrieve temperature and humidity data. This step is crucial for the subsequent steps in reading the parameters and automatically polling the sensor using PuTTY.
Reading the Temperature and Humidity of the XY-MD02
To read the temperature and humidity of the XY-MD02 sensor, you will need to establish a connection using PuTTY. Follow the following steps:
1. Connect the USB to RS485 converter to your computer’s USB port. Make a note of the serial communication (COM) port that is being utilized with the converter using the device manager. In our case, this is COM3.
2. Connect the RS485 converter to the XY-MD02 sensor using a 2-wire cable.

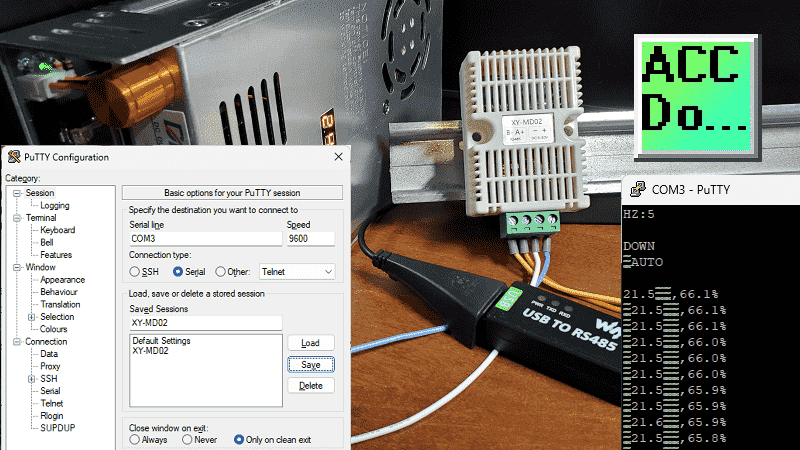
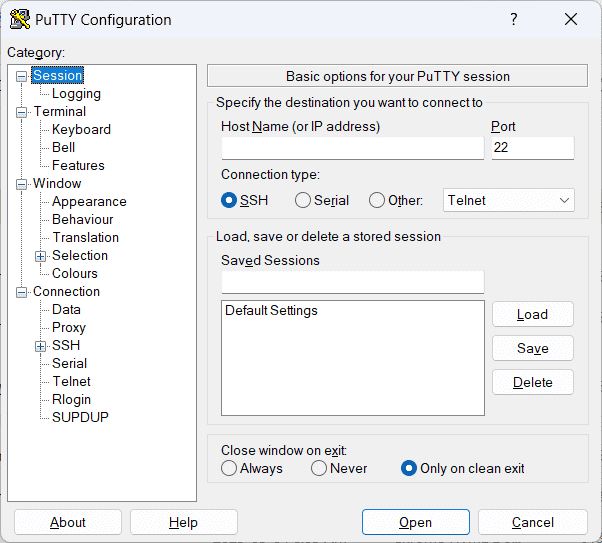
3. Open PuTTY, and go to the “Serial” category under the “Connection” section.
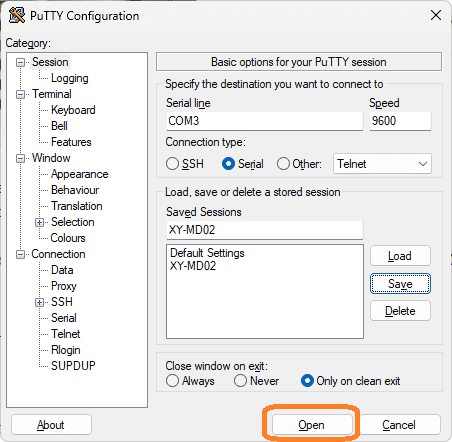
4. Select the appropriate COM port for the RS485 converter. In our case, this is COM3.

Set the baud rate to 9600, data bits to 8, stop bits to 1, and parity to None. These are the default parameters for the XY-MD02 sensor.
Select terminal.
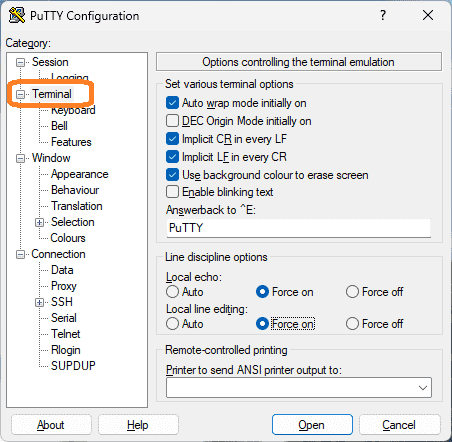
Ensure that ‘Implicit CR in every LF’ and ‘Implicit LF in every CR’ are selected. Select ‘ Force on ‘ for both under the local echo and local line editing.
Select session.

Under the connection type, select serial. Enter a name to keep these session parameters.
Select save to store these settings for later use.
5. Click on the “Open” button to establish the connection.
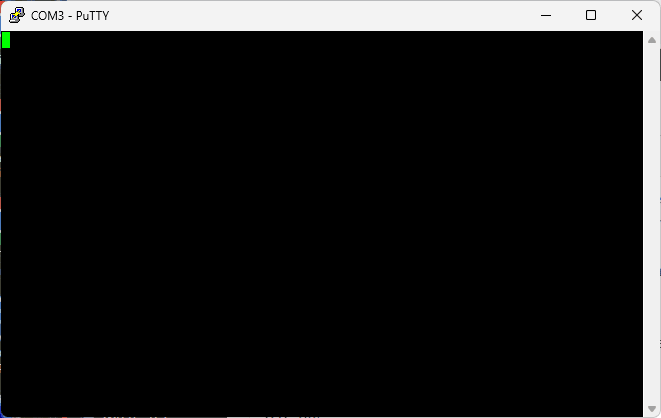
Once the connection is established, you can start reading the temperature and humidity data from the XY-MD02 sensor.
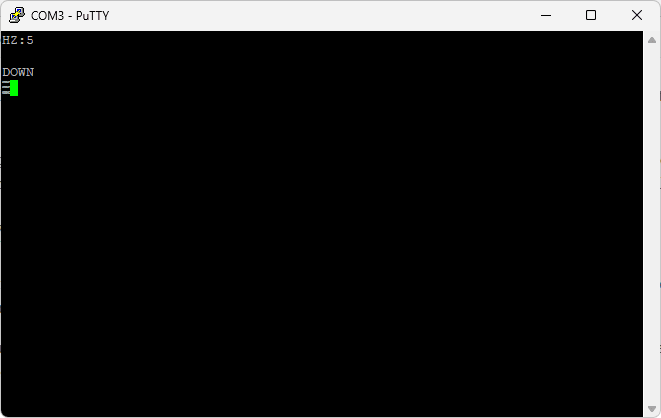
Here is the list of commands available for the XY-MD02 sensor.
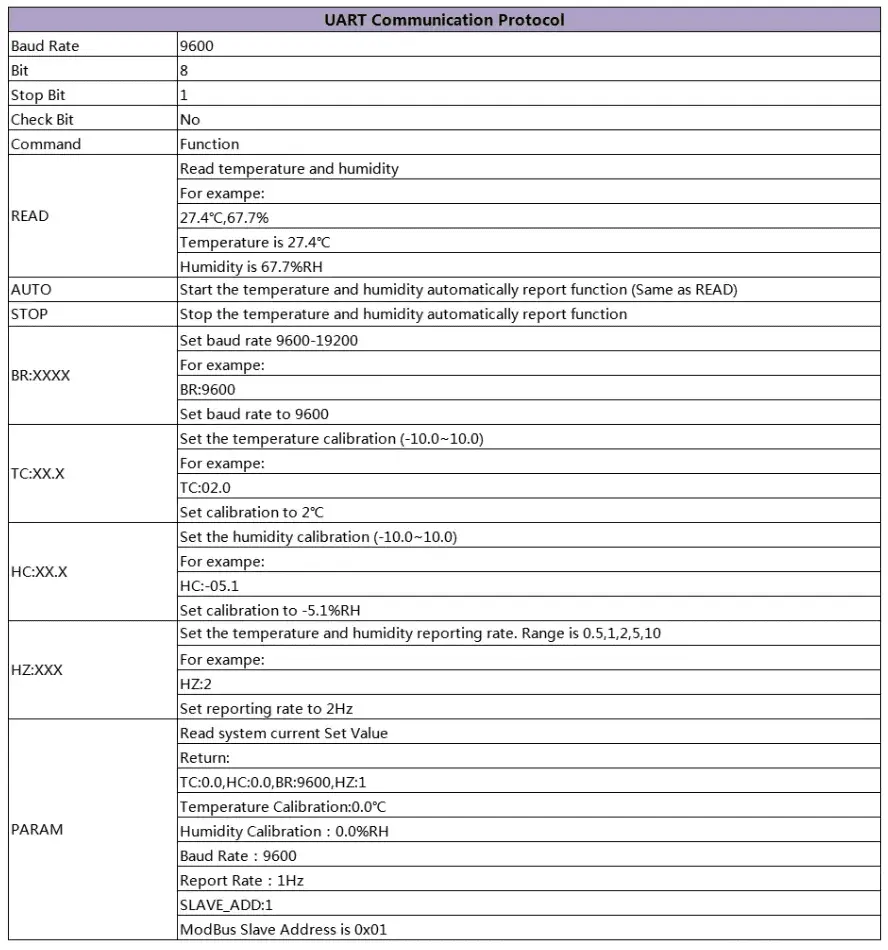
Send the command “READ” through PuTTY, and the sensor will respond with the current temperature and humidity values.
Note: The command must be all in capital letters.
By following these steps, you can successfully read the temperature and humidity of the XY-MD02 sensor using PuTTY. This information can be valuable for various applications that require monitoring and controlling environmental conditions.
Reading the Parameters of the XY-MD02
To fully utilize the XY-MD02 sensor, it is essential to understand how to read its parameters. By accessing the sensor’s parameters, you can gather additional information about its configuration and customize its behavior to suit your needs.
To read the parameters of the XY-MD02, you can continue using PuTTY, the serial communication software. Once you have established a connection with the sensor, as described previously, you can use the following commands.
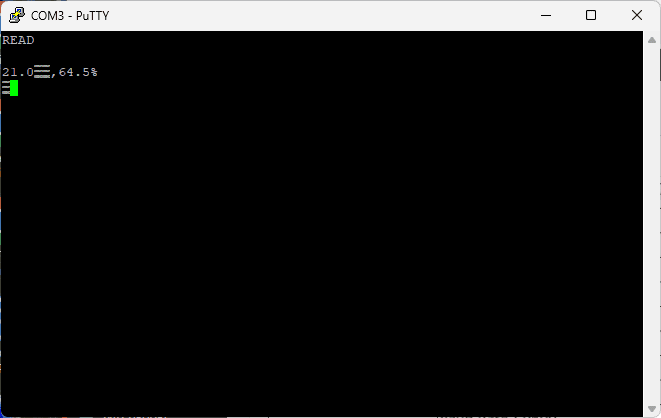
“PARAM” will read the current set values and return the temperature calibration, humidity calibration, baud rate, report rate, and the Modbus slave address.
The parameters of the XY-MD02 help you understand its settings and capabilities. This knowledge lets you fine-tune the sensor’s behavior and integrate it effectively into your projects. Since this is a 1:1 serial communication, the Modbus slave address can be read without using the Modbus protocol.
Automatic Polling XY-MD02 using PuTTY
You can utilize automatic polling to automate the process of reading temperature and humidity data from the XY-MD02 sensor. You can continuously retrieve real-time measurements by automatically polling without requiring manual input.
To set up the automatic polling rate, use the following HZ command. This command is a little confusing from the chart above. Here are the following command settings and the corresponding update times:
HZ:1 = 1 reading every second
HZ:0.5 = 1 reading every 0.5 seconds
HZ:2 = 1 reading every 2 seconds
HZ:5 = 1 reading every 5 seconds
HZ:10 = 1 reading every 10 seconds
Open PuTTY and connect with the XY-MD02 sensor again like we did previously.
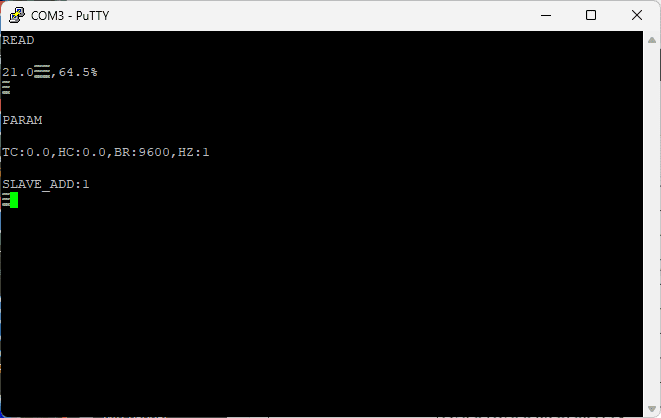
Enter the command “HZ:5” This will set up the automatic polling once every 5 seconds.
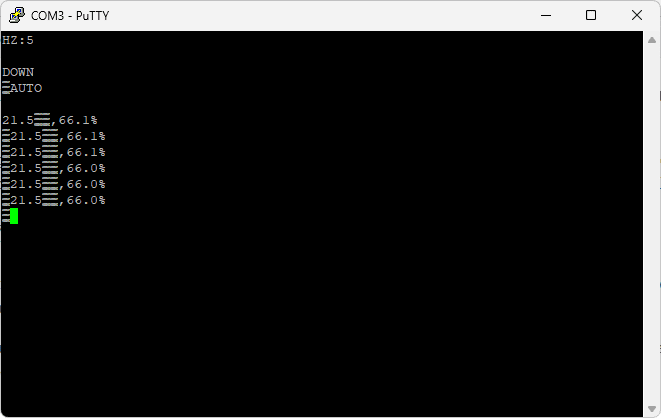
Enter the command “AUTO.” This will start the temperature and humidity automatic reporting function of the XY-MD02.
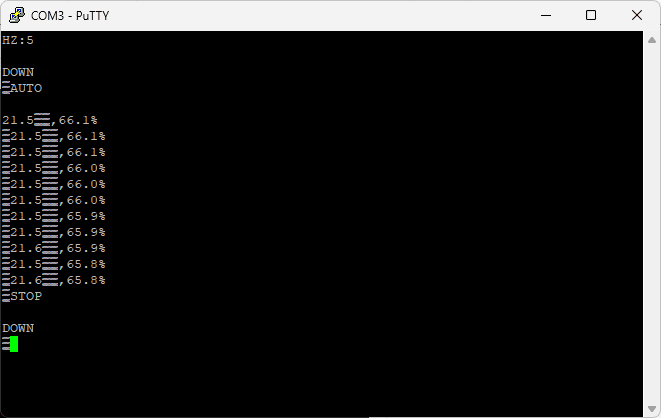
Enter the command “STOP.” This will stop the automatic reporting function. If the frequency of the automatic polling is too quick to type “STOP” into PuTTy, cycling power to the sensor will also stop the polling.
By setting up automatic polling, you can continuously monitor the temperature and humidity readings from the XY-MD02 sensor without manual intervention. This is particularly useful in applications where real-time data is crucial, such as environmental monitoring or process control. With PuTTY’s automation capabilities and the XY-MD02 sensor, you have a powerful combination for seamless data acquisition and monitoring.
Watch the video below to see PuTTY communicate serial UART to the XY-MD02 temp humidity sensor.
XY-MD02 Temperature Humidity Sensor – Modbus RTU (RS485)
Purchase
Amazon.com
Amazon.ca
Manual
Specifications and Documentation
Integrating XY-MD02 Sensor Modbus RTU Click PLC – Video
Connection to Raspberry Pi
Watch on YouTube: XY-MD02 Temp Humidity Serial UART Communication
If you have any questions or need further information, please contact me.
Thank you,
Garry
If you’re like most of my readers, you’re committed to learning about technology. Numbering systems used in PLCs are not challenging to learn and understand. We will walk through the numbering systems used in PLCs. This includes Bits, Decimal, Hexadecimal, ASCII, and Floating Point.
To get this free article, subscribe to my free email newsletter.
Use the information to inform other people how numbering systems work. Sign up now.

The ‘Robust Data Logging for Free’ eBook is also available as a free download. The link is included when you subscribe to ACC Automation.