The XY-MD02 temperature and humidity sensor uses Modbus RTU for communication. Modbus RTU (serial) works as a master (client) to slave (server) communication protocol. To add this sensor to an existing network as another unit number, you must set it up first.
We will be using the Simply Modbus Master software in demo mode to set the parameters of the XY-MD02 sensor. We will test the default values of the sensor and then adjust the parameters for our network. Let’s get started.
Additional information, including specifications and features of the XY-MD02, can be found here. This page will have more information than the XY-MD02 manual.
Once parameters are set up for the XY-MD02 temperature and humidity sensor, it can be added to an existing or new network. Here is a post showing this sensor connected to a Click PLC.
Integrating XY-MD02 Sensor Modbus RTU Click PLC – Video
Hardware XY-MD02 Modbus RTU
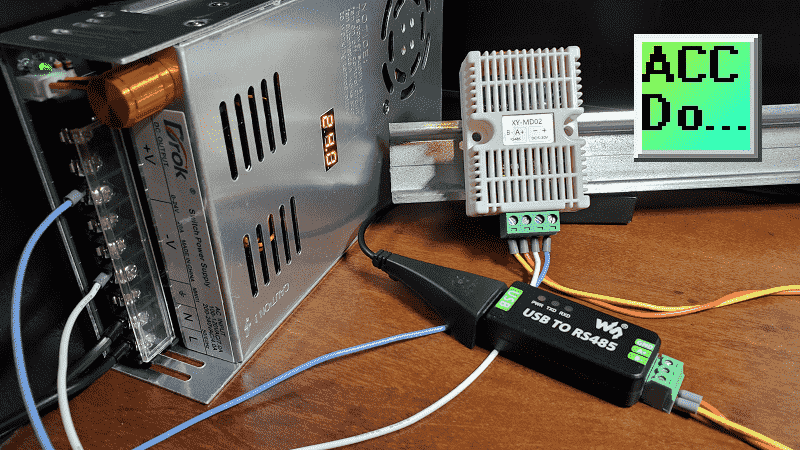
The USB port on our computer will use a USB to RS485 converter. Installation of this software has been discussed in a previous post. The XY-MD02 sensor will be powered up with a 24VDC supply. A picture of our configuration is shown above.
The wiring of the XY-MD02 sensor can be seen in the following diagram:
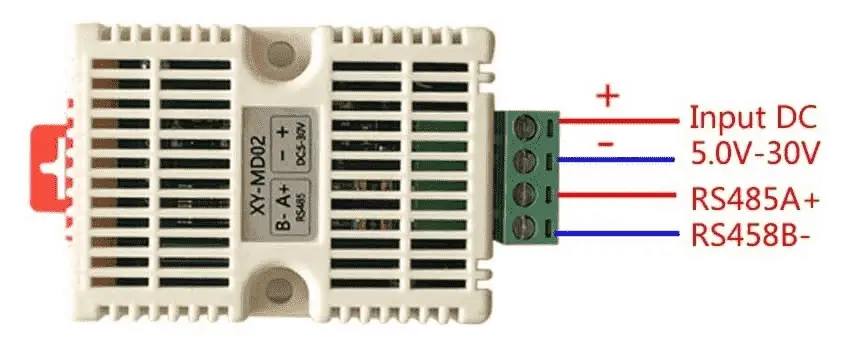
The supply voltage on our sensor can be anywhere from 5 to 30 volts DC. RS485 A+ will be connected to A+, and RS485 B- will be connected to B- on the USB/RS485 converter.
Our hardware can be found and purchased from the following Amazon affiliate links:
XY-MD02 – Temperature and Humidity Sensor – Modbus RTU, Serial UART, Communication
Waveshare industrial USB to RS485 converter
Waveshare USB to Serial PC Installation – Video
Power Supply
DROK Adjustable DC Power Voltage Converter AC 110V-220V to DC 0-24V
Software Installation XY-MD02 Modbus RTU
The Waveshare USB to RS485 installation instructions are covered in the following post. This driver will assign the device a communication port (COM Port). Using the device manager in Windows, you can see the communication port assigned to the USB to RS485 converter.
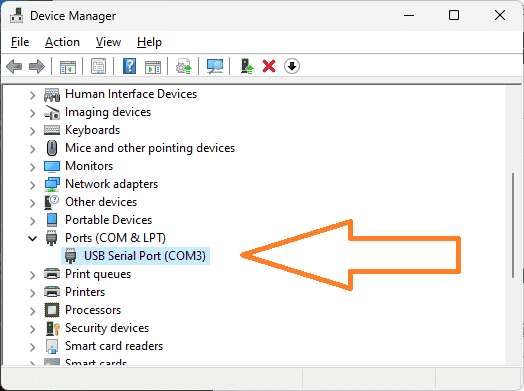
There are a few different ways to get to device manager in Windows 11. Right-click the Start button or press the Windows Logo + X key combination on the keyboard and, from the list, click Device Manager. You can also search for device manager on the search bar.
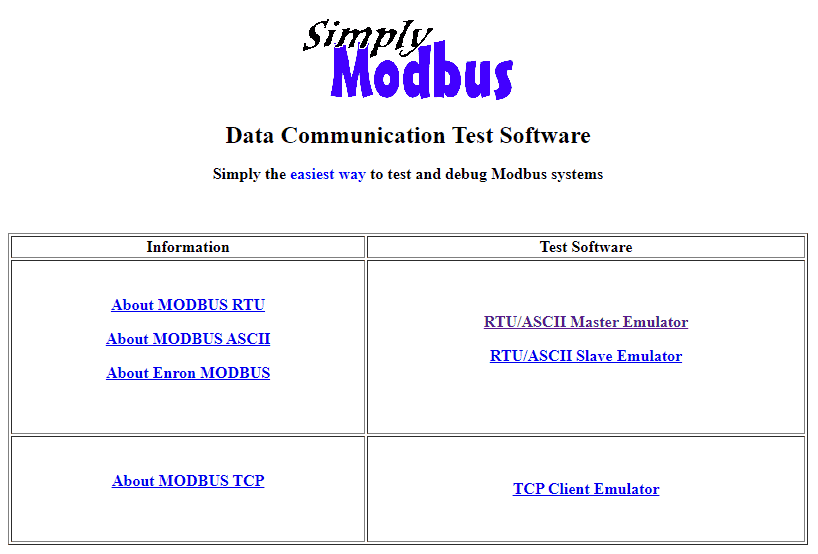
The Simply Modbus Data Communication Test software is the easiest way to test and debug Modbus systems. Additional documentation can also be found on the Simply Modbus website about Modbus.
Select the RTU/ASCII Master Emulator test software.
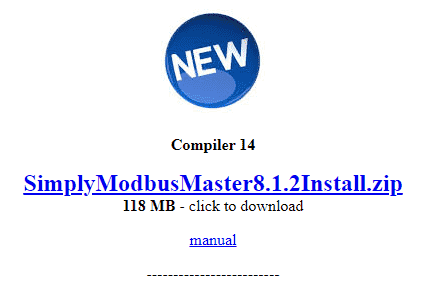
Scroll down the page until you see the link to download the Compiler 14. This is the latest version of the software. We are installing this on a Windows 11 64-bit computer. Select the download link.
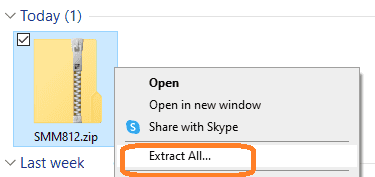
Once downloaded, right-click on the zip file and select ‘Extract All…’.
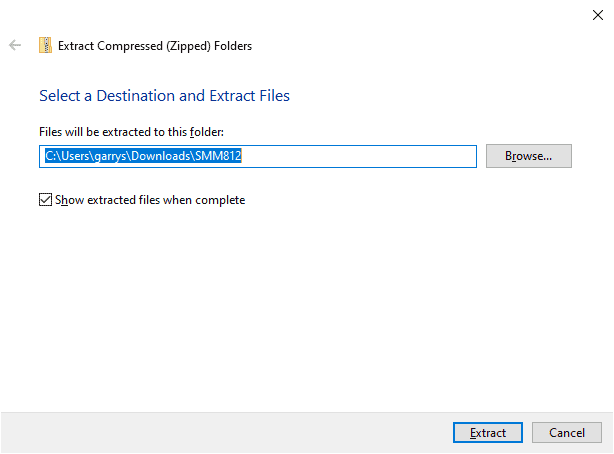
Use the default location and ensure that the ‘show extracted files when complete’ is checked. Select Extract.
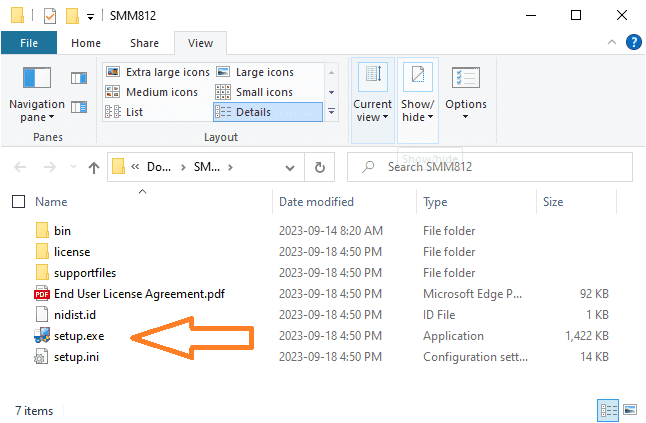
Double-click on the ‘setup.exe’ file to start the installation.

Leave the default file directories the same and select next.
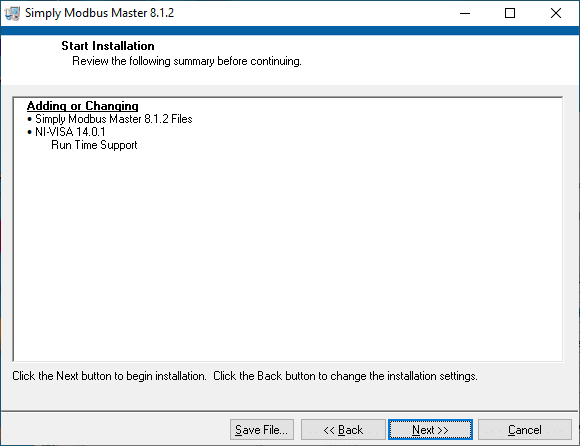
A summary review is then displayed. Select next to start the installation.

Select finish after the installation is complete.
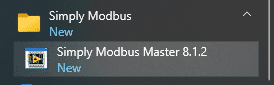
Select the start on the computer and look for the new ‘Simply Modbus Master 8.1.2’ to start the program.
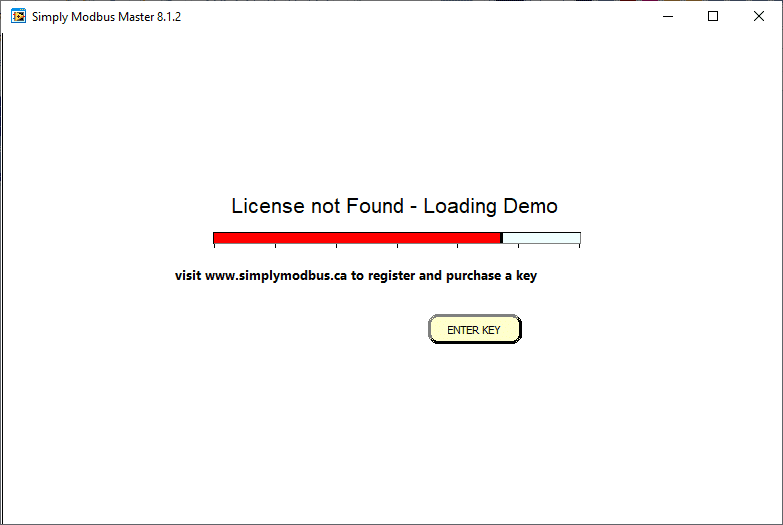
The ‘License not Found – Loading Demo’ will be displayed when the software starts. This software will allow you to read or write six times in the demo mode. Simply close and open the software again for another six read or write six times.
Jerry from Simply Modbus Software has extended a 10% discount to ACC Automation readers. Use the following URLs to receive a discount on these software packages:
RTU/ASCII Master referral $54
RTU/ASCII Slave referral $54
TCP Client referral $54
Please send me an email to request further discounts on multiple package orders.
Software Configuration XY-MD02 Modbus RTU
We will read the temperature and humidity to ensure the communications work as expected. The default parameters for the XY-MD02 sensor are unit address 1, 9600 baud, 8 data bits, one stop bit, and no parity.
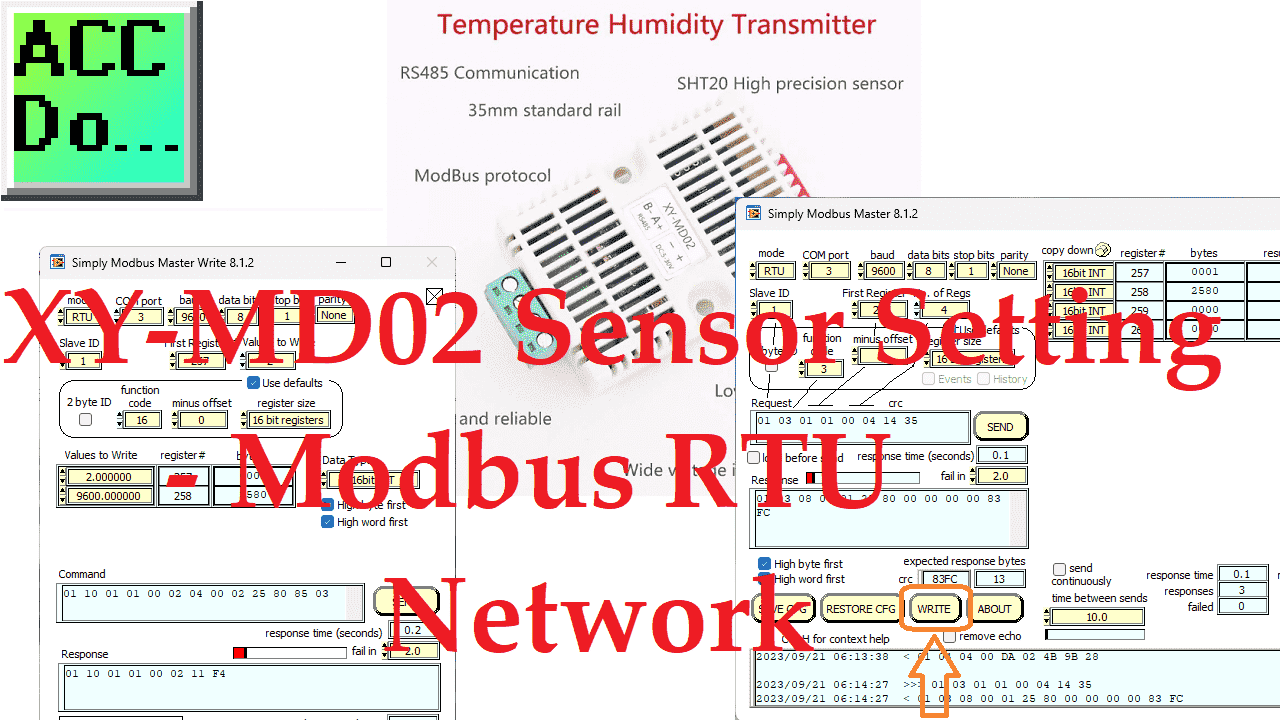
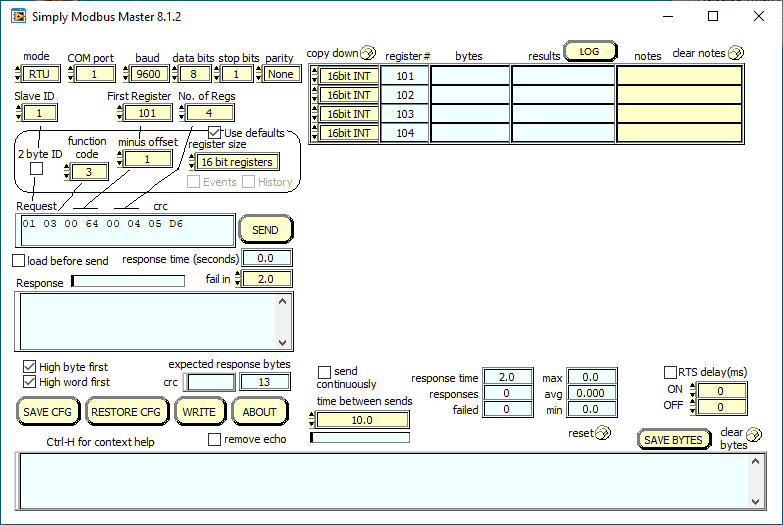
Here is the Simply Modbus Master 8.1.2 interface.
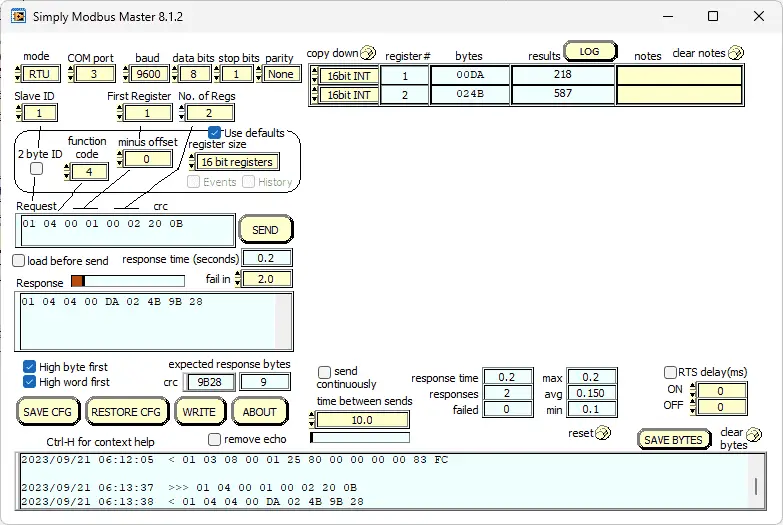
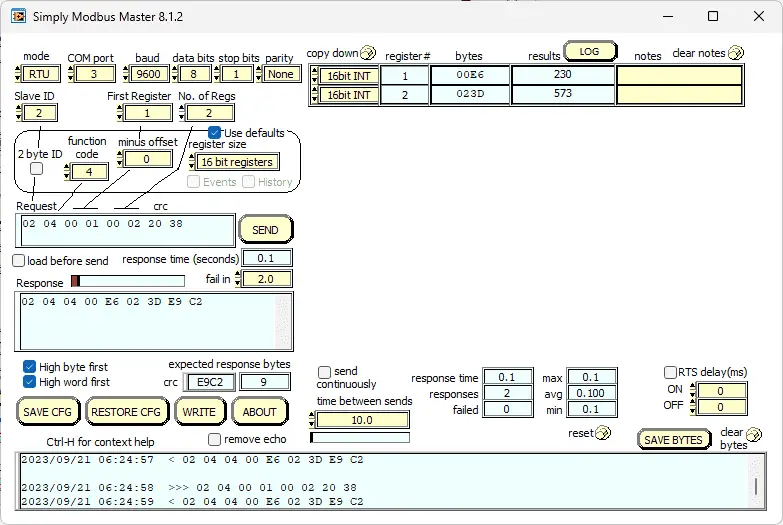
The first thing that we will do is read the temperature and humidity. Modbus RTU will be the mode for this communication. COM port three is used in our example based on the device manager indication. Our slave (server) address is one, and we will read two registers starting at address 1. The Modbus function code will be 4 with a 0 offset for the address. 16-bit registers will be read. Once we select the SEND button, our returning data can be seen in the results.
Note: One decimal place is understood—the reading of 218 means 21.8 degrees Celsius—and the reading of 587 means 58.7 % RH.
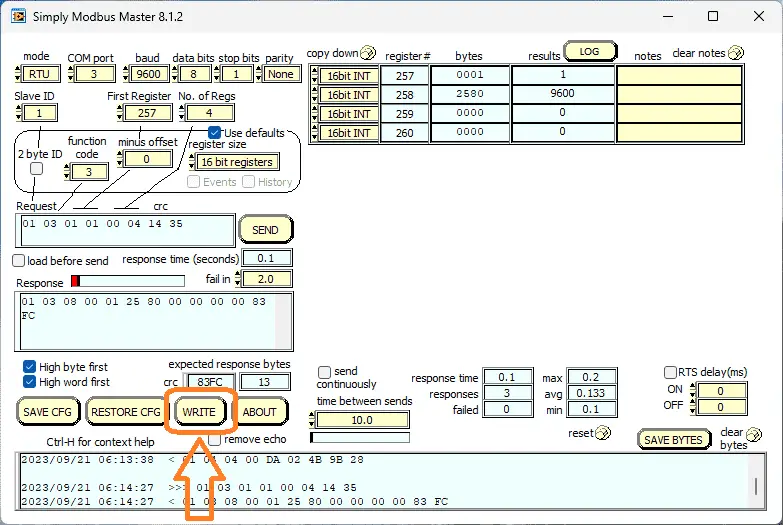
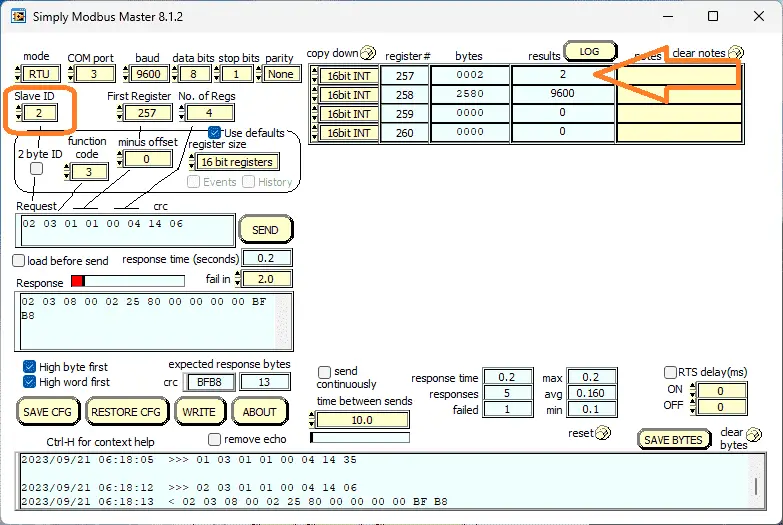
Changing the first register to 257 (101 hex), setting the function code to 3, and reading four registers will show you the parameters for the XY-MD02 sensor. This data represents the address number, baud rate, temperature offset, and humidity offset.
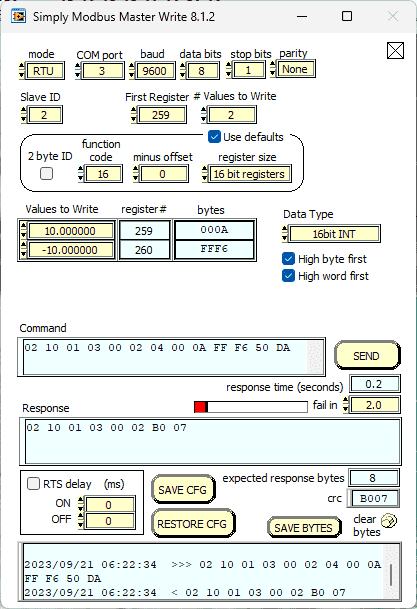
Select the WRITE button.
The Simply Modbus Master Write window will now be displayed.
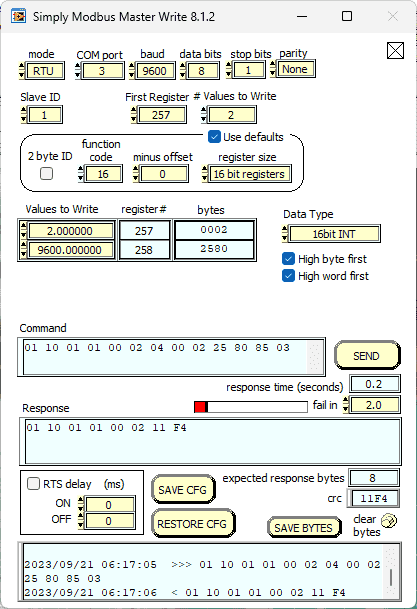
We will change the Modbus Unit number and the baud rate. The first register will be 257 (101 hex), and we will write two 16-bit addresses. Function code 16 (10 hex) will be used to perform the write operation. Enter the values for both registers and select send. This will now set the new parameters into the sensor. Power must be cycled on the XY-MD02 sensor for the new setting to take effect.
Going back to the reading again, select slave ID 2. You will now see that our Modbus address unit number has changed.
We can then write the offsets into the temperature and humidity sensor.
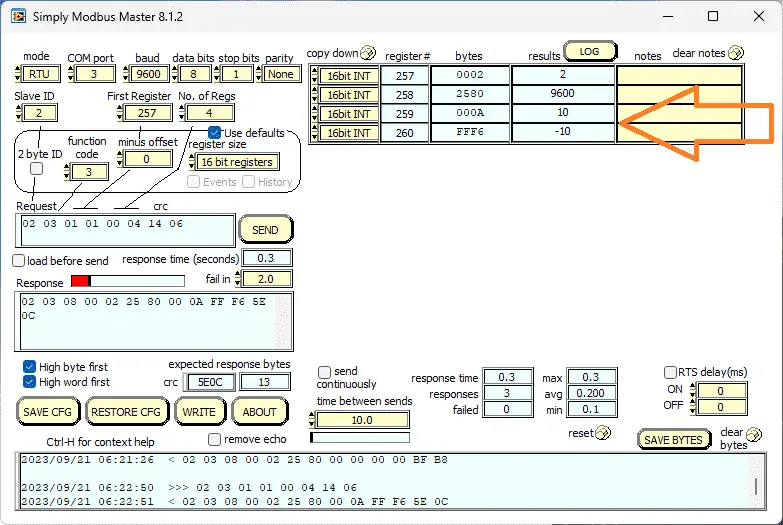
Rereading the parameters will show us our changes.
We can then go back and verify our temperature and humidity settings.
Watch the video below to see the Simply Modbus Master software set up the XY-MD02 temp humidity sensor.
XY-MD02 Temperature Humidity Sensor – Modbus RTU (RS485)
Purchase
Amazon.com
Amazon.ca
Manual
Specifications and Documentation
Integrating XY-MD02 Sensor Modbus RTU Click PLC – Video
Connection to Raspberry Pi
Watch on YouTube: XY-MD02 Sensor Setting – Modbus RTU Network
If you have any questions or need further information, please contact me.
Thank you,
Garry
If you’re like most of my readers, you’re committed to learning about technology. Numbering systems used in PLCs are not challenging to learn and understand. We will walk through the numbering systems used in PLCs. This includes Bits, Decimal, Hexadecimal, ASCII, and Floating Point.
To get this free article, subscribe to my free email newsletter.
Use the information to inform other people how numbering systems work. Sign up now.

The ‘Robust Data Logging for Free’ eBook is also available as a free download. The link is included when you subscribe to ACC Automation.