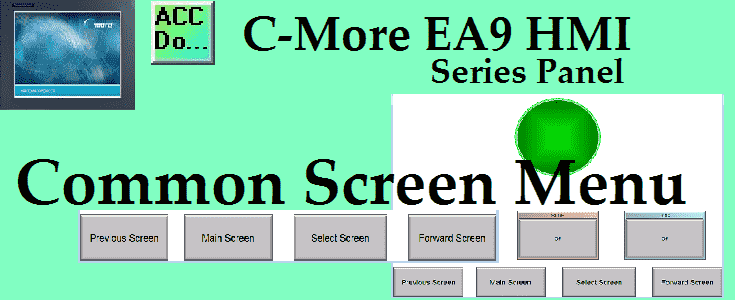
We will now look at programming in our C-More, common screen menus. Allowing operators of your HMI (Human Machine Interface) panel to easily navigate all of the information available is a vital part of programming. We want to present the information to the operator so they will clearly understand the programmed operation of the unit. Common menus on the HMI panel pages will allow the quick navigation, understanding, and control that your operators want. When programming operator interfaces I have always heard to use the KISS method. (Keep It Stupidly Simple.) Your HMI program interface could contain hundreds of pages containing vital information for operator understanding and control, but you must make it easily accessible and intuitive. This is how you design and program a good HMI panel display.
We will be creating a common screen menu for our C-More EA9 HMI Panel using the C-More programming software. Using our previous program created we will be making a background screen to act as our menu system. Let’s get started.
Previously in this C-More EA9 HMI Panel series, we have done the following:
System Hardware
– Unboxing and Review Video
– Powering the Unit Video
Installing the Software – Video
System Setup Screens – Video
First Program
– Establishing Communication and Updating Firmware Video
– First Program Video
Panel to PLC and PLC to Panel Settings – Video
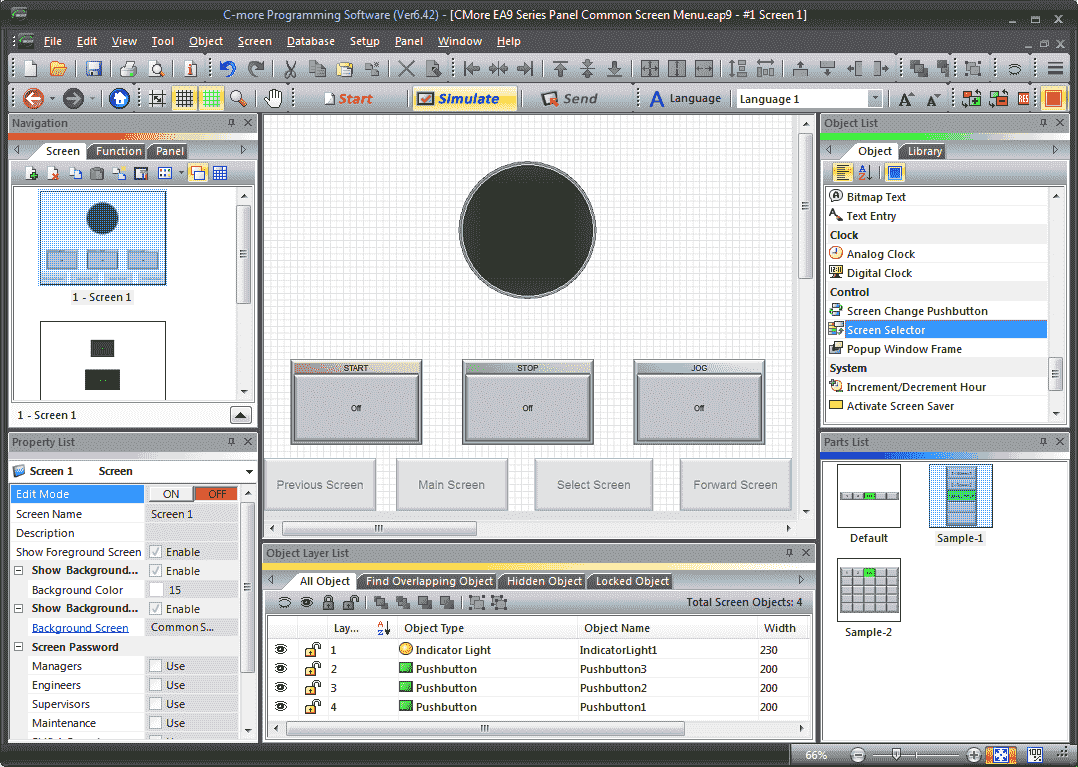
Creating the C-More Common Background Screen Menu
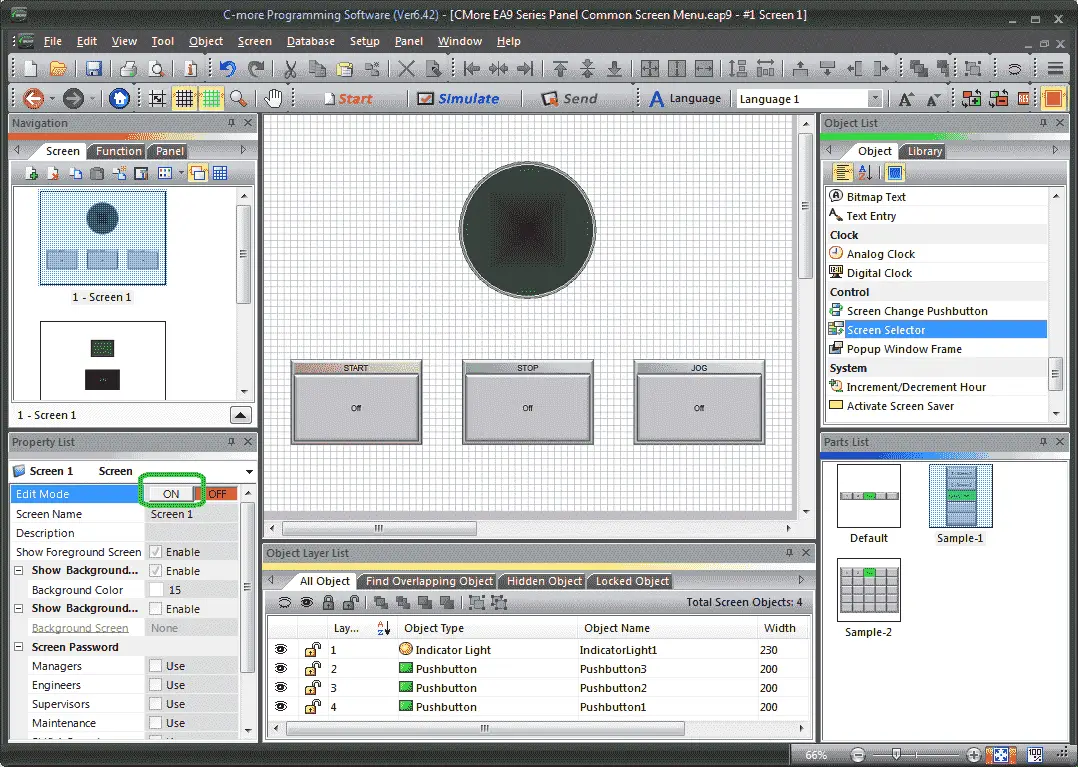
We will modify our program from C-More EA9 HMI Panel to PLC and PLC to Panel Settings. Our existing program has two pages: 1 – Screen 1 (Motor Start, Stop, Jog) and 2 Screen 2 (Communication Error Code and Bit)
Create a new screen by selecting an icon for a new screen under the screen tab in the Navigation window. Alternatively, you can use the main menu | New Screen… or Ctrl + N from the keyboard.
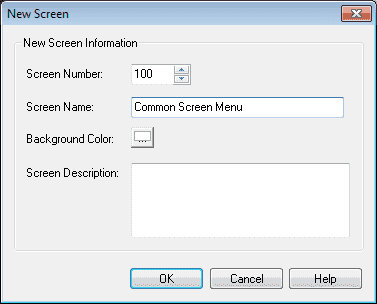
Our new screen will be number 100. Call the screen Common Screen Menu. We can also fill in the screen description to also help document our program. Hit OK.
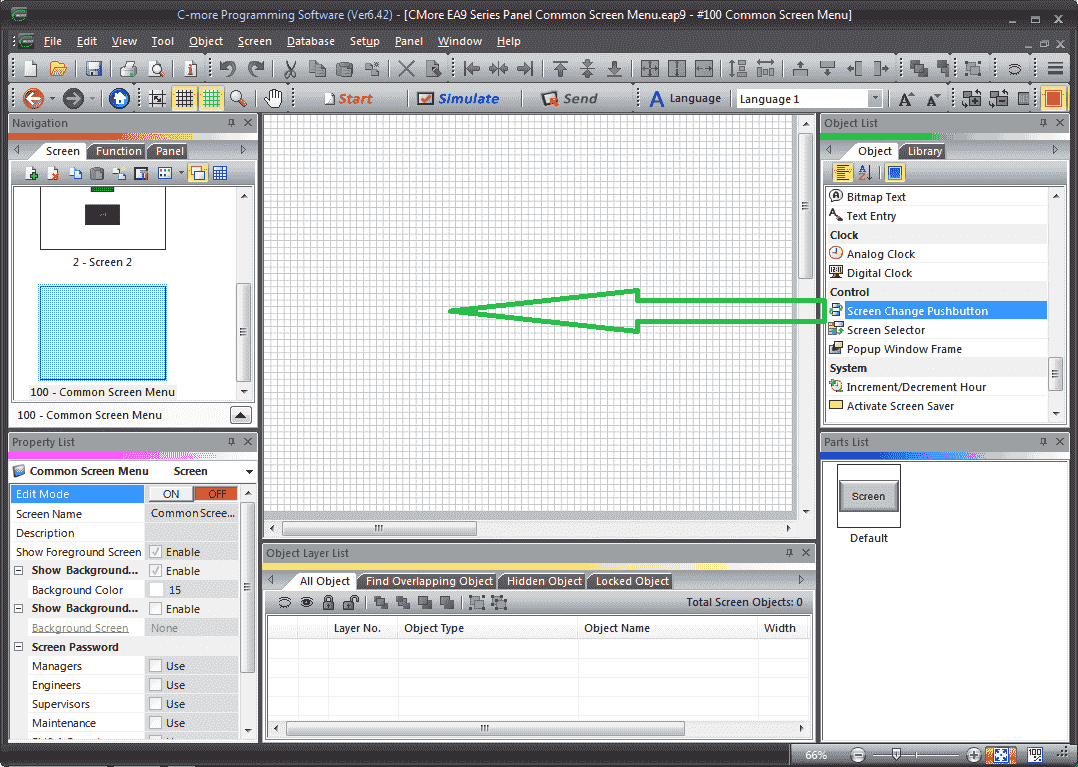
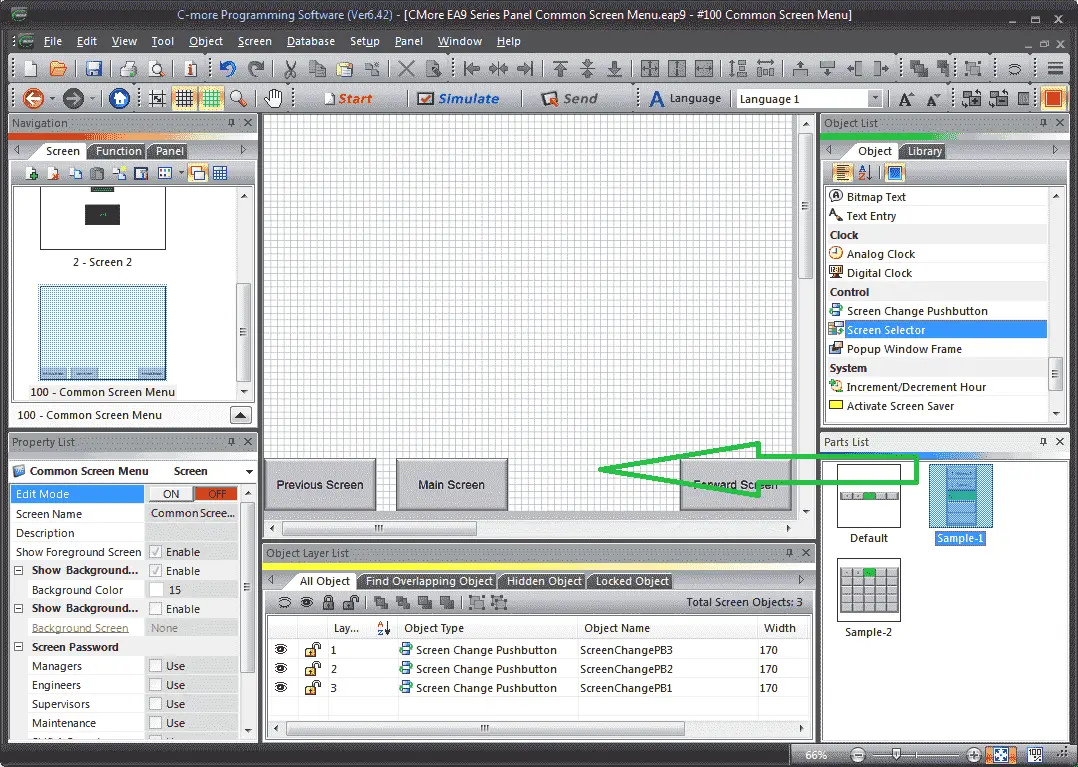
Our new screen will now be displayed. Select Screen Change Pushbutton from under the Control heading in the Object list. Click and drag this onto the work area of screen 100.
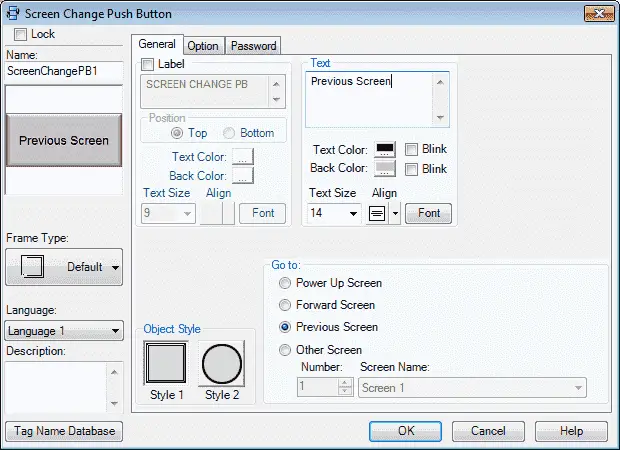
The text for the pushbutton will be “Previous Screen”. Use the size 14 font to ensure that the text is large enough to see. Under the ‘Go to:’ heading select previous screen. We will leave all of the other options as their default.
You can now use the mouse to size and position the pushbutton on the screen.
We will now copy this pushbutton object. Right click on the object and select duplicate. This will place an exact replica of the pushbutton on the screen. Double click on this button.
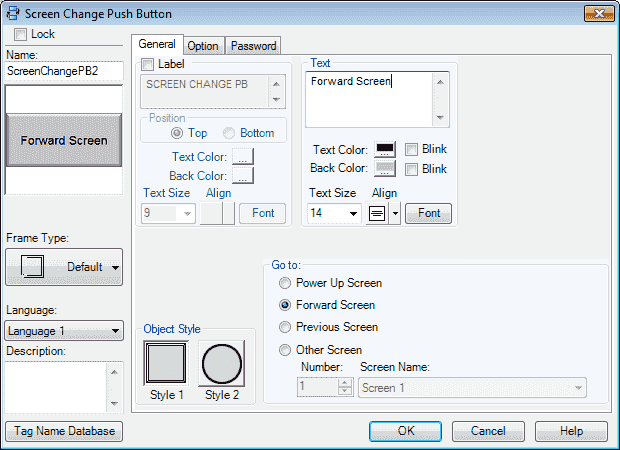
We will call this ‘Forward Screen’. Select Forward Screen under the ‘Go to:’ options. Hit OK.
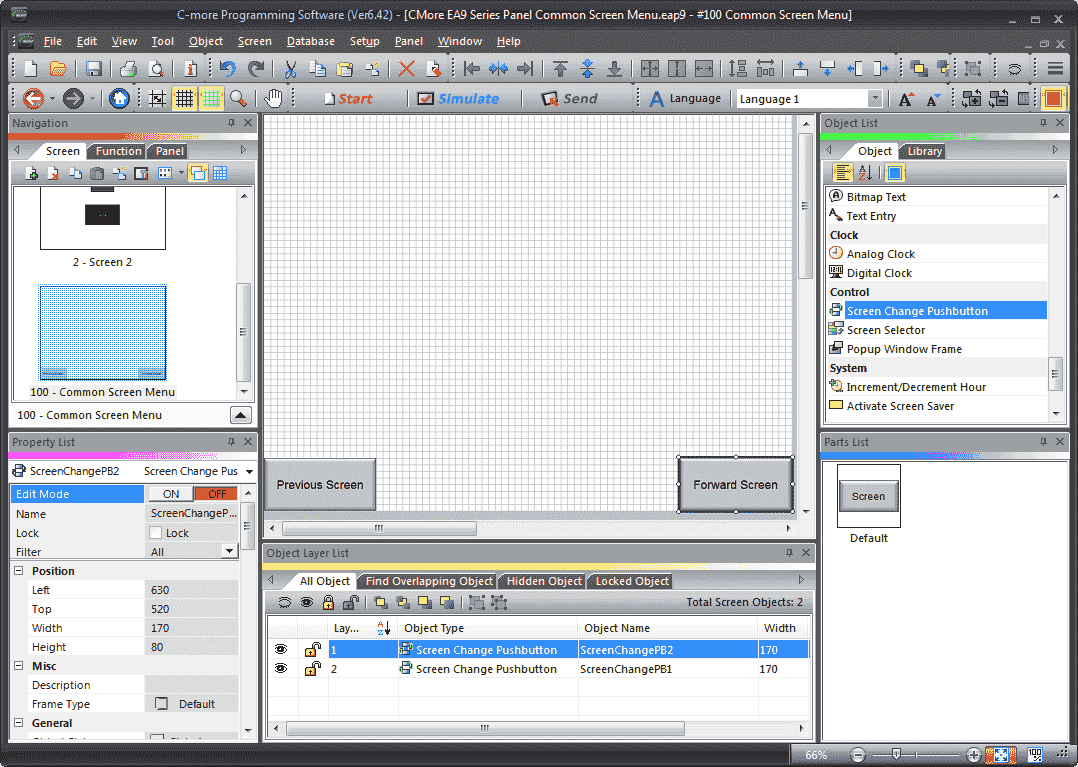
Use the mouse to position the pushbutton on the screen. Right click on the object and select duplicate again for this button.
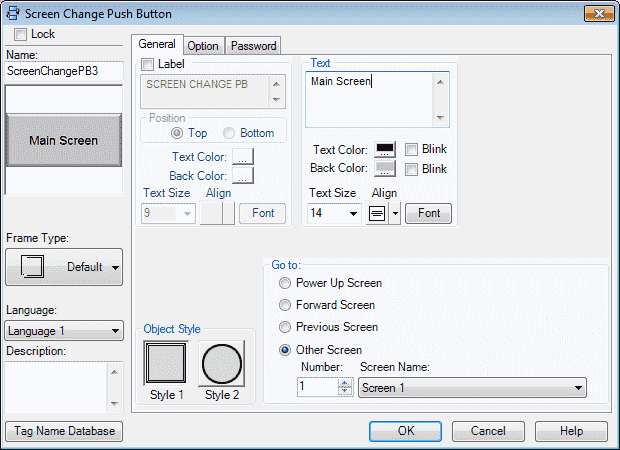
We will call this push button ‘Main Screen’. Under the ‘Go to:’ option select Other Screen and select screen number 1. Hit OK.

Position the new push button on the screen.
Select Screen Selector under the Control heading in the Object list. Click and drag Sample-1 onto the work area.
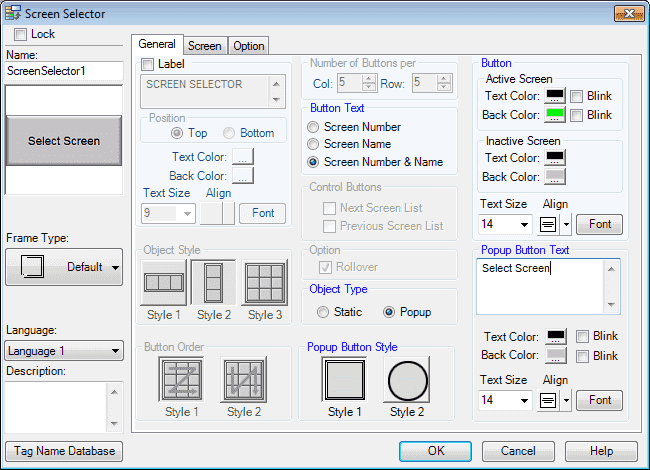
Under the general tab. Set the following parameters in the screen selector window.
Button Text – Select Screen Number and Name
Object Type – Select Popup
Button Text Size – Set to 14
Popup Button Text – Name – Select Screen
Text Size – Set to 14
Select the Screen tab in the screen selector window.
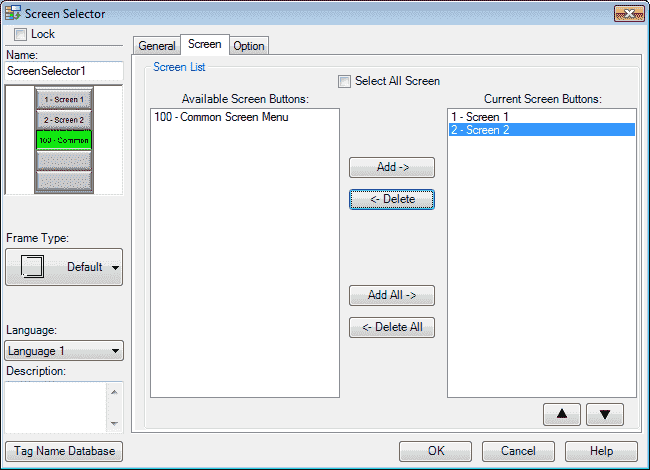
This option will allow you to set what screens can be set with the button. Deselect select all screen. (This is the default setting.) Select screen 100 and press delete. This will move the screen to the available screen button list.
You will see a graphical representation of the screen selector on the top left corner.
Hit OK.

You can now use the mouse to size and position the pushbutton on the screen.
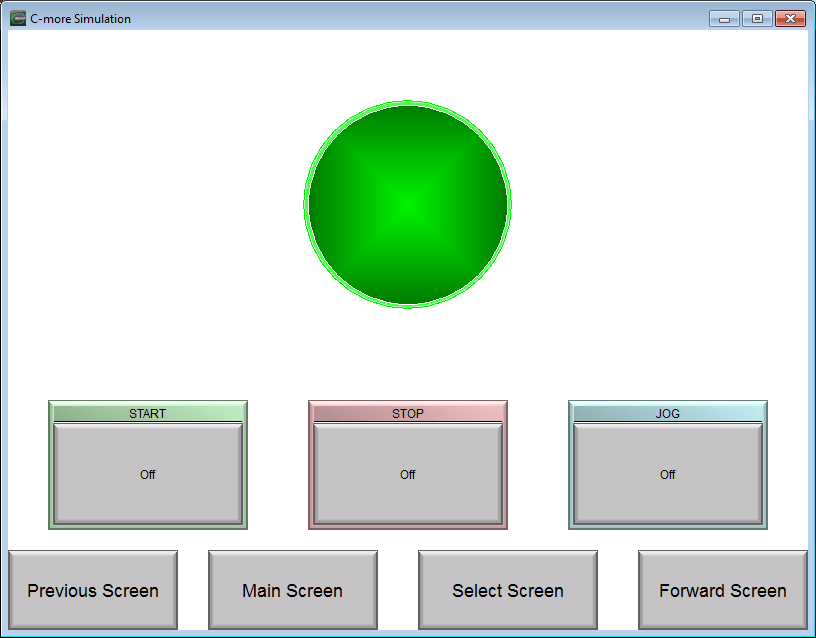
Our common screen menu is now complete. We can now add this to our existing screens.
Adding Common Screen Menu
Select screen 1 on the screen tab under the navigation. This will display screen 1 in our work area. Under the property list select ON for the edit mode.

Under the show background screen, select the enable.
Select the Common Screen Menu that we have just created above as the background screen.
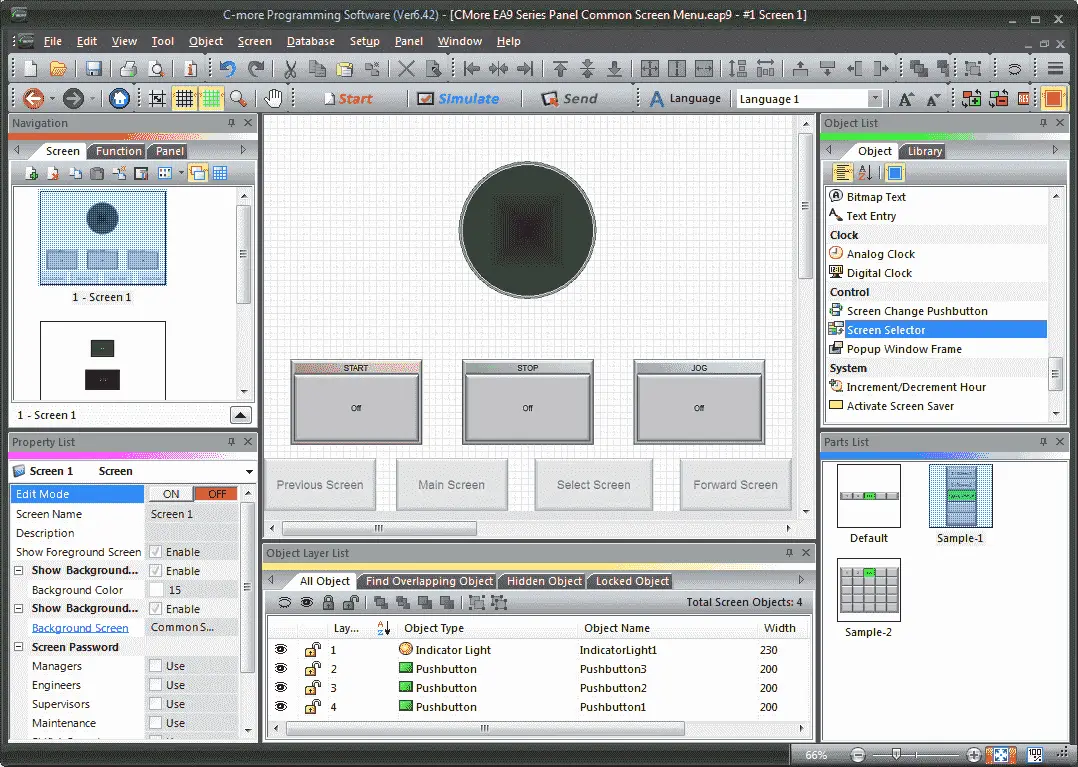
You will now see how the common screen menu will look in the work area. Select the OFF button for editing in the property list.
We will now select screen number 2 and perform the same operation.
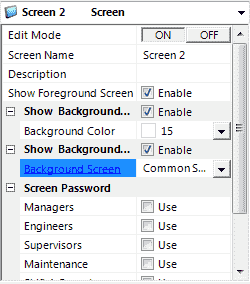
Select ON for editing on the property list. Enable the show background screen and select Common Screen Menu.
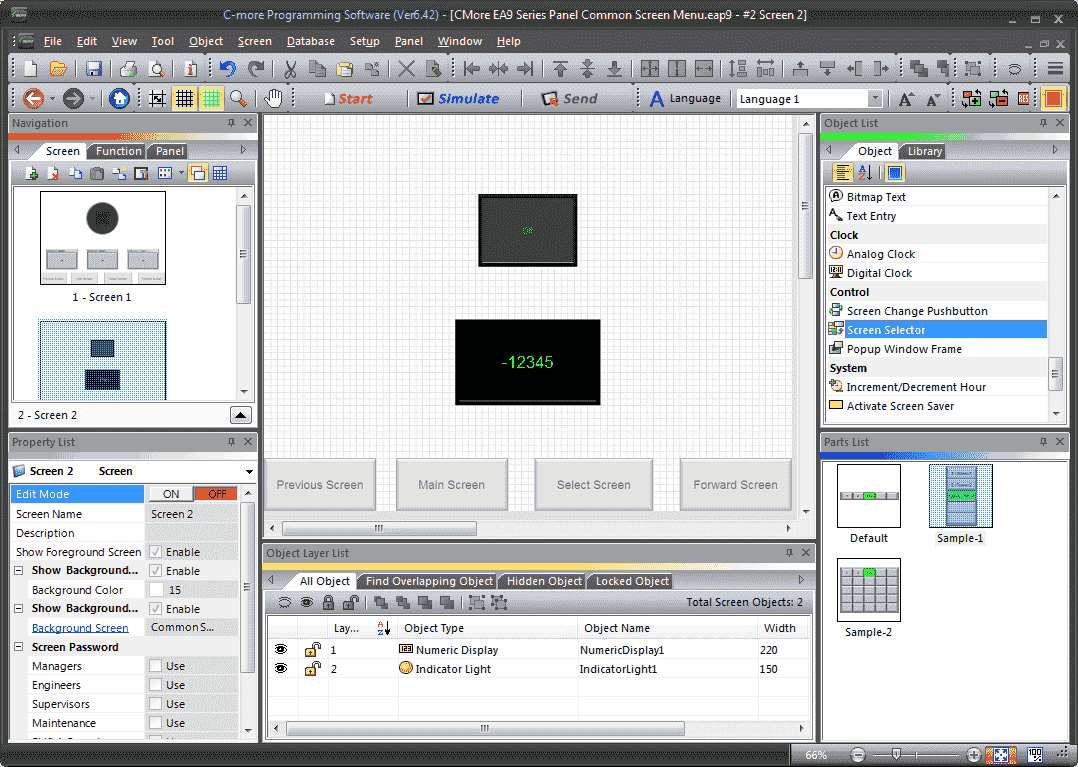
You will now see how the common screen menu will look in the work area. Select the OFF button for editing in the property list.
Simulate our C-More Common Screen Menu Program
Select Simulate from the icon at the top of the work window.
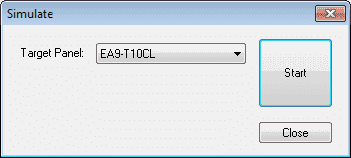
Our target panel will be the EA9-T10CL. Hit the Start button.

We will have two windows. The first is displayed above. It will display what the screen will look like. You can see that we have selected the screen select push button and the popup is now showing.
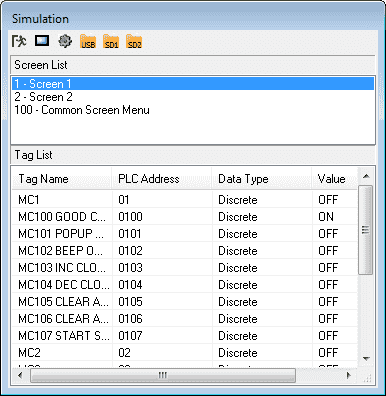
The other screen is the simulation. This will list the tags used in your program. You can toggle items on or off and the display window will respond. Note: The simulation will only work manually because no PLC controller is attached.
Watch the video below to see the common screen menu in action in our C-More EA9 HMI Panel.
Download the PLC and C-More Panel Programs here.
C-More EA9 Panels from Automation Direct
https://www.automationdirect.com/c-more/home
C-More – Graphic Panel (EA9 Series) User Manual and Quick Start Guides
https://cdn.automationdirect.com/static/manuals/ea9userm/ea9userm.html
EA9-T10CL C-More Specifications
https://cdn.automationdirect.com/static/specs/ea9t10cl.pdf
C-More EA9 Programming Software (Current Version V6.42)
https://support.automationdirect.com/products/cmore.html
This software will enable you to program all of the C-More EA9 HMI units. It includes a simulator for your application.
Next time we will look more at the project simulation that we can do in the C-More HMI Panel.
Watch on YouTube: C-More EA9 HMI Series Panel Common Screen Menu
If you have any questions or need further information please contact me.
Thank you,
Garry
If you’re like most of my readers, you’re committed to learning about technology. Numbering systems used in PLC’s are not difficult to learn and understand. We will walk through the numbering systems used in PLCs. This includes Bits, Decimal, Hexadecimal, ASCII and Floating Point.
To get this free article, subscribe to my free email newsletter.
Use the information to inform other people how numbering systems work. Sign up now.

The ‘Robust Data Logging for Free’ eBook is also available as a free download. The link is included when you subscribe to ACC Automation.