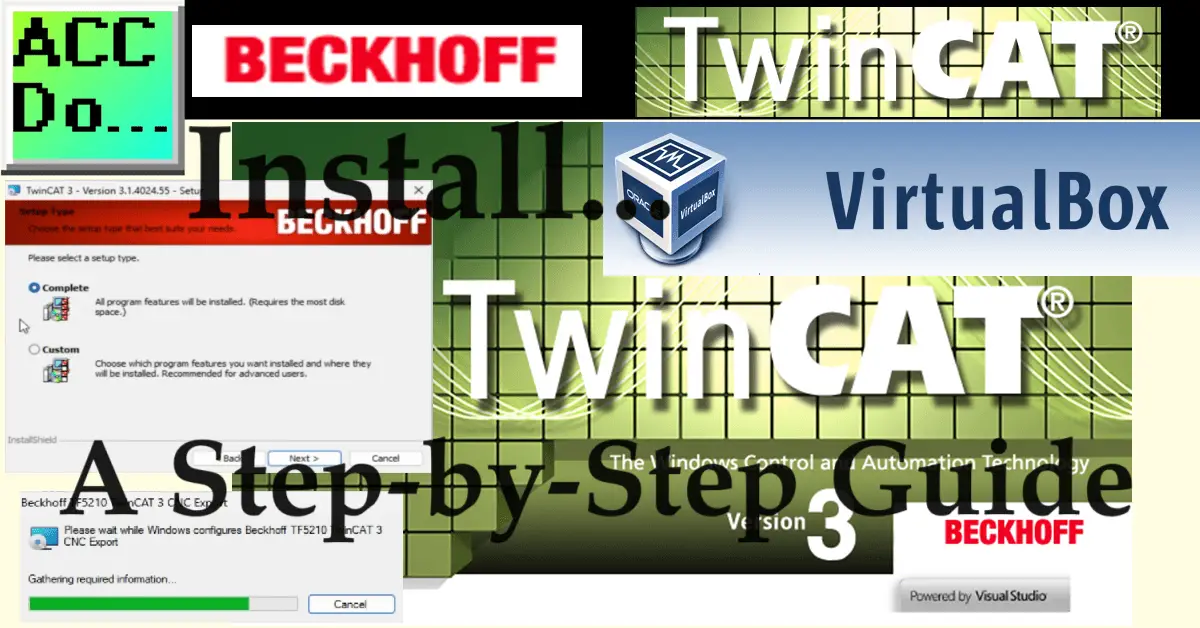
TwinCAT 3 is a popular automation software suite developed by Beckhoff Automation. We will install TwinCAT 3 on a VirtualBox running Windows 11. TwinCAT3 provides an integrated development environment (IDE) for programming, configuring, and commissioning automation systems.

It is ideal for developing and testing your PLC code before purchasing hardware. If you plan to work with TwinCAT 3, installing it on your computer is one of the first steps. In this guide, we will walk you through installing TwinCAT 3 step-by-step.
Previously, we have done the following:
Creating a Virtual PLC Programming Environment – Video
Step 1: Download the Installer
The first step is downloading the TwinCAT 3 installer from the Beckhoff website. You must create an account and log in to access the download page.
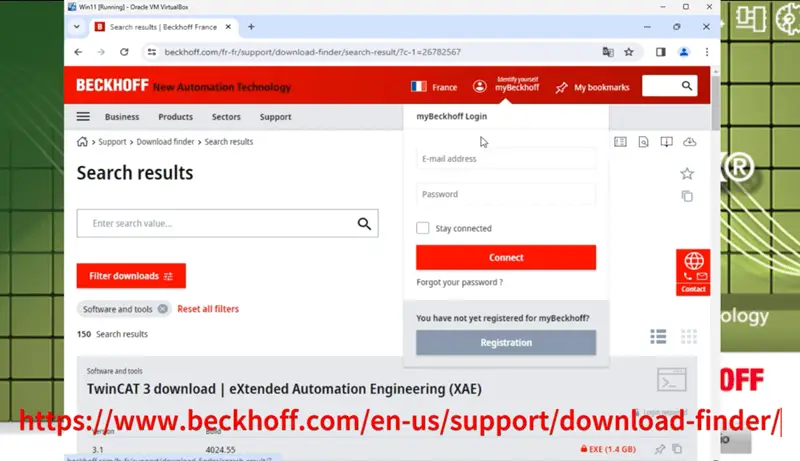
Once logged in, select the latest version of TwinCAT 3 and download the installer file.
TwinCAT 3 eXtended Automation Engineering (XAE) requires Windows 10 or 11. The hardware will include the following:
- Processor speed 1.8 GHz or faster; dual-core or better is recommended
- Main memory: at least 4 GB RAM (with TcXaeShell64: 16GB RAM recommended)
- Hard disk space: 10 GB of available memory if Visual Studio is not installed.
- Hard disk speed: Using a solid-state drive (SSD) is recommended.
- Graphics card: the minimum supported resolution should be 720p (1208 x 720). Support for Full HD resolution (1920 x 1080) or higher is recommended.
Step 2: Run the Installer (Install TwinCAT 3)
Once the installer file is downloaded, locate it in your downloads folder and double-click on it to run it. The User Account Control will ask if you want the TwinCAT 3.1 FULL setup package to make changes to your device. Select Yes.
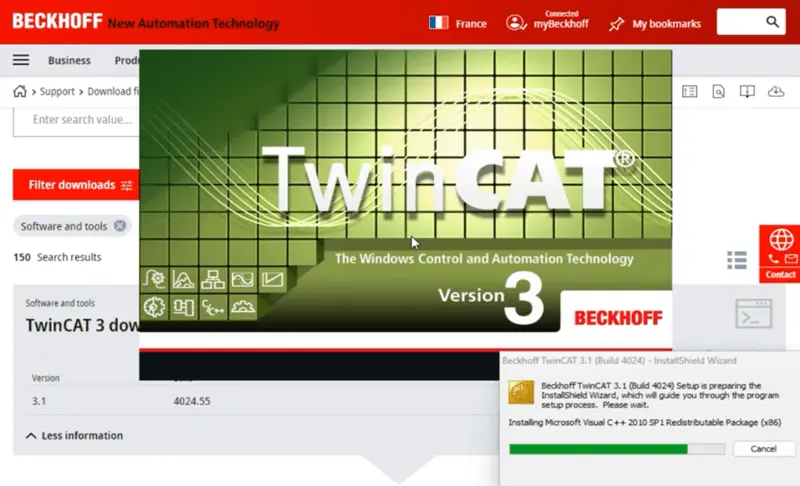
The setup package will then prepare the InstallShield wizard to take you through the setup progress. You will be presented with the welcome screen, which provides an overview of the installation process. Click on the “Next” button to proceed.
Watch the video below to see how to download and run the installer for TwinCAT 3.
Step 3: Select the Components to Install
You must agree to the Software License Agreement before proceeding. Select “I accept the terms in the license agreement.” Select Next. TwinCAT uses third-party software. You must accept the license agreement terms that 3rd party software will be installed. Select Next. The installer provides two options: “Full installation” and “Custom installation.”
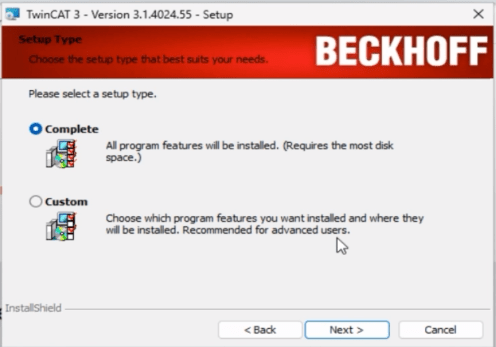
If you are unsure which components you need, select the “Full installation” option. Otherwise, select the “Custom installation” option and choose the components you want to install. Click on the “Next” button to proceed. You will be presented with a summary of the installation settings. Review the settings to make sure that everything is correct. If you need to make any changes, click the “Back” button to return to the previous step. If everything looks good, click the “Install” button to start the installation process.
Step 4: Wait for the Installation to Complete
The installation process will take some time to complete.
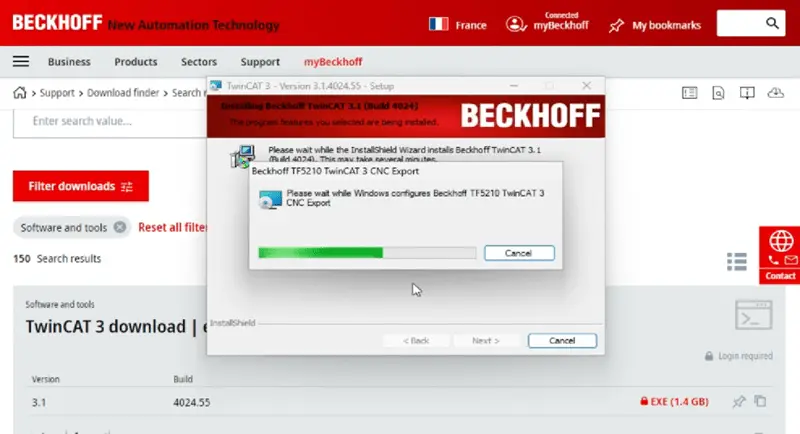
The duration of the installation process will depend on the components you selected to install. During the installation process, the installer will display the installation progress. Wait for the installation to complete.
Step 5: Launch TwinCAT 3
Once the installation is complete, select Finish. Due to the Beckhoff TwinCAT software’s changes to the system, you must restart your system. Select Yes. Wait for the restart and Windows update to complete.
Watch the video below to see the installation of the TwinCAT 3 IDE.
To start TwinCAT 3, we can right-click the TwinCAT Config Mode in the Windows system tray.
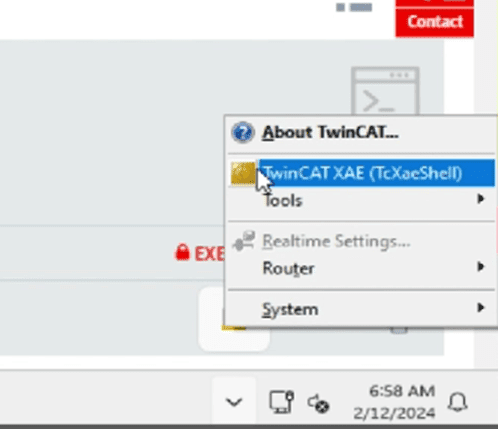
This will bring up a menu where we can select TwinCAT XAE (TcXaeShell) to start the program. The TwinCAT version 3 splash screen will be displayed as the IDE software loads.
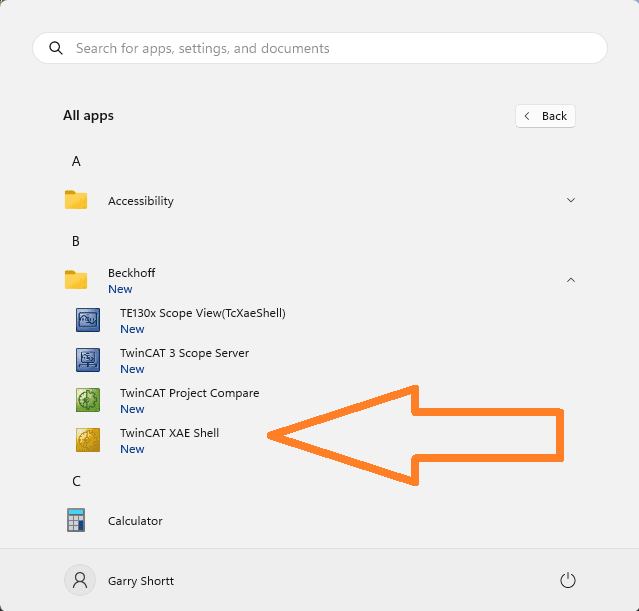
We can also start this software by selecting TwinCAT XAE Shell under the applications in the Windows menu.
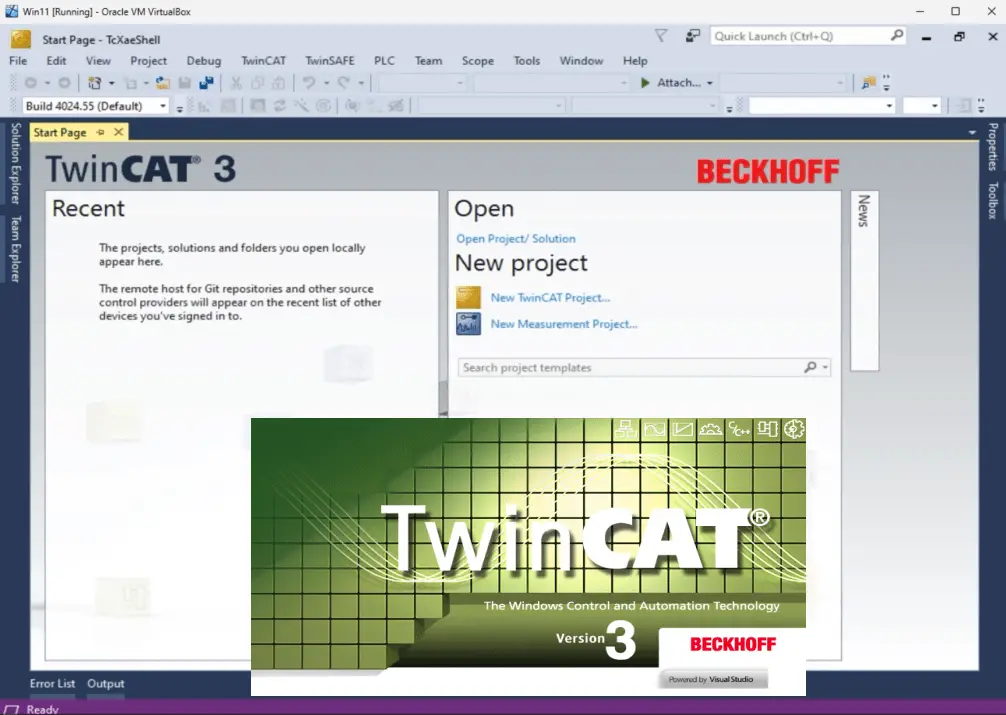
When the TcXaeShell program appears, you will see several windows open in the environment.

Use the pin icon to minimize and send to the edges of the display windows environment. The TwinCAT 3 start page is displayed. Here is one way to open or create a new TwinCAT project.
Conclusion
Installing TwinCAT 3 is a straightforward process that can be completed in just a few steps. I recommend installing this on a virtual machine like VirtualBox. TwinCAT 3 can be set up to run on a dedicated CPU Core of your computer.
This computer-based control software can configure the computer CPU cores; a virtual machine is best for your prototype projects. Following this step-by-step guide, you can install TwinCAT 3 on your computer and explore its features. TwinCAT 3 is a powerful automation software suite that can help you develop and deploy automation systems quickly and easily.
Watch on YouTube: You can Install TwinCAT 3: A Step-by-Step Guide
PLC Beginner’s Guide to PLC Programming
There are many different PLC manufacturers with other hardware and software. All of the programmable logic controllers have similar basic features. Here is how I would approach learning about basic PLCs.
Once you are familiar with the basics of the PLC, you will then learn specifics for the controller you will be programming.
This is the easiest way to learn about PLC programming.
Here are the controllers that we have covered or are covering at ACC Automation:
Arduino Opta PLC
BRX Do-More Series (Do-More Designer Software + Simulator)
Productivity Series P1000 / P2000
Click PLC Series
Omron CP1H Series
Horner XL4 PLC Series
EasyPLC Software Suite is a complete PLC, HMI, and Machine Simulator Software package. See below to receive 10% off this software. This PLC learning package includes the following:
Easy PLC – PLC Simulation will allow programming in Ladder, Grafcet, Logic Blocks, or Script.
HMI System – Easily create a visual human-machine interface (HMI)
Machine Simulator – A virtual 3D world with real-time graphics and physical properties. PLC programs can be tested using the EasyPLC or through other interfaces. (Modbus RTU, TCP, etc.)
Machine Simulator Lite – Designed to run on Android Devices.
Machine Simulator VR – Virtual Reality comes to life so you can test, train, or practice your PLC programming.
Purchase your copy of this learning package for less than $95 USD for a single computer install or less than $110 USD to allow different computers.
Receive 10% off the investment by typing in ACC in the comment section when you order.
Learn PLC programming the easy way. Invest in yourself today.
Additional examples of PLC program development using the five steps.
Click PLC – Easy Transfer Line Programming – Video
Productivity PLC Simulator – Chain Conveyor MS – Video
Five Steps to PLC Program Development – Die Stamping
PLC Programming Example – Process Mixer
PLC Programming Example – Shift Register (Conveyor Reject)
PLC Programming Example – Paint Spraying
PLC Programming Example – Delay Starting of 7 Motors
PLC Programming Example – Pick and Place
PLC Programming Example – Sorting Station (Shift Register)
PLC Programming Example – Palletizer
If you have any questions or need further information, please contact me.
Thank you,
Garry
If you’re like most of my readers, you’re committed to learning about technology. Numbering systems used in PLCs are not challenging to learn and understand. We will walk through the numbering systems used in PLCs. This includes Bits, Decimals, Hexadecimal, ASCII, and Floating Points.
To get this free article, subscribe to my free email newsletter.
Use the information to inform other people how numbering systems work. Sign up now.

The ‘Robust Data Logging for Free’ eBook is also available as a free download. The link is included when you subscribe to ACC Automation.