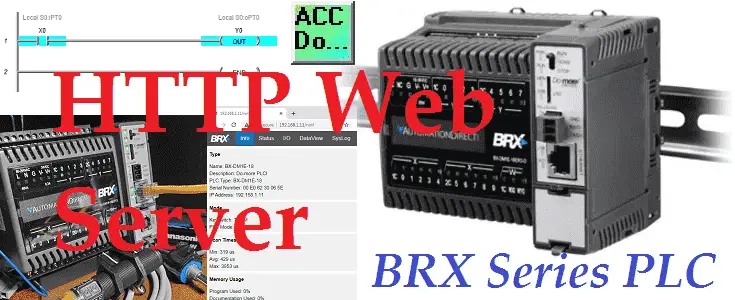
We will now look at the BRX Do-More PLC Web Server. Ethernet equipped BRX CPUs and the Do-More Designer Simulator can now have a web server. This can be accessed by any web browser using the IP address of the BRX Do-More CPU.
A web server is server software or hardware dedicated to running this software, that can satisfy client requests on an Ethernet network. A web server can contain one or more websites and websites can have several web pages. A web server processes incoming network requests over HTTP and several other related protocols.
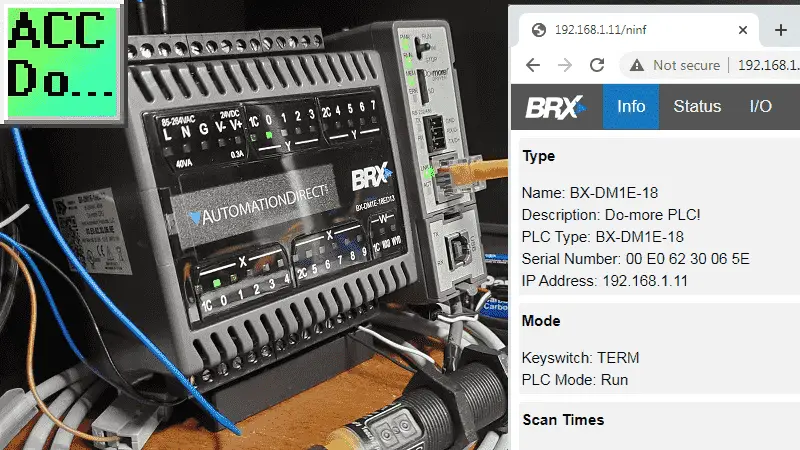
The website built into the BRX Do-More has several different tabs that have basic information about the system, status information like warnings and errors, input and outputs, system logs, user logs, and user pages. We will be enabling the webserver on our BRX Do-More PLC and showing the information that is available. This is a great tool for troubleshooting the PLC as you will see. Let’s get started.
Previously in this BRX series PLC, we have discussed:
System Hardware – Video
Unboxing – Video
Installing the Software – Video
Establishing Communication – Video
Firmware Update – Video
Numbering Systems and Addressing – Video
First Program – Video
Monitoring and Testing the Program – Video
Online Editing and Debug Mode – Video
Timers – Video
Counters – Video
High-Speed IO – Video
Compare Instructions – Video
Math Instructions – Video
Program Control – Video
Shifting Instructions – Video
Drum Instruction – Video
Serial Communication – Modbus RTU to Solo Process Temperature Controller – Video
Data Logging – Video
Email – Text SMS Messaging Gmail – Video
Secure Email Communication Video
AdvancedHMI Communication – Modbus TCP – Video
Analog IO – System Configuration – Video
HTTP JSON Instructions – Video
Analog Dusk to Dawn Program – Video
INC DEC 512 Registers for DMX512 – Video
PID with PWM Output – Video
PID Ramp Soak Profile – Video
Do-More Simulator MQTT Publish / Subscribe – Video
BRX Do-More PLC MQTT Communications – Video
Stride Field Remote IO Modules Modbus TCP Ethernet
– Unboxing SIO MB12CDR and SIO MB04ADS Video
– Powering and Configuring Video
BRX Do-More PLC to Stride Field IO Modbus TCP – Video
BRX Do-More PLC Ethernet Remote IO Controller BX-DMIO
– Unboxing BX-DMIO Video
– Configuration and Programming Video
Modbus RTU TCP Remote IO Controller BX-MBIO
– Hardware Video
– Powering and Configuring Video
BRX Do-More PLC to Modbus Remote IO Controller BX-MBIO – Video
Modbus ASCII Protocol – Video
Peerlink Ethernet Communication – Video
Our entire BRX D0-More series can be found here.
The programming software and manuals can be downloaded from the Automation Direct website free of charge.
Watch the video below to see how to enable and access the Web Server on the BRX Do-More PLC.
Do-More Designer Software
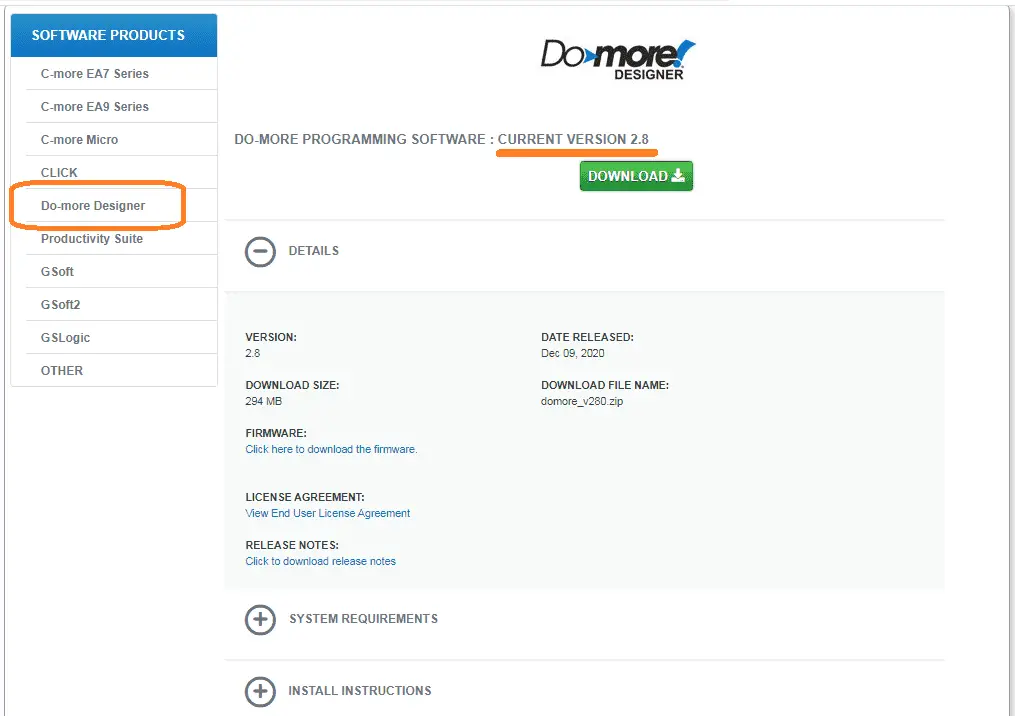
In order to run our web server on our BRX Do-More PLC, we will need to download and install version 2.8 or newer of the Do-More Designer Software.
You can download the latest version of Do-More Designer here.
Existing BRX PLC controllers will need to have the firmware updated.
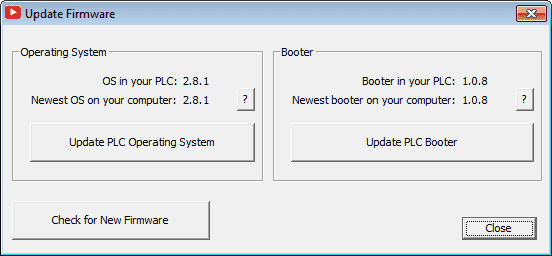
Access the current firmware by using the main menu | PLC | Update Firmware… in the Do-More Designer Software.
Do-More Static IP Address for Web Server
Call up the system configuration window by selecting System Configuration under the Tools heading in the project browser. Alternatively, you can use the main menu | PLC | System Configuration…
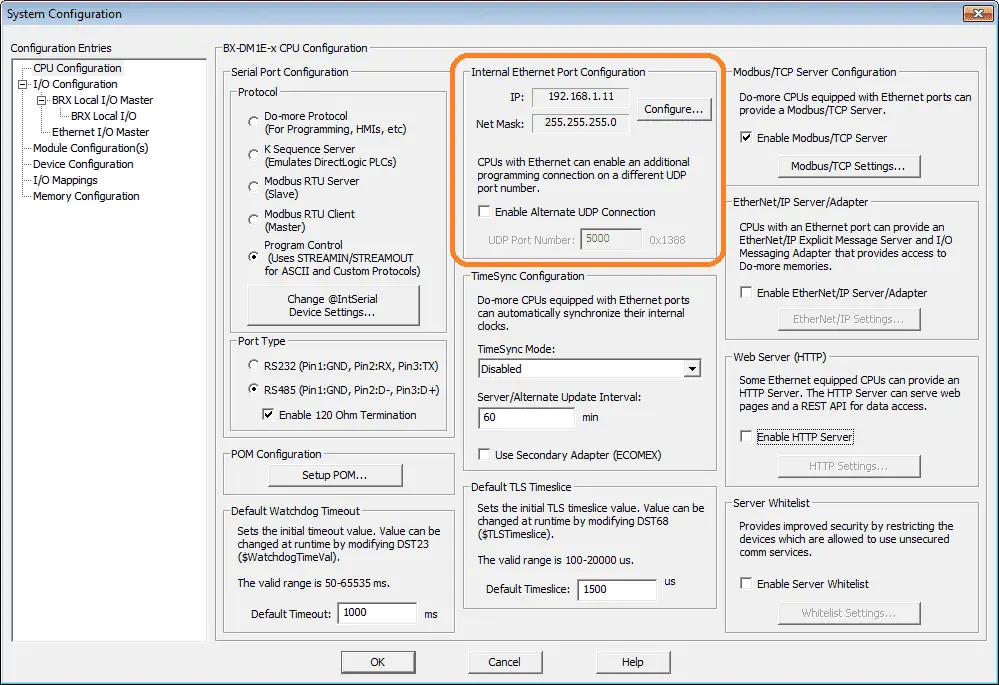
Select configure under the internal Ethernet port configuration.
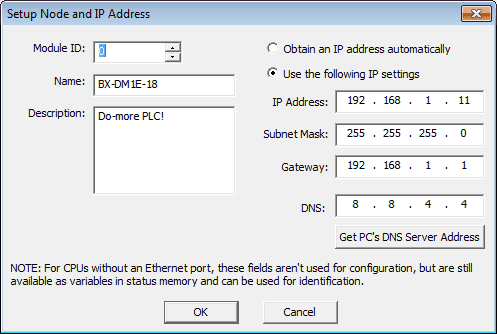
Select the use the following IP settings and fill in your address. This will be the IP address of our web server. The IP address would be unknown if we use it to obtain an IP address automatically. We would not know the address to call up our web server. Select OK.
Enable the BRX Do-More PLC HTTP Web Server
Check the box to enable the HTTP server. This is located on the system configuration window.
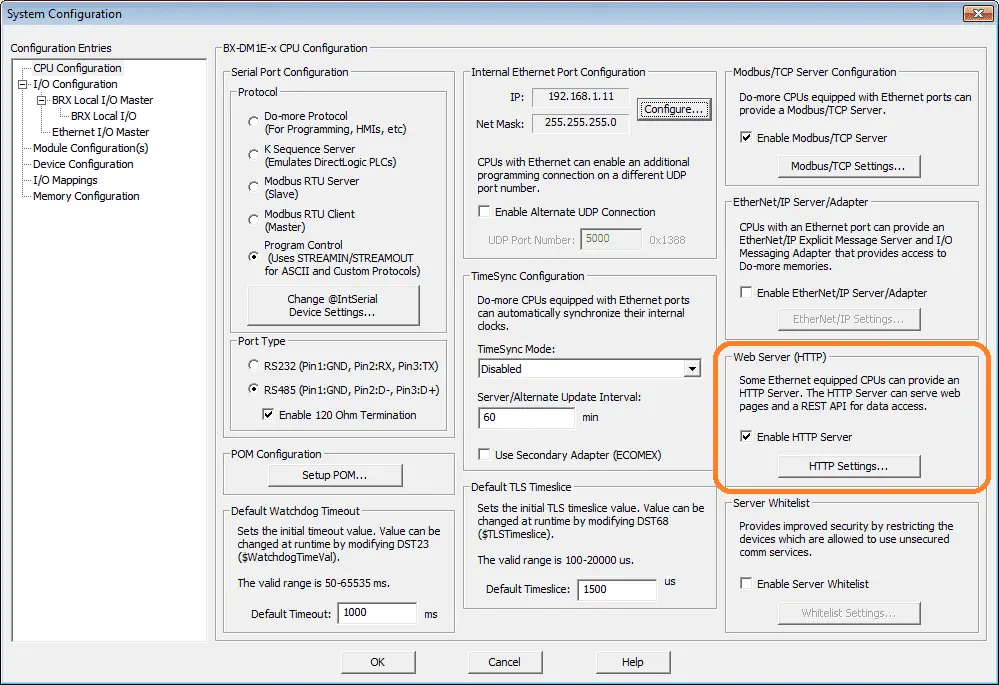
Select HTTP settings.
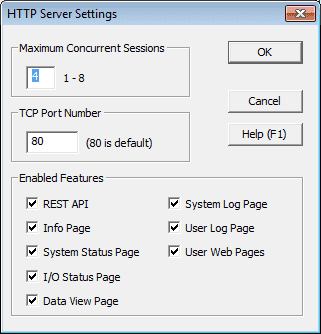
We will leave everything in their default settings.
Maximum Concurrent Sessions – This is the number of clients (Example: Web Browsers) that can connect to the BRX Do-More PLC.
TCP Port Number – 80 is the default port number for all HTTP web servers.
Enabled Features – Ensure that each of these is selected. We will discuss each one later in the post.
Select OK.
Server Whitelist for the BRX Do-More
Check the box to enable the server whitelist.
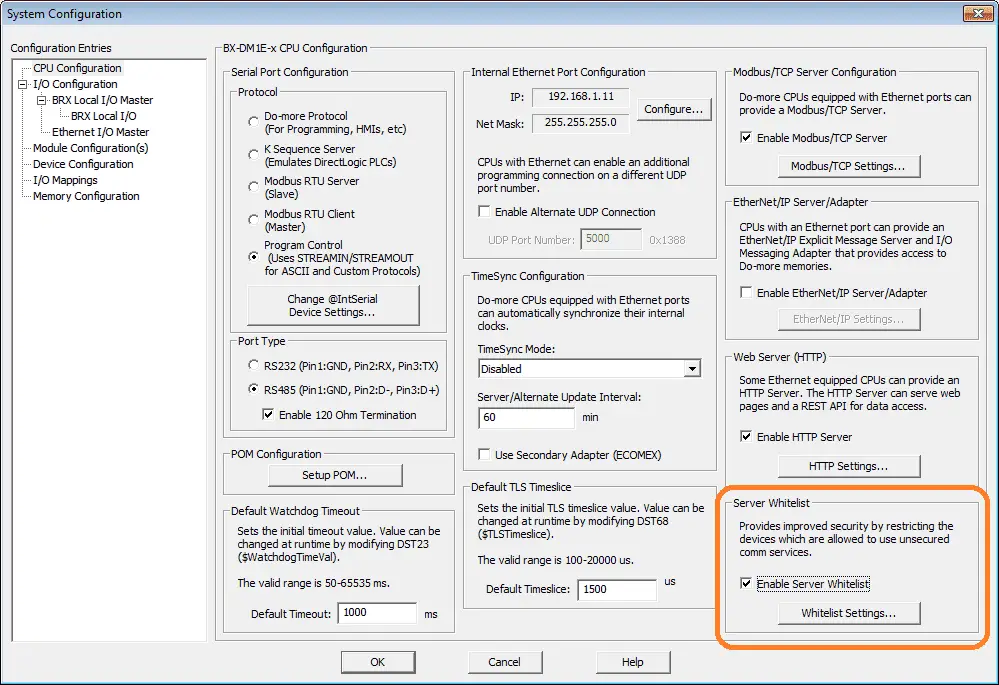
Select Whitelist Settings.
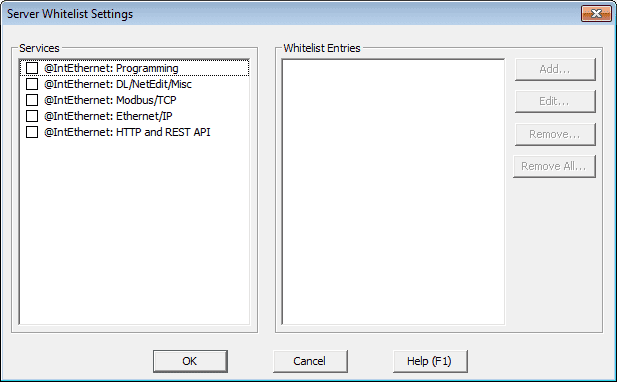
A whitelist allows access to resources on a device only to network entities that have been identified. It will deny (exclude) access to those resources from network entities, not on the whitelist. This will give you security knowing that only certain IP addresses can connect to your BRX Do-More CPU. Ethernet network communication servers (programming, Modbus/TCP, Ethernet /IP, etc.) will only work for network devices that are in the whitelist for that service.
Select all of the services except for Ethernet/IP under the Services and then select the Add button.
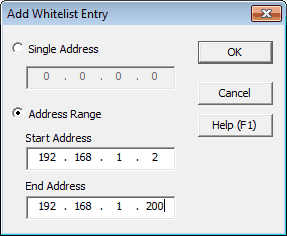
Select and input an address IP range for your network. You could also add individual computer IP addresses. Select OK.
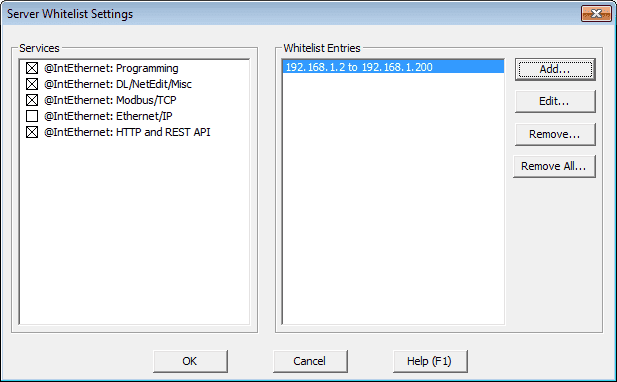
Here are our completed server whitelist settings. Select OK.
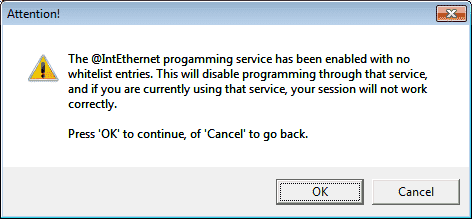
Any service that is not selected will produce an error message to ensure you want to basically disable that service. Select OK. Select OK on the system configuration window. We have now completed the Web Server and security for our BRX Do-More PLC.
BRX Do-More Sample Program for Web Server
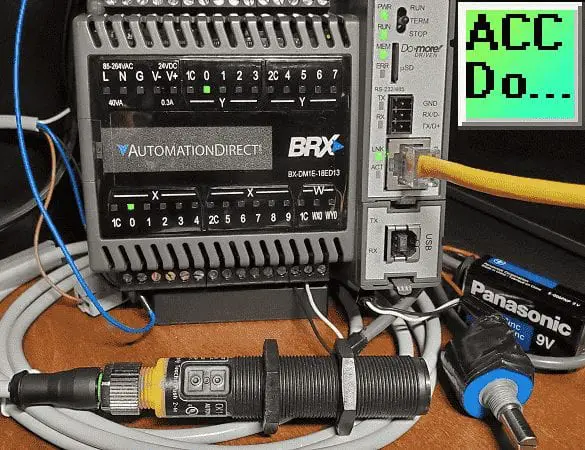
We will wire our analog input tester to the analog input WX0 on the BRX CPU. A capacitive CK1 proximity sensor will be wired to X0 on the BRX CPU.
Analog Input Scaling
Call up the system configuration window. Select BRX Local IO on the left side of the window.
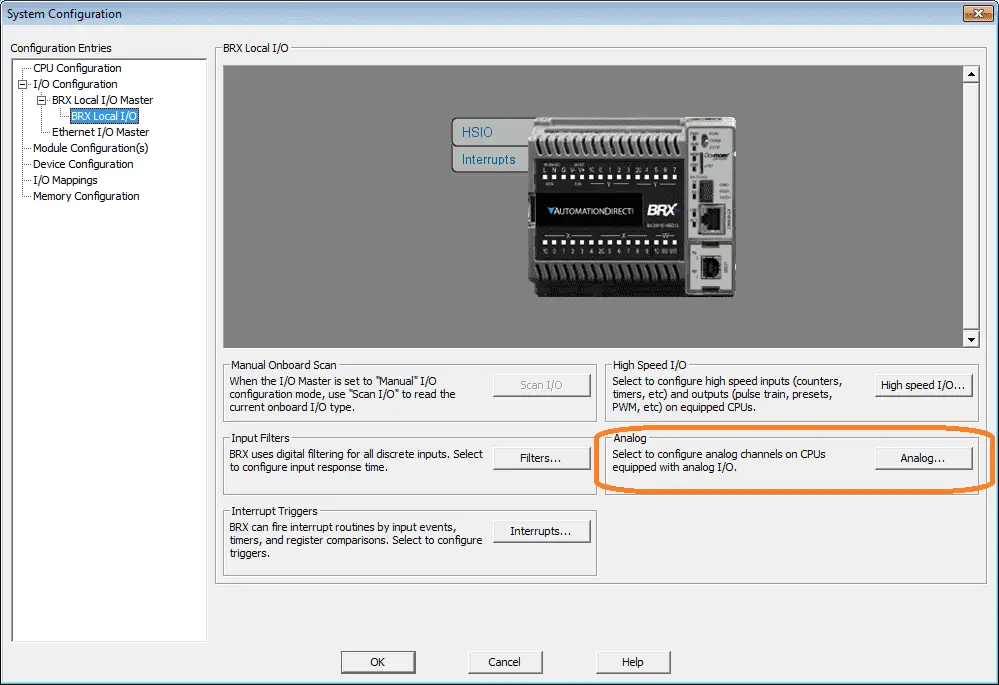
Select the analog button.
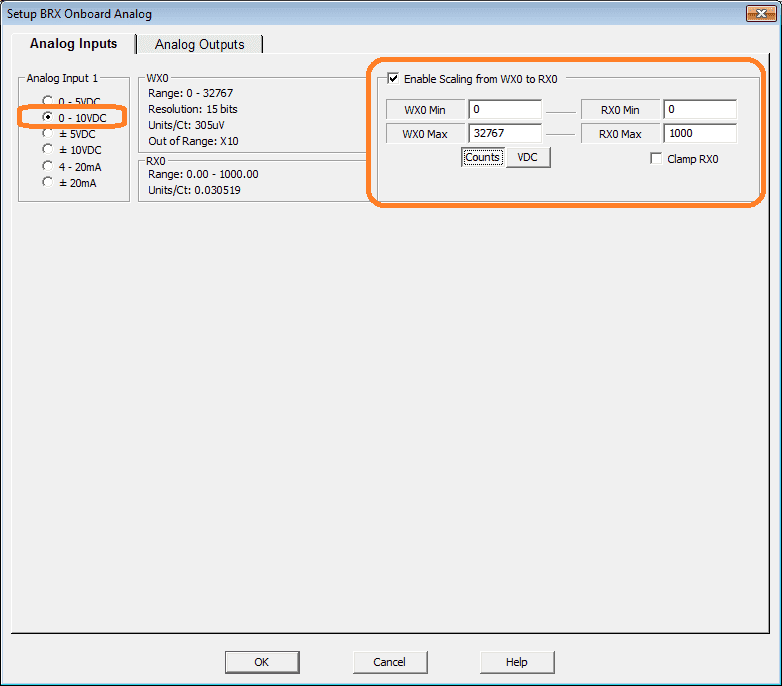
We will select 0-10VDC for our analog input signal. The scaling will be enabled from WX0 to RX0. 0 to 32767 will be scaled to 0 to 1000. This will represent our voltage on our tester. Select OK.
Discrete (Proximity) Input
Our input from our capacitive proximity sensor will directly trigger the first output Y0 on our BRX Do-More PLC.

That is our completed ladder logic program. Download this to the BRX Do-More PLC and place the PLC in run mode.
BRX Do-More Web Server
Enter our IP address in your web browser. (This is a client application.)
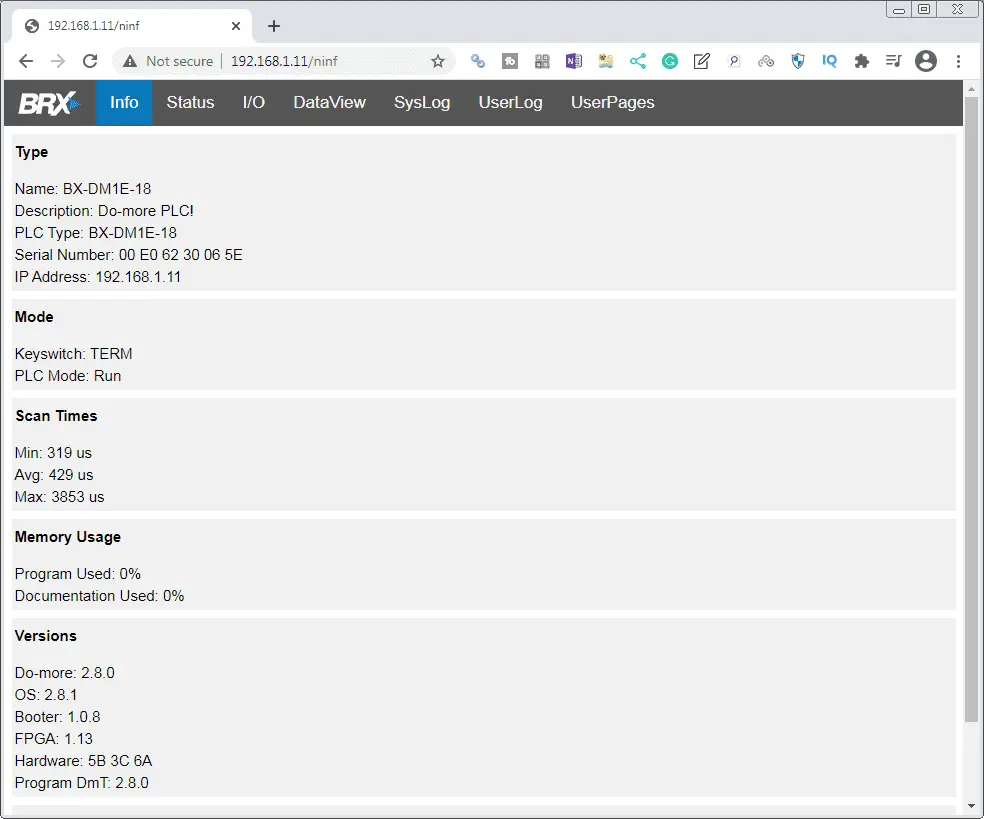
Since our IP address is on the whitelist, we will be able to see the website above. The info tab will show the hardware type, mode, scan times, memory usage, and versions. Select the status tab.
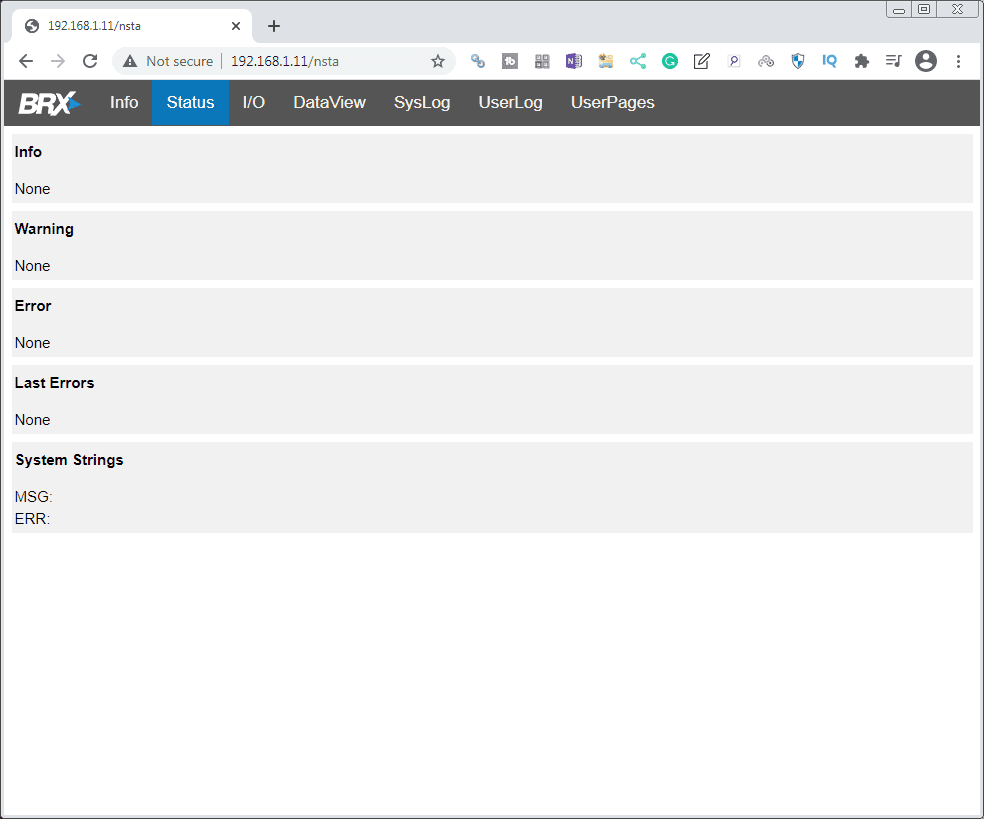
The status tab will show us warnings, errors, last errors, and system strings. Select the I/O tab.
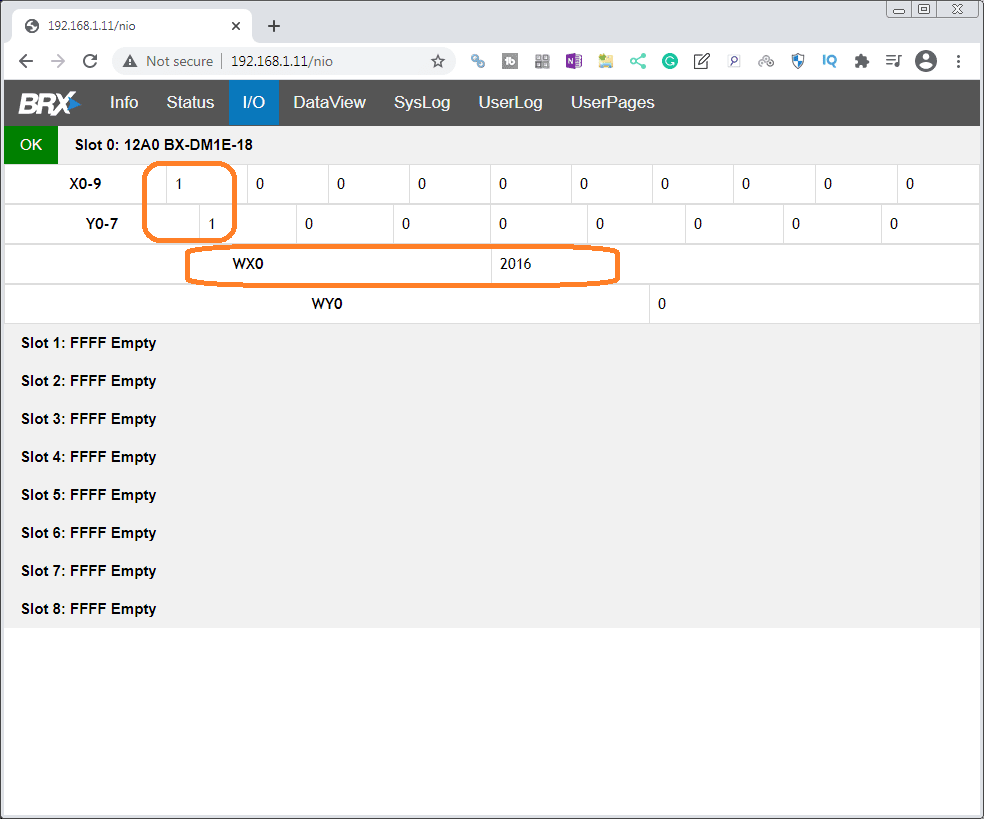
The I/O tab will display the physical inputs and output on our system. This can be a good tool for troubleshooting instead of connecting with the software. Select the Data View tab.
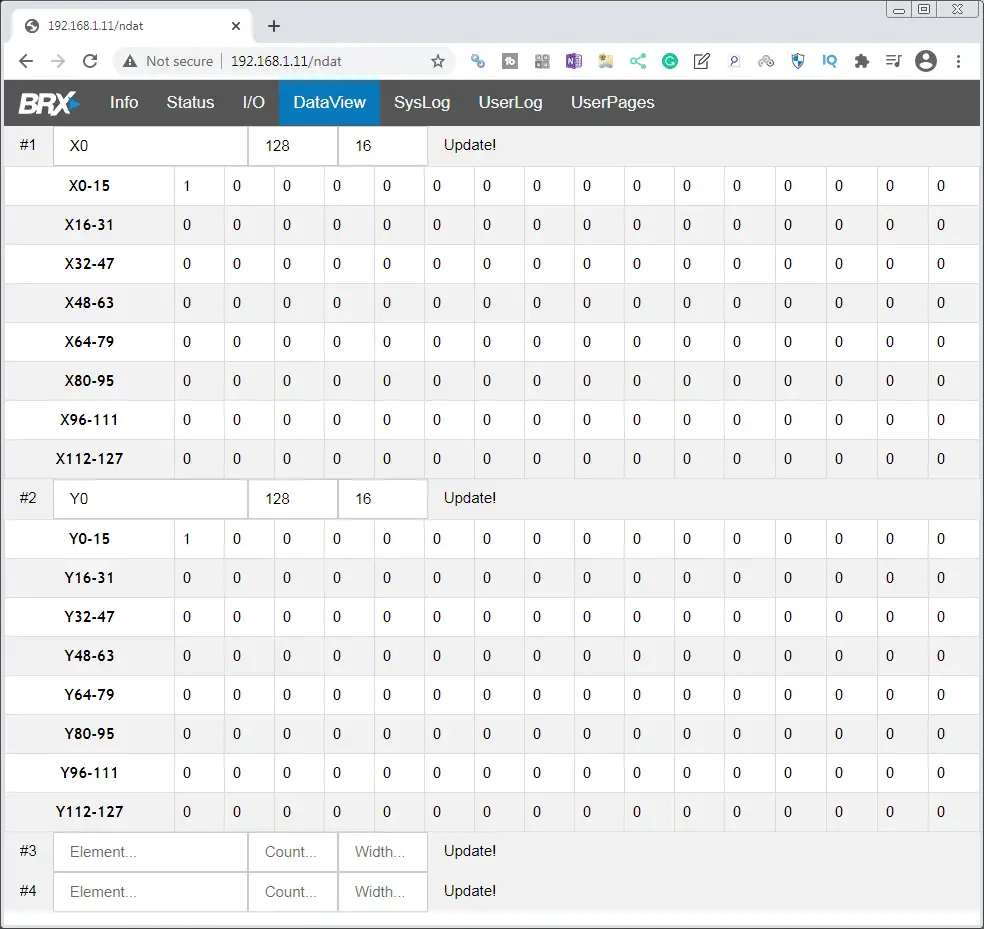
The Data View tab is very similar to the data view in the Do-More Designer software. We can select 4 elements and specify the number to view. Select WX0 count (1) for #3 and RX0 count (1) for #4. Select update to see the values.
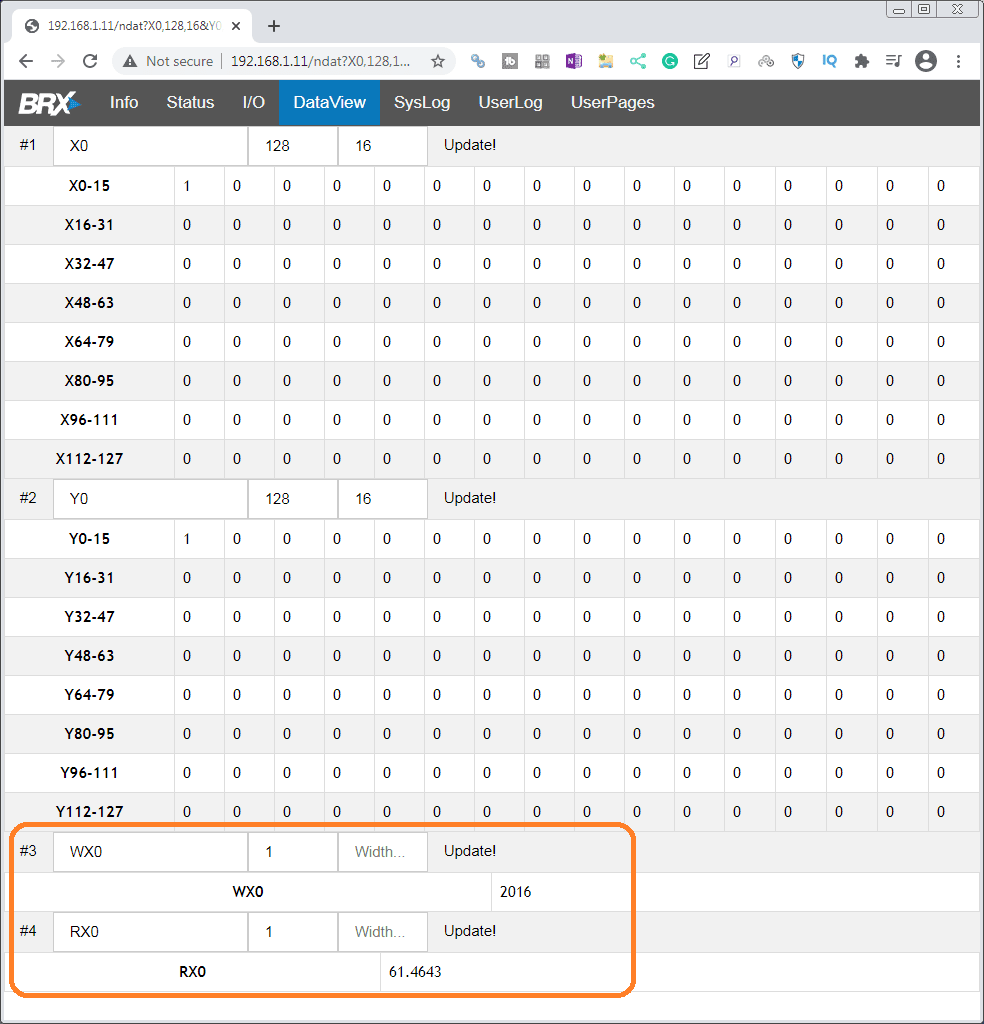
We can now see the analog input and the scaling. Select the system log (SysLog).
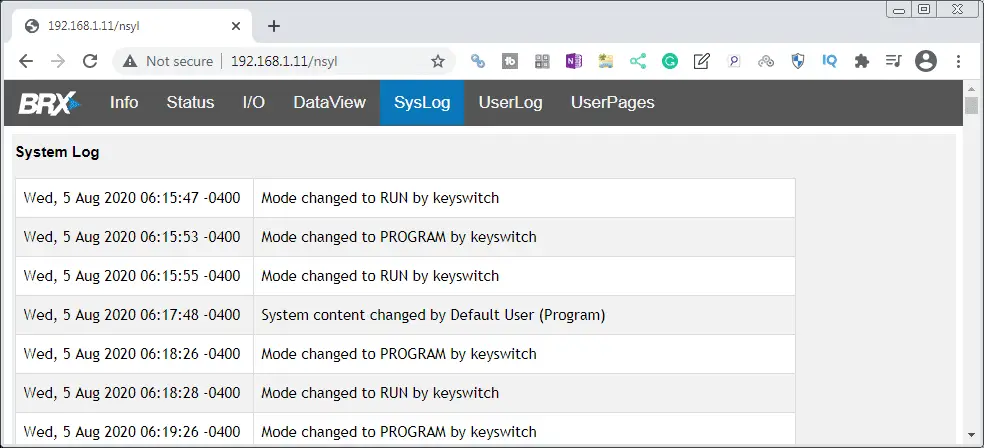
The system log will display all of the logged items. In our case when the PLC was put in run by the key switch. Select user log (UserLog).
User-generated events that are made with the STREAMOUT – Stream Out Data to Device instruction that targets the User Log. You could create your own generated events to aid in troubleshooting the PLC. Select user pages.
User pages are kept in a directory called “UP” in the memory. We can store log files, web pages, etc. in this location for easy access. Next time we will be looking at creating some dynamic web pages to display information.
Watch the video below to see the Web Server running on our BRX Do-More PLC.
Download the BRX Do-More PLC program here.
BRX Series PLC from Automation Direct – Power to deliver
Overview Link (Configure and purchase a system)
Manuals and Product Inserts (Installation and Setup Instruction)
Do-More Designer Software (Free Download Link) – The software will contain all of the instruction sets and help files for the BRX Series PLC.
Watch on YouTube: BRX Do-More PLC HTTP Web Server
If you have any questions or need further information please contact me.
Thank you,
Garry
If you’re like most of my readers, you’re committed to learning about technology. Numbering systems used in PLC’s are not difficult to learn and understand. We will walk through the numbering systems used in PLCs. This includes Bits, Decimal, Hexadecimal, ASCII, and Floating Point. To get this free article, subscribe to my free email newsletter.
Use the information to inform other people how numbering systems work. Sign up now. The ‘Robust Data Logging for Free’ eBook is also available as a free download. The link is included when you subscribe to ACC Automation.

