The C-More HMI Panel software uses virtual components called Objects. These objects are programmable to simulate the functions that you require on your automation project. Pushbuttons, Switches, meters, and graphs are just a few of the objects that are available to you.
The recipe object changes the value of a tag or multiple tags.
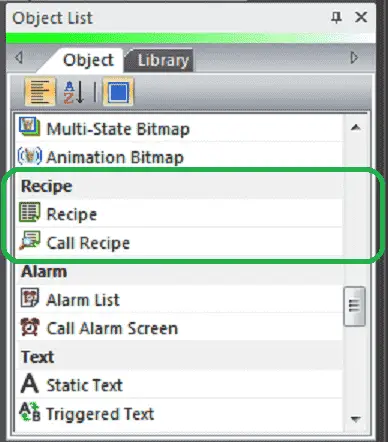
We will now look at the object list recipe that we can use with our HMI panel. The recipe objects that are available on the C-More EA9 are Recipe and Call Recipe. Let’s get started.
Previously in this C-More EA9 HMI Panel series, we have done the following:
System Hardware
– Unboxing and Review Video
– Powering the Unit Video
Installing the Software – Video
System Setup Screens – Video
First Program
– Establishing Communication and Updating Firmware Video
– First Program Video
Panel to PLC and PLC to Panel Settings – Video
Common Screen Menu – Video
Simulate Project – Video
Object List Shapes – Video
Object List Buttons – Video
Object List Indicators – Video
Object List Entry – Video
Object List Meters and Graphs – Video
Object List Bitmaps – Video
Watch the video below to see the Object List Recipe in action on our C-More EA9 HMI Panel.
Setting Our Recipe Screen – C-More EA9
We will be adding to the program we created last time. (C-More EA9 HMI Series Panel Object List Bitmaps).
Select the new screen under the main menu | Screen | New Screen…
Alternatively, we can also use the icons in the Navigation panel.
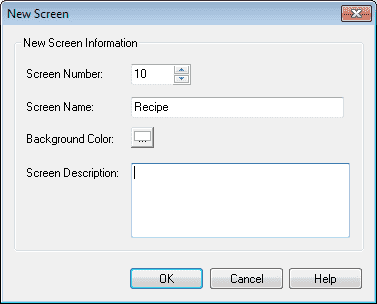
We will name the screen 10 Recipe. The screen description can be used to describe the screen. Hit OK.
Our new screen will now be displayed.

Under the property, list window turn on the editing and enable the show background. Select Common Screen Menu under the background screen. Turn off the edit mode under the property list.
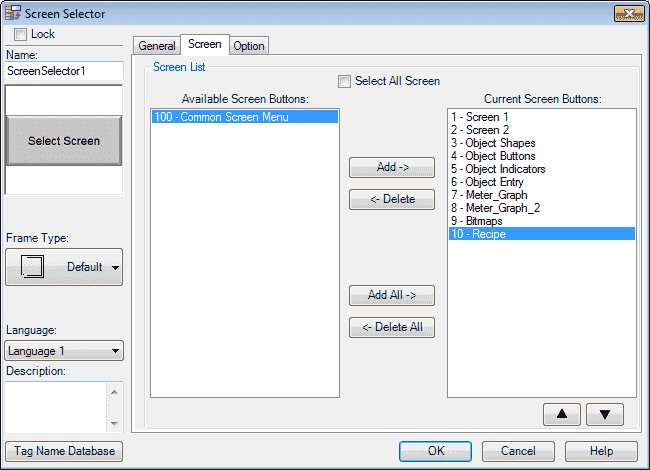
We must now add our new screen so we can select it when using the common screen menu. Select page 100. Select the Screen Selector button. Under the Screen tab, select the 10 – Recipe and hit the Add button so it moves it over to the Current Screen Buttons. Hit OK. We can now go back to our newly created Object Bitmap screen page 10 from our navigation window.
Our new screen is now ready for us to add our indicators.
Tag Name Database
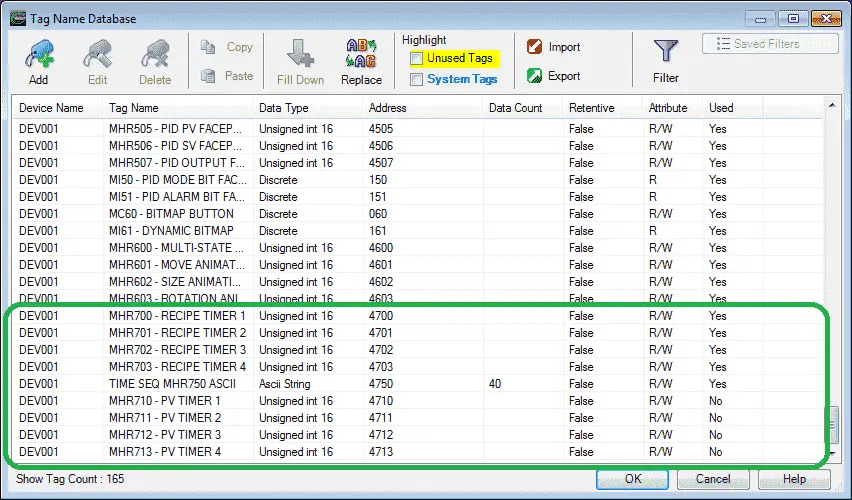
We will use the following addresses to control the Recipe object on the cmore HMI.
MHR700 – Unsigned Int 16 – Modbus Address 40700 – Read / Write (Recipe Timer 1)
MHR701 – Unsigned Int 16 – Modbus Address 40701 – Read / Write (Recipe Timer 2)
MHR702 – Unsigned Int 16 – Modbus Address 40702 – Read / Write (Recipe Timer 3)
MHR703 – Unsigned Int 16 – Modbus Address 40703 – Read / Write (Recipe Timer 4)
MHR750 – ASCII String – Modbus Address 40750 – Read / Write (TIME SEQ ASCII 40 characters)
MHR710 – Unsigned Int 16 – Modbus Address 40710 – Read / Write (PV Timer 1)
MHR711 – Unsigned Int 16 – Modbus Address 40711 – Read / Write (PV Timer 2)
MHR712 – Unsigned Int 16 – Modbus Address 40712 – Read / Write (PV Timer 3)
MHR713 – Unsigned Int 16 – Modbus Address 40713 – Read / Write (PV Timer 4)
C-More EA9 Recipe Database
Recipe information is kept in a recipe sheet. Recipe sheets consist of recipe records (each row) and destination tags (top row). The recipe records can contain values (our example) or tags. Recipe sheets are similar to spreadsheets and can be copied, pasted and edited. Excel or a text editor can be used to modify the sheets outside of the C-More programming software.
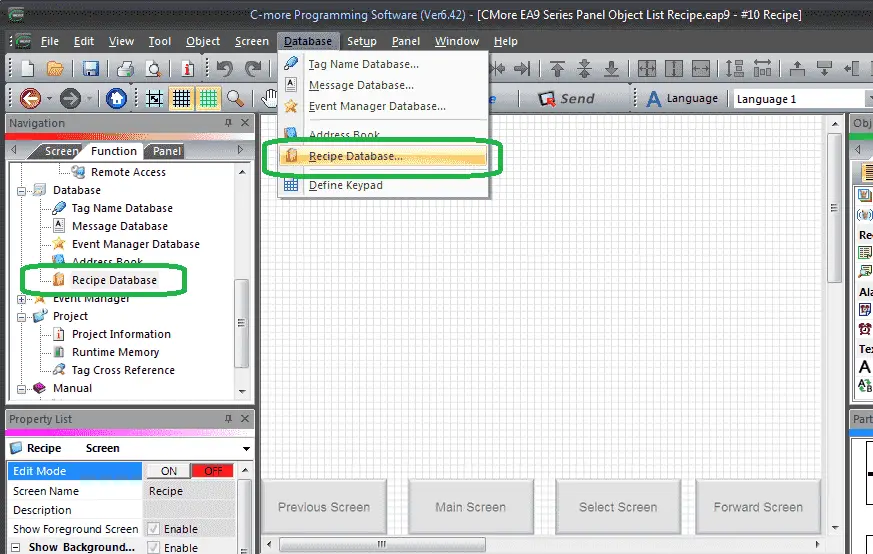
Call up the recipe database by selecting Recipe Database under the Database in the Function tab of the Navigation window. You can also use the main menu | Database | Recipe Database…
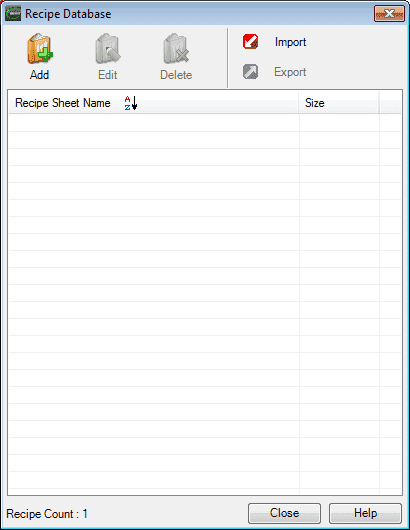
Select the add button on the recipe database window.
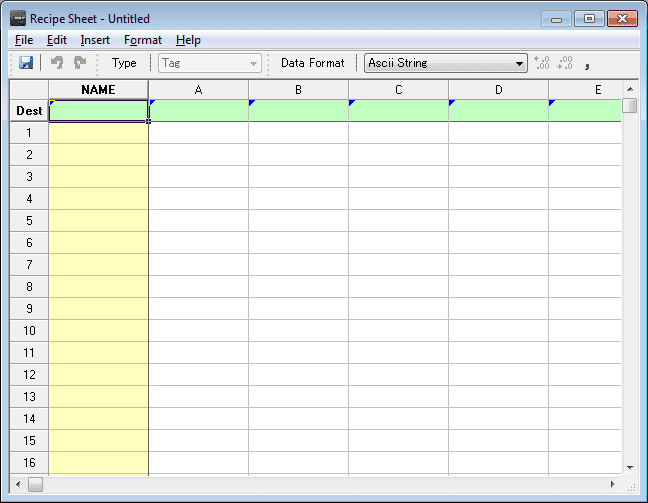
An untitled recipe sheet window will now be displayed.
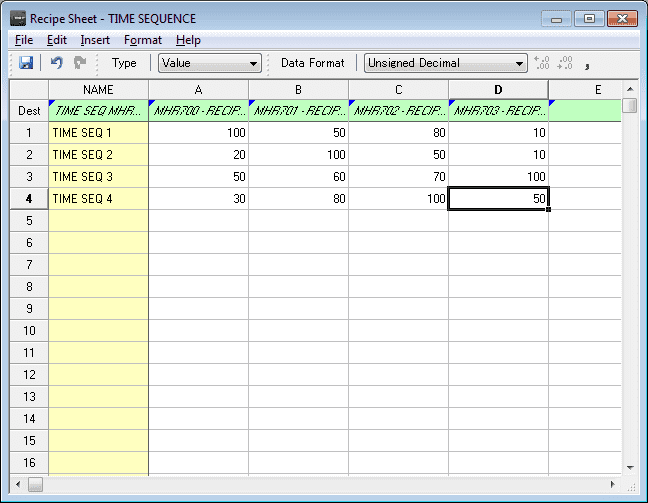
We will add the following to our recipe sheet window across the top.
Name Tag – MHR750 – This is the ASCII tag created above.
MHR700 – Recipe Timer 1 – This is the set value of timer 1 for the recipe.
MHR701 – Recipe Timer 2 – This is the set value of timer 2 for the recipe.
MHR702 – Recipe Timer 3 – This is the set value of timer 3 for the recipe.
MHR703 – Recipe Timer 4 – This is the set value of timer 4 for the recipe.
The left side will contain the recipe name for each of the settings. We will use the following: Time Seq 1 to Time Seq 4.
Fill in the time values that you want for each recipe record.
Save the recipe sheet with the name TIME SEQUENCE.
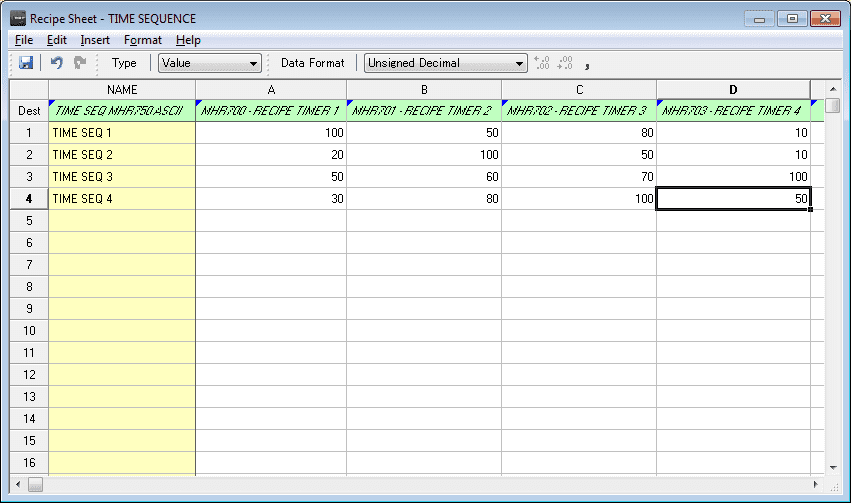
The recipe sheet window can be modified to see the complete title on the columns and rows. Move your mouse over the vertical lines until the symbol changes, then left-click and hold. Drag the line over to widen the column.
Select the X in the right-hand corner to close the window, or select File | Exit.
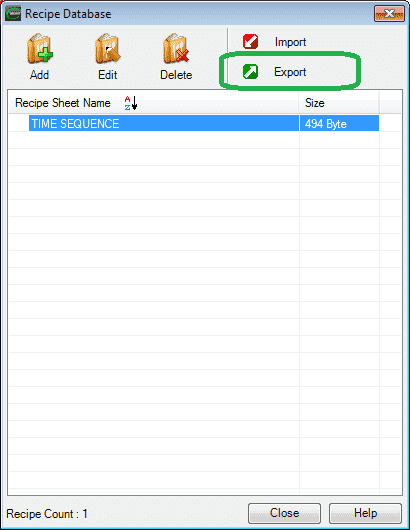
The TIME SEQUENCE recipe sheet can now be seen in the recipe database window.
Export Recipe
Select the Export button on the recipe database window.

You can now specify the location that you want to save your exported recipe sheet. Click the Export button.
When the file is exported a message will be shown showing the export is complete.
Click OK.
Editing the Recipe
When a Recipe Sheet is Exported, it saves the data as Unicode Text with a “.csv” extension. This means the if you use Excel to edit, you must save with the file type Unicode. Excel will default this type to a “.txt”. You must change the extension to “.csv” before you can import the recipe sheet file.
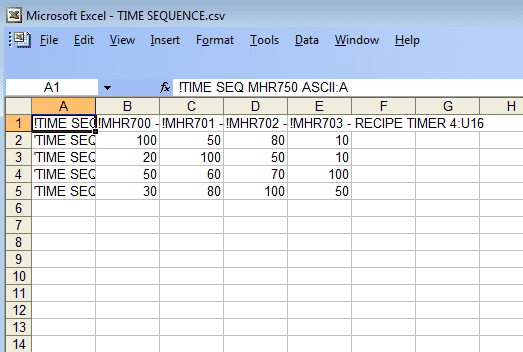
You can also edit the recipe file with a text editor like Notepad on a Windows computer. Watch the video below to see Notepad being used to edit/modify the recipe on our C-More EA9 HMI Panel.
Import Recipe Sheet
Select the Import button on the recipe database window.

Select the file you want to import. In our case, we will import TIME SEQUENCE1.csv. Using your mouse, select the file and hit the Open button. This will now import the file.
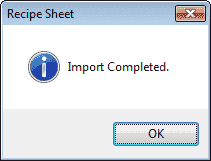
A message window will now appear indicating a successful import of a recipe sheet. Select OK.
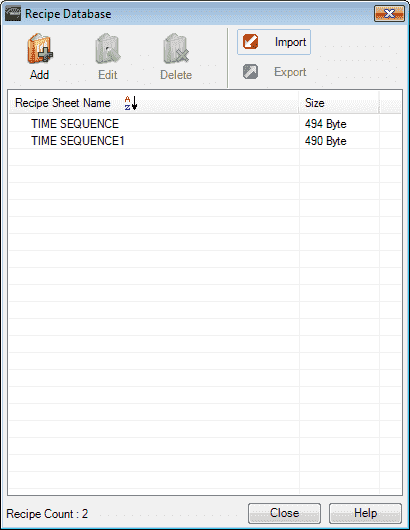
We can now see our two recipe sheets in the recipe database window. Select close.
C-More EA9 Recipe Button
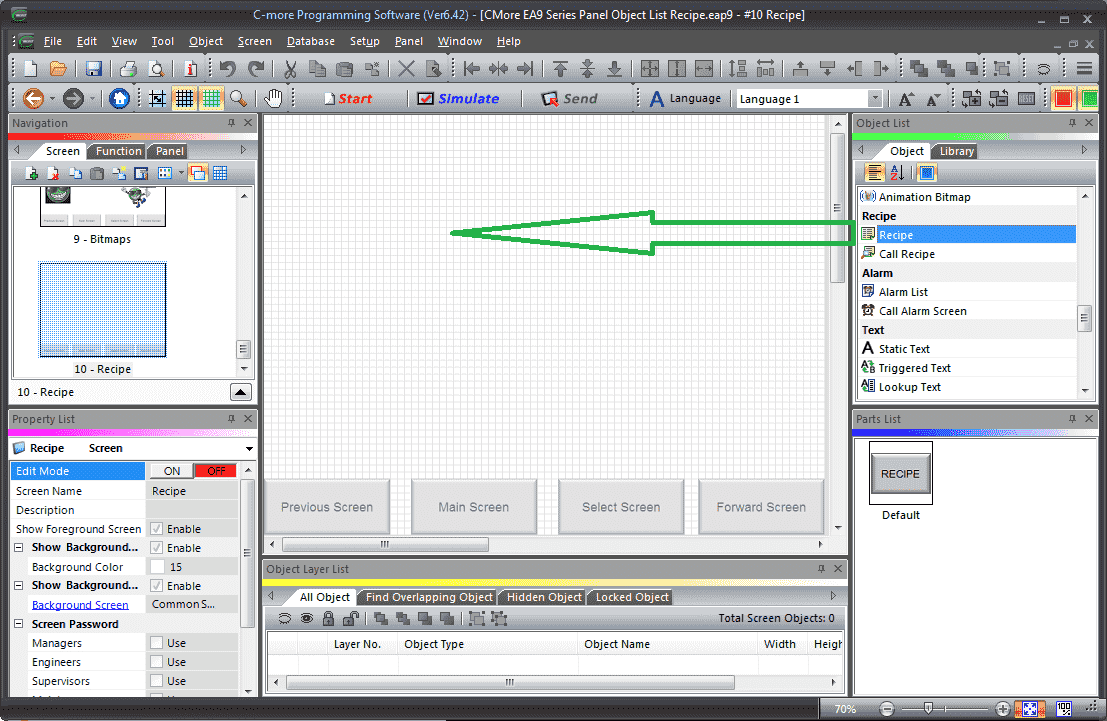
Select Screen 10 from the navigation window. We will now add a Recipe (Button) under the Recipe heading in the Object list window. Left-click (hold) and drag the Recipe onto the screen.
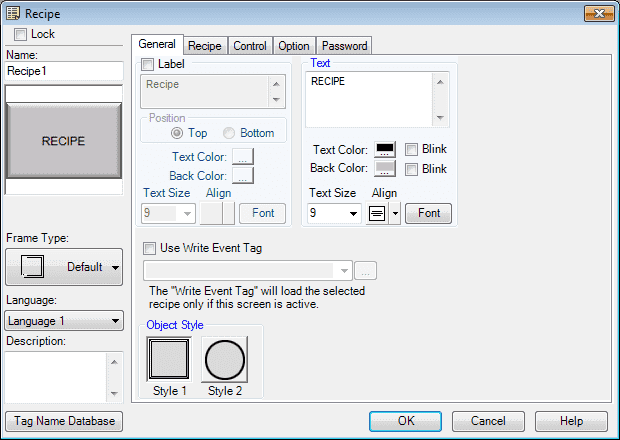
The Recipe window will display. You can also use the main menu | Object | Recipe | Recipe… and click on the work area of the screen. This will give you the default recipe button selection.
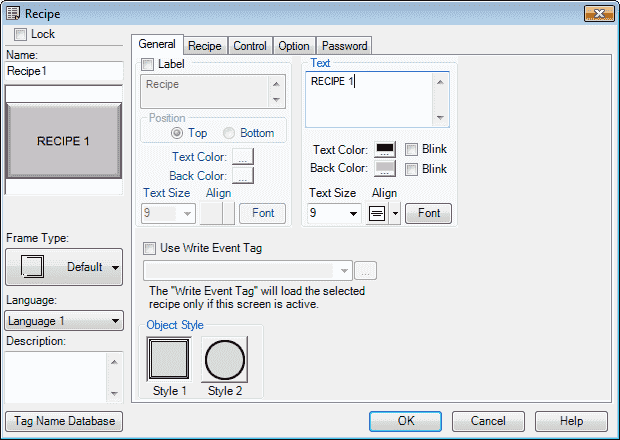
We will change the text to ‘Recipe 1’. All of the other parameters we will leave as their default. Select the Recipe tab.
Recipe Tab
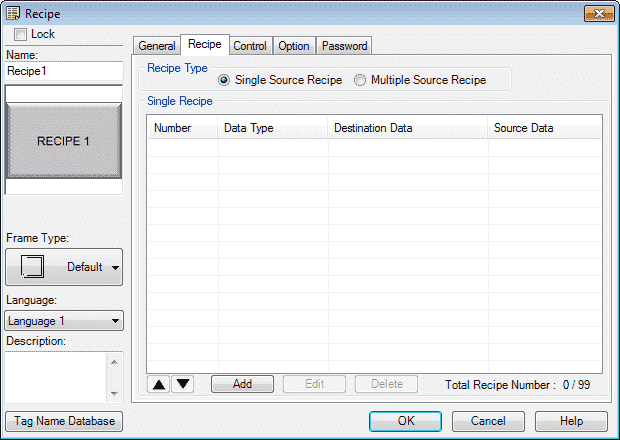
The recipe type can be a single source recipe or a multiple source recipe. Single source recipe is used to copy up to 99 (tags/numbers) into different tags into the PLC. This is similar to the recipe button on the C-More Micro HMI.
C-More Micro HMI Recipe – Video
In our example, we will use the multiple source recipe. This will use the recipe sheets to select the row that we want as the recipe.
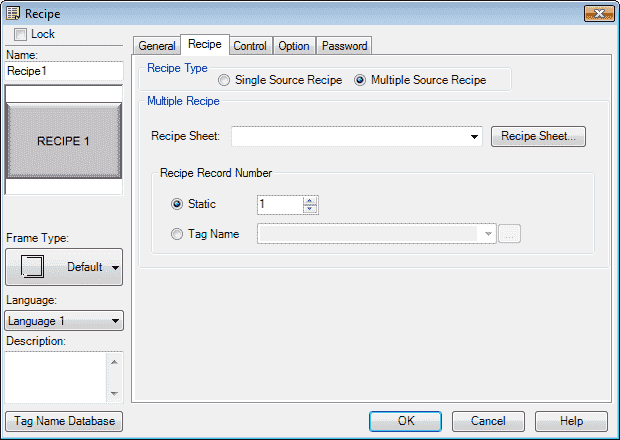
The recipe sheet that we will use is the TIME SEQUENCE that we set above. The recipe record number can be a static value or tag name that contains a value that will represent the row of the recipe that we want to use.
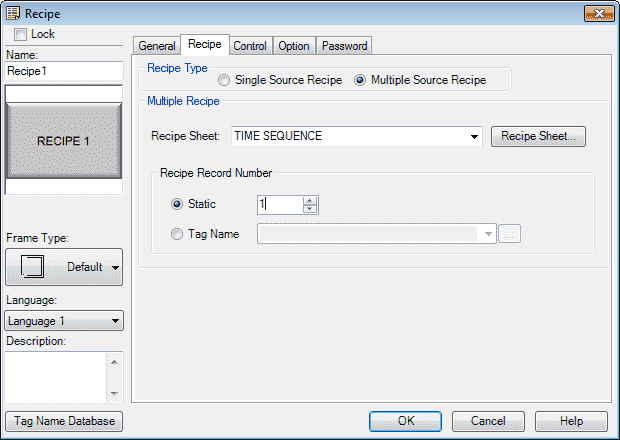
Our recipe button 1 will select the first row of recipe sheet TIME SEQUENCE. Select the Control tab.
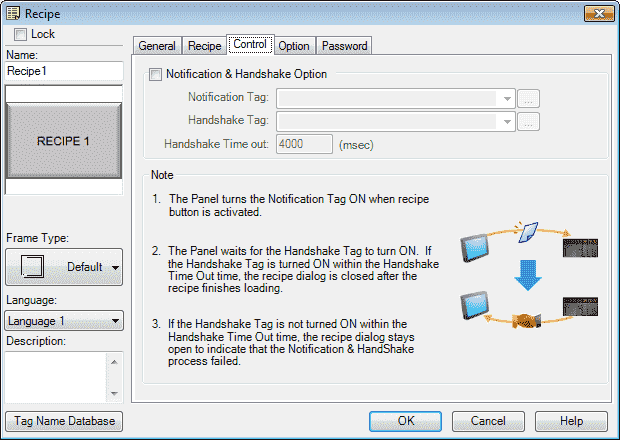
The control tab will allow you to set a notification bit when the recipe button is activated. We will not use this feature. Select the Options tab.
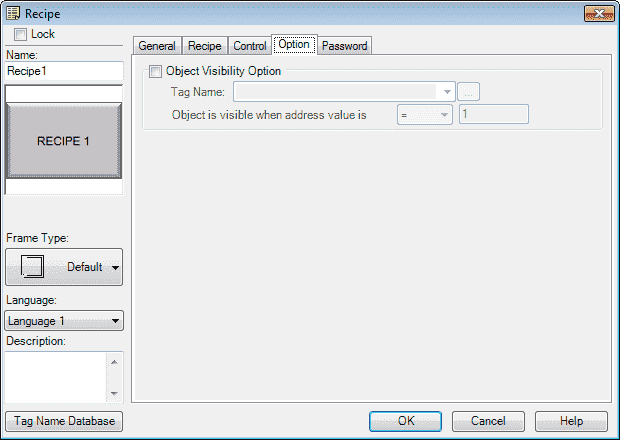
The options tab will allow you to set the visibility option for the recipe button. We will not use this feature. Select the Password tab.

We can set the password options for this button. Our example will not use this feature. Select OK.
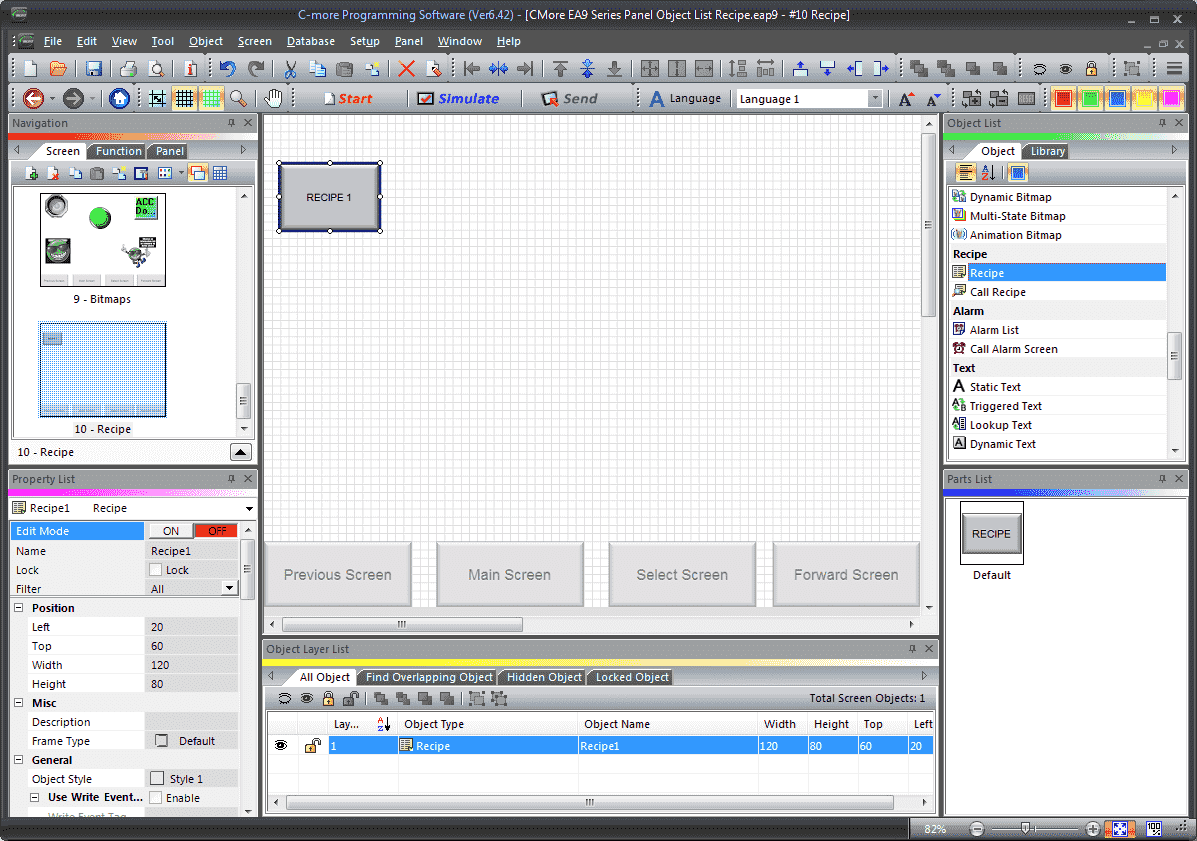
We can now use the mouse to size and position our recipe button on the screen.
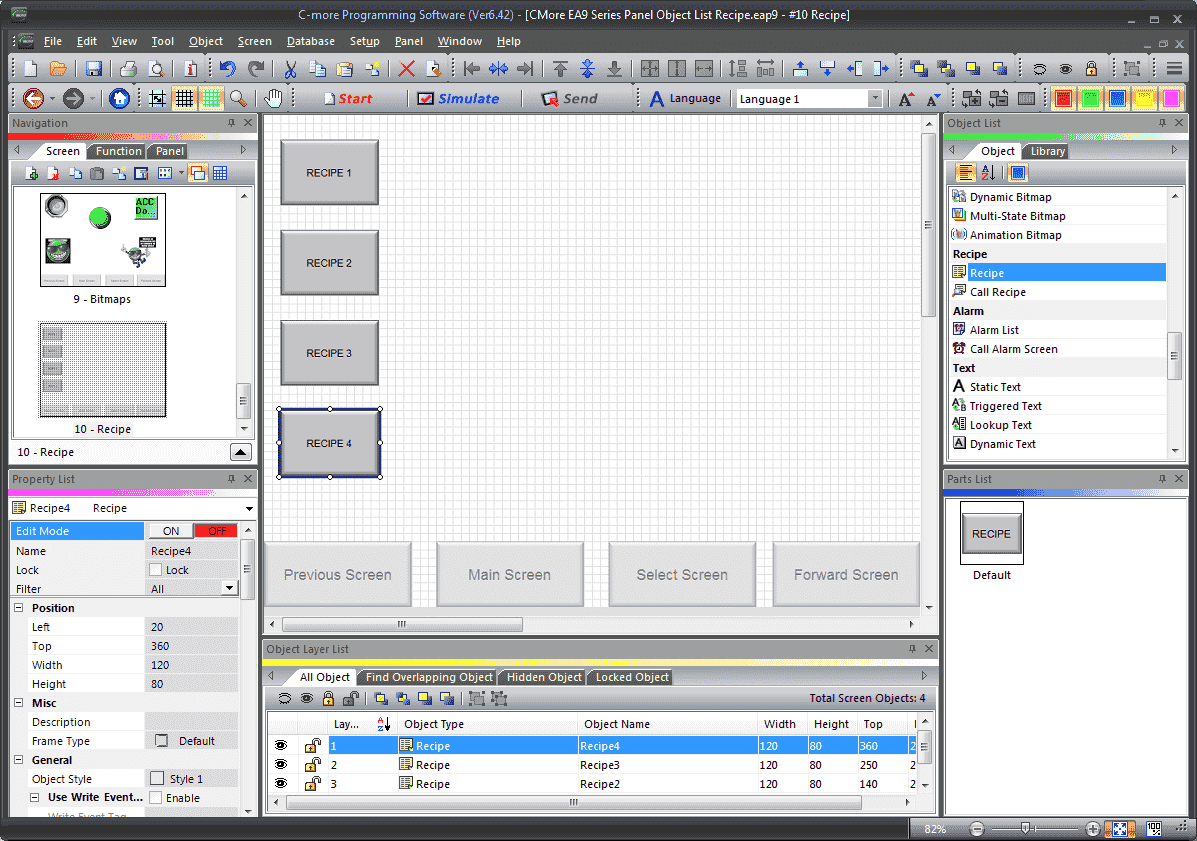
Using the duplicate we will add three more buttons for the remaining rows in our recipe sheet.
Recipe 2 – Recipe Record 2
Recipe 3 – Recipe Record 3
Recipe 4 – Recipe Record 4
Timer 1 – 4 SV and PV values
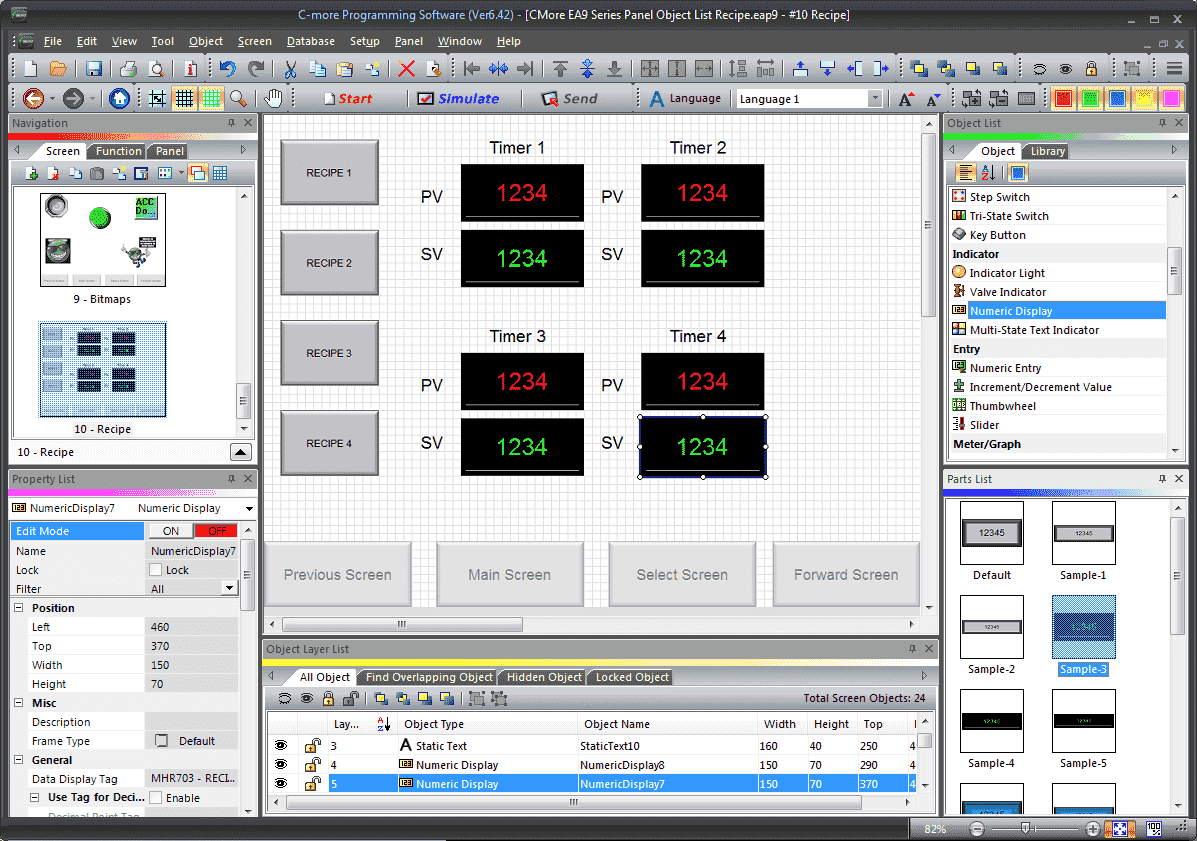
Using the numeric display value we will display the present value (PV) and the set value (SV). This way we can monitor our recipe numbers as we select the buttons.
Call Recipe
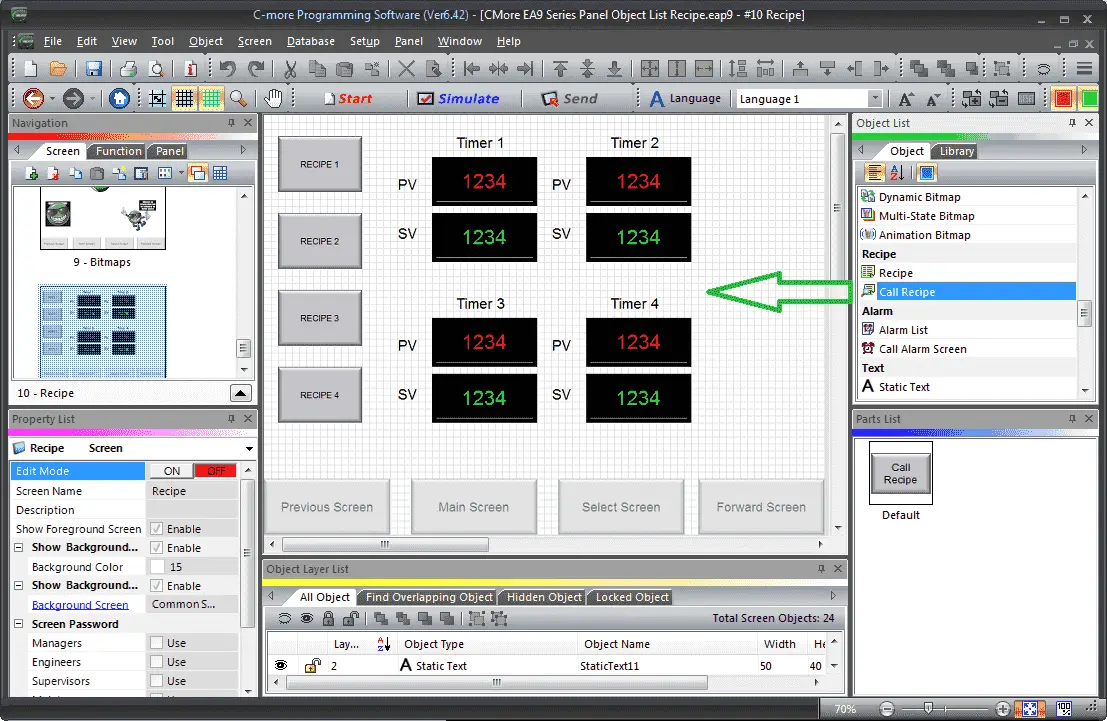
We will now add a Call Recipe (Button) under the Recipe heading in the Object list window. Left-click (hold) and drag the Call Recipe onto the screen.
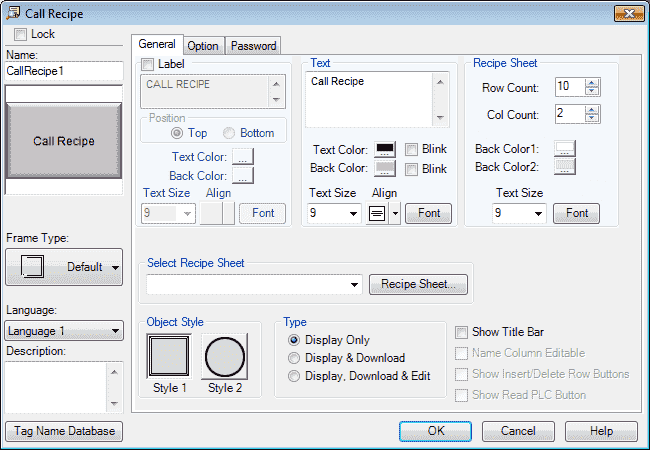
The Call Recipe window will display. You can also use the main menu | Object | Recipe | Call Recipe… and click on the work area of the screen. This will give you the default call recipe button selection.
The call recipe will display our recipe sheet on the HMI. This will allow the operator to select, modify and download the recipe with this operation.
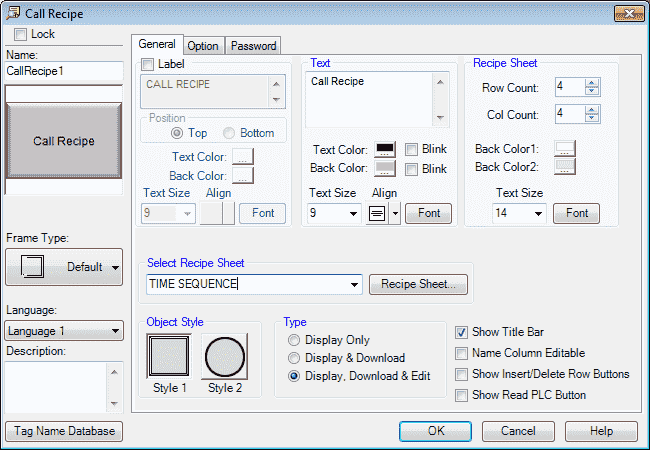
Under the select recipe sheet, we will use our TIME SEQUENCE created above.
Under the recipe sheet, our row count and column count will be set to 4. This is because we have four timers and four different rows in the sheets for our recipes.
Select the text size to be 14. This is so the display on the HMI will be large enough to read.
Our type will be Display, Download, and Edit. Click on the show title bar.
Select the Options tab.
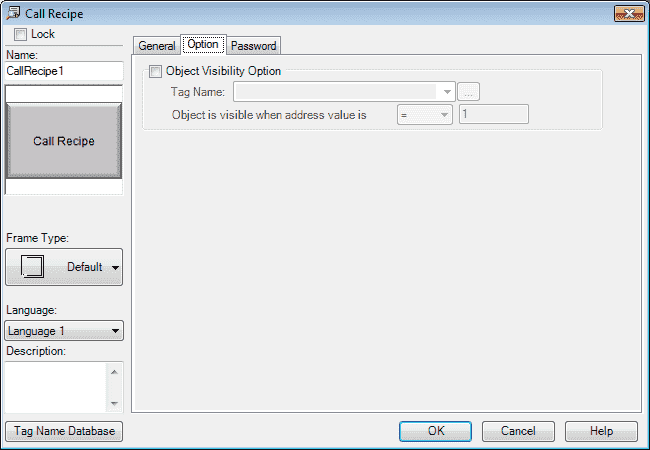
We will not use the visibility option for our sample program. Select the Password tab.

We can set up passwords for this get recipe button. Our sample will not use this option.
Select OK.
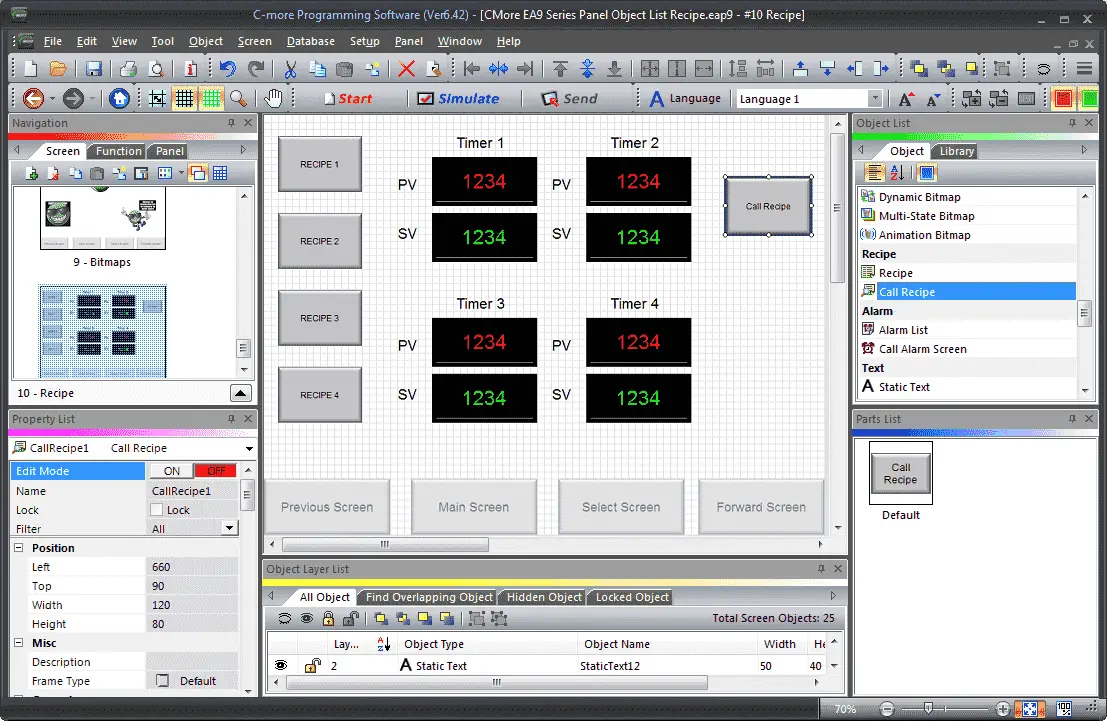
We can now use the mouse to size and position our call recipe button on the screen. We have now completed our recipe screen in our HMI.
C-More EA9 Object Recipe Simulation
We can simulate our HMI program to ensure that we have the screen look that we want.
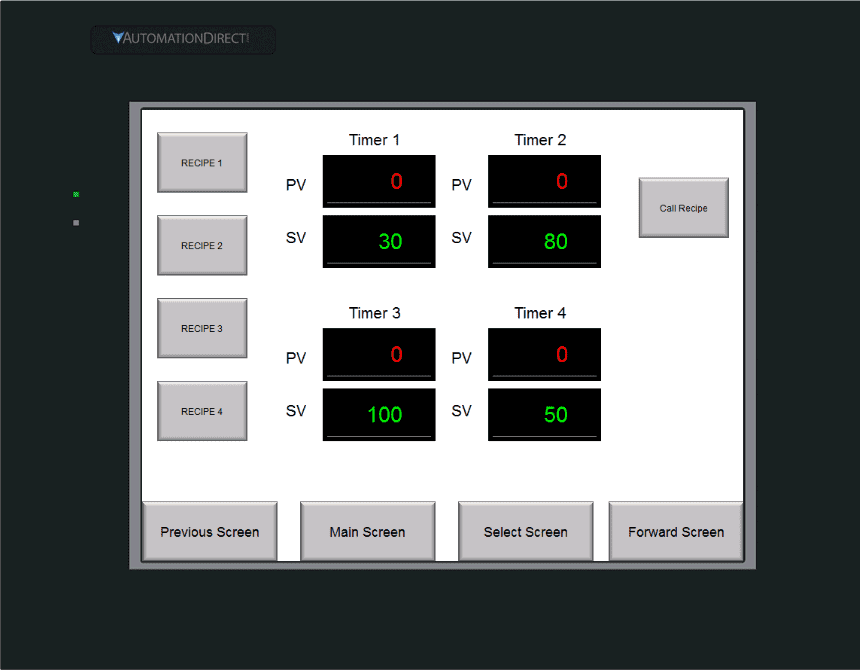
Selecting the RECIPE 1 to RECIPE 4 buttons will load the recipe from our recipe sheet.
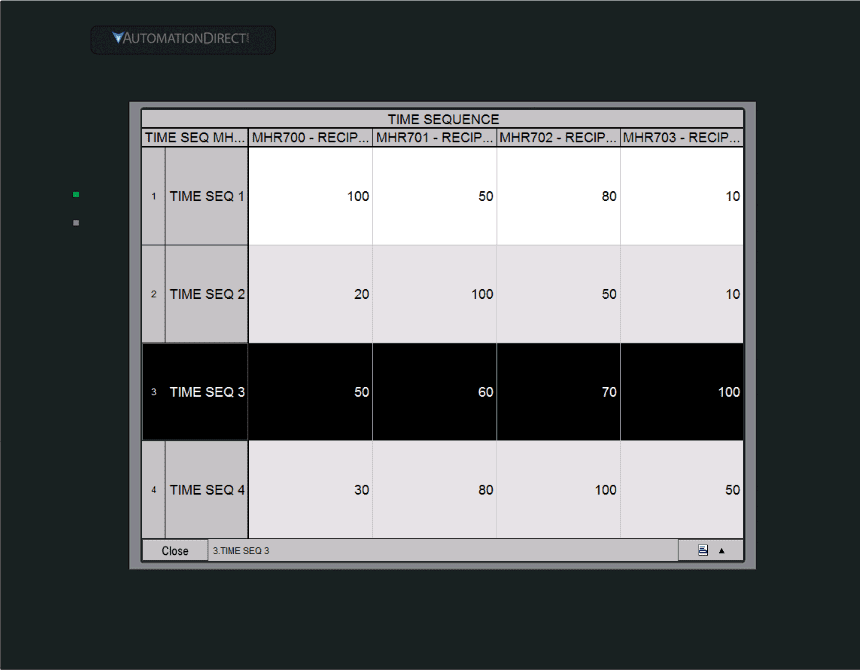
Selecting the GET RECIPE button will call up the TIME SEQUENCE sheet. We can select the recipe, load or edit.
See the video below to see the HMI in action with recipe selections.
Do-More Designer Simulator PLC Program Additions
Using the program we previously developed, we will add additional rungs to the program for our Recipe Objects.
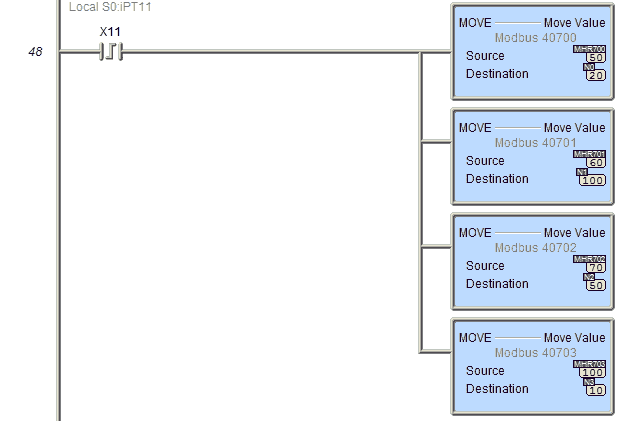
When the leading edge of X11 comes on, the recipe values MHR700 to MHR703 are transferred to N0 to N3.

On the trailing edge of X11, we move 0 (reset) the values in N0 to N3.
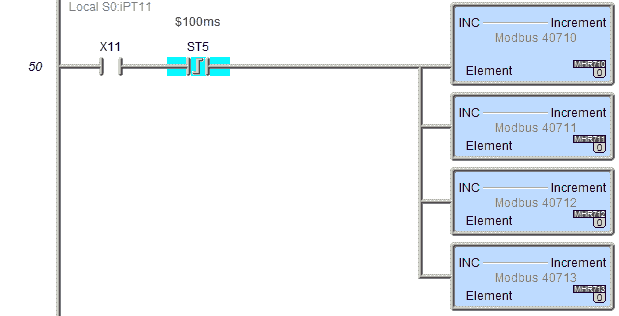
When X11 is on, the leading edge of the 100-millisecond timer bit will increment the addresses by one. (MHR710 to MHR713)
MHR710 to MHR713 are the present value (PV) of our timers.
N0 to N3 is the set value (SV) of our timers.
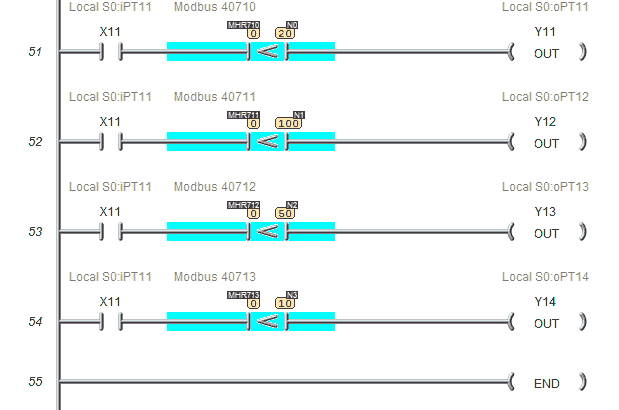
When X11 is on the PV is compared to the SV and if it is less than, the corresponding output will be turned on.
Download the PLC and C-More program here.
Watch the video below to see the Recipe Objects in action on our C-More EA9 HMI Panel. This will also demonstrate the PLC ladder code for functionality.
C-More EA9 Panels from Automation Direct
https://www.automationdirect.com/adc/overview/catalog/hmi_(human_machine_interface)/c-more_touch_panels_ea9_series
C-More – Graphic Panel (EA9 Series) User Manual and Quick Start Guides
https://cdn.automationdirect.com/static/manuals/ea9userm/ea9userm.html
EA9-T10CL C-More Specifications
https://cdn.automationdirect.com/static/specs/ea9t10cl.pdf
C-More EA9 Programming Software (Current Version V6.42)
https://support.automationdirect.com/products/cmore.html
This software will enable you to program all of the C-More EA9 HMI units. It includes a simulator for your application.
Next time we will look more at the defined custom keypads that we can use in the C-More HMI Panel.
Watch on YouTube: C-More EA9 HMI Series Panel Object List Recipe
If you have any questions or need further information please contact me.
Thank you,
Garry
If you’re like most of my readers, you’re committed to learning about technology. Numbering systems used in PLC’s are not difficult to learn and understand. We will walk through the numbering systems used in PLCs. This includes Bits, Decimal, Hexadecimal, ASCII and Floating Point.
To get this free article, subscribe to my free email newsletter.
Use the information to inform other people how numbering systems work. Sign up now.
The ‘Robust Data Logging for Free’ eBook is also available as a free download. The link is included when you subscribe to ACC Automation.

