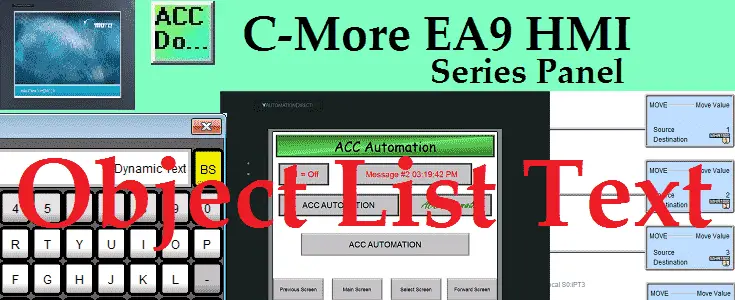
The C-More HMI Panel software uses virtual components called Objects. These objects are programmable to simulate the functions that you require on your automation project. Pushbuttons, Switches, meters, and graphs are just a few of the objects that are available to you.
The Text List Objects include a variety of options to customize the display of text on a screen.
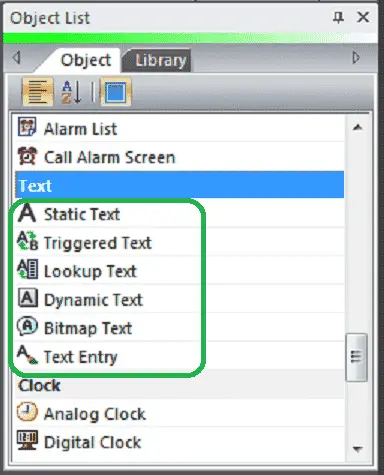
We will now look at the object list text that we can use with our HMI panel. The text objects that are available on the C-More EA9 are Static, Triggered, Lookup, Dynamic, Bitmap and Text Entry. We will program each of these text objects. Let’s get started.
Previously in this C-More EA9 HMI Panel series, we have done the following:
System Hardware
– Unboxing and Review Video
– Powering the Unit Video
Installing the Software – Video
System Setup Screens – Video
First Program
– Establishing Communication and Updating Firmware Video
– First Program Video
Panel to PLC and PLC to Panel Settings – Video
Common Screen Menu – Video
Simulate Project – Video
Object List Shapes – Video
Object List Buttons – Video
Object List Indicators – Video
Object List Entry – Video
Object List Meters and Graphs – Video
Object List Bitmaps – Video
Object List Recipe – Video
Define Custom Keypad – Video
Object List Alarms – Video
Watch the video below to see the Object List Text in action on our C-More EA9 HMI Panel.
Setting Our Text Screen
We will be adding to the program we created last time. (C-More EA9 HMI Series Panel Object List Alarms).
Select a new screen under the main menu | Screen | New Screen…
Alternatively, we can also use the icons in the Navigation panel.
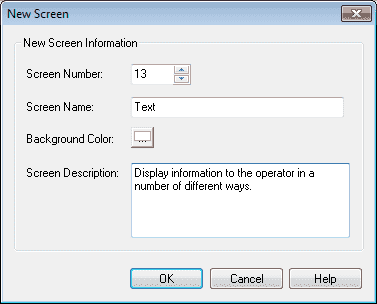
We will name screen 13 Text. The screen description can be used to describe the screen. Hit OK.
Our new screen will now be displayed.
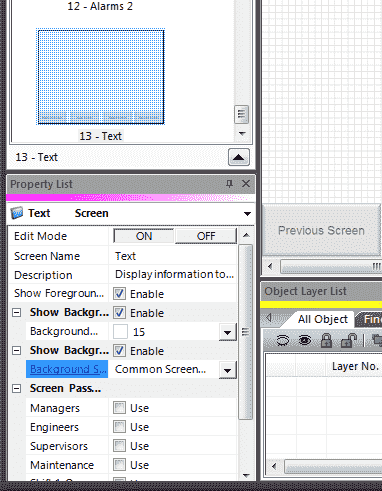
Under the property list window, turn on the editing and enable the show background. Select Common Screen Menu under the background screen. Turn off the edit mode under the property list.
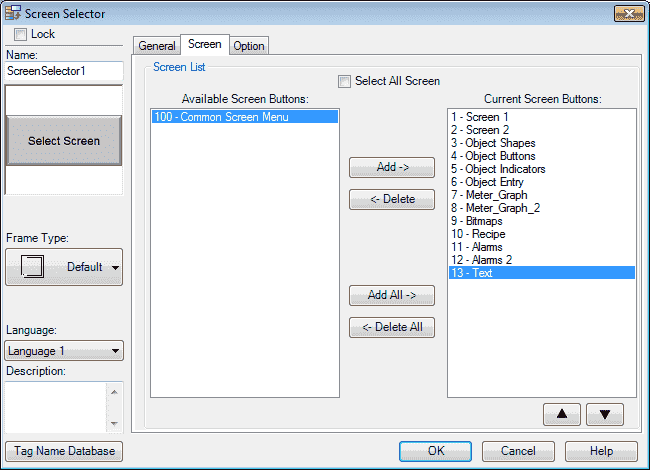
We must now add our new screen so we can select it when using the common screen menu. Select page 100. Select the Screen Selector button. Under the Screen tab, select the 13 – Text and hit the Add button so it moves it over to the Current Screen Buttons. Hit OK. We can now go back to our newly created Object Text screen page 13 from our navigation window.
Our new screen is now ready for us to add our text objects.
Tag Name Database
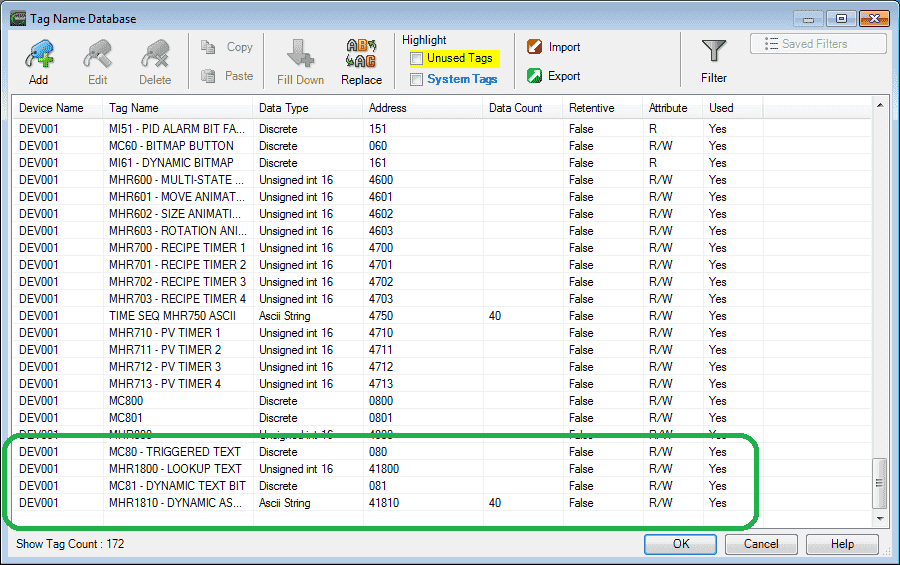
We will use the following addresses to control the text objects on our cmore HMI.
MC80 – Discrete On/Off – Modbus Address 00080 – Read / Write
MHR1800 – Unsigned Int 16 – Modbus Address 41800 – Read / Write
MC81 – Discrete On/Off – Modbus Address 00081 – Read / Write
MHR1810 – ASCII String – Modbus Address 41810 – 40 registers – Read / Write
Static Text
The Static Text Object is used to display a Frame with a personalized message of up to 500 characters. The Static Text Object can be continually displayed or can change visibility based on the status of an assigned Tag. It can be used for labels, instructions, warnings, etc.
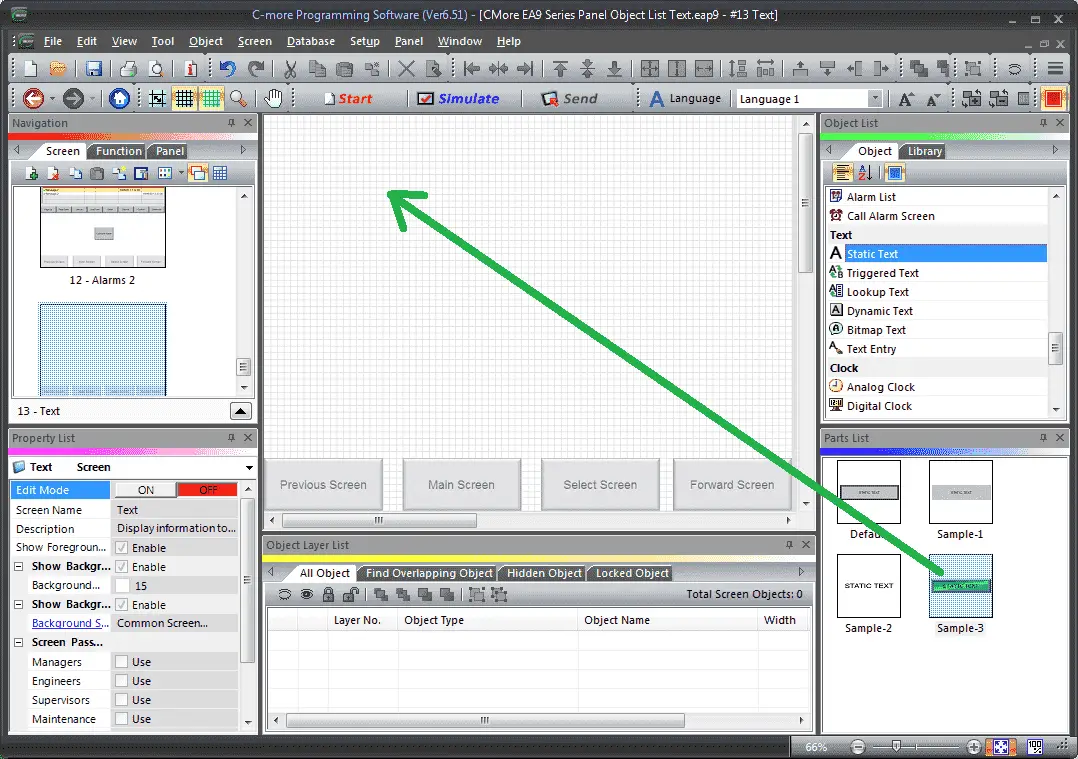
Select Screen 13 from the navigation window. We will now add a Static Text under the Text heading in the Object list window. Left-click (hold) and drag the Static Text Sample-3 from the Parts List onto the screen.

The Static Text window will display. You can also use the main menu | Object | Text | Static Text… and click on the work area of the screen. This will give you the default selection.
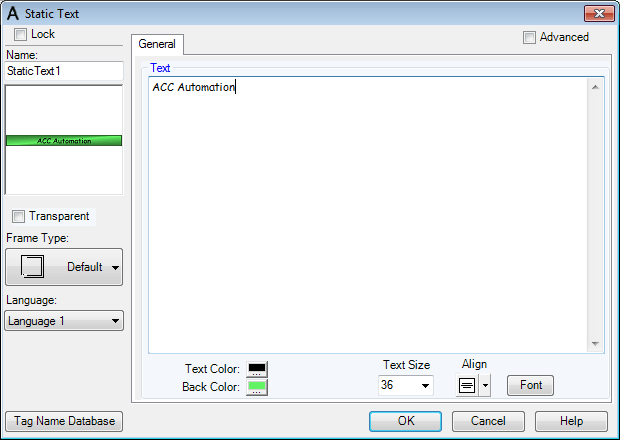
We will change the text message to ACC Automation. The text size will be 36 and will align in the center of our frame. We will leave the font and colours as their default values.
The default name will be Static Text 1. You will see a picture of what the object will look like on the screen. We will leave the transparent selection off and use the default frame type and language.
Select the Advanced option in the top right corner.
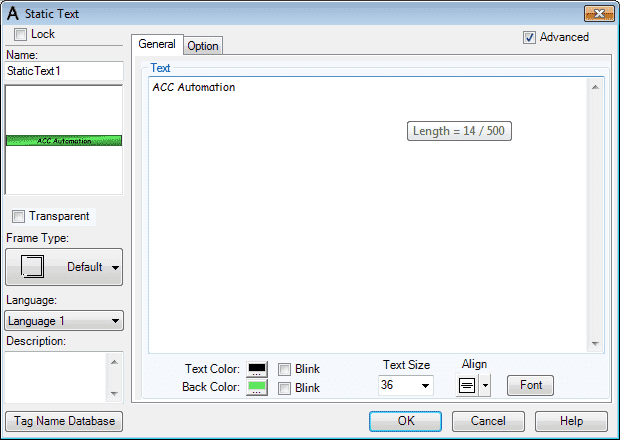
Our text and background colour can now be selected to blink, You will also see that we can create a description for this object. The option tab is now visible.
Select the Option tab.
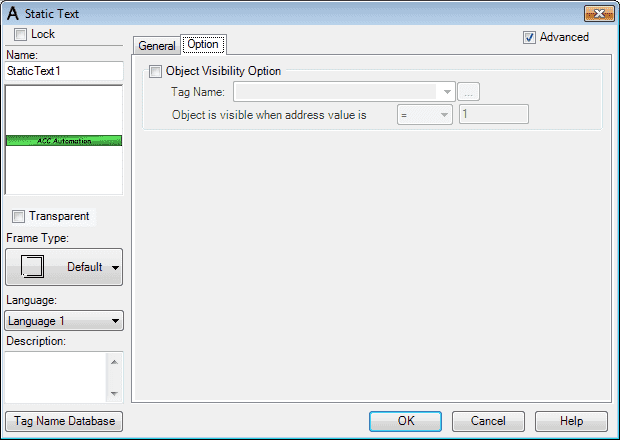
We can set the visibility of the Static Text. In our case, we will not set this parameter. Select OK
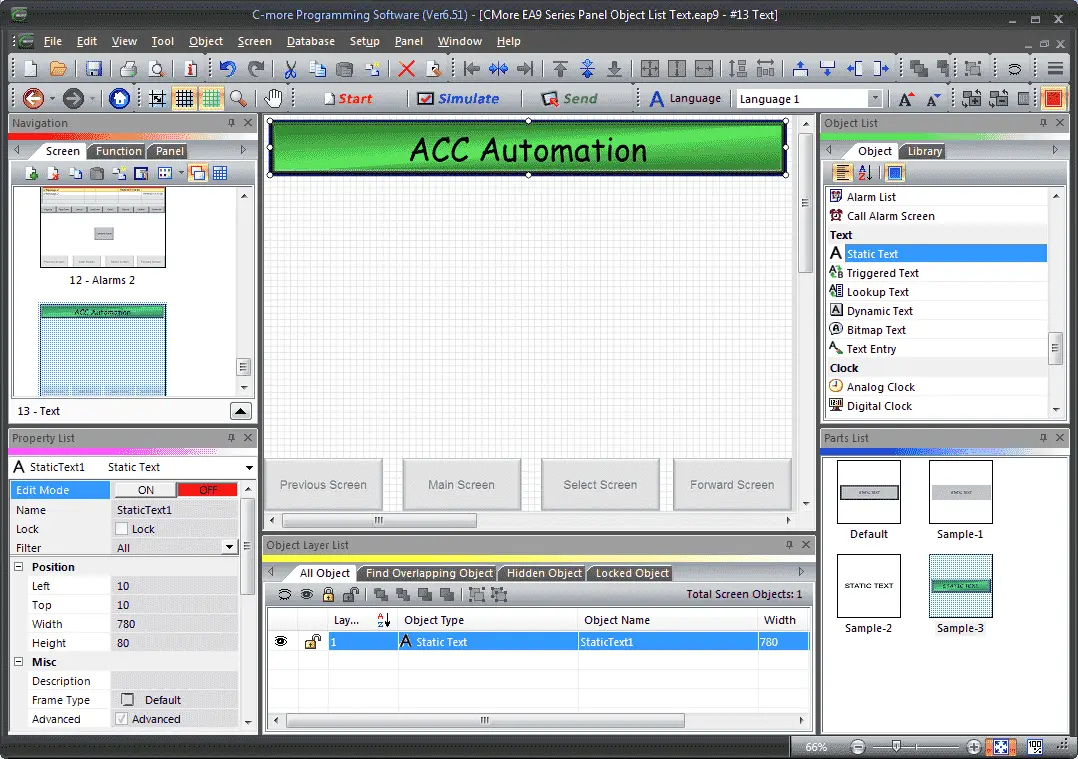
We can now use the mouse to size and position our static text on the screen.
Triggered Text
The Triggered Text Object is used to display a Frame with a personalized message. This Frame and Message can be placed on any screen and any location within the screen. The Object is always displayed like a sign but is configured to display only when prompted by an assigned Tag Name.
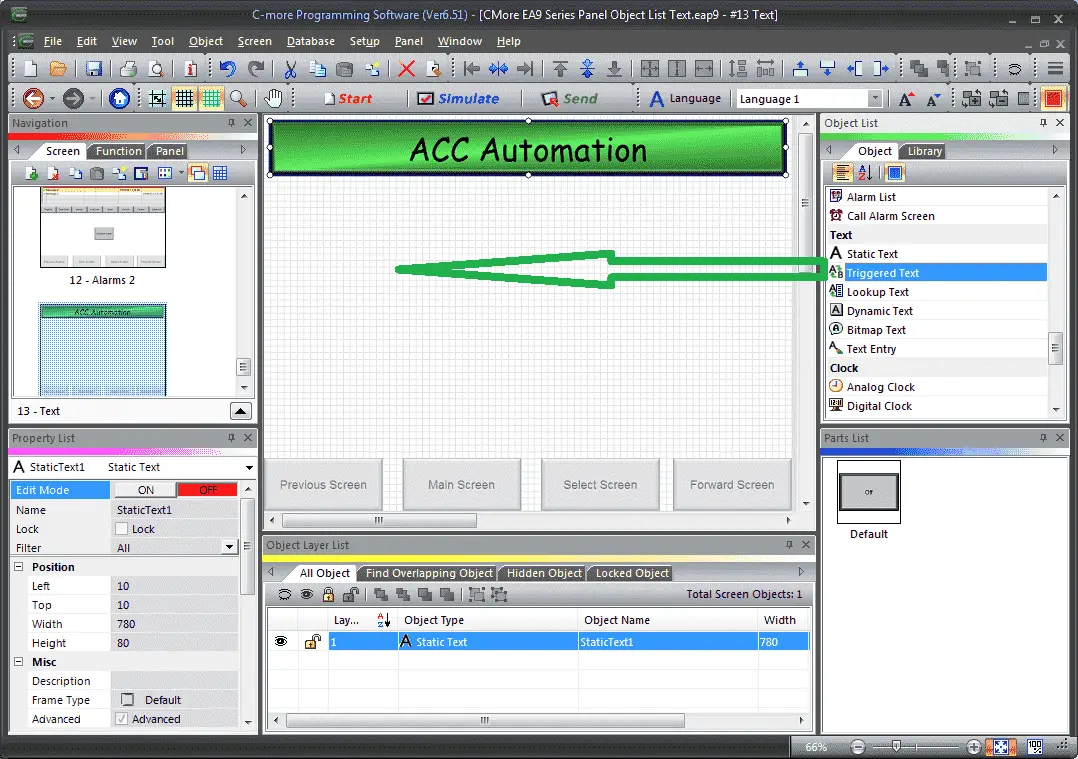
We will now add a Triggered Text under the Text heading in the Object list window. Left-click (hold) and drag the Triggered Text onto the screen.
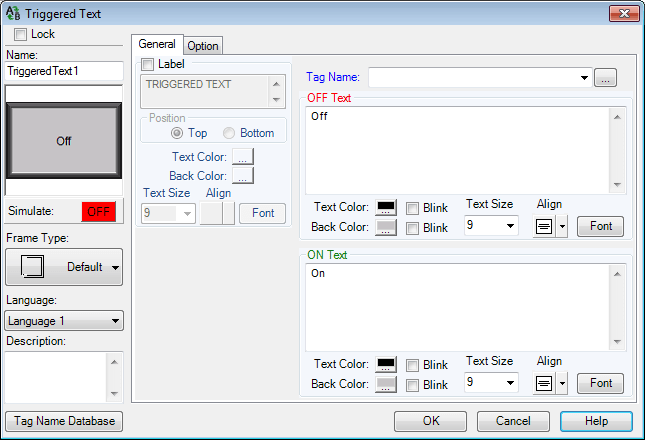
The Triggered Text window will display. You can also use the main menu | Object | Text | Triggered Text… and click on the work area of the screen. This will give you the default selection.
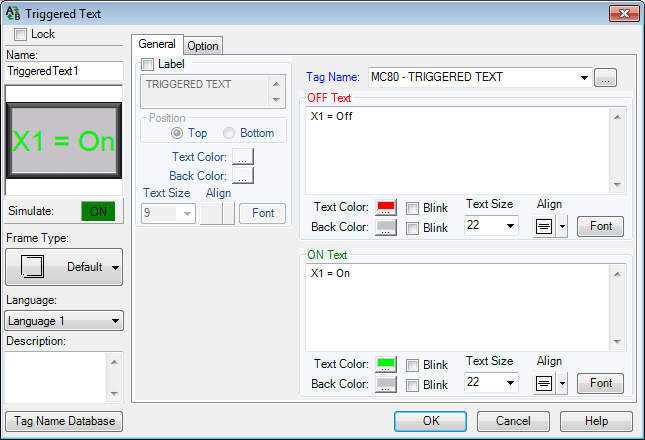
Select the tag name of MC80. Our off text will be “X1 = Off” and our on text will be “X1 = On” this will be in red and green. We will leave all the other parameters as their default.
Select the option tab.
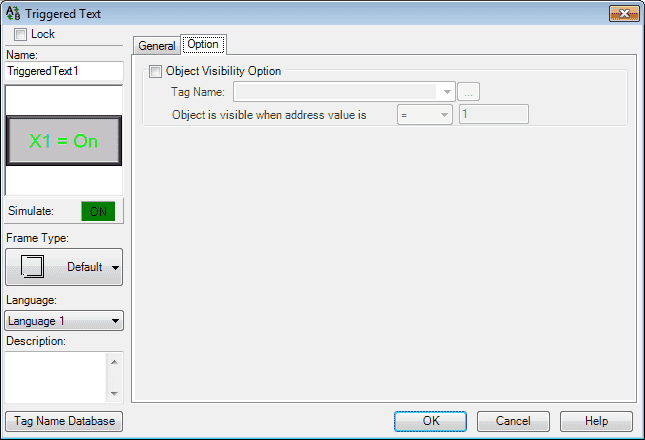
We can set the visibility of the Static Text. In our case, we will not set this parameter. Select OK
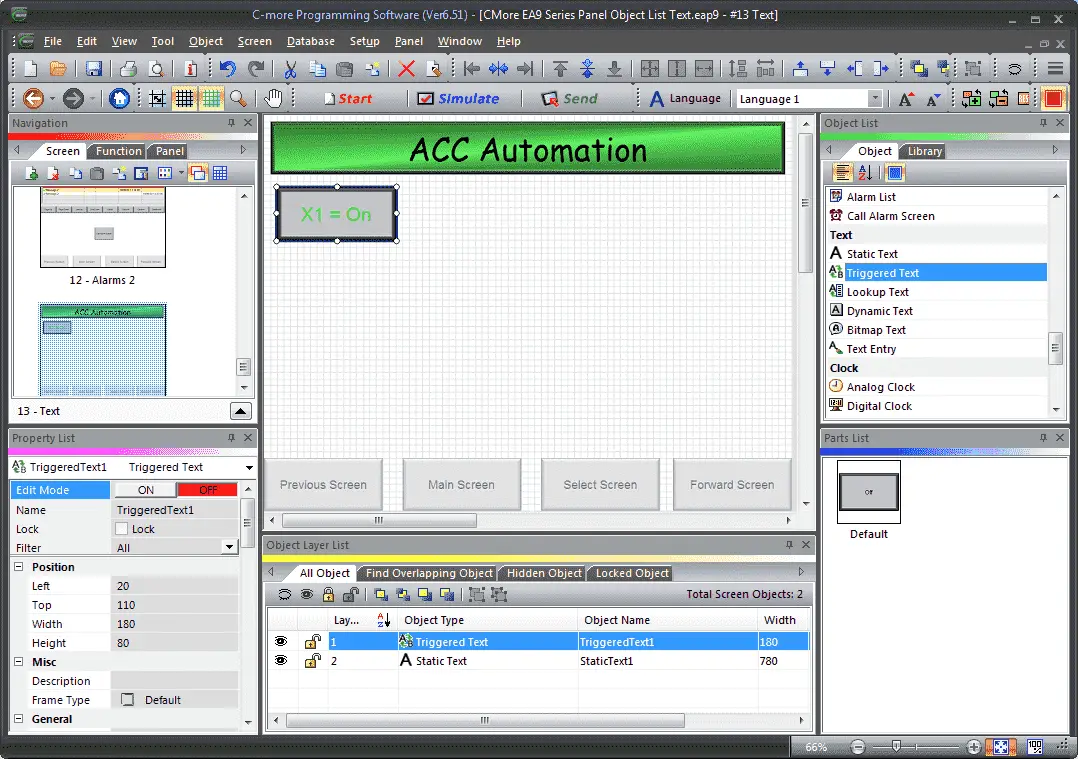
We can now use the mouse to size and position our trigger text on the screen.
Lookup Text
Lookup text is used to display messages programmed into the C-More HMI. It will look at a tag register that will display the database message the tag references.
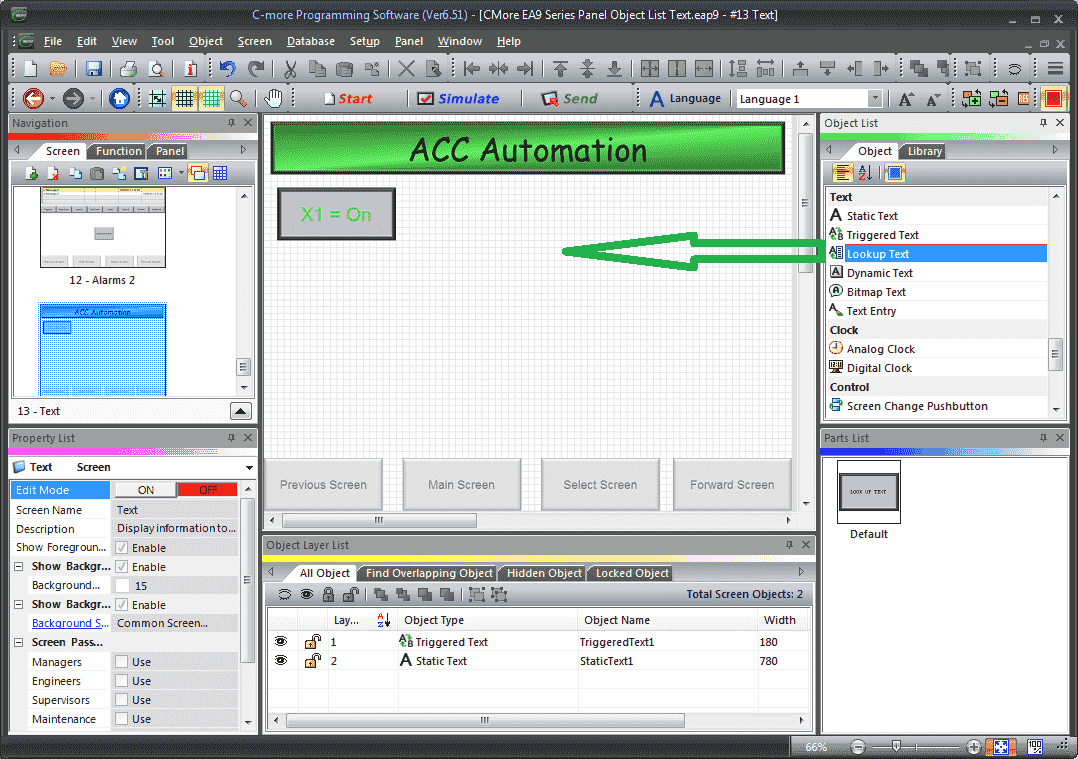
Left-click (hold) and drag the Lookup Text onto the screen.
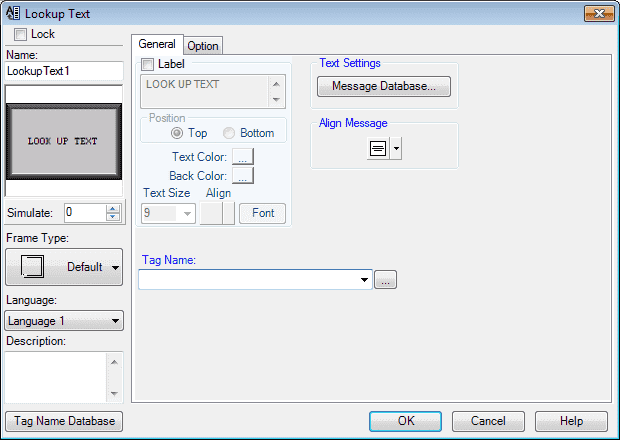
The Lookup Text window will display. You can also use the main menu | Object | Text | Lookup Text… and click on the work area of the screen. This will give you the default selection.
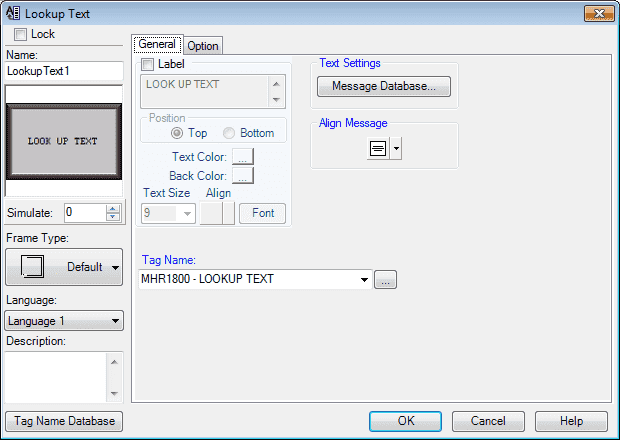
We will use the tag name MHR1800 – LOOKUP TEXT as programmed above. All other items will be left as their default. Select the Message Database…
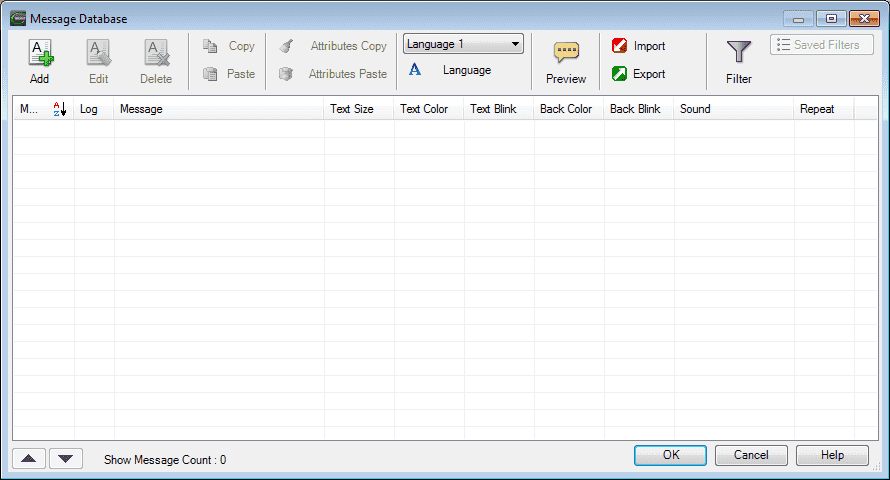
The message database window will now be displayed. This will list all of the messages that we will use for our lookup text object. Select the Add icon on the main menu. This will allow us to add our messages to the database.
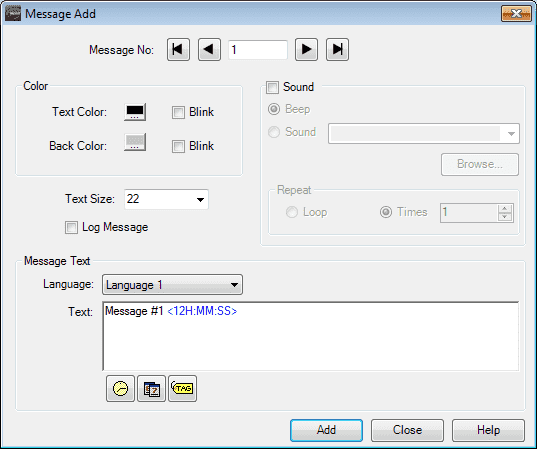
The message add window will allow us to set the text colour, background colour, and size that will be displayed. A sound can also be set with this message is displayed.
The message text can be logged. This will create a common separated value (CSV) file in the HMI.
The message itself can include other tag names, time and date within the message. In our example above we have included the time in the message in the format <12H:MM:SS>.
Select the Add button to add to the database and increment to the next message.
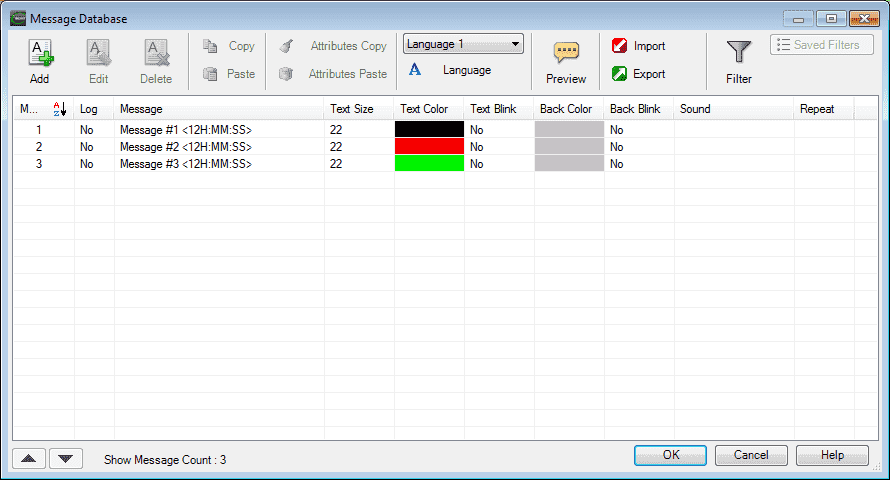
We will have three messages in our database.
1 – Message #1 <12H:MM:SS> (Black, Text Size 22)
2 – Message #2 <12H:MM:SS> (Red, Text Size 22)
3 – Message #3 <12H:MM:SS> (Green, Text Size 22)
Select OK to return to the lookup text window.
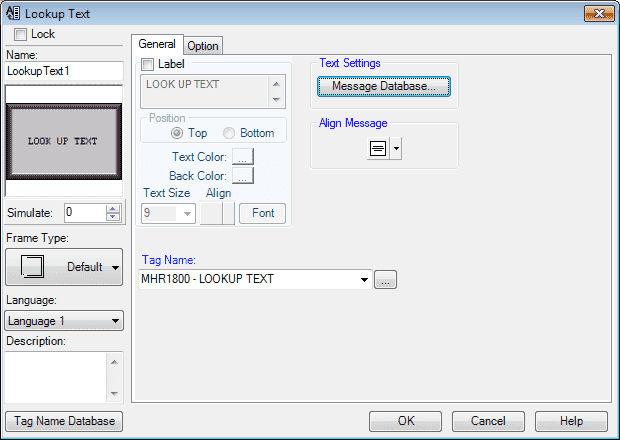
Our PLC program will control the message displayed in our Lookup Text. The value in MHR1800 will be 1, 2 or 3. If a value is set outside of the message numbers programmed then the display will be blank.
The option tab will allow us to set the visibility. We will not use this option. Select OK.
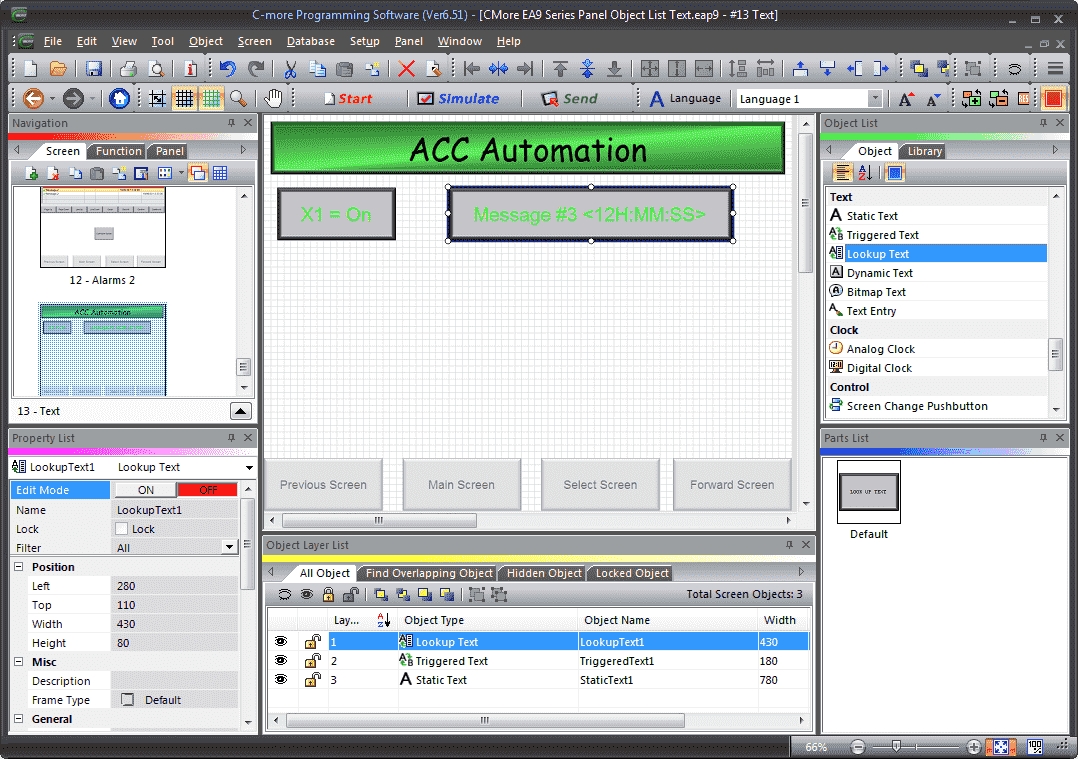
We can now use the mouse to size and position our lookup text on the screen.
Dynamic Text
Dynamic Text is used to display text that is retrieved from a tag name assigned to registers in the PLC that contain ASCII data.
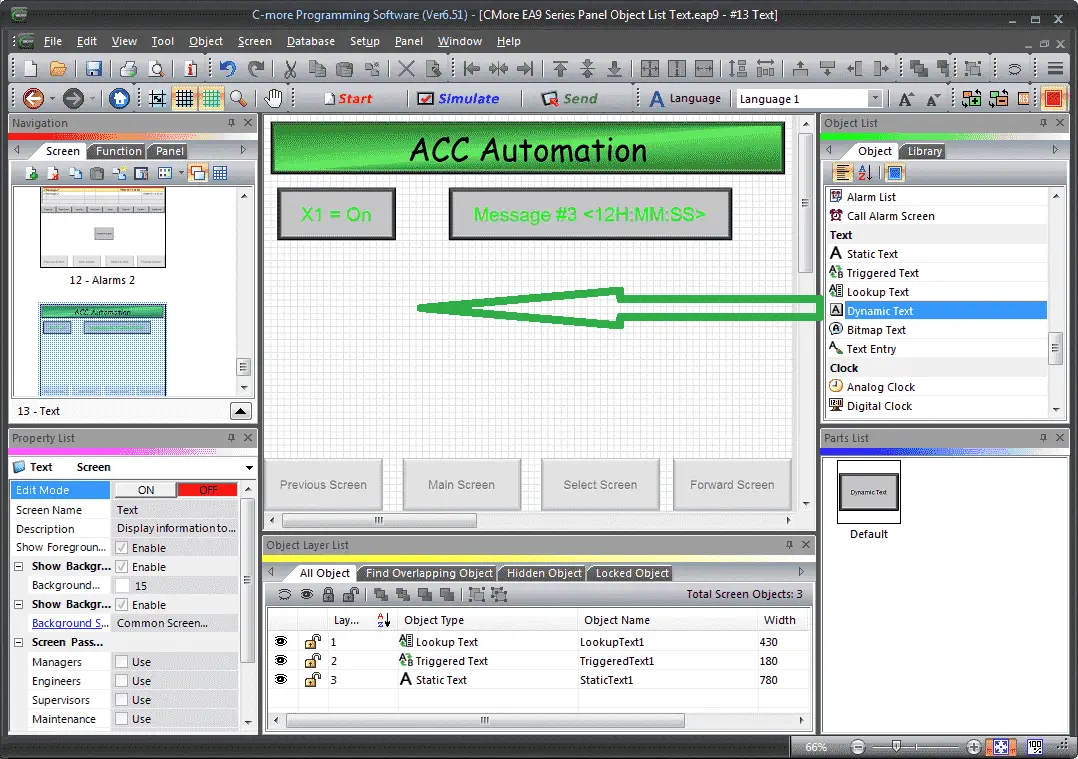
Left-click (hold) and drag the Dynamic Text onto the screen.
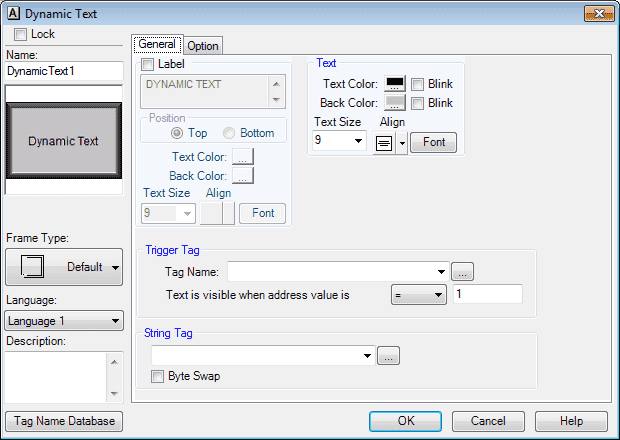
The Dynamic Text window will display. You can also use the main menu | Object | Text | Dynamic Text… and click on the work area of the screen. This will give you the default selection.

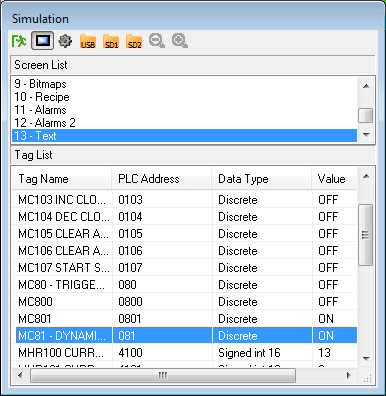
Our trigger tag will be set for MC81 – DYNAMIC TEXT BIT. This will control the visibility of the text on the object. The object visibility is still an option under the option tab on the dynamic text window. We will not use the object visibility for our example.
The string tag will be set for MHR1810 – DYNAMIC ASCII TEXT. This will be the location in the PLC that will have our text message in ASCII. Select OK.
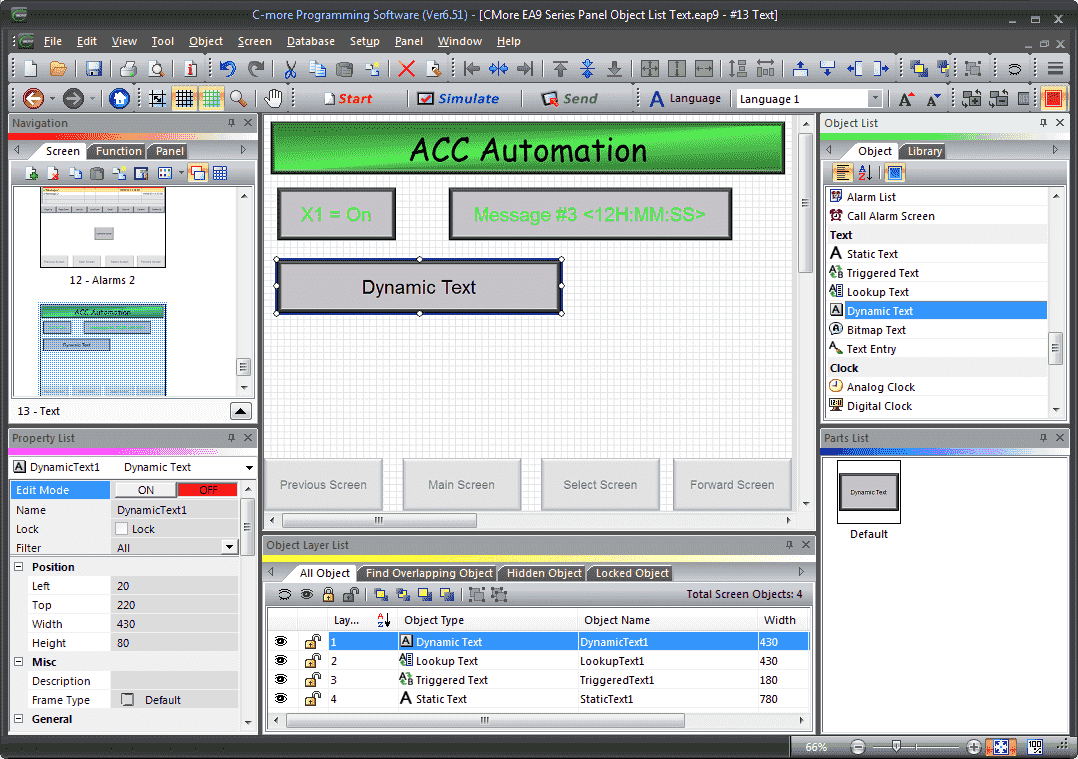
We can now use the mouse to size and position our dynamic text on the screen.
Bitmap Text
A Bitmap Text Object is to display information in fonts that won’t increase the size of the project. You can use a unique font that will be saved as a Bitmap Text Object without downloading the entire font to the panel.
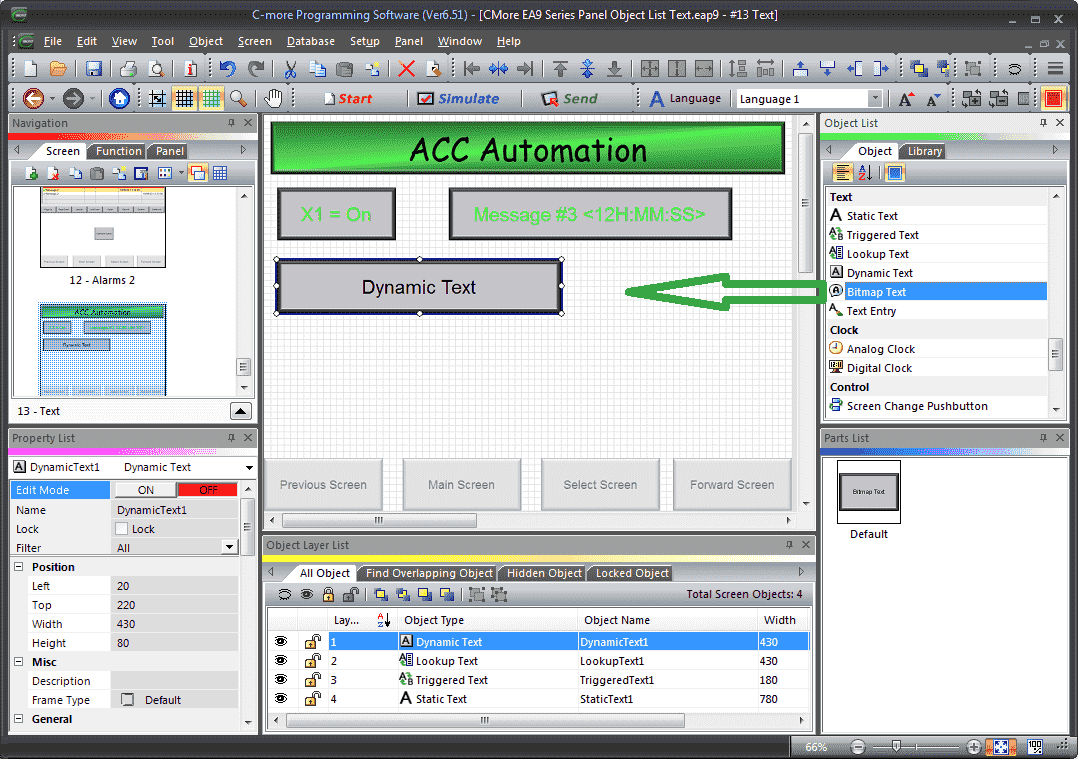
Left-click (hold) and drag the Bitmap Text onto the screen.
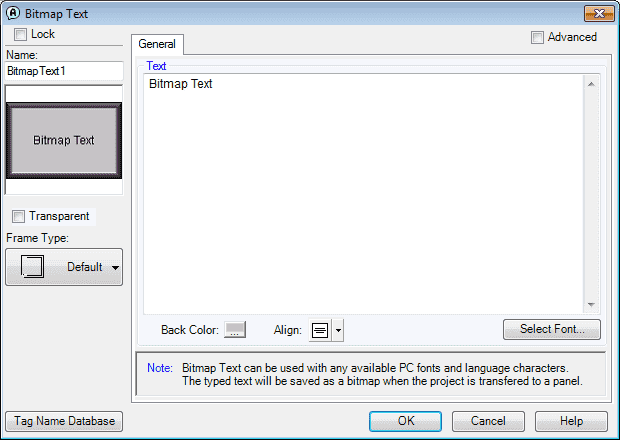
The Bitmap Text window will display. You can also use the main menu | Object | Text | Bitmap Text… and click on the work area of the screen. This will give you the default selection. Select the Select Font button.
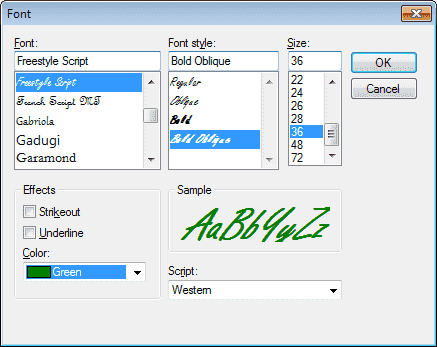
We can select any font that is on your windows computer. In our case, we will use the Freestyle Script with Bold Oblique. The size will be 36 and the colour will be green.
Select OK.
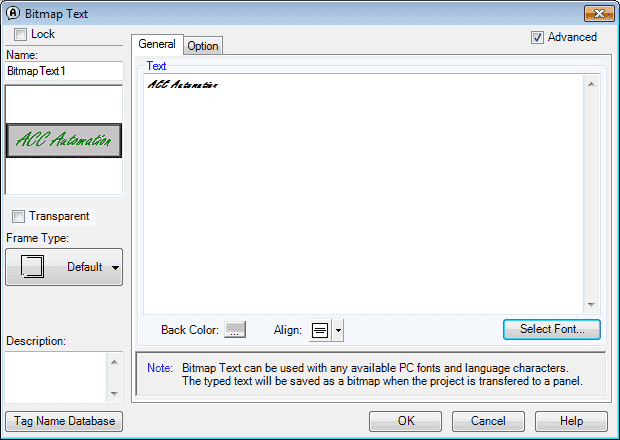
We can now change our text to the message that we want to display to the operator. In our case, we use ‘ACC Automation’. Select OK.
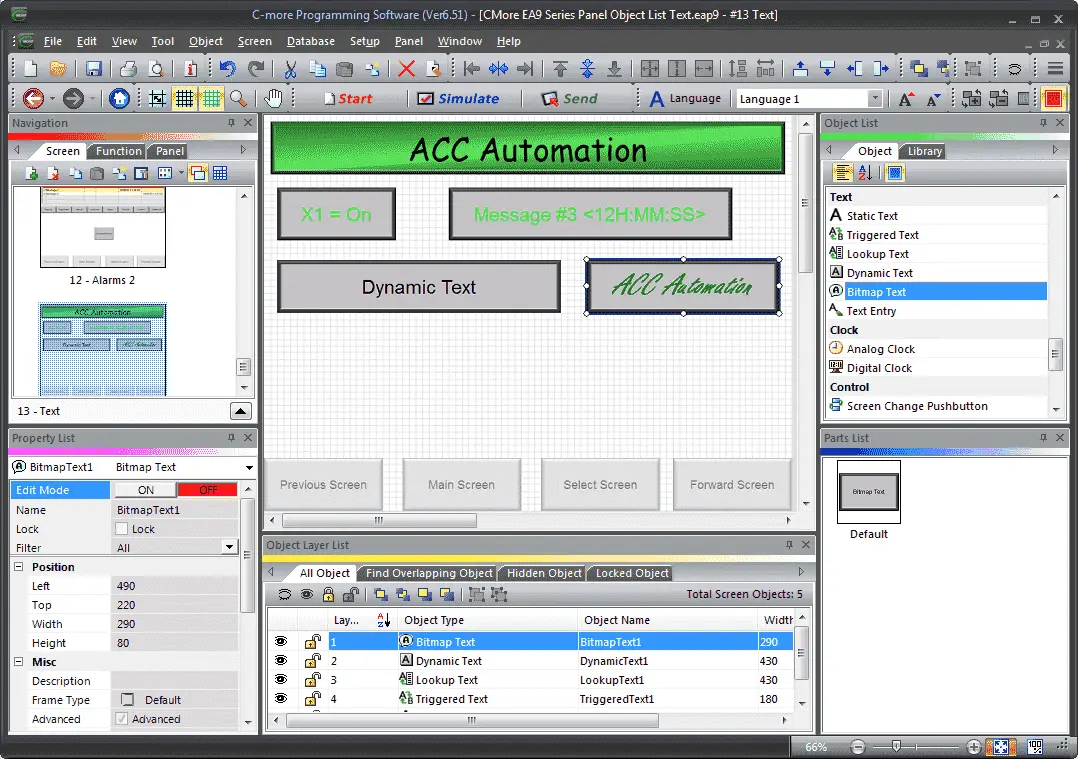
We can now use the mouse to size and position our bitmap text on the screen.
Text Entry
The Text Entry Object is used to enter a Text from your Panel to a PLC Register.
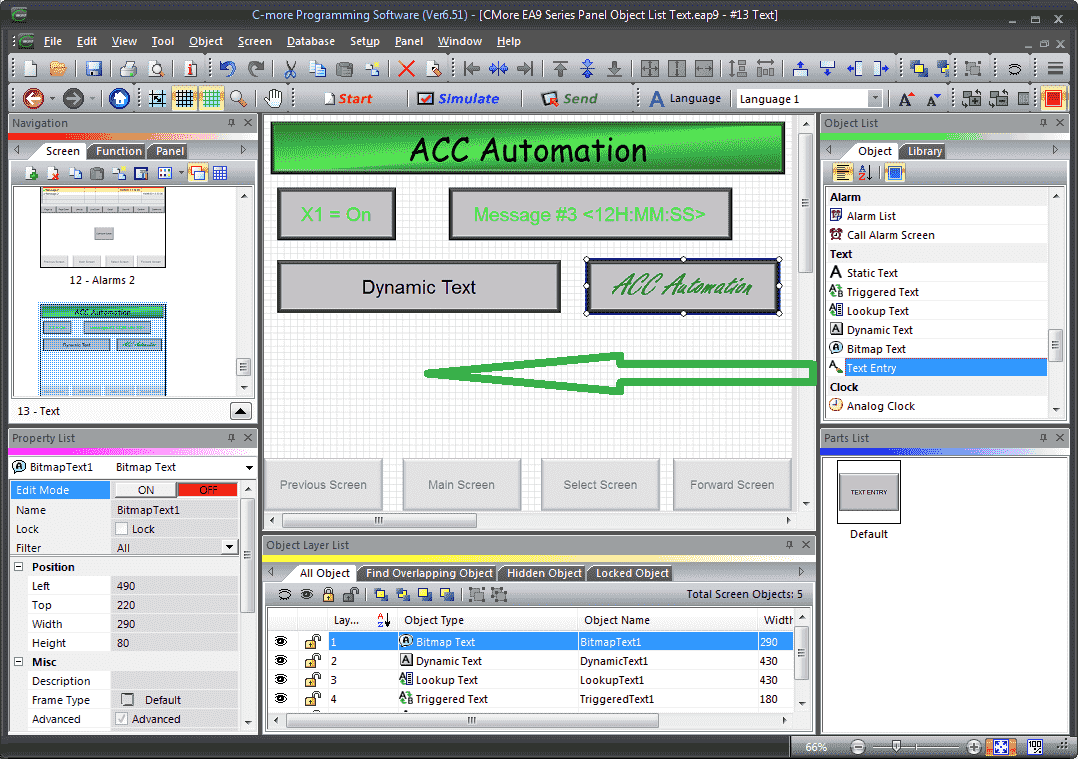
Left-click (hold) and drag the Text Entry onto the screen.
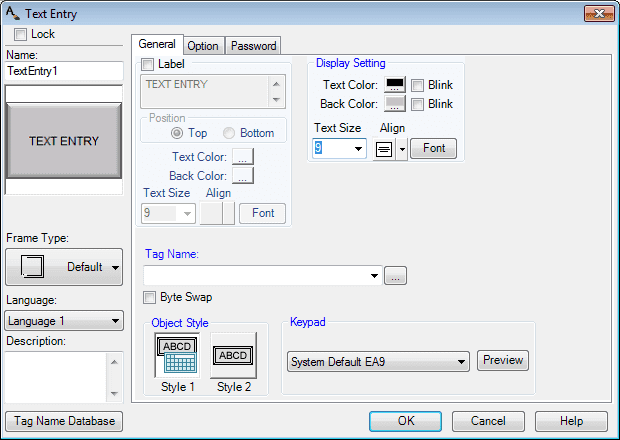
The Text Entry window will display. You can also use the main menu | Object | Text | Text Entry… and click on the work area of the screen. This will give you the default selection.
There are two ways (or Object Styles) in which you can enter this ASCII String Text:
Style 1: Opens a Text Keypad that enables you to enter a text message that will be written to the assigned Tag Name. This is the one we will be using in our example.
Style 2: Will require a USB input device connected to Port A of the panel. Most HID Standard USB keyboards, card scanners, and barcode readers may be used with this style. We will be discussing barcode inputs on a later post in this series.
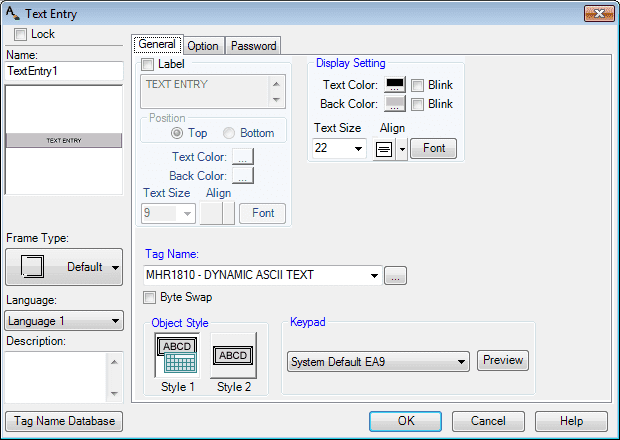
Our tag name will be MHR1810 – DYNAMIC ASCII TEXT. Select the Preview button beside the keypad selection.
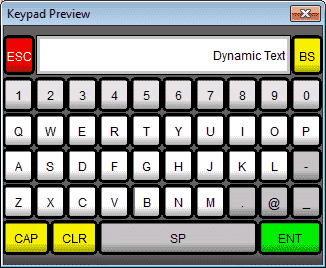
This will display our keypad entry. It will give you a good idea of how the display will look when the text entry button is selected. Select the X in the upper right corner to close the keypad preview window. Select the Option tab.
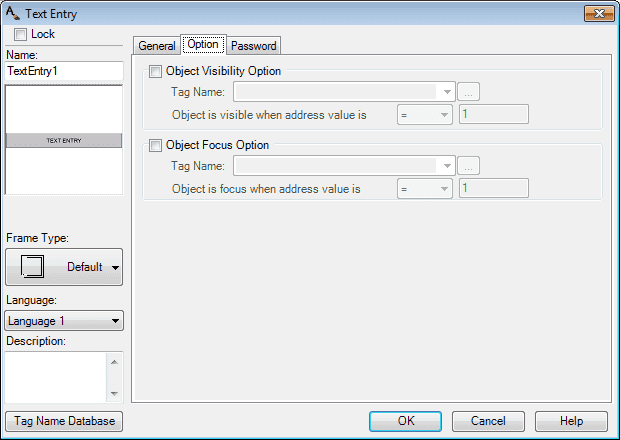
This tab will allow us to select the object visibility and focus options. We will leave these as their default for our example. Select the password tab.
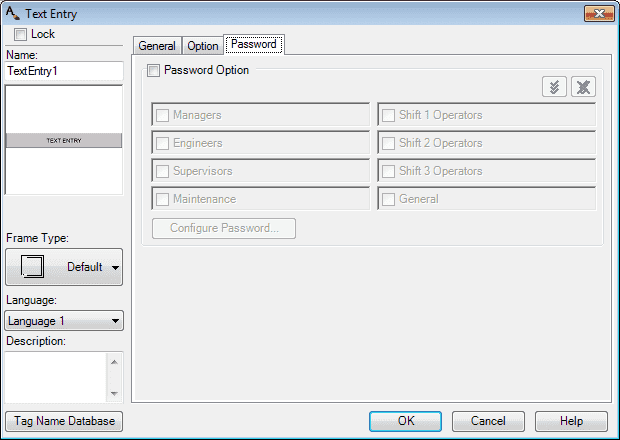
We can set up passwords for our text entry object. This will limit the number of people who will have access to this object. We will not use passwords in our example. Select OK.
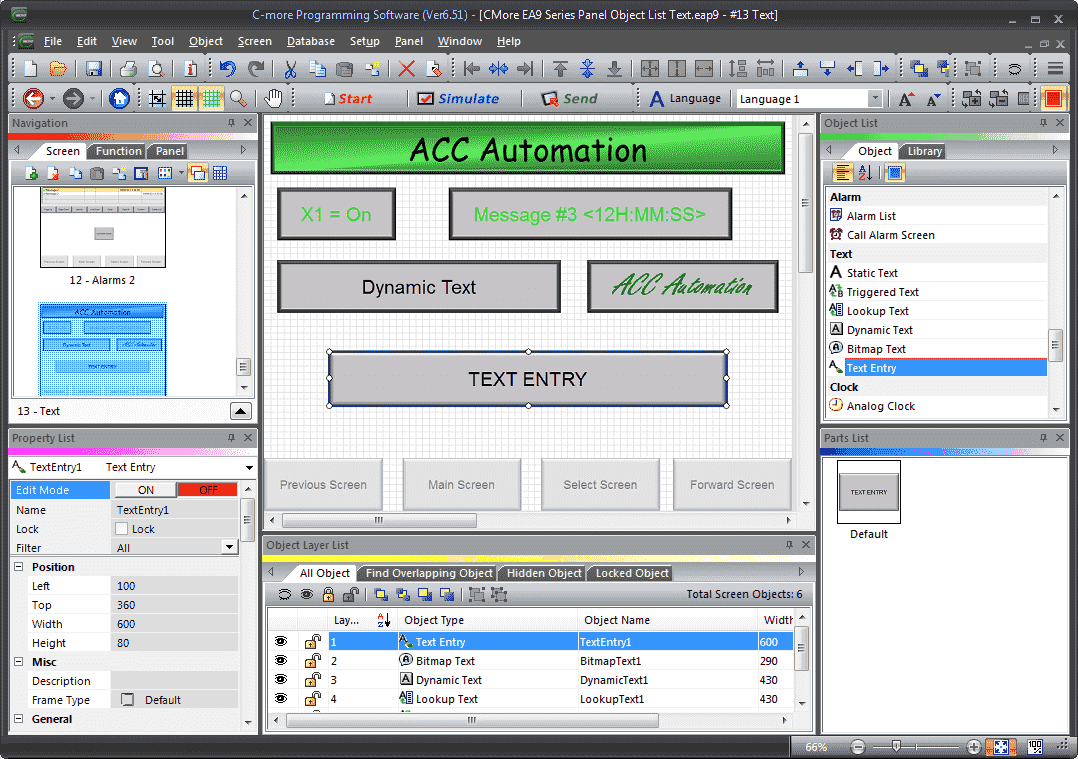
We can now use the mouse to size and position our text entry object on the screen.
Simulation
We can simulate our HMI program to ensure that we have the screen look that we want.
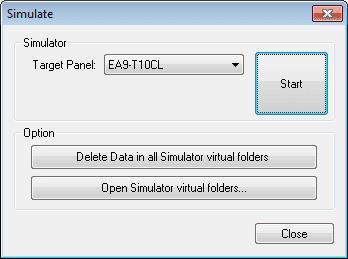
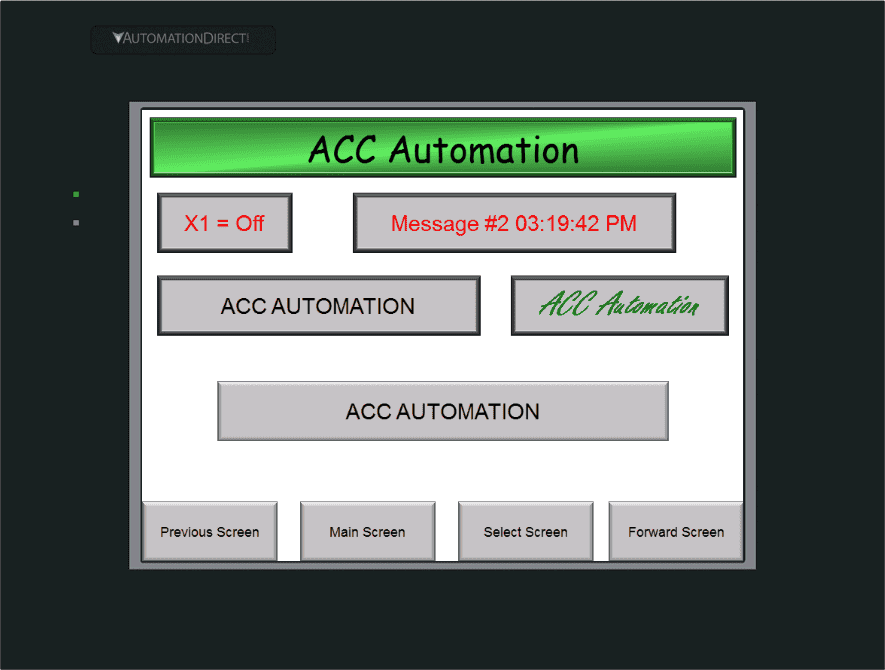
Changing the bits will activate our text objects.
See the video below to see the HMI in action with our text object selections.
Program Additions
Using the program we previously developed, we will add additional rungs to the program for our Text Objects.

When X1 turns on this will turn on MC80 and active the triggered text.
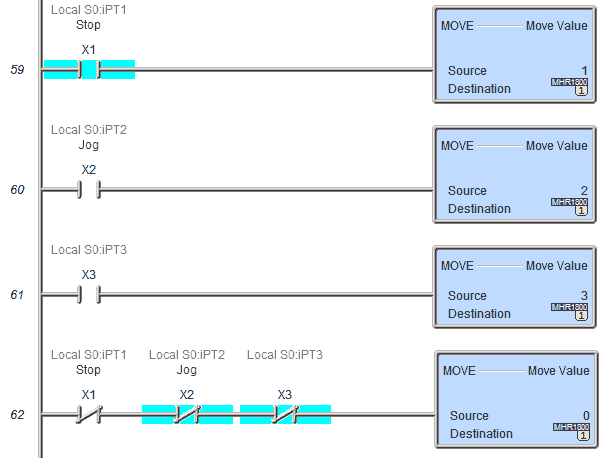
X1, when turned on, will move the number 1 into MHR1800. This will call up message 1 in our database for the lookup text. X2 and X3 will call up messages 2 and 3 respectfully. If all three inputs are off, then message 0 will be called. Since no message 0 is programmed, the lookup text will be blank.

X0 will turn on MC81. This is the display of the dynamic text.
Download the PLC and C-More program here.
Watch the video below to see the Text Objects in action on our C-More EA9 HMI Panel. This will also demonstrate the PLC ladder code for functionality.
Updating Software and Firmware
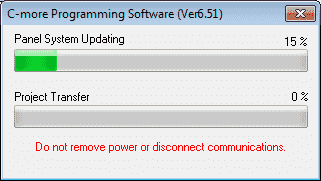
When a new version of the software is available the C-More will automatically detect this and will update. This will happen when you transfer your program to the C-More HMI.
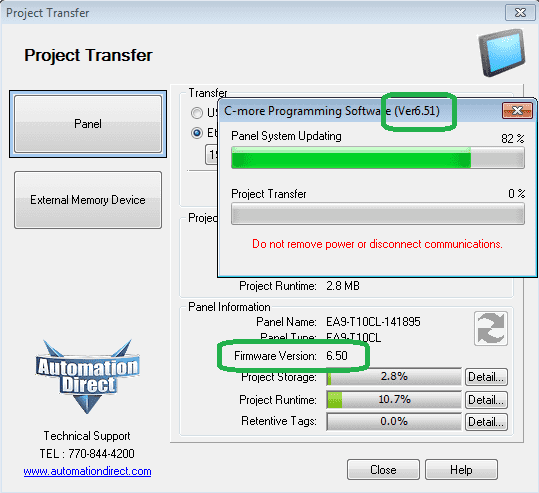
In this example, we are updating the firmware from version 6.50 to 6.51.
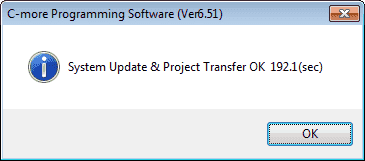
Upon a successful transfer, the information window will appear. Your current version will be displayed on the top line of this window.
C-More EA9 Panels from Automation Direct
https://www.automationdirect.com/adc/shopping/catalog/hmi_(human_machine_interface)/c-more_touch_panels_ea9_series
C-More – Graphic Panel (EA9 Series) User Manual and Quick Start Guides
https://cdn.automationdirect.com/static/manuals/ea9userm/ea9userm.html
EA9-T10CL C-More Specifications
https://cdn.automationdirect.com/static/specs/ea9t10cl.pdf
C-More EA9 Programming Software (Current Version V6.42)
https://support.automationdirect.com/products/cmore.html
This software will enable you to program all of the C-More EA9 HMI units. It includes a simulator for your application.
Next time we will look more at the object clock that we can use in the C-More HMI Panel.
Watch on YouTube: C-More EA9 HMI Series Panel Object List Text
If you have any questions or need further information please contact me.
Thank you,
Garry
If you’re like most of my readers, you’re committed to learning about technology. Numbering systems used in PLC’s are not difficult to learn and understand. We will walk through the numbering systems used in PLCs. This includes Bits, Decimal, Hexadecimal, ASCII and Floating Point.
To get this free article, subscribe to my free email newsletter.
Use the information to inform other people how numbering systems work. Sign up now.
The ‘Robust Data Logging for Free’ eBook is also available as a free download. The link is included when you subscribe to ACC Automation.

