The C-More HMI Panel software uses popup system default keypads. I recently was asked to enlarge the keypad to make editing easier.
We will now look at enlarging the existing system default keypads. This is especially good with touch screens over 10 inches. We will also look at how to define a custom keypad for the C-More HMI. Let’s get started.
Previously in this C-More EA9 HMI Panel series, we have done the following:
System Hardware
– Unboxing and Review Video
– Powering the Unit Video
Installing the Software – Video
System Setup Screens – Video
First Program
– Establishing Communication and Updating Firmware Video
– First Program Video
Panel to PLC and PLC to Panel Settings – Video
Common Screen Menu – Video
Simulate Project – Video
Object List Shapes – Video
Object List Buttons – Video
Object List Indicators – Video
Object List Entry – Video
Object List Meters and Graphs – Video
Object List Bitmaps – Video
Object List Recipe – Video
Watch the video below to see how to enlarge the default keypad on our C-More EA9 HMI Panel.
Display Large Key Pad on the C-More EA9 Panels
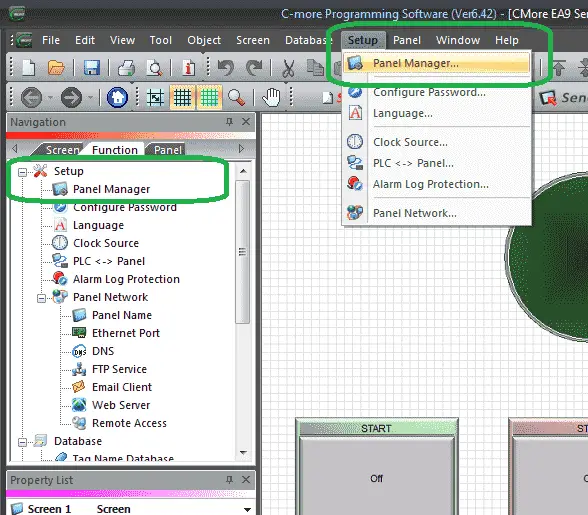
Call up the Panel Manager by selecting it under the Setup on the Function tab of the Navigation window. Alternatively, you can use the main menu | Setup | Panel Manager…
The panel manager window will now be displayed. Locate the option for Display Large Key Pad On Panels and check it.
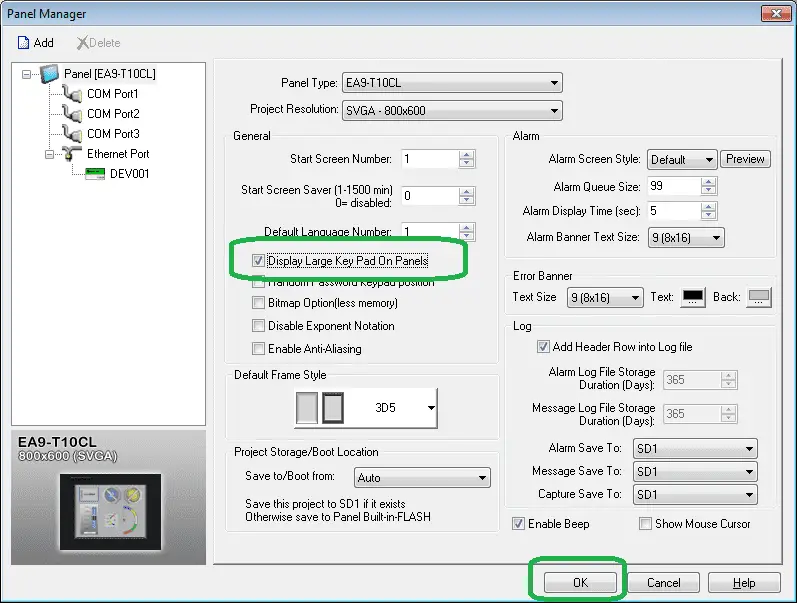
Select OK to close the panel manager window.
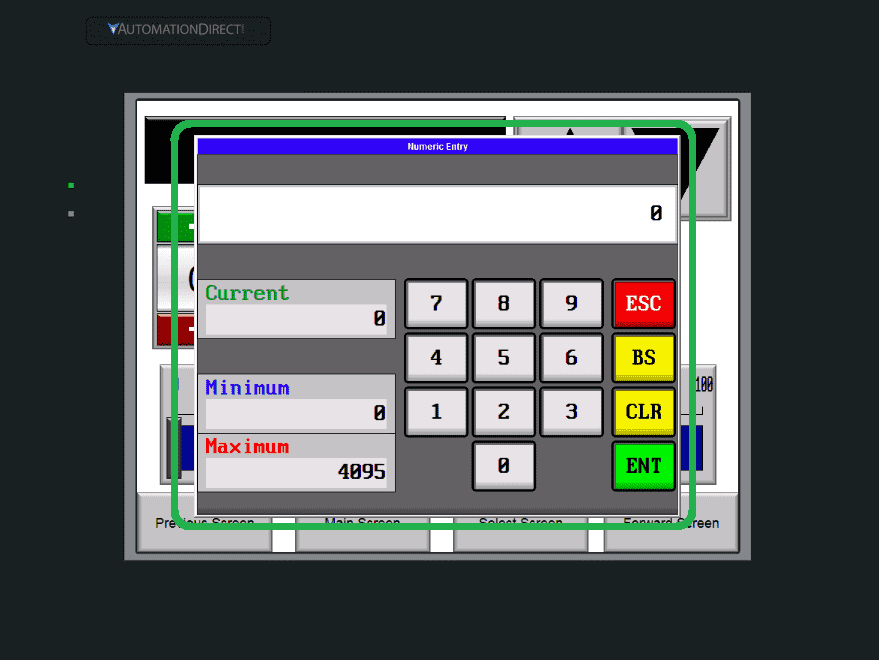
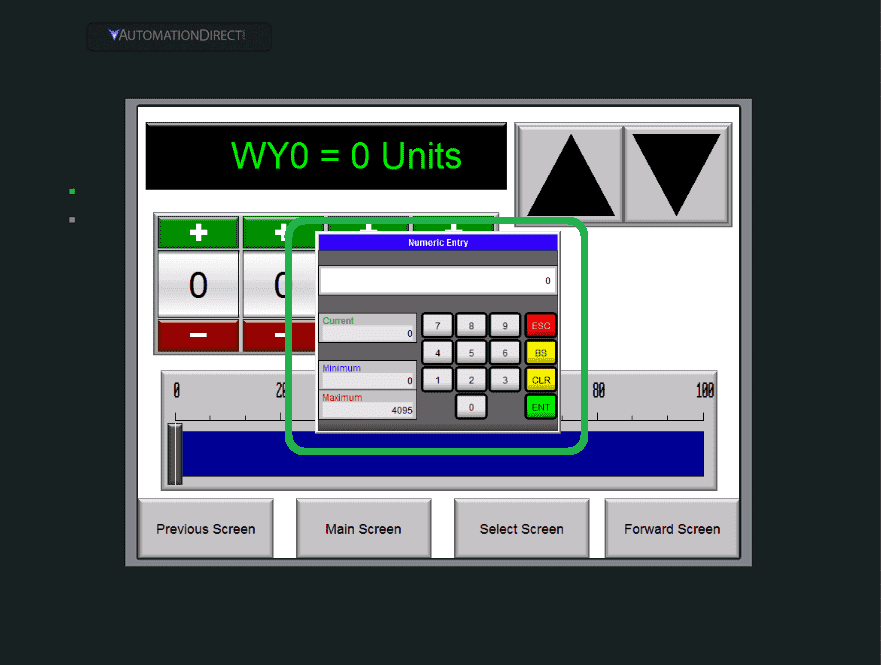
When the numeric entry keypad is displayed, it will appear much larger. This will help operators in seeing and accurately change the values.
Changing the Keypad on the C-More HMI
Using the existing program that we have been developing in this series, select the Object Entry page. (6)
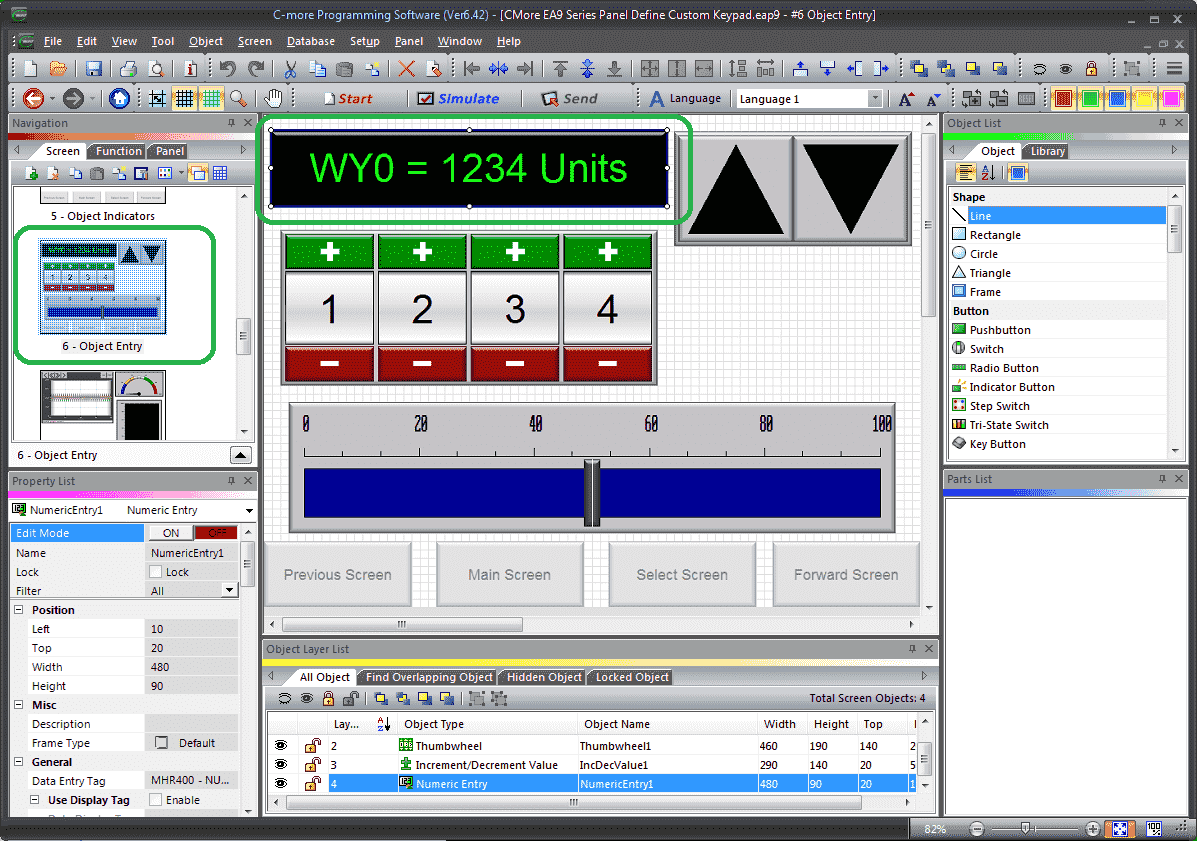
Double click on the NumericEntry1 to call up the Numeric Entry window.
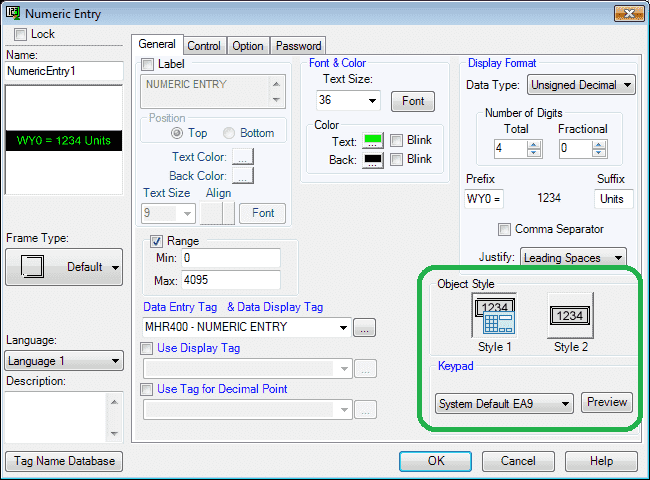
Under Keypad setting of this page, we can select the keypad that we would like to use with this entry. System Default EA9 is the default selection. Select the preview button.
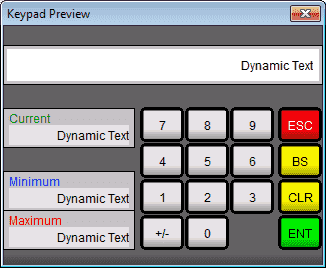
The Keypad Preview window will now display to show you what the keypad will look like on the screen. Hit the X in the top right corner to close this window. Hit the OK on the Numeric Entry window to close this window.
Custom Keypad – C-More EA9

Under the Screen tab in the Navigation window, select the Define Keypad icon.
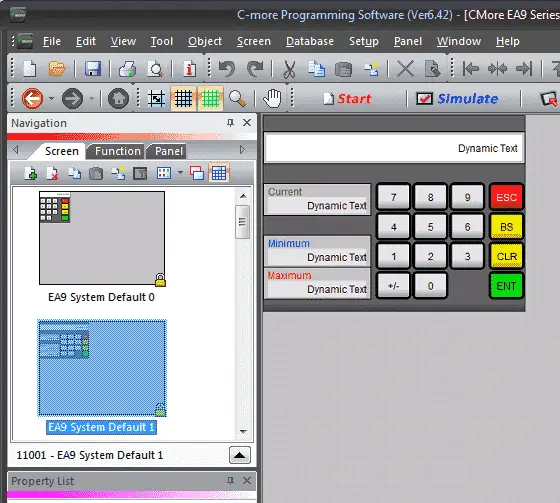
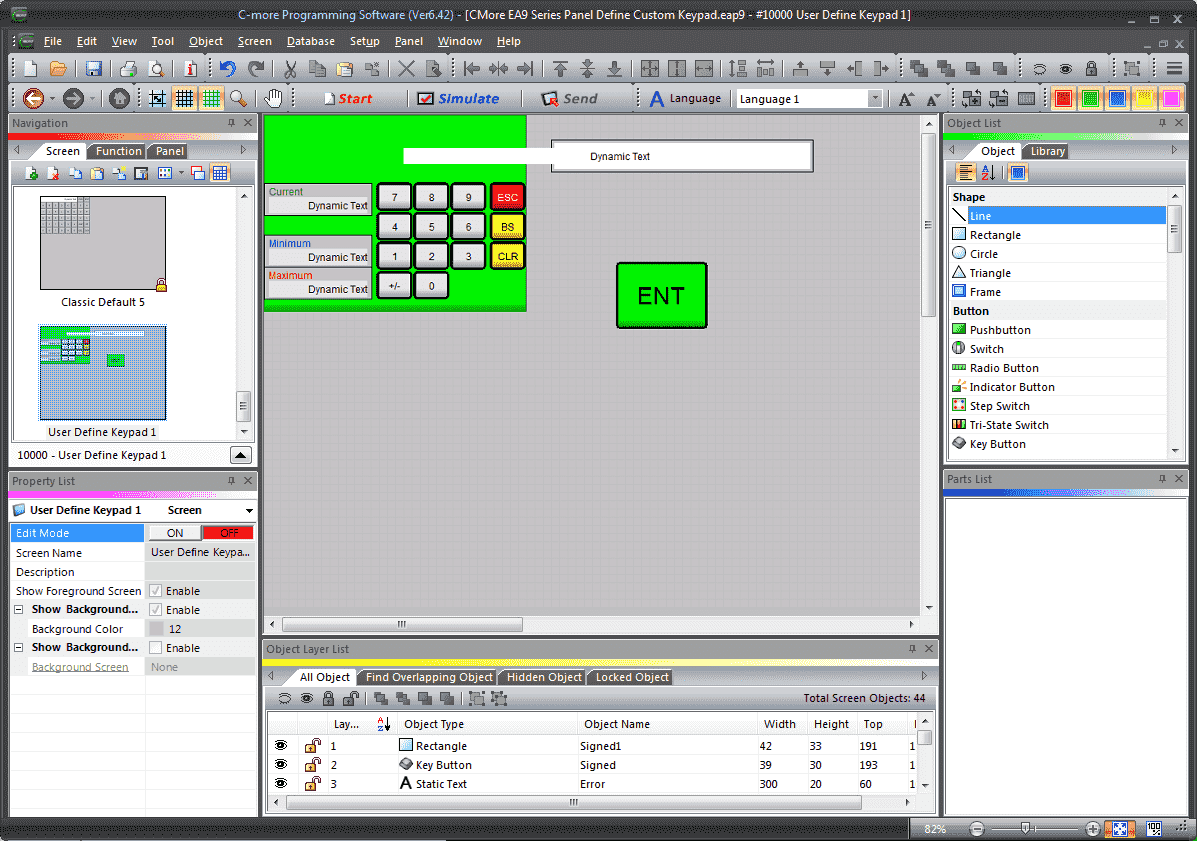
The Keypads in the HMI will all be now displayed. We will modify EA9 System Default 1.
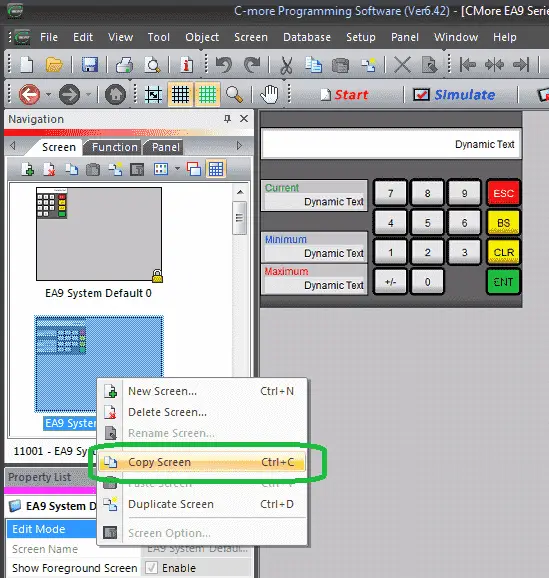
Click on the EA9 System Default 1. Right-click on the screen and select Copy Screen. Ctrl+C can also be used to copy the keypad.
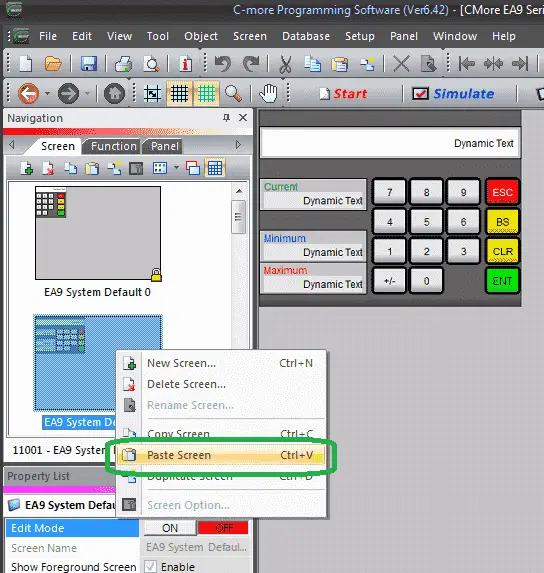
Right-click again on the screen and select Paste Screen. Ctrl+V can also be used to paste the keypad.
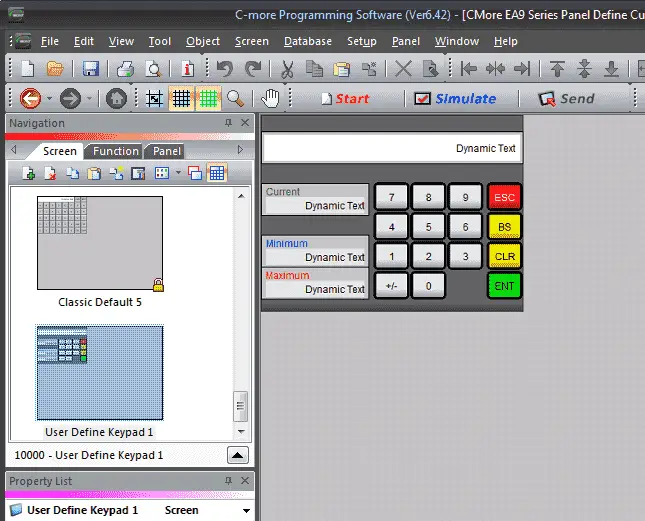
Pasting the keypad will automatically default to a new keypad. The default name is User Define Keypad 1.
The keypad can now be modified to the look and functions that you want in the HMI. In our case, we will increase the size and colour of the keypad. Our logo will also be displayed in the upper left corner.
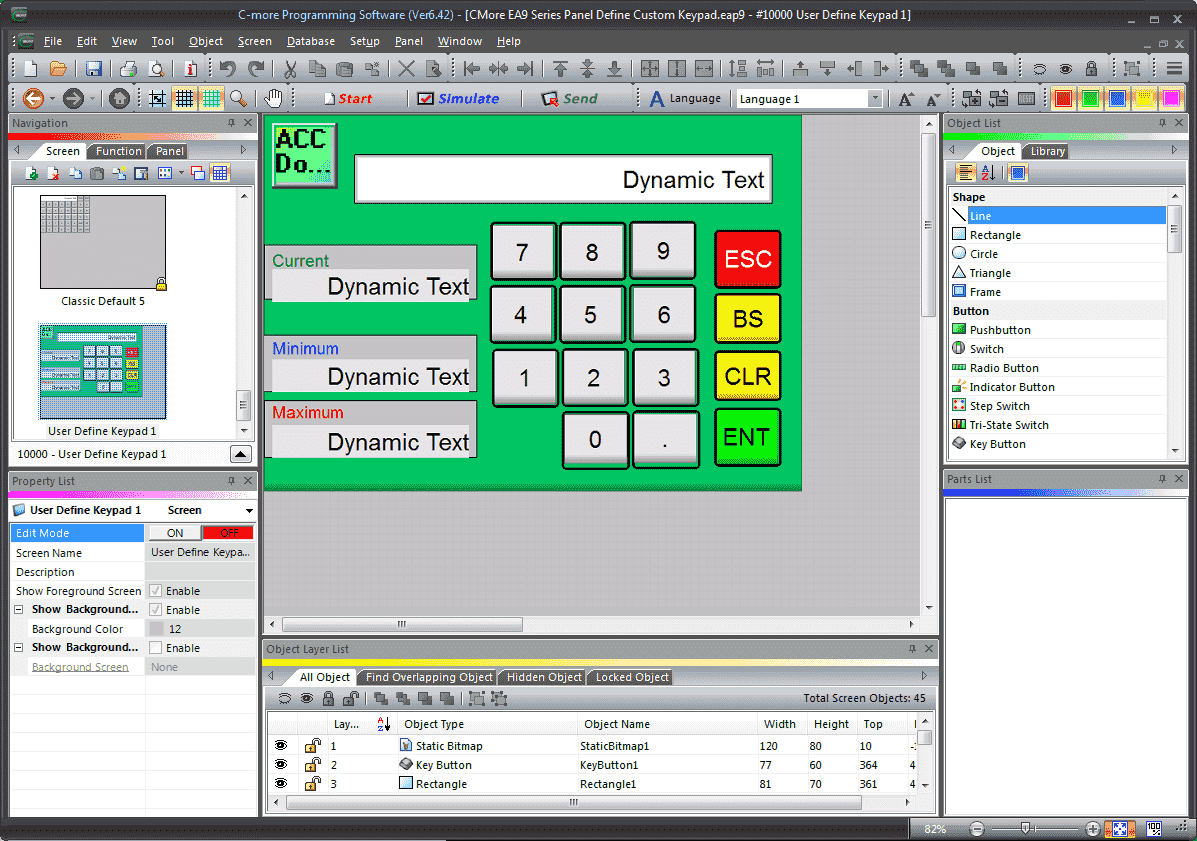
Here is the finished keypad. Save the HMI program.
Add Our Custom Key Pad to the Object Library
Adding our keypad to the object library will allow us to use this keypad in other programs that we may write.
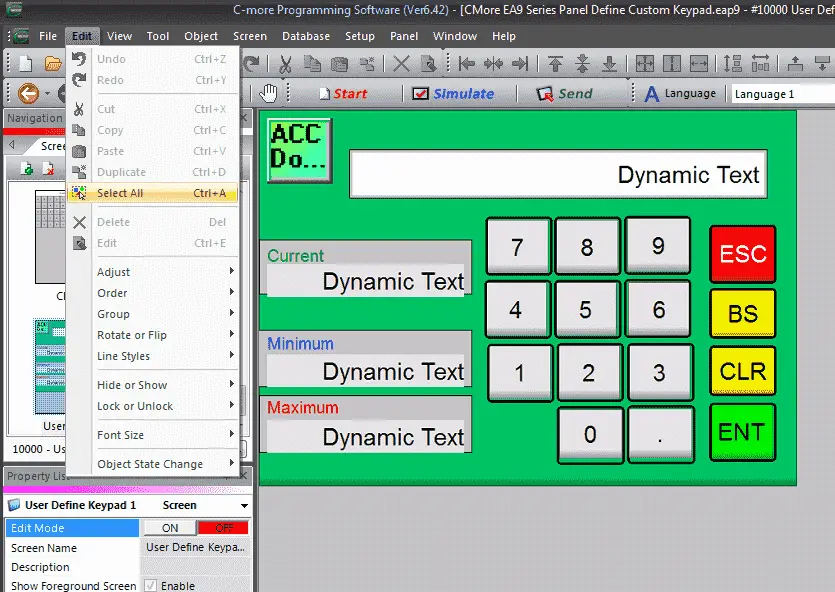
Select our User Define Keypad 1. On the main menu | Edit | Select All. You can also use the keyboard shortcut Ctrl + A. This will copy the keypad that we have just created.
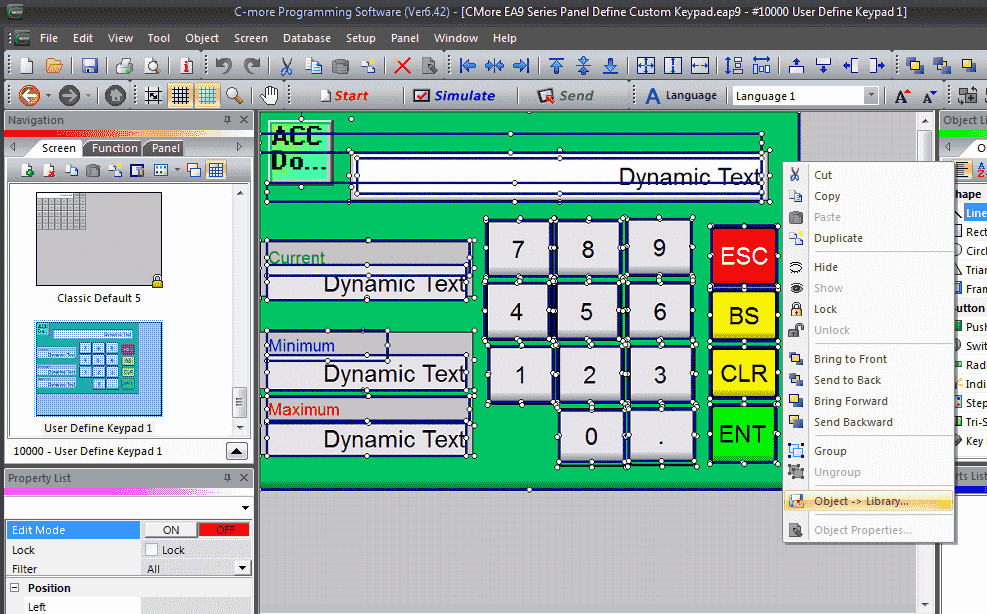
Right-click on the custom keypad and select Object -> Library…
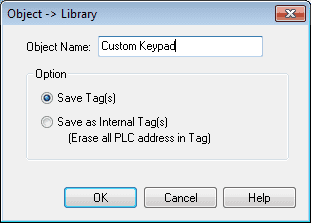
We can now name our keypad. Custom Keypad will be our name in the Object Library window. In this case, we will select Save Tag(s). This will keep our tags to the system tags that we have already programmed. Select OK.
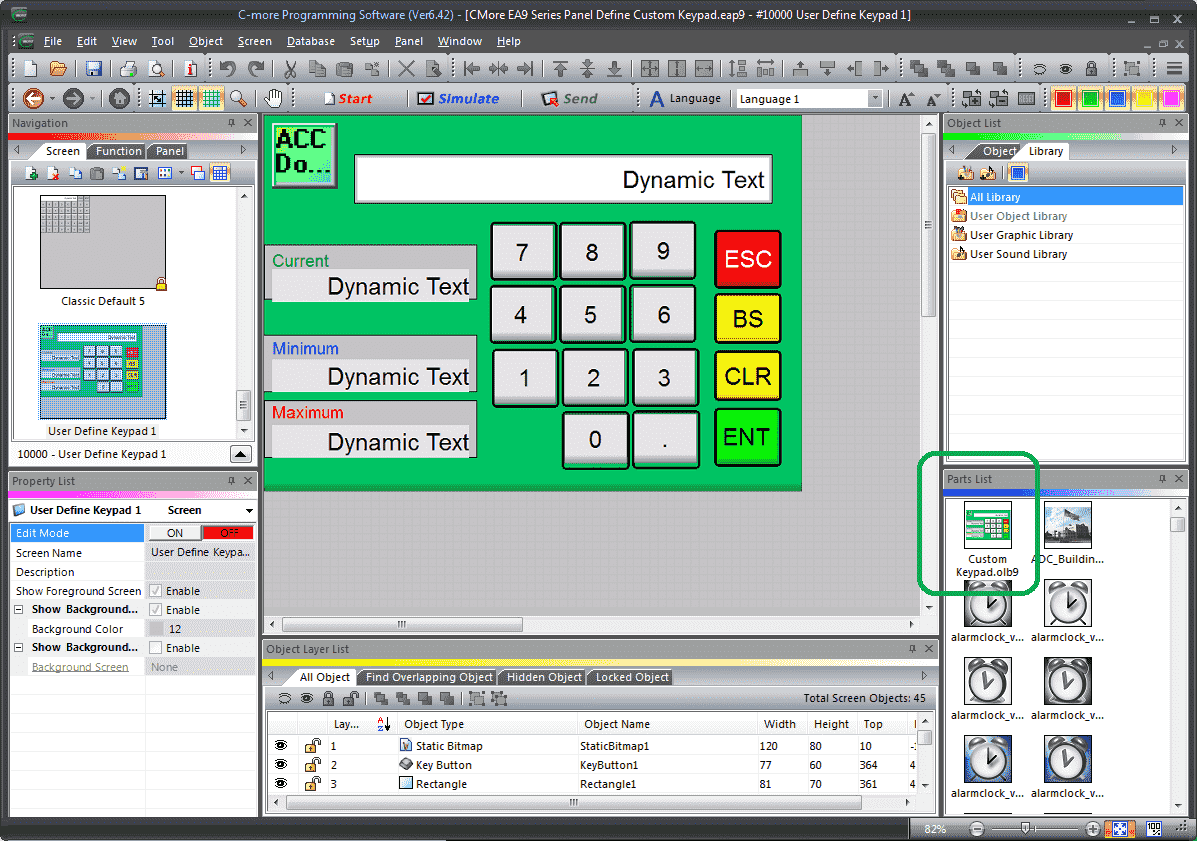
Our Custom Keypad will now appear in the Parts List when the Library is selected under the Object List.
Selecting our C-More Custom Keypad
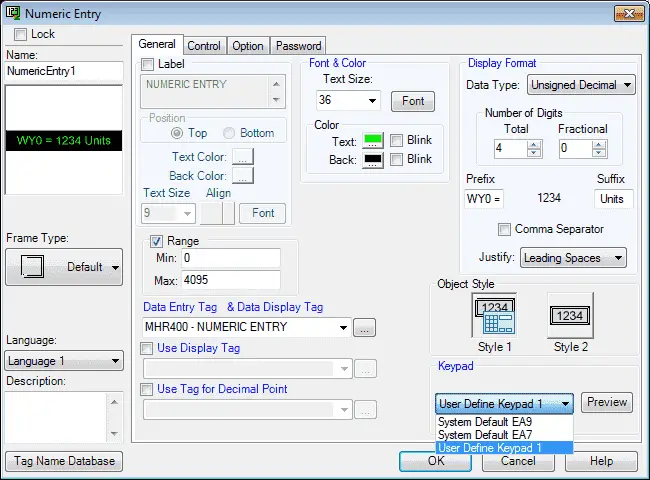
Select the Numeric Entry 1 on our Numeric Entry page 6 of the HMI. We can now change the Keypad to User Define Keypad 1.
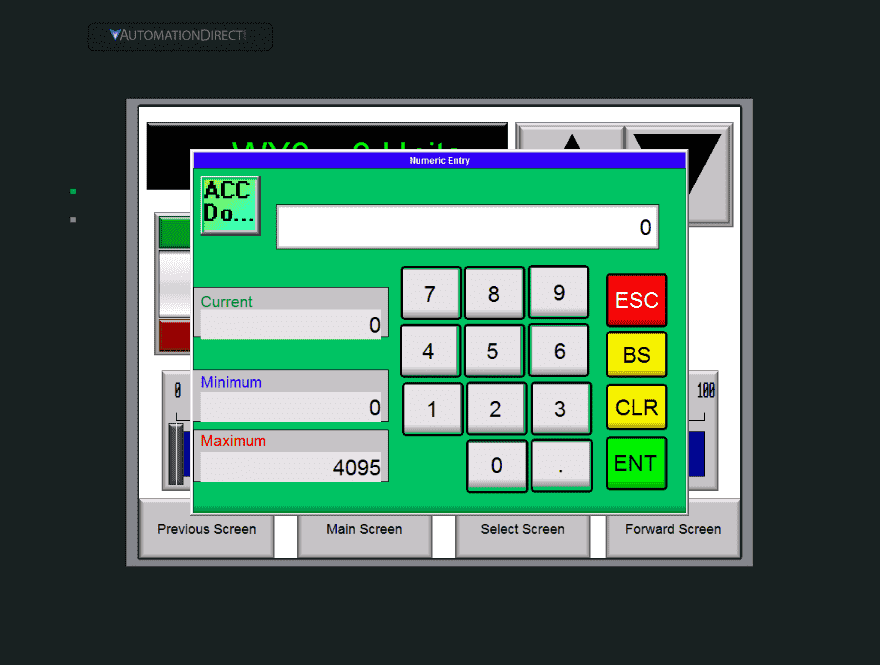
Running the HMI software and selecting the Numeric Entry will now display the custom keypad that we have programmed.
Download the C-More program here.
Watch the video below to see the Define Custom Keypad in action on our C-More EA9 HMI Panel.
C-More EA9 Panels from Automation Direct
https://www.automationdirect.com/adc/shopping/catalog/hmi_(human_machine_interface)/c-more_touch_panels_ea9_series
C-More – Graphic Panel (EA9 Series) User Manual and Quick Start Guides
https://cdn.automationdirect.com/static/manuals/ea9userm/ea9userm.html
EA9-T10CL C-More Specifications
https://cdn.automationdirect.com/static/specs/ea9t10cl.pdf
C-More EA9 Programming Software (Current Version V6.42)
https://support.automationdirect.com/products/cmore.html
This software will enable you to program all of the C-More EA9 HMI units. It includes a simulator for your application.
Next time we will look more at the object list alarms that we can use in the C-More HMI Panel.
Watch on YouTube: C-More EA9 HMI Series Panel Define Custom Keypad
If you have any questions or need further information please contact me.
Thank you,
Garry
If you’re like most of my readers, you’re committed to learning about technology. Numbering systems used in PLC’s are not difficult to learn and understand. We will walk through the numbering systems used in PLCs. This includes Bits, Decimal, Hexadecimal, ASCII and Floating Point.
To get this free article, subscribe to my free email newsletter.
Use the information to inform other people how numbering systems work. Sign up now.

The ‘Robust Data Logging for Free’ eBook is also available as a free download. The link is included when you subscribe to ACC Automation.