The EasyPLC Software Suite is a complete PLC, HMI, and Machine Simulator. This quick start aims to help you quickly learn this software suite. The manual that comes with EasyPLC Software Suite can always be referenced when required.
 We will be using the simple conveyor in the machine simulator. The EasyPLC PLC will be used to program the ladder logic for this simple conveyor. Compiling and transferring the program to the EasyPLC Virtual CPU, we will demonstrate the conveyor’s control. An HMI will also be programmed to indicate the direction of the conveyor. Let’s get started.
Learn PLC programming the easy way. Invest in yourself today. See below on how to receive a 10% discount on this already cost-effective learning tool.
Previously we have done the following:
Easy PLC Installing the Software – Video
Click PLC – Easy Transfer Line Programming – Video
Productivity PLC Simulator – Chain Conveyor MS – Video
Do-More PLC – EasyPLC Box Selection Program – Video
Click PLC EasyPLC Gantry Simulator – Video
Click PLC Simple Conveyor EasyPLC – Video
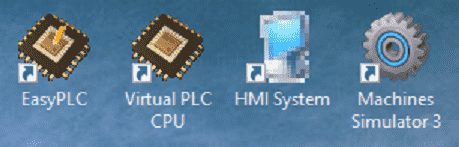
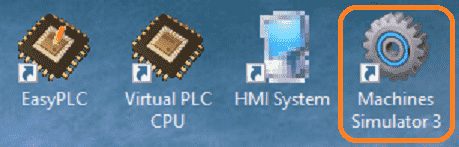
Please install the software from the link above. You will have four different icons on your desktop. We will be using each of these to demonstrate the EasyPLC Software Suite in this quick start.
 The EasyPLC will be used to write your PLC logic and HMI (human-machine interface) code. EasyPLC will then compile this code to the Virtual PLC CPU. Machine Simulator will operate using the virtual PLC CPU. The HMI System can then be run to display the HMI pages programmed. These software programs make up the main part of the EasyPLC software suite.
EasyPLC Machine Simulator – Quick Start
Start the machine simulator by double-clicking on the desktop icon.
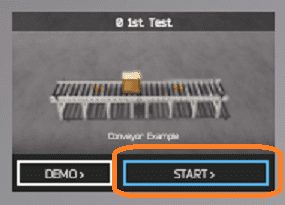
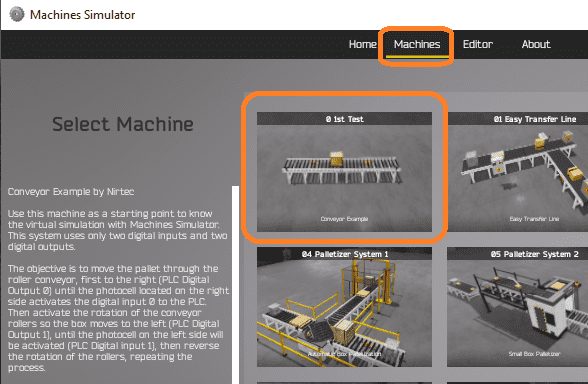 Select machines from the main menu or select start on the first screen of the machine simulator. Click on the “0 1st Test” machine. This will display a description of the machine. This conveyor example will use two digital inputs and two digital outputs. A pallet will move back and forth on the conveyor. When the pallet is detected on each end it will stop and reverse direction.
Move your mouse over the “0 1st Test” machine in the EasyPLC machine simulator. The demo mode will show you the operation of the machine which is very helpful sometimes in finding out the exact sequence of operation. Start mode will start the machine and wait for the outputs to be activated and set the inputs. Select the start mode.
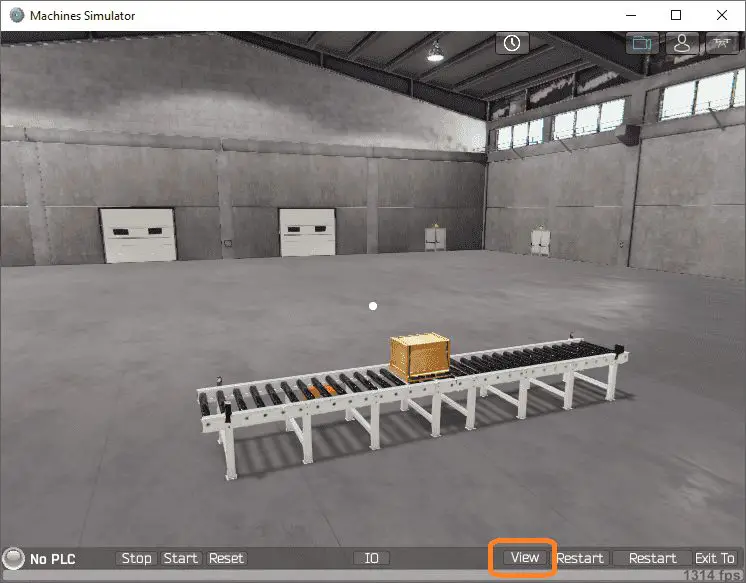 Here is the 3D View of the conveyor. You will see the PLC status, stop, start, and reset along the bottom left of the machine simulator window. These buttons and indicators are for the connected PLC. (Controller) The middle IO selection is for the machine simulator driver and configuration. On the right-hand side on the bottom are controls for the EasyPLC Machine Simulator itself. We have view IO, restart, restart, and exit. Select the View IO button.
 The outputs and inputs will now be displayed on the left-hand and right-hand sides of the window. Three icons on the top of the window will allow you to move around this 3D environment. The first icon is the default selection. This will enable you to move around without bumping into the components. The last icon will automatically show you around this virtual environment. The first-person mode will mimic a person in your 3D learning world. Move around and operate your machine.
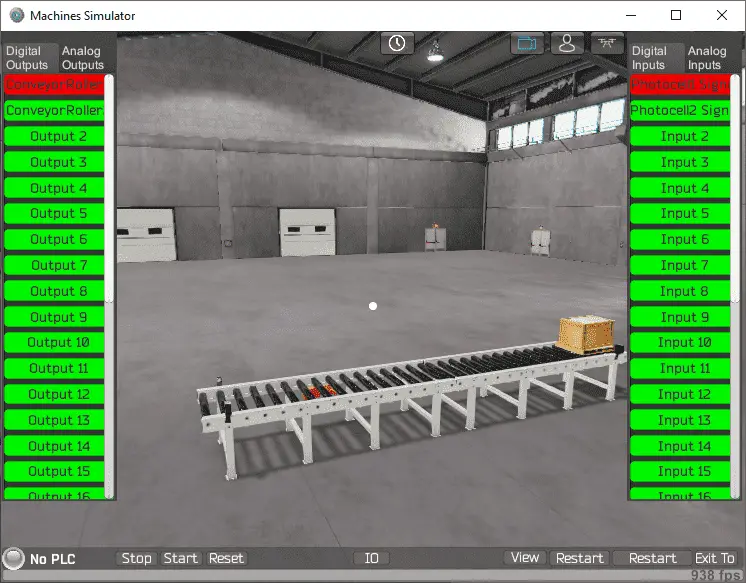 Clicking on the outputs will allow you to manually turn them on, moving the pallet. You can then monitor the inputs to see the photocells working. This manual mode will allow you to run the pallet off of the conveyor in either direction. If this happens, we can manually use the mouse to pick up and place the pallet back on the conveyor. Using the restart button on the bottom of the machine simulator window will reset the scene back to the start.
Energizing both the conveyor outputs together will cause the motors to smoke and turn black. When this happens, a reset for the MS needs to be done.
Watch the testing of the simple conveyor video below. This will include manually running the pallet off the conveyor’s end, moving the pallet, and burning the motors. The reset will also be demonstrated.
EasyPLC – Quick Start
The EasyPLC will simulate PLC programming software. This will be able to create, edit, monitor, and compile the PLC software for the virtual PLC CPU.
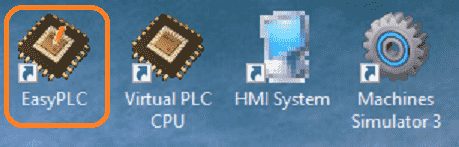 Double click on the EasyPLC desktop icon to start the programming software.
 A splash screen will be displayed and then the EasyPLC Editor window will be displayed.
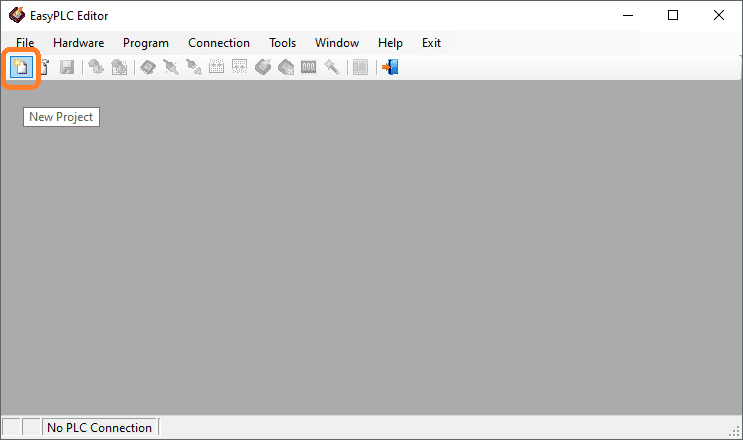 Select the new project icon or use the main menu | File | New Project.
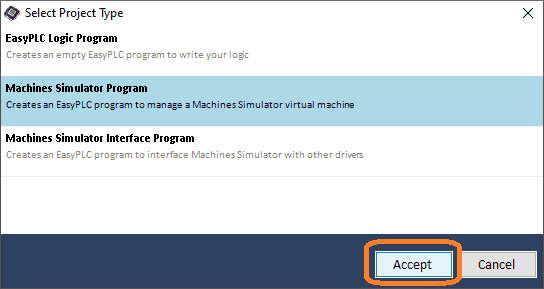 The select project type window will be displayed. Select the machines simulator project. This will allow us to create an EasyPLC program to manage an MS virtual machine. Select Accept.
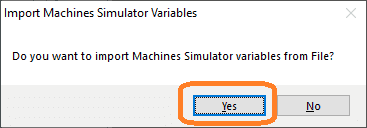 You will then be asked if you want to import the machine simulator variables. Select yes. This will save us from manually setting all of the IO names and addresses.
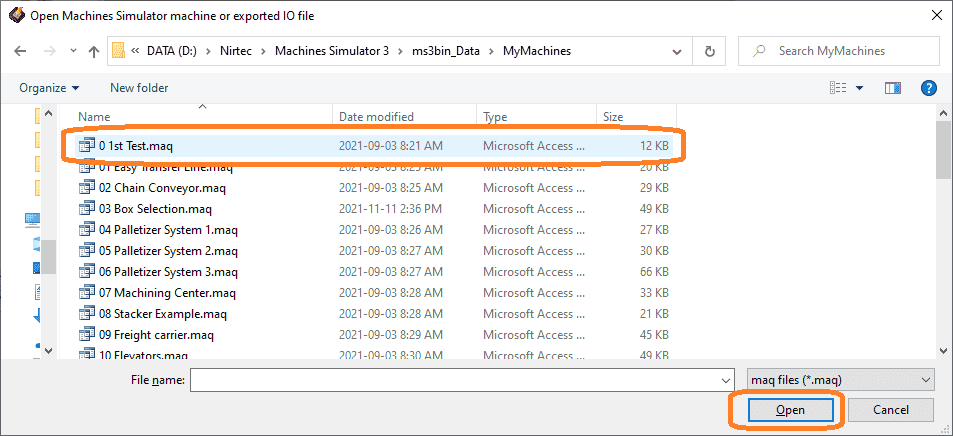 Navigate to where the files are for the machine simulator. In my case, they are located at D:\Nirtec\Machine Simulator 3\ms3bin_Data\MyMachines.
Select the 0 1st test.msq file and select open.
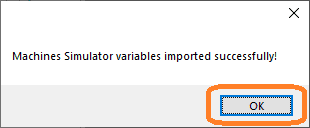 A message indicating that the variables were imported successfully will be displayed. Select OK.
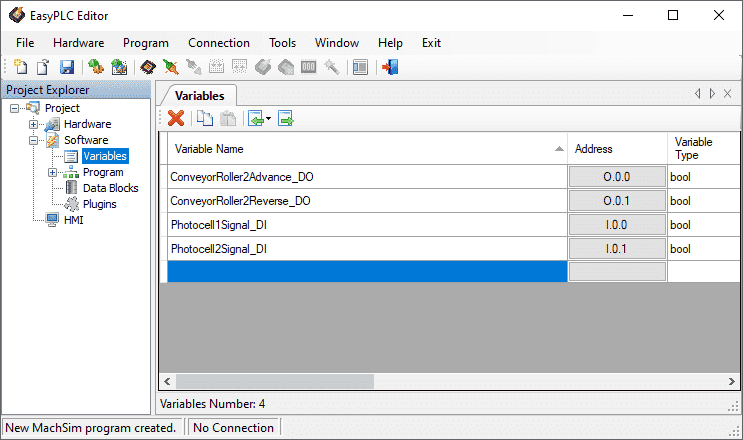 The EasyPLC Editor window will now have a project explorer. This will contain all of the information for our program and HMI. Under the heading of software, expand the selection and click on variables. These can be seen in the picture above.
 The Project Explorer has three main categories. Hardware, Software, and HMI.
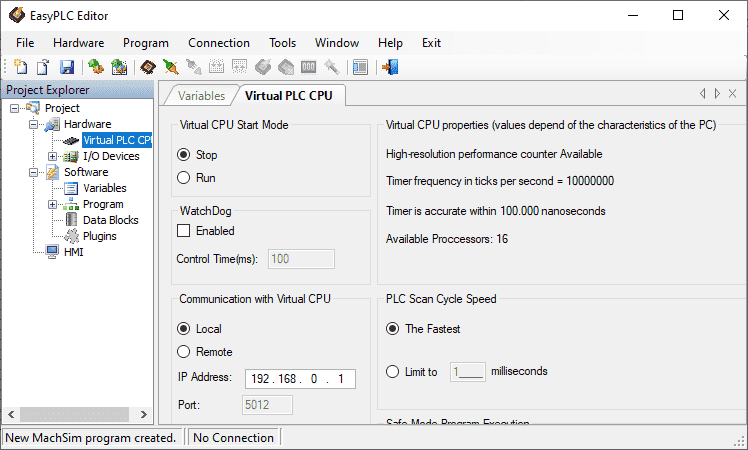
Under hardware click on virtual PLC CPU. This will show you the parameters for the CPU. You will notice that another tab is put up on the main screen. You can use the arrows to move from one tab to another or use the mouse to click on the tab you want to see. The X on the right-hand side of the tab will close the tab.
Select MachinesSimulator3 under I/O devices.
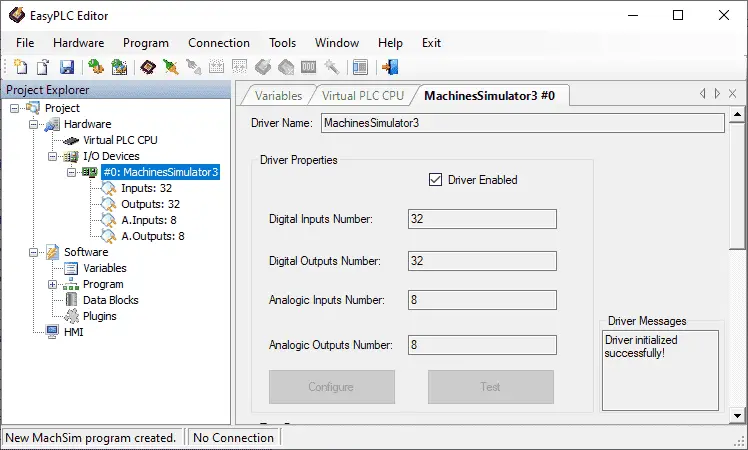 This will show you the driver and IO associated with the program. We only use two digital inputs and two digital outputs, but this is the default IO count.
Close the open tabs and select Program under Software.
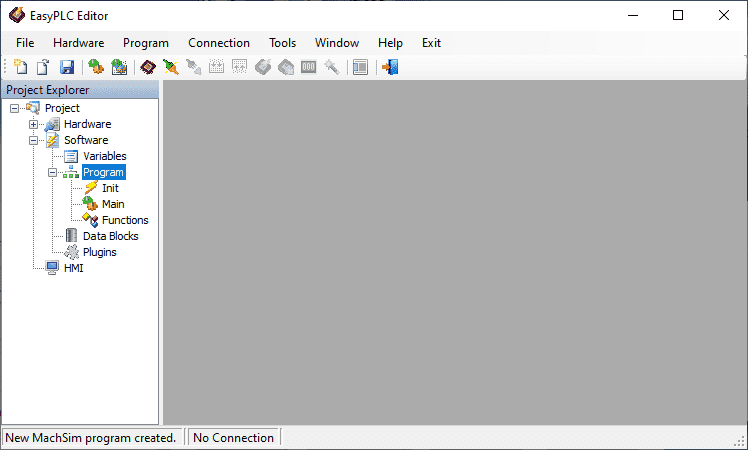 Expand program by selecting the + sign beside program. Under the program, there are three main items.
Init – Initialize – This code will run only when the controller is first powered on or when a transition from program to run mode happens on the PLC.
Main – This is the main programming code. It will be executed in a cyclic scan.
Functions – These are function codes that will be executed when called from the main program.
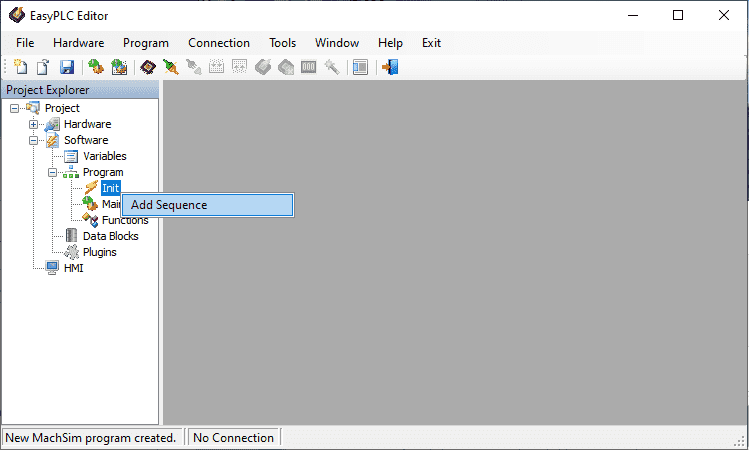 Right-click on Init and select add sequence.
 The create new sequence window will now be displayed. Five different coding methods can be used. Init_Sequence_1 is the default name for the new initialized code. We will leave this on the default ladder logic and select accept.
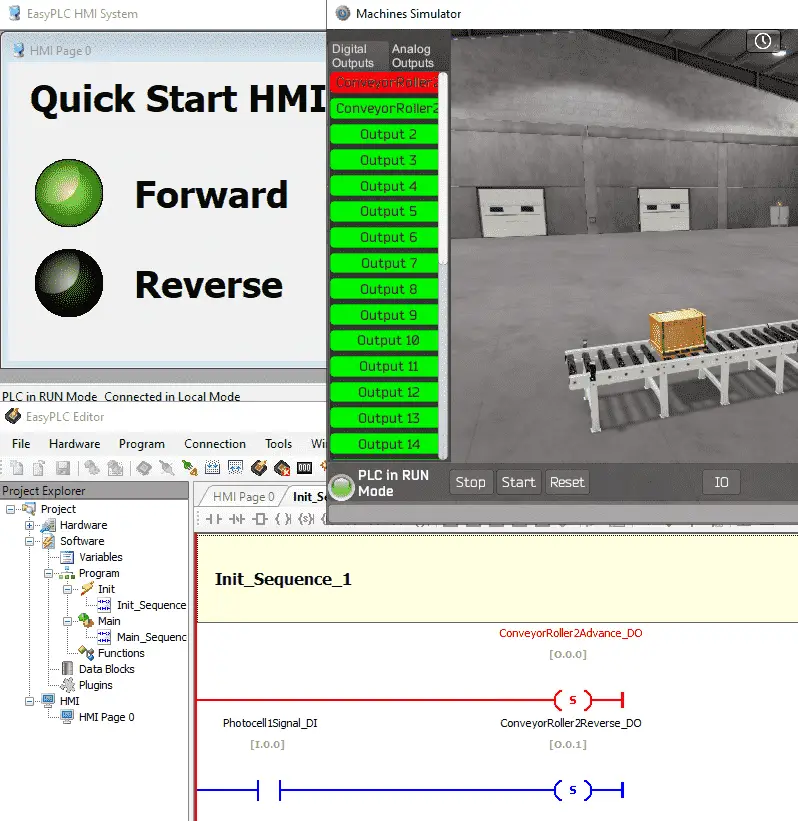
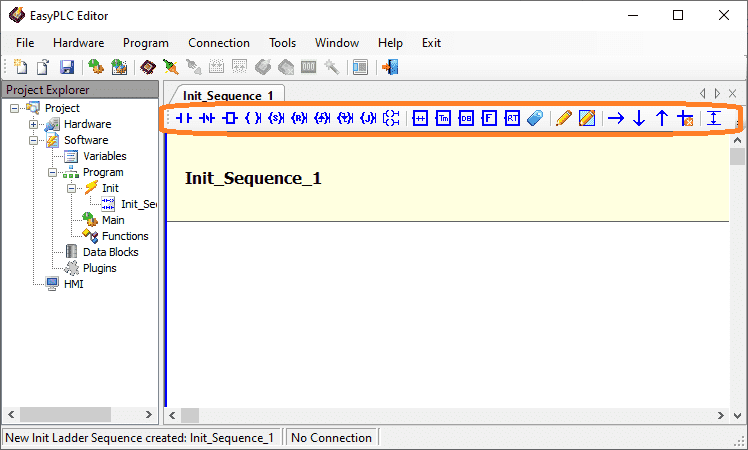 A new tab named Init_Sequence_1 will now be displayed in the work area. The icons at the top will allow you to enter your ladder logic. As your mouse rolls over the icon, a description of the symbol will be displayed. It is also said under the Init heading in the project explorer.
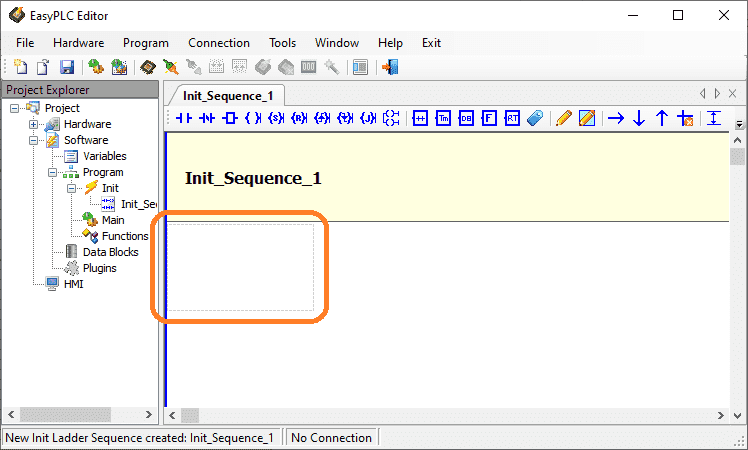 Position your cursor on the workspace by clicking it with the mouse. A dotted rectangular box will be displayed indicating your current cursor position.
 Select the normally closed contact. The variable list will also appear near your cursor so you can select the contact. Select Photcell1Siganl_DI for the contact.
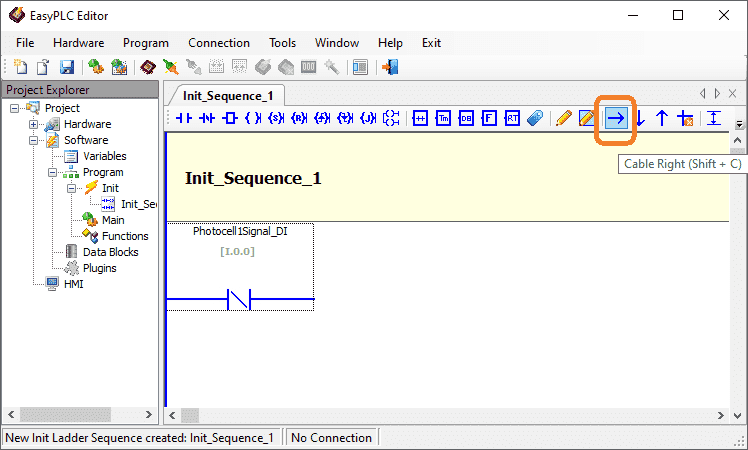 Use the cable right icon or shift + C to draw a line to the output contact.
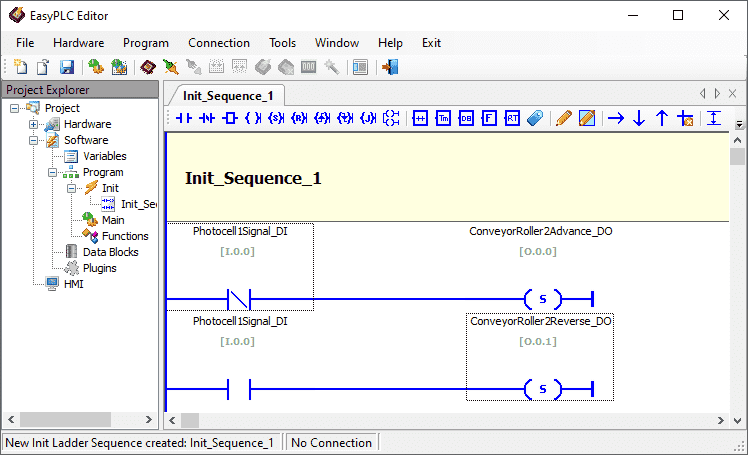 We are using the set coil to set the advanced conveyor motor if the photocell is not on. If it is on then the end of the conveyor is reached so we must set the reverse conveyor motor.
Remember that this is the initial sequence for the machine. We will start moving the conveyor in one direction. We will now program the main ladder code. This will be executed all the time cyclically.
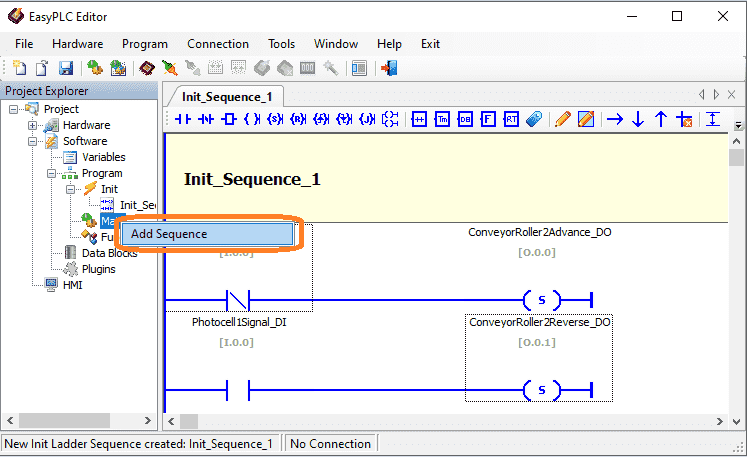 Right-click on the Main under the program in the project explorer. Click on add sequence.
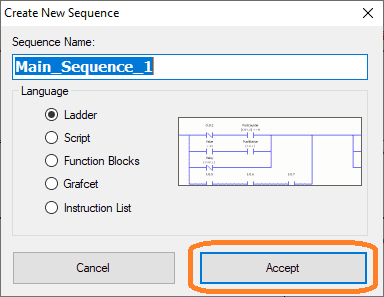 The create new sequence window will be displayed. Just like the initial code, there are five different coding methods that can be used. Main_Sequence_1 is the default name for the new main code. We will leave this on the default ladder logic and select accept.
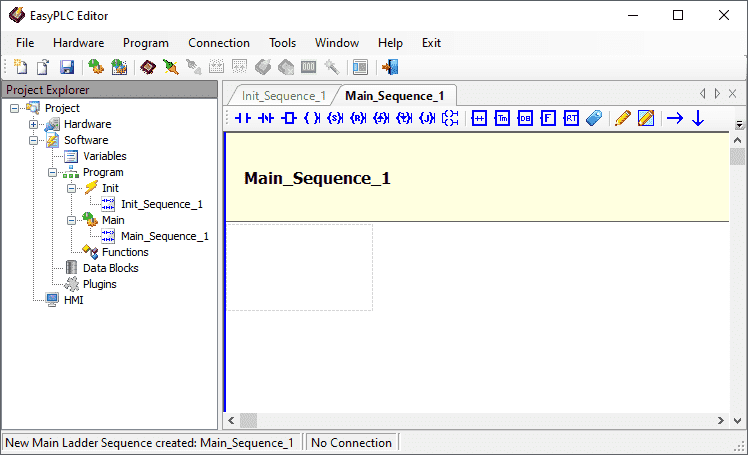 This new tab is now displayed beside the initial one that was created. We can now add our code to be scanned all of the time.
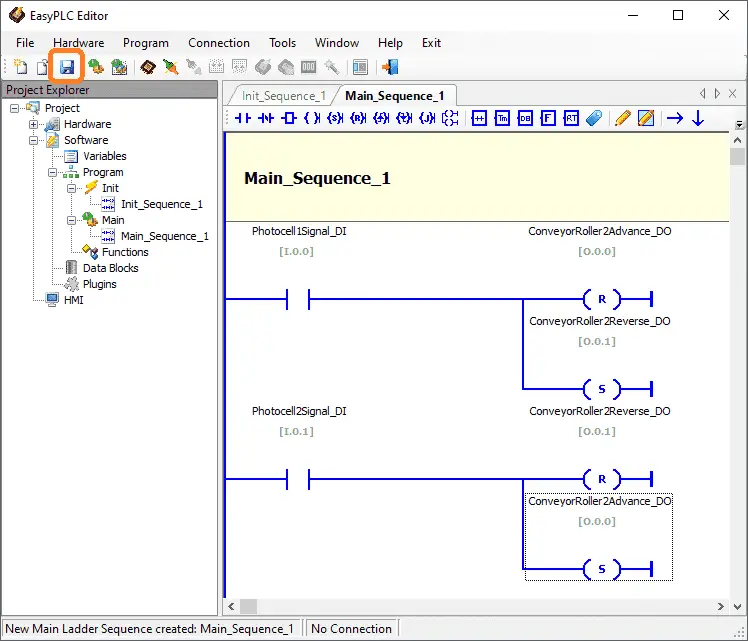 When photocell1 is o, we reset the conveyor advanced and set the conveyor reverse; Photocell2 will reset the conveyor reverse and set the conveyor advanced. Click on the save icon. This can also be done using the main menu | File | Save Project As.
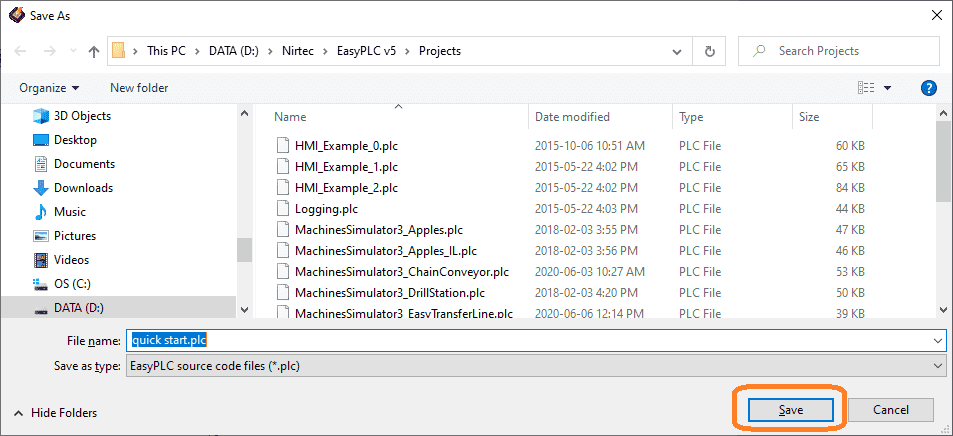 Save the project as a quick start. The extension is “.plc”. You will notice that there are several different sample projects already under the projects directory within EasyPLC v5. Select save.
Compile and Transfer EasyPLC PLC Program – Quick Start
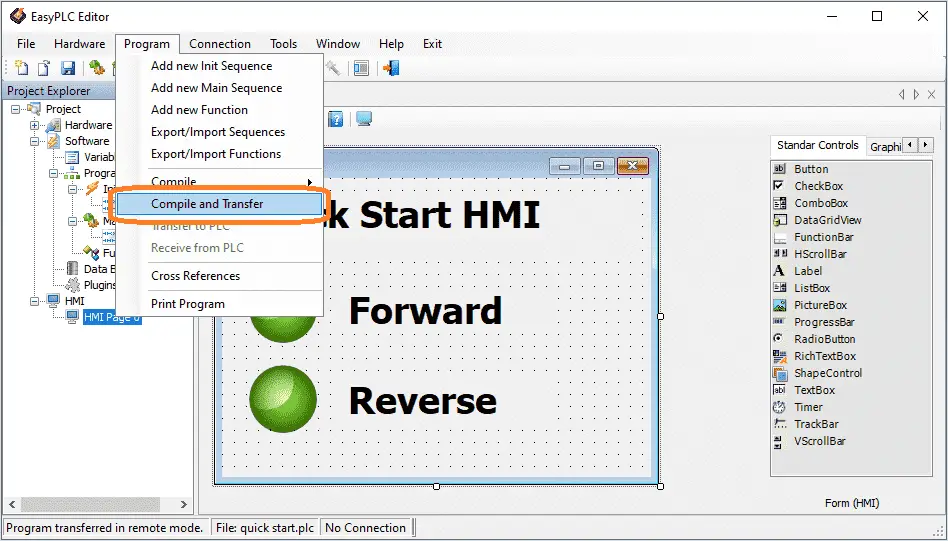
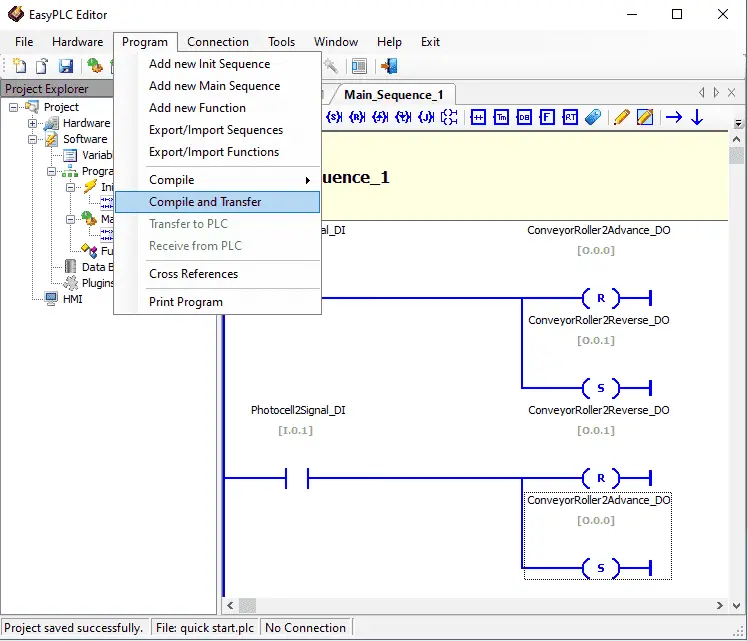 On the main menu of the EasyPLC Editor, select Compile and Transfer under the program. The transfer is to the EasyPLC virtual PLC CPU.
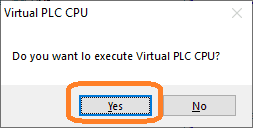 If the Virtual PLC CPU is not running, you will be asked if you want to start it. Select Yes.
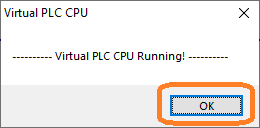 Notification will be given when the Virtual PLC CPU is running. Select OK.
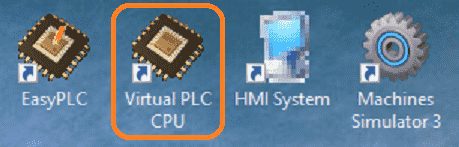 You can also start the EasyPLC virtual PLC CPU using the desktop icons. This mimics a physical PLC. The virtual PLC is what is running our logic.
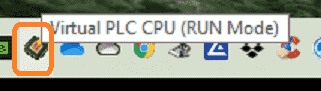 This virtual PLC can be seen as an icon on the taskbar in windows. Double-clicking this will show you the Virtual PLC CPU.
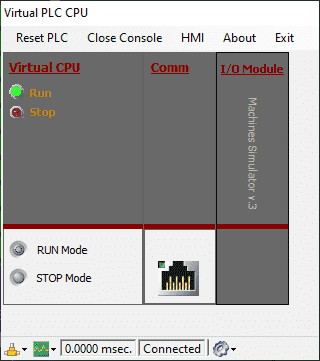 There are several options that can be seen or changed on this virtual PLC. Starting and stopping the controller can quickly be done here.
EasyPLC Connect On-Line with the Virtual PLC – Quick Start
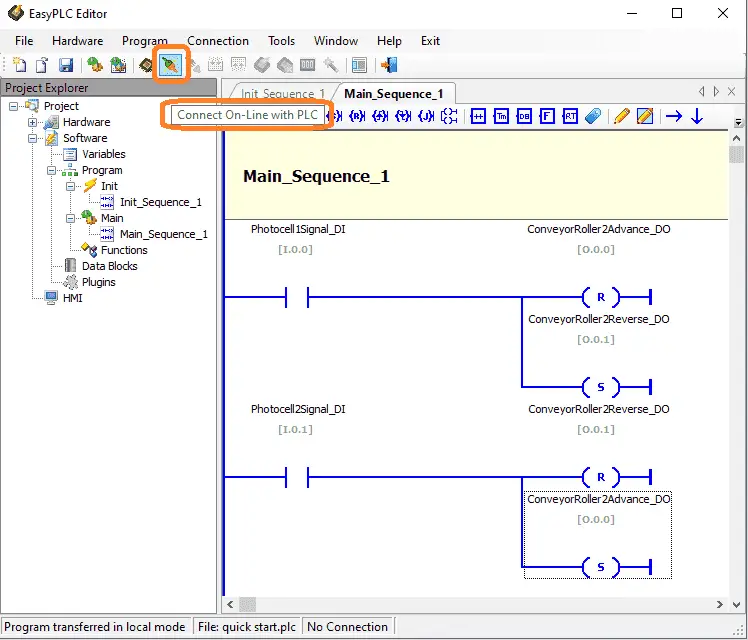 Select connect online with the PLC icon. This will connect with the EasyPLC virtual PLC.
 Once connected, you will see the status at the bottom of the EasyPLC Editor window. Icons that are available will be in color. You can disconnect, transfer to the PLC, transfer from the PLC, set run mode, set stop mode, reset, and force variables when online to the virtual PLC controller.
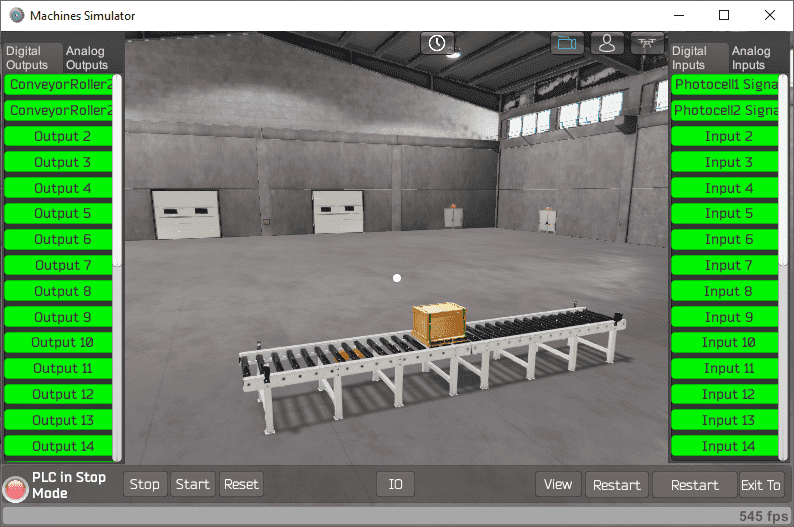 Switch back to the machine simulator window. You will see that the bottom left now will indicate that the PLC is connected and in stop mode.
 Putting the PLC in run mode will execute the program. This can be done with the start button on the machine simulator window, the run mode icon on the EasyPLC editor, or the run mode button on the virtual PLC CPU.
The PLC will now execute the initial program to start the pallet moving. As the pallet reaches each end it will stop and run in the opposite direction. Watch the video below to see this quick start guide in action using the EasyPLC software suite.
EasyPLC HMI System – Quick Start
The EasyPLC also has a human-machine interface (HMI). This will allow you to create interactions with an operator of this machine.
 Disconnect from the virtual PLC CPU. Under project in the project explorer, right-click on the HMI and select the new HMI page.
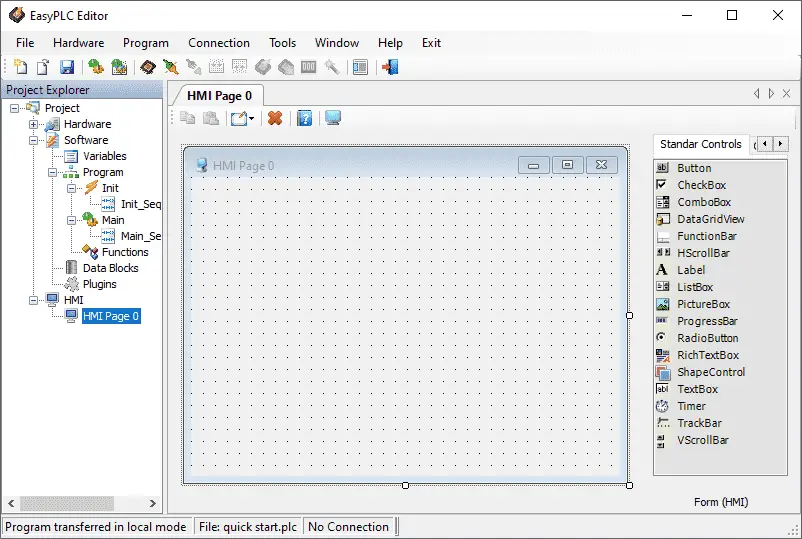 An HMI Page 0 tab will now be shown when you select the new page under HMI in project explorer. This has similar properties and methods similar to visual studio. Click on Label under the standard controls window.
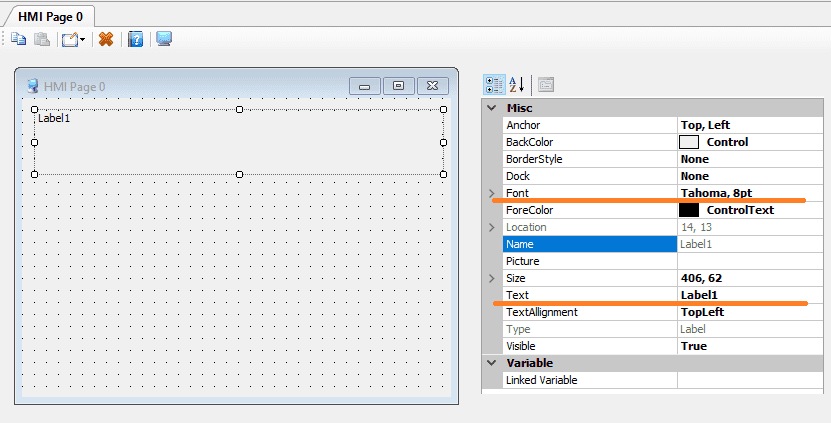 Using your mouse select an area to place the label on the HMI window. Use the different parameters under Misc to change the look of the static text.
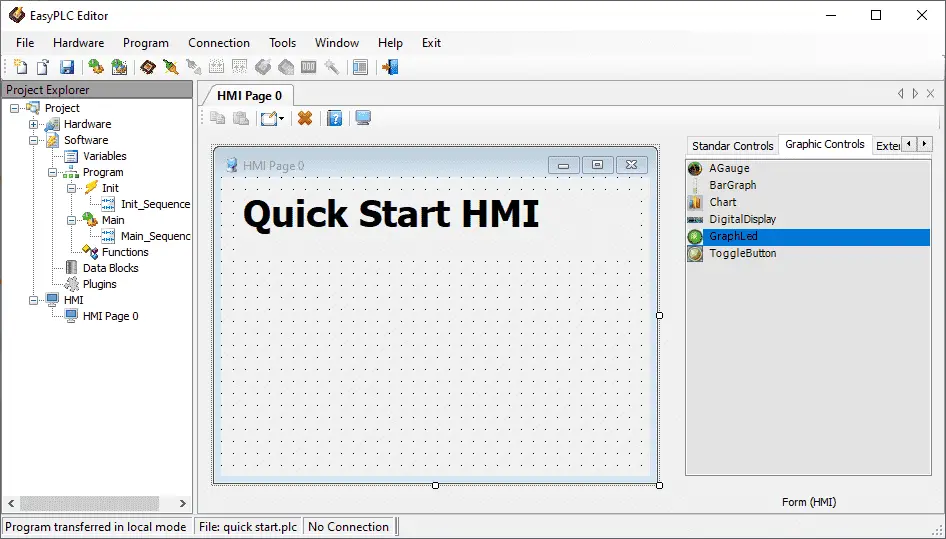 Select GraphLed under the graphic controls tab. Using the mouse draw the position of the LED.
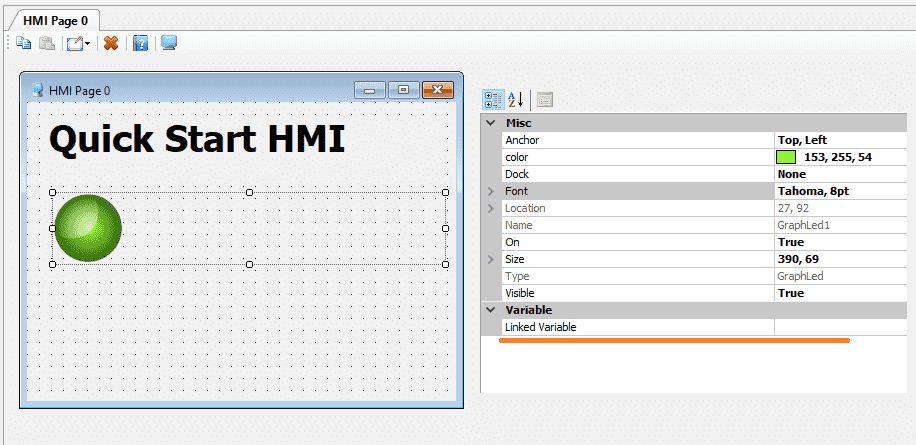 Under the Variable in the linked variable, you can then select the conveyor advance output. This LED light will light up if the output is on.
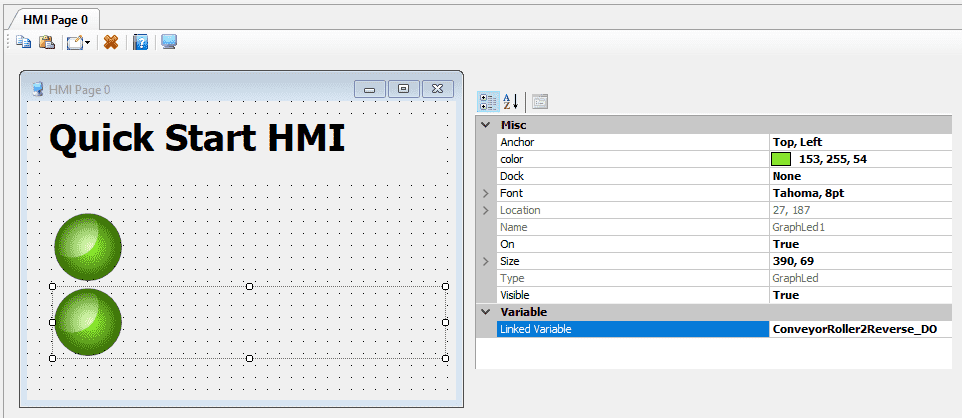 Using copy and paste you can duplicate the first GraphLed. Link the second LED to the conveyor reverse.
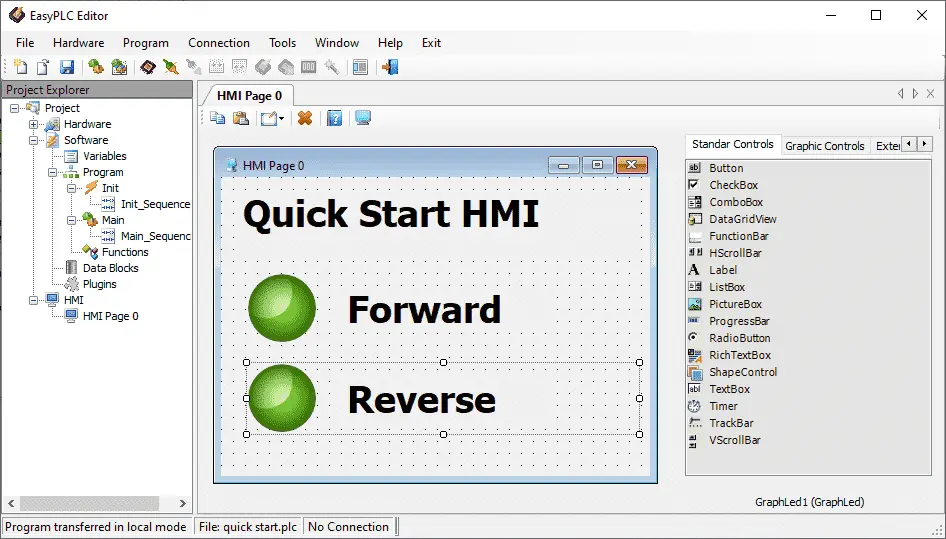 Using the label display again, put a label beside each LED. This will indicate the forward and reverse of the conveyor.
We now have our first HMI display created. Save the project.
 Compile and transfer the program to the virtual PLC CPU.
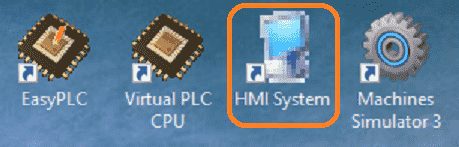 Once the program is transferred to the PLC, you can call up the HMI by using the desktop icon. You can also use the launch HMI system under the main menu | Connection in the EasyPLC editor.
 The EasyPLC software suite is an entire automation package. This will help you to program, demonstrate, or test your automation solution.
Watch the video below to see the components work in the EasyPLC software suite quick start.
Download the EasyPLC quick start sample program and HMI for the simple conveyor line machine.
EasyPLC Software Suite is a complete PLC, HMI, and Machine Simulator Software package. This PLC learning package includes the following:
Easy PLC – PLC Simulation that will allow programming in Ladder, Grafcet, Logic Blocks, or Script.
HMI System – Easily create a visual human-machine interface (HMI)
Machine Simulator – A virtual 3D world with real-time graphics and physical properties. PLC programs can be tested using the EasyPLC or through other interfaces. (Modbus RTU, TCP, etc.)
Machine Simulator Lite – Designed to run on Android Devices.
Machine Simulator VR – Virtual Reality comes to life so you can test, train or practice your PLC programming.
Purchase your copy of this learning package for less than USD 75 for a single computer install or less than USD 100 to allow different computers.
Receive 10% off the price by typing in ACC in the comment section when you order. http://www.nirtec.com/index.php/purchase-price/
Learn PLC programming the easy way. Invest in yourself today.
Watch on YouTube: EasyPLC Software Suite – Quick Start
If you have any questions or need further information, please contact me.
Thank you,
Garry
If you’re like most of my readers, you’re committed to learning about technology. Numbering systems used in PLCs are not challenging to learn and understand. We will walk through the numbering systems used in PLCs. This includes Bits, decimals, Hexadecimal, ASCII, and Floating points.
To get this free article, subscribe to my free email newsletter.
Use the information to inform other people how numbering systems work. Sign up now.

The ‘Robust Data Logging for Free’ eBook is also available as a free download. The link is included when you subscribe to ACC Automation.