An array is a storage area for common data type tags. They usually have some relationship with each other and must be manipulated as a group. We can use arrays for motion control, recipe management, sequencing (indirect addressing), math, etc. The Productivity 2000 Series PLC uses arrays programmed using the Productivity Suite Software.
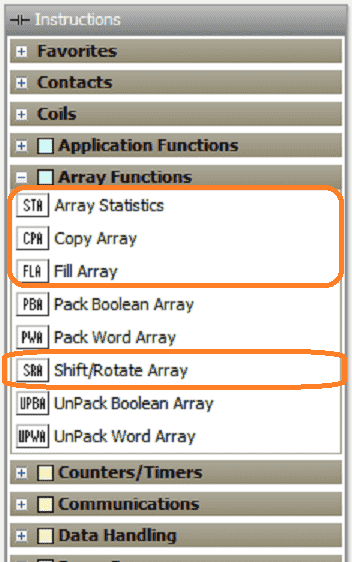
Last time we defined an array and used this in an indirect addressing program. It sequenced bits in an output card indirectly. In this second part, we will be looking at the following instructions:
Array Statistics (STA) – This will perform operations such as Summing, Averaging, Minimum Value, and Median Value on an Array.
Copy Array (CPA) – Copy a block of 1 or 2-dimensional arrays into a destination array.
Fill Array (FLA) – Copy a value to a block of array elements
Shift / Rotate Array (SRA) – Concurrently Shift or Rotate values in an Array.
Let’s get started with the Productivity 2000 Series PLC arrays part 2.
Previously in this Productivity 2000 series PLC, we have discussed the following:
P2000 Hardware Features – Video
Productivity Suite Software Install – Video
Communication (System Configuration) – Video
First Program – Video
Debug Mode – Video
PLC Program Documentation – Video
PLC CPU Display – Video
PLC Online Programming – Video
PLC Tag Database – Video
Ladder Logic Contacts – Video
Ladder Logic Outputs – Video
Timers – Video
Counter – Video
Productivity 2000 PLC Ladder Logic Math – Video
Data Handling Instructions
Part 1 – Video
Part 2 – Video
Array Functions
Part 1 – Video
Productivity Array Statistics (STA)
This instruction will perform statistical operations such as Summing, Averaging, Minimum, and Median Values on an Array.
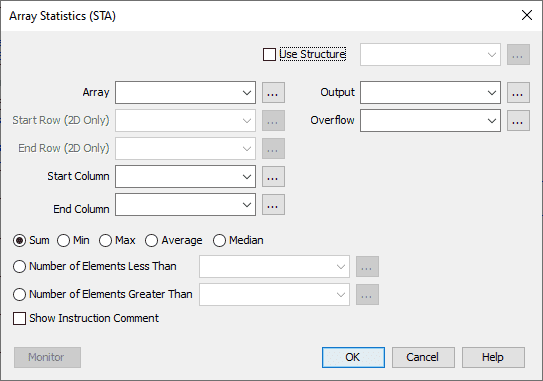
We will use a structure with this instruction. (Sta_Array) If we do not, you will have to specify an address for all of the parameters required for the instruction.
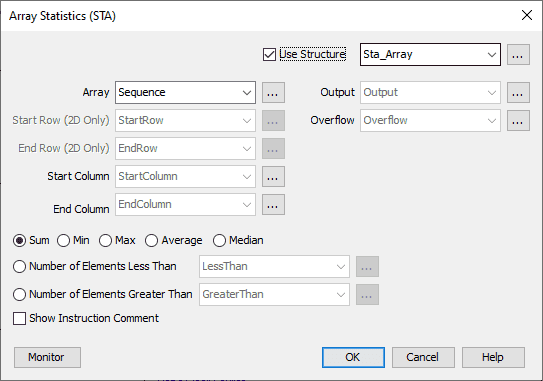
We will use the Array called Sequence from last time. We will sum the elements in the Array. Minimum, Maximum, Average, and Median are also available in the array statistics instruction. Select OK.
Our tags can now be defined. Set the End Column to the initial value of 3 and the Start Column to the initial value of 1. Our instruction will add (sum) the elements of the 1D Array starting at one and ending at 3.
Note: All arrays will start with 1.

Switch 2 is used to execute the Array Statistics instruction. Our Array Sequence has the elements 0, 1, and 3 added together. This will put the value of 4 in the output parameter.
If our End Column were changed to 4, the result (Sum) would be 11. (0 + 1 + 3 + 7)
Productivity Copy Array (CPA)
This instruction will copy a block of 1 or 2-dimensional arrays into a destination array.
The first thing that we need to do is add two arrays. Call up the tag database by hitting the icon under the Write Program in the Application Tools or from the main menu | Edit | Tag Database. When the tag database window appears, select add tags at the bottom left of the window.
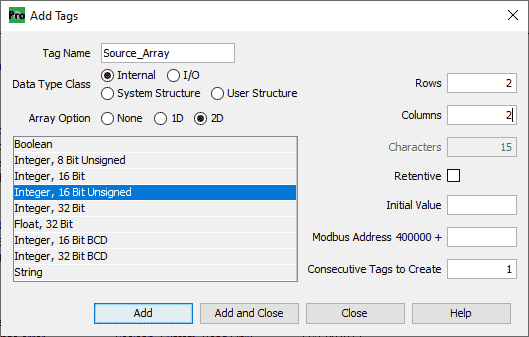
Call this Source_Array. The data type will be 2D Array and Integer, 16 Bit Unsigned, 2D Array. We will make this Array 2 rows by two columns. Hit Add to add the Array.
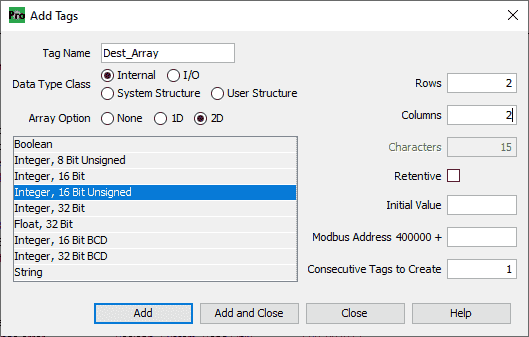
Our second Array will be called Dest_Array. The data type will also be 2D Array, Integer, 16 Bit Unsigned. The size will be the same as the Source_Array, two rows by two columns. Hit Add and Close.
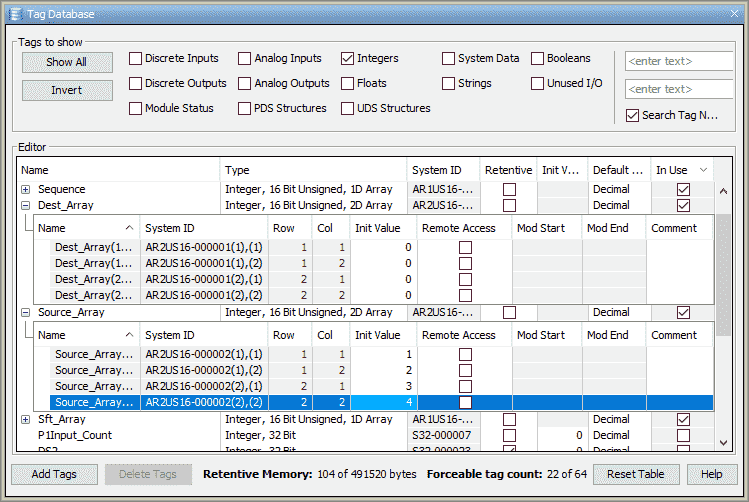
Under the Tag Database window, ensure that tag Integers are selected. You will see our two new arrays. We will leave the initial values in the Dest_Array as 0. Respectfully change the Source_Array values to 1, 2, 3, and 4.
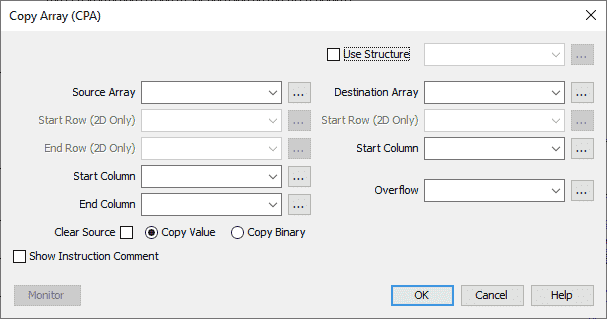
We will use a structure with this instruction called CPA_Array. The Source Array will be Source_Array, and the Destination Array will be Dest_Array that we have created above.
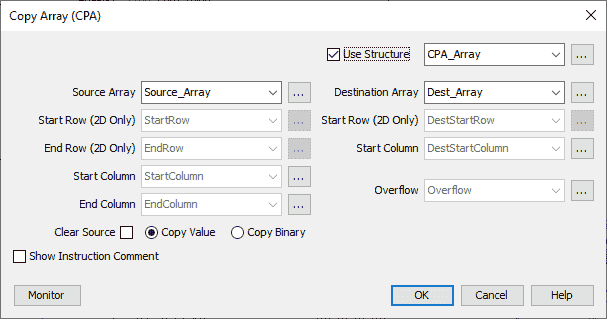
Ensure that the Copy Value is selected. Notice that we can also choose Clear Source and Copy Binary. Hit OK.
We can now define our tags for the instruction. Our Destination Start Row and Column will be set for 1, 1. The Source Start Row and Column will also be set for 1, 1. Source End Row and Column will be set for 2, 2. This will copy the entire source array values into the destination array values.

When switch three is enabled, our copy is executed. You will see the source array is copied to the destination array.
Productivity Fill Array (FLA)
This instruction will copy a value to a block of array elements.
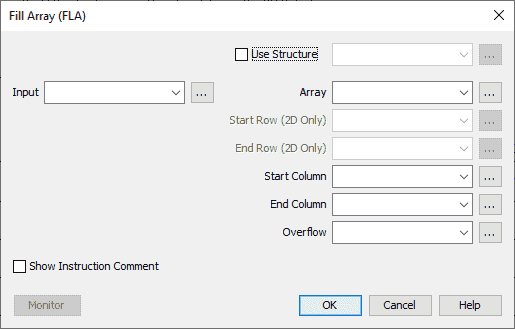
We will use the structure name FLA_Array. The Array we will fill will be the Dest_Array we created above.
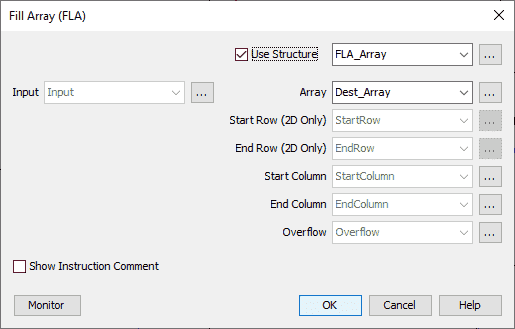
Hit OK.
Define the following tags for our instruction:
Start Row – 1
Start Column – 1
End Row – 2
End Column – 2
Input = 0 (This will fill the elements in our Array with the value of 0.)
This will fill our entire Array. Hit OK.

When switch four is energized, the Array will be filled with the input value based on the starting and ending locations we specified. In our case, we have zeroed the Dest_Array that we copied from the previous example.
Productivity Shift / Rotate Array (SRA)
This instruction will concurrently Shift or Rotate values in an Array.
We will first create a one-dimensional array called Sft_Array.
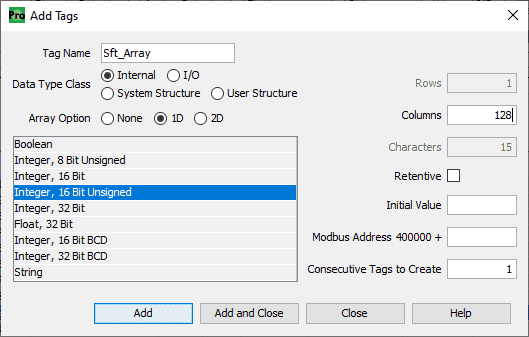
The Array will be Integer, 16 Bit Unsigned, 1D Array. We will have 128 columns (elements) to shift or rotate.
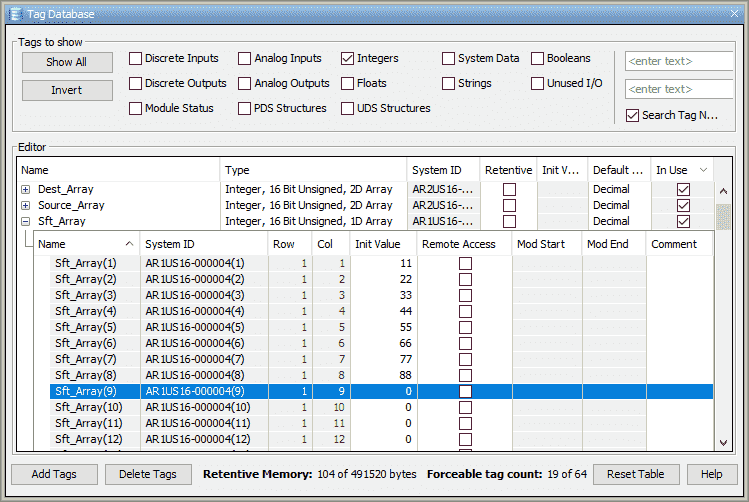
Fill in the first few elements of the Array. In our example, we use 11, 22, 33, 44, etc.
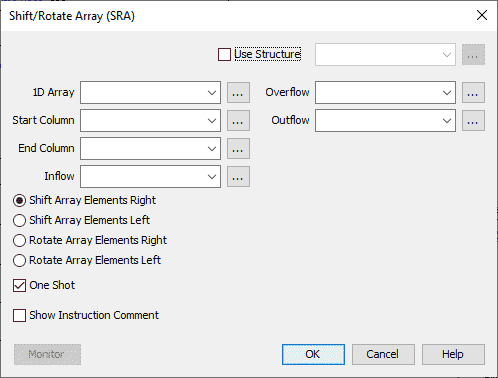
The structure name will be SRA_Array, and the 1D Array will be Sft_Array that we have created above.
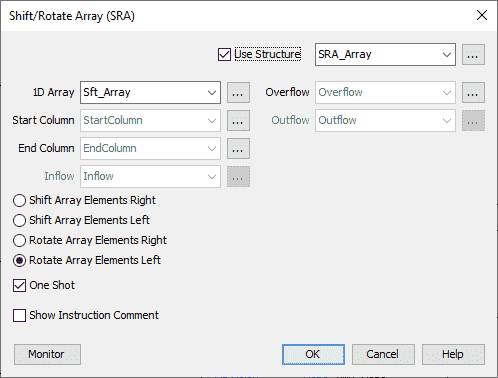
Select the Rotate Array Elements Left and ensure that the One-Shot is selected. This means the instruction will execute only on a transition from off to on. Select OK.
We can now define the tags in our structure. The End column will be set to 128, and the Start column will be set to 1. This will rotate our entire Array. Hit OK.

Switch five will execute the Shift Rotate Array instruction on the leading edge. (One-Shot) We are rotating the elements left, so the elements all get shifted, and the element in the first element gets moved (rotated) to the last element.
Download the PLC program here.
Watch the video below for the array instructions we created on our Productivity 2000 Series PLC.
Productivity 2000 Series PLC from Automation Direct
Overview Link (Additional Information on the Unit)
Configuration (Configure and purchase a system – BOM)
User Manual and Inserts (Installation and Setup Guides)
Productivity Suite Overview (Features of the fully functional free software package for the Productivity Family of PLC (PAC) controllers)
Productivity Suite Programming Software (Free Download Link)
This software contains all the instructions and helps files for the Productivity Series.
Watch on YouTube: Productivity 2000 PLC Array Functions Part 2
If you have any questions or need further information, please get in touch with me.
Thank you,
Garry
If you’re like most of my readers, you’re committed to learning about technology. Numbering systems used in PLCs are not challenging to learn and understand. We will walk through the numbering systems used in PLCs. This includes Bits, decimals, Hexadecimal, ASCII, and Floating points.
To get this free article, subscribe to my free email newsletter.
Use the information to inform other people how numbering systems work. Sign up now.
The ‘Robust Data Logging for Free’ eBook is also available for free download. The link is included when you subscribe to ACC Automation.

