
The cmore EA9 HMI has an event manager that can be used to trigger actions based on various events.
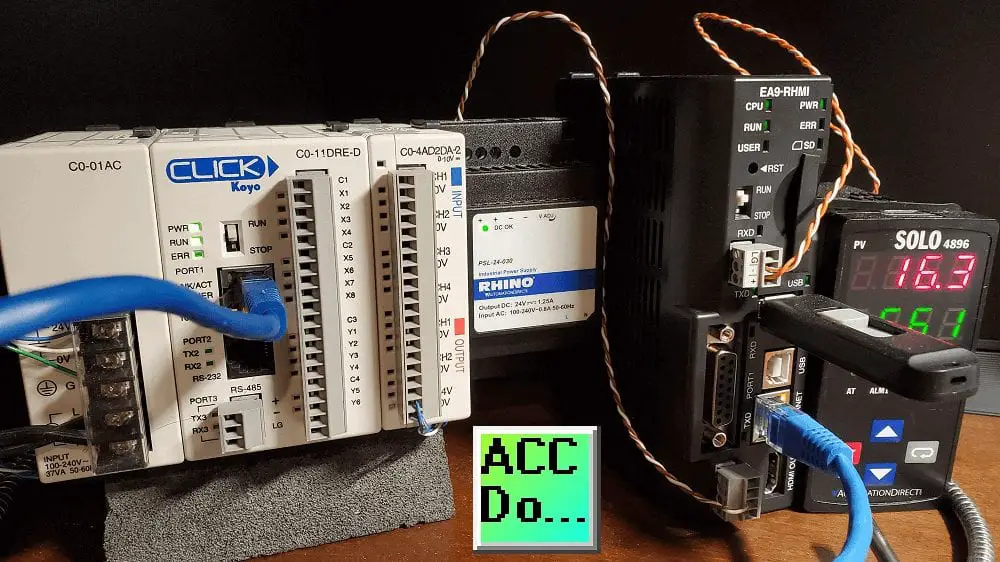
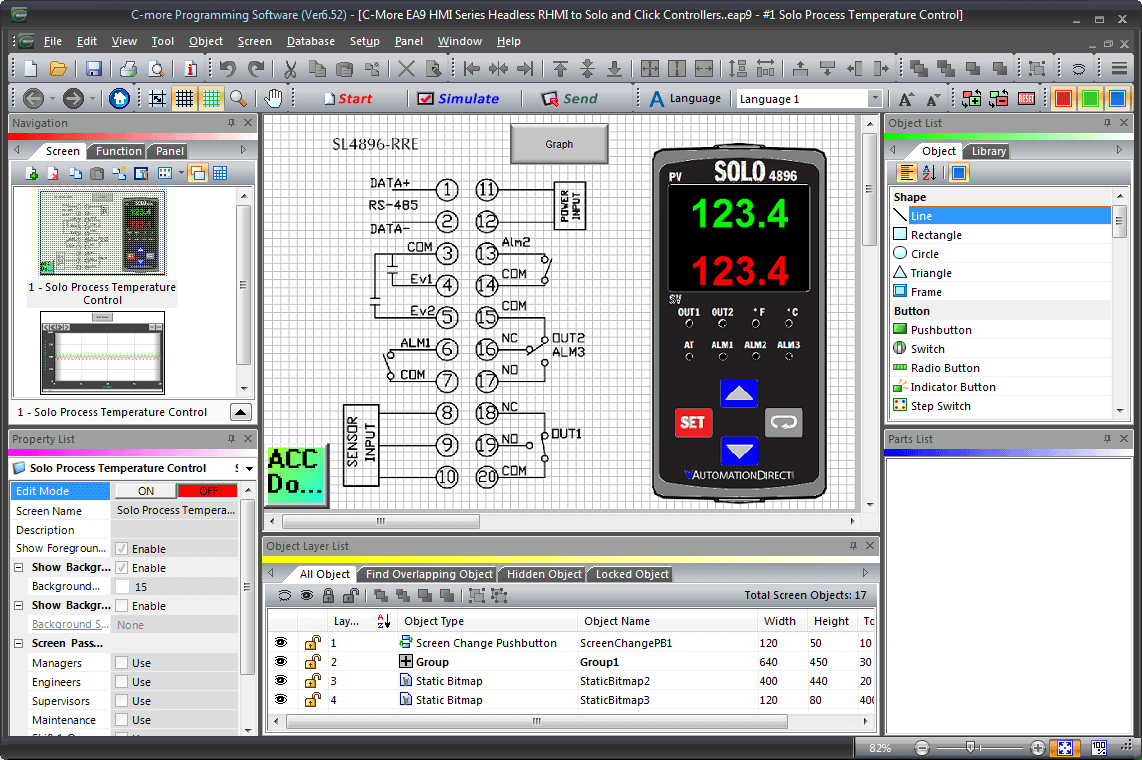
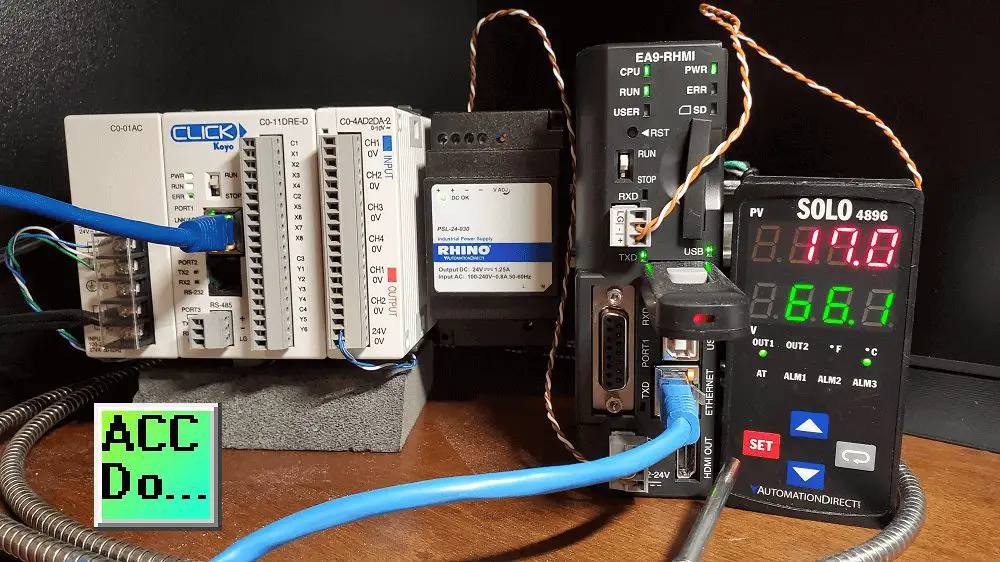
We will be adding a Click PLC to our headless RHMI cmore EA9 program that we created last time to communicate to the solo process temperature controller. The Solo will be connected via RS485 using the Modbus RTU protocol. Using the Modbus TCP protocol we will connect the Click PLC to the Ethernet port. Using the event manager we will be writing the set value (SV) and present value (PV) of the solo process temperature controller to the Click PLC. We will also allow the Click PLC to write the SV into the solo. This is in addition to the writing of the set value via remote apps and the solo itself. Let’s get started.
Previously in this C-More EA9 HMI Panel series, we have done the following:
System Hardware
– Unboxing and Review Video
– Powering the Unit Video
Installing the Software – Video
System Setup Screens – Video
First Program
– Establishing Communication and Updating Firmware Video
– First Program Video
Panel to PLC and PLC to Panel Settings – Video
Common Screen Menu – Video
Simulate Project – Video
Object List Shapes – Video
Object List Buttons – Video
Object List Indicators – Video
Object List Entry – Video
Object List Meters and Graphs – Video
Object List Bitmaps – Video
Object List Recipe – Video
Define Custom Keypad – Video
Object List Alarms – Video
Object List Text – Video
Object List Clock – Video
Barcode Scanner Input – Video
Web Server and Remote Access – Video
Data Logging – Video
FTP File Transfer Protocol – Video
Sending Email – Video
Headless RHMI Panel
– Unboxing Video
– Establish Communication Video
Headless RHMI Setup Screens – Video
Headless RHMI Remote Control
– Windows Remote Access Console Video
– Android Remote Access App Video
Headless RHMI to Solo Process Temperature Controller – Video
Watch the video below to see the headless cmore unit work with the Solo and Click PLC controllers. The cmore will write the set value (SV) and present value (PV) of the Solo process temperature controller to the Click PLC. Through the event manager, we will read a set value (SV) from the Click PLC and place it into the Solo. The Click PLC SV will then be set to zero. (0)
Event Manager – C-More EA9
The Event Manager allows the C-more to take action based on events like changing tag values, day-of-week, time-of-day, or even based on a particular screen change. The actions can include setting a tag value, copying tag data between tags, changing the screen, capturing a screen, playing a sound file, even sending an e-mail (including embedded tag data, screen captures, or PLC log files). Previously, we used the event manager to add alarms.
Object List Alarms – Video
Panel Manager to Add Click PLC
We will be using the program we developed last time in the following post.
Headless RHMI to Solo Process Temperature Controller – Video
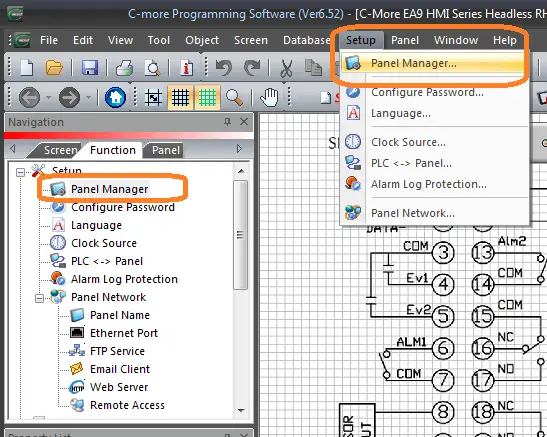
Select panel manager from the main menu | Setup | Panel Manager… Alternatively, you can select the panel manager under the setup in the Function tab of the Navigation window.
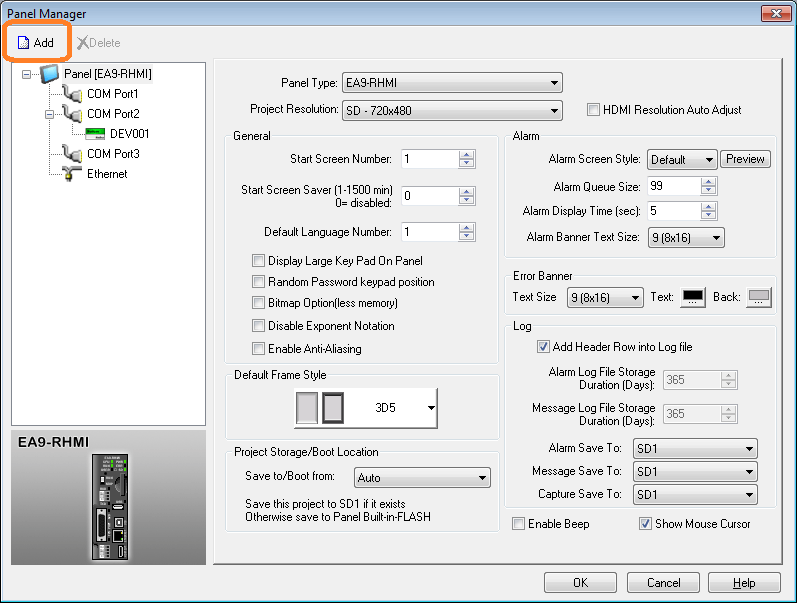
Our Solo process controller is DEV001 on COM Port 2. We will set up the Click PLC on the Ethernet port. Select ADD on the Panel Manager window.
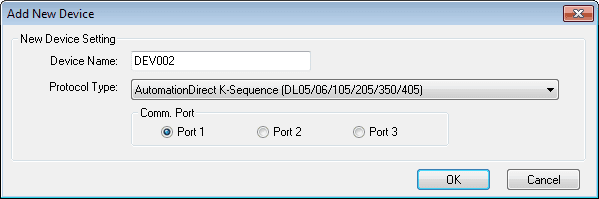
We will leave the Device Name as the default DEV002.

Select AutomationDirect CLICK Ethernet as the Protocol Type.
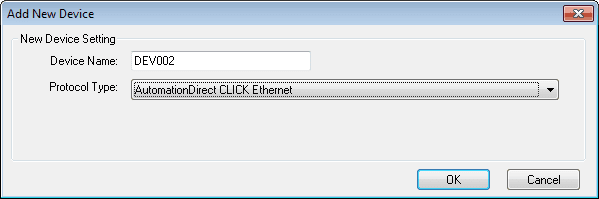
The port selection will automatically be selected for us based on the protocol type we selected. Select OK.
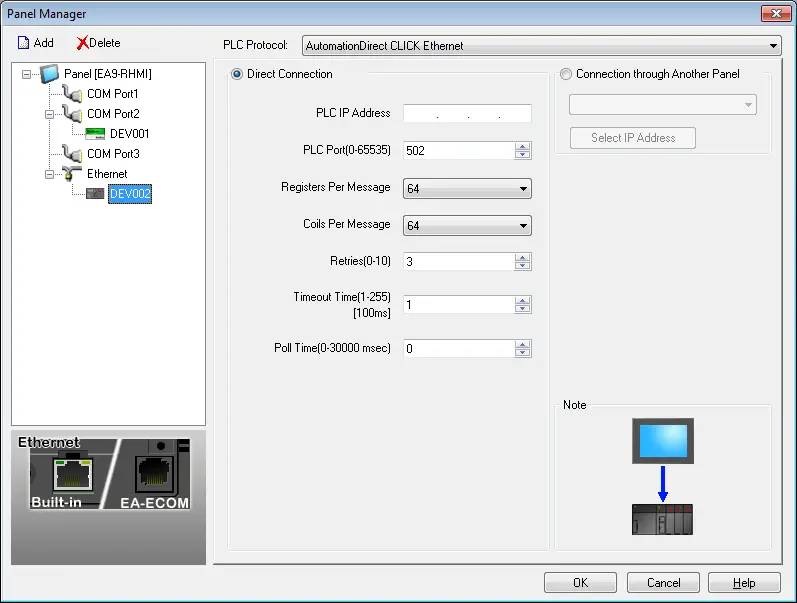
We can now fill in our PLC IP Address. We will keep all of the other parameters as their default.
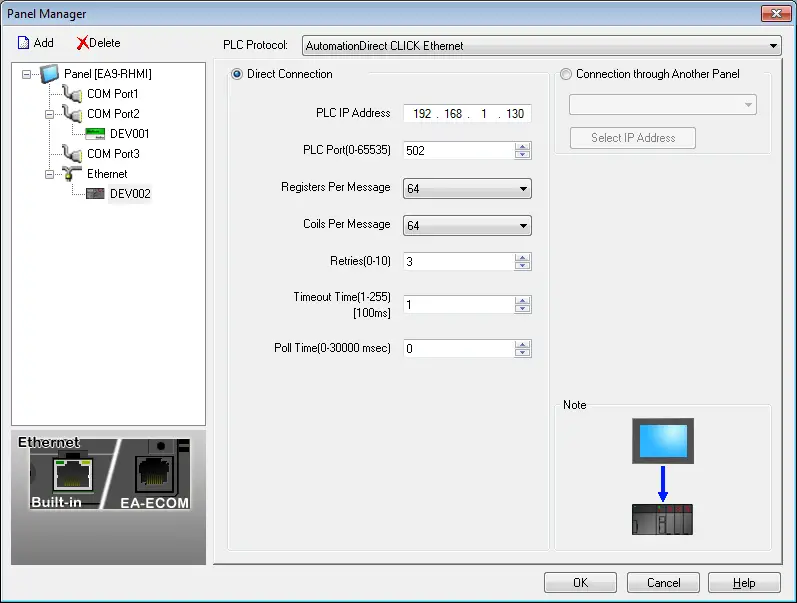
Our Click PLC is now set up on our C-More RHMI. Select the Panel [EA9-RHMI] on the left-hand menu of the Panel Manager window.
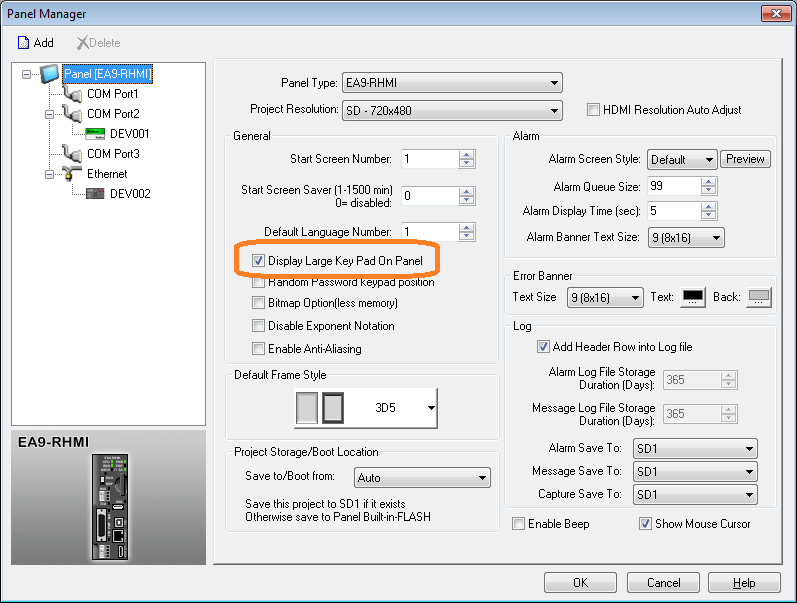
We will select the Display Large Key Pad On Panel. This option makes the editing of the parameters easier for larger fingers. Ease of use is also better for remote access.
Select OK.
Event Manager Database – C-More EA9 HMI
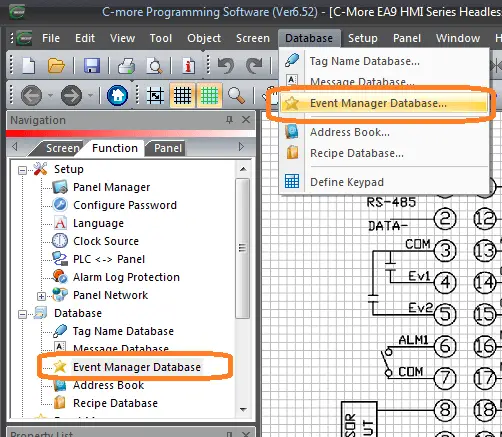
Select from the main menu | Database | Event Manager Database… Alternatively, you can select the Event Manager Database under the Database heading in the Function tab of the Navigation window.
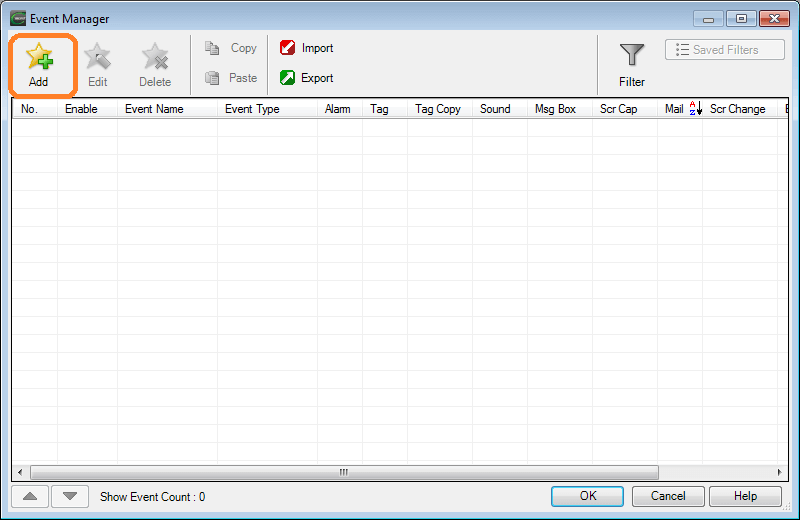
Select the Add icon in the Event Manager window.
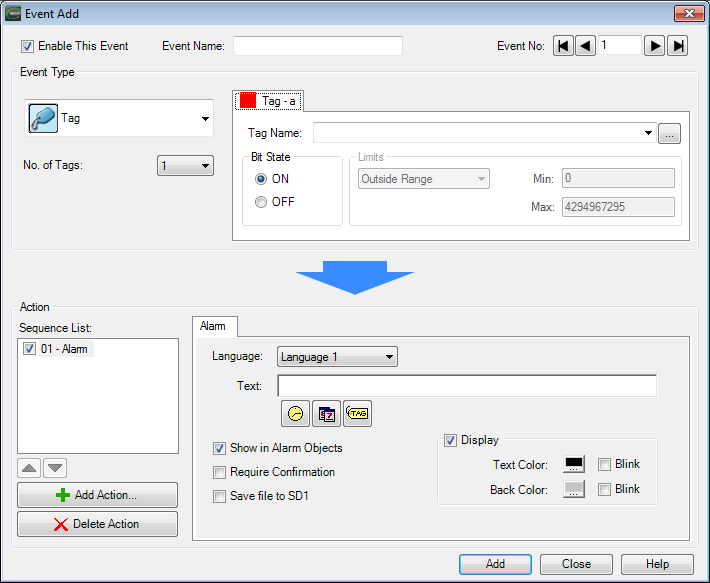
Enter the Event name as Solo Values to Click.

We are going to create an event to copy the Solo PV and Solo SV values into the Click Memory area once be second. We will use the one-second clock bit flag in the Click PLC for the timing.
Select the three dots next to the Tag Name field in the Tag-a section.
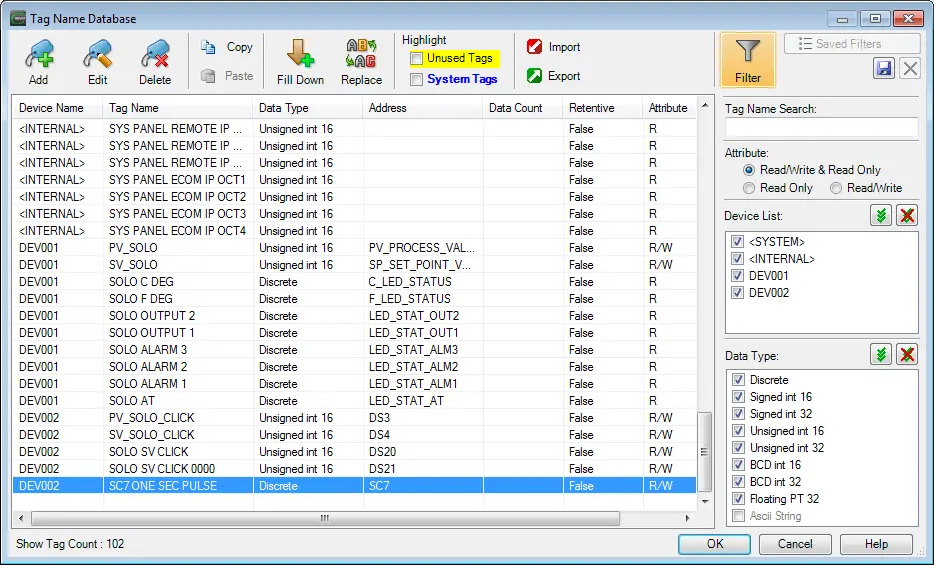
We will be using the following memory areas for our DEV002 (Click PLC) in our Cmore headless unit.
PV_SOLO_CLICK – Unsigned int 16 – DS3 – Read/Write
SV_SOLO_CLICK – Unsigned int 16 – DS4 – Read/Write
SOLO SV CLICK – Unsigned int 16 – DS20 – Read/Write – Set SV from Click
SOLO SV CLICK 0000 – Unsigned int 16 – DS21 – Read/Write – Reset SV value in Click
SC7 ONE SEC PULSE – Discrete ON/OFF – SC7 – Read/Write
Select the one-second pulse (SC7) and select OK.
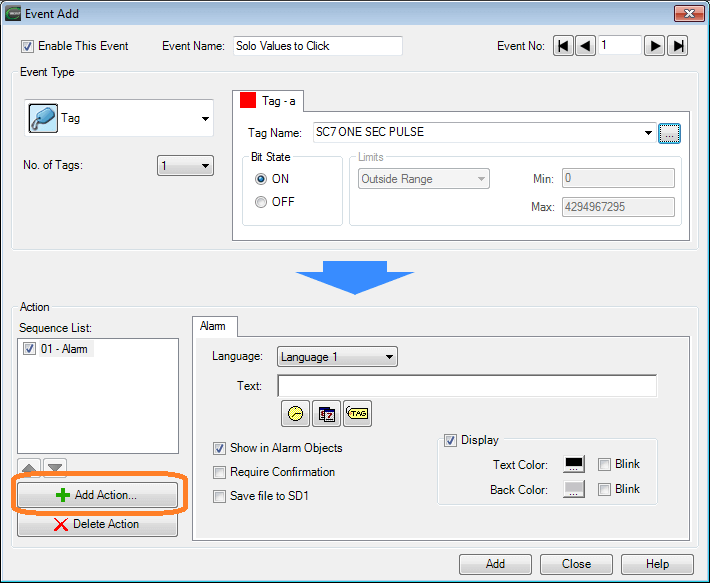
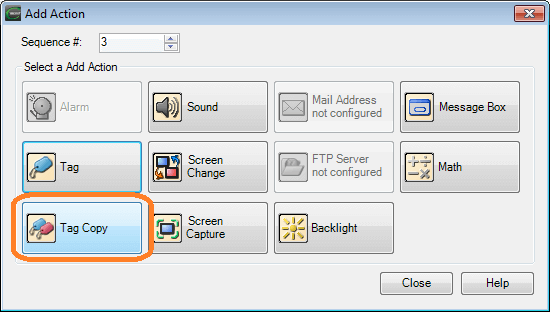
We will leave the Bit State as ON. This means when the bit turns on the following actions are to be done. Select Add Action.
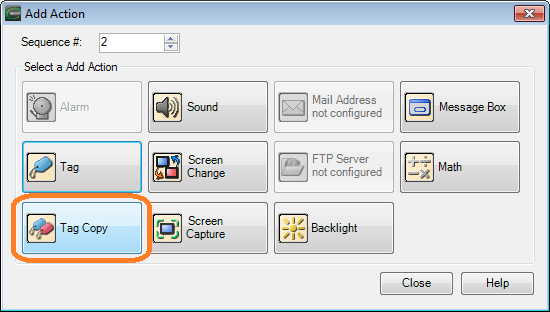
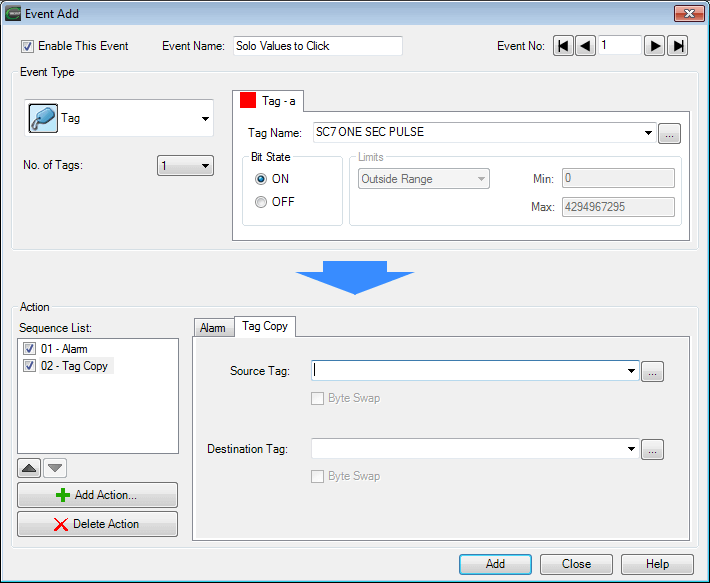
Select Tag Copy. This will copy the contents of one tag into another.
The source tag will be the PV_Solo. This is the present value of the solo temperature controller. The destination tag will be PV_SOLO_CLICK this will be the memory tag DS
3 of the Click PLC.
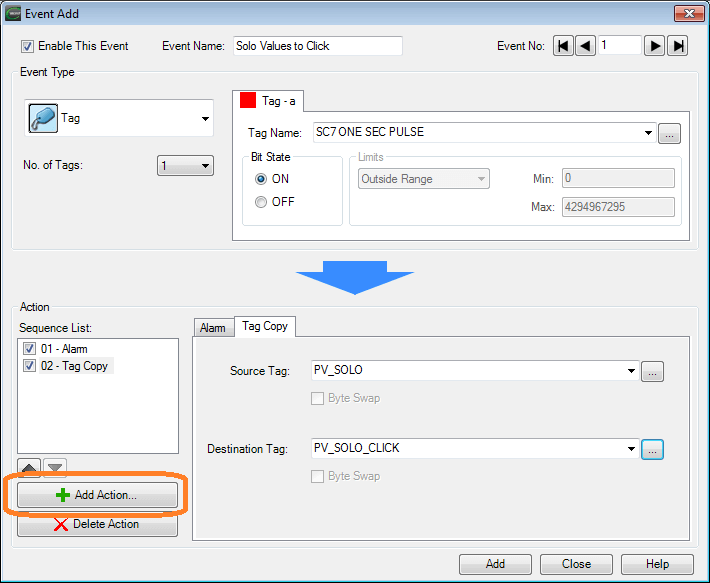
Select Add Action again.
Select Tag Copy again. We can have multiple items for each of the actions in for our event.
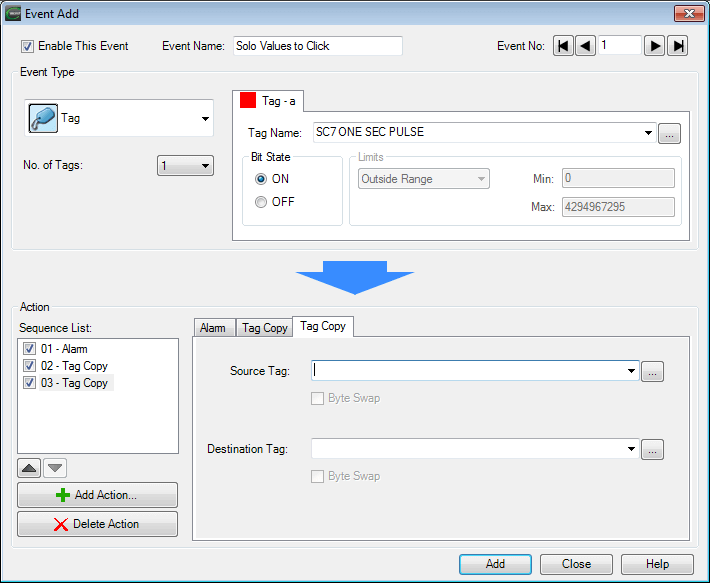
The source tag will be the SV_Solo. This is the present value of the solo temperature controller. The destination tag will be SV_SOLO_CLICK this will be the memory tag DS
4 of the Click PLC.
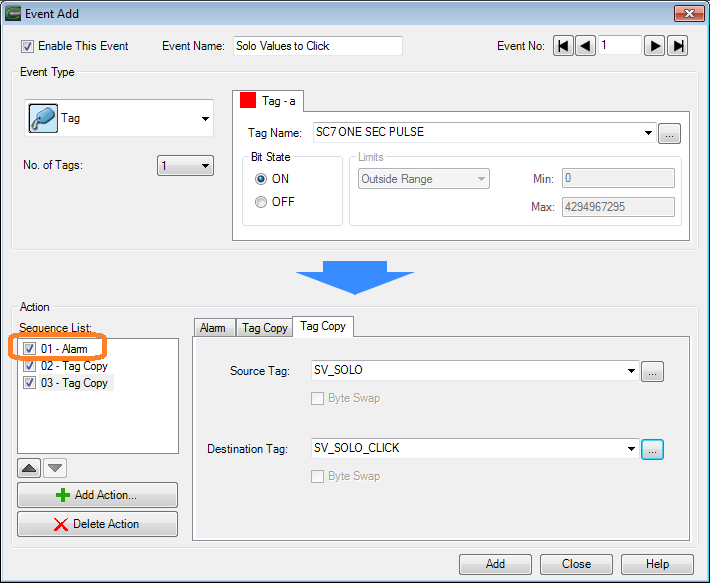
Select the 01-Alarm action in the sequence list.
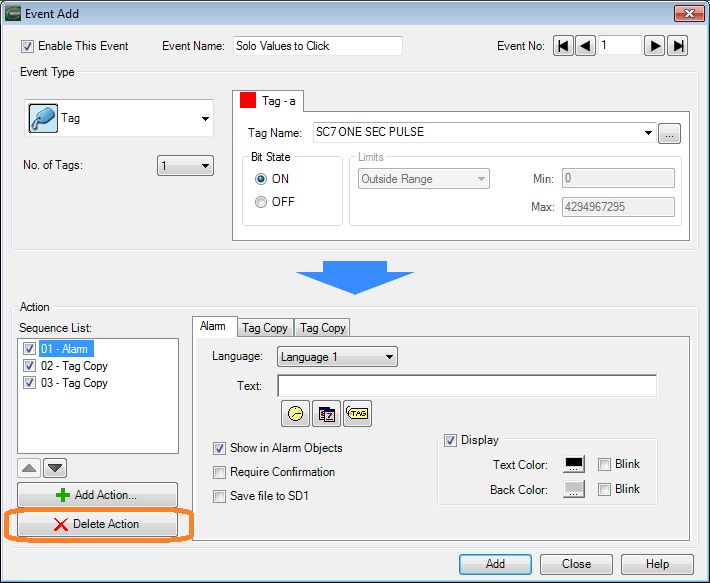
Select the delete action button. We will not require an alarm each time the information is copied to the Click PLC. (1-second interval)
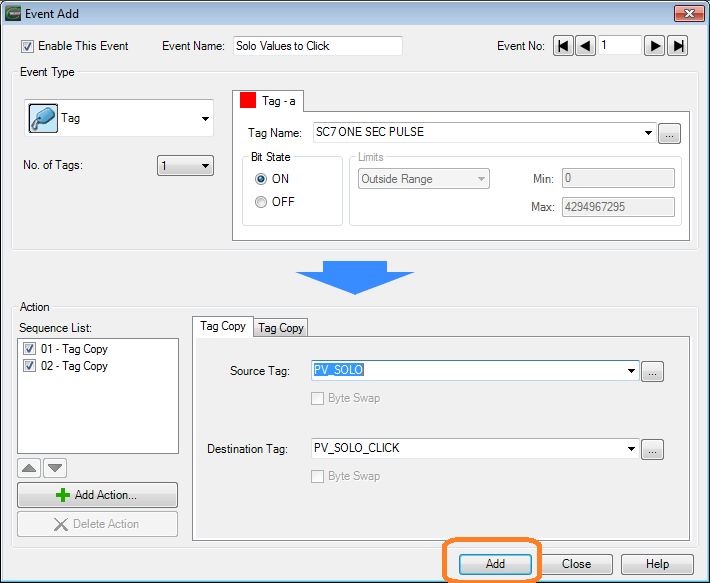
We have now created our first event for the EA9-RHMI headless cmore. Select the Add button.
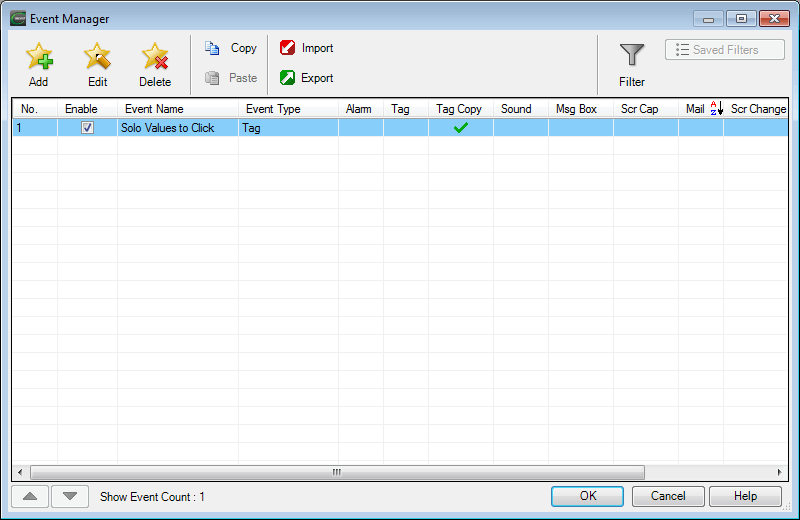
This will now add our event to the event database.
The next event to add will check to see if the Click PLC has a value to put into the set value (SV) of the Solo. If it does then the value will be copied to the SV of the Solo. Then the value in the Click PLC will then be reset. (Set to 0.)
Select the Add icon in the Event Manager.
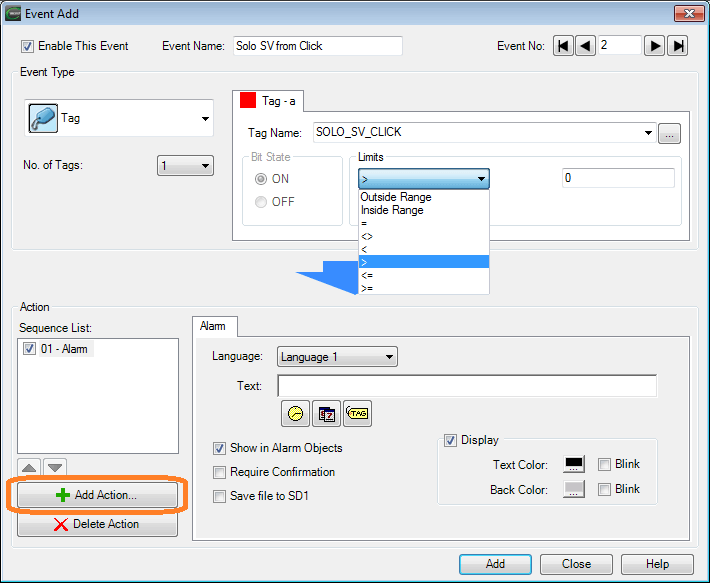
We will name this event Solo SV from Click. Our tag will be SOLO_SV_CLICK which is the DS20 memory in the click PLC. Under limits select the greater than symbol and the value of 0. Select the Add Action… button.
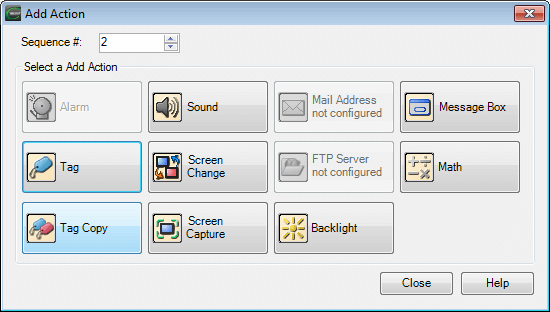
Select the Tag Copy button on the Add Action window.
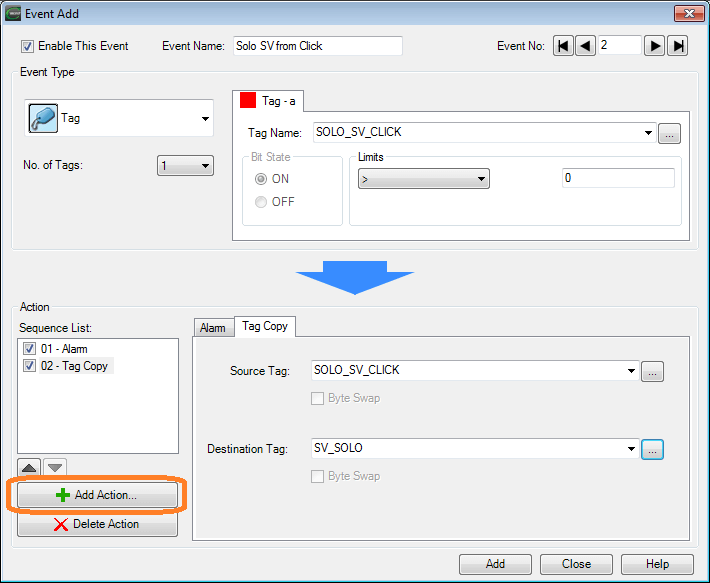
Our source tag will be SOLO_SV_CLICK. The destination tag will be the SV_SOLO. This will copy our set value from the click to the solo controller. Select the add action button again.
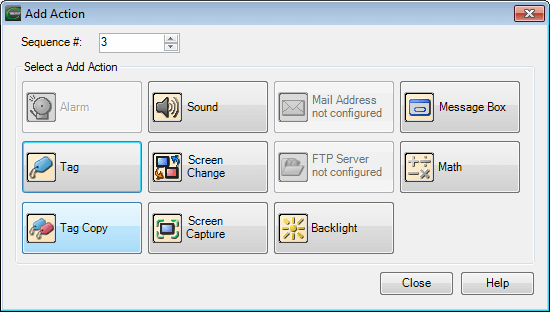
Select the Tag Copy button on the Add Action window.
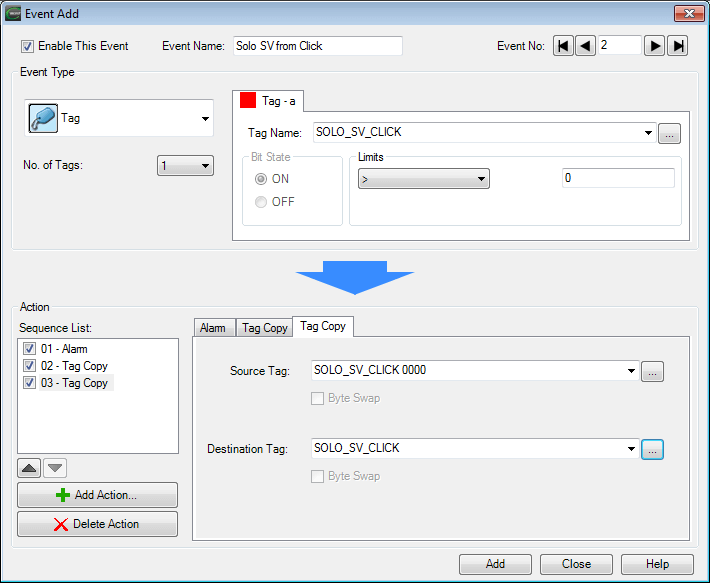
Our source tag will be SOLO_SV_CLICK 0000. The destination tag will be the SOLO_SV_CLICK. This will copy our reset value of 0 (DS21) to the set value (DS20) in the click controller. Resetting will ensure that the set value write will only happen once. Select the 01 – Alarm under the sequence list. Then select delete action.
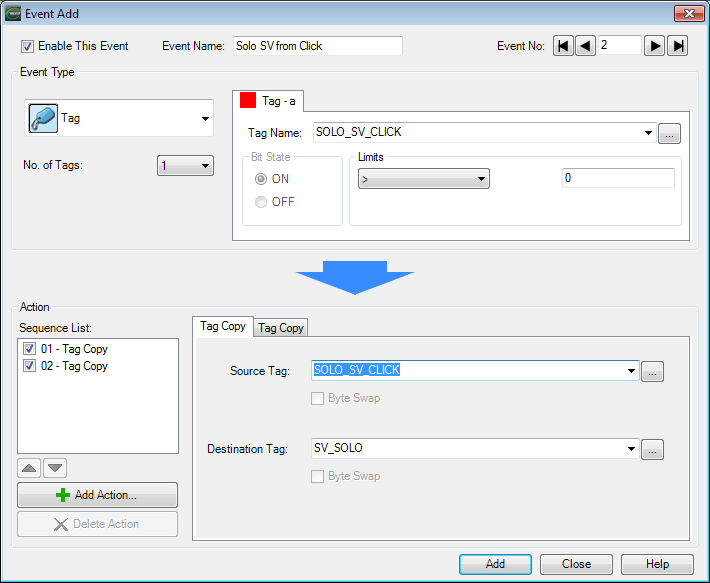
Select the Add button to add our event to the event manager database.
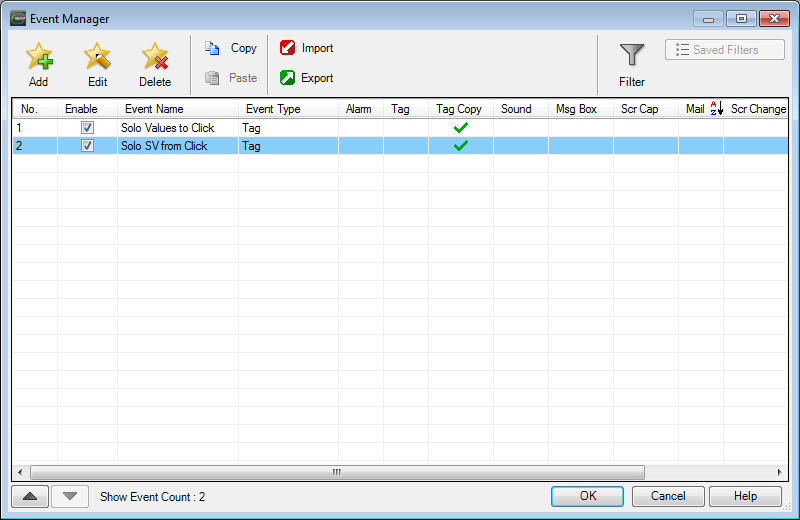
Our events have now been entered to allow our connected Click PLC to read and write the PV and SV of our Solo process temperature controller.
Select OK in the event manager window.
Remote Access Apps – C-More EA9 HMI
Start our remote access application. Review how to do this in the following post.
Headless RHMI Remote Control
– Windows Remote Access Console Video
– Android Remote Access App Video
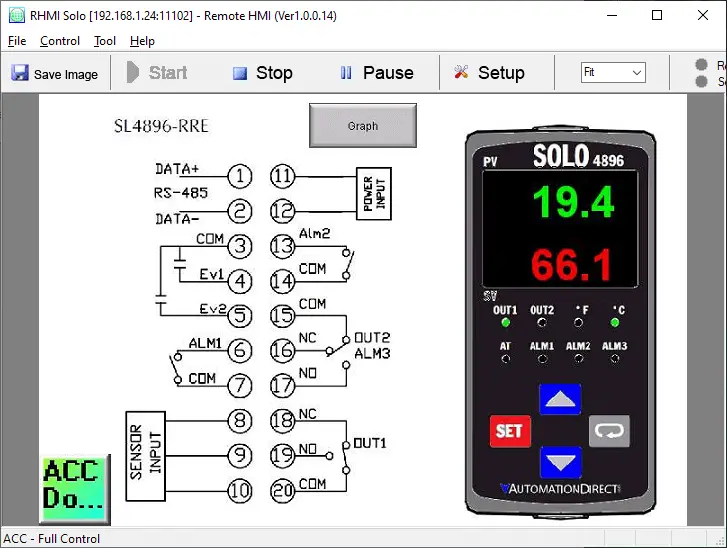
You can monitor and control our Solo via the remote application for the C-more.
Click PLC Program – C-More EA9 HMI
We will use the program that we developed in the following post.
Click PLC Logging Data with Time and Date Stamp – Video
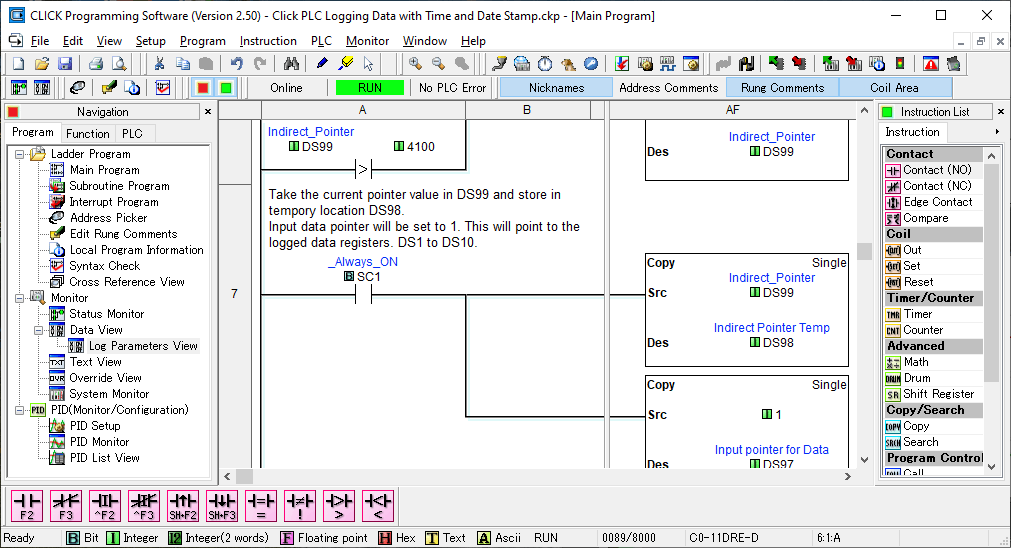
In this Click PLC example program, we took a series of consecutive memory locations (DS1 to DS10) and stored them in memory areas DS100 to DS4100 each minute.
We used DS3 as the Solo PV and DS4 as the Solo SV in the click PLC. Last time we used these memory areas as spare locations.
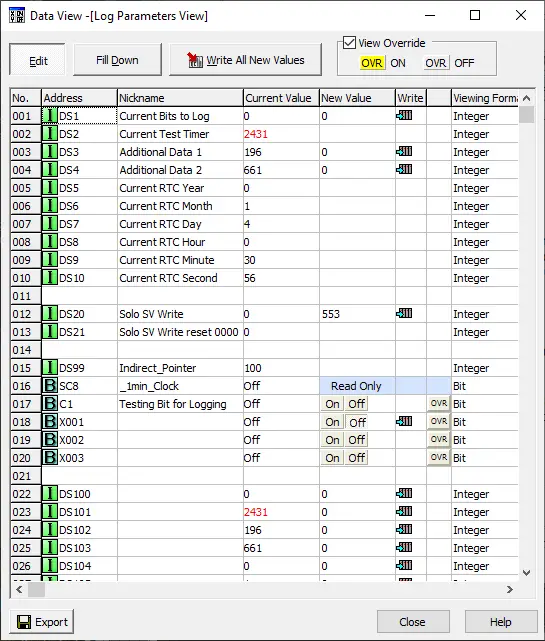
DS20 and DS21 have been added to our Data View (Log Parameters View) that we created last time.
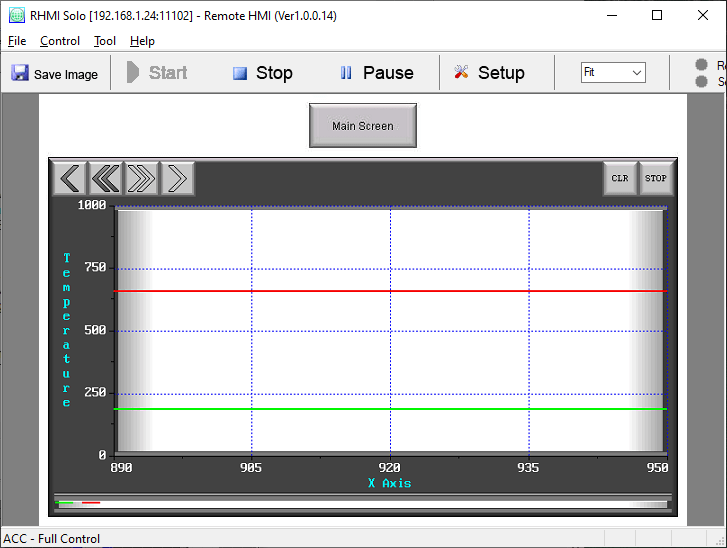
Watch the video below to see the headless cmore unit work with the Solo process temperature and Click PLC controllers.
Download the C-More and Click PLC programs here.
C-More EA9-RHMI Features
C-more EA9 series headless HMI supports HD 1280 x 720 (60Hz) pixel screen
resolution HDMI output, 800MHz CPU, 12-24 VDC powered, includes (2) serial ports, USB 2.0 Type A and B ports and one Ethernet port. Supports (1) SD memory card. Compatible withEA9-PGMSW programming software version 6.50 or later.
• Ethernet 10/100 Base-T port
(program/download & PLC
communication)
• Expansion Module Support
• Use EA-ECOM for second Ethernet Port
• Remote Internet access
• Serial PLC interface (RS-232/422/485)
• One built-in SD memory card slot
• 12–24 VDC powered
• HDMI audio/video out
• 82MB project memory
• Data logging
• 0 to 50°C [32 to 122°F] operating
temperature range
• DIN rail mountable
• UL, cUL & CE agency approvals
• 2-year warranty from date of purchase
C-More EA9 Panels from Automation Direct
https://www.automationdirect.com/adc/overview/catalog/hmi_(human_machine_interface)/c-more_touch_panels_ea9_series
C-More – Graphic Panel (EA9 Series) User Manual and Quick Start Guides
https://cdn.automationdirect.com/static/manuals/ea9userm/ea9userm.html
C-more Headless HMI (EA9-RHMI) Manual and Quick Start Guide
https://cdn.automationdirect.com/static/manuals/ea9rhmim/ea9rhmim.html
EA9-T10CL C-More Specifications
https://cdn.automationdirect.com/static/specs/ea9t10cl.pdf
C-More EA9 Programming Software (Current Version V6.42)
https://support.automationdirect.com/products/cmore.html
This software will enable you to program all of the C-More EA9 HMI units. It includes a simulator for your application.
This concludes our C-More EA9 HMI Series. If a particular application arises then additional posts will be made. Thank you for following this series.
Watch on YouTube: C-More EA9 HMI Series Headless RHMI to Solo and Click PLC Controllers
If you have any questions or need further information please contact me.
Thank you,
Garry
If you’re like most of my readers, you’re committed to learning about technology. Numbering systems used in PLC’s are not difficult to learn and understand. We will walk through the numbering systems used in PLCs. This includes Bits, Decimal, Hexadecimal, ASCII and Floating Point.
To get this free article, subscribe to my free email newsletter.
Use the information to inform other people how numbering systems work. Sign up now.

The ‘Robust Data Logging for Free’ eBook is also available as a free download. The link is included when you subscribe to ACC Automation.
The method of connecting Click PLC to the Ethernet port using the Modbus TCP protocol is highly effective. I got to know your blog better later. Thank you sir.
Hi Marlyn,
Thank you for the comment. I appreciate it.
Garry